How to easily create a custom product in WooCommerce

WooCommerce custom products are products that can be personalized based on customer’s preferences. Stores selling apparel, skateboards, curtains, and computers are popular examples of businesses that offer product customization options.
Out of the box, the standard WooCommerce product page is dynamically built and pre-configured to present available purchasing options. However, it isn’t ideal for selling custom products. Customers can only choose between the available product variations.
To sell custom products, you need a way to enable customers to provide details for customization. Depending on the product you’re selling this could be their initials, inspirational quotes, or a custom print.
In this guide, we’ll explain how you can set up WooCommerce custom products on your online store. We’ll also take a quick look at why you might want to create custom products in WooCommerce in the first place and what you’ll need.
Let’s put things into context before we begin.
Anatomy of a standard WooCommerce product page
For each product you sell, WooCommerce shows the product image, title, price, and add to cart button on the single product page. If you sell products with attributes and variations, they’ll also appear on the front-end.

The standard product page isn’t ideal for selling WooCommerce custom products. This is because stores that sell custom products have special requirements as compared to regular online shops. These types of WooCommerce websites need to use add-on fields that enable customers to place orders for personalized products.
Why you’d want to create a custom product
By custom products we mean products that are produced individually, usually by a craftsperson or tailor, to meet the unique requirements of the customer. Custom products are unique products that require specific instructions from the customer in terms of their design, materials, measurements, or components.
To accept orders for these types of products, you need to include custom add-on fields on the product page. Let’s say you want to sell custom coffee mugs. Customers can personalize it by uploading the design (or logo) they want to add to their coffee mug.

In this way, setting up a WooCommerce custom product means enabling customers to place an order for a unique product.
Offering custom products is more important than ever for online retailers. Customers expect great experiences when shopping online – and this holds true for just about any kind of product. When consumers have the power to personalize the product they’re ordering, they’ll be more likely to make the purchase. This is why custom products can be a great selling point for businesses looking to differentiate themselves from the competition.
Offering custom products will help you deliver a personalized, interactive experience. It will give customers full control over the product they purchase which can be a unique selling point for your business.
In addition to this, selling personalized products will also help you figure out which products are most popular. You can then focus your marketing efforts on those products and offer even more customization options.
What are add-on fields?
Add-on fields are fields that you can add to the WooCommerce single product page to let customers personalize the products they want to place an order for. Essentially, add-on fields let the user input their own information which is then sent to the store owner along with the order details.
Add-on fields aren’t part of WooCommerce’s standard feature set. So to create your custom products you’ll need another product designer plugin: WooCommerce Product Add-Ons Ultimate.
WooCommerce Product Add-Ons Ultimate
Personalise products with extra fields and custom options
Here’s is a list of the 16 add-on fields included with the Add-Ons Ultimate plugin:
- Calculation
- Checkbox
- Checkbox Group
- Color Picker
- Date
- Image Swatch
- Information
- Name Your Price
- Number
- Products
- Radio Group
- Select
- Select Box
- Text
- Textarea
- Upload
Here are some ideas on how you can use them in your online store:
- Checkboxes. If you offer gift wrapping, you can ask the customer: Do you want to wrap the product? by using a checkbox. This also works for offering an option to add extended warranties to their order. You might ask: Do you want to extend the warranty on your purchase for an additional $12.99?
- Dropdowns. Let’s say you sell pizza. You can use dropdown lists to enable customers to select a crust size for their pizza.
- Text fields. If you run an online store selling watches or jewellery, you can use a text field box to let customers submit the text they want to engrave on the item. This could be a name, personal message, or quote.
- Upload fields. A file upload box lets customers upload an image, print, or logo for their custom product.
You can get all these add-on fields (and many more) with the WooCommerce Product Add-Ons Ultimate plugin.
Why you’d use add-on fields instead of attributes
Now you might be wondering why you’d want to use add-on fields instead of WooCommerce attributes and variations? Aren’t they basically the same thing?
The short answer is: No.
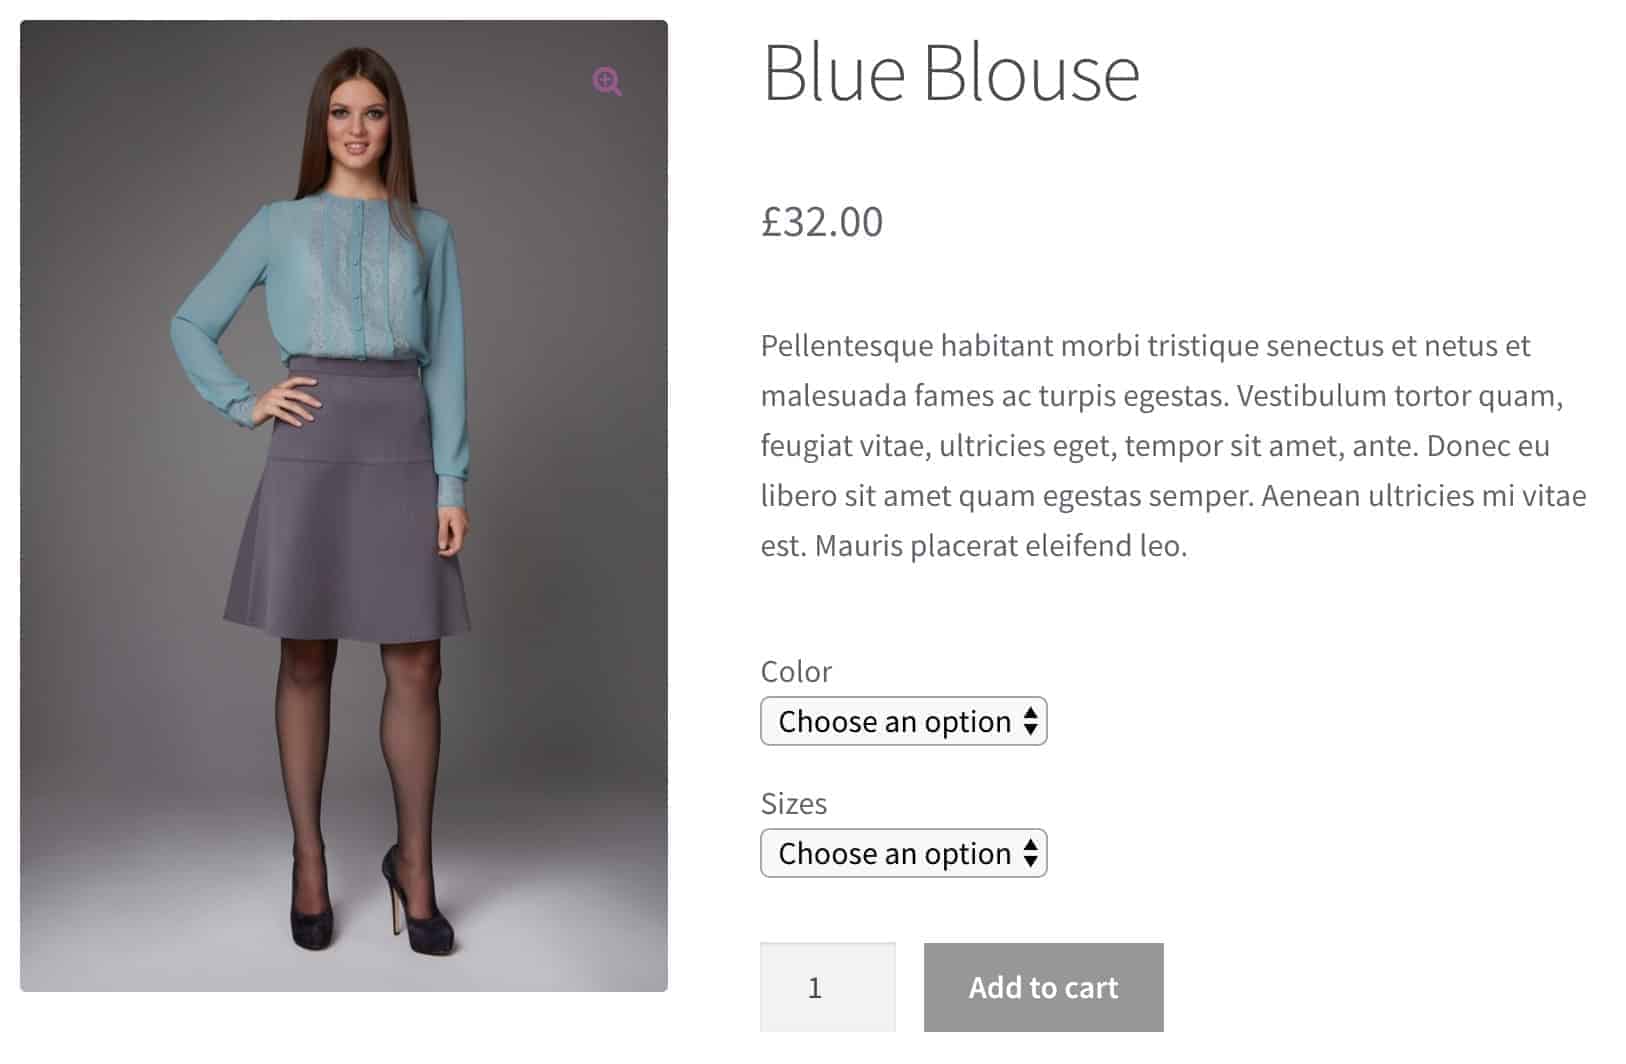
Variations let you set attributes for products such as colour and size and then set prices and stock levels for each variation. This way, you’re able to show different prices for different product variations. Here’s an image of a typical WooCommerce product page with variations:

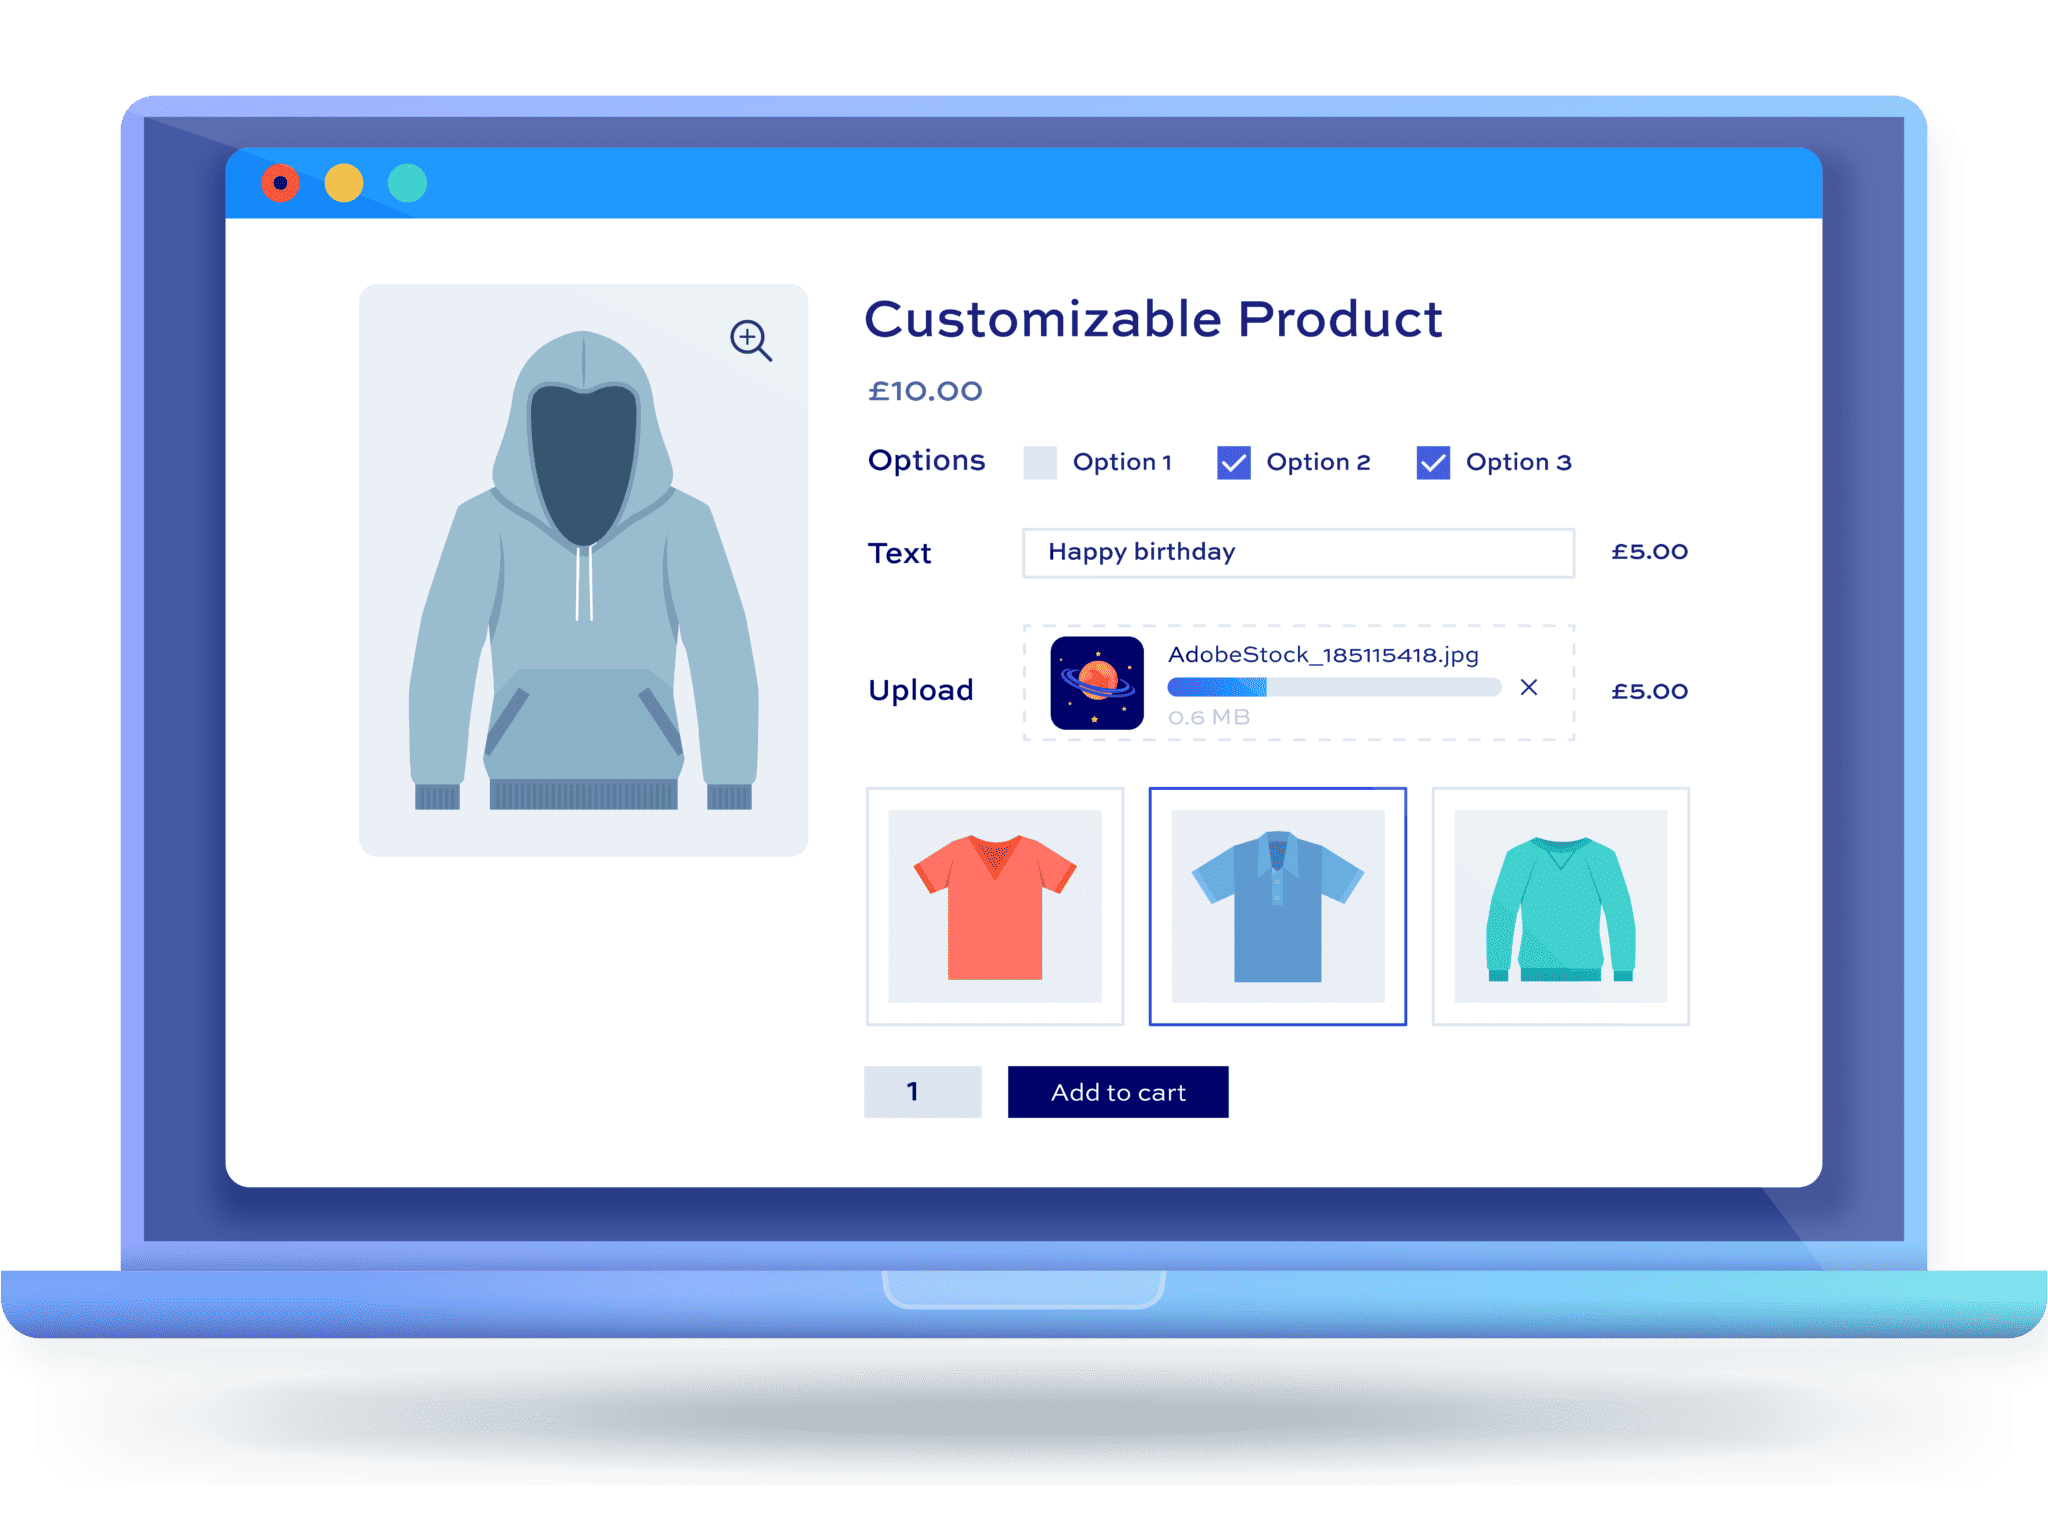
And here’s a screenshot of a product with add-on fields:

Product variations don’t let you customize WooCommerce products. You can only choose which version of the product you want from what’s available.
On the other hand, custom product options aren’t limited to select fields as is the case with variation fields. Custom add-on fields let your customers enter unique input enabling them to enter personalized messages or upload a photo – which can’t be done with variations.
So, let’s say you sell watches with a fixed option like size. For this, you can easily add dropdown variations to your product listing and set prices accordingly. This would only allow customers to choose the variation they want before placing an order.

However, if you also offer custom engraving, you can use a combination of text boxes and dropdown menus to help customers order exactly what they want.
How you can create a custom product using add-on fields
In this section, we’ll take a look at how you can use add-on fields to create a custom product using the WooCommerce Add-Ons Ultimate plugin.
How to create groups and add fields
Here’s how you can create groups and fields for providing customization options:
- Open up the WooCommerce product you want to add add-on fields to
- Scroll down to the ‘Product data’ section and click on the ‘Product Add-ons’ tab
- Click the ‘Add Group’ button and enter:
- Title
- Group Description
- Group Layout
- Conditions
- Click the ‘Add Field’ button to add a new add-on field
You can add as many groups and fields as you’d like. The different field options that you can configure will depend on which field you add to the product.

That said, for each field, the plugin lets you enter a field label, set a field price, default value, description, and image. In addition to this, you can also make it a required field and charge a flat rate or percentage.
Related Tutorial
Check out our WooCommerce custom fields article for more information and ideas
Example #1: Text fields and select fields
You can use basic text fields to allow customers to enter a personalized engraving for jewellery and watches. Similarly, they can enter a personal message they want on their hand-written greeting cards by entering it in the text box.
The text field lets you set the minimum and maximum characters customers can enter and enable price per character.

Select fields are great for when you need to provide a predefined set of options for users to pick from. Following our greeting card example, you could use a select field to let customers choose the occasion.
For the select field, you can enter different options that will appear in the dropdown along with a price for each if you want to charge extra.
Example #2: Swatches, colour pickers, and select box fields
Swatches are great for selling bouquets, carpets, curtains, and custom skateboards, or anywhere else you need to display your products available in different sizes, colours, or prints.

For image swatches, you can enter options with images and prices for each option. You can also set the minimum number, maximum number, number of columns, allow multiples, and hide labels.
Colour pickers work great for custom apparel (such as t-shirts and caps), fabric, notebooks, and posters where you can give customers the option to choose any colour they want.

For colour pickers, you can set the default colour and element width and choose to display common palettes.
The select box field is perfect for when you want to let customers choose from a predefined set of values such as skateboard sizes or computer processors.

The select box field lets you create different options that appear in a dropdown. You can add an image and price for each option.
Example #3: Child product fields
Child product fields allow you to use other products as extra fields in your WooCommerce product. These are useful for displaying complete-the-look products and composite products.

You can also use this to recommend products that other customers also bought or items that are frequently bought together. This gives more exposure to other products in your store, boosting sales.
For child product fields, you can choose the child products you’d like to let customers pick from, the layout they’re presented in, product quantities, field placeholder, discount, and discount type.
Related Tutorial
You can take a look at this article for an in-depth tutorial on composite products in WooCommerce
Common use cases for creating custom products
Let’s go over some common use cases for the types of custom products you can sell:
Build your own product (computer, cereal, pizza)
Some of the most common examples of products that can be customized include computers, gift baskets, pizzas, sandwiches, cereals, and hampers.

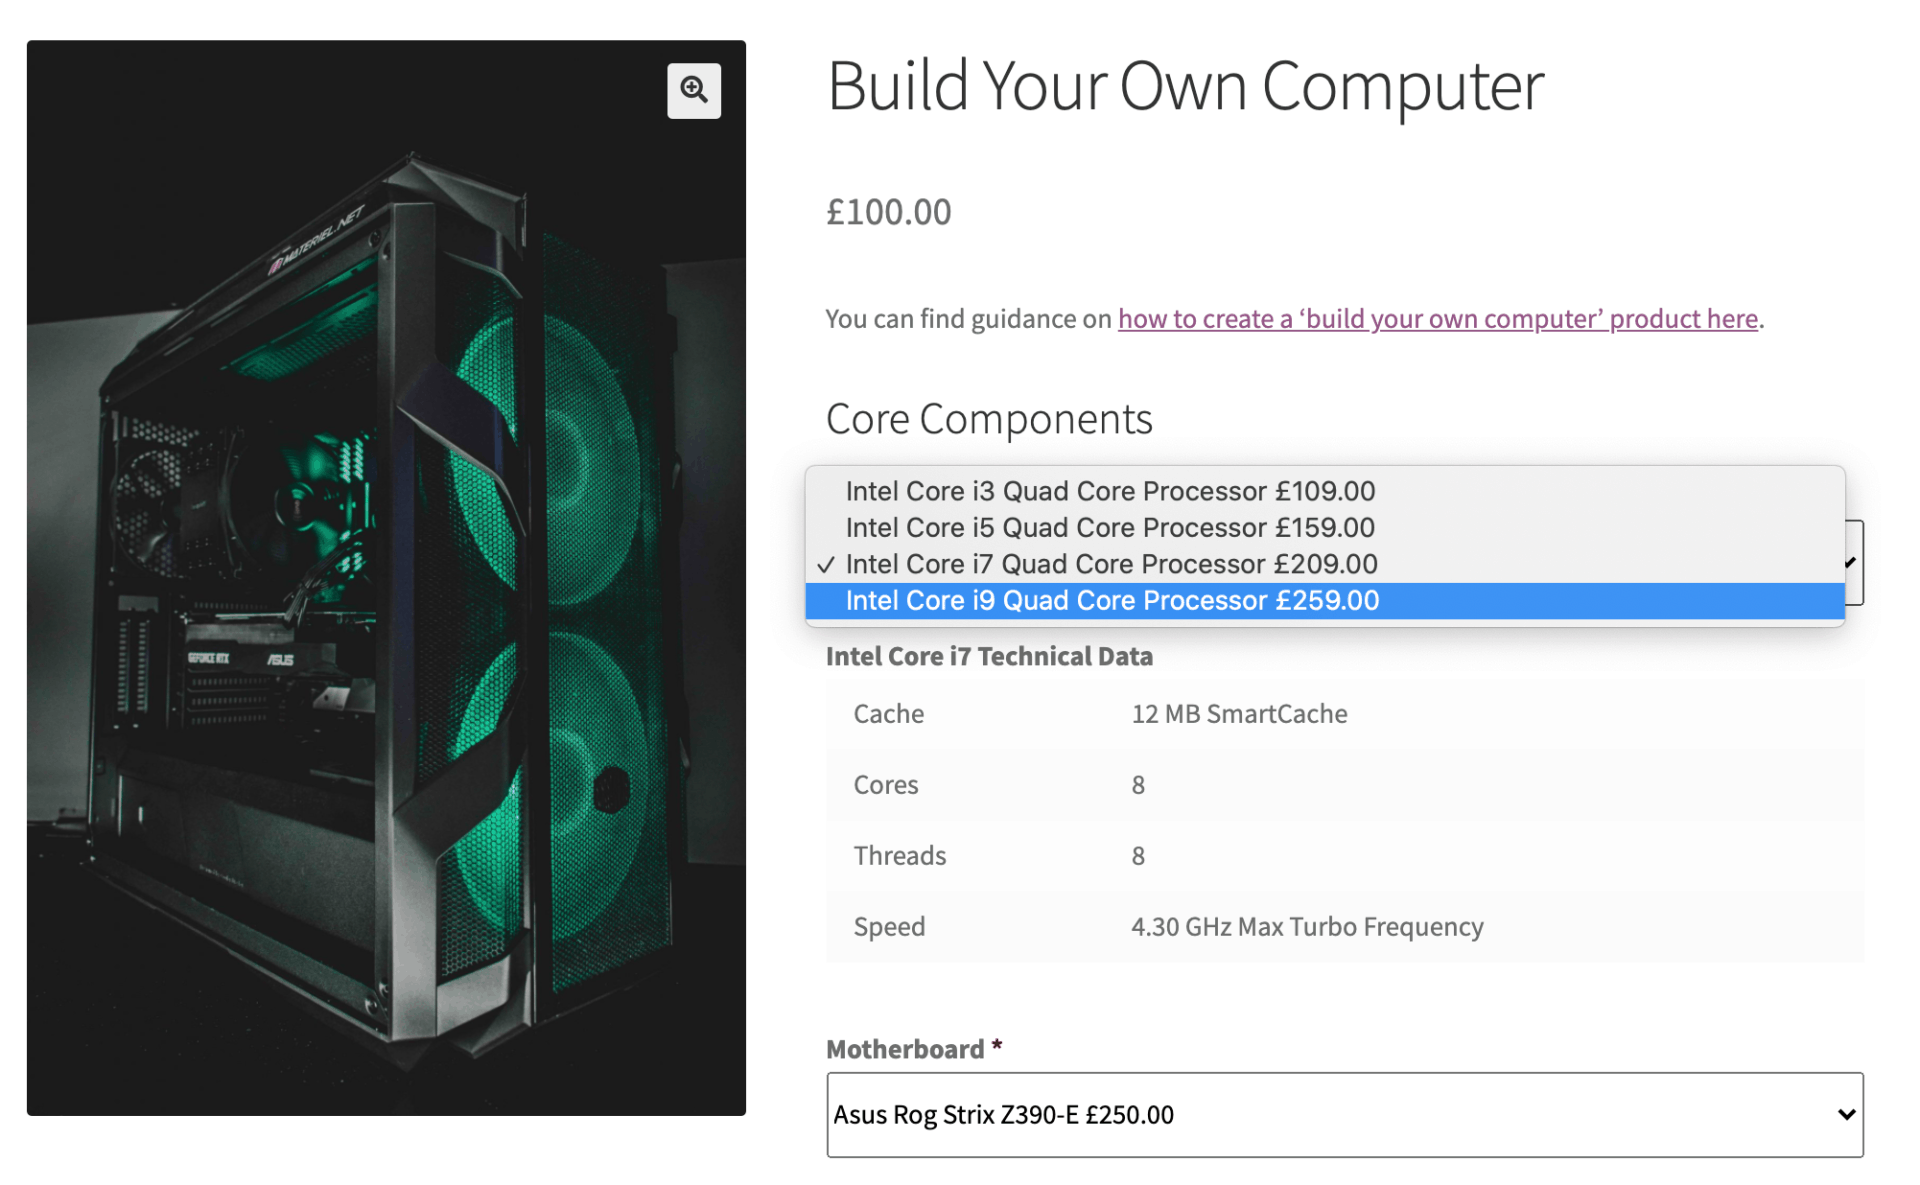
This build your own computer product uses products and information add-on fields.
Letting customers create their own product is a great way to delight them – even if it’s something as simple as choosing pizza toppings.
Related Tutorial
Take a look at this article for even more ideas on how to customize products in WooCommerce
Personalised products (jewellery, phone case, face mask)
Jewellery, face masks, and phone cases are great fit for e-commerce as these products are lightweight, can be customized, and are easy to ship.
Many online stores offer size, colour, finishing, and material options. But with custom fields, you can offer more like adding your own name, image, logo, and embossing options. Custom jewellery, face masks, and phone cases are always in demand – especially because customers are constantly looking for unique products to accessorize with.

This custom face mask example uses text fields, file upload, colour picker, and a radio group to let customers personalize the product.
Subscription boxes (meal plans)
Subscription boxes are popular products that let customers mix and match items to create their own, custom subscription box. However, subscriptions can be frustrating for customers if they don’t have control over what’s included in the box which can lead to higher unsubscribe rates.
A build-a-box style subscription for meals allows customers to choose exactly what they want in their meal box. This is an easy way to let customers personalize their orders. Custom fields can be used to create a simple flow where customers can pick what meals they want delivered on a weekly basis using text fields and dropdowns.

This type of subscription box product uses a variety of different fields including product, select, and textarea.
Design your own clothes/apparel (tshirts, hoodies, caps)
Tshirts with custom images or messages are a popular example of product customizers. With custom fields like text fields and upload fields, your customers will be able to upload their own designs, photos, personal messages, or slogans and choose colour options.

This product uses image swatches, file upload, and text fields. Check out the tee-shirt designer tutorial for step-by-step instructions on how to create this exact product. You can try out the different customization options on this tee-shirt designer demo.
Moreover, you can offer gift wrap options as well. This works for all sorts of clothing and apparel such as hoodies, caps, gym wear, and scarves.
More complex use cases
Let’s take a look at some more advanced use cases for creating custom products in WooCommerce:
Product boxes and bundles (hampers, florist)
Mixed case products enable you to create a larger, combined product by including one or more products. Common examples would include mixed cases of wine bottles or essential oils or gift hampers.
Here’s an example of a mixed wine case:

This WooCommerce custom product uses product fields to let users build their mixed wine case.

As with composite products and product boxes, product bundles let the customer combine different elements to create a product. These typically include other products as custom elements within the main product e.g. a bouquet or a case.
Related Tutorial
Here’s an in-depth tutorial on WooCommerce product bundles
Building complex products out of components (skateboard, crib)
When you aren’t selling single unit products, you can let customers put together a custom product out of parts. For example, if you sell cribs you could let customers choose a crib style, colour, bumpers, and accessories.

For example, this crib example uses select, checkbox, colour picker, and checkbox group fields to let customers build a custom crib.
B2B products (packaging, business cards, merch)
Businesses that sell custom boxes wholesale for product packaging can use add-on fields to produce and deliver packaging based on the specific requirements of their B2B buyers.

This way, they’ll be able to take orders for packaging based on the customer’s choice of material, packaging that is environment friendly, packaging with a personalized logo and company name, and special boxes that can deliver delicate and expensive items.
The same is true if you sell book binding and merchandise products to B2B customers such as pens, notepads, t-shirts, and mugs.
How to create a custom product box
Let’s say you want to let customers personalize their mixed wine case. Start by adding all of the wine bottles to WooCommerce as individual products. Next, you can create a new product for the Mixed Case. If you charge based on the wine added, you’ll need to set the price of the mixed case to 0.
The WooCommerce Product Add-Ons Ultimate plugin gives you some additional options for how to show the price on the front-end. You can set the ‘Price label display’ field to ‘Hide price’ so the mixed case’s price (i.e. $0) doesn’t show up on the front-end.
The next step is to add the wine bottles as child products. Choose ‘Products’ in the ‘Field Type’ setting and in the ‘Child Products’ field, enter the names of the wines you want to offer as part of the mixed case

Let’s look at the extra settings you get with WooCommerce Product Add-Ons Ultimate plugin:
- ‘Products Layout’: This setting lets you choose how to show your wines. Set this option to ‘Column’ to display them in a single column layout.
- ‘Products Quantities’: This option lets customers select how many of each wine they’d like to add to their mixed case. Select ‘Independent’ to add a quantity field alongside each child product.
- ‘Min Child Products’ and ‘Max Child Products’: You can use this option to set the minimum and maximum numbers of child products customers can add to their case. For this example, we want customers to add exactly 12 bottles to their mixed case, so set both values to 12.
- ‘Discount’ and ‘Discount Type’: We’ll be offering a 10% discount on this mixed case so set ‘Discount’ to 10 and ‘Discount Type’ to ‘Percentage’.
When you’re done, publish the product. It will look something like this on the front-end:
You can view a working demo of this mixed case product here.

Related Tutorial
Here’s a tutorial on creating a mixed case product in WooCommerce
Extended features for custom products
The great thing about the WooCommerce Product Add-Ons Ultimate plugin is that it lets you enhance the customer’s shopping experience in a variety of different ways. Here are some ideas for WooCommerce custom products:
Conditional fields and groups
Let’s say you want to show fields only when certain conditions are met. You can do this by using conditional logic.
Let’s say if a customer ticks a checkbox for an extended warranty, you’d like to show select fields with different options for the available warranties. Similarly, you might like to hide a field if a user enters a certain value in another field. You can use conditional fields and groups to perform these tasks.
To use conditional logic, you’ll have to create at least two custom fields in your product. Following our crib example from before, let’s say you want to let customers add a mattress to their order. If the customer chooses to add a mattress then a field will appear asking them what colour the bed sheet should be.

Notice the ‘Conditions’ section is set to show the ‘Bed sheet’ field only is the ‘Include mattress?’ field is ticked.
Here’s what it looks like on the front-end:
crib-example/crib-example-condition-false


Related Tutorial
There’s more information on conditional product options here
Calculation fields
If you sell products that aren’t priced by a standard unit such as area or volume, you can use a measurement price calculator. This way, customers will be able to calculate the product price based on user-inputted measurements.
Calculation fields are useful if you sell products like carpets, mirrors, wallpaper rolls, and windows and glass. You can easily create a price calculator setting formula that calculates the product price based on input data and other factors.
For example, if you sell wallpaper rolls, you could ask the customer to enter the height and width they need and use a formula to determine how many rolls they’d require and how much that would cost them.

Here’s an example of how calculation fields may appear on your product page (view the demo product here):

Related Tutorial
Here’s some more information on calculating product prices based on user input
File uploads
File uploads are useful when you want to let customers upload an image (photo, logo, or custom graphic). This is also a great option for stores that sell to businesses. They can use WooCommerce custom product add-on fields to sell things like packaging, bookbinding (materials, sizes, designs), and merch (pens, notepads, t-shirts).

Similarly, businesses that sell custom cakes can use file upload fields to allow their customers to submit custom designs for their cakes.
Related Tutorial
Take a look at this article for full guidance on how to upload files to WooCommerce product pages
Real life case studies
Let’s look at some real-word examples of stores that sell WooCommerce custom products using add-on fields available with the WooCommerce Product Add-Ons Ultimate plugin:
Case study #1: BAGS & PIECES
BAGS & PIECES uses WooCommerce Product Add-Ons Ultimate to show all eight style options available in their DIY Box for the Ultimate Crossbody Bag. The customer can select a leather structure (smooth or grain leather), and depending on the customer’s selection, leather colours are displayed (either in grain or smooth images).

The leather colours already show up on the front-end before the customer chooses a leather structure – enabling customers to quickly view the colour options. Moreover, the conditional formatting helps change the coloured thumbnails based on the customer’s choice i.e. grained or smooth leather.
Customers can also choose the colour of the lining, the metal accessories (either silver or gold), and the carrying options they want. They can also use a statement strap by selecting a webbing style.
In addition to this, customers can add custom monogramming to the leather. They can select the colour of the embossing foil and their custom initials or pre-made quotes.
Next, they’ll be able to select where the custom monogramming will be positioned on the bag. The conditional option makes sure that the custom quote fits the position on the bag selected by the customer.
After this, customers can choose to add gift cards with custom text and gift wrapping.
Case study #2: Tickled Moon
Tickled Moon uses the WooCommerce Product Add-Ons Ultimate plugin to create the personalization fields for their children’s custom products. Each product has its own customization requirements like the child’s name, birthday, family, friends and pet names, favorite toy, and favorite food.
With WooCommerce Product Add-Ons Ultimate, Tickled Moon can quickly and easily create individual product pages with the relevant customization fields. The data from these fields is then combined with the product text to generate a real-life illustrated preview on the product page.

Tickled Moon also uses conditional logic to show or hide certain fields. For example, they have a book named “The Joyful Adventures” that lets customers add an optional number of family and friends into the book. Using the conditional logic, they’re able to keep the personalization form brief on the product as input fields are shown depending on the number of names the customer would like to add to the book.
Similarly, they use dropdown lists to enable the customer to add in a child’s favorite toy or favorite food or create their own custom options.
Styling add-on fields
If you’re developing an e-commerce website for a client, you might need to style add-on fields. There are two ways to do this if you’re using the WooCommerce Product Add-Ons Ultimate plugin:
Using the Customizer
Here’s how you can style add-on fields using the Customizer:

- Go to Appearance > Customize from the WordPress admin panel
- Click on ‘Product Add-Ons Ultimate’ and then ‘Styles’
- Customize the add-on fields using the available options
The WordPress Customizer has built-in options for customizing add-on fields in a variety of ways including tweaking field wrapper margins, background colours, text colours, swatch highlight colours, and much more.
You can also configure labels by going to ‘Product Add-Ons Ultimate’ and then ‘General’ from the Customizer.
Using custom CSS
Here’s how you can customize add-on fields using custom CSS code:
- Go to Appearance > Customize from the WordPress admin panel
- Click on ‘Additional CSS’
- Add your custom CSS code
You’ll be able to live preview the changes you make.
Conclusion
With the WooCommerce Product Add-Ons Ultimate plugin, you can create WooCommerce custom products using add-on fields on the single product page. This is a great way to delight customers, stand out from the competition, and boost sales.
We shared examples of how you can use the different add-ons fields available with the WooCommerce custom products plugin. Hopefully, you’re in a good position now to create your own custom products.
Ready to create custom products on your online store? Get the WooCommerce Product Add-Ons Ultimate plugin today!
WooCommerce Product Add-Ons Ultimate
Personalise products with extra fields and custom options


