How to create a WooCommerce price matrix – three easy ways

A WooCommerce price matrix shows your prices in a grid or table so customers can compare options and buy faster. In this tutorial, we’ll show you three ways to create one, depending on what you sell.
After completing this tutorial:
- Users will be able to:
- See prices for every size and color of a product in a single grid
- Enter quantities for several variations and add them to the cart in one click
- Filter a large grid to show only the sizes or colors they want
- Browse your catalog in a sortable price table
- Enter their own measurements or choose options and see a price from your price table
- As the store owner or admin, you’ll be able to:
- Replace variation dropdowns with a price grid
- List products by category in a quick order table
- Price made-to-measure products from lookup tables with one, two or more inputs
Here’s a quick guide to which method suits your products:
- Method #1: Variations grid. Ideal for variable products with one or two attributes, such as t-shirts in different sizes and colors
- Method #2: Product catalog table. Ideal for stores where customers buy several different products per order, such as groceries or craft supplies
- Method #3: Lookup tables. Ideal for made-to-measure products priced by one, two or more inputs, such as blinds priced by width and height
There’s a demo product here so you can see a price matrix in action.
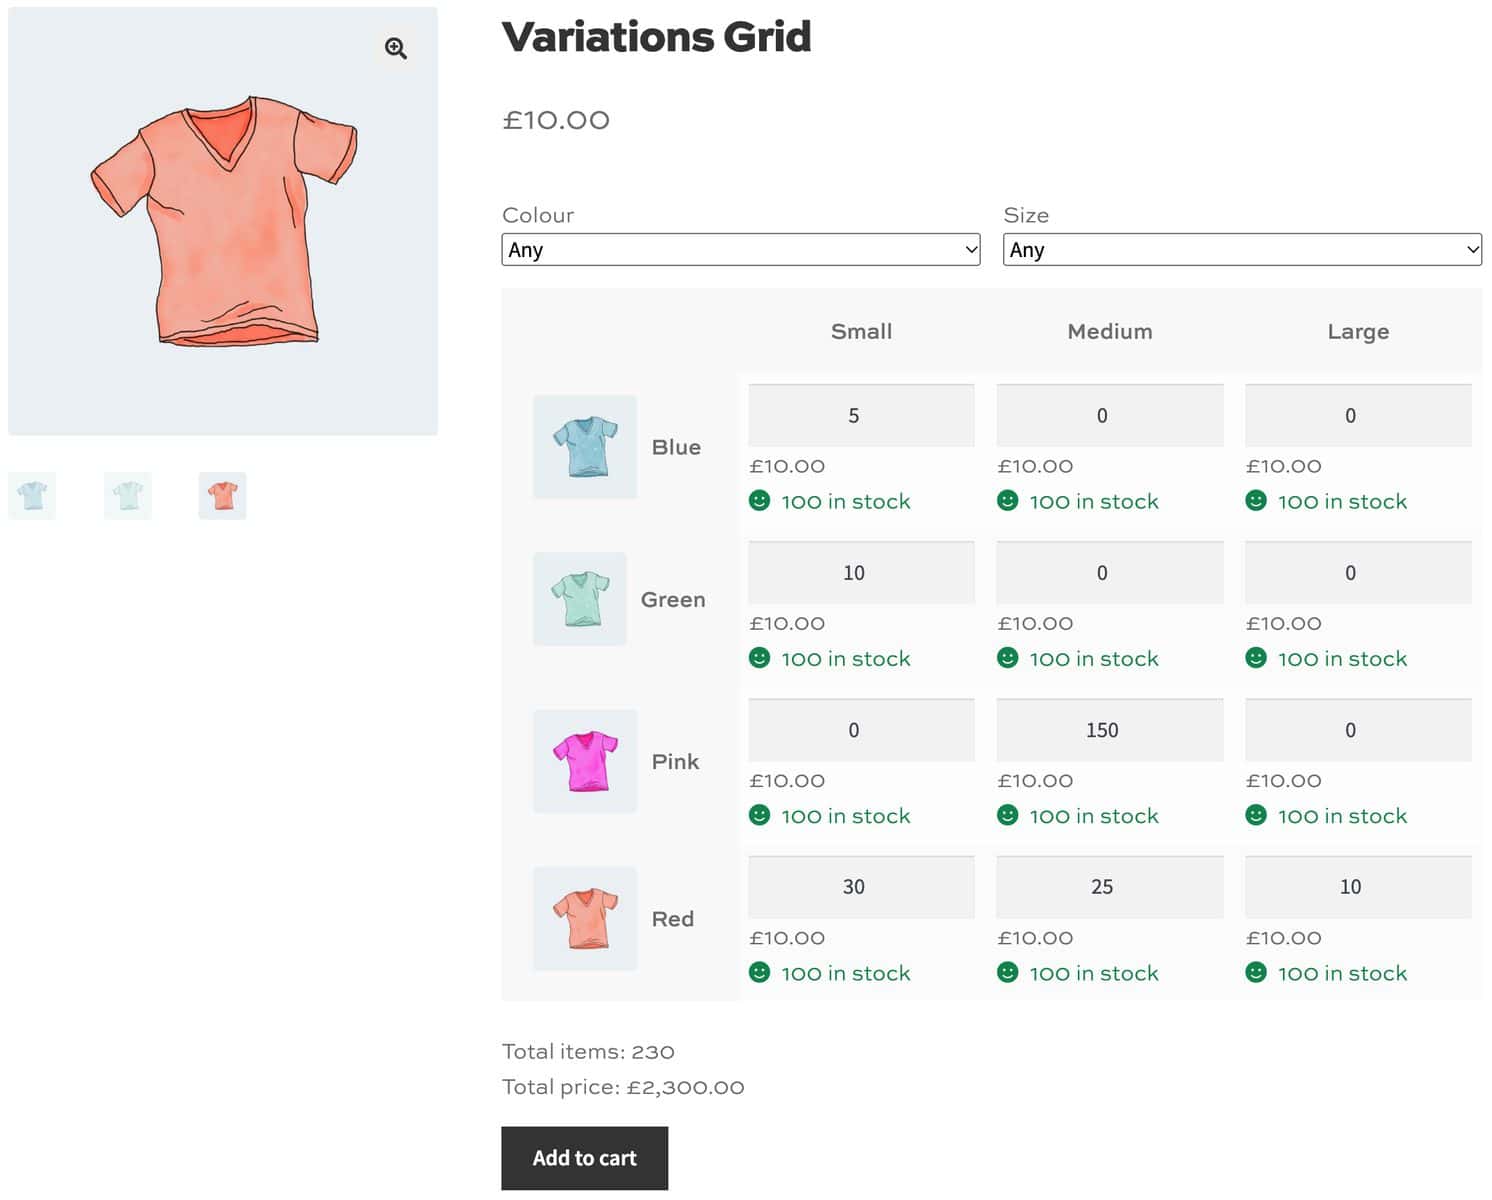
What is a WooCommerce price matrix?
A WooCommerce price matrix displays product prices in a table or grid on the front end. Customers see every option and its price together, instead of selecting options one at a time to reveal each price.
Here’s a simple pricing matrix example for a t-shirt sold in three sizes and three colors:
| Small | Medium | Large | |
|---|---|---|---|
| Blue | $18 | $18 | $20 |
| Green | $20 | $20 | $22 |
| Red | $20 | $20 | $22 |
The colors run down the side, the sizes run along the top and each cell shows the price for that combination. In WooCommerce, each cell can also hold a quantity field so customers can order several variations at once.
You can use a price matrix for:
- Product variations. Show every combination of two attributes, such as size and color, in a grid with its own price and quantity field
- Product catalogs. List products in a table so customers can browse and add items to their cart as they go. This works well for grocery stores, wholesale stores and stores selling physical or digital goods
- Calculation and lookup tables. Price custom products, such as blinds or wallpaper, from a table of widths and heights so customers can order the exact size they need
A price matrix makes it easier for customers to compare options and discover more of your products. It also speeds up ordering, which can increase your average order value.
Price matrix vs variation dropdowns: which is better for WooCommerce?
WooCommerce displays variations in dropdowns by default. A customer picks a size, then a color, and only then sees the price and stock for that one combination.
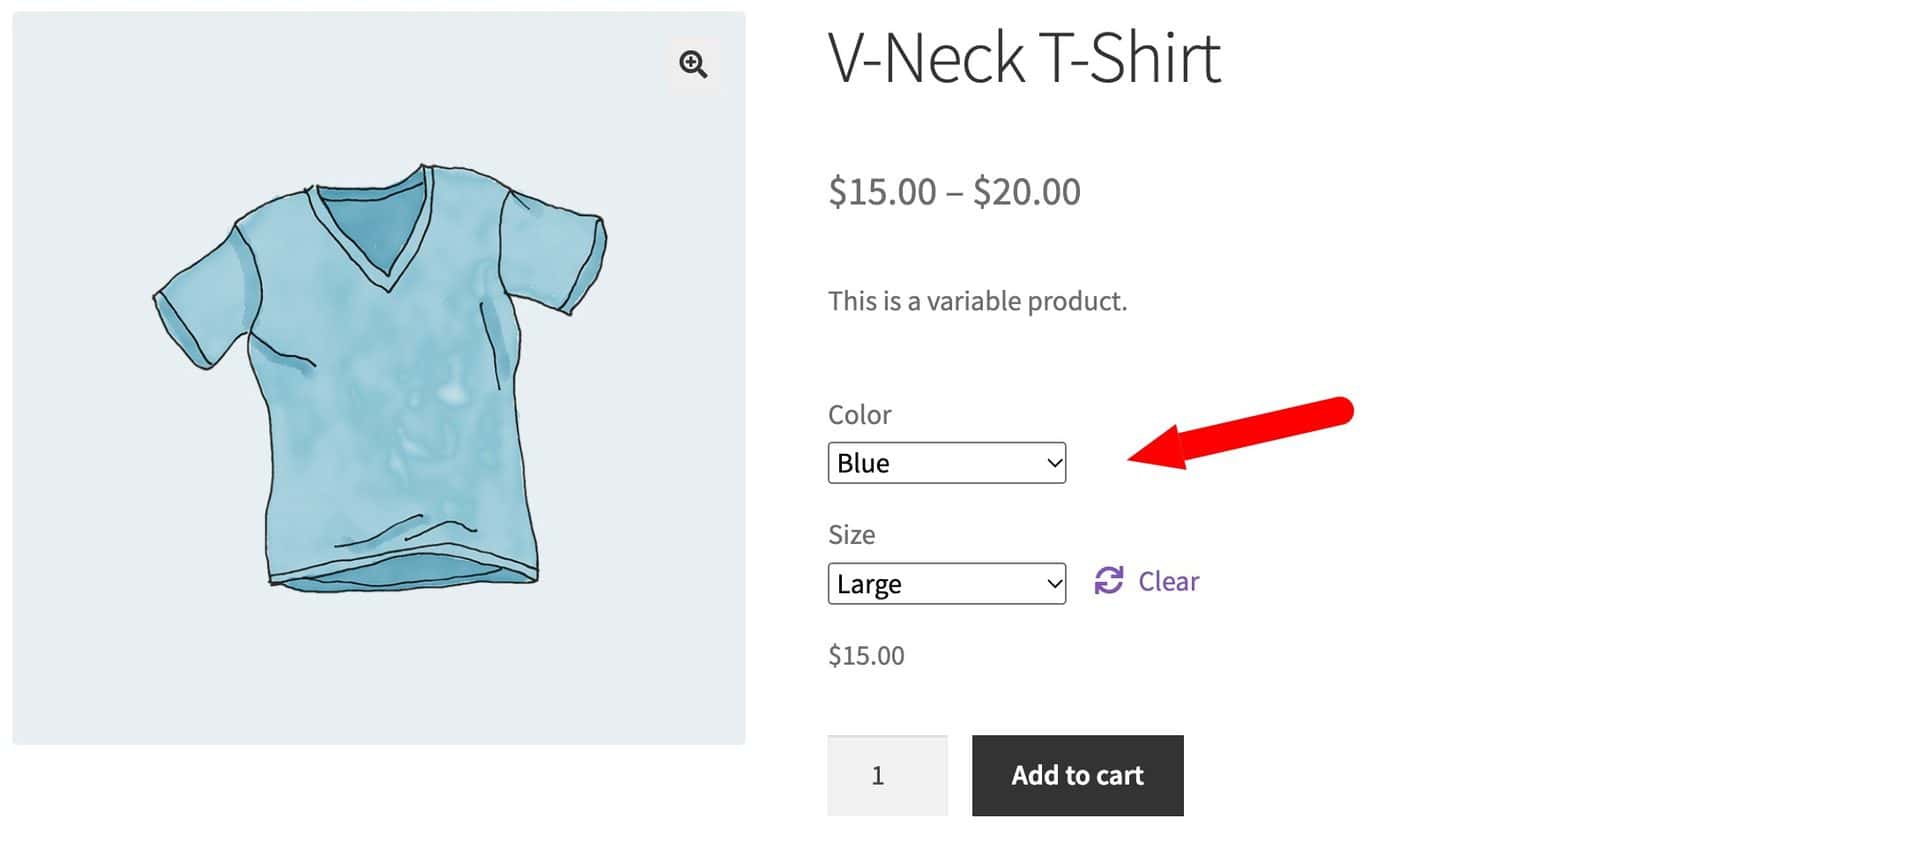
Dropdowns hide your options until the customer opens them. Baymard Institute’s research found that some users overlook size dropdowns completely, yet 28% of desktop ecommerce sites still use them for size selection.
A price matrix shows every option up front:
| Variation dropdowns | Price matrix | |
|---|---|---|
| Prices | Shown for one combination at a time | Shown for every combination together |
| Stock | Revealed after a selection | Shown in the grid |
| Ordering several variations | Add each one to the cart separately | Enter quantities and add them all in one click |
| Best for | Products with few variations or more than two attributes | Products with one or two attributes and bulk or wholesale orders |
Dropdowns work well when customers usually buy a single item and you only have a handful of variations. A price matrix works better when customers compare prices across sizes, buy several variations in one order or need to see what’s in stock before they choose.
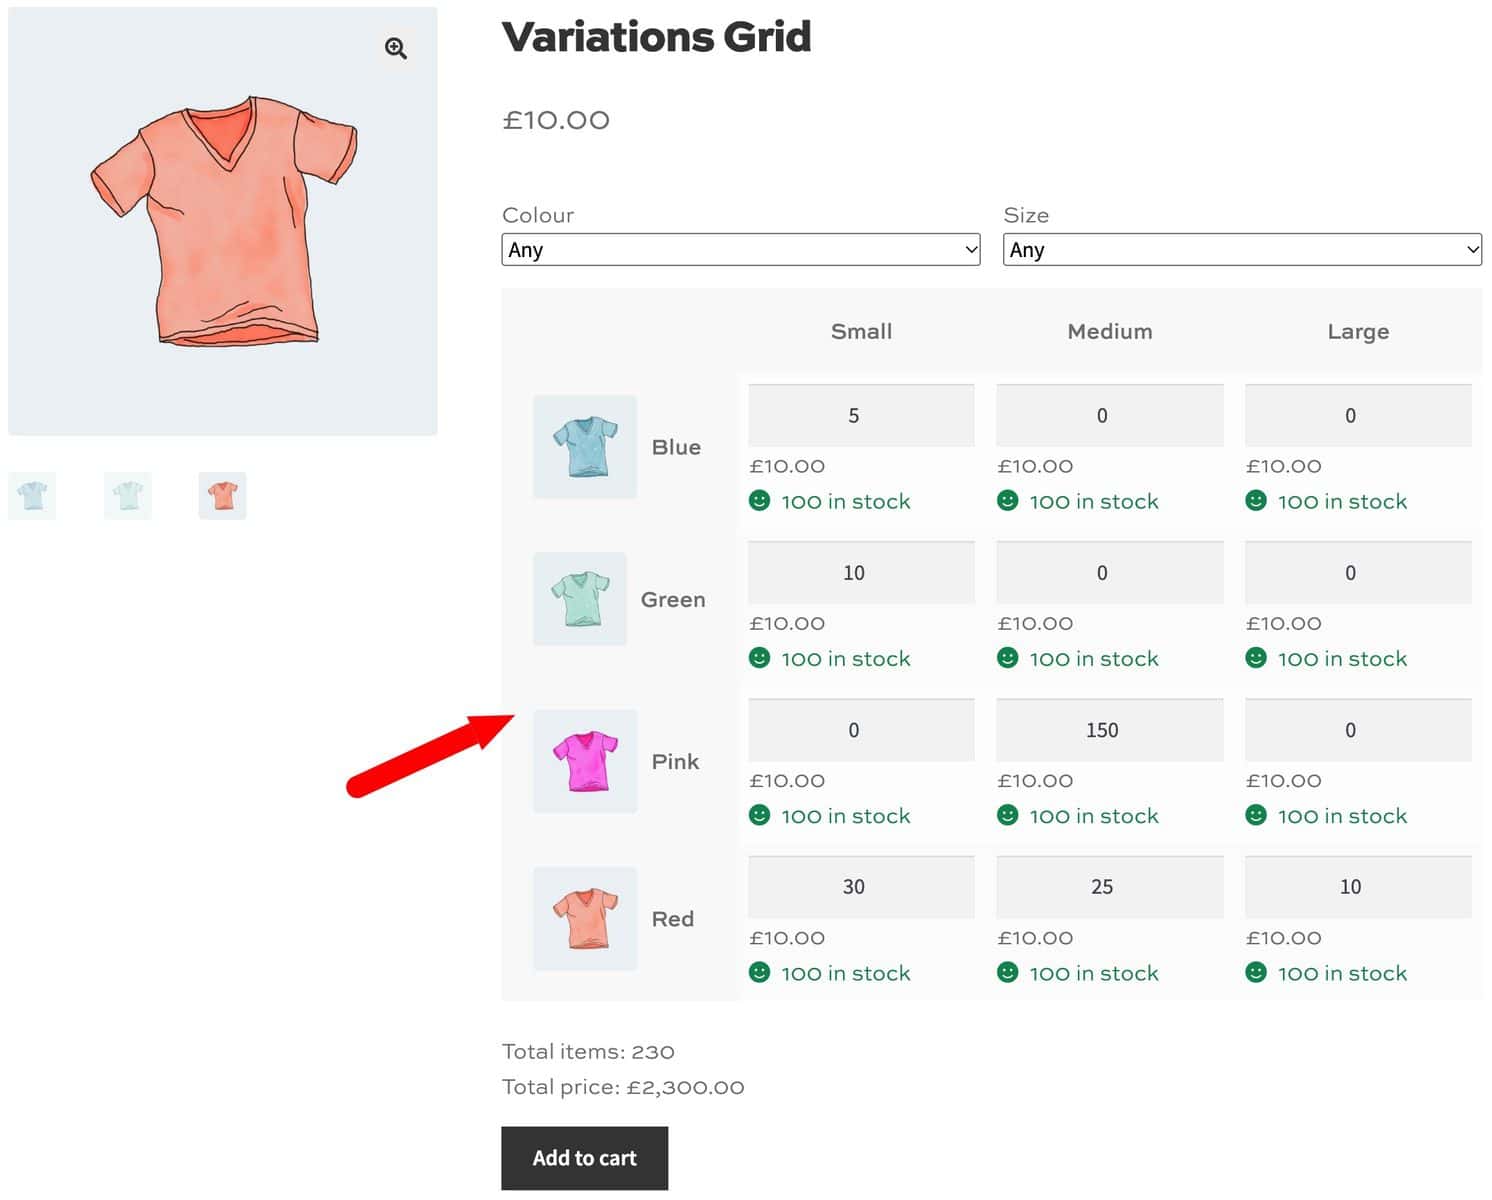

Our customers were finding it tough to see what was in stock when multiple attribute variations were in use. This plugin makes it way easier for customers to order the right size and colour variations.
If you sell variable products, the first method shows you how to replace the dropdowns with a grid.
Method #1: Price matrix for product variations
A variations grid displays your product’s variations in a price matrix on the single product page. Each variation has its own quantity field and can optionally display its price and stock.
Customers enter the quantity they want for each variation and add them all to the cart in one go. This is ideal for wholesale stores and products with lots of variations.
The WooCommerce Bulk Variations plugin lets you display variations in a grid instead of dropdowns. It’s compatible with all themes and page builders.
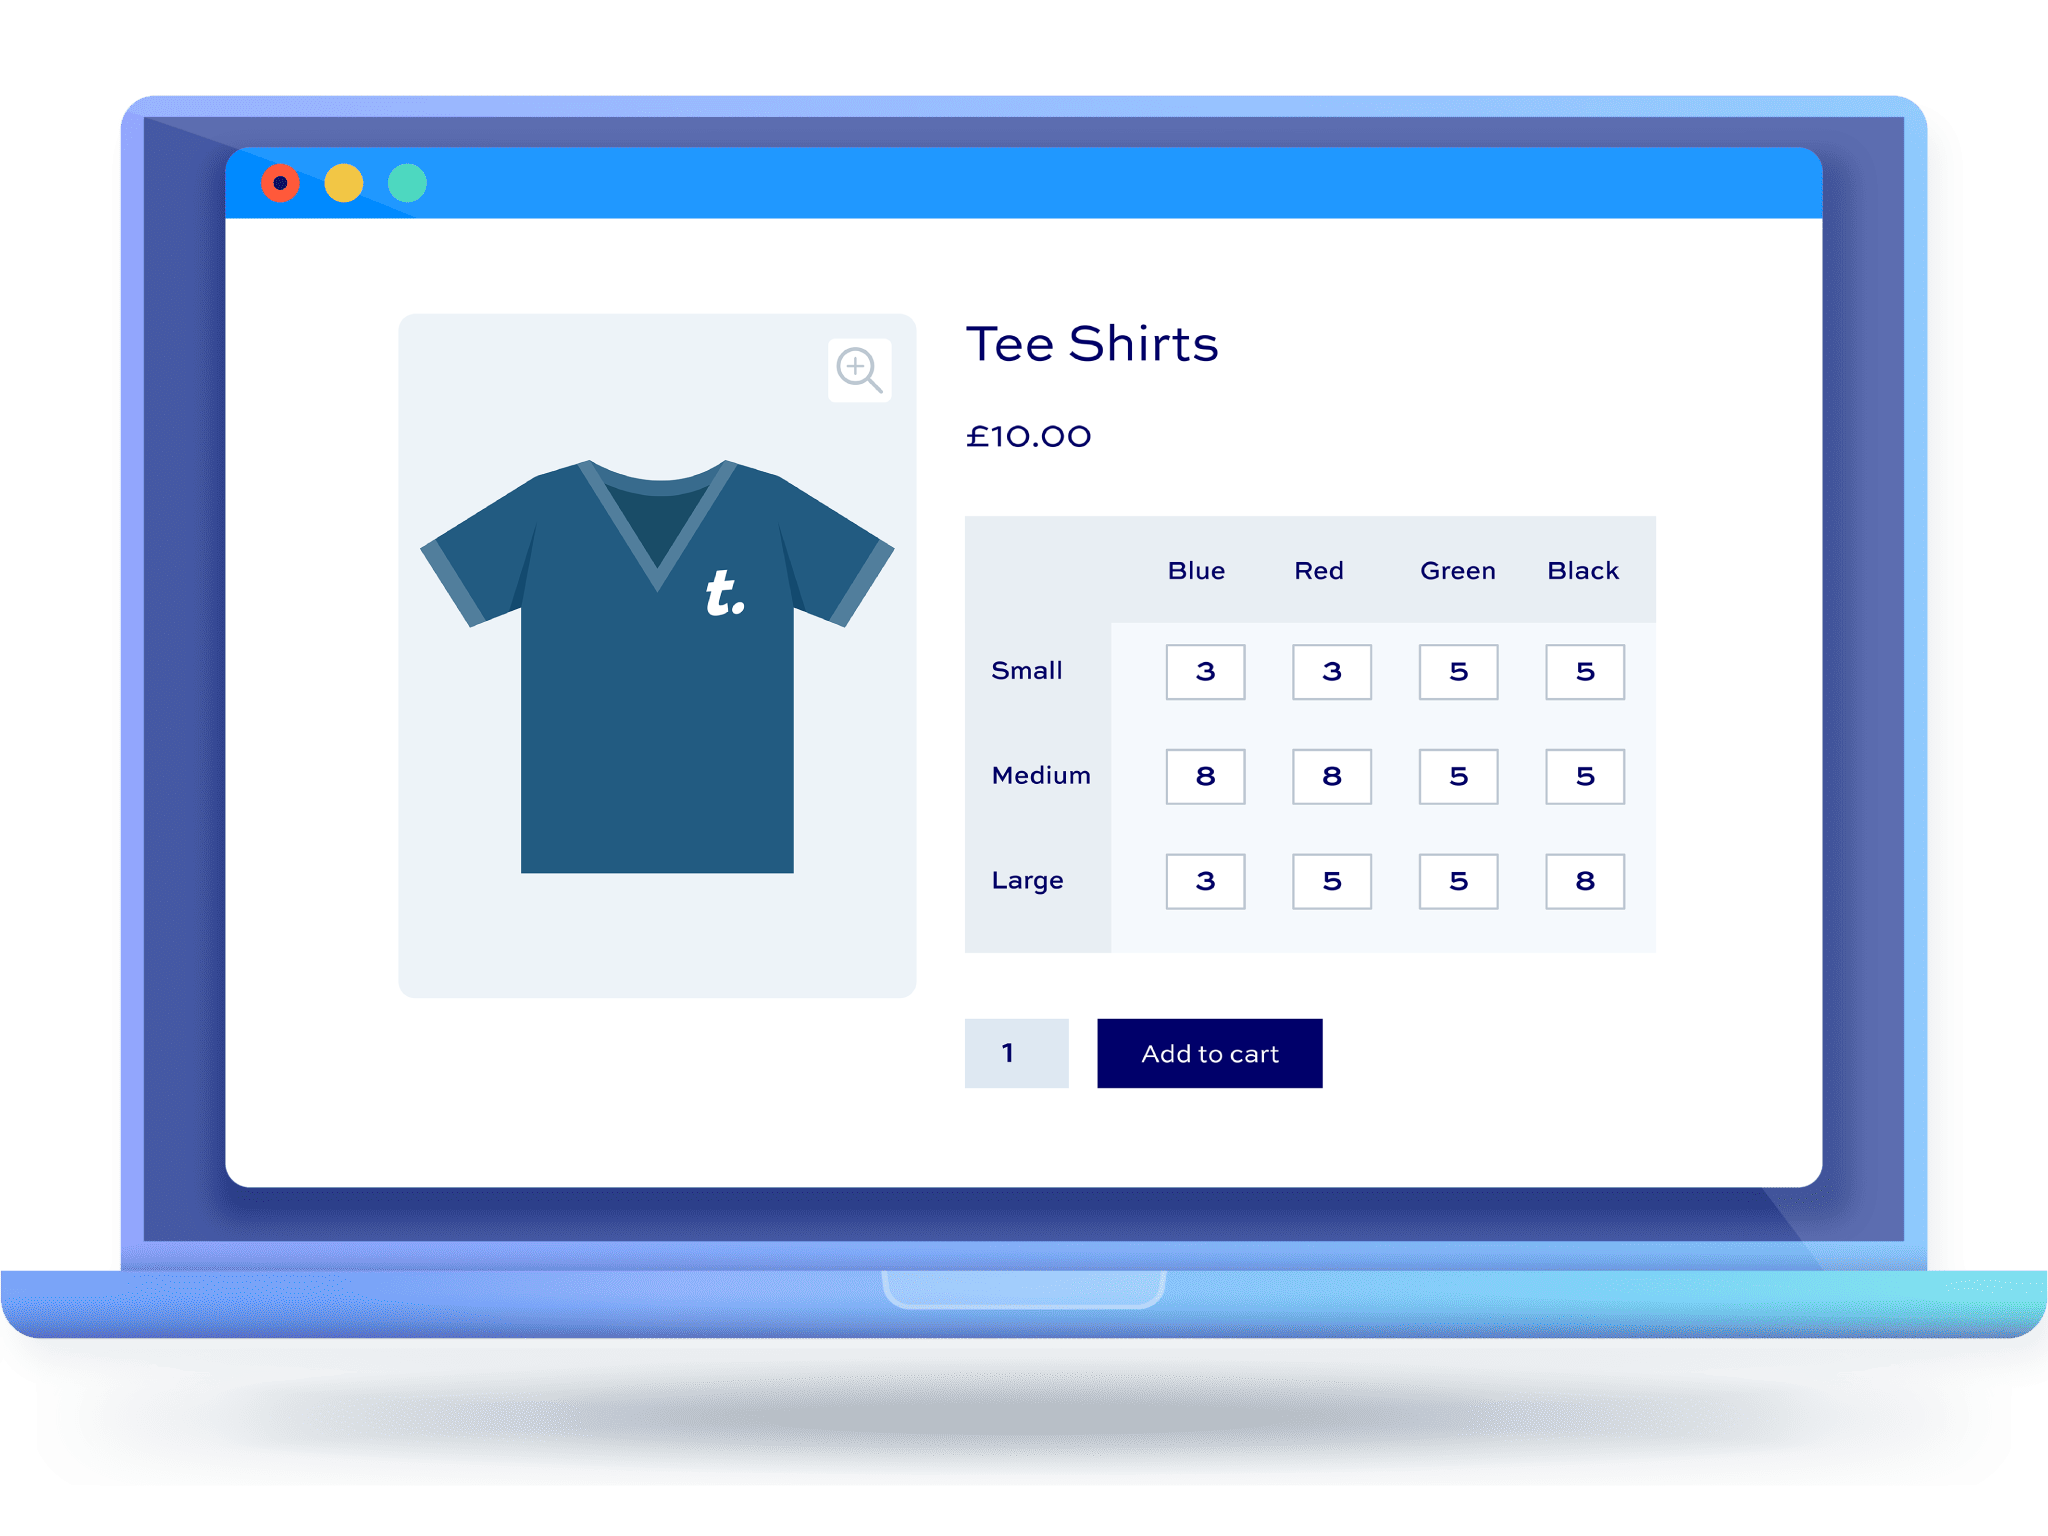
Speed up the buying process with bulk order forms
In this tutorial, we’ll assume that you already have WordPress and WooCommerce installed and ready to go.
Step #1: Install WooCommerce Bulk Variations
Once you’ve purchased WooCommerce Bulk Variations:
- Download the plugin’s zip file by clicking on the link on your order confirmation screen or in your welcome email. You’ll receive the email automatically a few seconds after you’ve completed the purchase
- Go to Plugins > Add New in your WordPress dashboard
- Click on the ‘Upload Plugin’ button
- Drag and drop the plugin’s downloaded zip file into the ‘Choose File’ area and click ‘Install Now’
- When the plugin has uploaded, click the ‘Activate Now’ button
You now have Bulk Variations installed and activated. Next, let’s create the product.
Step #2: Create a variable product
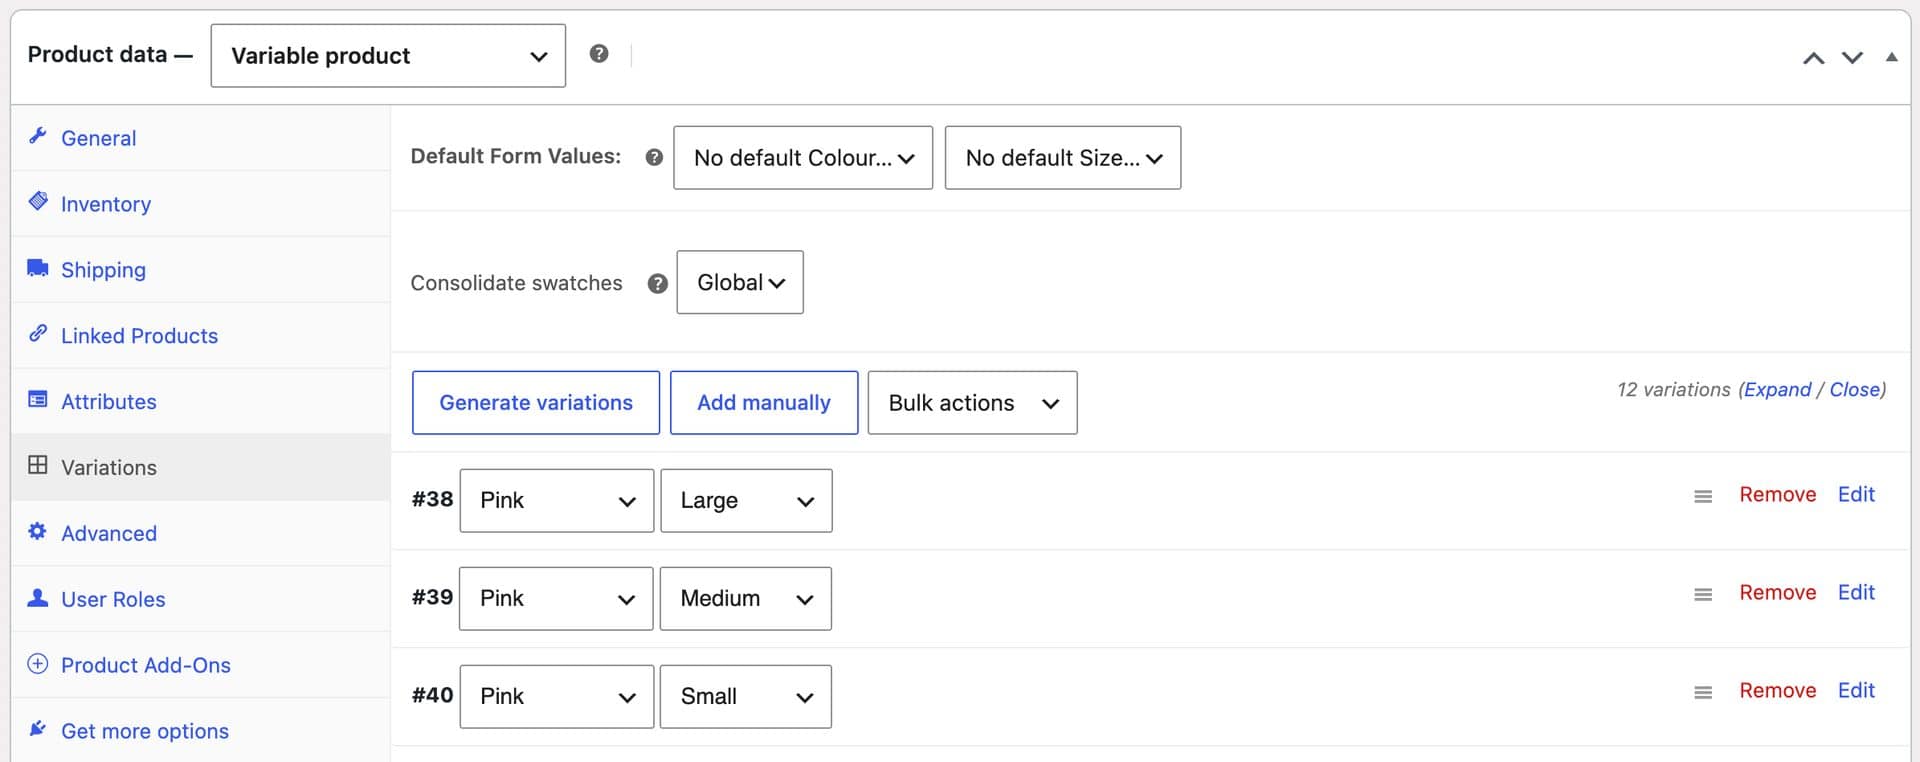
Create a variable product with one or two attributes. For example, if you sell t-shirts, your attributes could be ‘Size’ and ‘Color’.
Create your attributes at Products > Attributes. Custom attributes created at the product level won’t work with this method.
Add your variations, then enter a price, assign stock and upload an image for each one. You now have a variable product ready to display in a grid.
Step #3: Set the display mode to grid
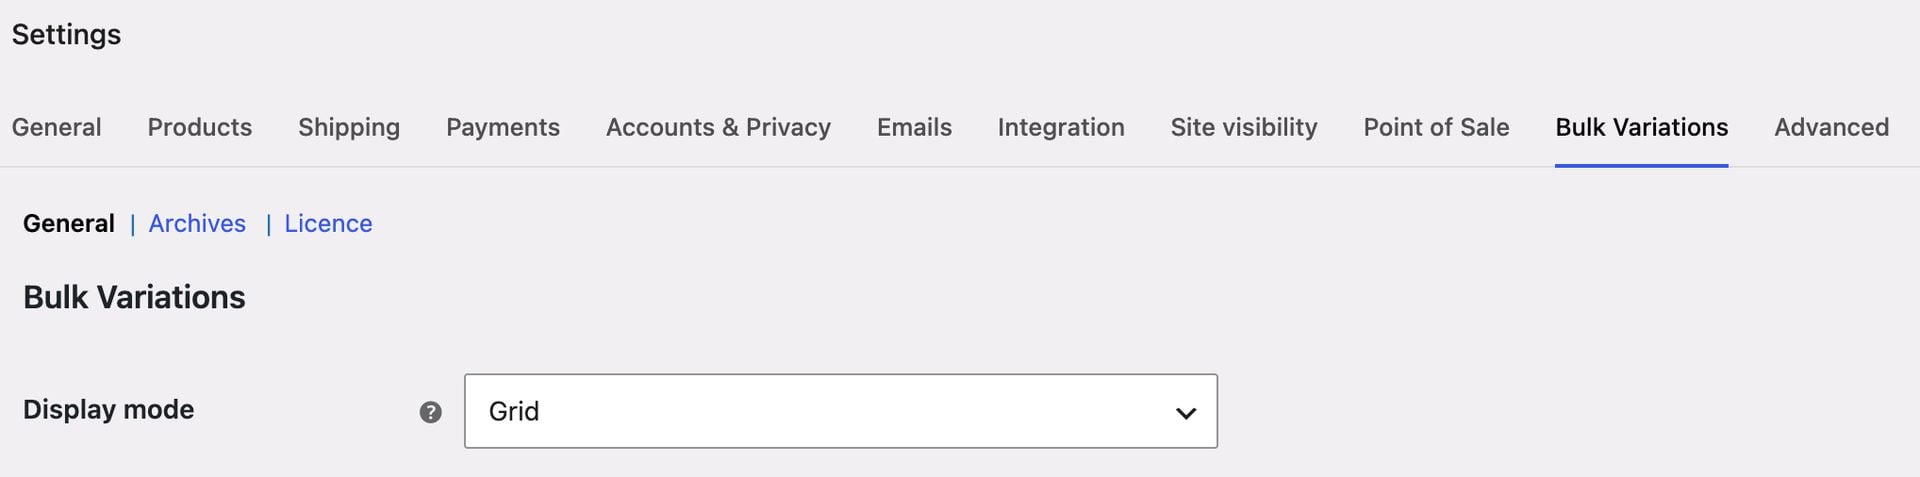
Go to WooCommerce > Settings > Bulk Variations and choose ‘Grid’ in the ‘Display mode’ field.
Choose whether to display the price and stock information under each variation’s quantity field. With two attributes, your variations display as a table. With one attribute, they display in a single column.
You can also choose to display the total number of variations selected by the customer and the front end and/or the total value of the items selected.
Save your settings and view your product. Customers can now enter a quantity for each variation and add them all to their cart in one go.
There’s a demo product here so you can try it yourself.
Step #4: Optionally let customers filter the grid
Enable filtering to let customers narrow a large grid down to a single row or column. For example, a customer could filter a t-shirt grid to show only the red shirts in every size.
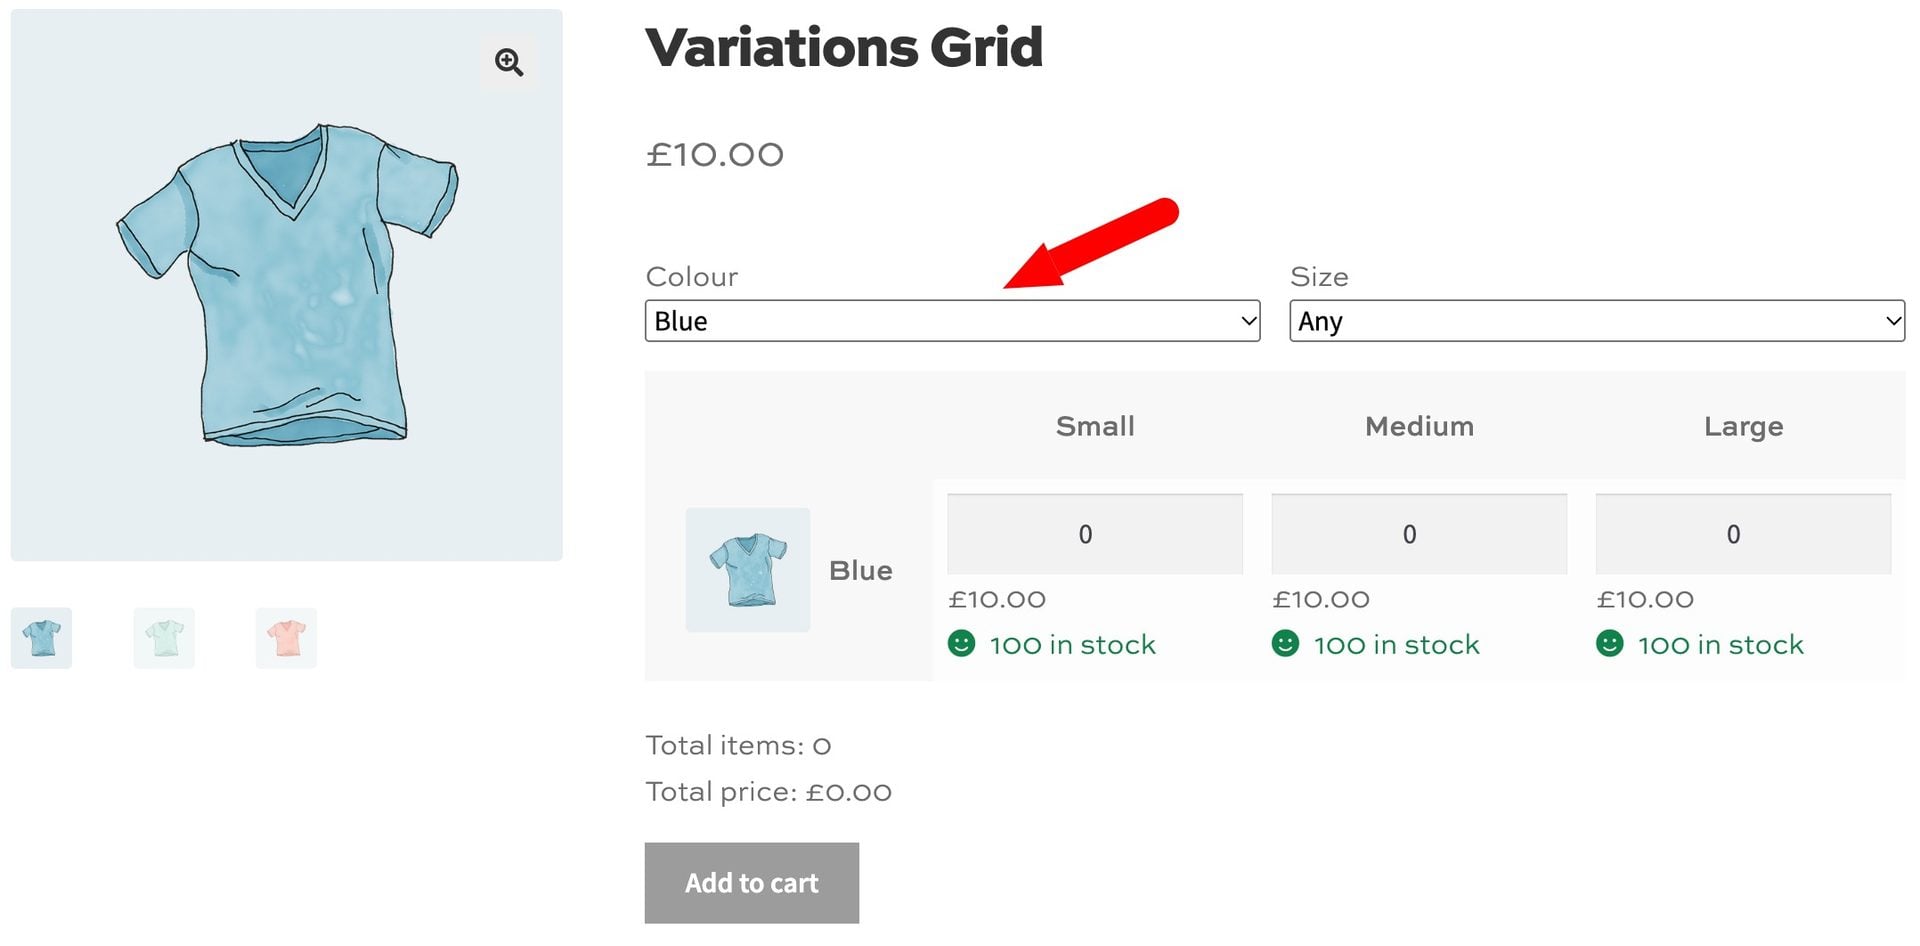
Filtering works with the grid display mode for products with one or two attributes. You can turn it on at three levels:
- For all products. Go to WooCommerce > Settings > Bulk Variations > General and tick ‘Enable filtering’
- For an attribute. Go to Products > Attributes, click ‘Configure terms’ for your attribute and set the ‘Grid filtering’ field to ‘Yes’ or ‘No’
- For a single product. Set the ‘Grid Filtering’ field on the ‘Attributes’ tab of the ‘Product data’ panel
Product settings override attribute settings, which override the global setting. Filtering is off by default.
Customers now see a dropdown above the grid for each attribute. Choosing ‘Any’ clears the filter, and any quantities they’ve already entered stay in their order even if the filter hides them.
If you use WooCommerce Variation Swatches, the filter displays variations as color, image, text or radio swatches instead of dropdowns. Our support doc on filtering the bulk variations order form covers each setting in more detail.
Step #5: Optionally add extra fields with Product Add-Ons Ultimate
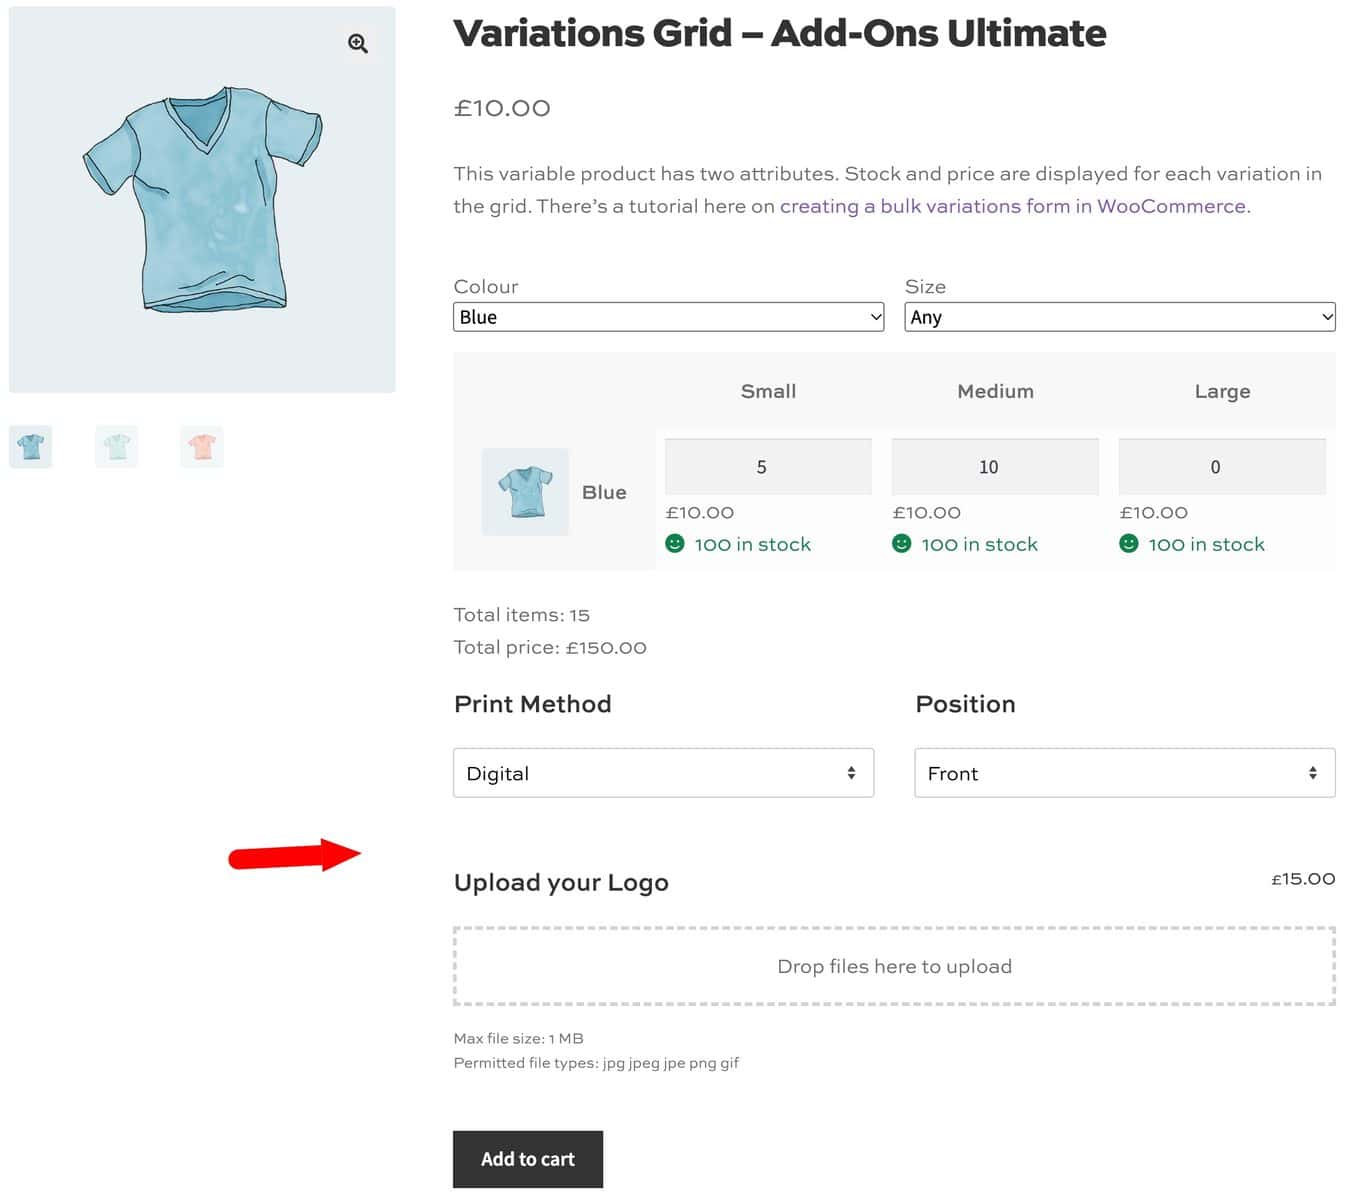
Use the WooCommerce Product Add-Ons Ultimate plugin to add extra fields alongside your grid. For example, if you sell t-shirts, you could let customers upload a logo or other graphic to print.
That’s how to create a price matrix for product variations. Now let’s look at how to display your whole catalog in a price table.
Method #2: Price matrix for product catalog
A product catalog price matrix lists your products in a table. Customers can browse your catalog and add products to their cart as they go.
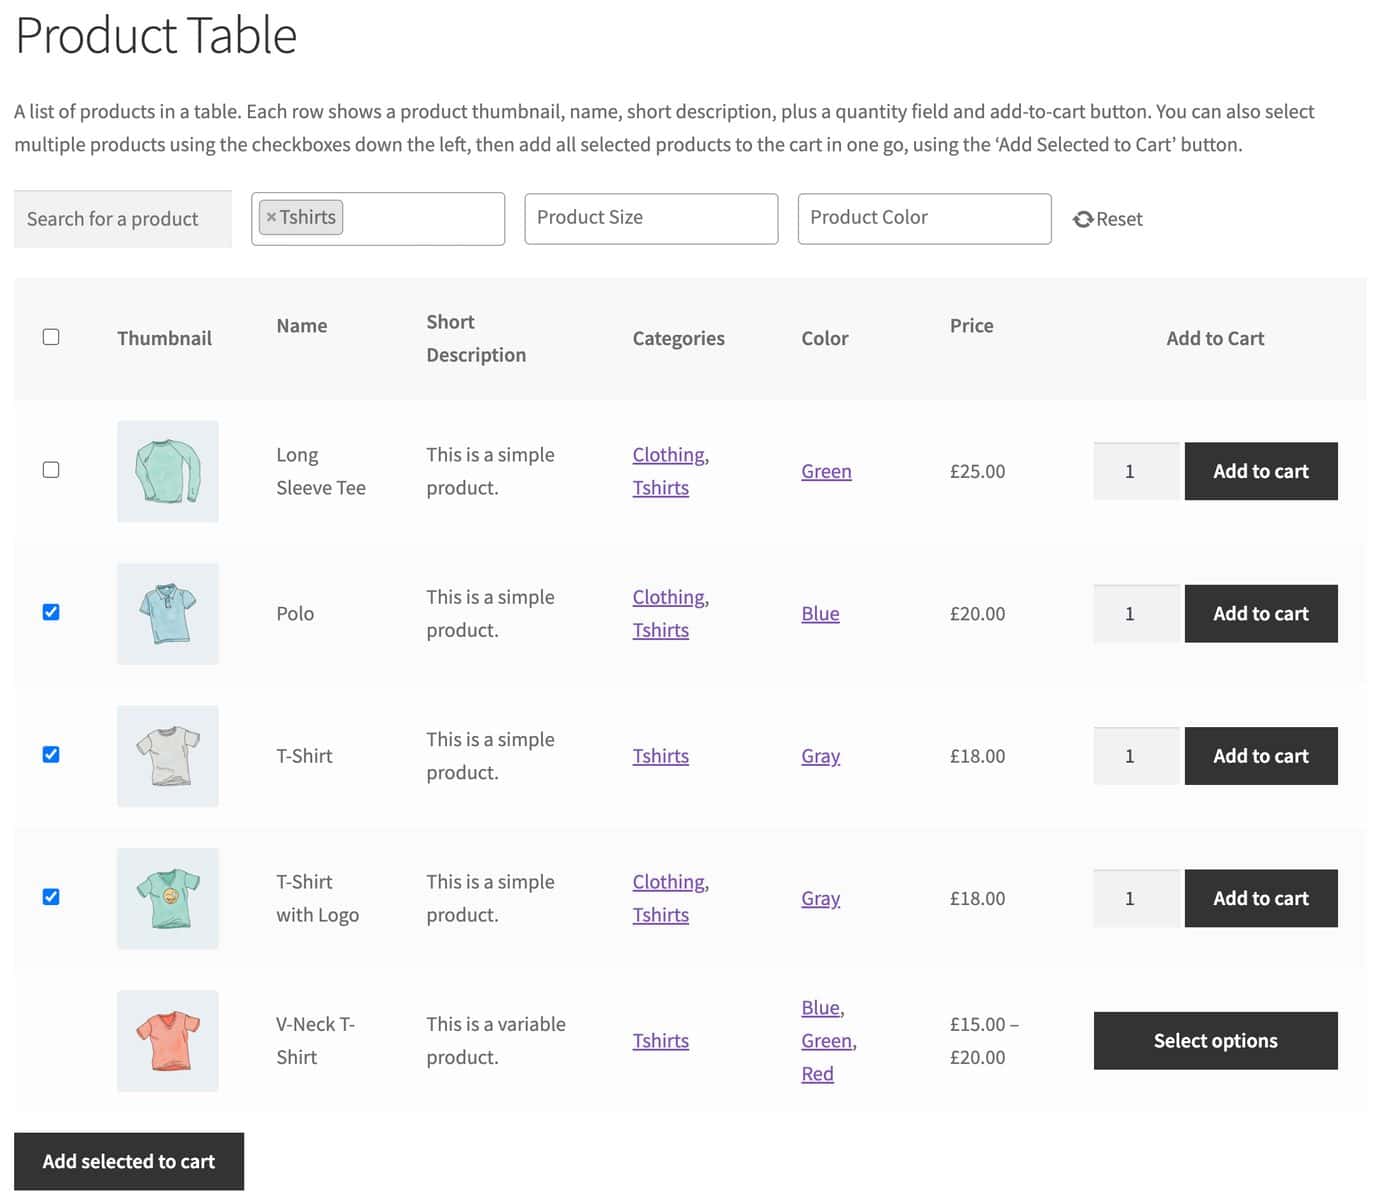
This works for simple and variable products, whether they’re physical goods or digital products. It’s ideal for stores where customers buy several items per order, such as grocery stores or stores selling apparel, craft supplies, toys or accessories.
The WooCommerce Product Table Ultimate plugin lists products in quick order tables. It also works for products with variations.
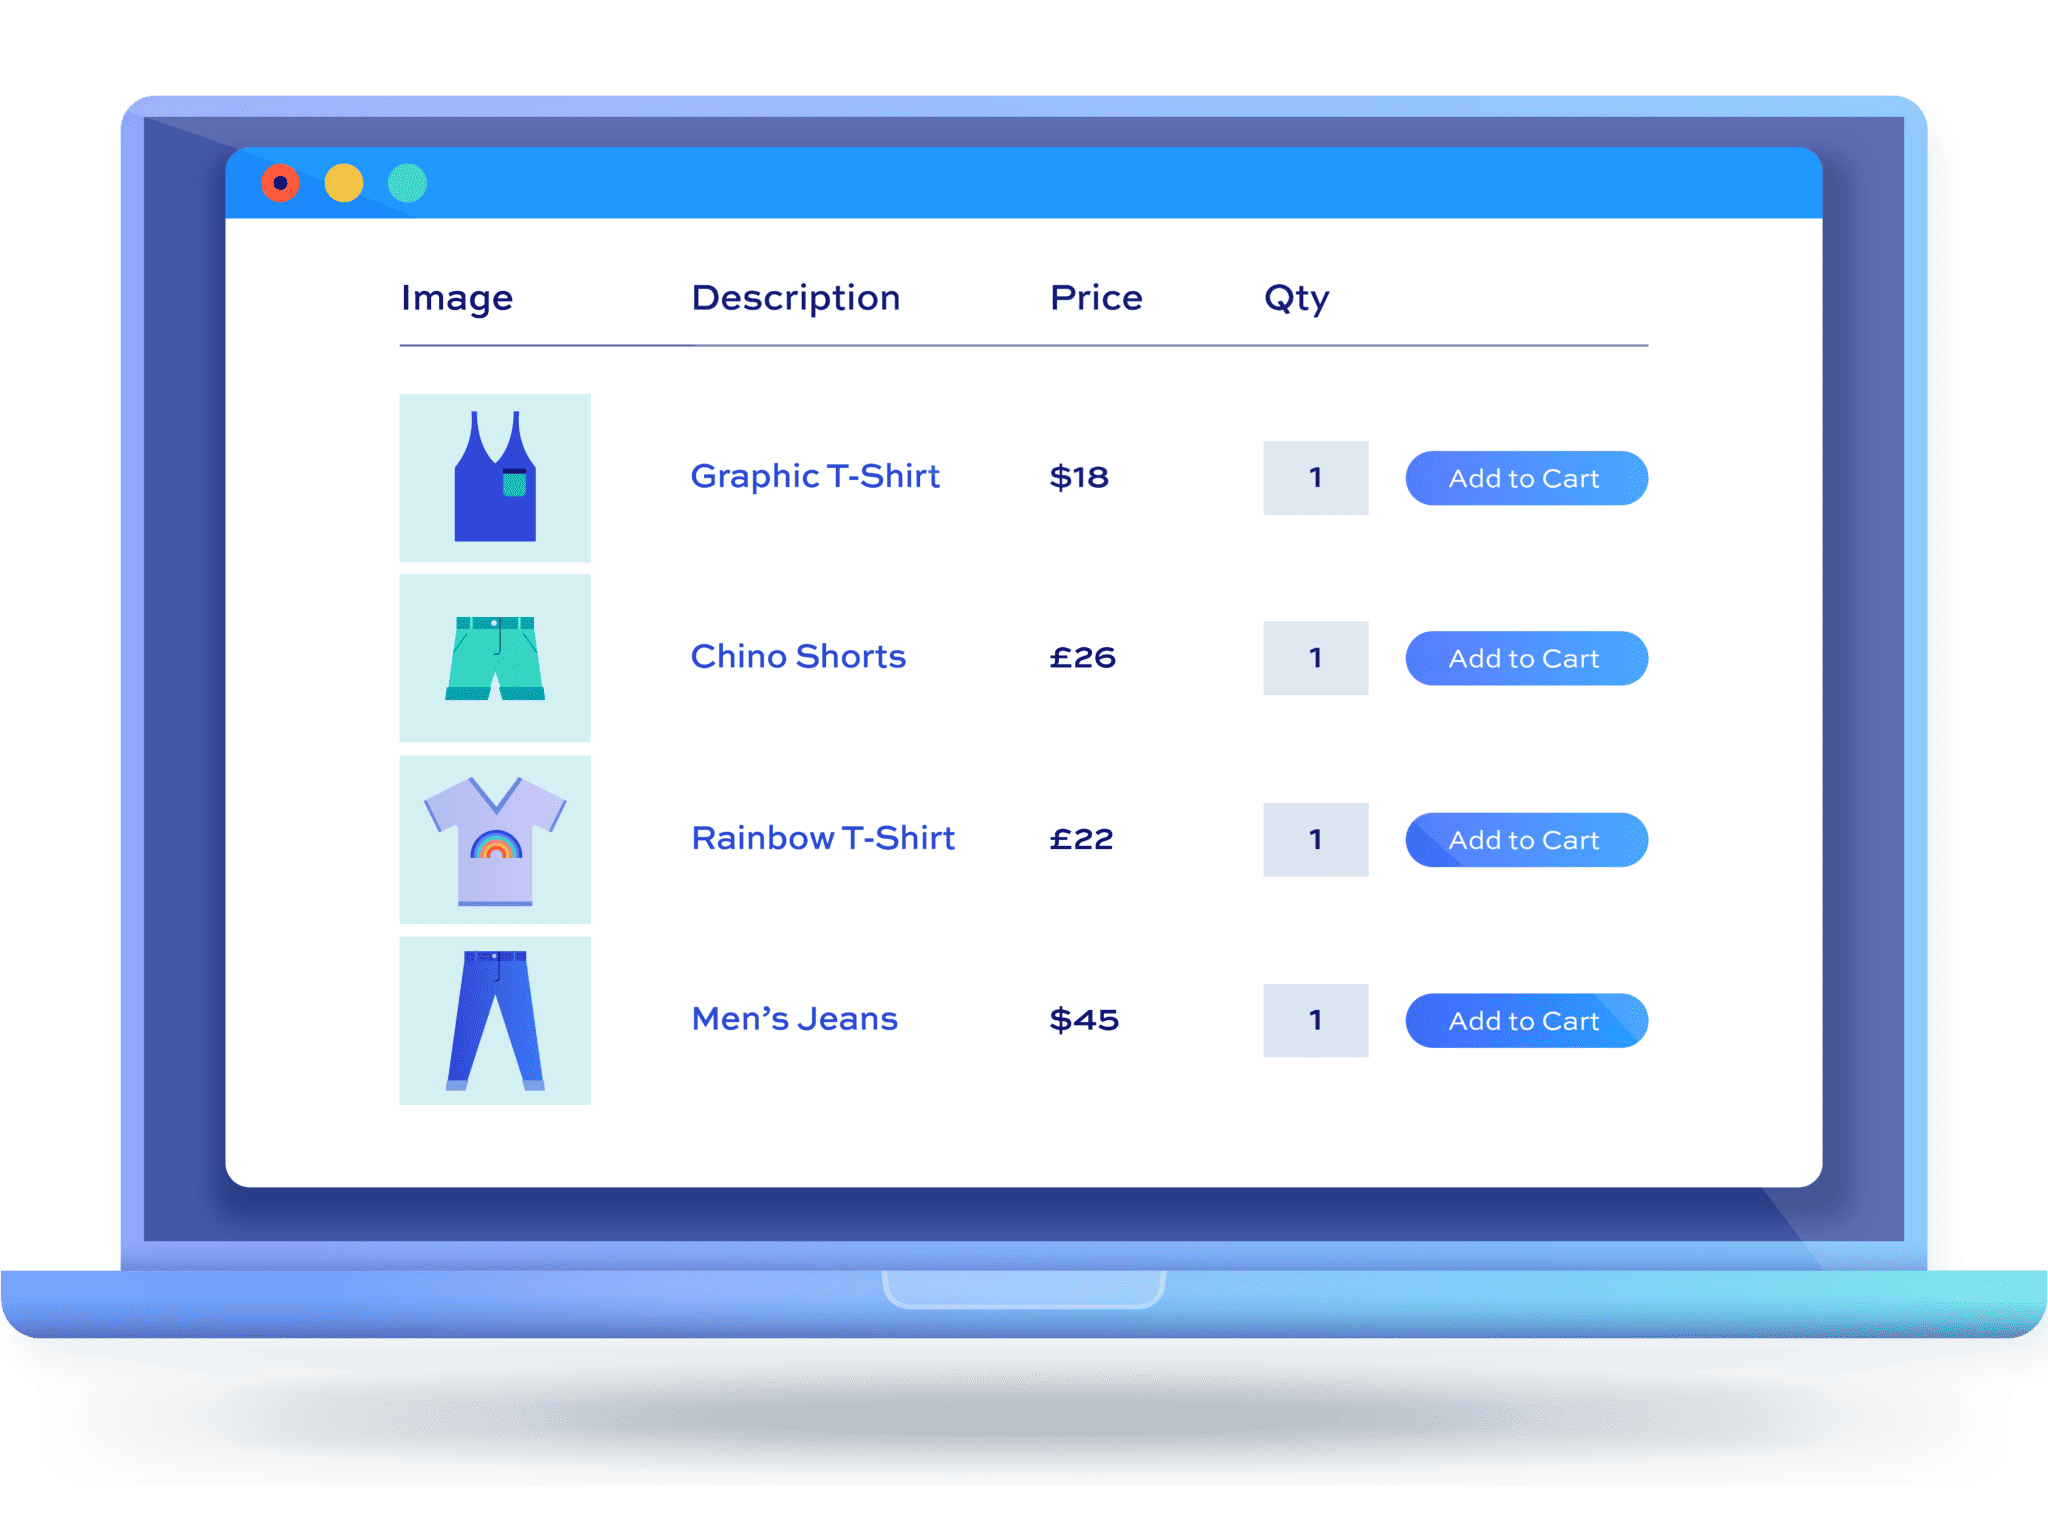
WooCommerce Product Table Ultimate
List products in quick and easy order forms
You can choose which details to display in each column, such as the product title, description, categories, price and an add-to-cart button. You can also make columns sortable and let users filter by category, attribute or tag.
Step #1: Install WooCommerce Product Table Ultimate
Install and activate Product Table Ultimate in the same way as Bulk Variations in Method #1. You now have the plugin ready to create your table.
Step #2: Add the Product Table Ultimate block
Create a new page where you’ll display your price matrix. Click the ‘New Block’ icon and search for the ‘Product Table Ultimate’ block.
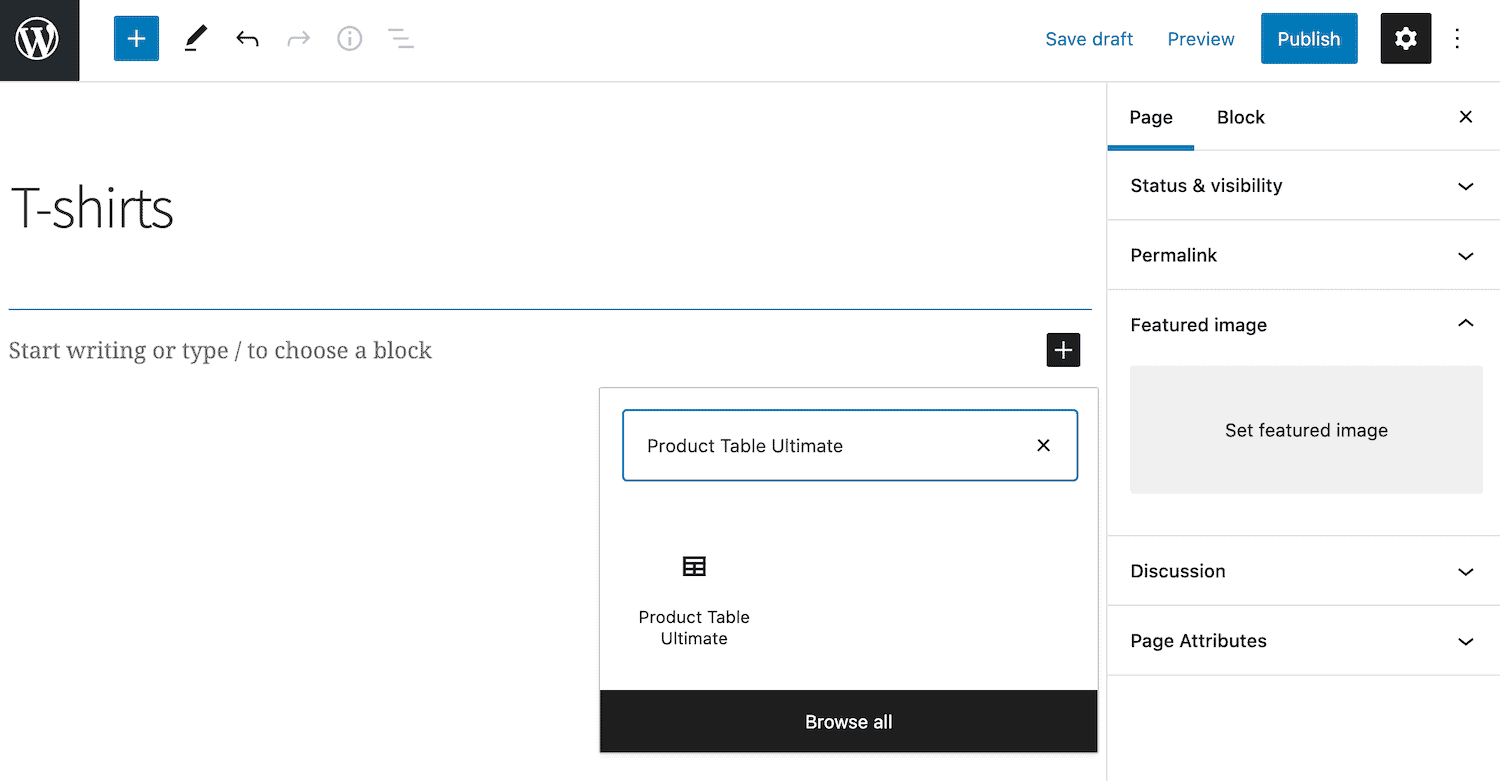
Edit the table’s parameters from the ‘Block’ menu on the right. You can preview the table in the editor as you go.
Publish your page. Customers can now browse your products in a table and add them to their cart. There’s a demo here so you can see how it works.
Step #3: Optionally show products from specific categories
Display products from selected categories if you sell lots of different types of product. Configure the block’s settings:
- Set the ‘Product Source’ field to ‘Categories’
- Enter the category ID in the ‘Categories’ field. To display several categories, enter a comma-separated list of IDs
Your price matrix now only displays products from the categories you entered. This lets you create a separate order page for each category instead of listing every product in one table.
That’s how to create a price matrix for your product catalog. Now let’s look at how to price made-to-measure products using lookup tables.
Method #3: Lookup tables for made-to-measure products
A lookup table works out a product’s price from your own price list. The customer enters their measurements or chooses options and the product reads the matching price from your table.
This is ideal for made-to-measure products where prices don’t scale evenly, such as blinds or wallpaper. Measurements can round up to the next size in your table, so you don’t need to price every possible size.
You can create three types of lookup table, depending on how many inputs set the price:
- One axis. A table with two columns, one for the lookup value and one for the price, such as a round mirror priced by its diameter
- Two axes. A grid of prices, also called a 2D pricing table, for two inputs such as width and height
- Multiple axes. A flat table with one row for every combination of three or more inputs, such as width, height, mirror type and thickness
Here’s how a 2D pricing table looks in a spreadsheet:
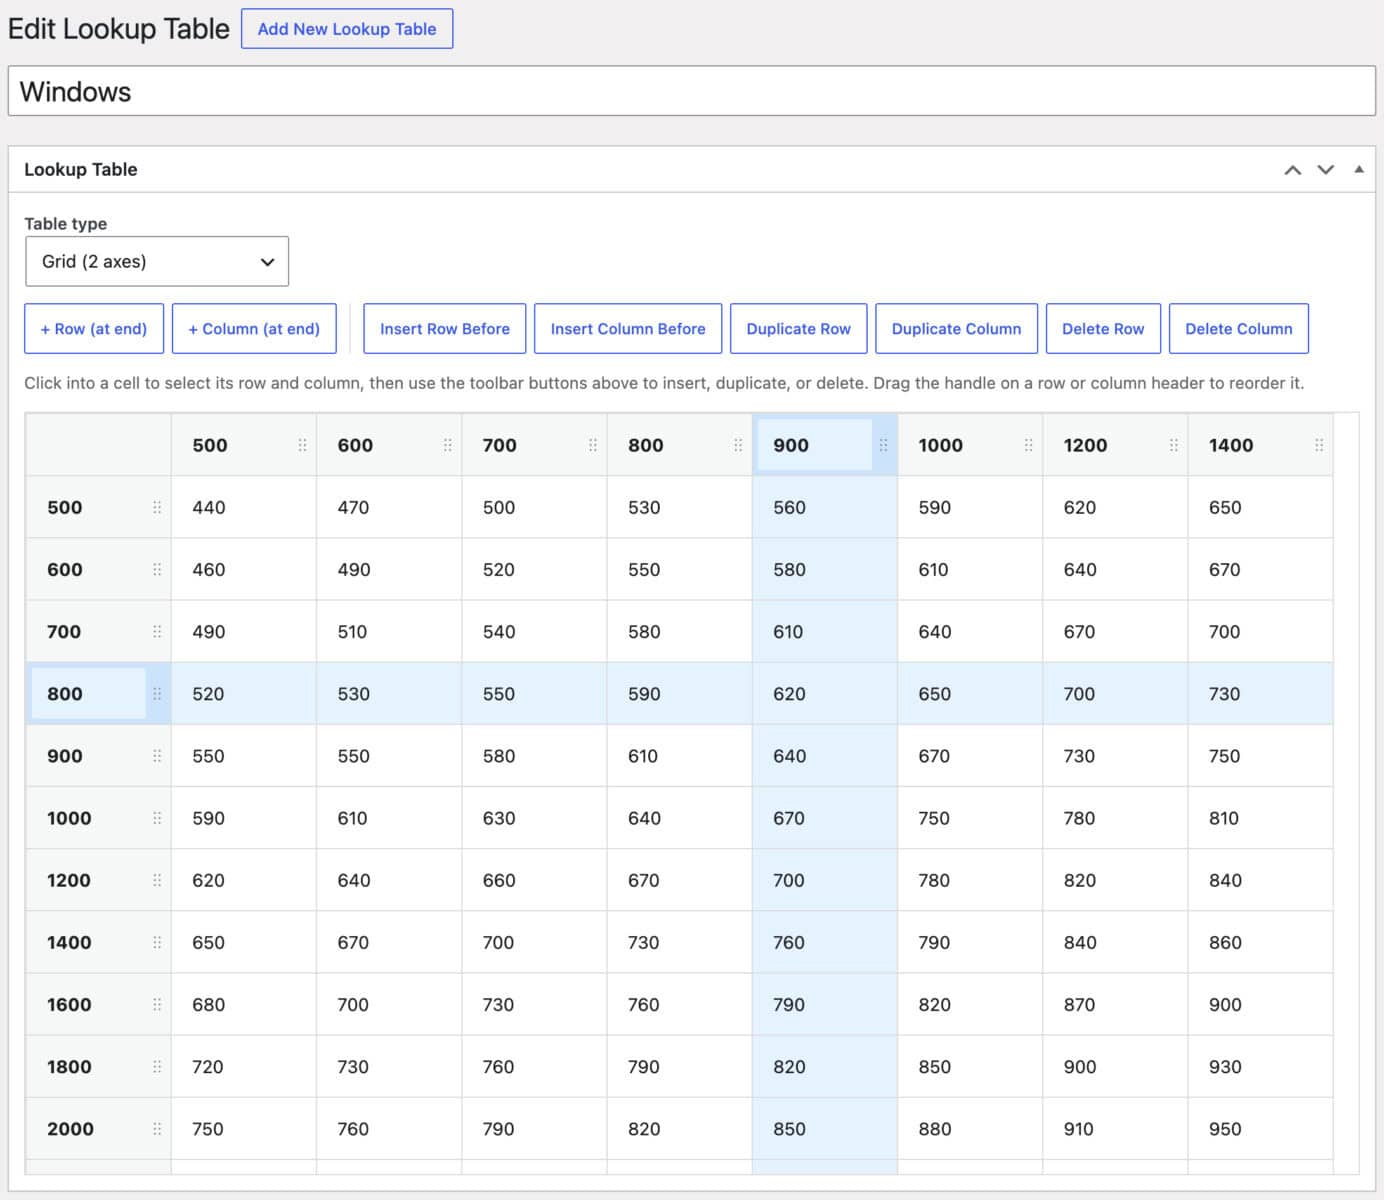
In this example, widths run along the top and heights run down the side. In the example above, a width between 801 and 900 and a height between 701 and 800 returns a price of 620.
A multi-axis table lists each combination as a row, with the price in a final ‘Return’ column:
| Width | Height | Mirror type | Thickness | Return |
|---|---|---|---|---|
| 60cm | 60cm | Silver | 4mm | 70 |
| 60cm | 60cm | Bronze | 6mm | 105 |
| 90cm | 90cm | Silver | 6mm | 160 |
You’ll need WooCommerce Product Add-Ons Ultimate and the Advanced Calculations extension. Advanced Calculations adds lookup tables to the calculation fields in Add-Ons Ultimate.
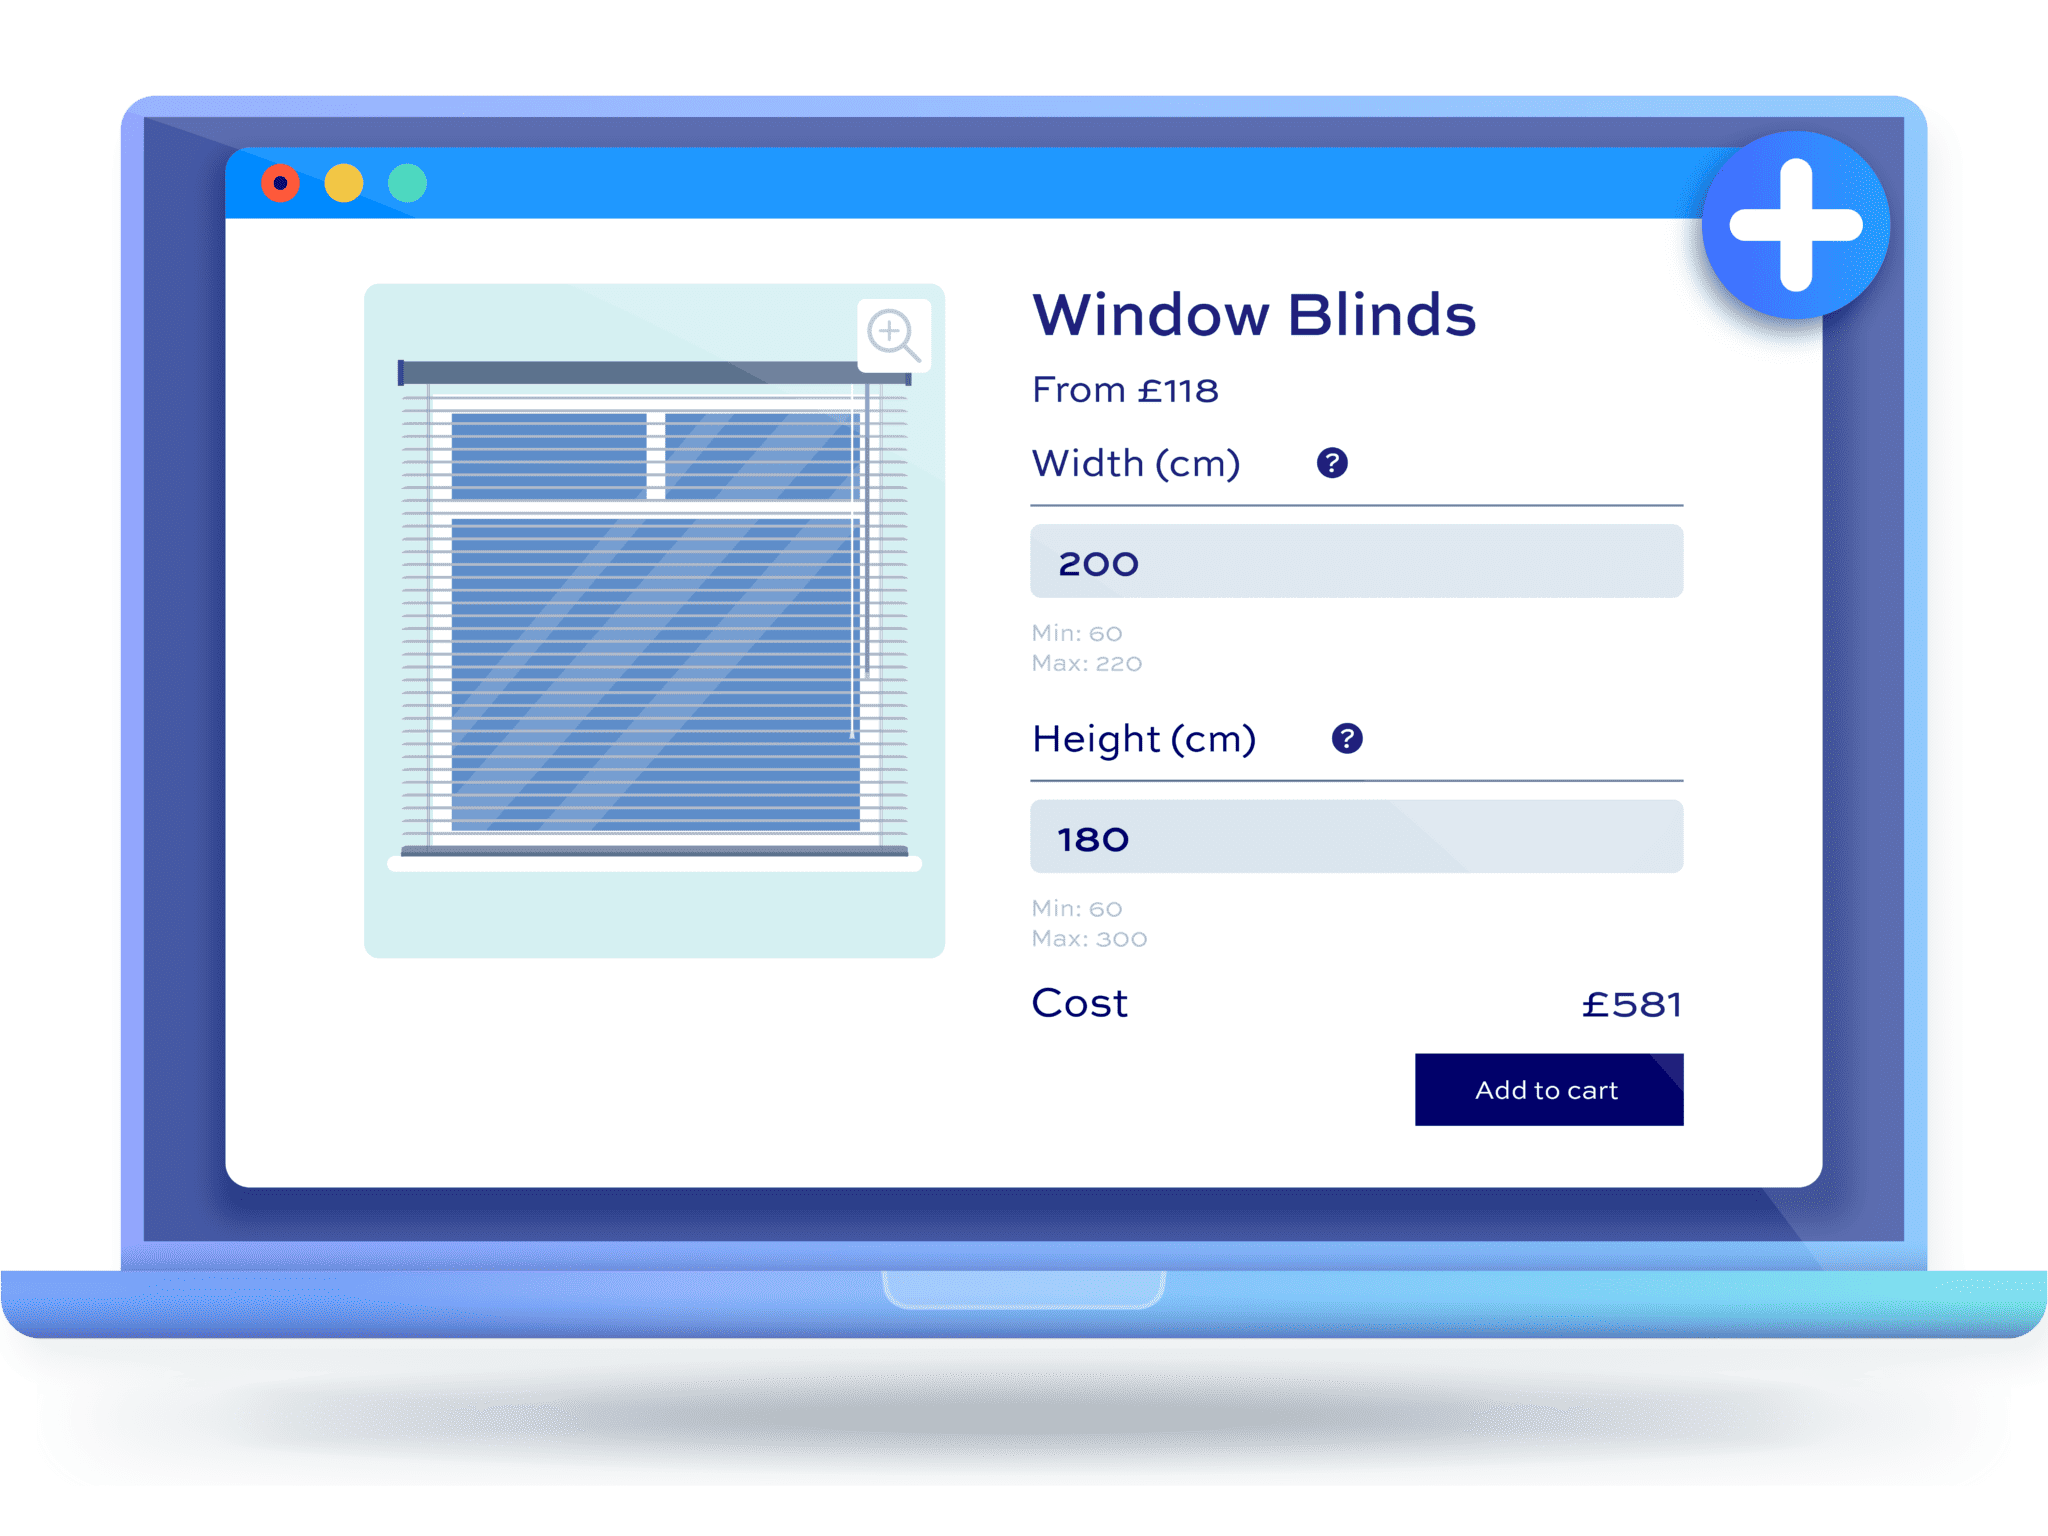
Advanced Calculations for Add-Ons Ultimate
Read prices and values from lookup tables
There’s a demo product here for a 2D pricing table and a multi-axis demo here so you can see both in action.
Step #1: Install Product Add-Ons Ultimate and Advanced Calculations
Install and activate both plugins in the same way as Bulk Variations in Method #1. You now have everything you need to create your lookup table.
Step #2: Create your lookup table
Go to Product Add-Ons > Lookup Tables and click ‘Add New Lookup Table’. Enter a name, such as ‘Blind prices’, and choose the type of table in the ‘Table type’ field:
- Choose ‘Grid (2 axes)’ for a 2D pricing table. Put the widths in the first row and the heights in the first column, with the top-left cell left blank
- Choose ‘Grid (2 axes)’ for a one-axis table too, using just two columns. Put the lookup values, such as diameters, in the first column and the prices in the second
- Choose ‘Flat table (3 or more axes)’ for a multi-axis table. Add a column for each input and a final ‘Return’ column for the price
Import your prices from a CSV file or enter them directly in the dashboard. Click ‘Publish’ to save your table.
Step #3: Add your input fields
Click the ‘Product Add-Ons’ tab on the ‘Product data’ panel of your product. Add a field for each input in your table.
Use number fields for one-axis and two-axis tables, so customers can enter their own measurements. For example, add a ‘Number’ field labeled ‘Width’ and another labeled ‘Height’.
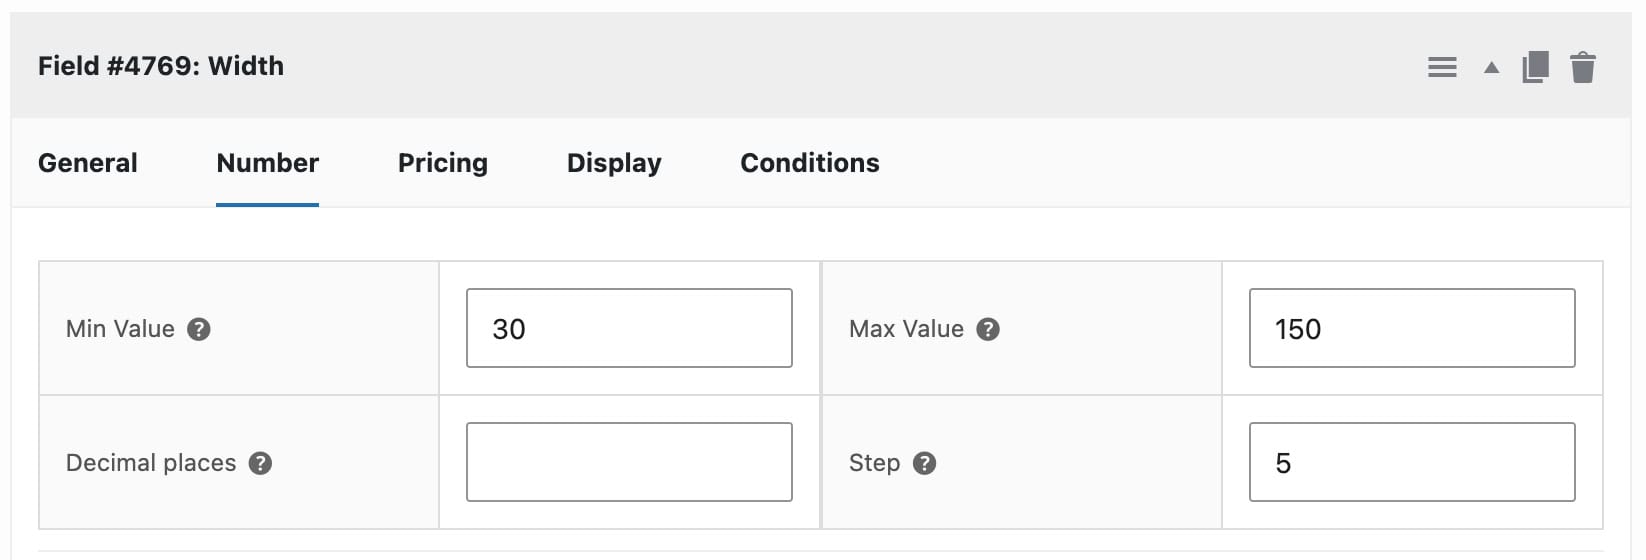
Set a minimum and maximum value on each number field so customers can only enter sizes you make.
Use select fields for multi-axis tables, since every input must match a row in your table exactly. Make sure each option’s text matches your table, including capital letters.
Step #4: Add a calculation field
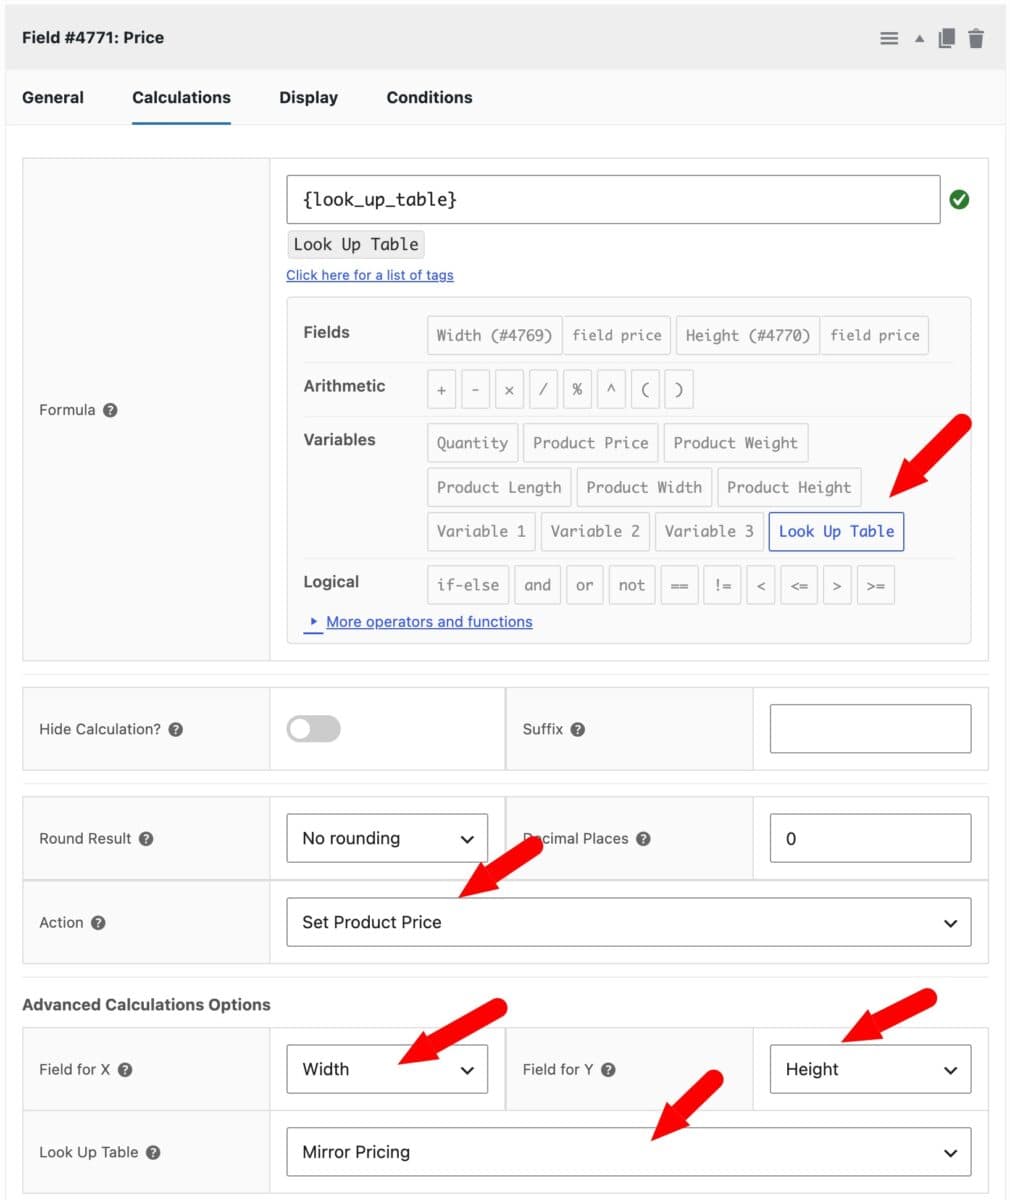
Add another field and set its ‘Field Type’ to ‘Calculation’. Then:
- Enter
{look_up_table}in the ‘Formula’ field - Select your table in the ‘Look Up Table’ field
- Map your input fields to the table’s axes
- Choose ‘Display As Cost’ in the ‘Action’ field
For a 2D pricing table, choose your width field in the ‘Field for X’ field and your height field in the ‘Field for Y’ field. Leave ‘Exact match?’ unchecked to round each measurement up to the next size in your table.
For a one-axis table, choose your input field, such as ‘Diameter’, in the ‘Field for Y’ field. The first column of your table is read as the Y axis.
For a multi-axis table, choose your fields in the ‘Axis Fields (in column order)’ section, in the same order as your table’s columns. Pick the version of each select field ending ‘(option label)’.
Publish your product. Customers can now enter their measurements or choose their options and see the price update instantly.
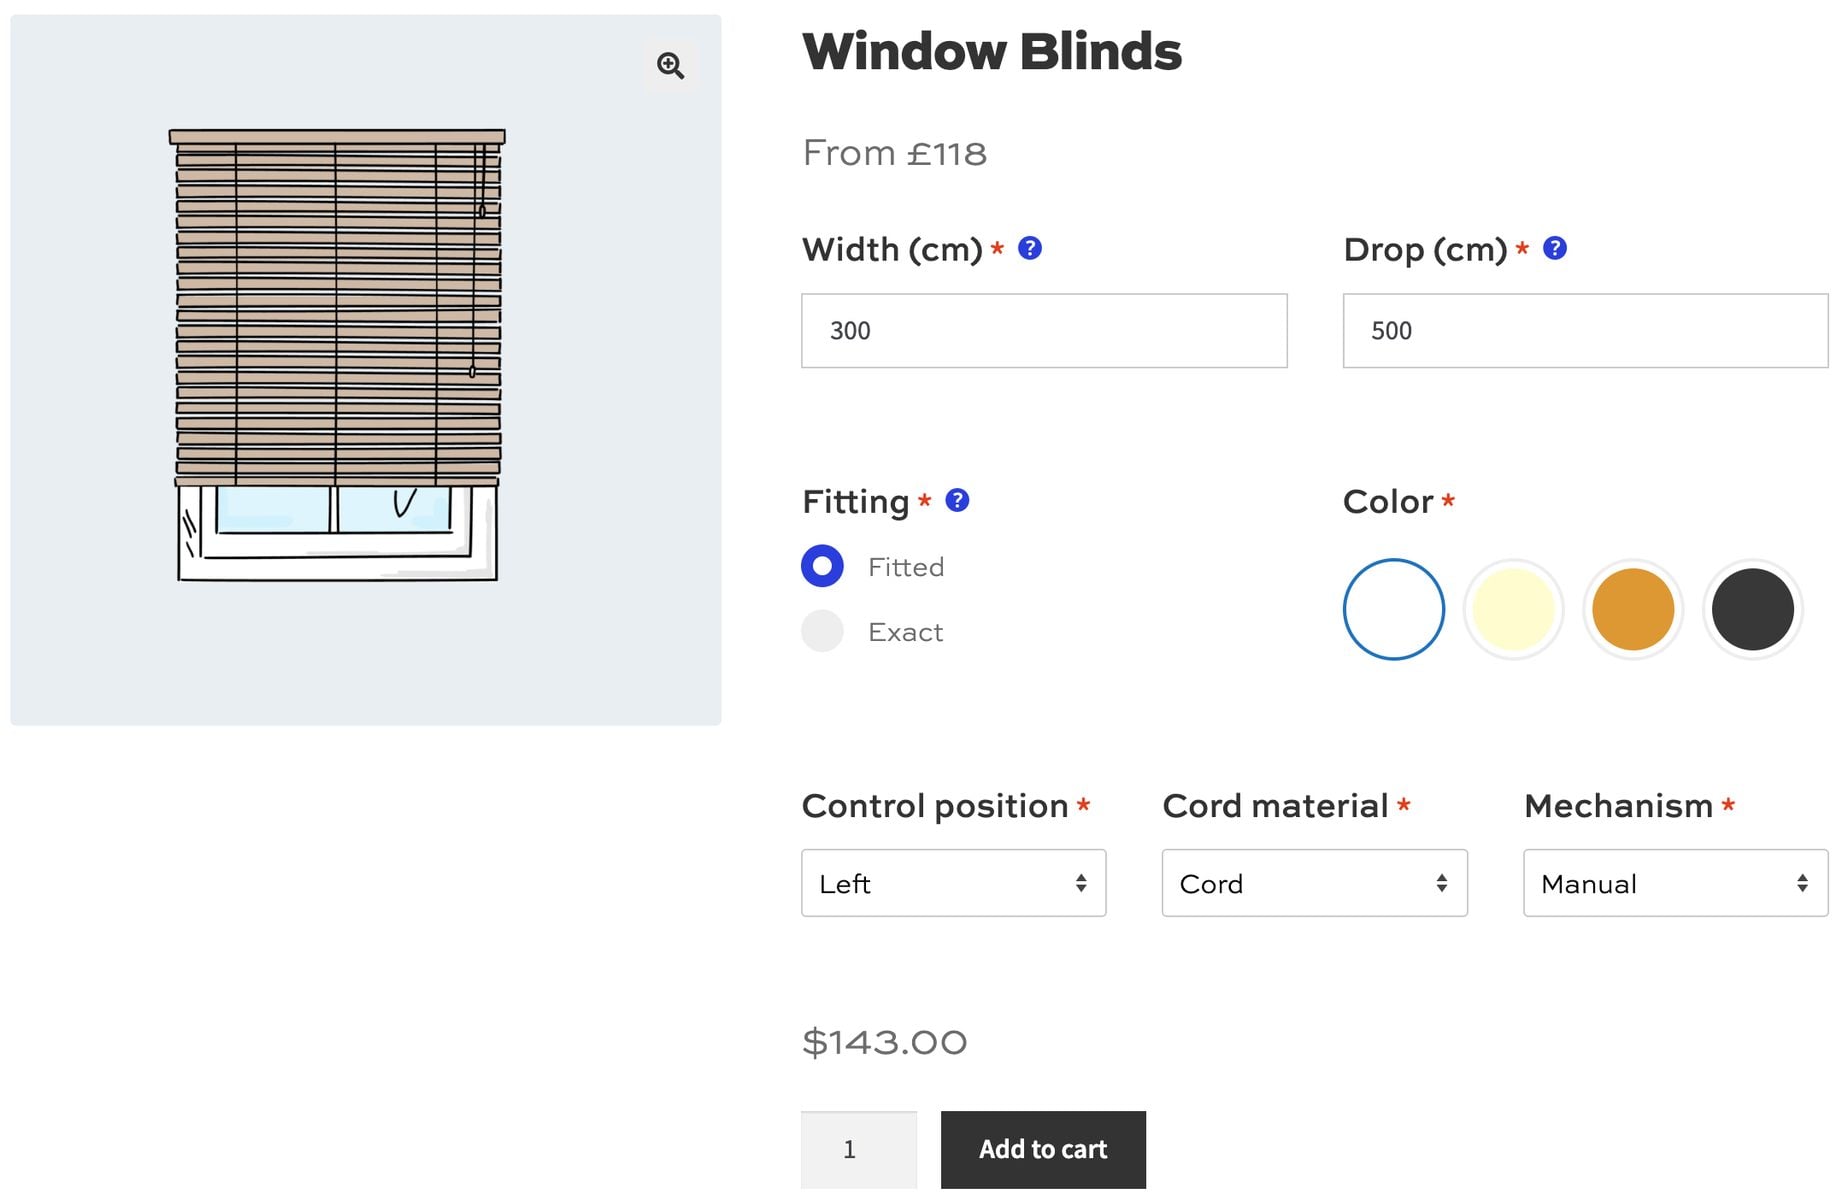
Our guide to WooCommerce lookup table pricing walks through each type of table step by step, including 2D pricing tables, multi-axis tables and adding a markup.
Price matrix FAQs
Yes. A price matrix lets wholesale buyers enter quantities for many variations and add them to the cart in one click, instead of adding each variation separately. Gartner found that 61% of B2B buyers prefer a buying experience without a sales rep, so a fast self-serve order form makes a big difference.
Install WooCommerce Bulk Variations and create a variable product with one or two global attributes, such as size and color. Then go to WooCommerce > Settings > Bulk Variations and set the ‘Display mode’ to ‘Grid’. Your variations display in a grid with a quantity field for each one.
The best plugin depends on the type of price matrix. Use WooCommerce Bulk Variations for a grid of product variations, WooCommerce Product Table Ultimate for a catalog price table and Advanced Calculations for Add-Ons Ultimate for made-to-measure pricing.
Yes. Upload a grid of widths and heights as a lookup table using Advanced Calculations, then add width and height fields with Product Add-Ons Ultimate. Our guide to WooCommerce lookup tables shows you how to set it up step by step.
Yes. Advanced Calculations supports flat tables with three or more axes, such as width, height, material and finish. Each row holds one combination of options and its price, and customers choose each option from a select field.
Yes. Product Add-Ons Ultimate works alongside Bulk Variations, so you can add extra fields such as logo uploads or personalization text to a variations grid.
WooCommerce price matrix – recap
In this article, we looked at three ways to create a WooCommerce price matrix. We created a variations grid for variable products, a catalog price table for simple products and lookup tables with one, two or more axes for made-to-measure products.
WooCommerce Bulk Variations replaces variation dropdowns with a grid. Product Table Ultimate lists your catalog in quick order tables and Advanced Calculations reads prices from your own lookup tables.
All our plugins are compatible with all themes and page builders, including Astra, Flatsome and Woodmart, and page builders like Elementor and Divi. If you have any questions, our world-class support team is on hand to help. And they’re backed by a 14-day money-back guarantee, so you can try them risk-free.
Speed up the buying process with bulk order forms