How to create custom products for blinds, shutters and curtains in WooCommerce

If you are selling made-to-measure coverings for windows – like blinds, shades, shutters or curtains – you’ll want to allow users to enter their measurements and choose their own options. WooCommerce doesn’t allow you to do this by default – so you’ll need a plugin.
The WooCommerce Product Add-Ons Ultimate plugin allows your users to enter custom sizes (metric and/or imperial) and select additional options. It can also update your product prices based on user selections.

Likely features for your blinds and shutters products
Whatever kind of customizable window product you’re selling, you are likely to want some or all of the following features:
- Input field for width, drop and depth
- Unit agnostic – so you can use inches, cm, mm, or any other unit of measurement
- Fields to choose specific product features – like cord position, electric motors
- Visual swatches to pick colors and other design elements
- Price calculations to dynamically update the product price as the user chooses their options
Product Add-Ons Ultimate has around different 20 field types – everything you need to create your custom product.
How to create customizable products for blinds in WooCommerce
In this tutorial, we’ll be creating a WooCommerce product for customizable blinds – but this is easily adapted to any kind of similar product like shutters or curtains.

There’s a working demo version of this product here.
Step 1: Install and activate WooCommerce Product Add-Ons Ultimate
Once you’ve downloaded and installed the plugin, you can start adding extra fields to your blinds product.
Step 2: Add fields for the custom dimensions
A key feature of any custom blinds product is for the user to enter their custom dimensions. Typically this will be width and drop and, possibly, depth of the slat. To create a custom field for users to enter a dimension:
- In the ‘Product data’ section, click on the ‘Product Add-Ons’ tab
- Click ‘Add Group’ and give it a label
- Click ‘Add Field’ and give it a label, e.g. ‘Width’
- Choose ‘Number’ as the field type
- Select the ‘Required Field’ parameter to ensure that users enter a value in this field
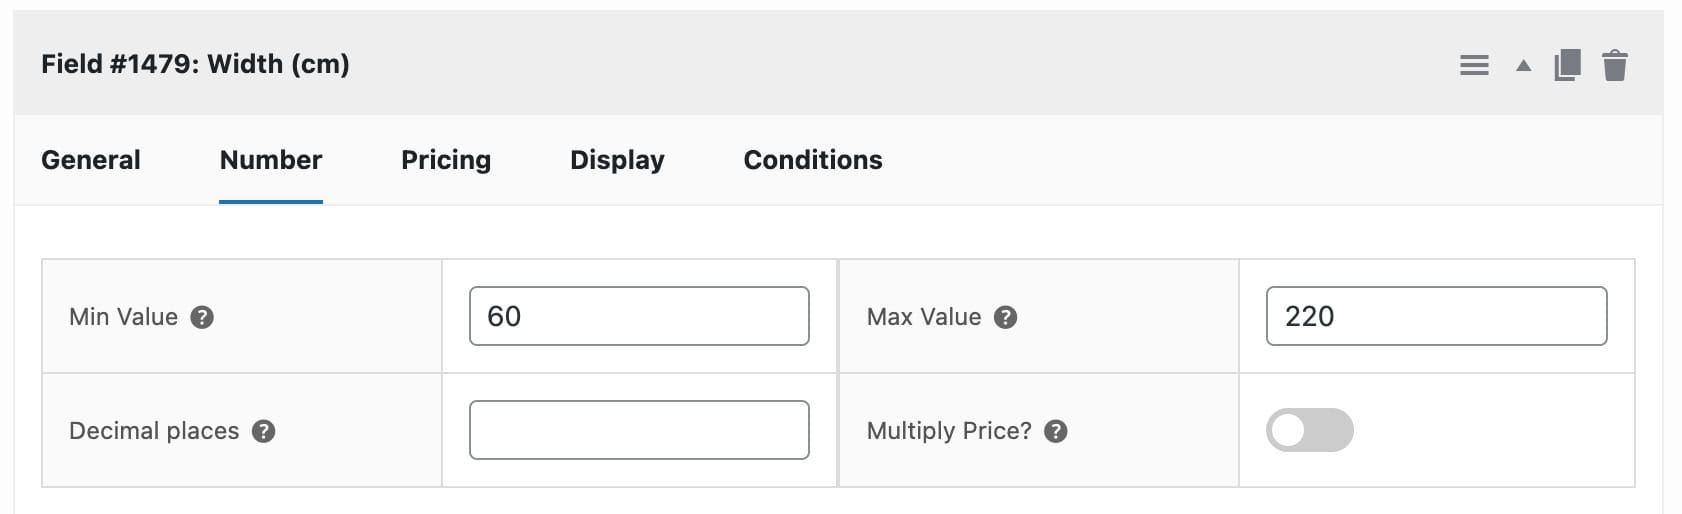
- Click the ‘Number’ tab and set a minimum and maximum value if these apply. For instance, if you don’t supply blinds less than 30cm wide, enter 60 in the ‘Min value’ field
- Optionally, set the ‘Display as Slider’ parameter on the ‘Display’ tab if you’d like to allow the user to use a range slider control for the width
- If you would like to allow the user to enter a decimal, you can specify how many decimal places
You can repeat these steps for the ‘Drop’ measurement.
Step 3: Set an option for the fitting
On some blinds, the user might need to choose how to fit the blind. For example, there might be an option to fit the blind in the window recess or outside the recess on the surrounding frame. If you want to include an option for the fitting:
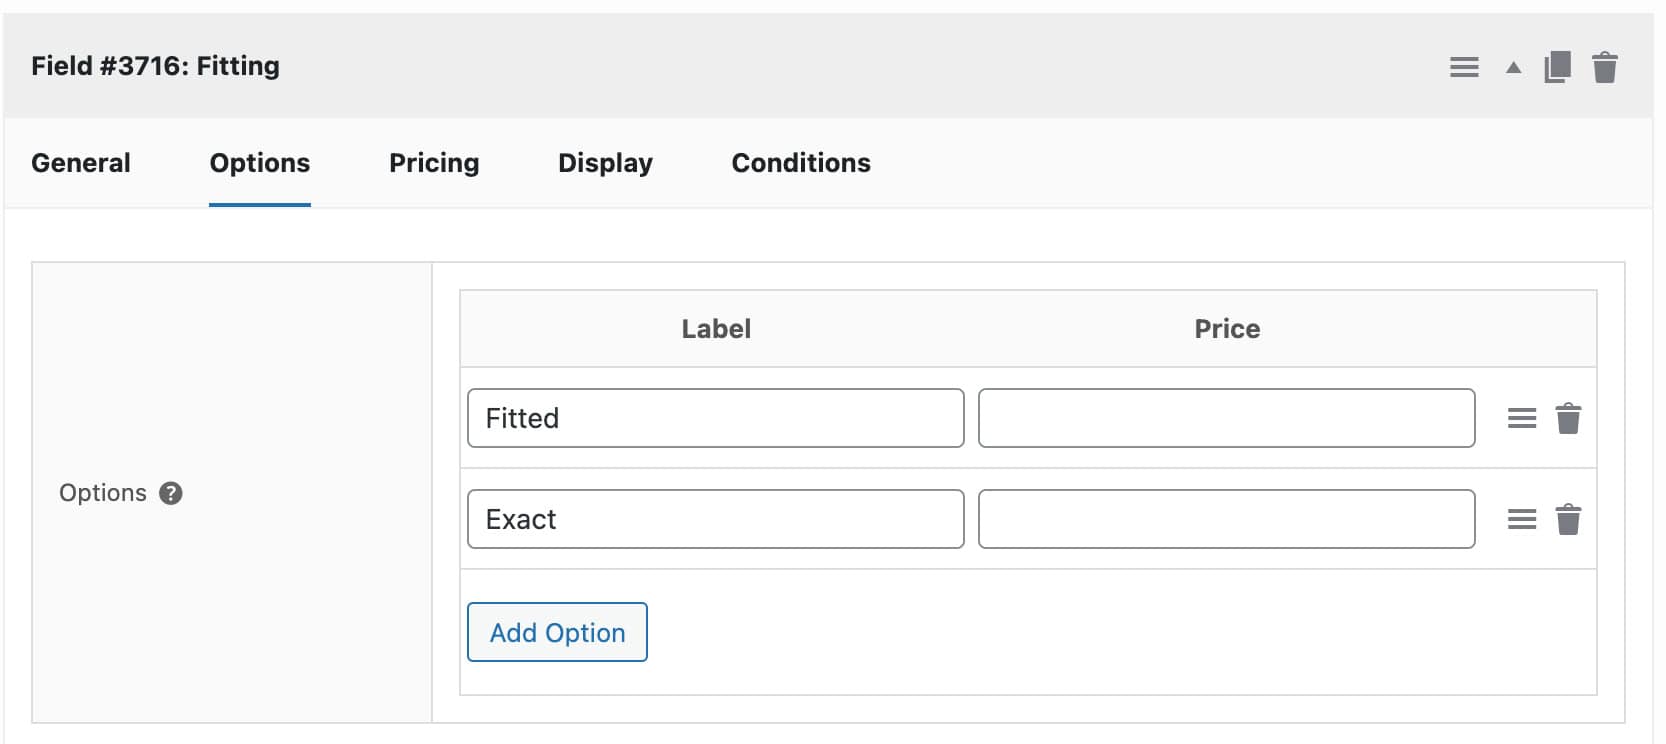
- Add a new field and select the ‘Radio Group’ field type. (If you want to make this more visual, you could use the ‘Swatch’ field type instead and include an image for each option)
- Click the ‘Options’ tab then click ‘Add Option’ for each fitting option
- Enter a label for each option, e.g. ‘Recess’ and ‘Exact’
- Enter a cost for the different option if it applies
If you’re including an option for the fitting method, you might want to include some extra information for users on how to measure their blinds for their chosen fitting.
Step 4: Specify the color and material
Depending on whether you have one product or multiple products for your blinds, you might want to include an option for the user to select their color. You can do this one of two ways – either by using variations or by including an add-on field:
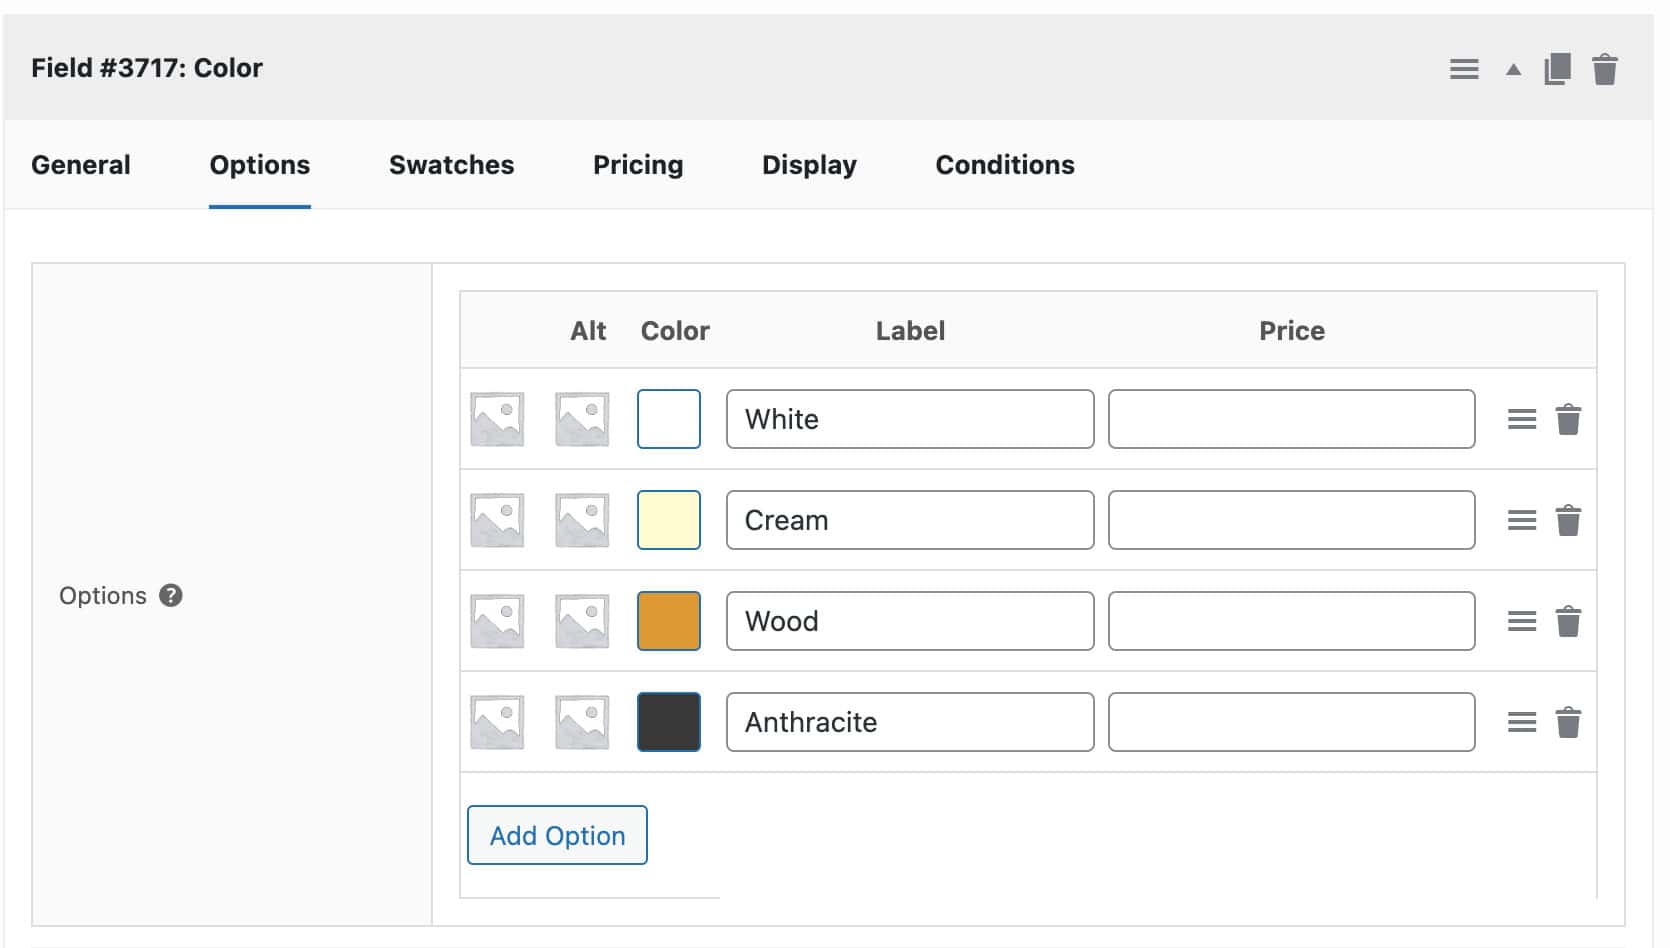
- For the user to select a color swatch for the color of their blinds, add a new field and choose the ‘Swatch’ field type
- Click the ‘Options’ tab and add an option for each color
- Use the color picker to assign the color for each option
- Add a label for each color
- Add a price for any colors that have a surcharge
If you’d like to offer a choice of materials for the blind, create another swatch field:
- Upload an image of the material to display to the customer
- Add a label to each option
- Assign a price if appropriate
There’s more information on using swatches in WooCommerce here.
Step 5: Create additional options
There are a number of extra options that you might want to offer your user. You can include these in a different group if you like.
The options will depend on your store. Possible options include:
- Depth of slat: for slatted blinds, create a radio group with options for the user to select the depth of slat. Assign additional prices if required
- Control position: if you’d like to allow the user to choose what side to have the control cord, create another radio group or a select field with ‘Left’ and ‘Right’ as the options
- Cord material: you might want to give the user a choice between the cord material, e.g. cord, stainless steel, etc. Create another radio group or select field and enter options with additional prices as appropriate
- Motorized mechanism: certain manufacturers provide an optional motorized mechanism. You can create a checkbox option for this with an extra charge
Step 6: Specifying the product dimensions for shipping
Finally, you might want to dynamically specify the product dimensions for your shipping costs. You can do this using a calculation field.
For example, to set the product width based on the user’s input width, create a new calculation field and set the ‘Action’ parameter to ‘Add to Product Length’. If you have packaging that’s going to affect the overall product length, you can factor this into your calculation:

Adding enhanced tooltips to your blinds product
Many users require help with measuring and fitting their made-to-measure blinds. Providing additional, detailed information to them can be the difference between a sale and not.
In our example, we have added tooltips to a couple of the options where users might need some extra guidance.

The user can click on this and launch a modal window.
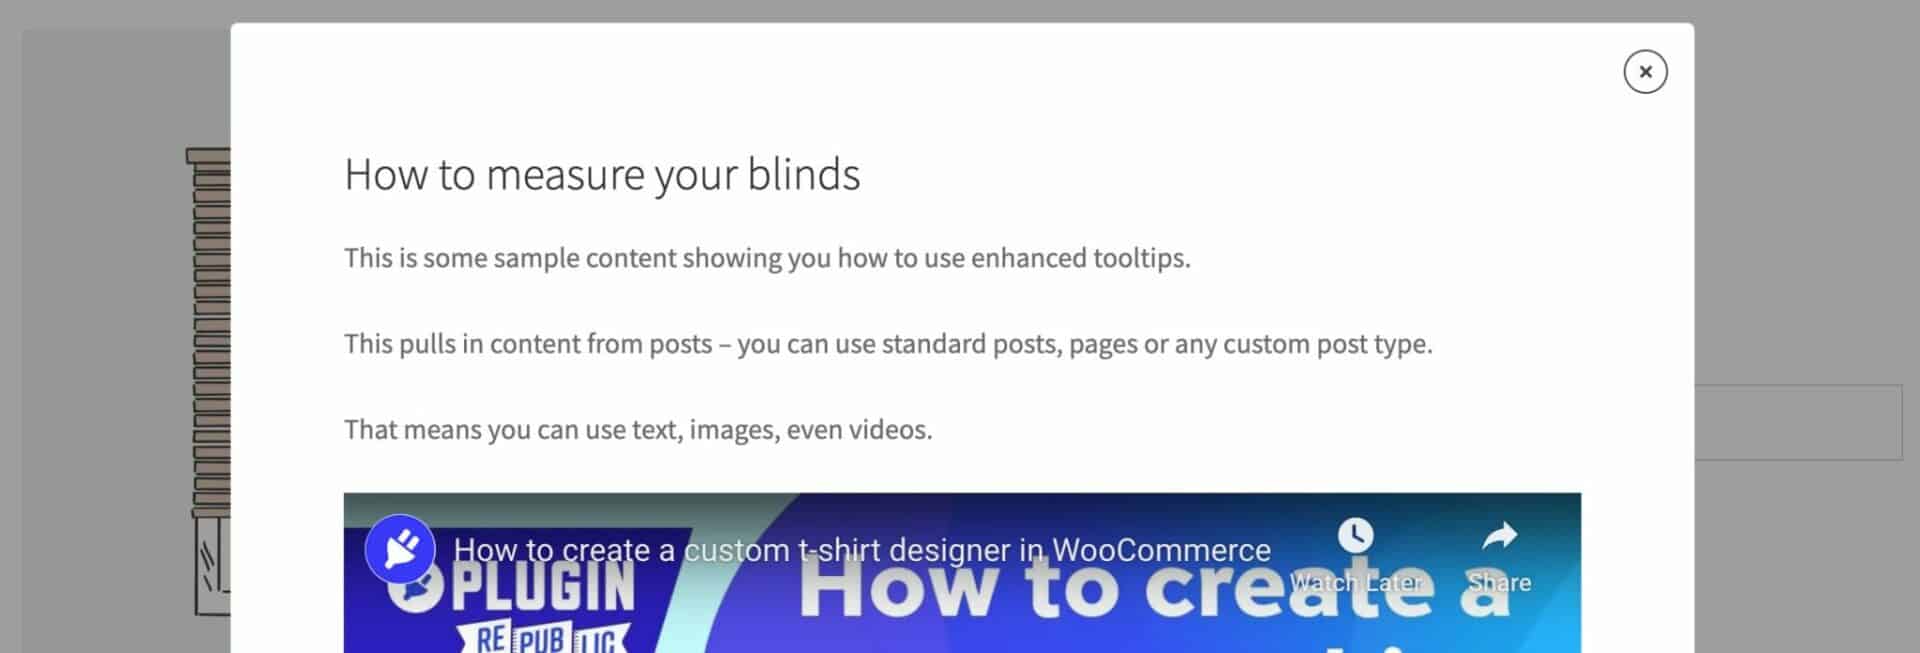
The content for the tooltip is pulled from a post, which means you can include any kind of content – headings, text, images, videos.
You can find out how to enable these enhanced tooltips here.
Calculating the price of the custom-made blinds
In our example product, there are several factors that can influence the price of the finished blind:
- Dimensions: width and drop
- Slat size
- Color
- Material
- Optional extras
Let’s look at two methods to calculate the overall price.
Method 1: Simple calculation
The easiest way to calculate the final price is to use a calculation based on each of our factors. For example, we might cost our blinds based on the area and any optional extras.
So the calculation could be based first on the width multiplied by the drop:
width * drop
Then multiplied by a factor, e.g.:
( width * drop ) * 0.01
This will give us a base price for the product. Then we just need to add in any extras:
( ( width * drop ) * 0.01 ) + slat-size + color + material + etc
To create a calculation like this:
- Add a new field and choose the ‘Calculation’ field type
- Enter your formula in the ‘Formula’ field. There’s a full list of the available tags to use here
- Choose ‘Set Product Price’ in the ‘Action’ parameter. This will override any pricing and set the overall product price with the result of the calculation
So this will give us a final price. The only drawback to this is that it is heavily dependent on the total area of the finished blind and doesn’t account for any discounts for scale – i.e. the larger the blind, the less the cost per square unit.
Method 2: Calculation using a lookup table
The solution to this is to use a lookup table.
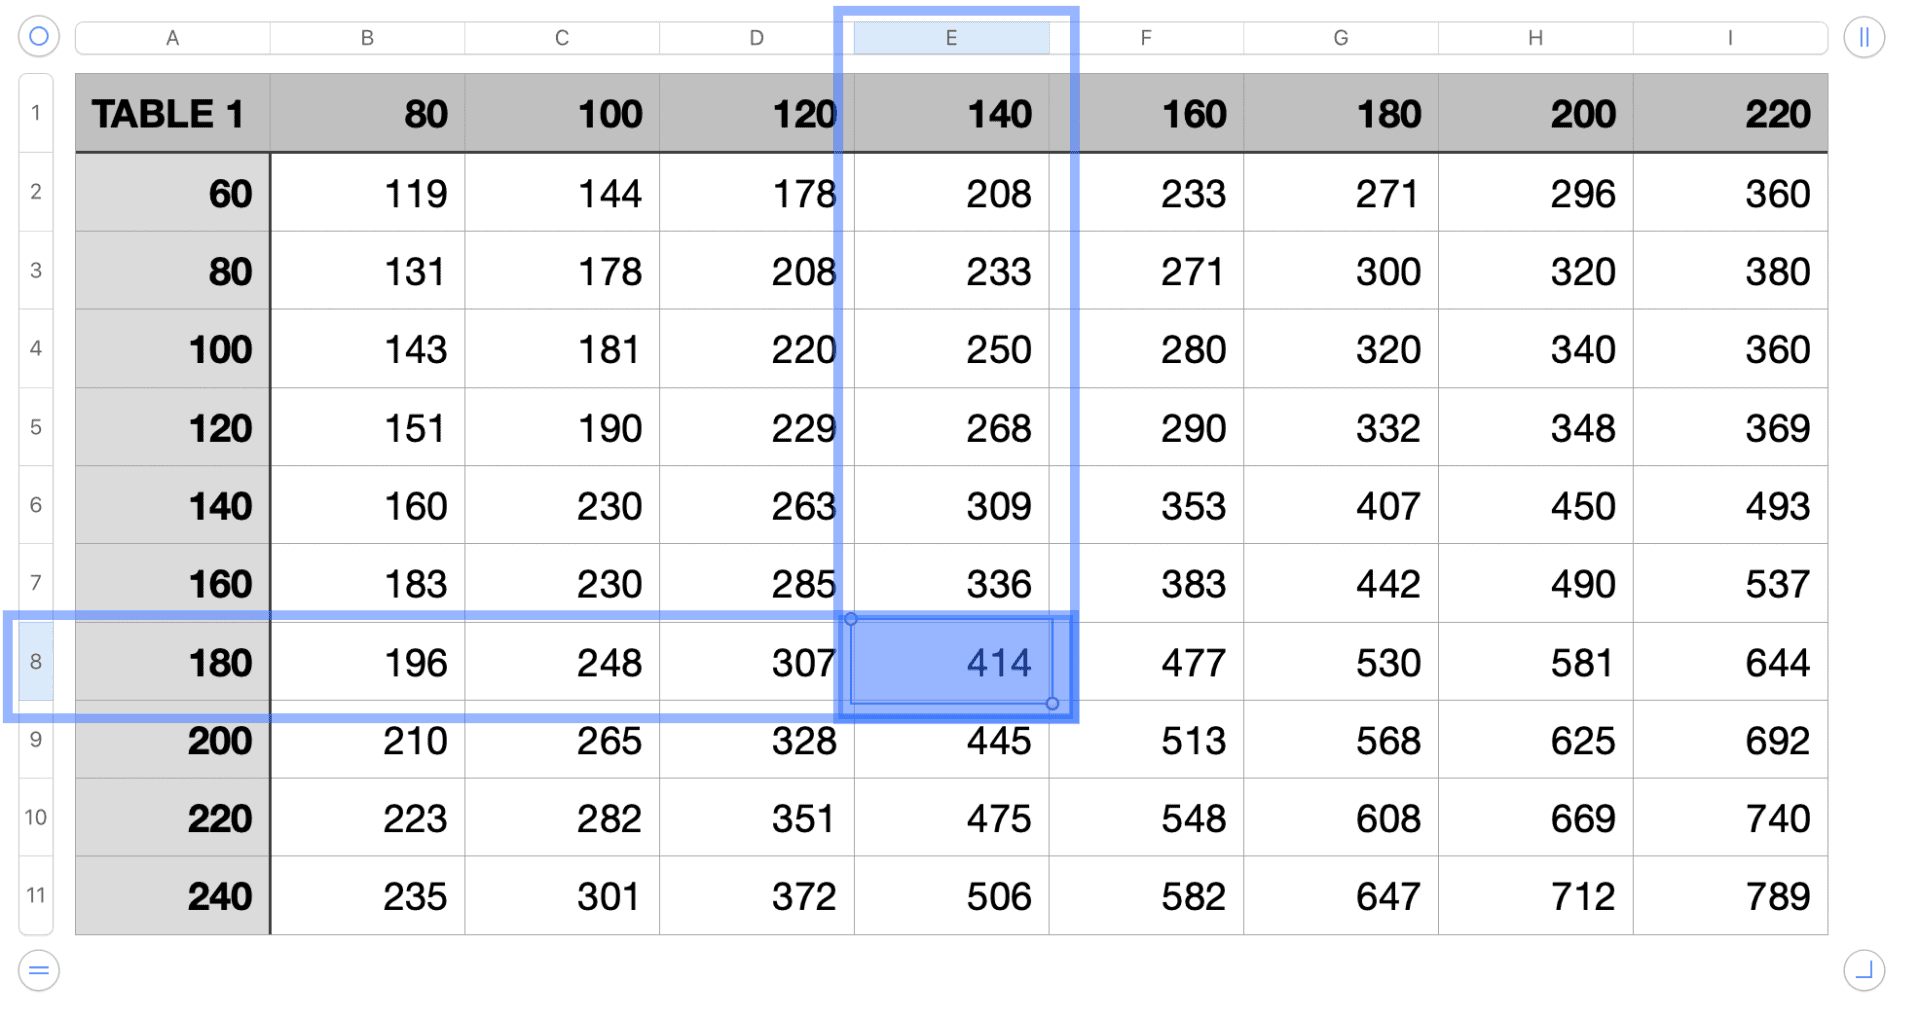
A lookup table allows you to read a value from a large array of values, based on user inputs. So you can look up the value for the width, cross-reference it with the value for the height, and return a price.
In the table below, the width measurements run along the table horizontally and the drop measurements run down it vertically. If the user enters a width between 160 and 180 and a drop between 120 and 140, the table will return a price of 414.
To use lookup tables, you’ll need Add-Ons Ultimate plus the Advanced Calculations extension:
To create your calculation field:
- Create and upload your lookup table as a CSV file following the instructions here
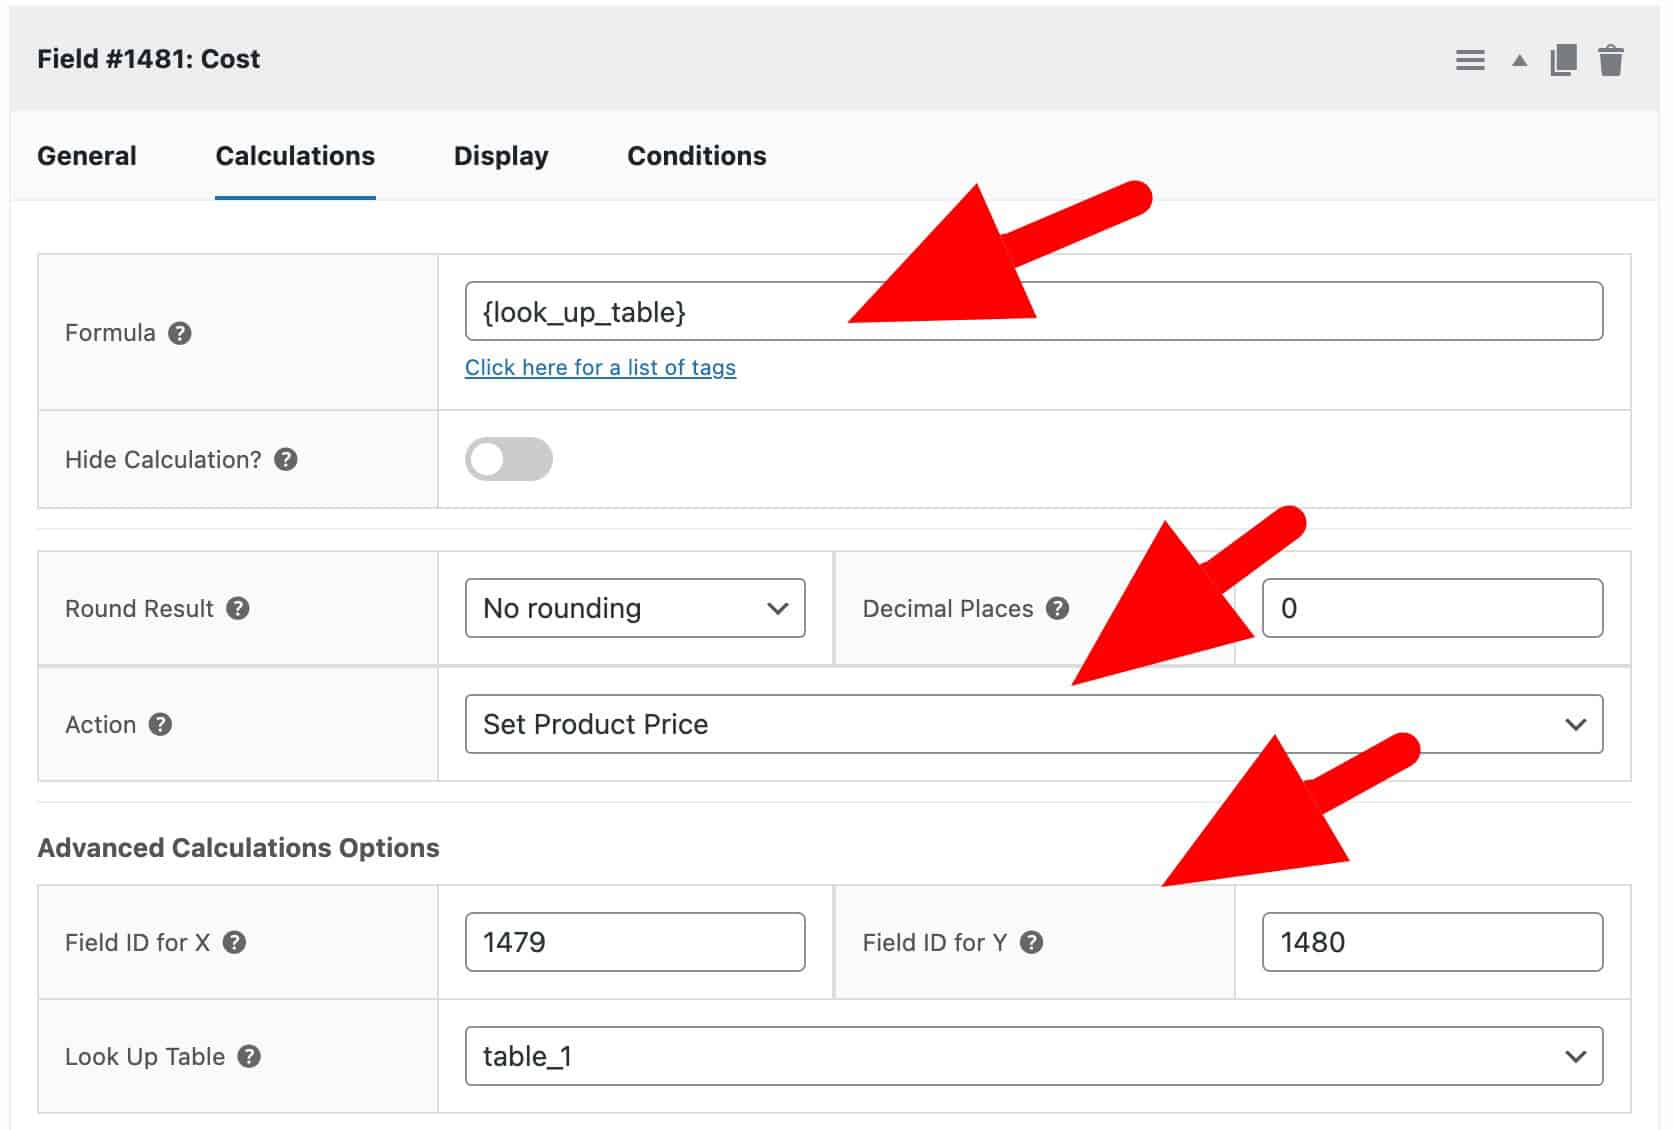
- Add a new field and choose the ‘Calculation’ field type
- Enter
{look_up_table}in the ‘Formula’ field - Choose the name of your table in the ‘Look Up Table’ field
- Specify the IDs of the input fields to be used when looking up the price
There’s a more detailed tutorial on using lookup tables for WooCommerce products here.
Creating custom products for blinds, shutters and curtains in WooCommerce
So that’s a quick tutorial on how to create a custom product for all kinds of window covering. We used blinds as our example but the principle is the same for shades, shutters, curtains, etc.
To allow users to enter their custom dimensions and choose extra options, you’ll need the WooCommerce Product Add-Ons Ultimate plugin.
And if you want to create pricing rules based on a pricing matrix, you’ll also need the Advanced Calculations extension: