Sell food products online with WooCommerce – your ultimate guide

Over the years, technology trends have changed the way people shop. People prefer to buy all sorts of products online, including food. As a food business owner, you need to sell food online to make it easier for prospective customers to buy from you.
In this complete guide, we’ll go over a step-by-step tutorial on how to set up an e-commerce store to sell food products online. We’ll also cover everything you need to start selling food online and share some actionable tips to help you get started with a step in the right direction.
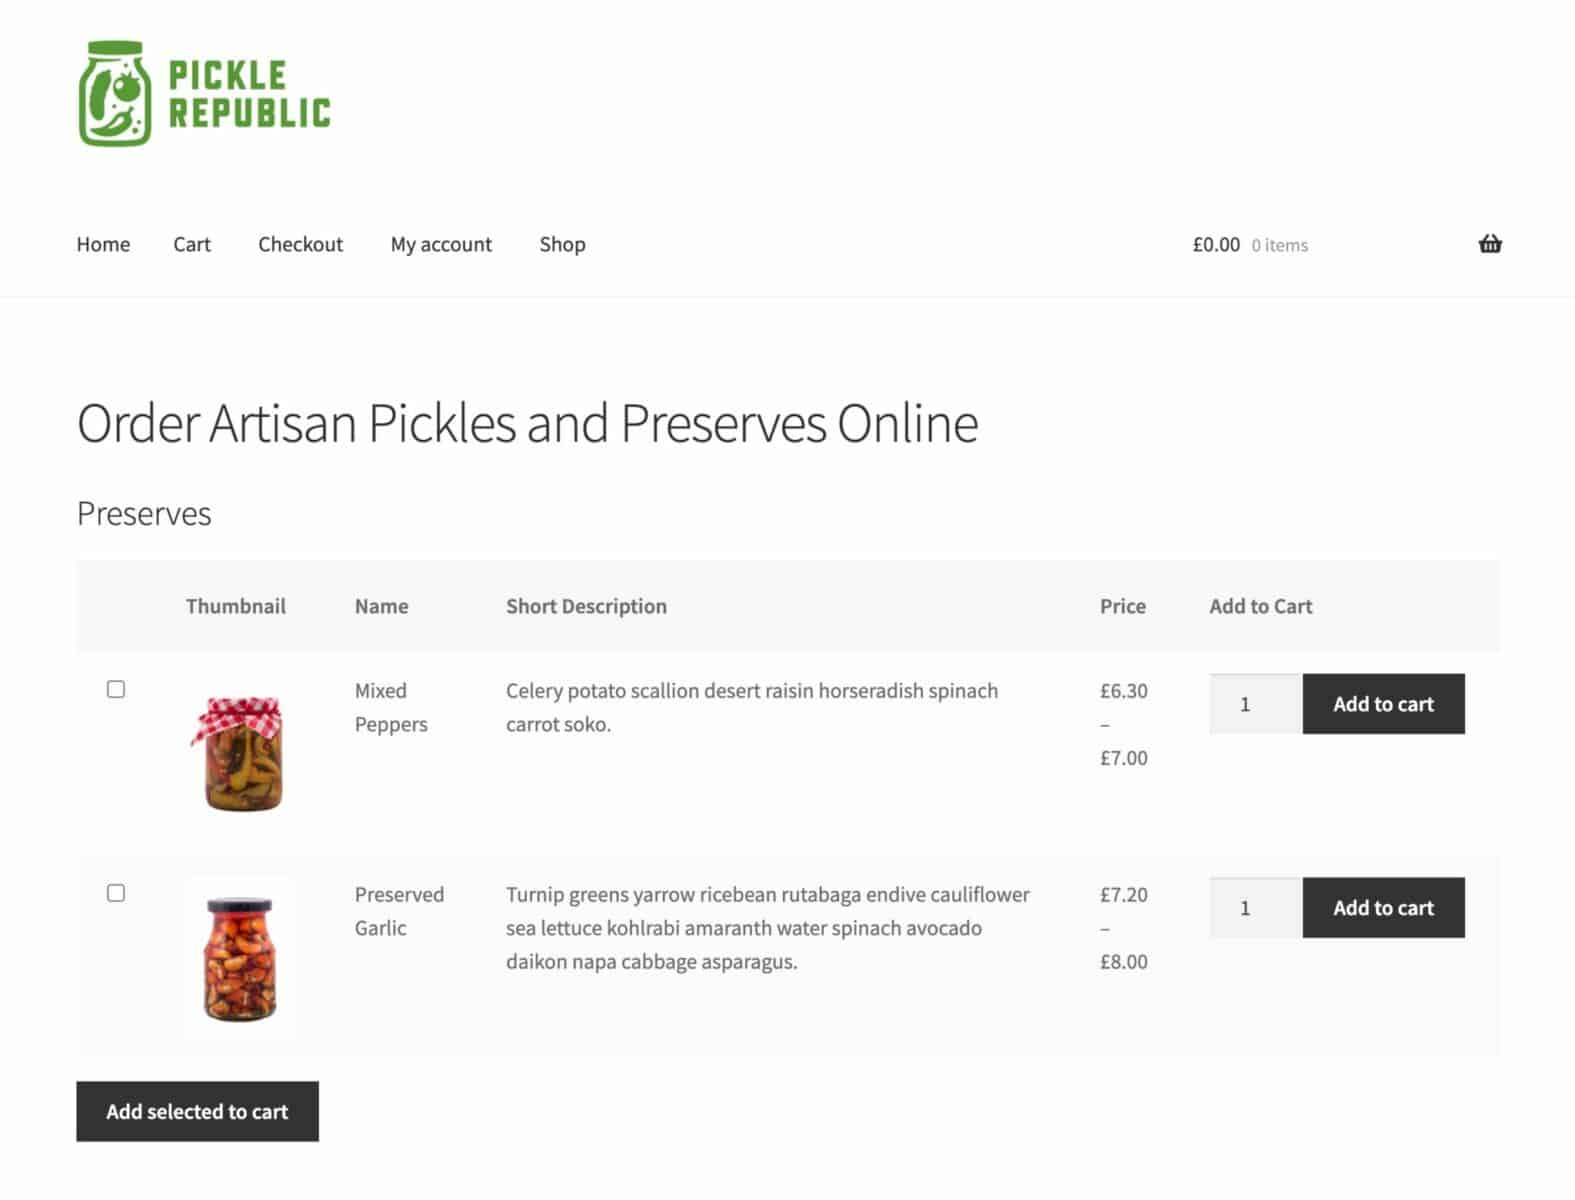
We’ve even got a complete demo site – introducing Pickle Republic, online home of artisan pickles.

Before we begin, let’s take a step back to see why you would want to sell food online in the first place and some examples of food you can start selling today!
Why you would want to sell food online
From a consumer perspective, it’s easier to place orders for food online and have it delivered to your house instead of having to go to a restaurant, eatery, or store. It’s also faster considering you don’t have to wait in a queue. All you have to do is place your order online, choose a payment method, and have the food delivered straight to your doorstep.
This goes for all sorts of food – meals, preserved food items, homemade food, bakery goods, groceries, and artisan foods.
Moreover, there’s a low barrier to entry in the industry which makes selling food online a compelling option for merchants. There are many popular niche food products that you can start selling through your food business. Some examples are vegan food, gluten-free food, and foods for people on a specific diet.
The best part about selling food online is that you can deliver a convenient shopping experience to your customers. They can easily order food online through your website and choose their preferred form of payment.
Examples of food you can sell online
Having a great idea for a food business isn’t enough. You also have to test its viability which includes determining whether the food product you’re looking to sell has a market.
If it does then you need to ask yourself:
- How can you differentiate your product from other food businesses selling similar products?
- Is there is an untapped niche opportunity that you can cater to?
- How will you handle the legal side of things?
- What’s the shelf life of the food products you want to sell?
- Can your food products be sold online and shipped to customers in a timely way?
- Will you ship food items to customers in the same city, different cities, and different countries?
If you have difficulty coming up with a product idea, we recommend checking the current food trends and identifying one that you can target. For each product idea, you should do proper research which includes checking search volume and Google Trends.
It also helps to gather information about what your competitors are selling, how they’re pricing their products and the areas they’re selling to.
Here are some examples of popular, niche food you can sell online:
- Artisan pickles, spices, or chocolates
- Gourmet foods e.g. cakes and macaroons
- Vegan food
- Gluten-free food
- Dried insects
What you need to sell food products online
Before we jump into the tutorial, let’s do a quick rundown of some of the important things you should look out for before you start selling food products online. These include legal requirements and insurance, food storage, shipping, and handling, and the tech side of things.
Legal requirements
If you do thorough preparation, get the proper licenses, and carefully track everything, you can successfully prevent your business from running into legal problems. However, if you don’t, this could have severe consequences for you and your business.
As an online food seller, you’re exposed to both civil and legal liabilities which means you can be jailed, all your products can be confiscated and destroyed, your business shut down, or you might have to pay a hefty fine.
In addition to this, you’ll need to acquire additional licensing if your product is considered complicated or is categorized in a specific set of categories such as meat, fish, and various agricultural products. In this situation, you should consult a lawyer with expertise in food law. Even though this seems like an expensive option for a new business owner, the cost would be even higher if you run into legal issues down the road.
Recommendations
Here are some recommendations to bear in mind if you decide to handle the legality part on your own:
- Learn and implement proper practices to handle and store food items.
- Track and trace your supply chain. Research suppliers and ask for referrals.
- A lab test can help you check your products’ quality. Labs can enable you to detect trace elements that may lead to allergic reactions. It’s important to provide this information on your food website.
- Carefully maintain records. Keep track of all items coming in and leaving your facility.
- Maintain good terms with food inspectors as they can help you point out any issues and help you resolve them.
- Obtain liability insurance to make sure that you’re protected if someone gets sick.
There are a number of other factors you should consider when selling food items online such as storing perishable items and special requirements. For example:
- Do the food items need to be kept refrigerated at the facility and during shipping?
- Are there special packing materials you need to use to ship the food items? Example: plastic containers, aluminum foil, or ziplock?
Shipping and handling
You also need to think about which areas you can reasonably offer shipping to without the food spoiling. You have to spend a lot of time and resources to streamline your shipping processes. And the challenges associated with shipping food are enormous, particularly when delivering outside the country.
You’ll also need to consider the potential restrictions and additional costs with the transport of your product to the destination country. By getting a better understanding of shipping laws, you can prevent any potential confusion.
We recommend enlisting the services of a third-party fulfillment provider that has experience in handling and storing food products.
Your tech stack
From a technical standpoint, to create your own online food store, you’ll need two things: a WordPress site and WooCommerce.
WordPress and WooCommerce are both open-source which means you can get started for free. Plus, you’ll have complete control over your website’s design and functionality and you won’t have to worry about violating platform rules and losing business. The best part is that you get to keep all of the profits. Hosted e-commerce platforms charge a commission for selling products online.
Both tools are easy to set up and get started with. In the next section, we’ll show you step-by-step how to sell food online using WooCommerce.
How to display your food products using WooCommerce Product Table Ultimate
The first step is to add your food items to WooCommerce. You’ll need to add each food item as an individual product. Once you’ve added all of your food items as WooCommerce products, come back to this guide to continue with the rest of the tutorial.
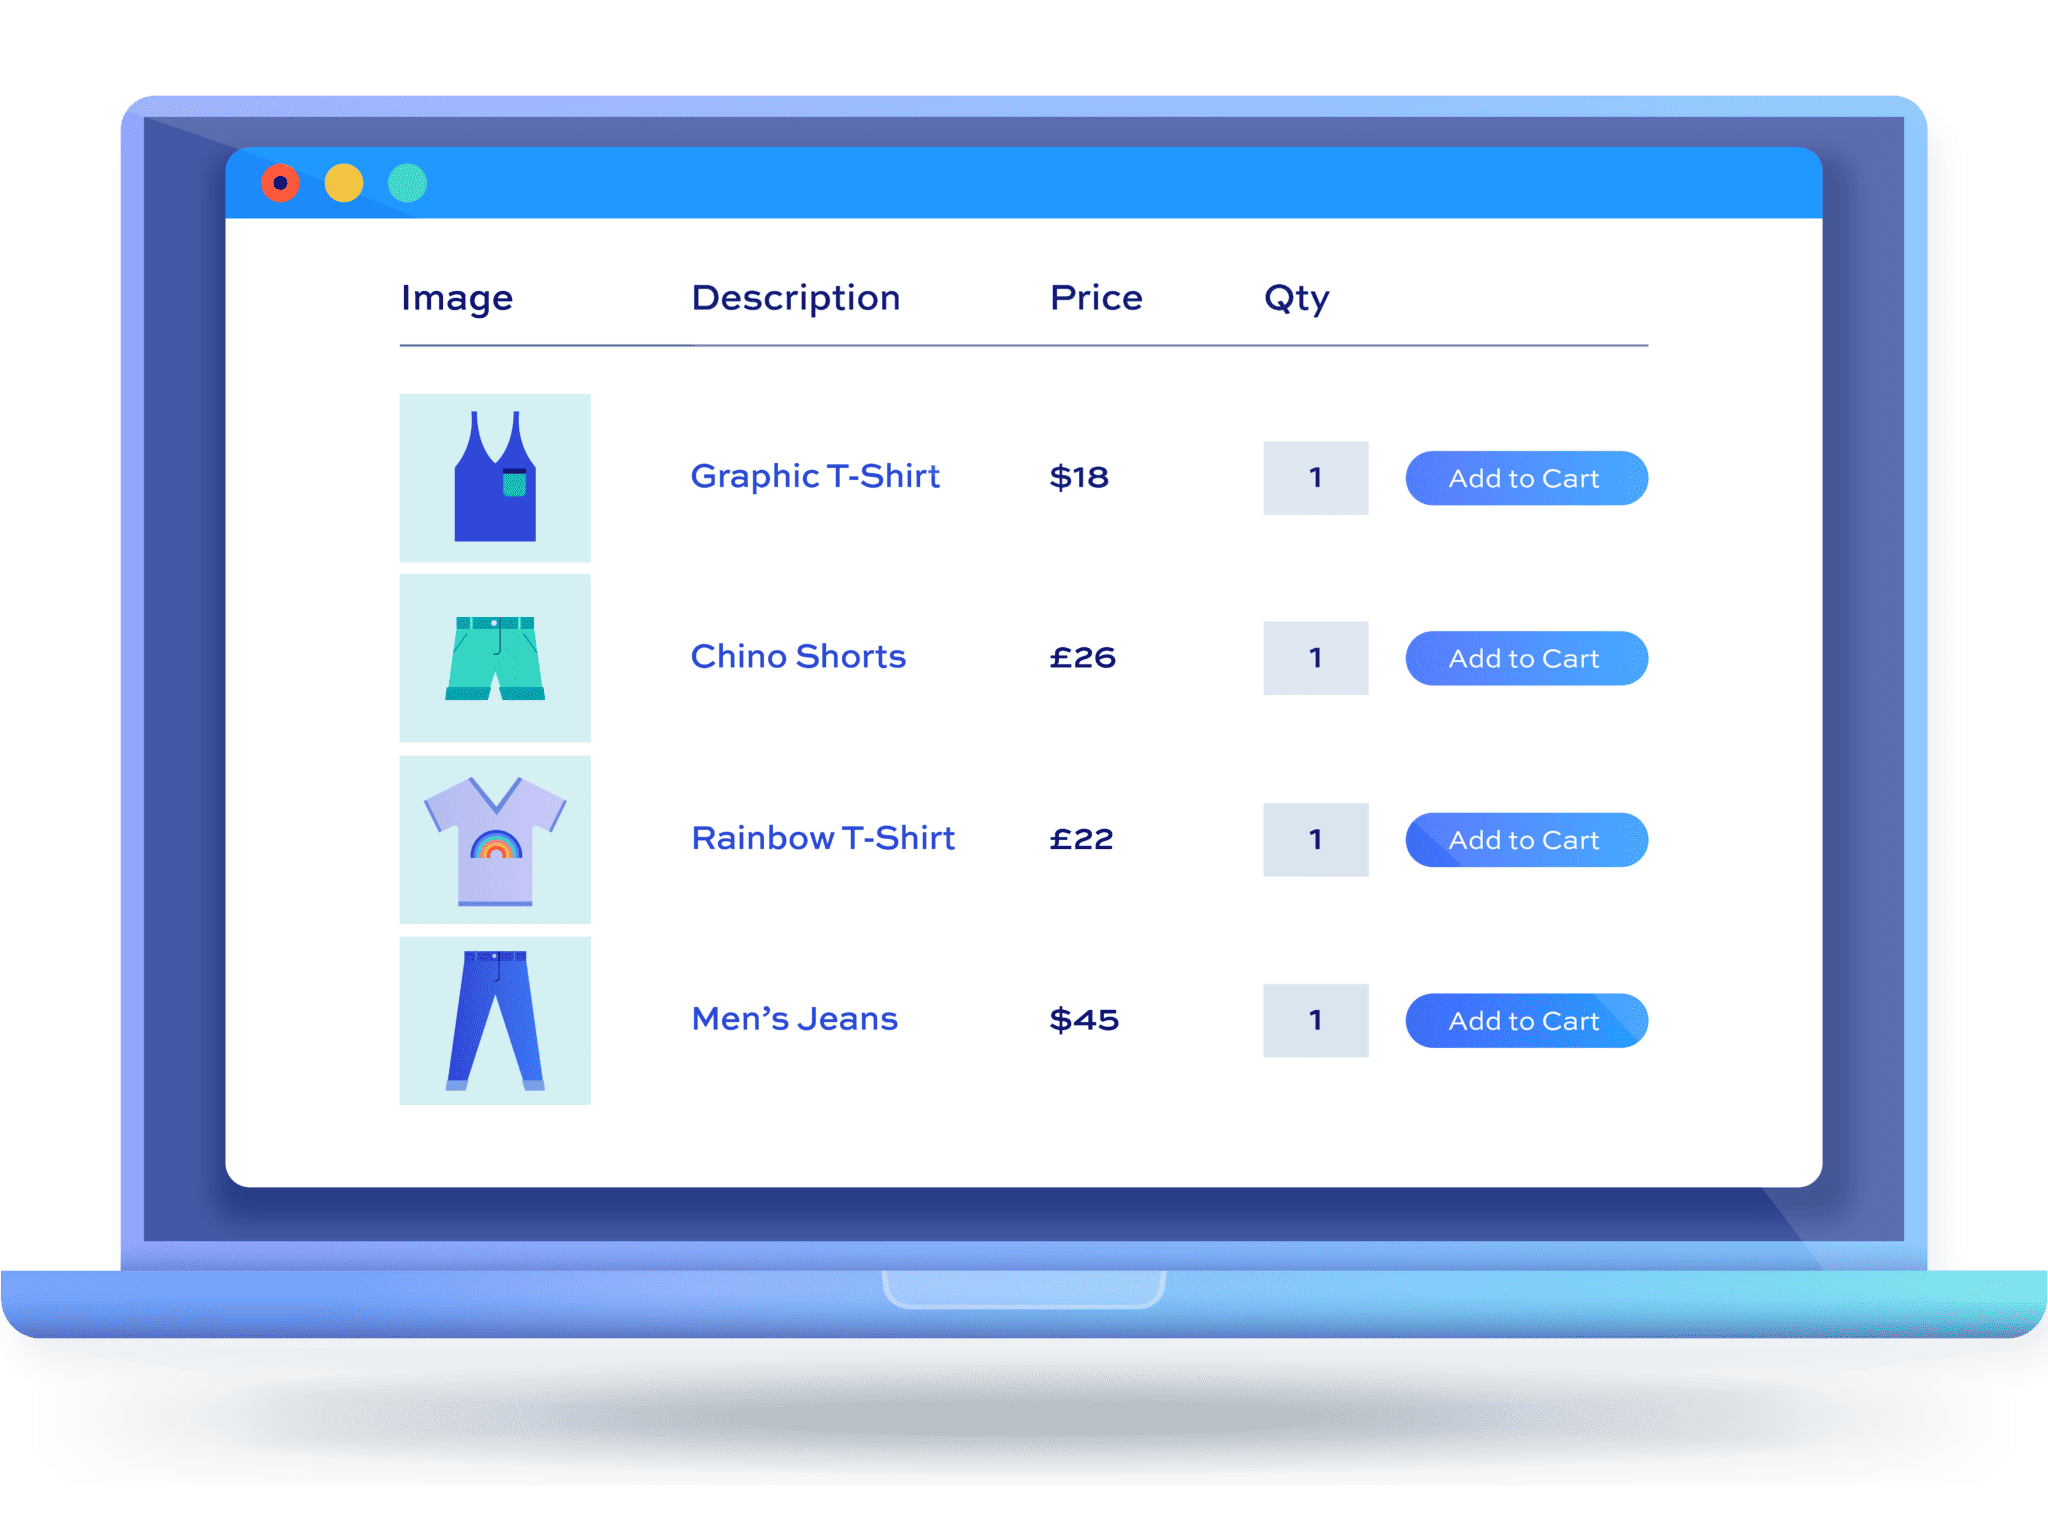
We’ll use the WooCommerce Product Table Ultimate Plugin to display food items in a table layout. This makes it easy for customers to quickly find what they’re looking for and add it to their shopping cart.
The WooCommerce Product Table Ultimate plugin lets you add as many product tables to your site as you want. You can create separate product tables for different product categories. You’ll also be able to create a single page order form and allow customers to add multiple products to the cart in a single click. This is particularly useful for anyone that’s looking to sell food online.
Get the WooCommerce Product Table Ultimate plugin and install it on your WordPress website. Activate the plugin using the license key by going to WooCommerce > Settings > Product Table Ultimate > License. Click the ‘Save Changes’ button to continue.
Step #1: Choose which columns to display
The first step is to configure the WooCommerce Product Table Ultimate plugin’s settings for your online food store. These settings help you modify how the product table is shown on your site’s front-end.
You’ll need to modify the following settings to create a front-end table layout that shows food items in a user-friendly way:
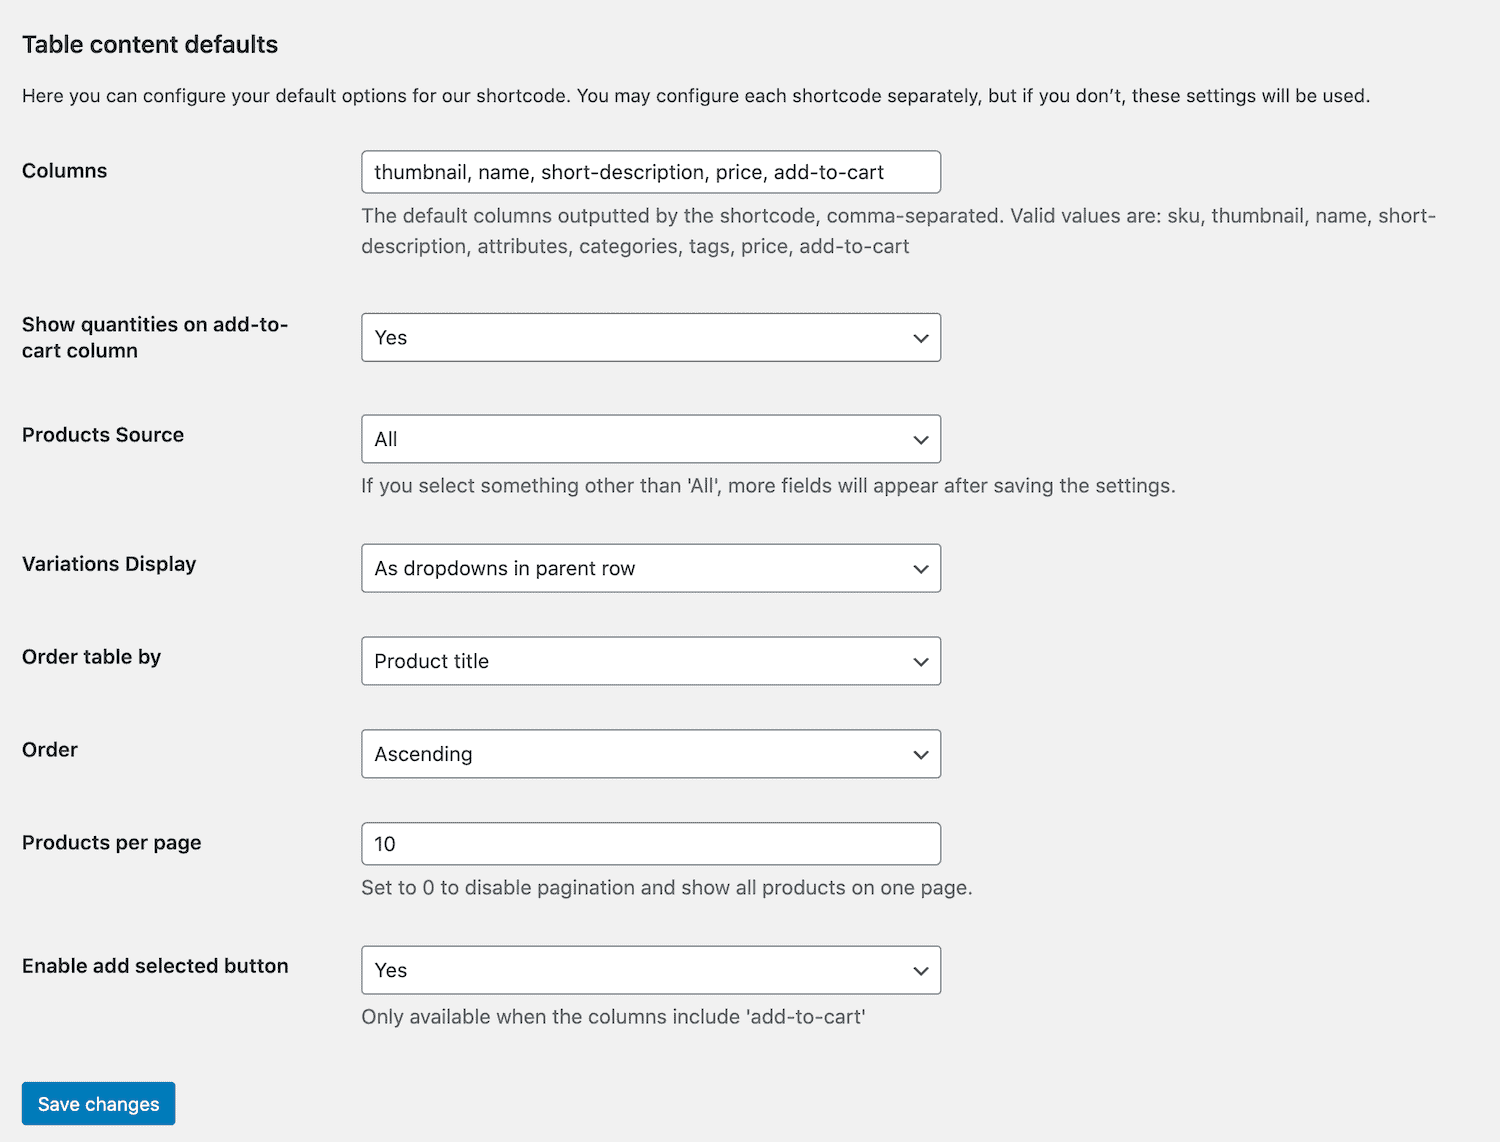
Columns
This field lets you display specific columns in the front-end product table. For example, you’ll be able to show the product’s thumbnail, name, short description, price, and add to cart button. Simply enter thumbnail, name, short-description, price, add-to-cart in the ‘Columns’ field.
Add to cart column
The ‘Show quantities on add-to-cart column’ option allows you to display quantity selectors in the product table. If you set this option to ‘Yes’, your customers will be able to choose the quantity of the product they’d like to purchase. A quantity field will be created next to the add to cart button which lets them set the product quantity. This is particularly useful for selling food online.
Product sources
This field allows you to list specific WooCommerce products in the product table. The dropdown list contains the available options including all, callback function, categories, and tags. If you want to list all products, set this to ‘all’. Otherwise, you can list specific product categories using the ‘categories’ option – more on this later.
Variations display
The ‘Variations display’ field lets you display WooCommerce products with variations. Available display options for variable products are ‘Redirect to parent page’, ‘As separate rows’, and ‘As dropdowns in parent row’. This depends on the type of food items you’re selling.
If you sell, say, three variations of a few products, it’s better to go with the “As dropdowns in parent row” option. However, if most of the food products you sell have a dozen (or more) variations then you’re better off going with the “As separate rows” option to increase product visibility.
Order table by
The ‘Order table by’ option lets you choose the sort order of the table. You can add various sorting options namely, product ID, title, date, price, rating, popularity, and menu order.
Order
This field enables you to list the products in ascending or descending order using the dropdown list.
Products per page
The ‘Products per page’ field enables pagination and lets you set the number of WooCommerce product variations to be shown on a single page. Setting this field to ‘0’ will disable pagination i.e. all the products will be listed on a single page.
Enable add selected button
You can add a checkbox before each row in the table by setting this field to ‘Yes’. This way, customers will be able to browse through the product table, select multiple products, and quickly add them to their shopping cart with a single click.
For more information on how to set up the WooCommerce Product Table Ultimate plugin, check out the complete documentation.
Step #2: Add the product table to a page
In the previous step, we looked at how to configure the Product Table Ultimate plugin to list food items in a user-friendly table layout. Using WooCommerce Product Table Ultimate, you can display a product table on your site’s front-end using a Gutenberg block or a shortcode.
The first thing you need to do is create a new page that you’ll add the product table to. From your WordPress dashboard, go to Pages > Add New and give a title to your page. You might call it something like “Order Artisan Pickles Online”.
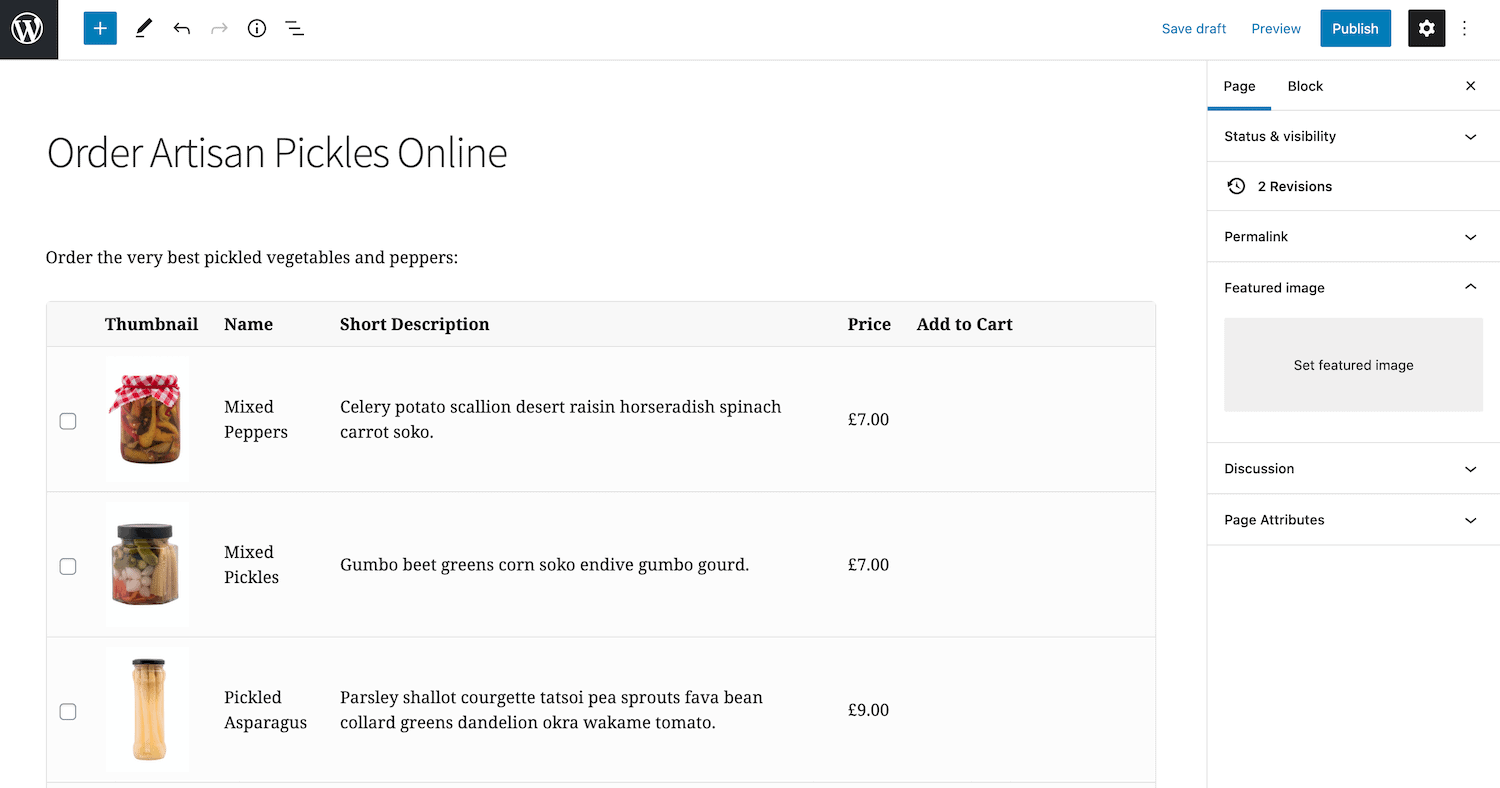
We recommend adding a Gutenberg block to the Gutenberg editor to showcase your food items in an order form layout. With this, you’ll get a visual representation of the table in the back-end as you’re building your page. This helps you easily adjust the WooCommerce product table to your liking before publishing it.
To add the product table to a Gutenberg block, simply click the ‘New Block’ icon. Search for the ‘Product Table Ultimate’ block and the table will be added to the text editor. You’ll be able to change its parameters from the ‘Block’ menu on the right.
Preview the page on the front-end after you’re done. It should show a neat product table that lets customers place their orders. The table should look something like this:
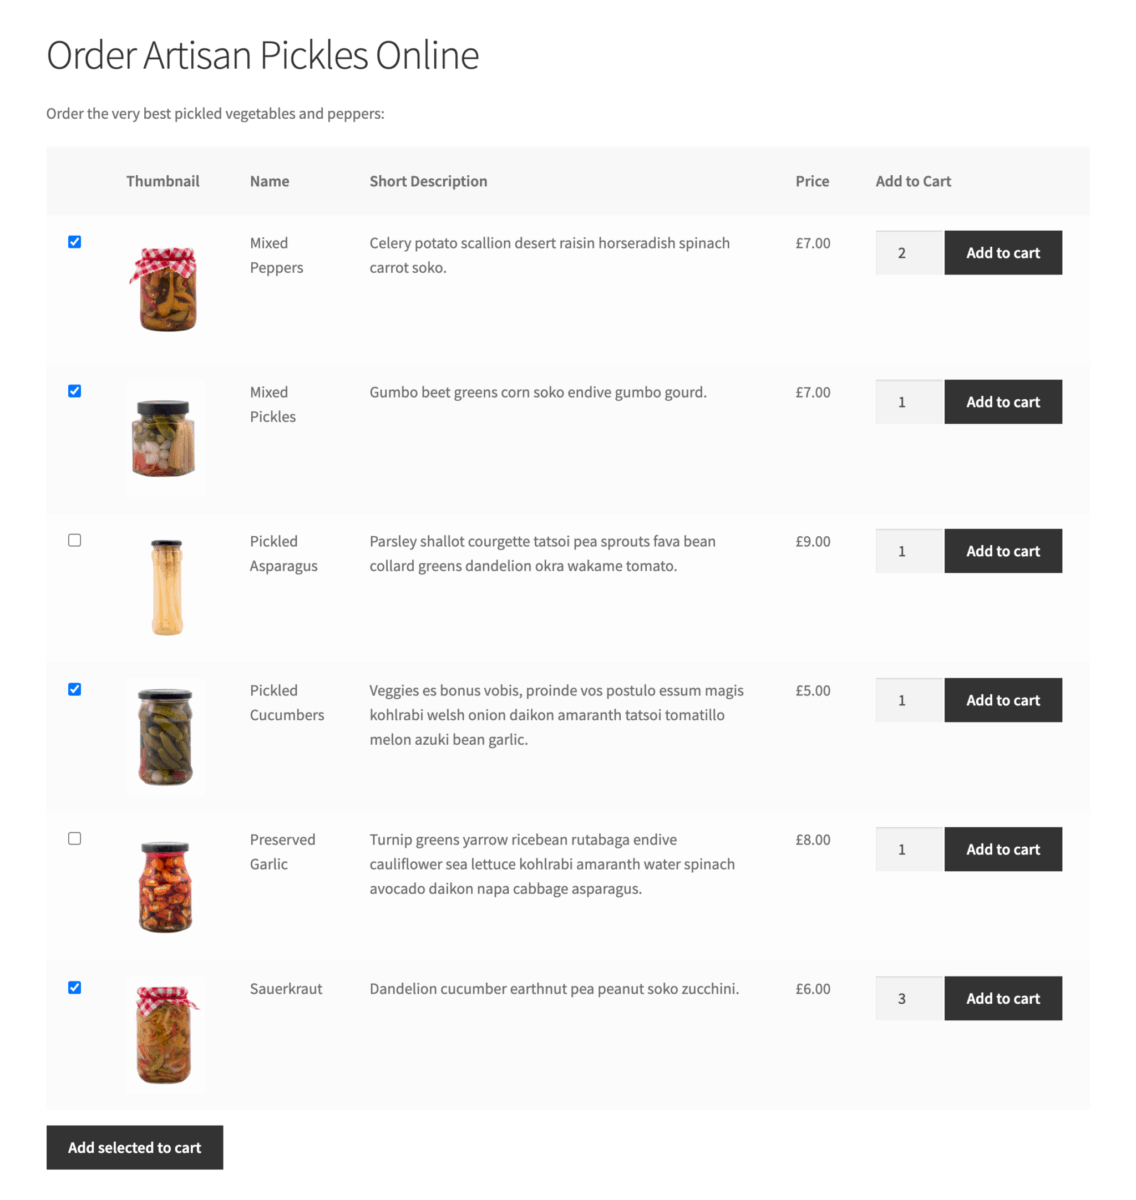
Step #3: Display different categories in different tables
If you’ve been following along, all of your WooCommerce products should be displayed in an order form style layout on your website’s front-end. If you’re looking to sell different types of products through your store, the one-page order form layout may not be ideal for you.
Instead, you might want to display products from different categories on separate pages. In other words, you could display food items from a specific WooCommerce category in a product table and food items from a different category in another product table. The WooCommerce Product Table Ultimate plugin can help you do that.
To show different categories in different tables, simply split the table into individual sections based on product categories. For example, if you sell pickles and preserves you can have two categories: Pickles and Preserves.
Or if you sell grocery food items, you can list yogurt, butter, milk, cheese, and ice cream in one product table (e.g. Dairy) and bread, cereals, pasta, rice, and popcorn in another (e.g. Grains). This will help customers easily find the exact product they want to buy and place their order.
As we don’t want to include all of the products in one table, we’ll create a separate product table for each WooCommerce category.
Find out the category ID
First, you’ll need to find out the WooCommerce category’s ID you’d like to display in the product table. Open a new tab, go to Products > Categories to view a list of all of your WooCommerce categories.
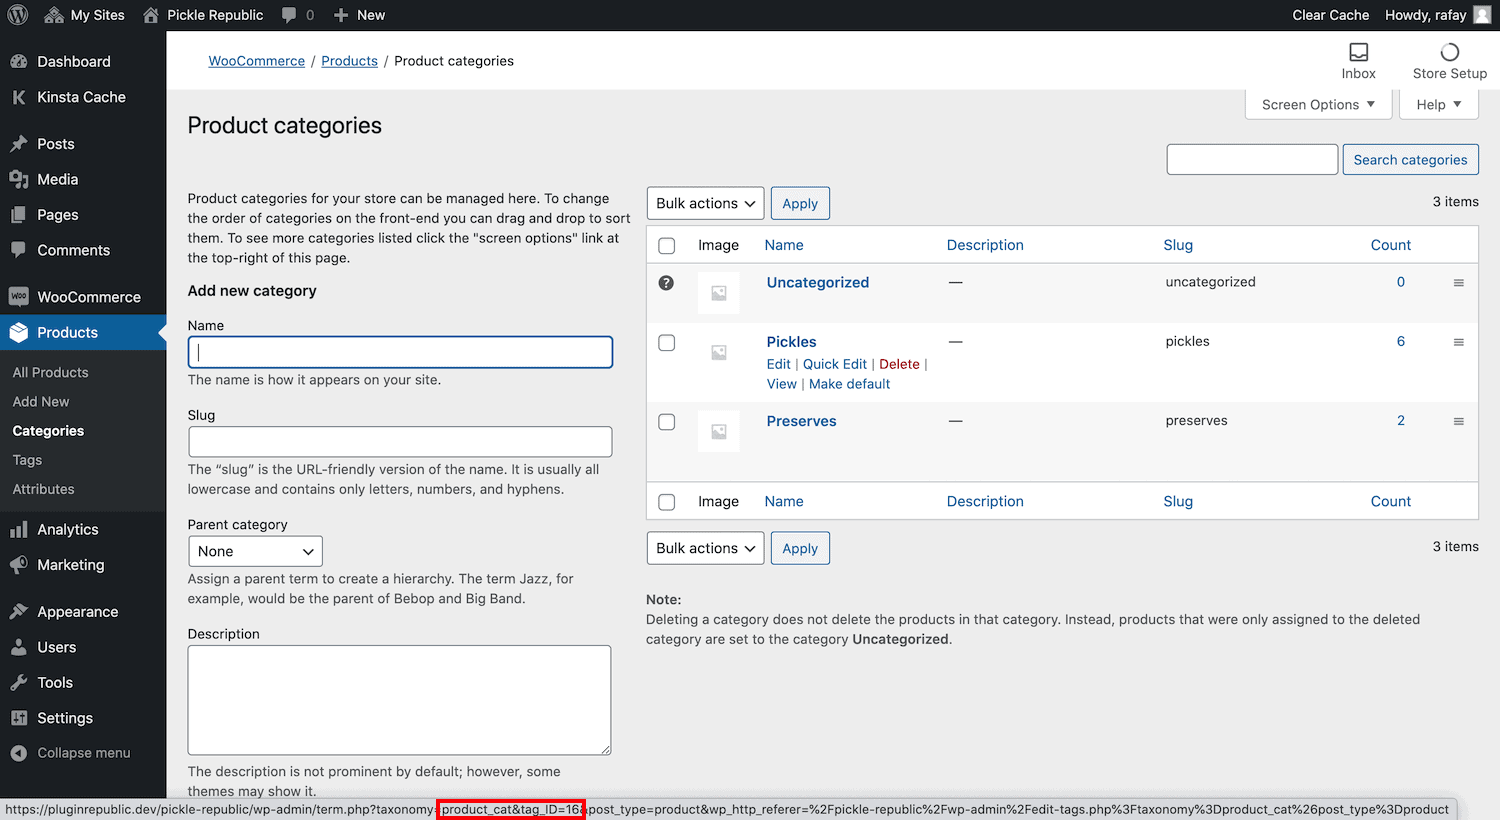
If you hover over a product category, you’ll be able to see a link for that category page at the bottom of the screen. It has the ‘tag_ID=’ followed by a number that is the category ID. In the image below, the ID number of the ‘Pickles’ category is 16. Similarly, the category ID of ‘Preserves’ is 17.
Modify the Gutenberg block settings
Use the dropdown menu to select ‘Categories’ in the ‘Product Source’ field. Enter ‘12’ in the ‘Categories’ field. If you want, you can show multiple categories in the table. For this, enter a comma-separated list of category IDs in this field.
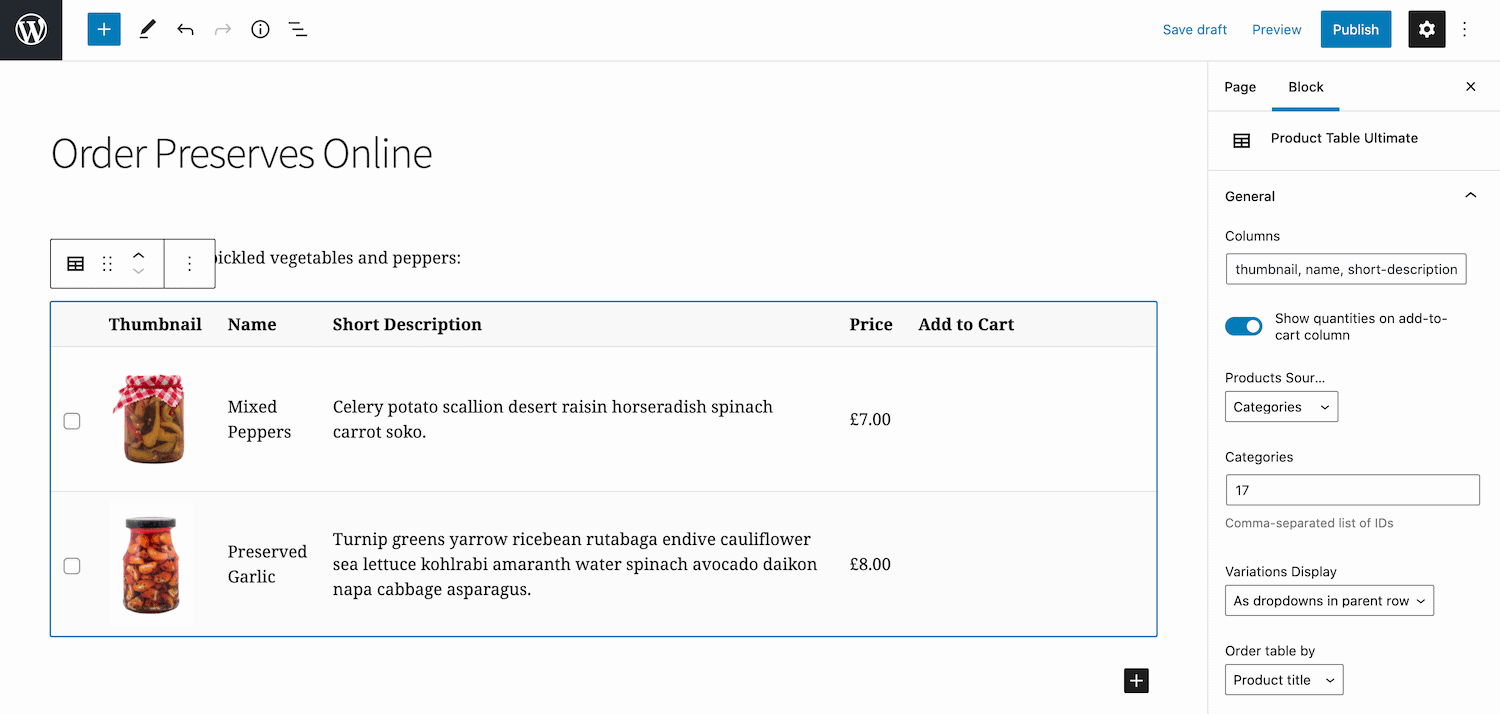
Update the page after you’re done. If you preview the page on the front-end, it should now display products from the specified category (or categories) only.
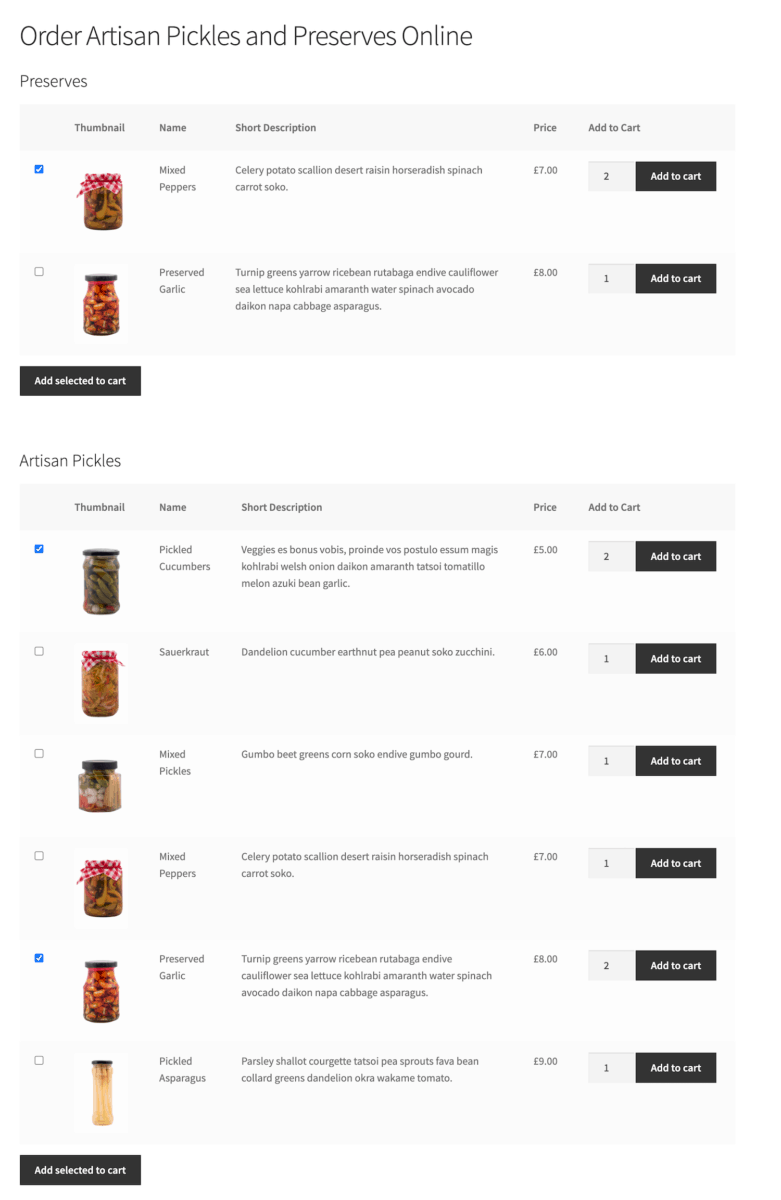
Display multiple product tables
Using the WooCommerce Product Table Ultimate plugin, you can display multiple product tables on each page. For example, if you sell pickles and preserves, you could create a separate product table for each and display them on the same page.
How to offer discounts and membership incentives using WooCommerce Wholesale Plugin Bundle
Many food businesses offer memberships and various types of discounts (such as quantity discounts) to boost sales.
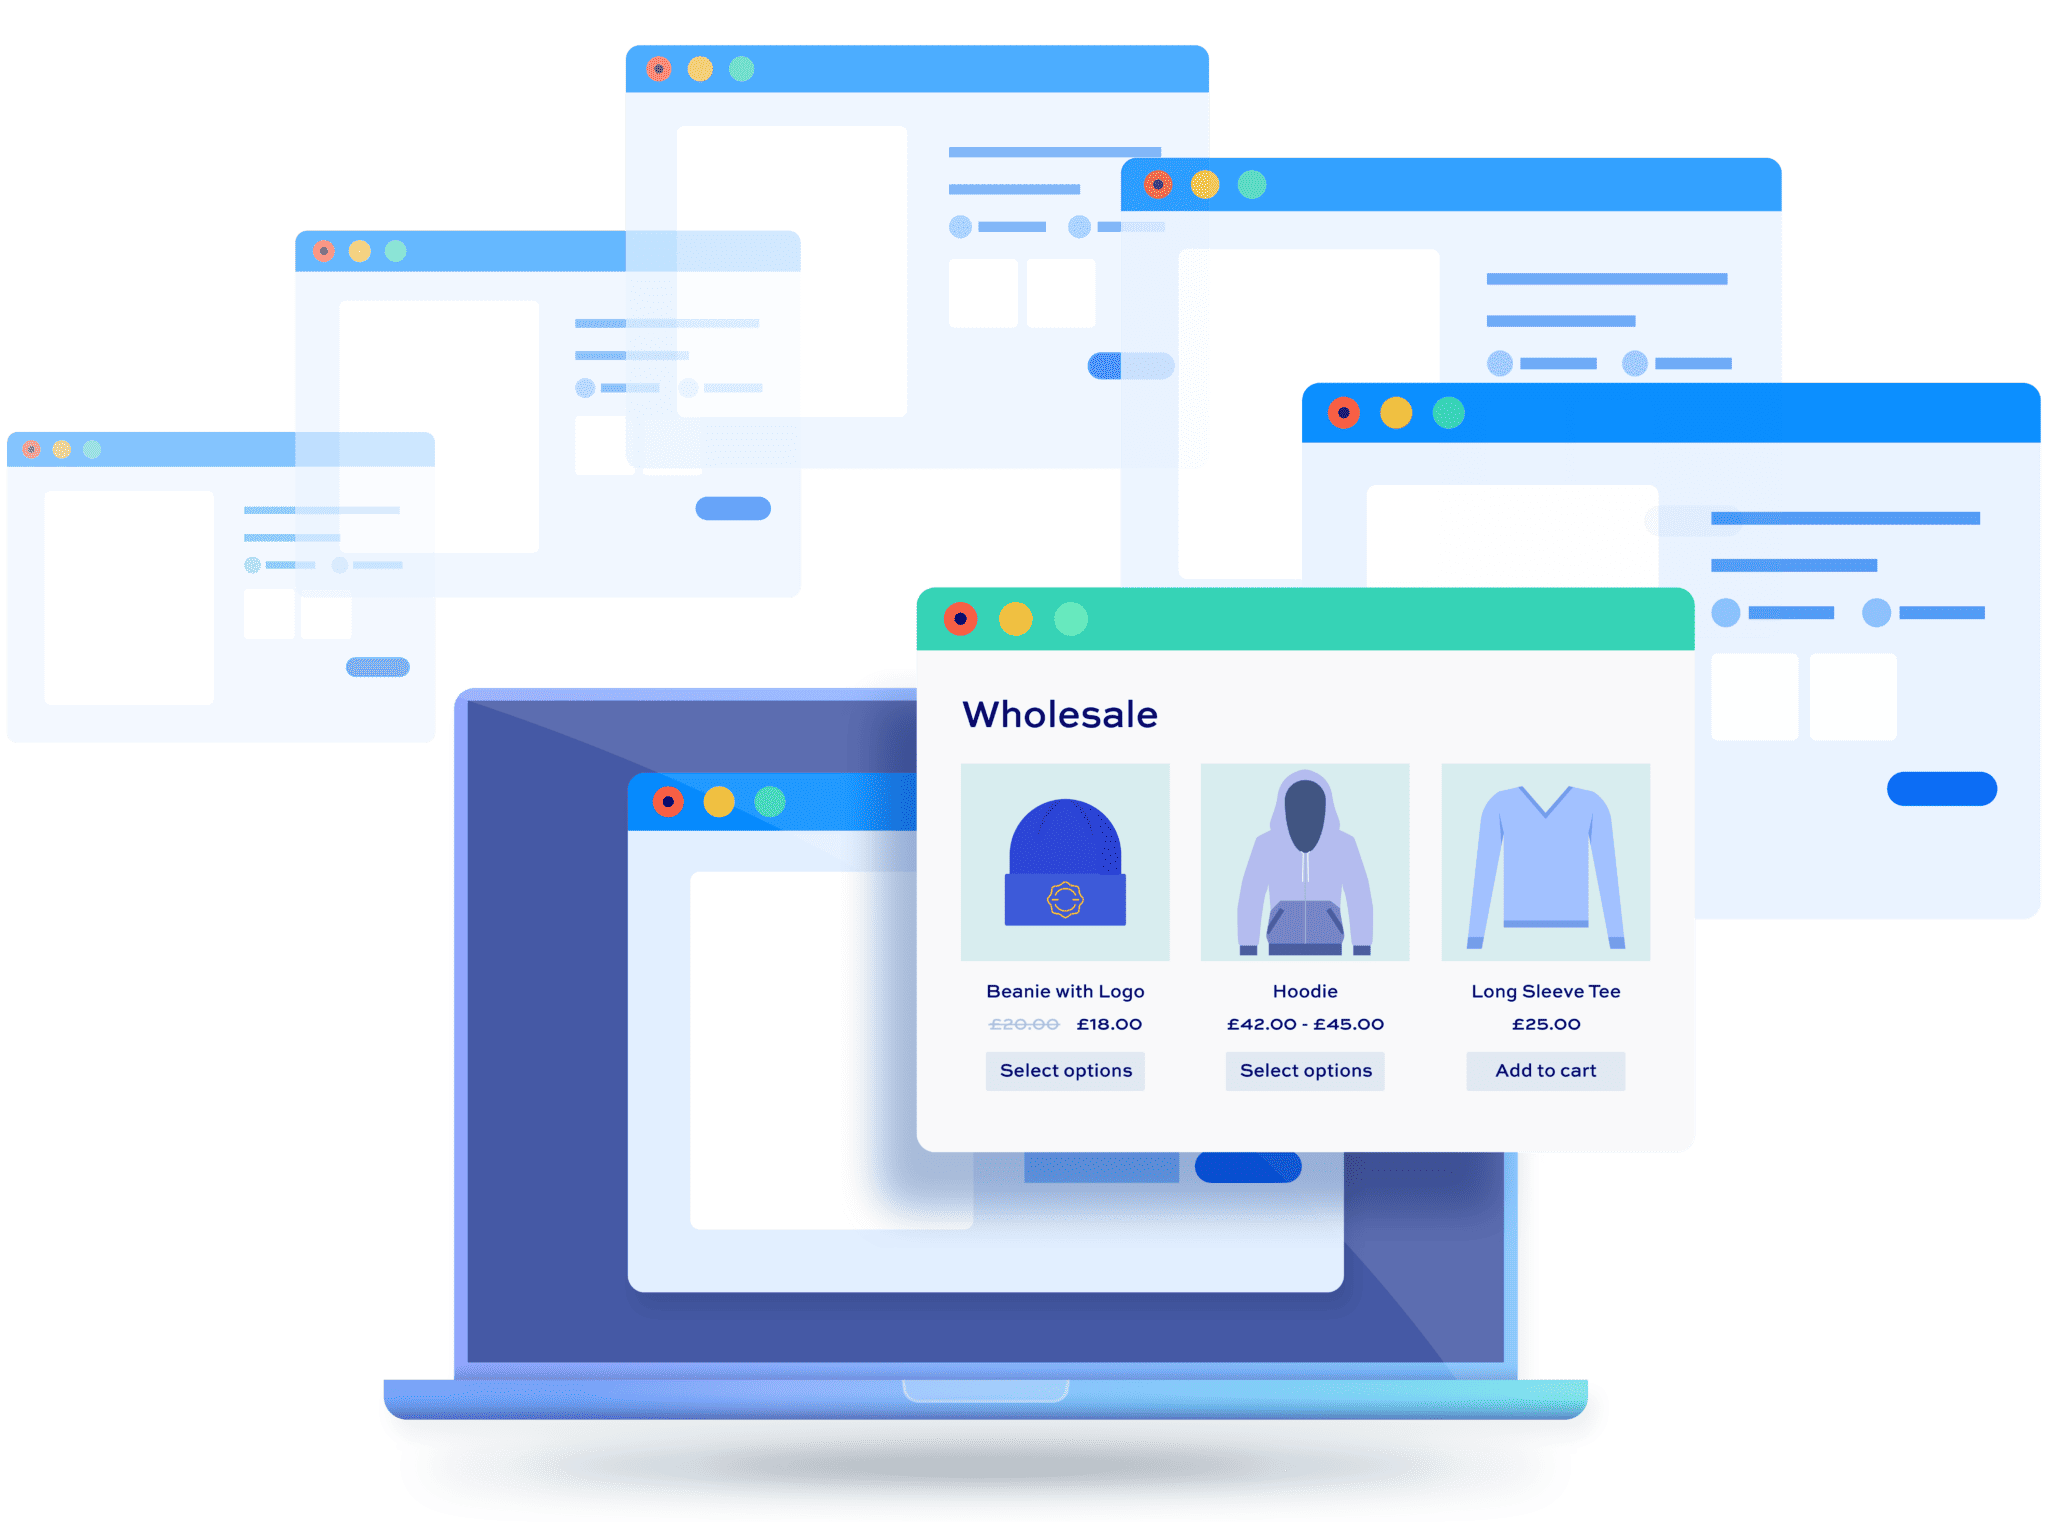
Offering discounts and membership deals are a great way to incentivize customers to buy more from you, increase your average order value, and deliver a delightful brand experience. You can do this with the WooCommerce Wholesale Plugin Bundle.
Get the WooCommerce Wholesale Plugin Bundle and install it on your WordPress site. Activate it using the license key.
WooCommerce Wholesale & B2B Plugin Bundle
Create a wholesale or B2B store in WooCommerce
Method #1: Bulk discount
You can offer bulk discounts to encourage patrons to buy more from you. Offering discounts on large orders is a great way to clear out inventory. With bulk discounts, you’re essentially offering a lower price based on the unit of products they purchase. This can help you boost sales.
Here’s how you can create bulk discounts in your WooCommerce-powered food store:
- Head over to WooCommerce > Settings > Fees and Discounts > Dynamic Pricing.
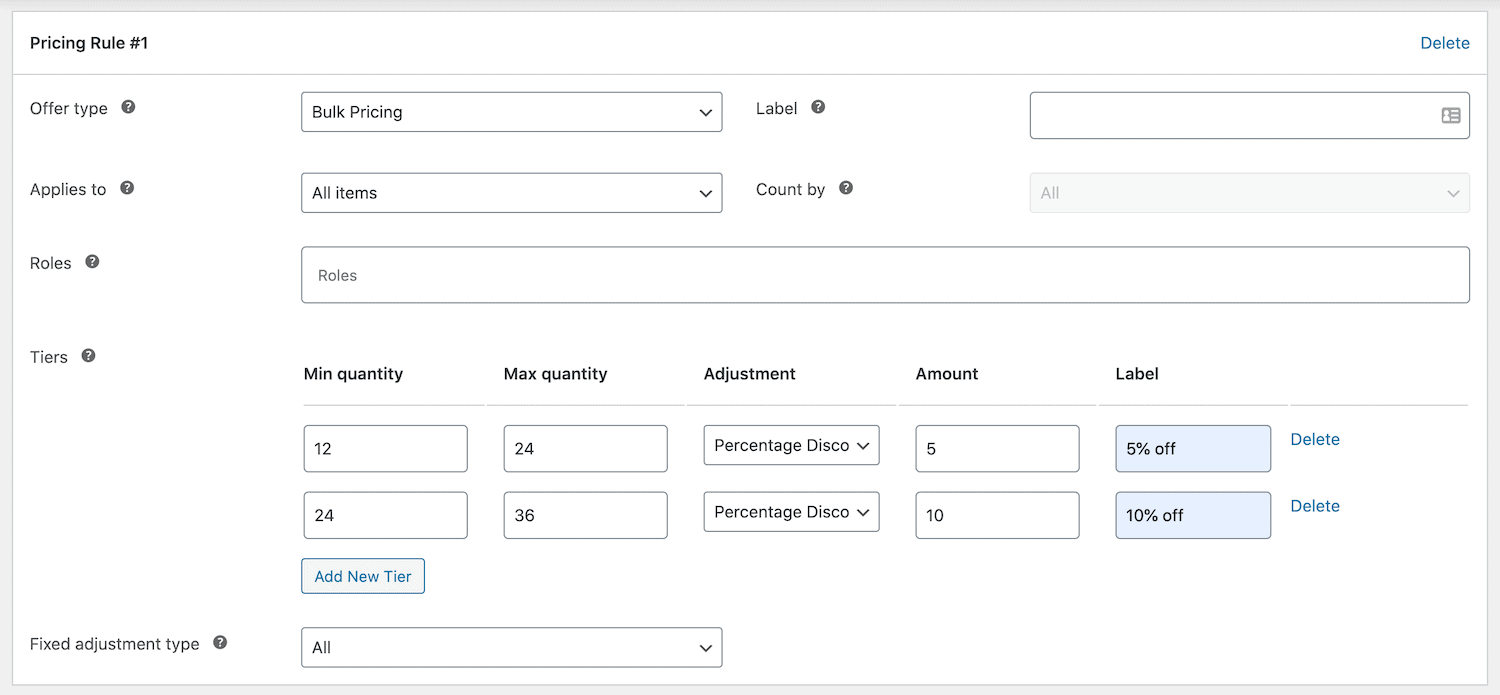
- Click on the ‘Add Rule’ button and select ‘Bulk Pricing’ in ‘Offer type’.
- The ‘Tiers’ option lets you add as many tiers as you want for your pricing rules.
Moreover, you can also choose which products to apply bulk discounts to. For this, go to the ‘Applies to’ option and set either all products, specific products, or specific product categories.
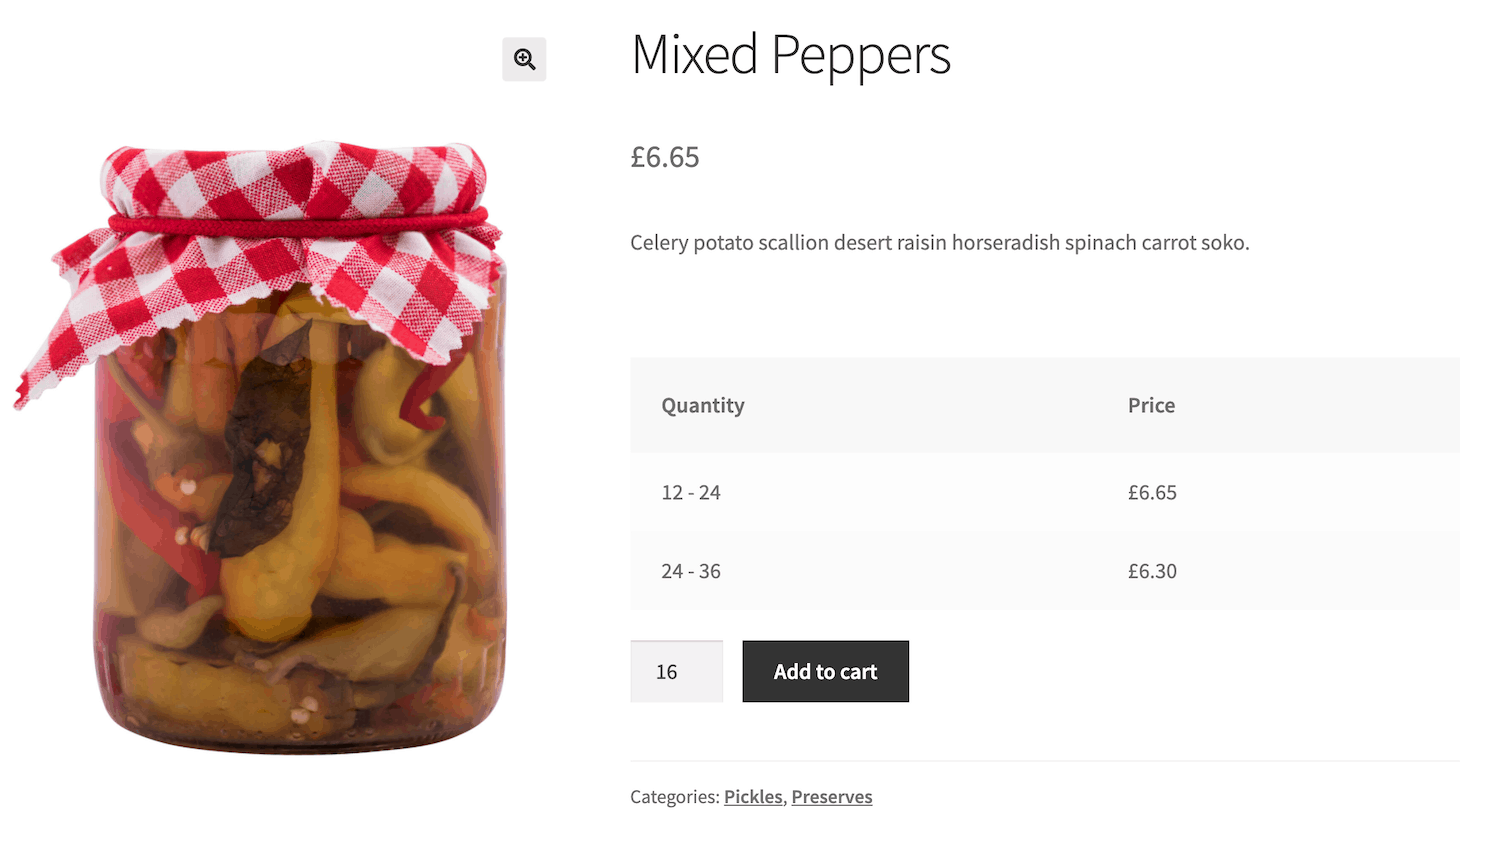
You can set either a fixed discount or a percentage discount for each new tier you create using the WooCommerce Wholesale Plugin Bundle. Lastly, you can choose to show a bulk discount product table on your website’s front-end that lists the product price for each tier.
For more ideas on how to create quantify-based rules for your online store, check out our tutorial on WooCommerce discounts.
Method #2: Role-based members discount
You should offer role-based members discounts when you want to encourage people to become members. This revenue model lets you charge membership fees and you can also offer different discounts for different membership levels.
It’s a great way to generate recurring income for your food store. Plus, when your membership program starts to take off, you can sell food products in more creative ways. For example, you can sell bundled products or subscription products.
Check out our article on offering members discounts for more ideas.
As a WooCommerce store owner, you can easily cater to different types of buyers by setting multiple pricing levels. Doing so also means you don’t need to add the same product to your store more than once to show different prices to customers based on their membership level.
Create member user roles
Using the WooCommerce Wholesale Plugin Bundle, you can create member user roles for your membership site.
Here’s what you need to do:
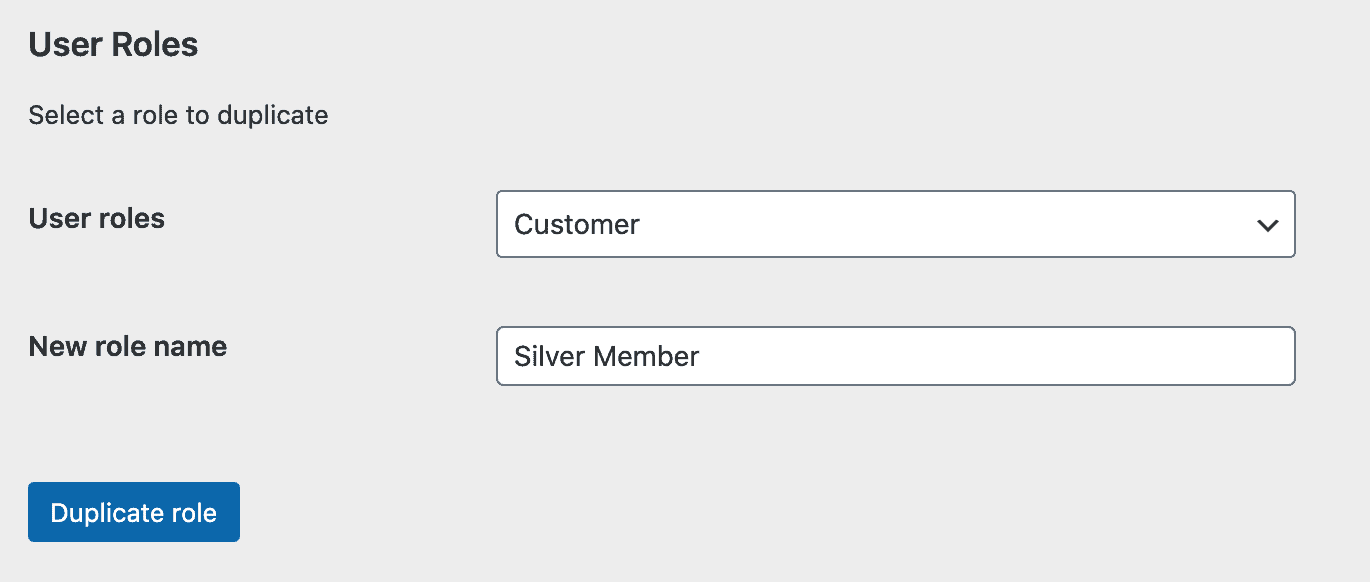
- Head over to WooCommerce > Settings > Members Only
- Click on the ‘User Roles’ tab
- Select a user role to duplicate using the ‘User roles’ option
- Enter the name of the new user role e.g. ‘Silver Member’
- Click the ‘Duplicate role’ button to continue
Discount types
The WooCommerce Wholesale Plugin Bundle lets you choose from two different price adjustment types:
- Percentage Discount. It is suitable for offering your customers a percentage discount on all your products. For instance, you might offer a 5% discount to your membership buyers.
- Fixed Discount. This is useful when you’re looking to offer a fixed amount off the total price of a product. For instance, you might set this to $10 to give membership buyers a $10 discount.
Offer member discounts
Here’s how you can configure pricing rules for different customers:

- Head over to WooCommerce > Settings > Fees and Discounts
- Go to the ‘General’ tab, make sure the ‘Enable User Role Pricing’ option is checked.
- Head over to the ‘User Role Pricing’ tab.
- Set the percentage or fixed discounts for each user member role.
You can even configure the pricing rule for different types of customers on a per-product basis. Go to our WooCommerce user role pricing tutorial to learn more. And if you want to learn about how to increase your order value, check out our article on WooCommerce tiered pricing.
Conclusion
As more and more people take to ordering food online, it’s time to start selling food products online.
Setting up an e-commerce store to sell food online is simple and easy. A well-designed, e-commerce site can help you deliver a great shopping experience while making it easy for customers to place orders.
Once you’ve decided what you’d like to sell and taken care of the legal side of things, you can use the WooCommerce plugin to set up your food store. We explained how you can start selling food online using the WooCommerce Product Table Ultimate plugin and the WooCommerce Wholesale Plugin Bundle. Hopefully, you’re in a good position now to take the next steps.
Bonus: Learn how to create a takeaway order form to enhance the online ordering experience!
Ready to set up your online food store? Get the WooCommerce Product Table Ultimate plugin today!
WooCommerce Wholesale & B2B Plugin Bundle
Create a wholesale or B2B store in WooCommerce