Bookings for WooCommerce allows you to make your products fully bookable. In this quick guide, we’ll look at how to add optional or required extras to any bookable product using Product Add-Ons Ultimate.
If you don’t already own both plugins, they are available together at a discount in the WooCommerce Bookings and Product Add-Ons Bundle. If you own one of the plugins, you can upgrade and just pay the difference.
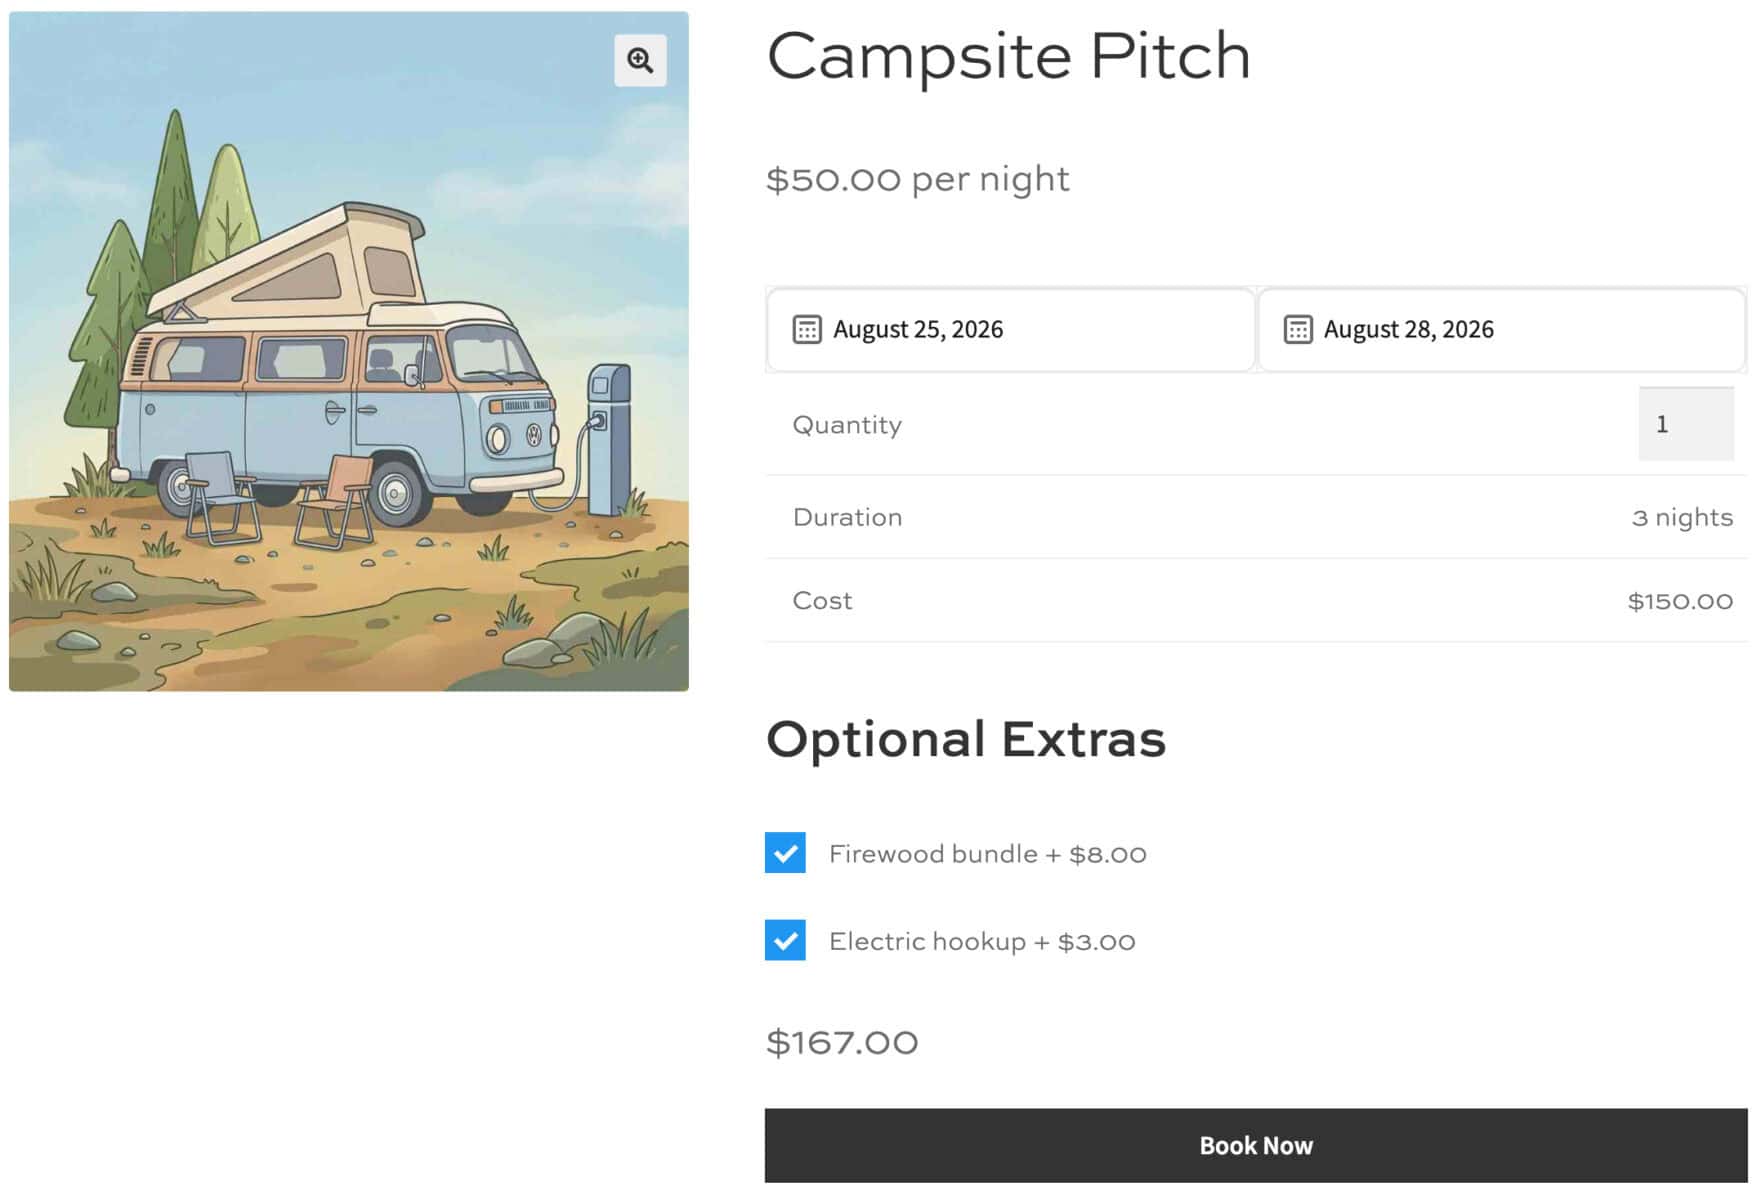
We’ll use a campsite pitch booking as the example. With Product Add-Ons Ultimate, you can offer extras like an extra vehicle pass, a firewood bundle, or an electric hookup at the point of booking.
How to add upsells and add-ons to a bookable product
Here’s a quick overview of how to add extra options to WooCommerce bookings using Product Add-Ons Ultimate.
- Open your bookable product
Edit an existing bookable product, or create a new one.
- Add a new add-on field
Click the ‘Product Add-Ons’ tab in the ‘Product data’ section then click ‘Add Group’ and ‘Add Field’. Give the option a name and choose a field type, such as a checkbox or dropdown.
- Set pricing for your add-on field
Charge a one-off fee, or charge per bookable unit rate such as per night.
- Publish and check the front end
Your extra options will appear below the booking calendar on the product page.
Let’s look at each step in more detail by working through a specific use case.
Example use case: Create a bookable campsite pitch with add-on options
In our example, the customer will be able to book a campsite pitch and select extra options for their stay.
Step #1: Open your bookable product
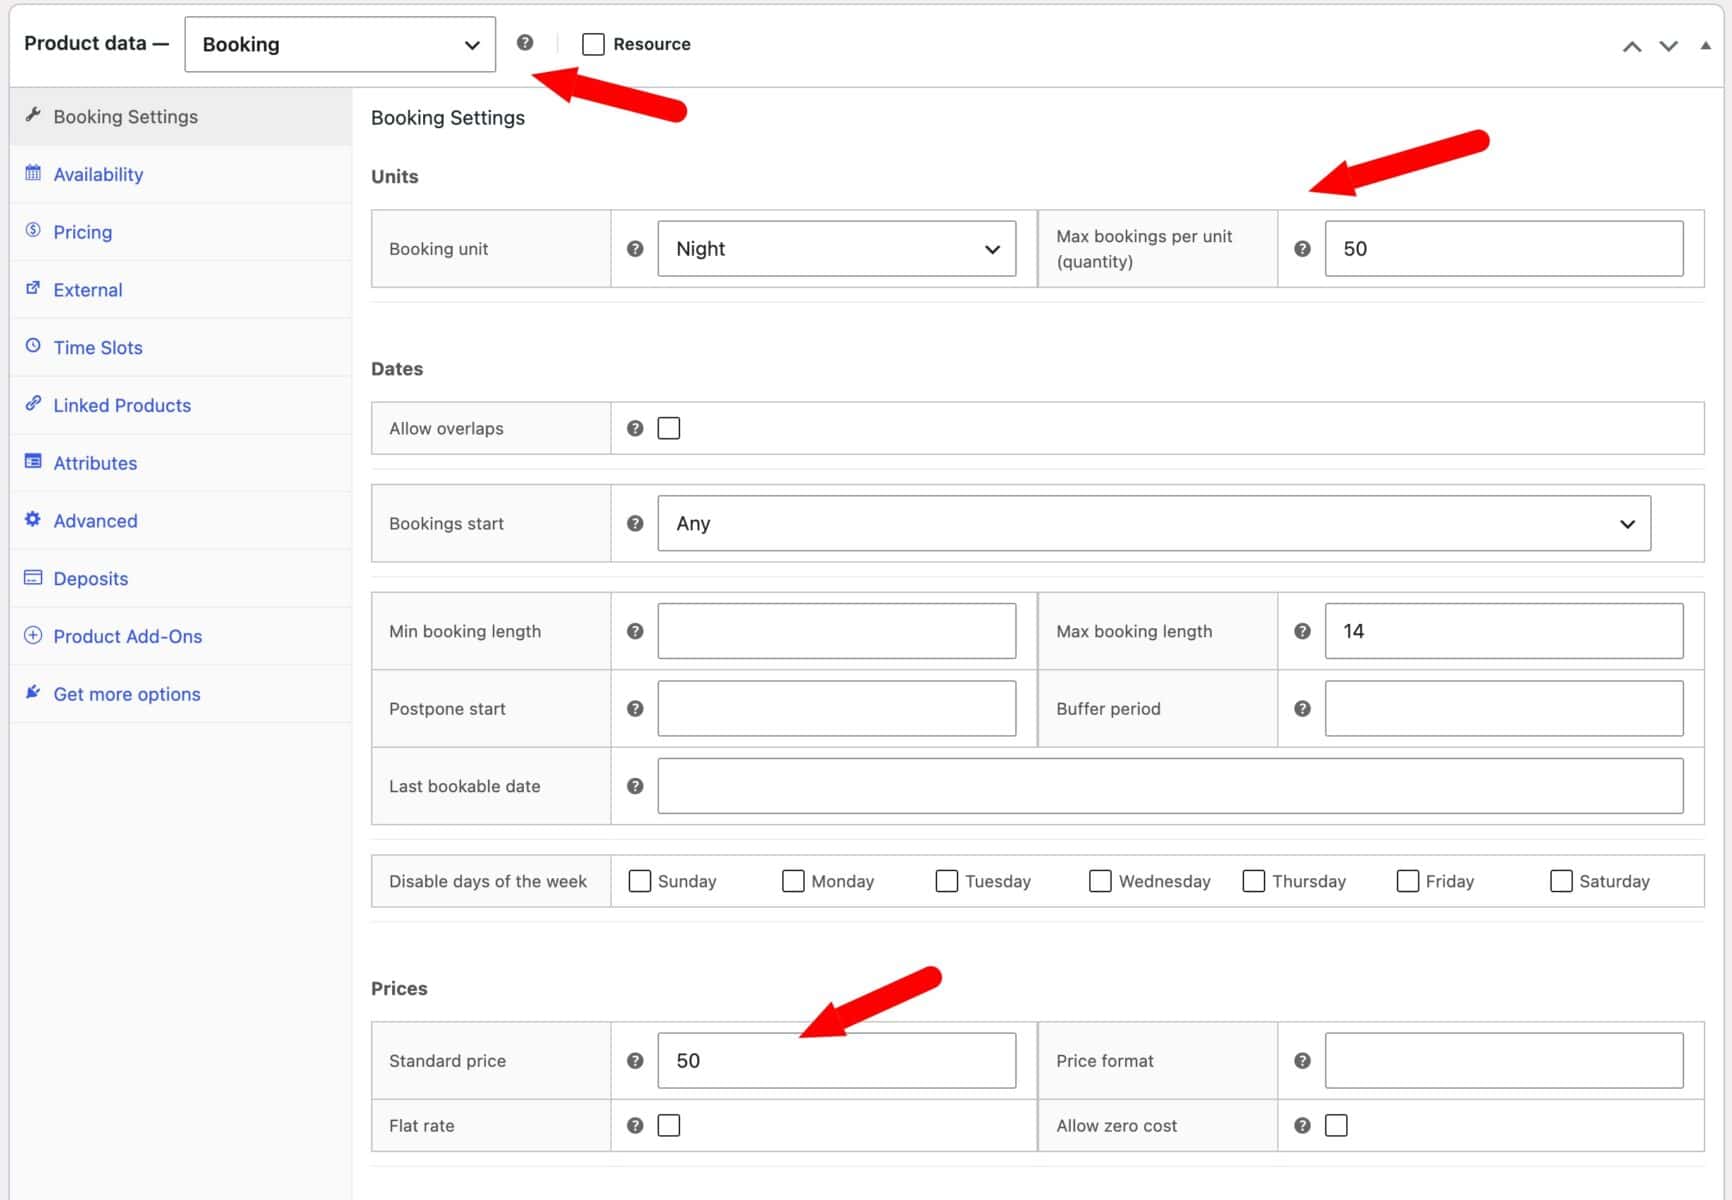
Edit your campsite pitch product, or create a new one and set its product type to ‘Booking’. Define the booking unit, e.g. ‘Night’, and decide on minimum and maximum booking duration. Set a price per night for the booking.
Set the total number of pitches available in the ‘Max bookings per unit’ setting. This defines the availability of pitches – so you never get overbooked.
Step #2: Specify the field settings
To add extra options to your bookable product:
- Click the ‘Product Add-Ons’ tab in the ‘Product data’ panel. This is where you’ll build your list of extra options
- Click ‘Add Group’ then ‘Add Field’
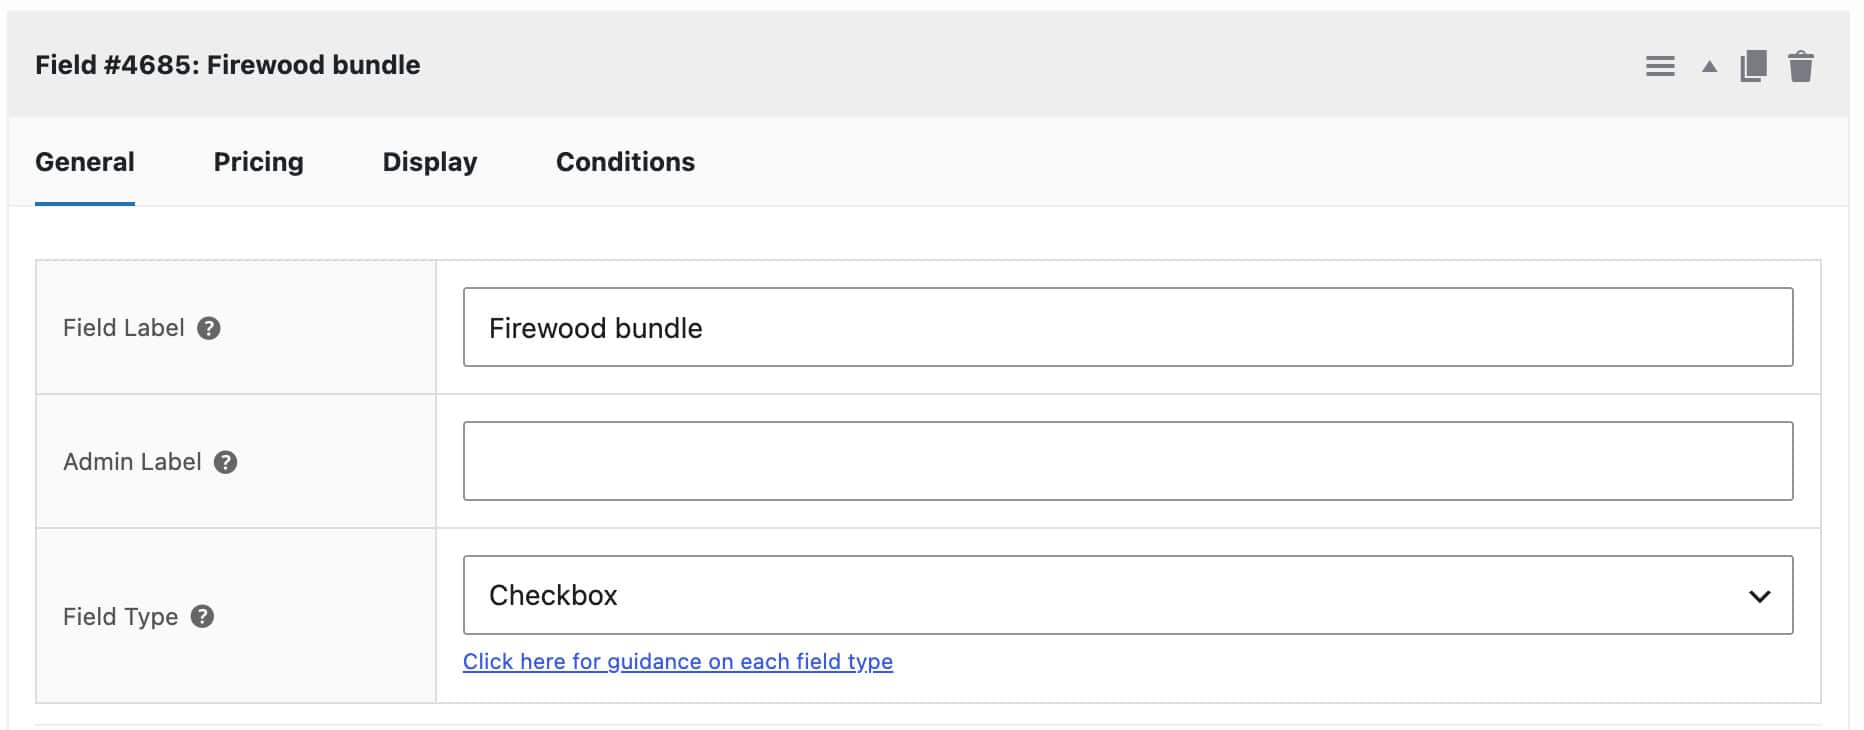
- Enter a name for the option in the ‘Field Label’ setting, for example ‘Firewood bundle’ or ‘Extra vehicle pass’
- Choose a field type such as checkbox, dropdown, or radio buttons depending on how you want campers to select it. There’s a list of all the field types here.
- Enable the ‘Required Field?’ setting if the user must make a selection from this field
Example #1: Firewood bundle
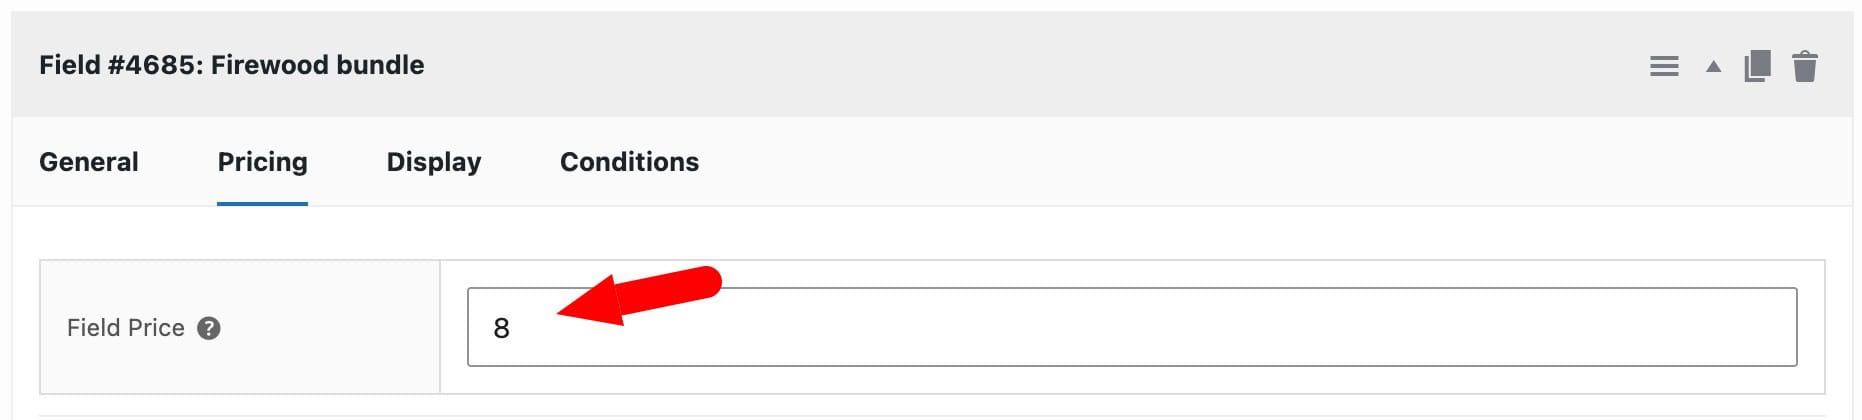
Set the field type to ‘Checkbox’ and label it ‘Firewood bundle’. This works well as a simple yes/no upsell that campers can add to their pitch booking at checkout.
Example #2: Electric hookup
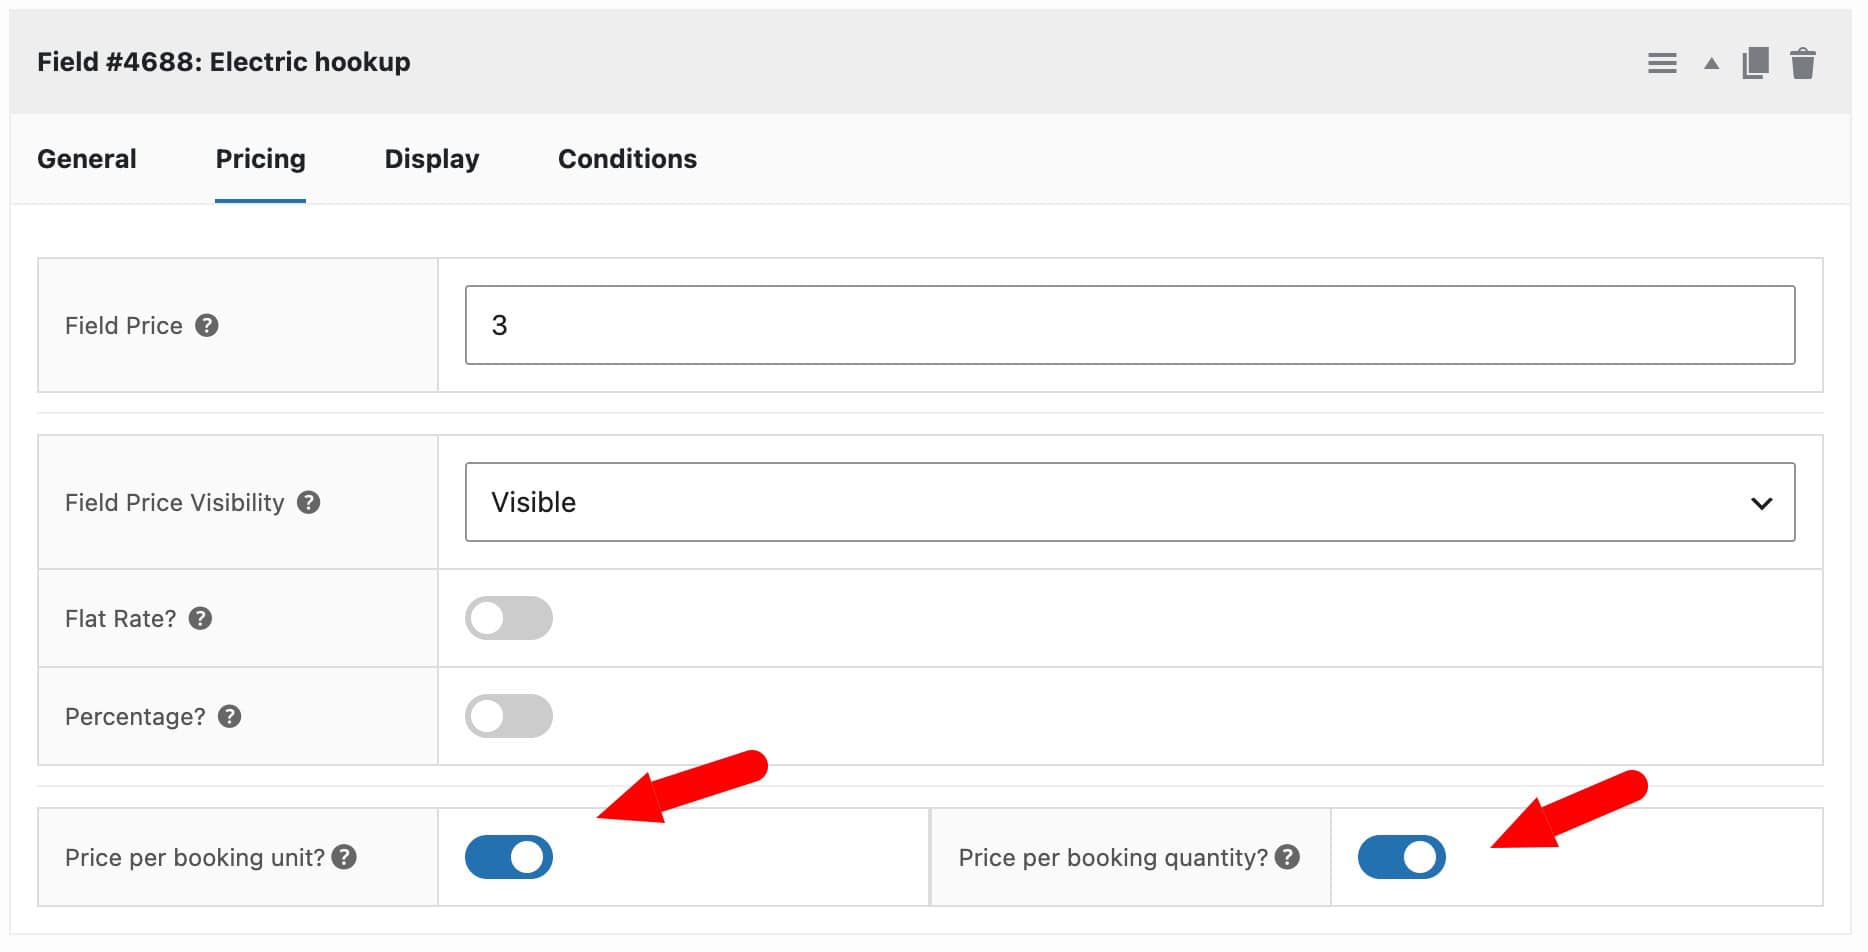
Set the field type to ‘Checkbox’ or ‘Dropdown’ and label it ‘Electric hookup’. Since this extra applies to every night of the stay rather than a single flat cost, you’ll set it up as a per-unit charge in the next step.
Step #3: Set pricing
Click on to the ‘Pricing’ tab. For an add-on field with a single, one-off price, just enter a value in the ‘Field Price’ setting. When the user chooses this option, the price will be added to their overall booking cost.
If you want to charge per night of their stay, just enable the ‘Price per unit’ option.
If the user has booked more than one pitch and you want to charge the add-on field fee for each booking, enable the ‘Price per booking quantity field.
Step #4: Publish and check the front end
Publish your product and check the pitch page. Your extras will appear below the booking calendar, and the total updates automatically as campers make their selections.
That’s how to add extra options to your bookable products. You can also find out how to use Add-Ons Ultimate to add bookable products as options. Check out these two articles:
- How to add a rental bundle to WooCommerce bookings
- How to assign resources to bookable products in WooCommerce
Real world examples of add-on fields on bookable products
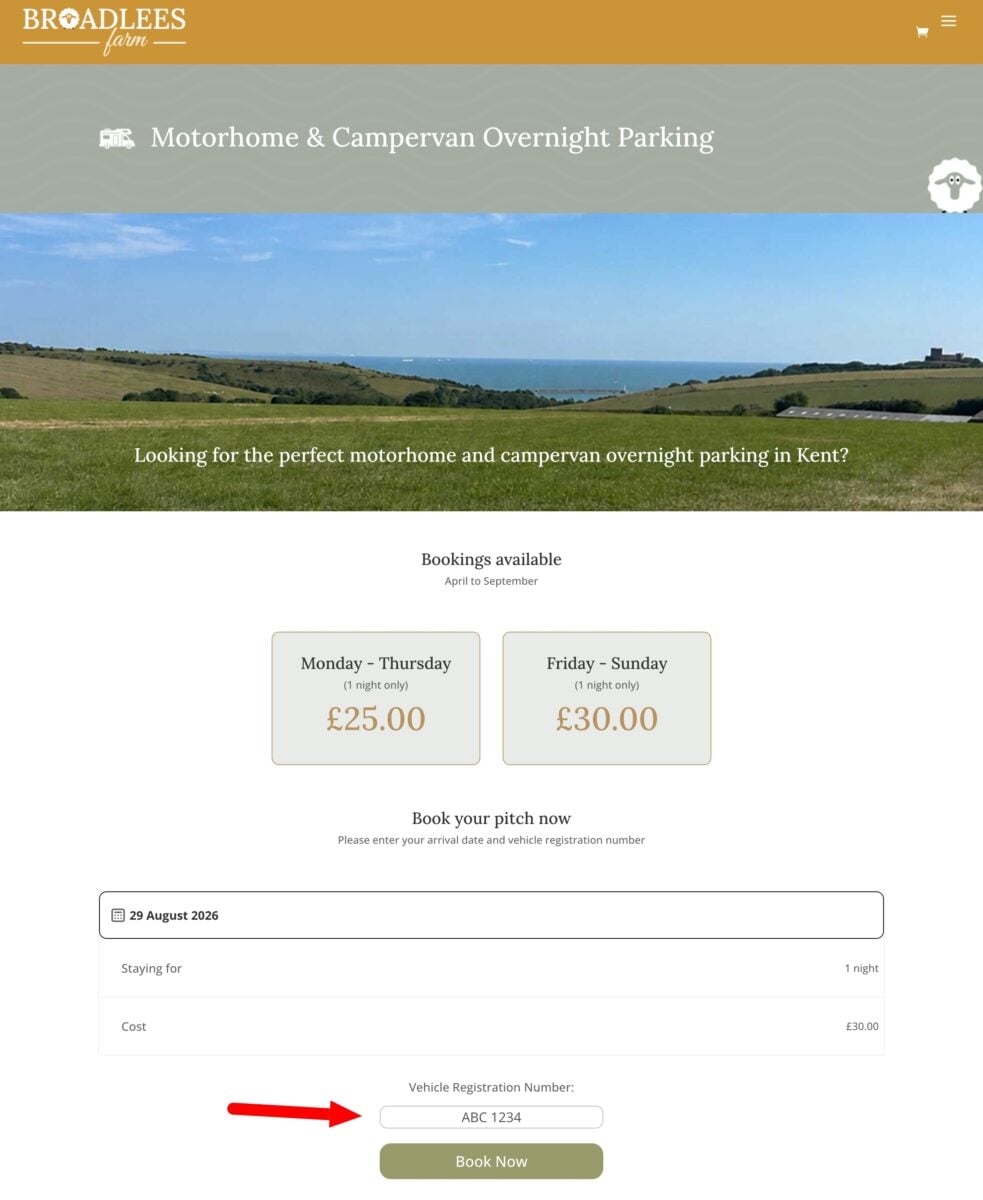
Here’s a very simple example. Broadlees Farm use Bookings for WooCommerce and Product Add-Ons Ultimate to accept overnight bookings for motorhowm and campervan parking.
Users can book in online and must enter their vehicle registration as an add-on field.