Bookings for WooCommerce allows you to offer and charge for bookable Zoom calls. The user can select a date and time then checkout and pay – and the Zoom call will be automatically scheduled and a link attached to the user’s confirmation email. You’ll also receive a link to the meeting and a link to join as host.
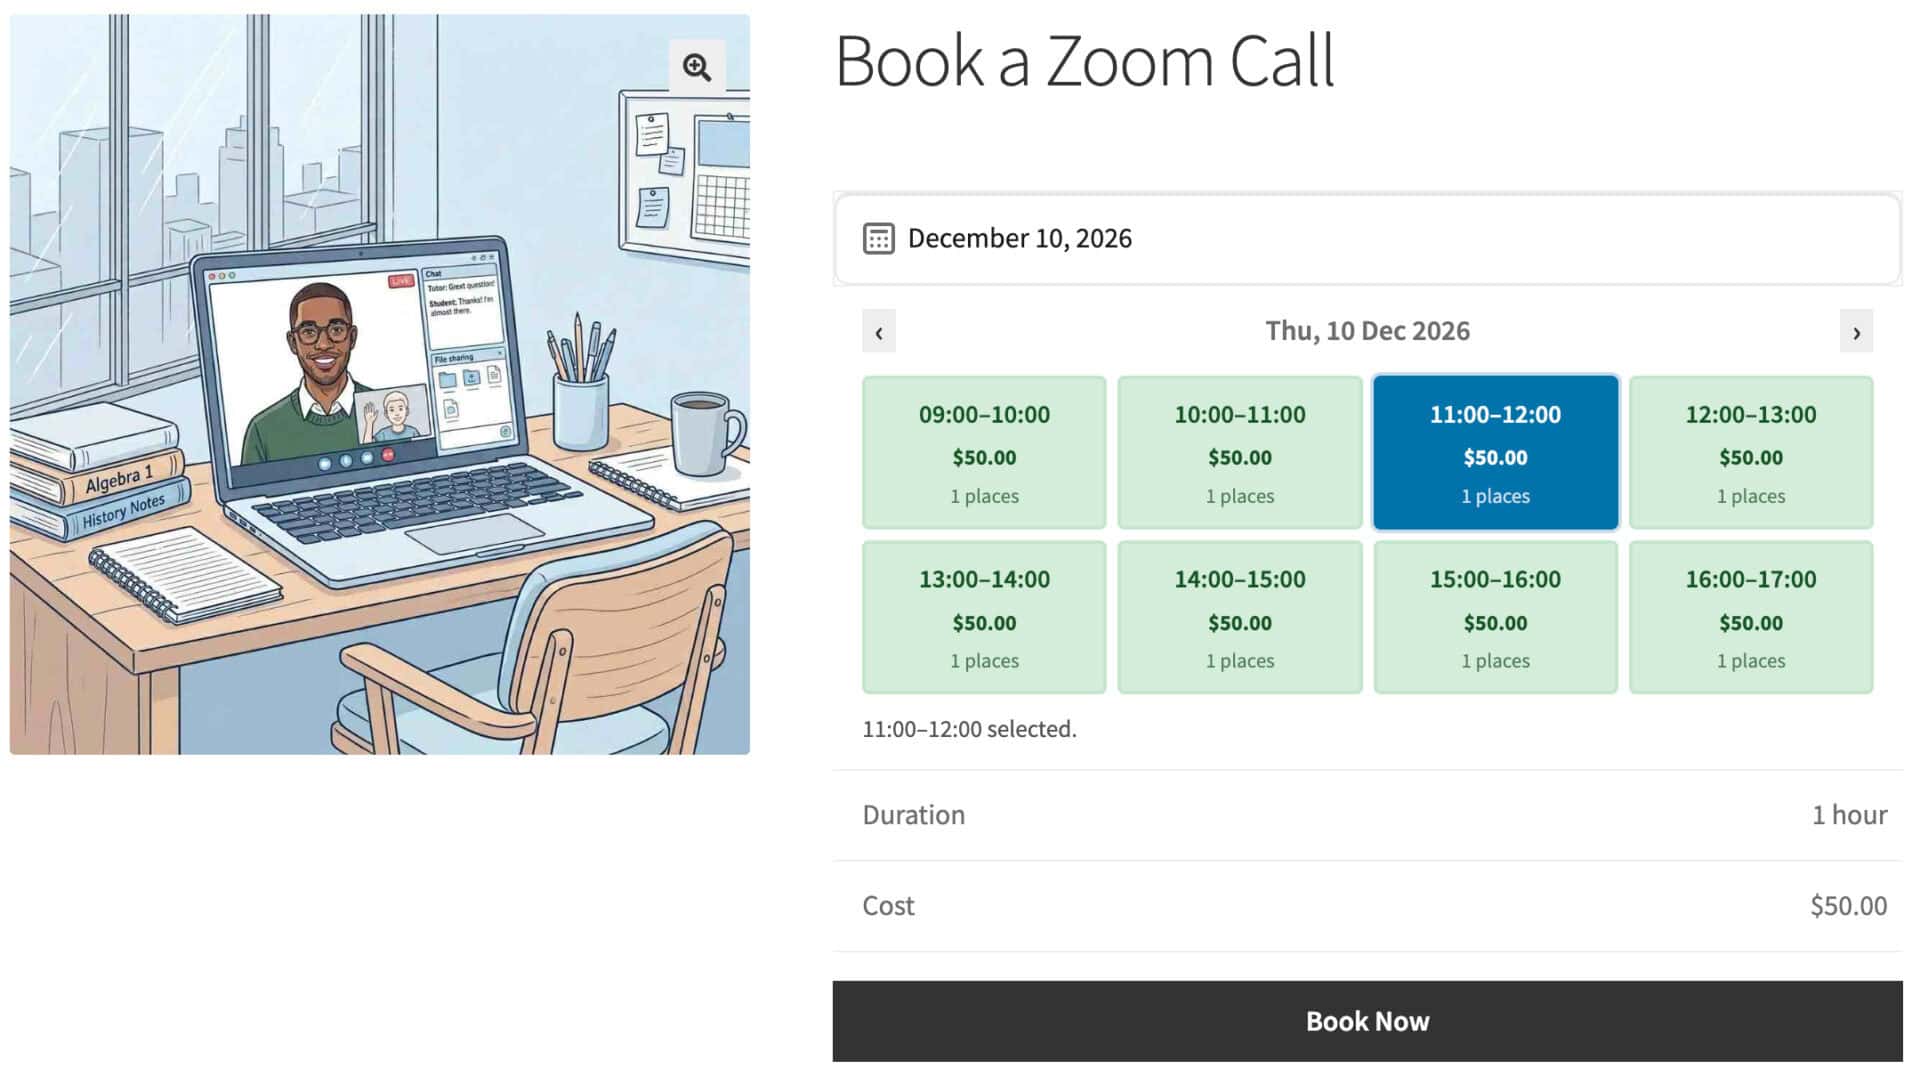
Schedule a Zoom meeting through a WooCommerce booking
To automatically schedule Zoom calls as part of your WooCommerce booking, follow the steps below.
Step #1: Create a Zoom Server-to-Server OAuth app
You can follow Zoom’s guide to create a Server-to-Server OAuth app or use the steps below. Your Zoom account needs admin-level role permissions to add the admin scope the plugin uses:
- Sign in to the Zoom App Marketplace with the Zoom account that will host the meetings
- Click the ‘Developers’ link in the lower left corner to open the ‘Created apps’ page
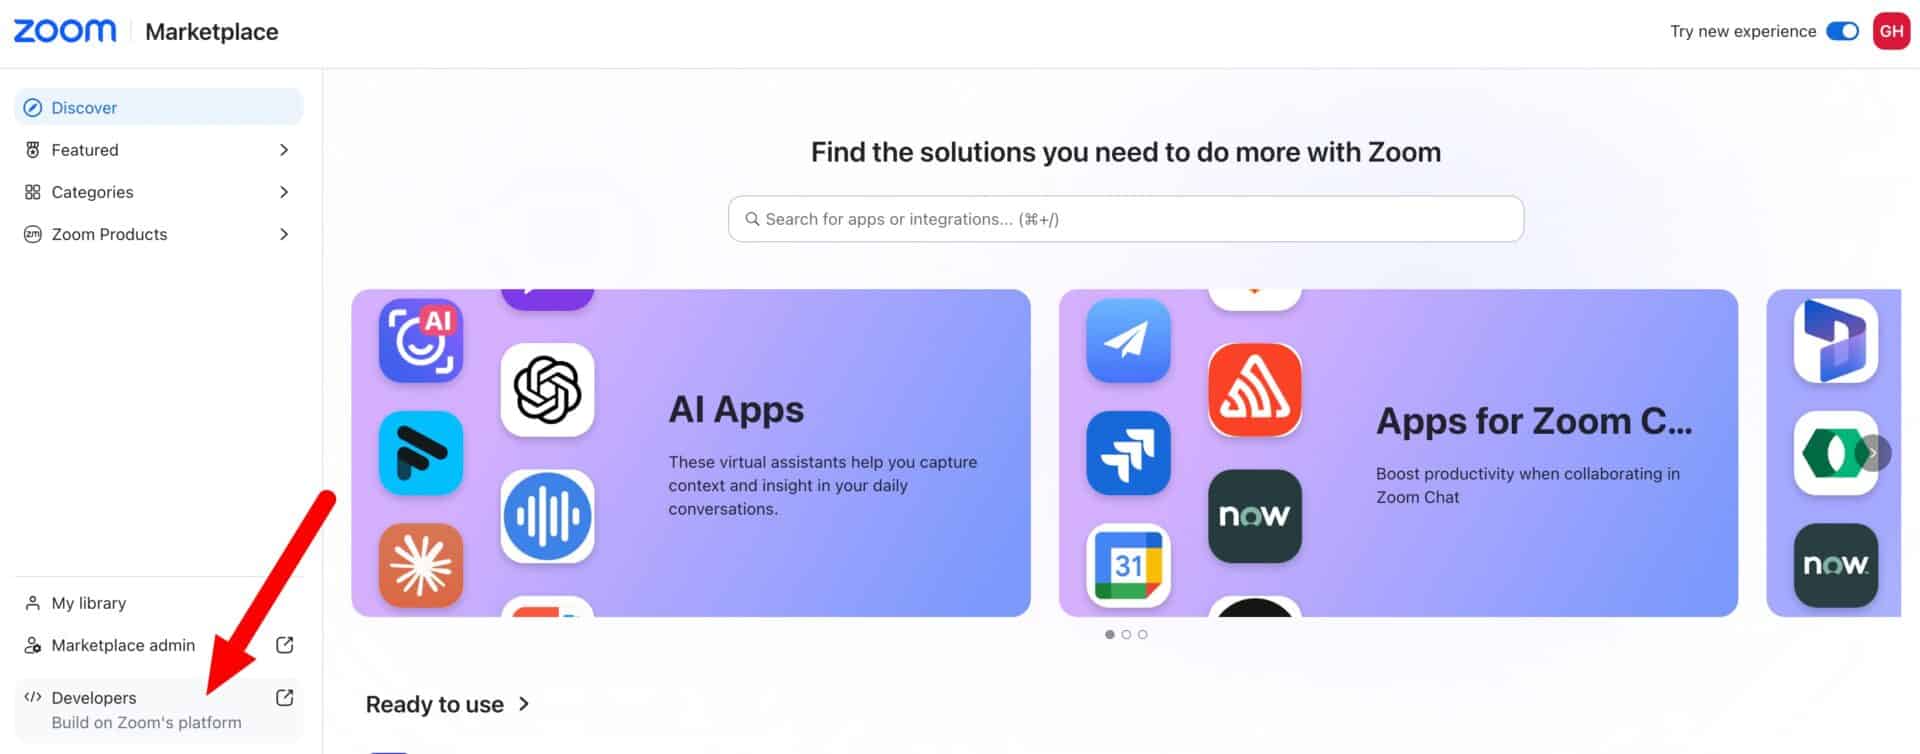
- Click the plus sign next to ‘Developer’ in the upper left corner and select ‘Build an app’

- Select ‘Server-to-Server OAuth app’ and click ‘Create’
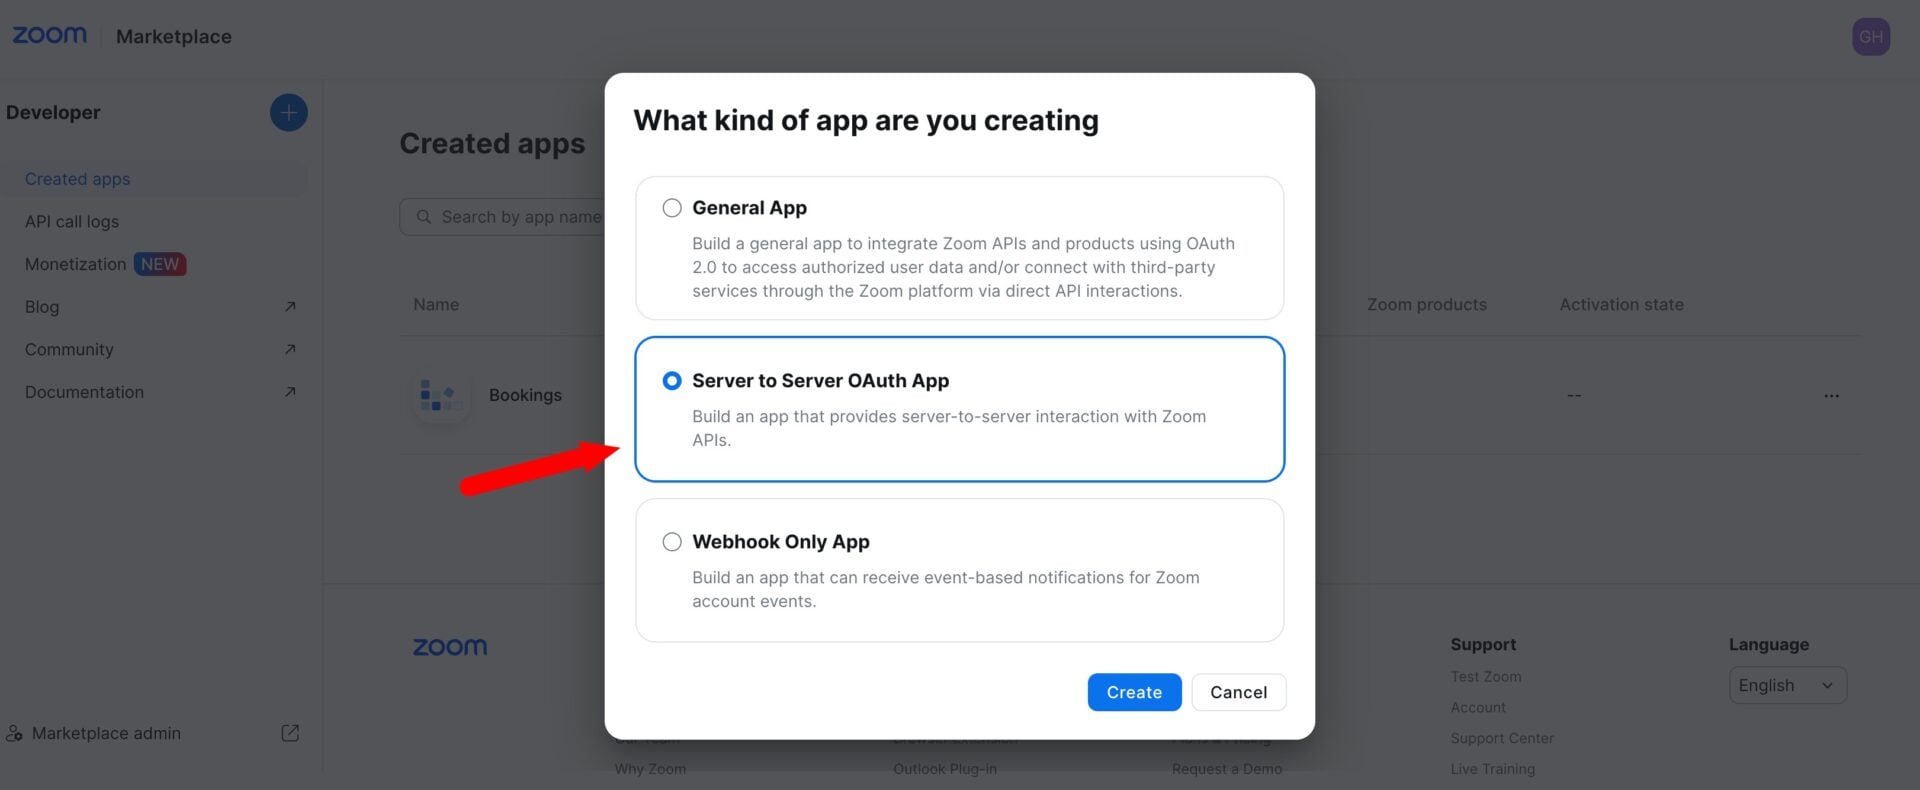
- Enter a name for your app
- Copy the Account ID, Client ID, and Client Secret from the ‘App credentials’ section
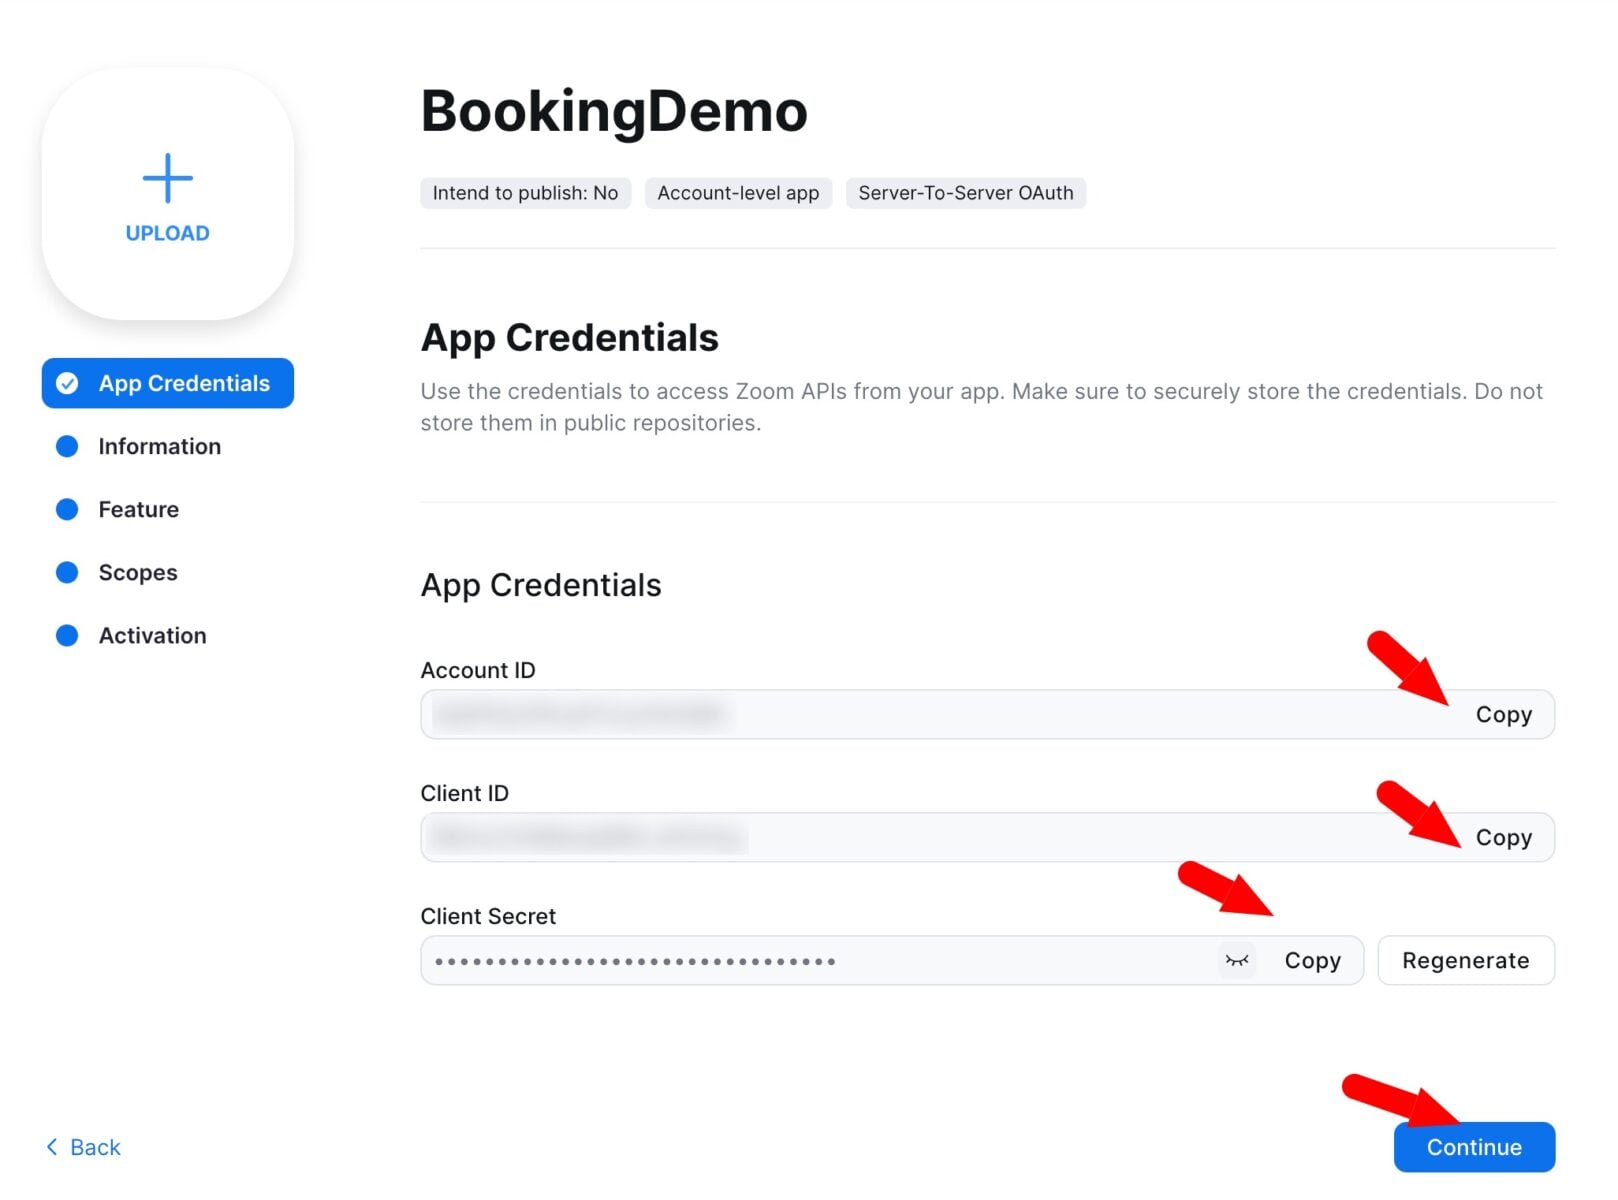
- Click ‘Continue’ and step through the set-up, adding a short description, company name, and developer contact details in the ‘Information’ section. The contact name and email address are required for activation
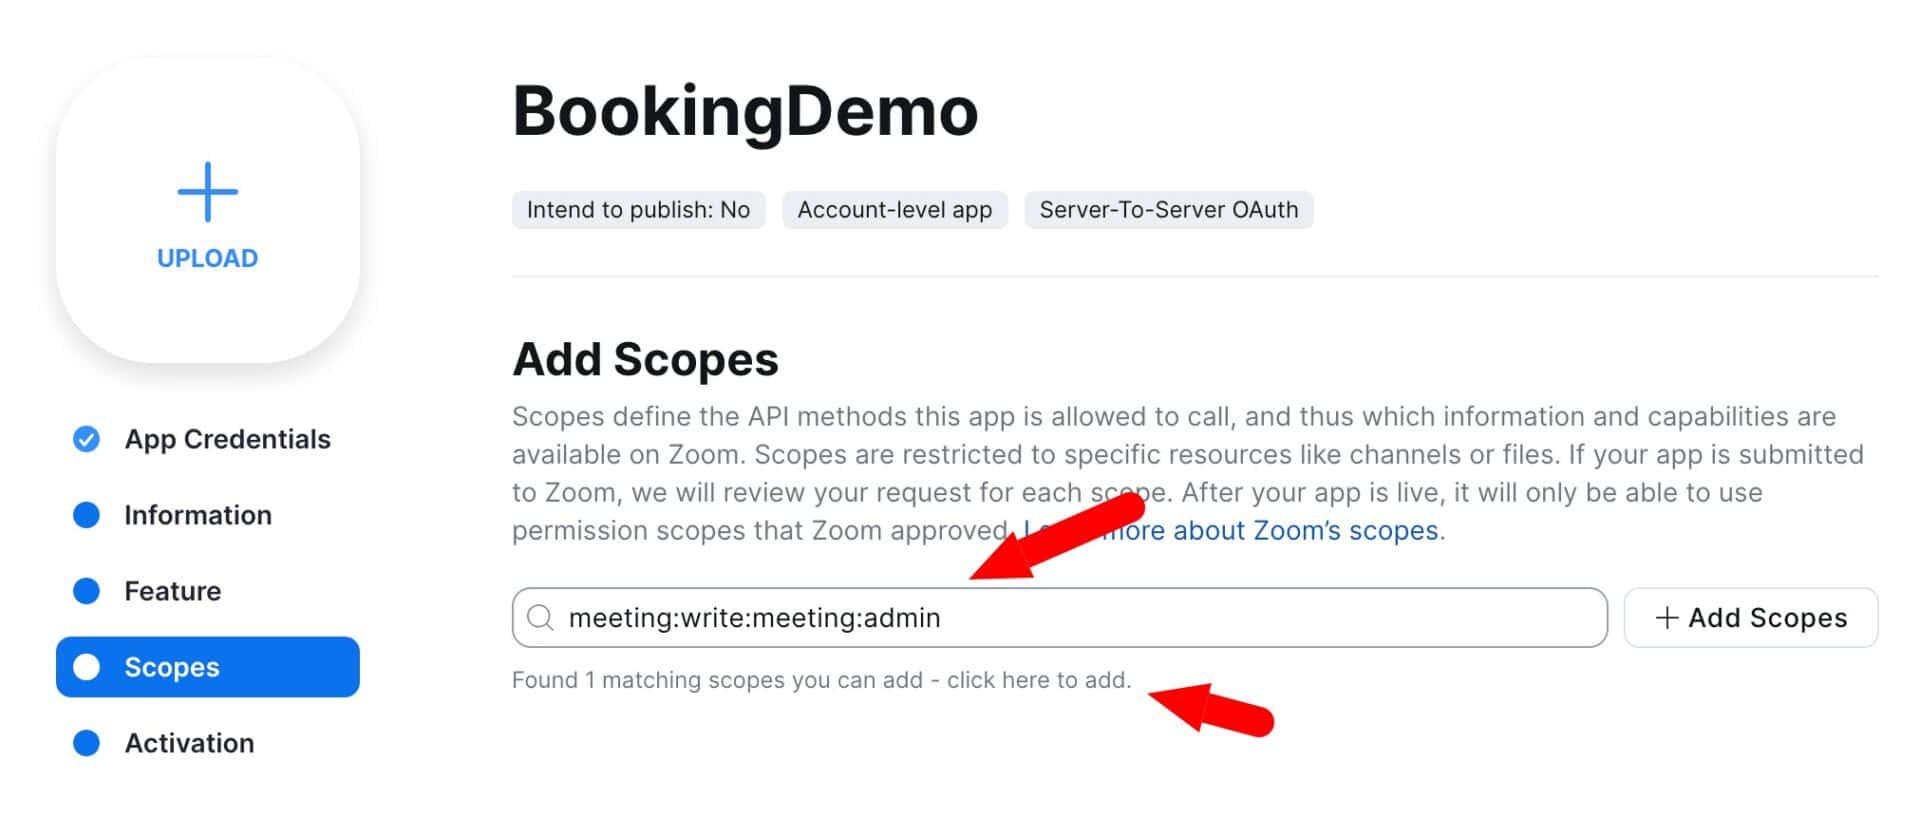
- On the ‘Add Scopes’ step, enter
meeting:write:meeting:adminin the search field. Then click the ‘click here to add’ link below the search field
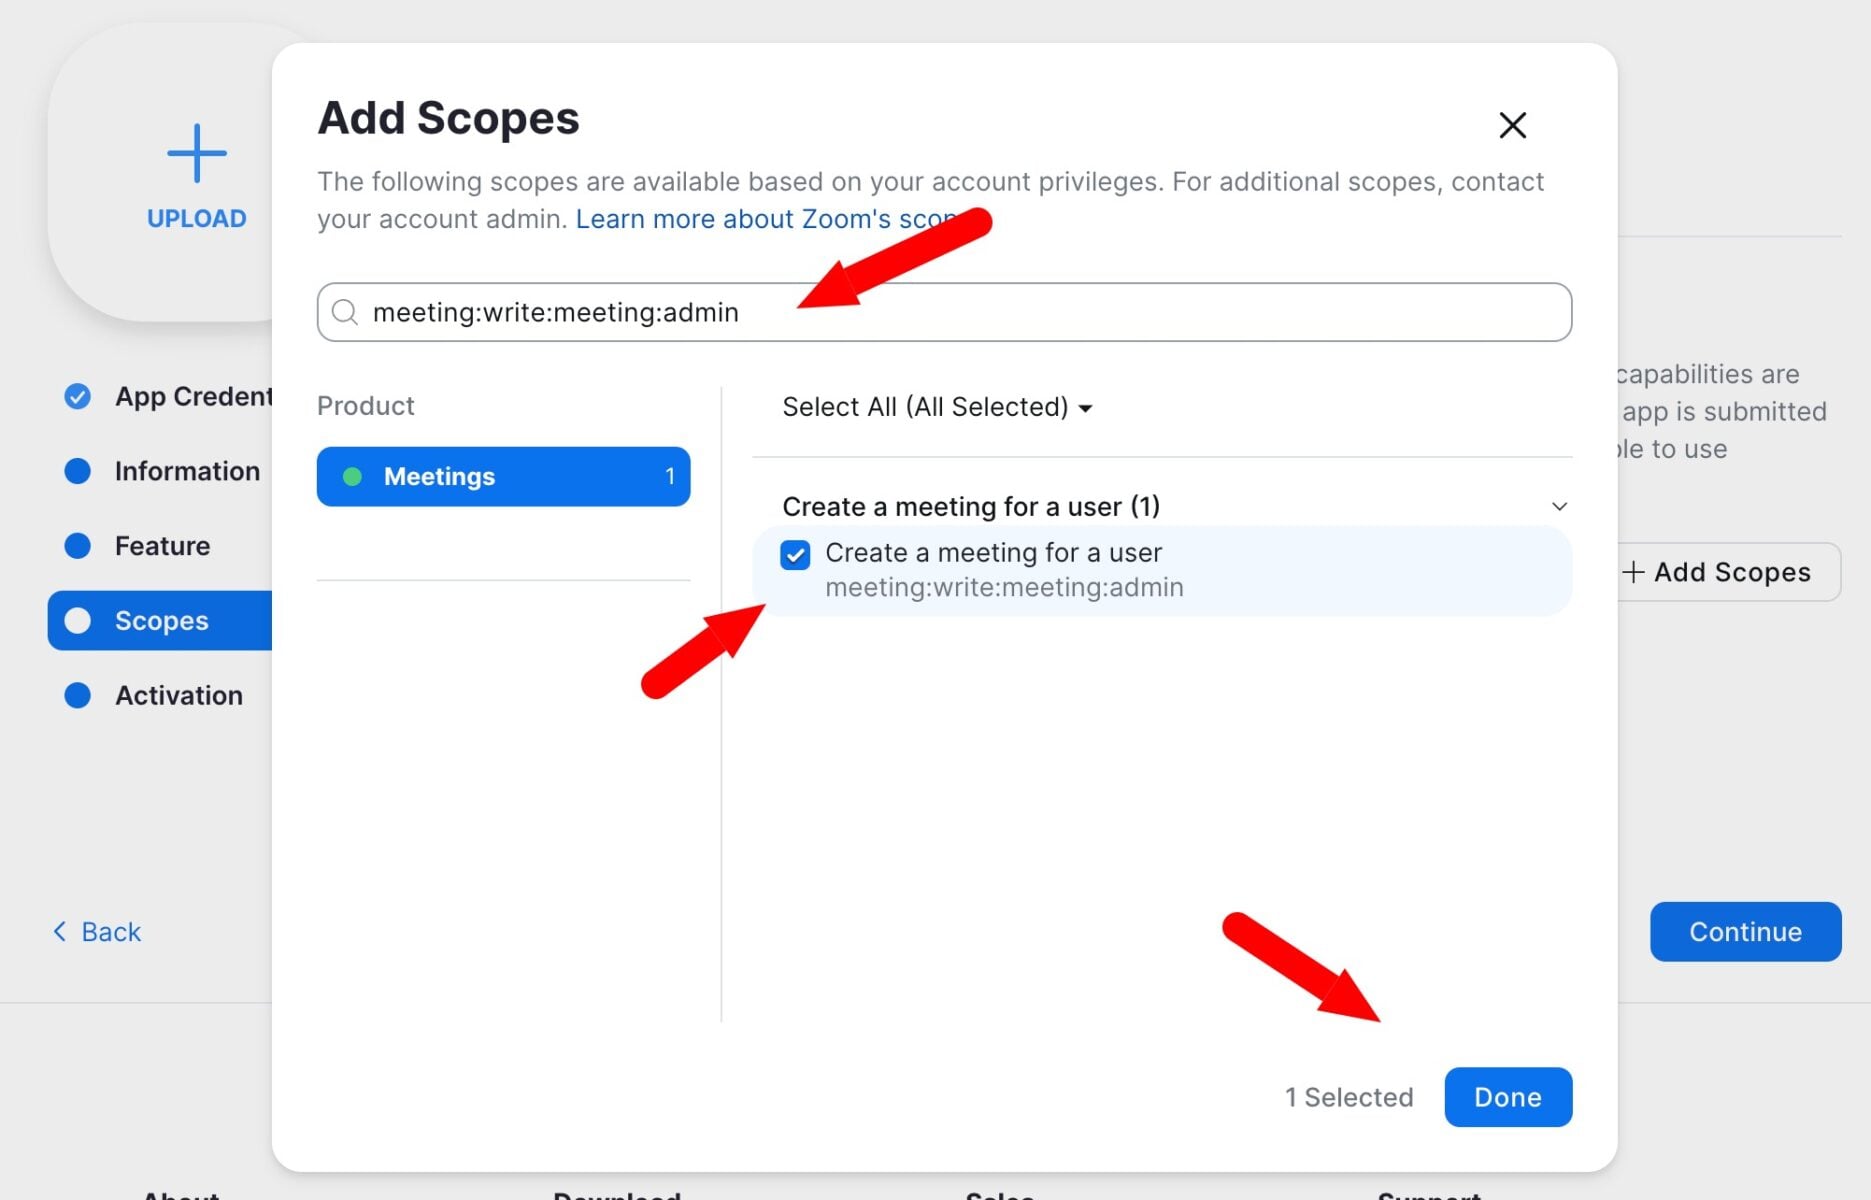
- Enter
meeting:write:meeting:adminscope again then select the checkbox against the highlighted scope. Click ‘Done’
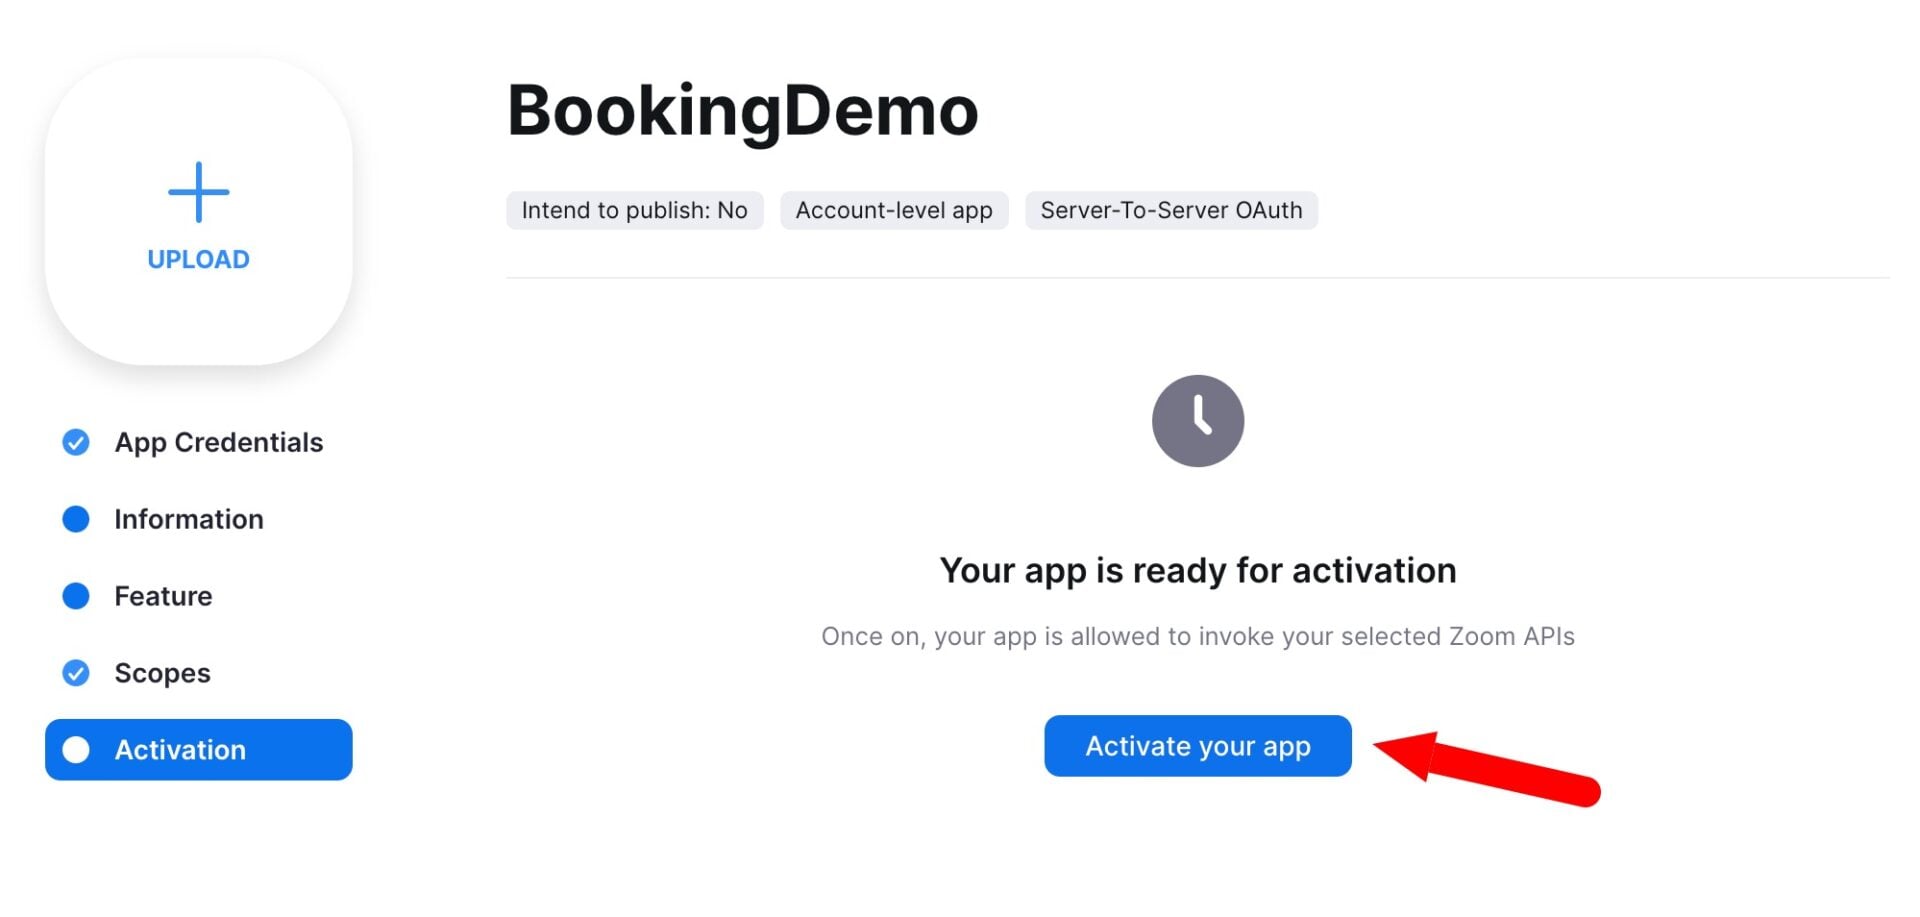
- Activate the app in the ‘Activation’ section
Step #2: Connect the plugin to Zoom
With your app set up, you can enter your credentials into the Bookings settings.
- Go to Bookings > External > Zoom
- Paste the Account ID, Client ID, and Client Secret values
- Save your settings
- Click ‘Test connection’ to confirm the credentials work
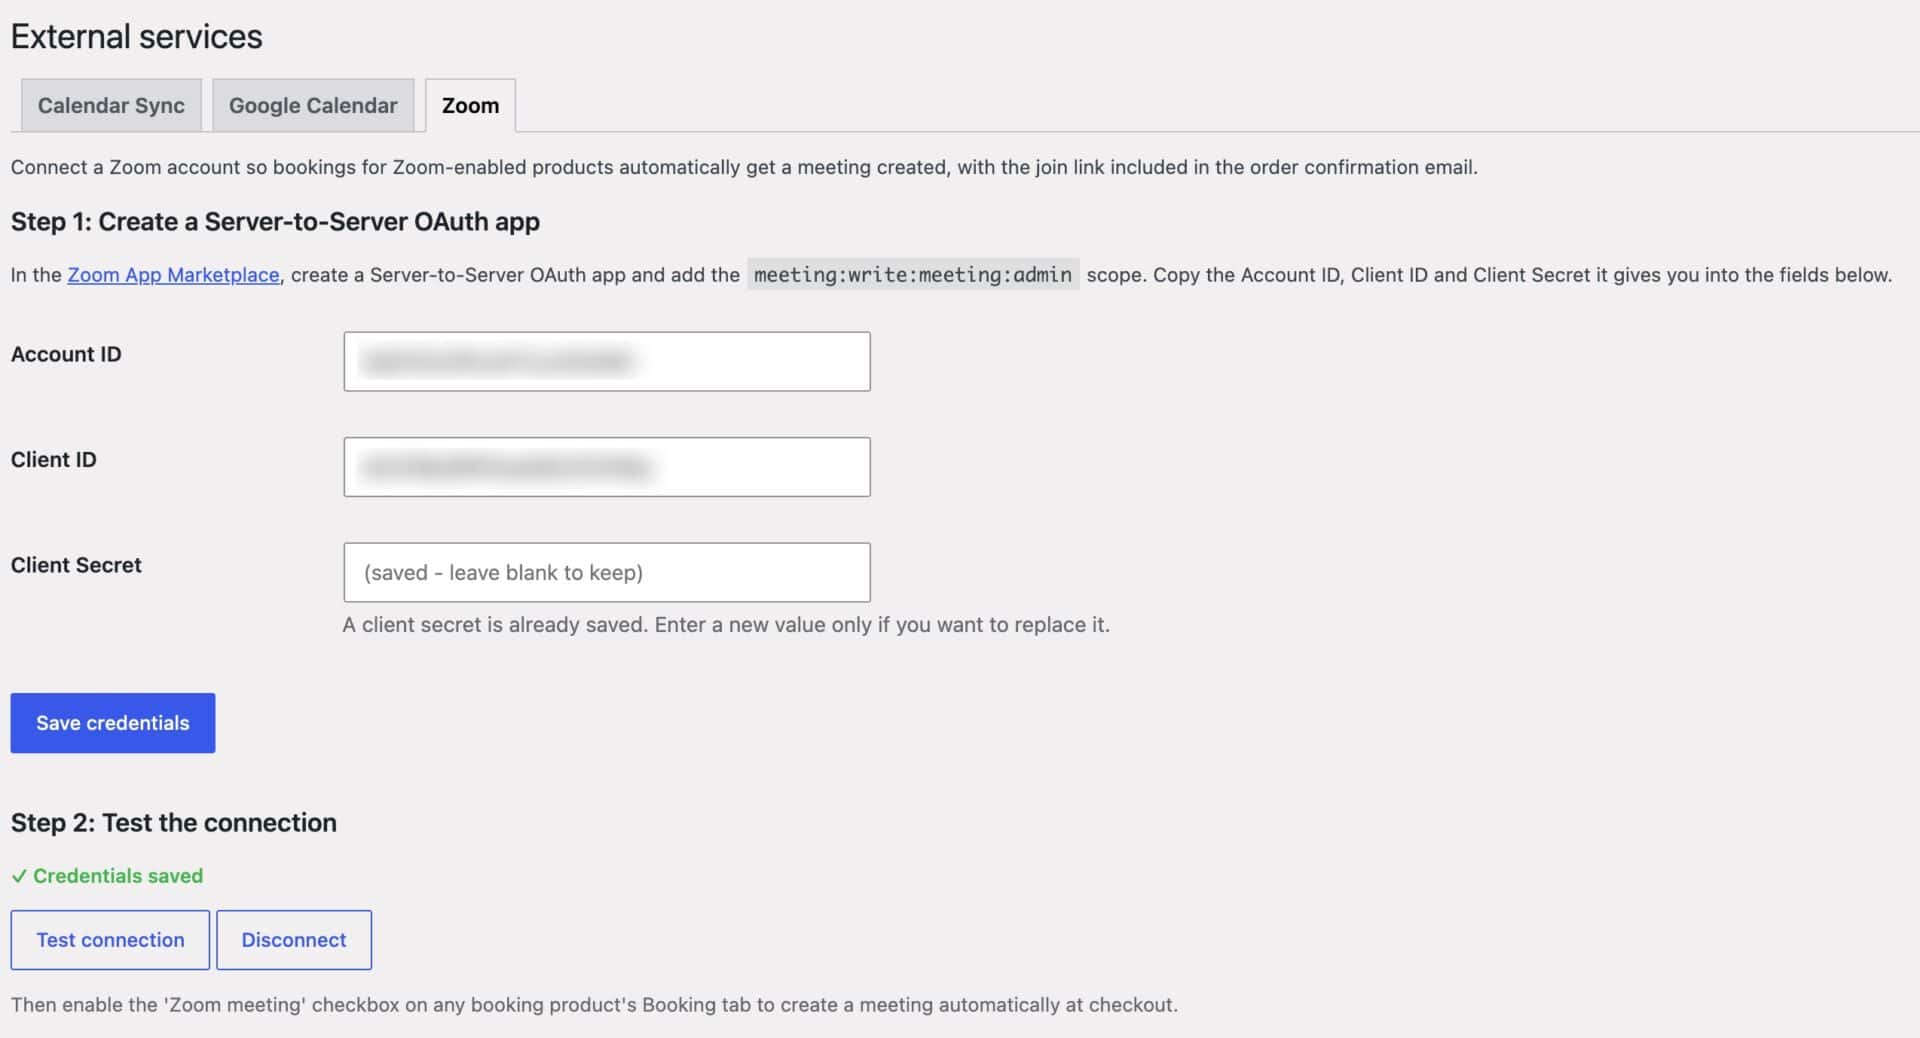
If you need to remove the connection, you can click ‘Disconnect’. This will clear all saved credentials and the cached access token.
Step #3: Enable Zoom on a product
Finally, you just need to enable Zoom on a bookable product.
- Set up the product and create time slots – these are the appointments that the plugin will use to determine when and how long the zoom calls are
- Click on the ‘External’ tab
- Check ‘Zoom meeting’ under the ‘Zoom’ heading
- Save the product
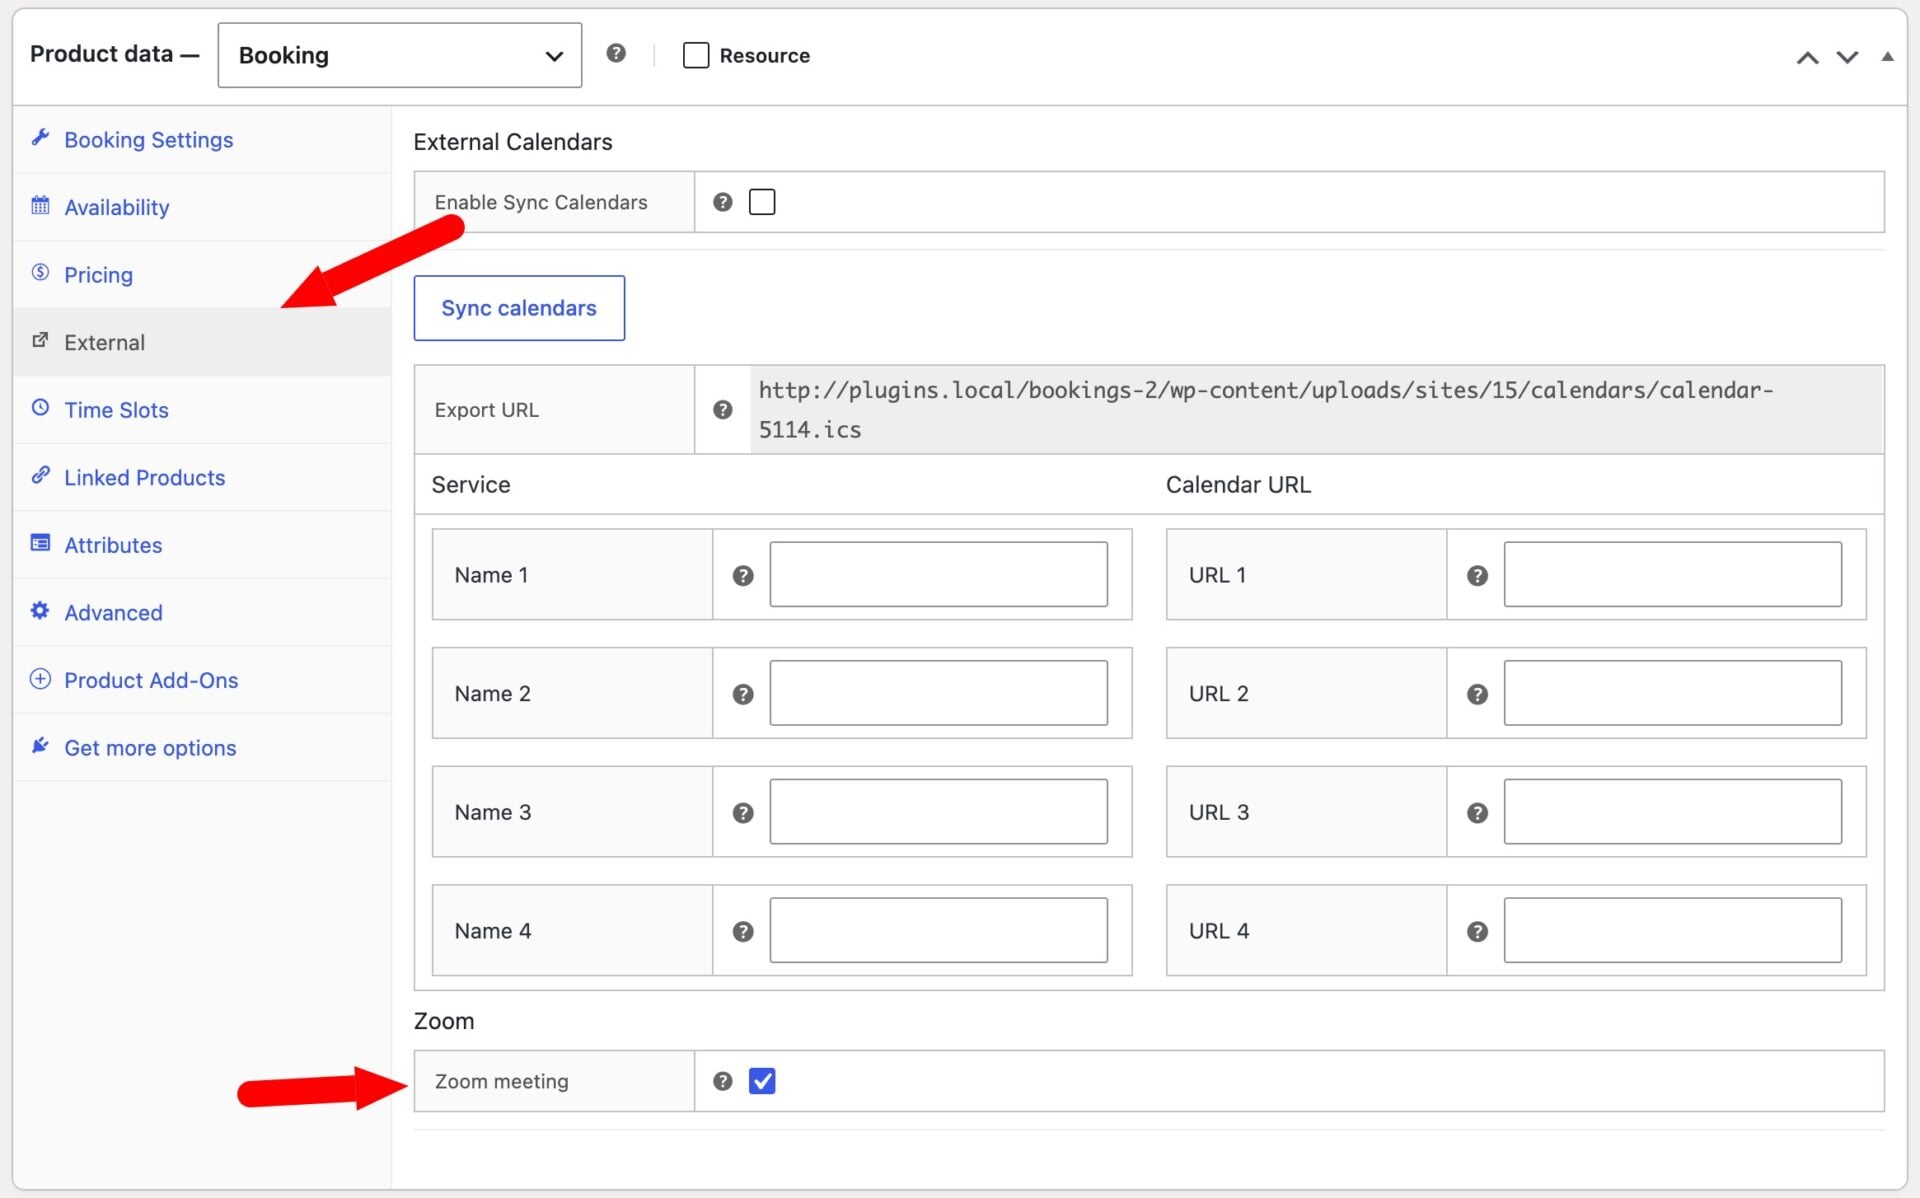
Your customers can now book an online meeting with you, pay at checkout and instantly receive an email containing a link to the Zoom call.
How does the Zoom integration work?
The plugin creates a Zoom meeting when a customer places an order for a Zoom-enabled product. It uses the booking’s date and time slot for the meeting’s start time and duration.
If the product has no time slot, such as a date-only or flat-rate booking, the meeting defaults to 60 minutes starting at 10am on the booking date.
Each order item gets one meeting only. A booking never ends up with two meetings.
Where does the join link appear?
The join link is saved to the booking and appears:
- In the order confirmation email, other order emails, and the admin order view, alongside the line item
- In the ‘Order details’ panel on the booking’s edit screen in the admin
The booking’s edit screen also shows a ‘Start as host’ link for the person running the call. This link only appears there.