How to sell photography sessions and prints in WooCommerce
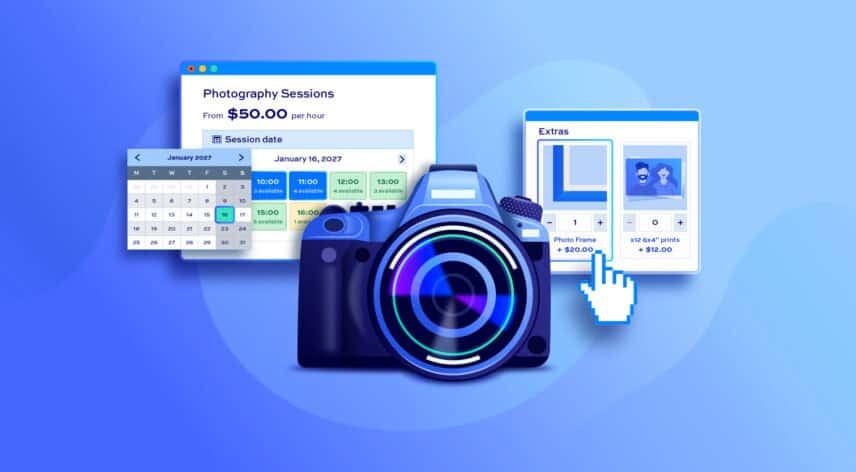
In this article, you’ll learn how to take online photography session bookings, create private client proofing galleries, and sell customizable prints – all from your WooCommerce store. We’ll cover three plugins that handle each of these needs, and show you how to combine them into a single end-to-end workflow.
You can use each plugin independently or together, depending on what your business requires.
What does a photographer need from WooCommerce?
Here are the three most common needs – and the plugin that solves each one:
- Session bookings – clients need to book a date and time slot, not just add a product to a cart. Bookings for WooCommerce handles this.
- Client-specific galleries – after a shoot, each client should only see their own images. WooCommerce Members Only restricts products and content to specific users.
- Customizable print products – customers want to choose print sizes, finishes, and framing before they buy. WooCommerce Product Add-Ons Ultimate adds those options to any product.
We’ll walk through each one in turn, with a short tutorial for each plugin.
Part 1: How to accept photography session bookings in WooCommerce
The Bookings for WooCommerce plugin will allow you to sell date and time-based sessions directly from your store. Clients choose the date and time for their photoshoot and booked times automatically become unavailable – so no one can double-book.
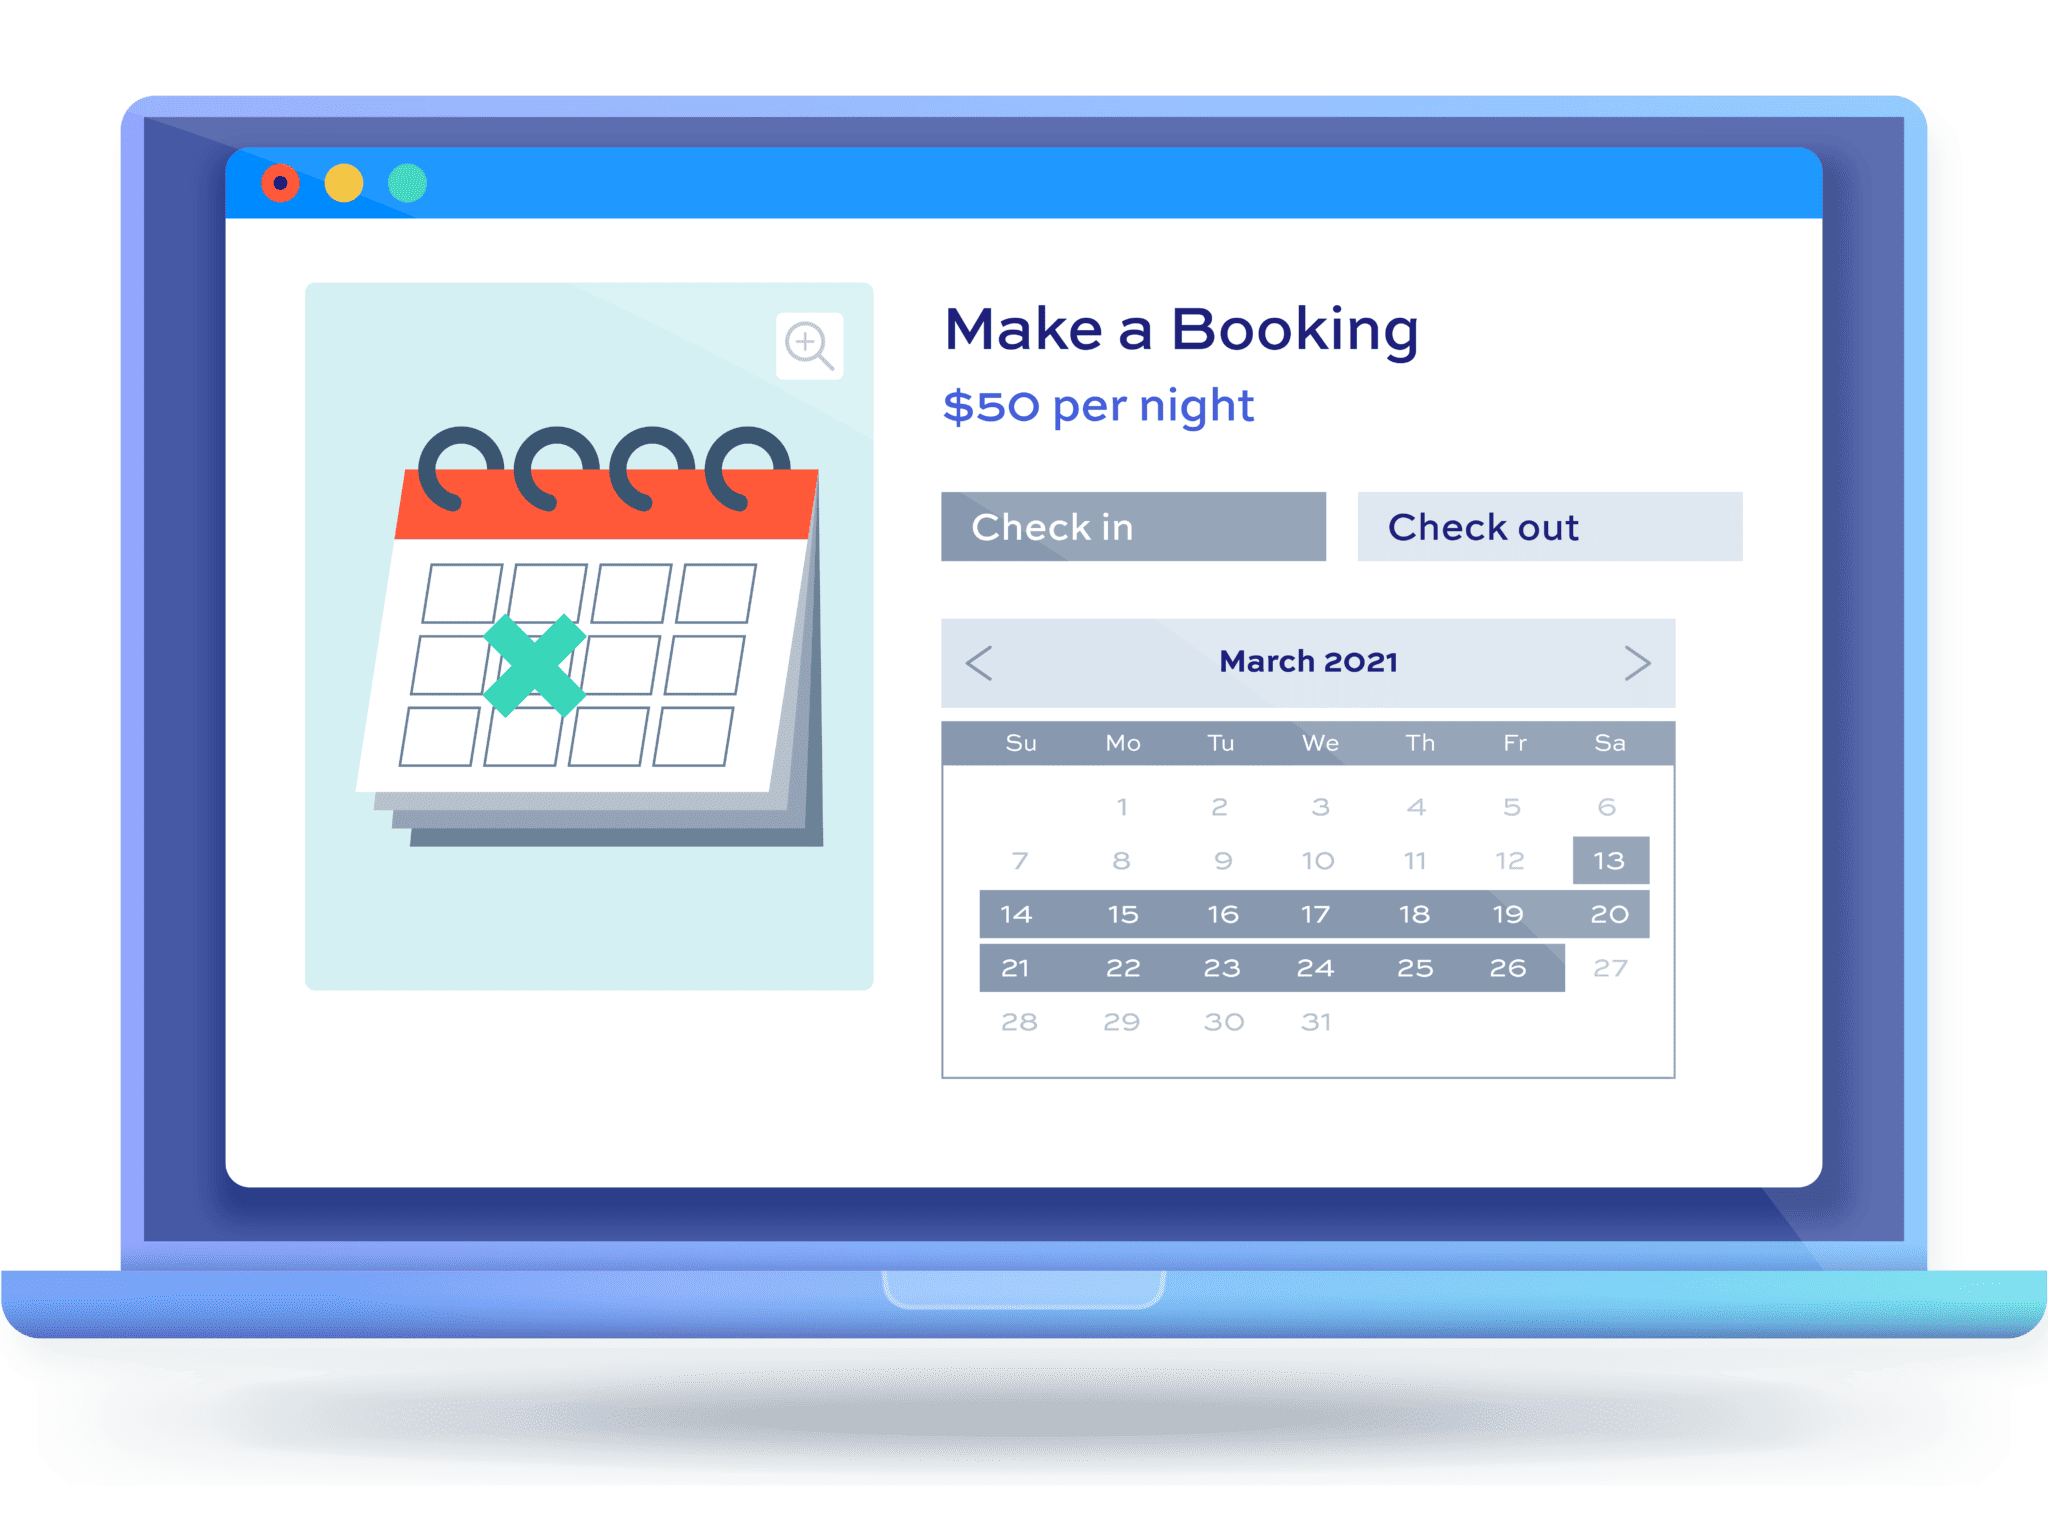
It’s compatible with all themes and page builders and makes it easy to start accepting bookings online for your photography studio or sessions.
How do I set up a bookable photography session in WooCommerce?
Once you’ve purchased and installed Bookings for WooCommerce:
Step #1: Go to Products > Add New and give your session a name – for example, “Portrait session” or “Family shoot.”
Step #2: In the Product data panel, open the dropdown and select Bookable product as the product type.
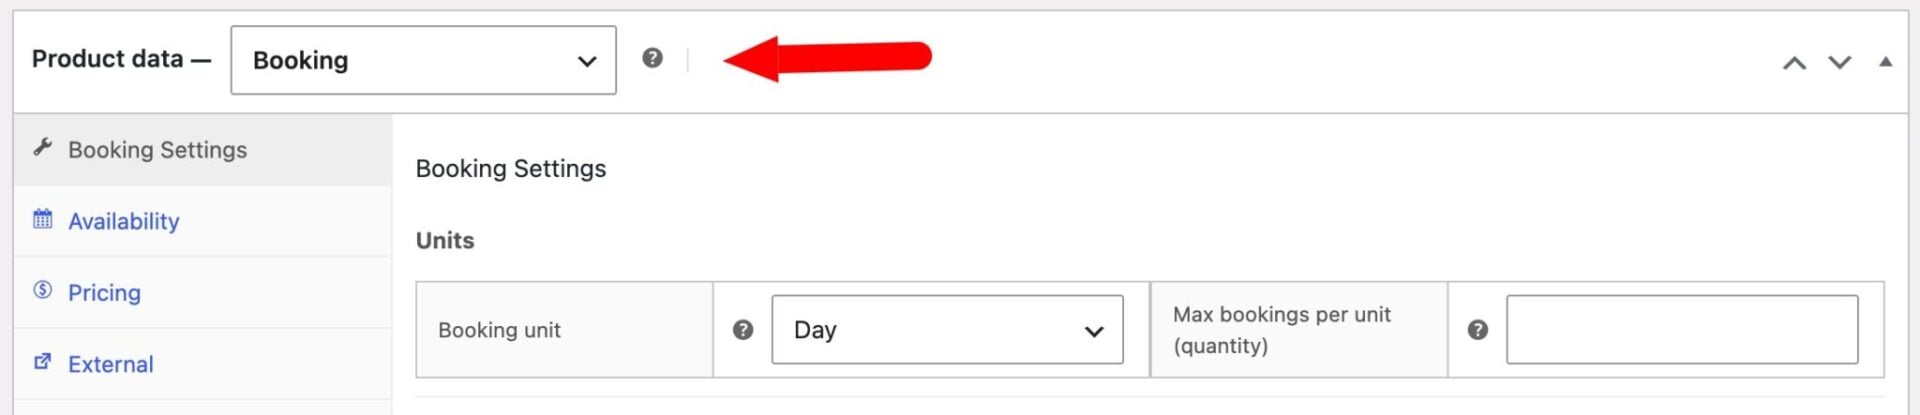
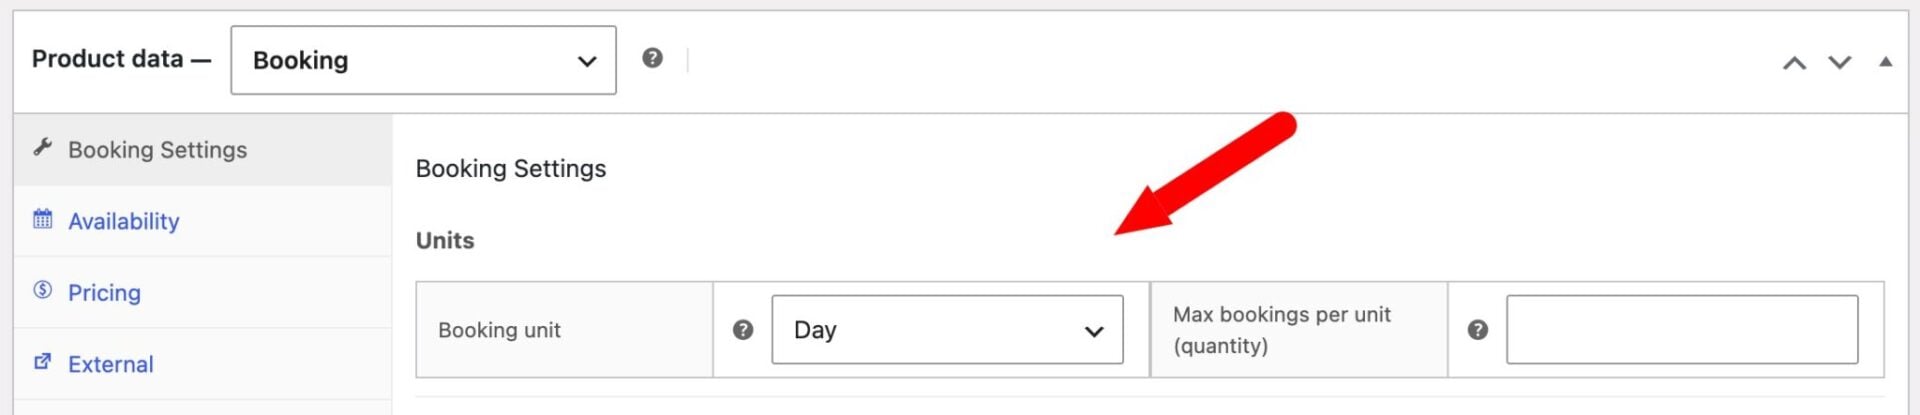
Step #3: Go to the Booking Settings tab and set the Booking unit to Day. Time slots are only available when the booking unit is set to Day.
Step #4: Go to the Time Slots tab, check Enable time slots, and configure your timings. Set the Slot duration to the length of a session – for example, 60 minutes. Set the First slot time (for example, 09:00) and the Last slot end time (for example, 17:00). With 60-minute slots, this creates eight slots running from 9:00 AM to 4:00 PM. We’ll look at how you can block time off, e.g. for a lunch-break, below.
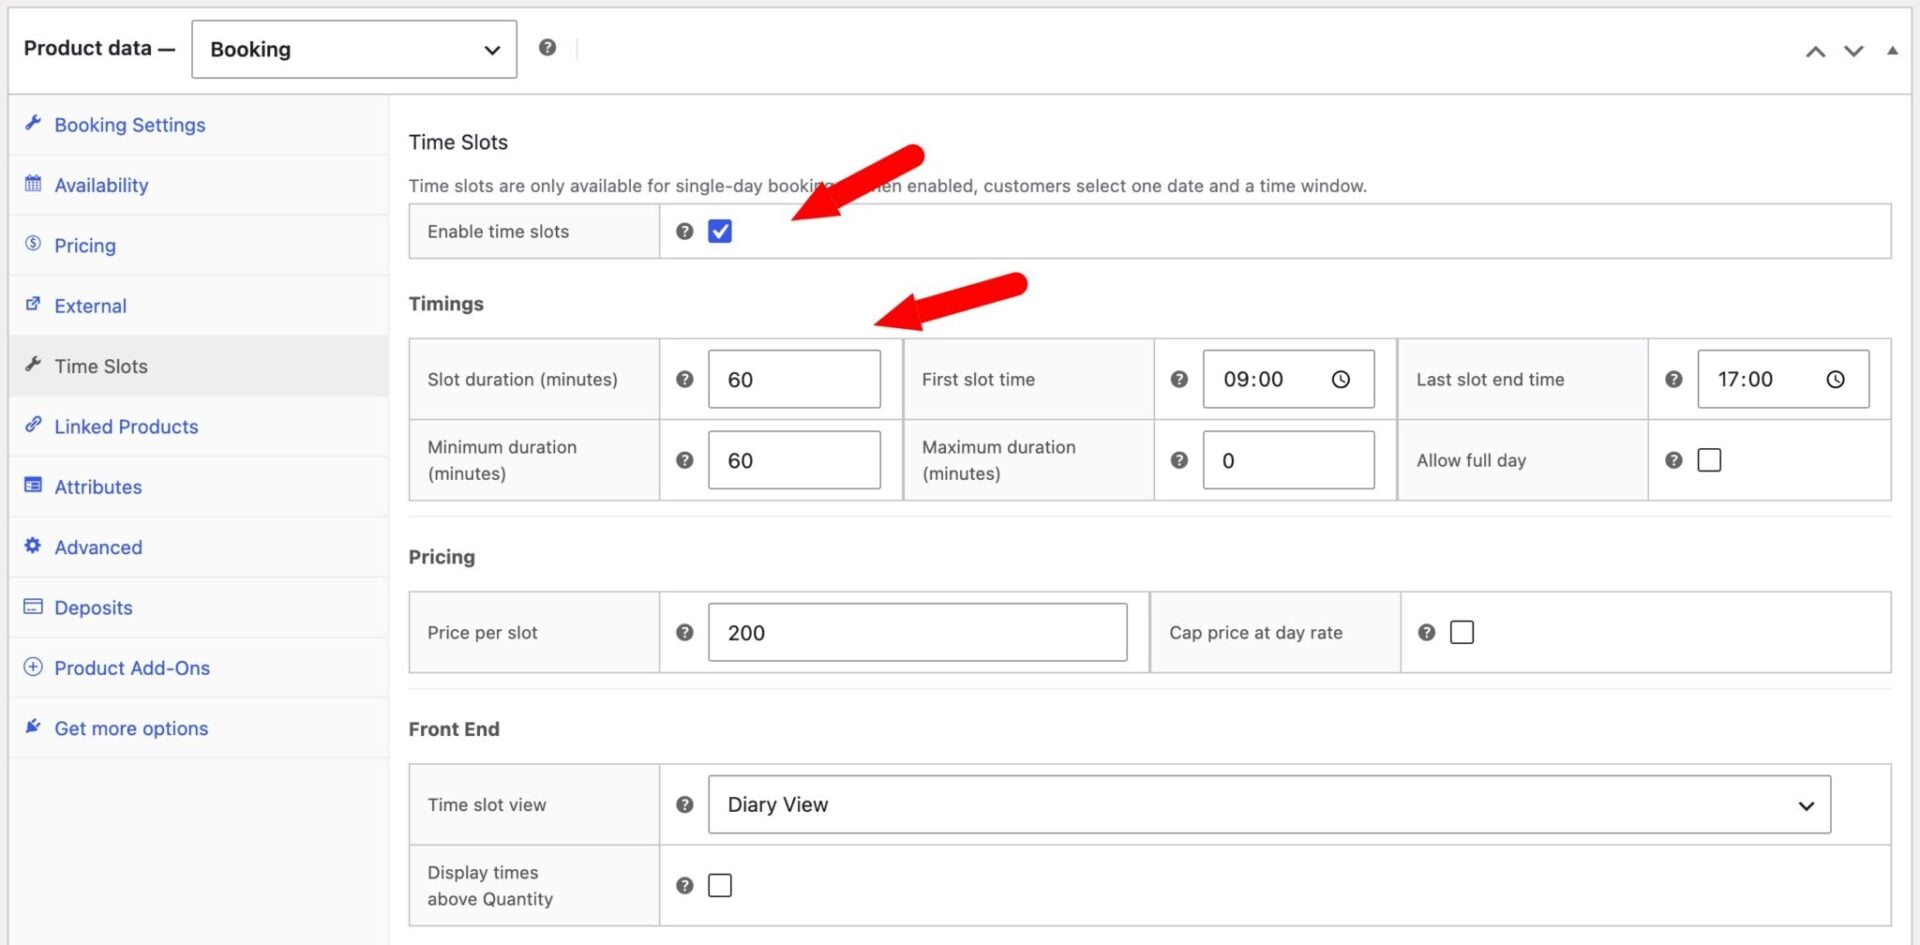
Step #5: Set a Price per slot. If you charge per hour, enter the hourly rate here – a client booking a two-hour session will automatically be charged twice the slot price.
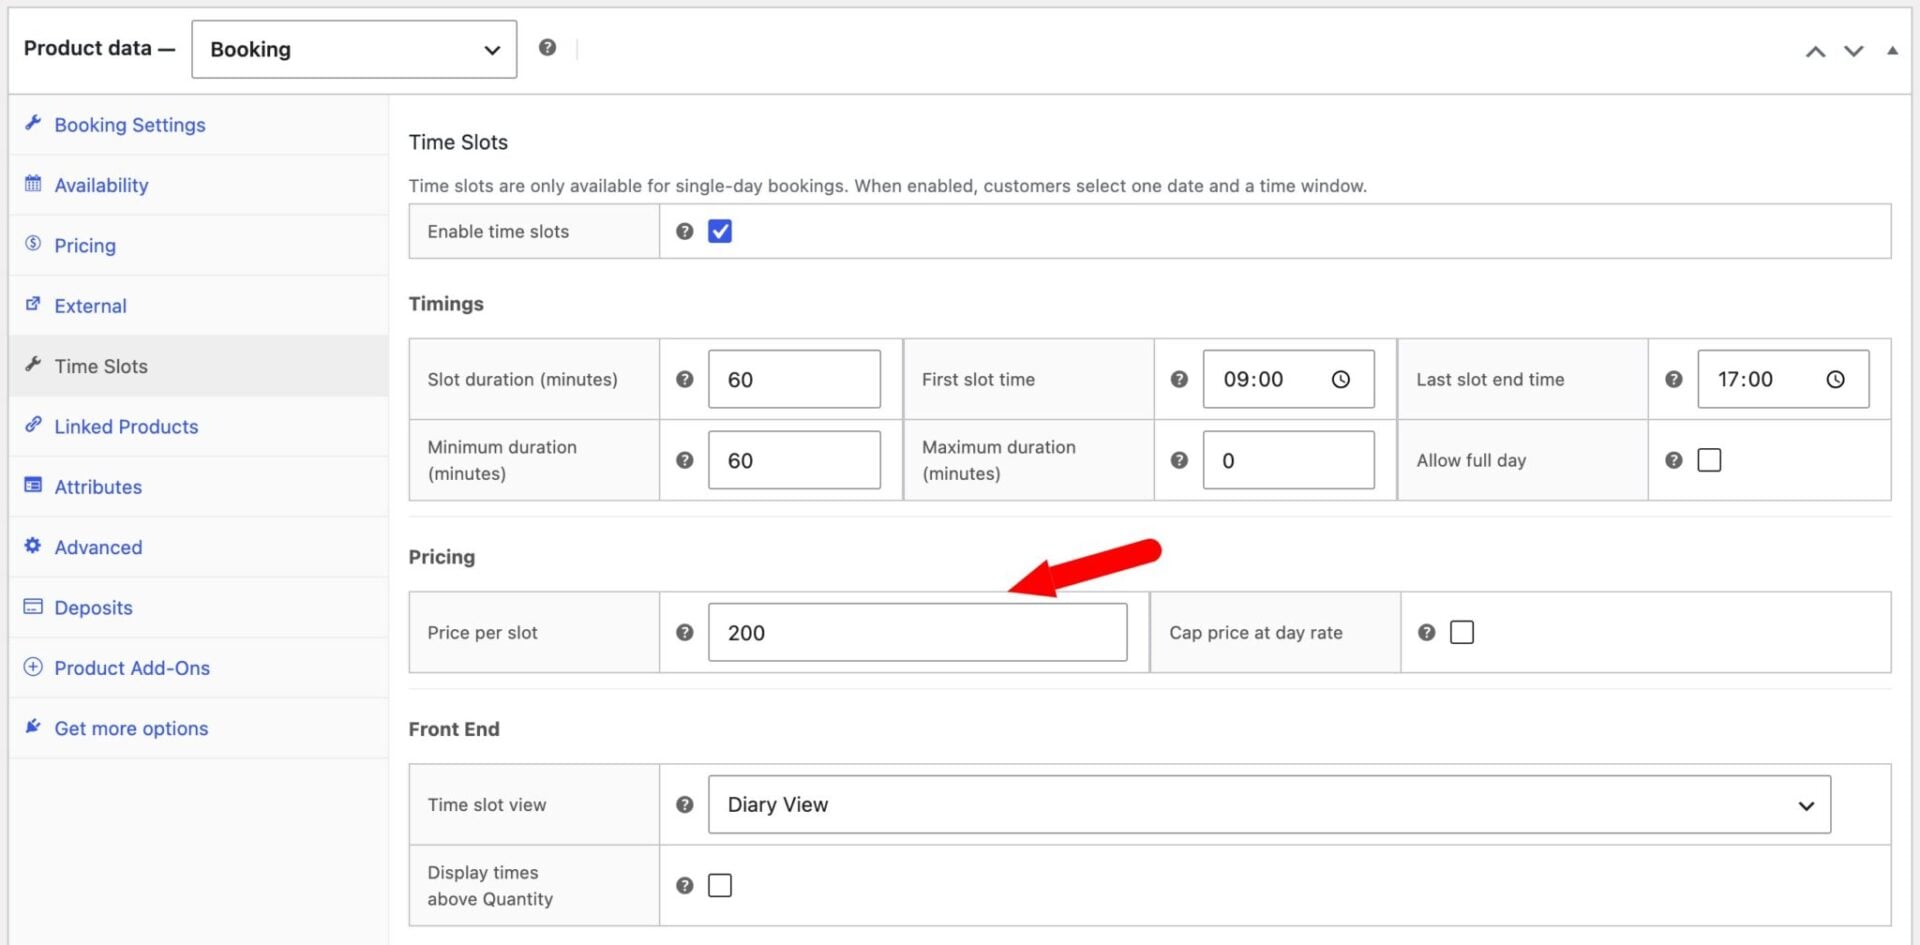
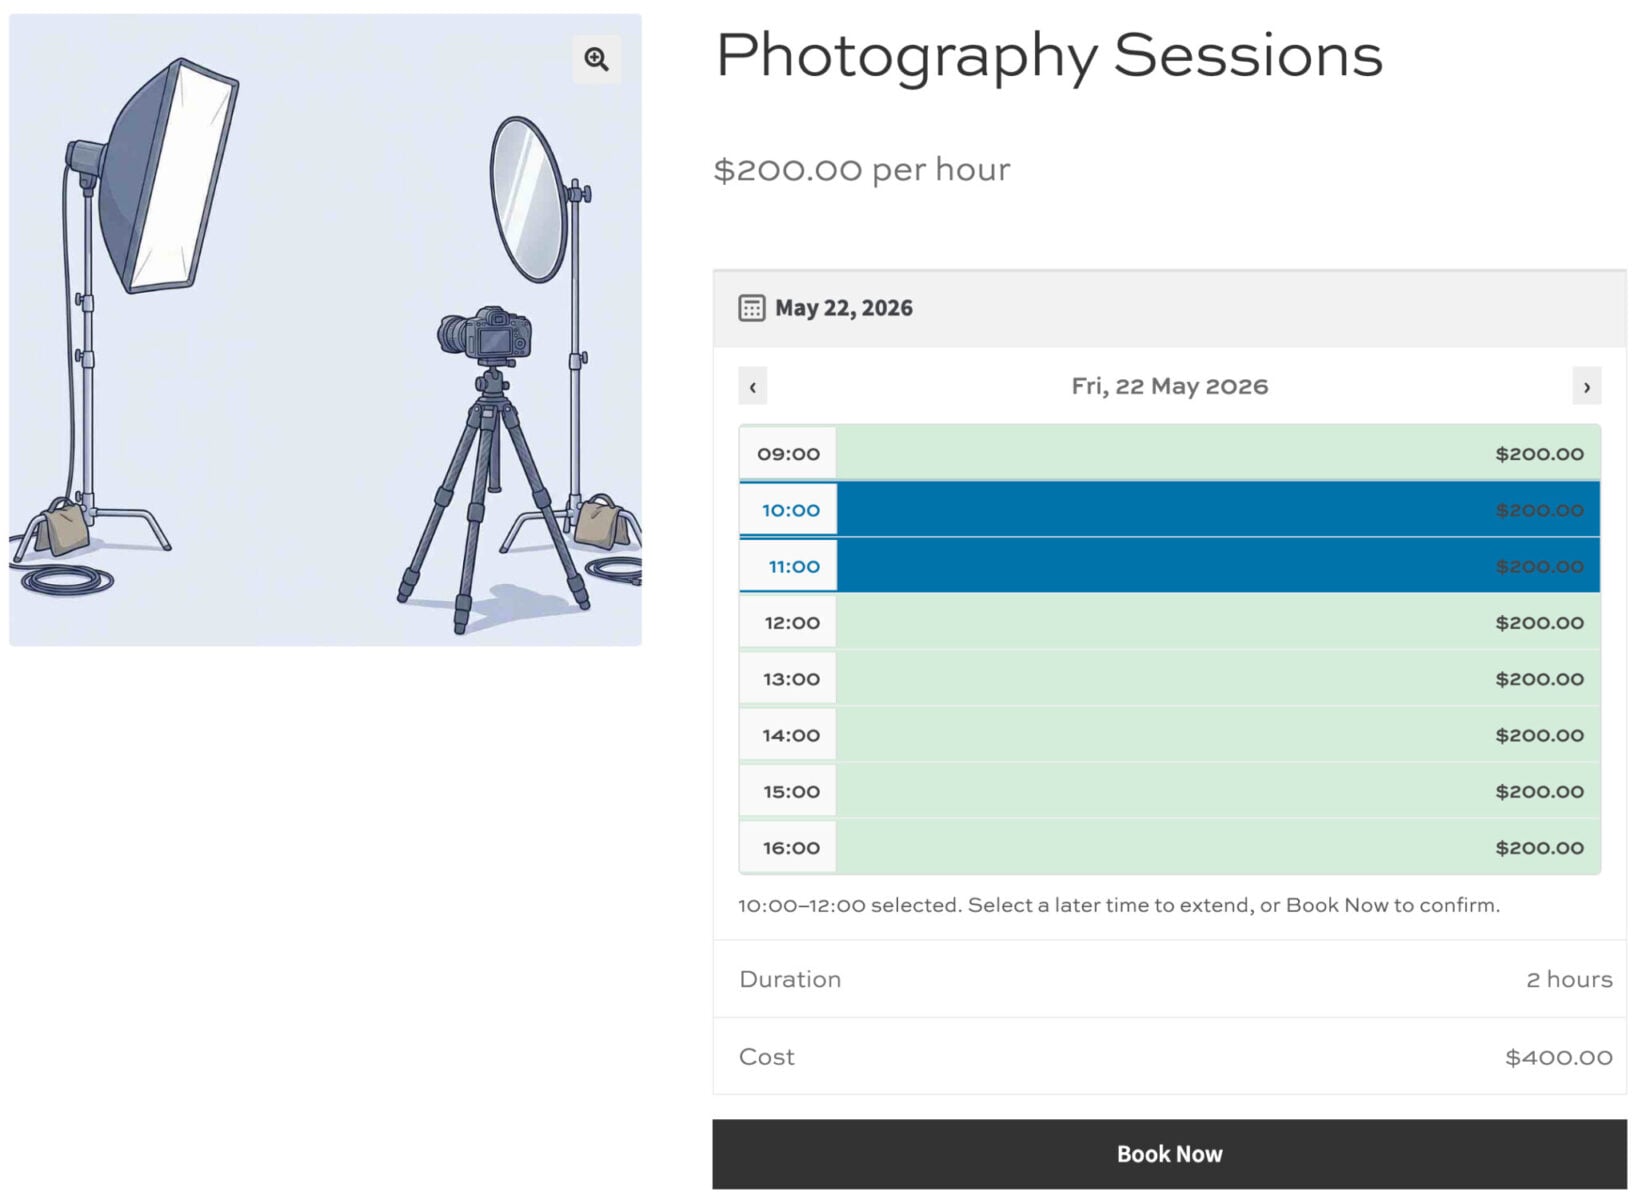
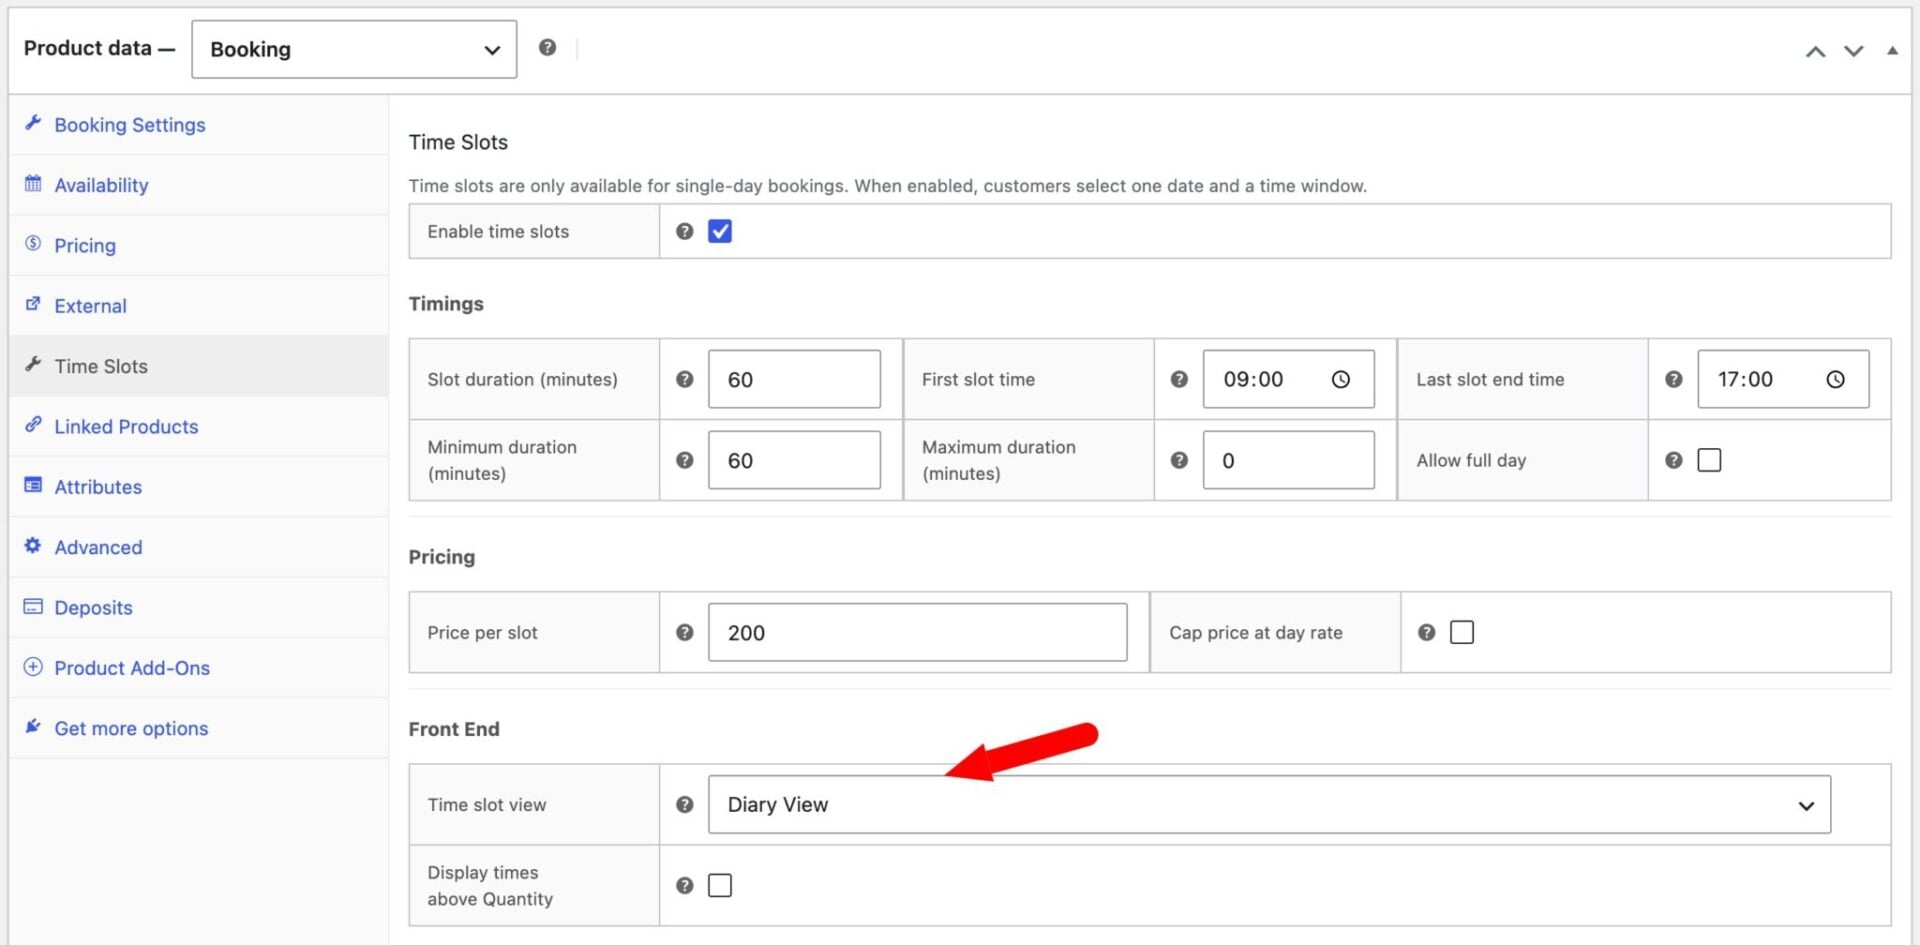
Step #6: Choose a Time slot view. In this example, we’ve chosen ‘Diary View’ which gives your customers a graphical view of each time slot available in a day with color-coded availability.
Step #7: Publish your product. Clients will see a date picker followed by a time slot selector, and booked slots will automatically become unavailable.
There’s a demo product here.
Now let’s look at some additional options.
Add extra options to photoshoot bookings
When a client makes a booking from your website, it’s a great opportunity to upsell some extra options to them. You might want to offer different print packages, hair or makeup services, props, or allow the user to specify the format and number of photos.
Or you might need to charge extra based on the number of people attending the shoot, offer different theme packages, or different locations. It’s possible to add all these options and add a surcharge with the WooCommerce Product Add-Ons Ultimate plugin. We’ll cover this in Part 3 below.
Manage session bookings from the back end
All bookings are managed from your WordPress dashboard. Go to WooCommerce > Orders to see every booking as a standard WooCommerce order – you can view the client’s details, the session date and time, and the payment status from the same screen.
To view or edit an individual booking, go to Bookings in your WordPress admin. Click on the booking you want to update, then click ‘Edit booking’ to change the date, time, or quantity. This is useful if a client needs to reschedule.
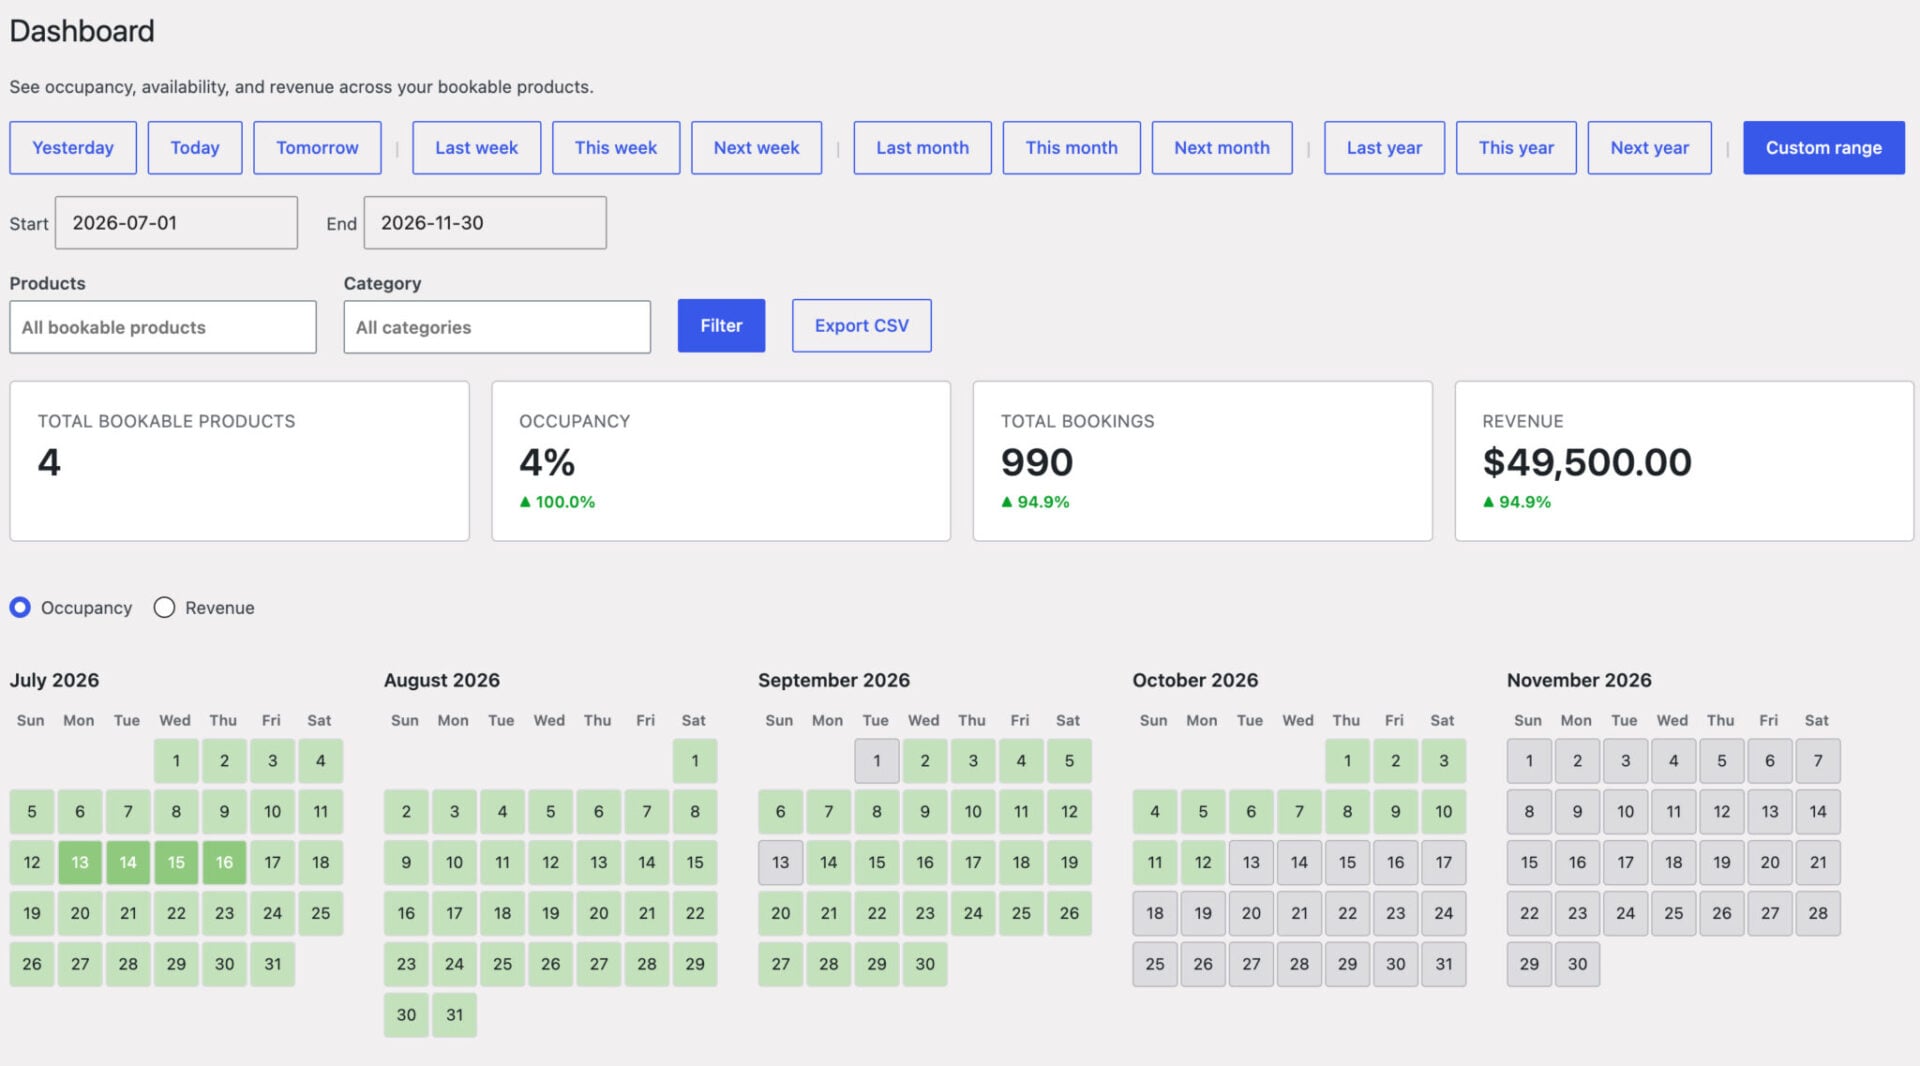
To see all booked slots at a glance, go to Bookings > Dashboard. Pick a date range and it shows a calendar, week diary, or single-day diary as appropriate, with summary tiles for occupancy and bookings so you can spot gaps and plan your schedule across all your session products at once.
You can also add bookings manually from the back end – useful for clients who book by phone or email. Go to Bookings > Add Booking and complete the details on their behalf.
If you shoot at multiple locations, create a separate bookable product for each one. You can configure different availability and pricing per product, and clients simply choose the location they want when browsing your store.
The Time Slots tab includes a Slot discounts section where you can reward clients who book more time. Click Add discount to add a row, then set a minimum number of slots and the discount amount – either a fixed amount or a percentage. For example, you could offer a 10% discount for bookings of two slots or more, and 20% for four slots or more. If a client qualifies for multiple tiers, the highest tier is applied automatically.
Yes, the Per-slot overrides table lets you set a different price for any time slot within a specific date range. Each row in the table has a start time, end time, start date, and end date, plus an optional price override. To charge a higher rate during peak season – for example, Christmas or summer – add a row covering that date range with a higher price per slot. Outside that range, the standard slot price applies. You can add as many override rows as you need, and the first matching rule in the list takes effect.
Availability is managed on the Booking Settings tab. You can set which days of the week are bookable, and add specific blocked dates – for example, holidays or days you’re already booked for other work. The Per-slot overrides table also lets you set availability to zero for a specific slot or date range, which effectively blocks that time without removing the product from your store. So if you need to book a lunch break between 1 and 2, just enter 0 as the availability for that time slot.
To create a product like this in WooCommerce where users can book and pay for photography sessions online, you just need the Bookings for WooCommerce plugin.
Part 2: How to show client-specific products in WooCommerce
The WooCommerce Members Only plugin will allow you to restrict any product or product category to specific users. After a shoot, each client logs in and sees only their own products – no one else’s. You can restrict access to specific users or you can allocate passwords to access certain content.

How do I restrict products to specific clients?
There are two approaches depending on how many clients you’re managing. Both use Members Only, but they differ in how you organize the access rules.
Option #1: Restrict individual products by user ID or password (best for a small number of clients)
This option works well if you only have a few clients – and you only need to allocate one product per client.
Once you’ve purchased and installed Members Only:
Step #1: Create a product for your client’s images – for example, a simple product called “Emma and James Wedding Gallery.”
Step #2: Open the product and navigate to the Members Only tab in the Product data panel.
Step #3: Under Restrict by, select By User then click into the User ID field to search for the user. Alternatively, select Password and set a password that only your client knows.
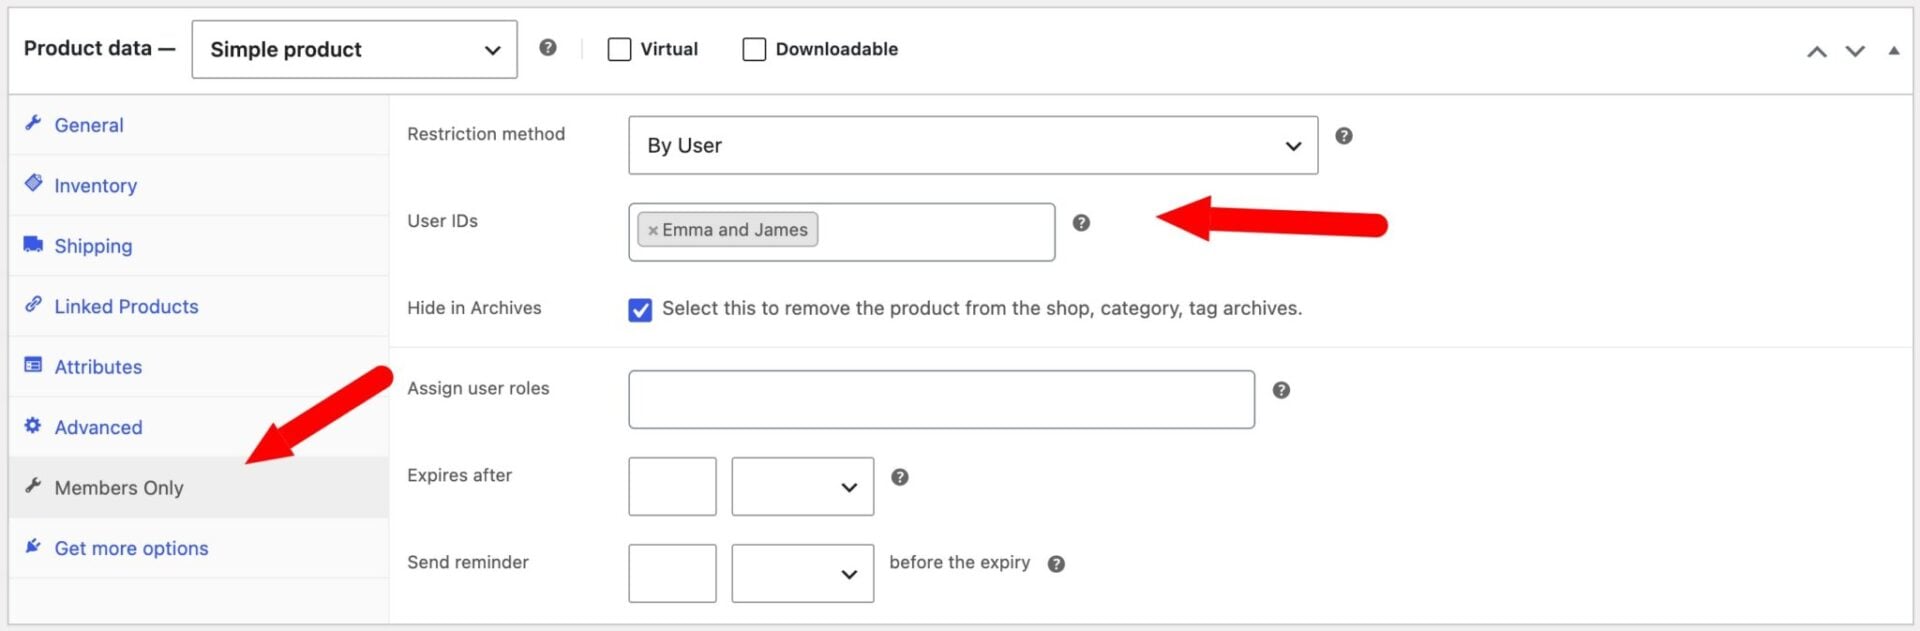
Step #4: Save the product. The client can now access it by logging in with their account or entering the password – and no one else can see it.
Full instructions are available in the restrict by user ID or password documentation.
Option #2: Create a category per client with membership plans (best for larger client bases)
If you have lots of clients or your clients have lots of products, then it’s simpler to create a membership rule by product category. That way, you can assign a specific category to each client then allocate multiple products to that category.
Step #1: Create a product category for each client. Go to Products > Categories and add a category – for example, “Emma and James Photos.”
Step #2: Create the client’s products and assign them to their category.
Step #3: In Members Only, go to WooCommerce > Members Only > Membership Plans and create a new plan for the client.
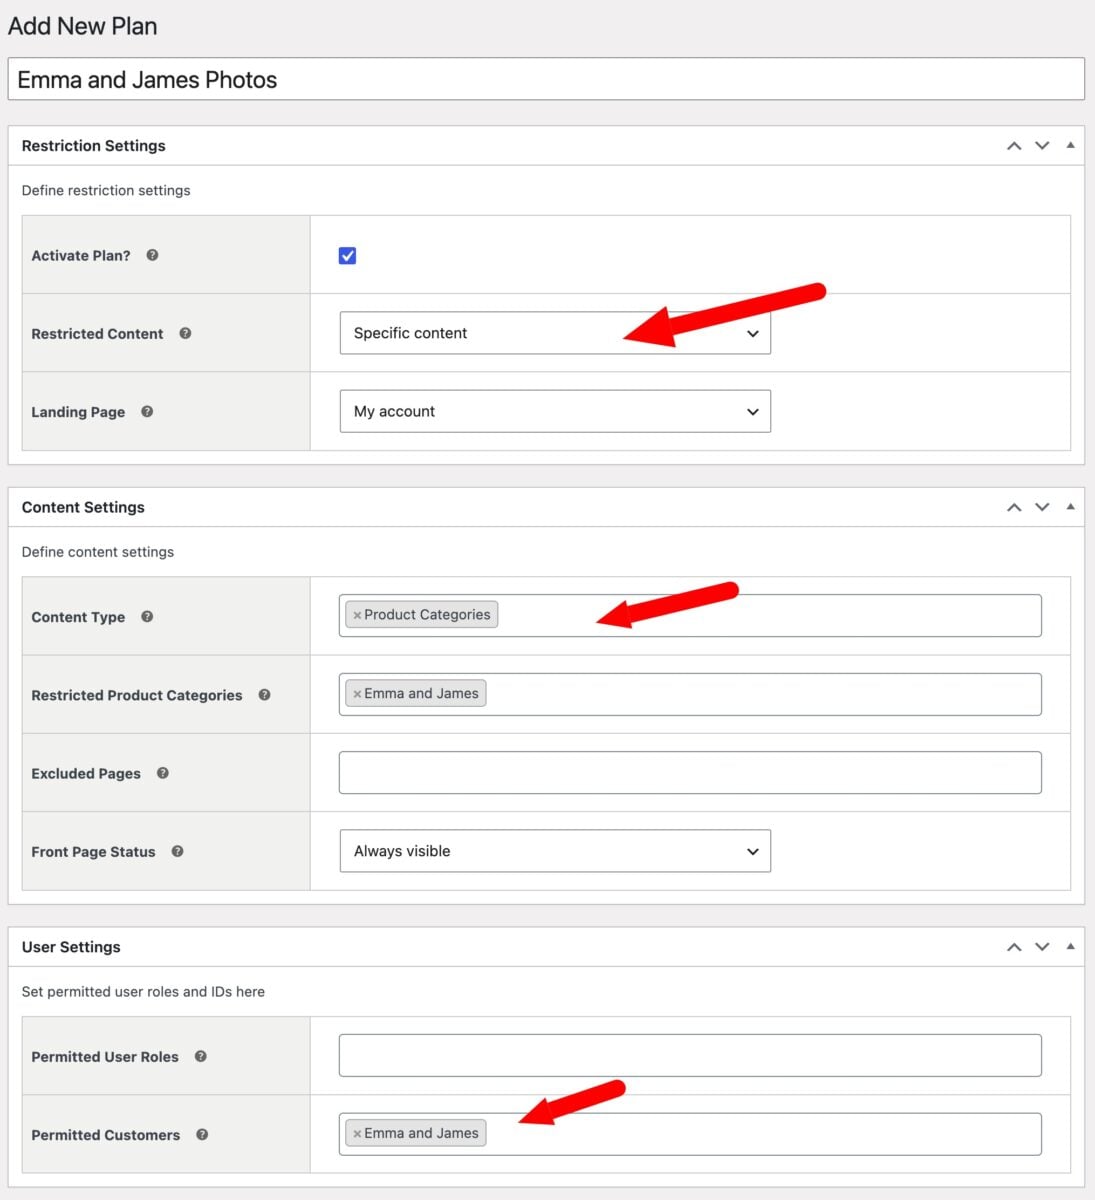
Step #4: In the plan settings, restrict access to the client’s product category by setting:
- Restricted Content to Specific Content
- Content Type to Product Categories
- Restricted Product Categories to the specific product category for the client
- Permitted Customers to the client’s account
If you prefer, you could also set a password for each client so that they don’t even need to log in on your site. Full details are in the membership plans documentation.
What does the client experience look like?
From the client’s perspective, they log in to your store and see only their own images listed as products. They can browse, select what they want to buy, and go straight to checkout – without ever seeing another client’s products.
For this functionality, you just need the WooCommerce Members Only plugin.
Part 3: How to sell customizable prints in WooCommerce
The WooCommerce Product Add-Ons Ultimate plugin will allow you to add options such as print size, finish, and framing to any product. Prices update dynamically as customers make their selections, and you can upsell related products directly on the product page.
It’s fully compatible with the other two plugins featured in this article. So you can use this to:
- Allow users to customize your own standalone photography products
- Offer upsells and additional options to users when they are booking a photography session with you
- Offer upsells on client-specific photos

How do I add print options to a WooCommerce product?
Once you’ve purchased and installed Product Add-Ons Ultimate:
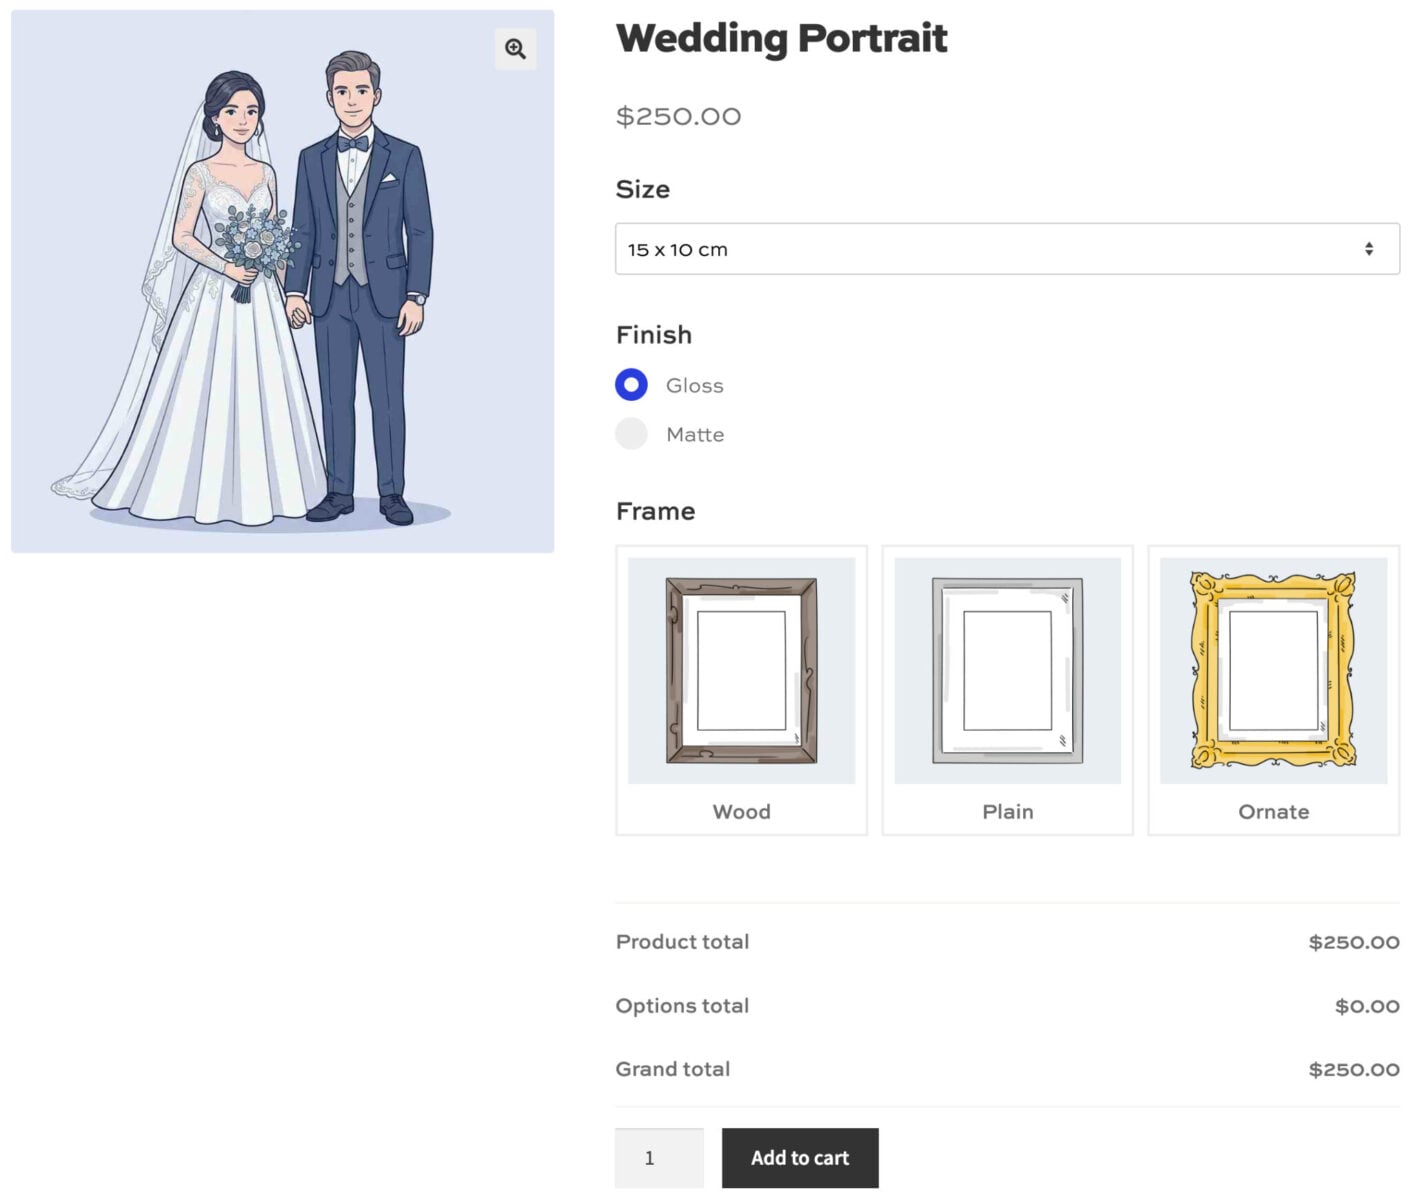
Step #1: Open a print product or create a new one. This can be a simple WooCommerce product – for example, “Wedding Portrait.”
Step #2: In the Product data panel, go to the Add-Ons tab.
Step #3: Add a Size field. Use radio buttons so the customer selects one size – for example, 6×4, 8×6, A4, and A3. Set a price adjustment for each option so larger sizes cost more.
Step #4: Add a Finish field. Offer choices such as matte, gloss, or satin. You can charge extra for premium finishes or leave the price adjustment at zero.
Step #5: Add a Framing field if you offer framed prints. Use a dropdown or radio buttons – for example, unframed, oak frame, or black frame.
Step #6: Save the product. Customers will see all the options on the product page, with the price updating dynamically as they make their selections.
How do upsells work on the product page?
Product Add-Ons Ultimate supports child products – related products shown directly on the main product page. You can use these to upsell complementary items such as a matching canvas print, a photo book, or a gift print alongside the main order.
Child products appear as options the customer can add to their cart from the same page, which keeps the buying experience seamless and increases average order value.
Further reading
WooCommerce Product Add-Ons Ultimate can be used for lots of print and photography stores. See also our guides on:
Can I use all three plugins together?
Yes – and for most photography studios, combining all three creates a complete client journey from first contact to final sale.
A new client books a session through Bookings for WooCommerce, choosing their preferred date and time. After the shoot, you upload their images as products and restrict access using Members Only – the client logs in and browses their private gallery. They then choose the prints they want and customize each one using Product Add-Ons Ultimate before checking out.
Each plugin is independent, so you can adopt them one at a time. A studio that only needs bookings can start with Bookings for WooCommerce and add the others later. A photographer who shoots on location and just wants to sell prints can go straight to Product Add-Ons Ultimate.
How to sell photography sessions and prints in WooCommerce – recap
Bookings for WooCommerce handles session scheduling, WooCommerce Members Only keeps client galleries private, and WooCommerce Product Add-Ons Ultimate lets customers configure exactly the prints they want. Use one, two, or all three together – they’re designed to work independently or as a complete solution for your WooCommerce photographer website.
All three plugins are compatible with all themes and page builders – and each is backed by a 14-day money-back guarantee and world-class support, so you can try them risk-free.