This article will walk you through how to get started with the WooCommerce Members Only plugin. We’ll cover the main plugin settings and how to create membership plans to restrict access to content to certain users.
Plugin settings
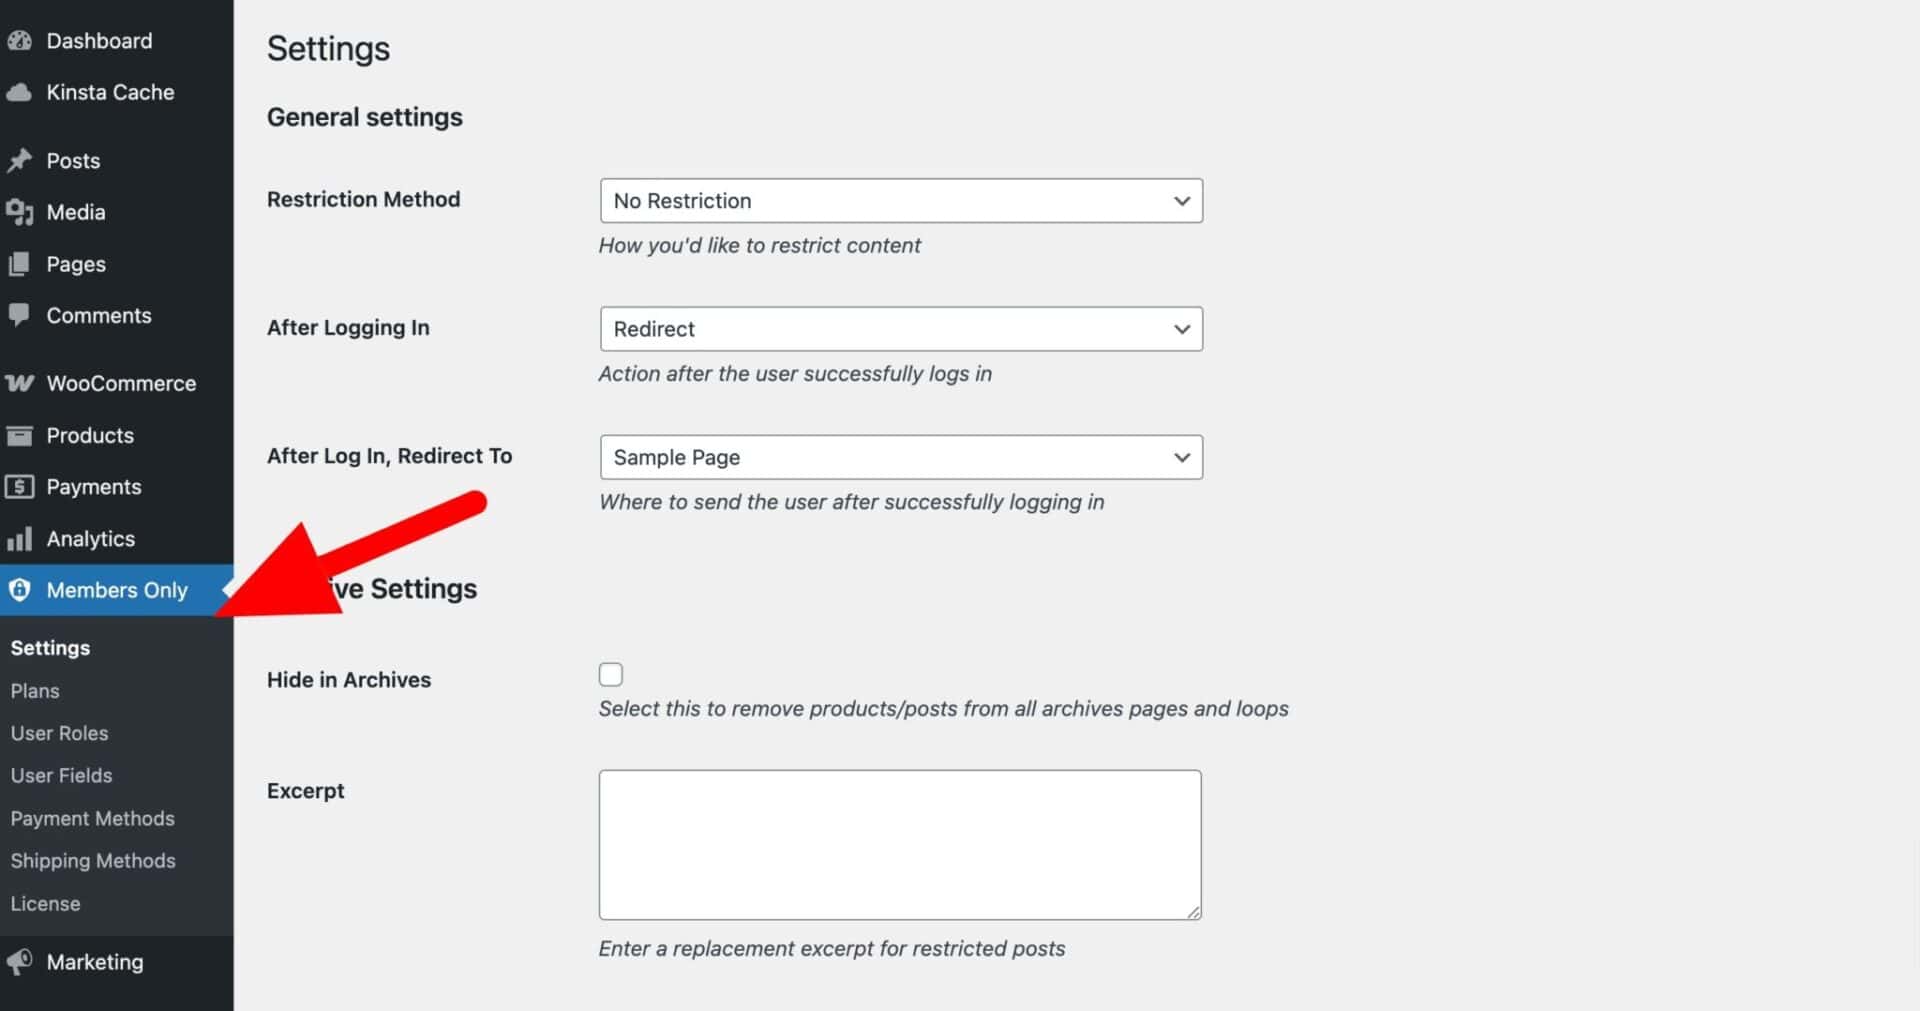
Once you’ve installed and activated Members Only, you’ll see a new menu item in your WordPress dashboard. Click on Members Only > Settings to view the global plugin settings. These are the settings that will apply across the site to all membership plans.
General settings
Restriction Method
Restriction method defines how restricted users are identified. You can choose from the following options:
- No restriction: this is the default value. When ‘Restriction method’ is set to ‘No restriction’ all content on the site will be accessible by all users
- Log-in status: set ‘Restriction method’ to ‘Log-in status’ if you want to prevent users who are not logged in to your site from accessing content
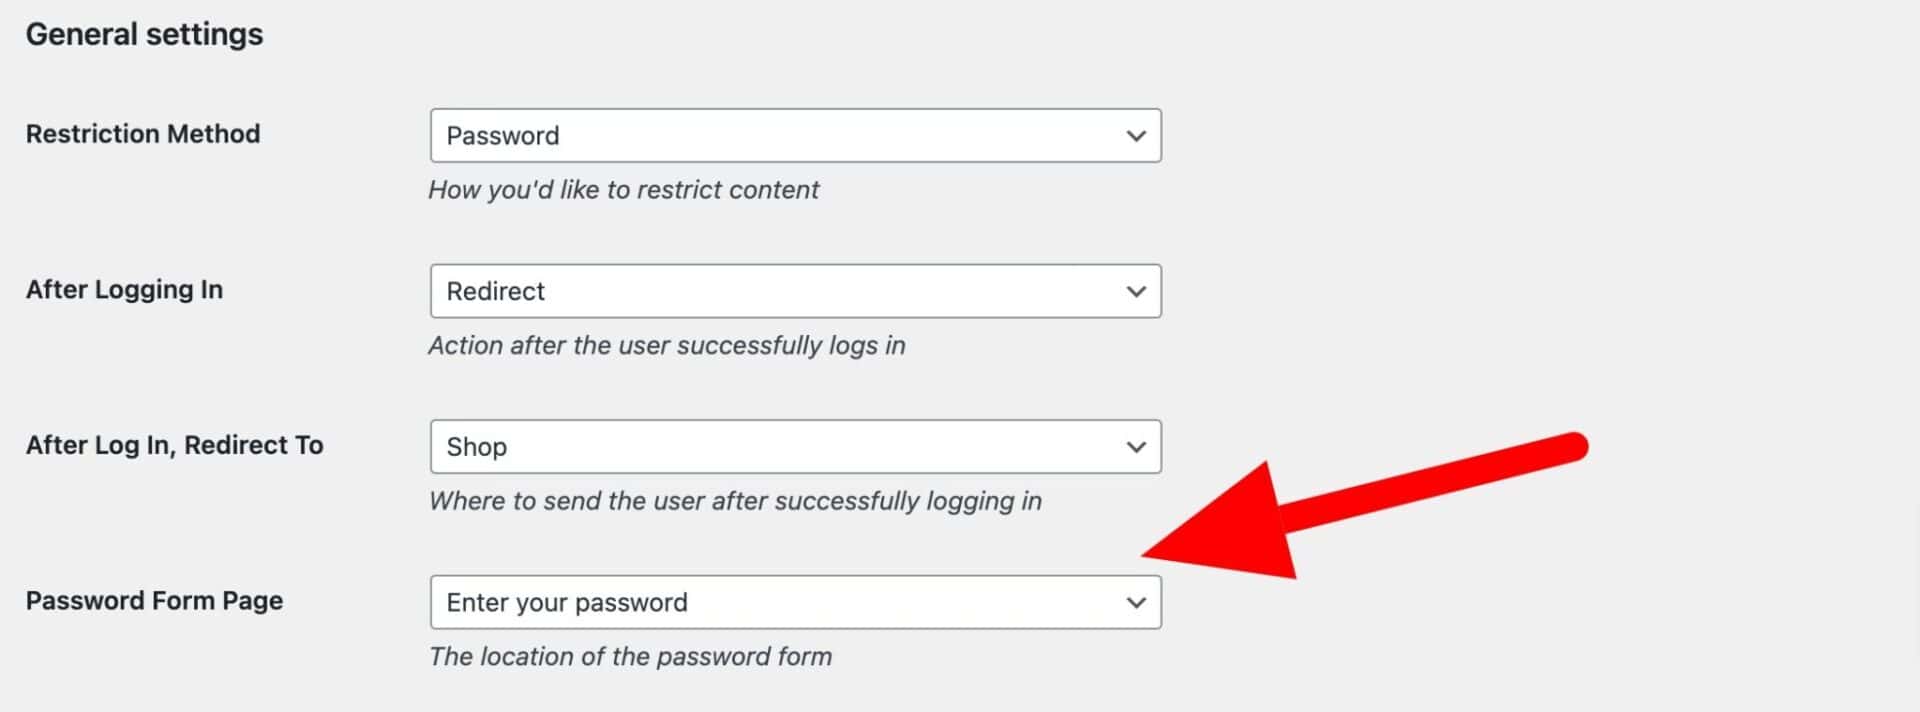
- Password: choose ‘Password’ to require a password for users to access content. You can set multiple passwords for the same content, and you can set different passwords for different content. You can set passwords when you create a membership plan. Note that the first time you choose ‘Password’ here and save the settings, the plugin will offer to automatically create a page with the password log-in form
- User role: choose ‘User role’ to restrict content according to user’s roles. You can set different restrictions in different membership plans – so some content could be restricted to ‘Wholesale’ users; other content could be restricted to ‘Retail’ users. You can also restrict access to specific users with this setting
After Logging In
When the user logs in, either through the standard WooCommerce/WordPress log-in screen, or when they enter a valid password, you can select what page to direct them to. Choose from:
- Stay on page: choose this option if you don’t want to redirect the user after logging in
- Redirect: choose this option to redirect the user to a different page
After Log In, Redirect To
This option will become available if you choose ‘Redirect’ in the setting above. You can choose any page on the site to redirect your users to. Note that you can also select ‘Referring page’ if you would like to send your users back to the original page they tried to access.
Password Form Page
If you select ‘Password’ from the ‘Restriction Method’ field, you’ll see an extra field appear for the location of the password form.
Creating a password form
The easiest way to create a password page and form on the front end is to ensure that you have selected ‘Password’ from ‘Restriction Method’ then click ‘Save changes’. You’ll see a notification to automatically create a page:

Just click ‘Yes, please create a page for the password form’ and the plugin will automatically create a page in the front of your site – and embed the password form in the page too.
Archive Settings
These settings relate to how restricted content is handled in archive pages (e.g. category pages).
Hide in Archives
Select this option if you wish restricted content to be removed from any archive pages. So a post that was restricted would not appear on the blog page; a product that was restricted would not appear on the shop page.
Excerpt
Enter some optional text to be displayed in place of a restricted post’s excerpt.
Product Archive Settings
These settings relate specifically to how WooCommerce products are displayed in archive pages.
Access Product Pages
Select this option if you would like users to be able to access restricted product pages. You might want to enable this option to allow users to view a product’s description but not be able to purchase the product without a membership.
Add to Cart Text
If you like, you can replace the text on a restricted product’s add to cart button with your own text – e.g. ‘Log in to purchase’.
Redirect from Add to Cart Button
Enable this option to redirect a user to another landing page when they click on a restricted product’s add to cart button. You can specify the landing page in the membership plan’s setting.
Hide Price
Enable this option to hide prices on restricted products.
Widget and Menu Settings
The settings in this section relate to menu and widget item restrictions.
Enable Widget Whitelist
Check this option in order to enable the setting below.
Widget Whitelist
Enter the name of widgets, e.g. Search, that can be displayed to users who are restricted from viewing content. Enter each name on a new line.
Exclude from Menu
Enter any menu item names, e.g. Shop, to be excluded from the menu when a user does not have access rights. Enter each name on a new line.
Creating membership plans
Membership plans allow you to set specific membership rules. You can create multiple plans, restricting access to different content from different users.
Create your first membership plan
To create a plan, go to Members Only > Plans then click the ‘Add New Plan’ button.
Add a name for the membership plan and enter its settings.
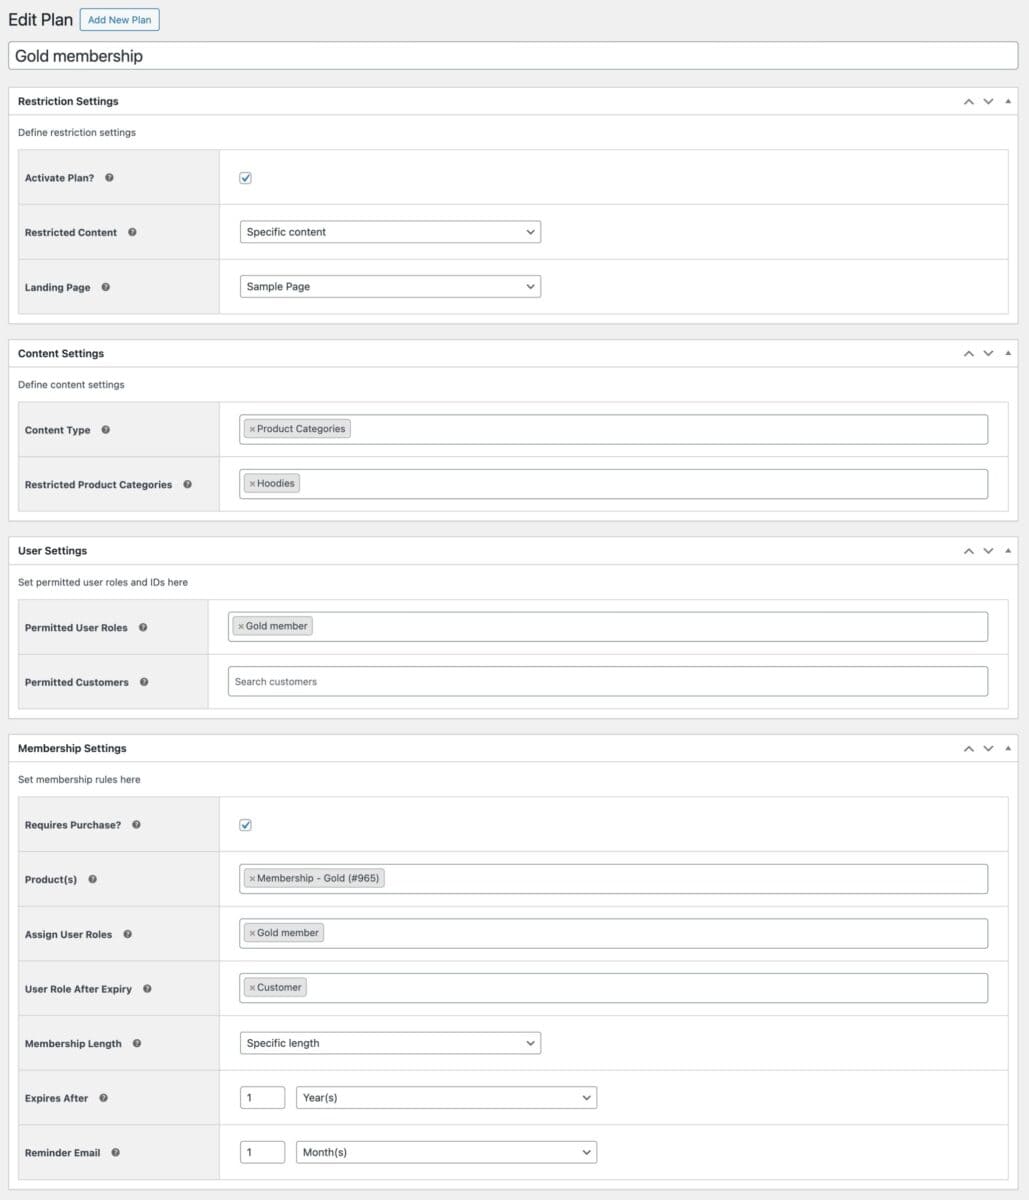
Restriction Settings
Activate Plan
You will need to enable this option for the plan to be activated. Keep it disabled if you want to pause the membership plan.
Restricted Content
The setting defines what content is restricted by this specific rule. You can choose between:
- Entire site: all pages, except the log-in screen and home page, are restricted from the users defined in this plan. Other users can still see the rest of the site
- Specific content: choose this option to restrict specific content. You can define that in the ‘Content Type’ setting below
Landing Page
This setting defines what page the user will be redirected to if they try to access restricted content. Setting the landing page at plan level means you can direct users to different pages depending on what content they try to access.
Content Settings
Content Type
Here you can select different content types to restrict. Choose one or more of the following:
- Product Categories: choose this if you want to restrict access to one or more product categories
- Post Categories: choose this to restrict access to selected post categories
- Pages: select this option to restrict access to certain pages
- Custom Post Types: choose this to restrict access to certain post types
- Taxonomy: select this to restrict access by taxonomy term
When you select one of the items above, further menu options will become available:
Restricted Product Categories
Enter one or more product categories to restrict.
Restricted Post Categories
Enter one or more post categories to restrict.
Restricted Pages
Define which pages should be restricted
Restricted Post Types
Choose one or more custom post types to restrict access to.
Restricted Taxonomies
Select a taxonomy. Then select one or more terms from the field below.
Password Settings
This section will be enabled if you have chosen ‘Password’ as the ‘Restriction Method’ in the main settings.
Passwords
Enter one or more passwords required to access this content. Enter each password on a new line.
Excluded Pages
You can choose to exclude specific pages from plans. Any pages selected in this setting will always be available to all users.
User Settings
This section will enabled if you have chosen ‘User role’ as the ‘Restriction Method’ in the main settings.
Permitted User Roles
Enter one or more user roles that are permitted to view this content.
Permitted Customers
Additionally, you can add specific customers that are allowed to access the content.
Membership Settings
In this section you can define rules about how users can purchase membership and how long it lasts for them. Note that you will need to set ‘Restriction Method’ to ‘User role’ in the global settings.
Requires Purchase
Enable this option if the user needs to purchase a product to access the content restricted by this membership plan.
Product(s)
Select one or more products that will grant the user access to this plan. You can choose simple products or variations. When the user purchases a product specified here, they will be allocated a user role (see next setting).
Assign User Roles
Specify one or more user roles that will be allocated to the user if they purchase a product in the setting above. Generally, the user role specified here should be the same as a user role specified in ‘Permitted User Roles’ setting above.
User Role After Expiry
If this plan is time-limited, the user’s allocated role above will be automatically removed from their profile at the end of the membership period. You can enter an optional role here that will be assigned at the same time (e.g. ‘Gold – expired’)
Membership Length
Use this setting to define how long a membership is valid for in this plan. Choose from:
- No expiry: membership to this plan will never expire
- Fixed date: membership will expire on a defined date
- Specific length: membership will expire after a define period
Fixed Date
Enter the date that the membership will expire if you chose ‘Fixed date’ above
Expires After
Choose how long the membership will last if you chose ‘Specific length’ above
Reminder Email
You can opt to send the user a reminder email a certain period before the end of their membership.