How to fix variations not showing in WooCommerce
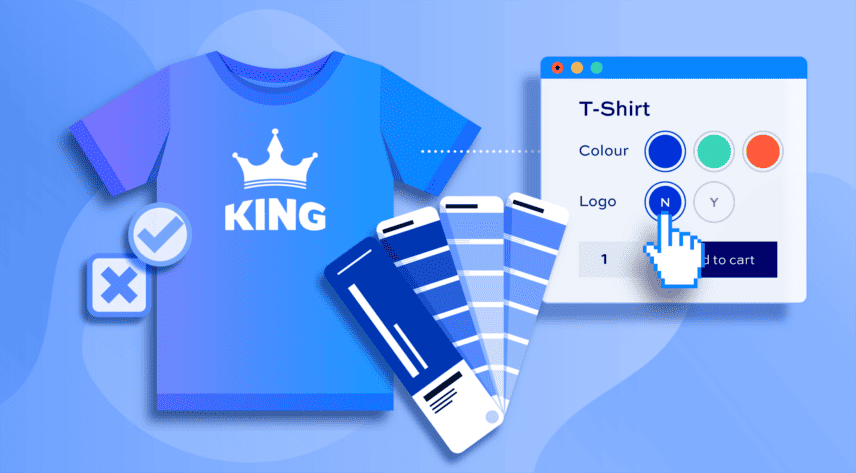
Product variations in WooCommerce offer a powerful way for store owners to present diverse styles of products in a user-friendly manner. They allow customers to choose from an array of options, such as size, color, or material, all conveniently displayed on a single product page. By using variations, businesses can efficiently manage and showcase their products, enhancing the overall shopping experience.
However, any glitches or errors with your product variation display can have a detrimental impact on your site’s usability and even lead to lost sales. To maintain a seamless shopping experience and maximize conversions, it’s crucial to promptly troubleshoot and resolve any issues with WooCommerce variations not showing.
In this article, we’ll cover some of the most common issues with WooCommerce product variations not displaying properly and how to fix them. Then, we’ll provide some top tips for enhancing your product variation display with the help of some highly recommended plugins.
Common WooCommerce product variations issues
WooCommerce product variations play a pivotal role in offering customers a diverse range of choices when shopping online. Properly displaying these variations is vital for providing a seamless customer experience and maximizing sales potential. When variations are showcased correctly, it enhances product visibility, encourages user engagement, and ultimately boosts conversion rates.
Conversely, encountering issues with product variations not displaying properly can have adverse effects on your online store. Here are the most common issues WooCommerce store owners face when it comes to displaying product variations:
- One of the common problems is the variations tab not showing correctly in the product data section of the WooCommerce backend, which hinders the store owner’s ability to configure and manage product options efficiently.
- On the front-end, customers may face challenges when variation featured images or data fail to display correctly, leading to confusion and potential frustration during the shopping process.
- Some or all variation options may not appear on the front-end, limiting customers’ ability to make personalized choices.
The major reasons behind the WooCommerce variation display not showing are incorrect settings, theme or plugin conflicts, and your version of WordPress, WooCommerce, or specific plugins being out of date. In the next section, we’ll dive deeper into how you can resolve these common issues on your WooCommerce site.
Step-by-step guide to fixing WooCommerce variations
Resolving most of the issues with WooCommerce variation display is often straightforward to do, even if you’re not very tech-savvy. Let’s go over the main steps for identifying and fixing issues with product variations in WooCommerce, starting with the two most likely culprits:
Missing price for variations
One of the most common reasons for product variations not displaying is the absence of prices for those variations. If you’ve created variations but haven’t assigned prices to them, customers won’t see the options when viewing the product. To fix this:
- Go to the product editing page in WooCommerce.
- Navigate to the “Variations” tab.
- Ensure that each variation has a valid and appropriate price assigned.
Variation marked as out of stock
If a variation is marked as out of stock, it won’t be displayed to customers who are browsing your store. To address this:
- Access the product editing page for the affected product.
- Visit the “Variations” tab.
- Check the stock status of each variation. If a variation is out of stock, either update the stock quantity or mark it as “In Stock” if applicable.
Verify product variation settings
If your product variations have assigned prices and are in stock, then it could be you haven’t configured your variations correctly. Follow these steps to verify and configure your product variation settings:
1. Accessing the product edit page:
- Log in to your WooCommerce admin panel.
- Navigate to the “Products” tab and select “All Products.”
- Locate the product for which you want to manage variations and click “Edit.”
2. Configuring attributes and terms:
- Within the product edit page, navigate to the “Attributes” tab.
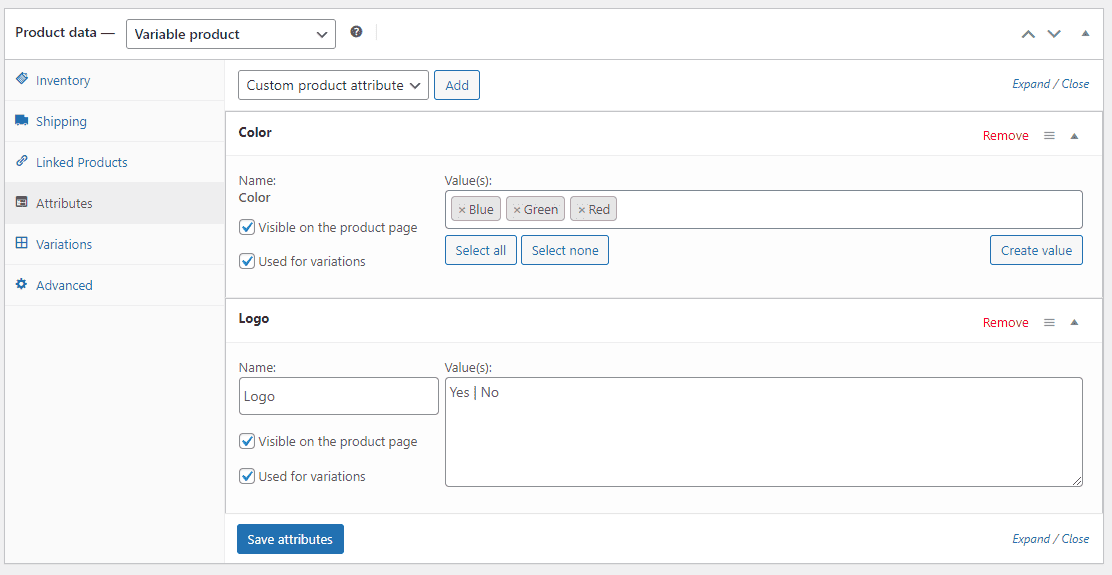
- Ensure that you’ve selected the appropriate attributes for your product. If you need to create a new attribute, you can create a global product attribute by going to WooCommerce>Products>Attributes. Alternatively, you can create a custom product attribute directly in the product page backend, by following the steps below:
- Click the “Add” button next to the “Custom product attribute” dropdown.
- Provide a name for the attribute, such as “Logo.”
- Add attribute values (e.g., “Yes” and “No”) that are relevant to your product.
- Check the boxes to make the attribute visible on the product page and available for variations.
3. Adding variation details:
- Scroll down to the “Variations” section on the product edit page.
- Choose the “Create variations from all attributes” option and click “Go.”
- WooCommerce will generate variations based on the attributes and terms you’ve set up.
- Review each variation to ensure accurate pricing, inventory levels, and other relevant details.
4. Saving changes:
- Once you’ve configured your product variations, click the “Update” button to save your changes.
e. Preview and test:
- Visit the product page on your WooCommerce storefront to see how the variations are displayed to customers.
- Test the functionality by selecting different attribute combinations and verifying that prices and availability update accordingly.
Check theme compatibility
If there are integration issues between your current theme and WooCommerce, it could lead to problems with displaying variations. The best way to check this is to test with a default WooCommerce theme:
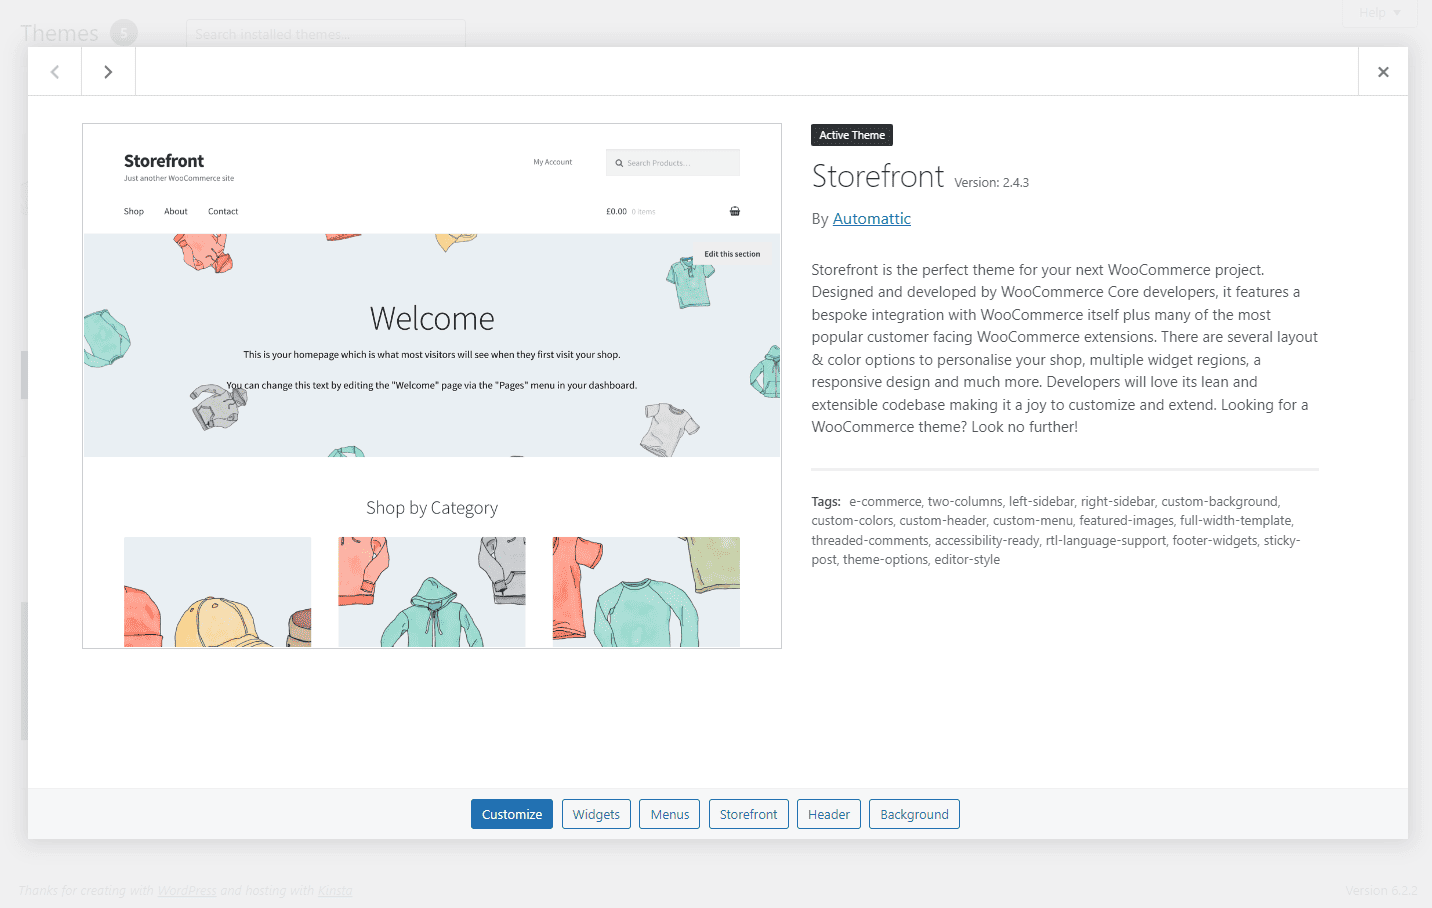
- To isolate the issue and determine if it’s related to your current theme, temporarily switch to a default WooCommerce theme like “Storefront.”
- Visit your website and navigate to a product page with variations. Check if the variations are displayed correctly with the default theme.
- If the issue is resolved with the default theme, it suggests that there might be a compatibility issue with your original theme.
Resolve plugin conflicts
Conflicts between plugins can lead to unexpected behavior, including the incorrect display of WooCommerce variations. To ensure variations are shown as intended, follow these steps to identify and resolve potential plugin conflicts:
1. Update plugins and WordPress core:
- Keeping your plugins, including WooCommerce, up-to-date is crucial for a seamless online store experience. Outdated plugins can lead to compatibility issues.
- Regularly check for updates in your WordPress admin panel under “Plugins” > “Installed Plugins.”
- Update all plugins and the WordPress core to their latest versions.
2. Clear browser cache:
- Browser caching can sometimes cause older code to be loaded, affecting the display of your variations.
- Clear your browser’s cache and cookies to ensure you’re viewing the most recent version of your website.
3. Deactivate plugins methodically:
- To identify a potential conflicting plugin, deactivate all plugins except for WooCommerce.
- Test your product pages with variations to see if the issue is resolved. If it is, you’ve confirmed that a plugin is causing the conflict.
- Reactivate each plugin one by one, testing your variations after each activation.
- If the issue reappears after activating a specific plugin, you’ve likely found the culprit.
4. Update or replace conflicting plugins:
- Once you’ve identified the conflicting plugin, check if an update is available. Sometimes, plugin authors release updates to address compatibility issues.
- If an update doesn’t resolve the conflict, consider searching for alternative plugins that offer similar functionality but are more compatible with your WooCommerce setup.
5. Reach out for support:
- If you’re unable to identify or resolve the plugin conflict on your own, reach out to the plugin’s support team or community forums for assistance.
- Provide them with detailed information about the issue, including any error messages or unexpected behavior you’ve observed.
Regenerate thumbnails
In some instances, you may encounter a situation where product thumbnails within WooCommerce fail to display correctly. This can subsequently lead to the absence of featured images for product variations on your website. If you’re encountering this issue, regenerating thumbnails can often be a simple and effective solution. Follow these steps to regenerate thumbnails for your WooCommerce site:
1. Navigate to the thumbnail regeneration tool:
- Access your WordPress admin panel.
- Go to “WooCommerce” in the left-hand menu.
- Choose “Status.”
- Click on the “Tools” tab.
2. Regenerating the thumbnails
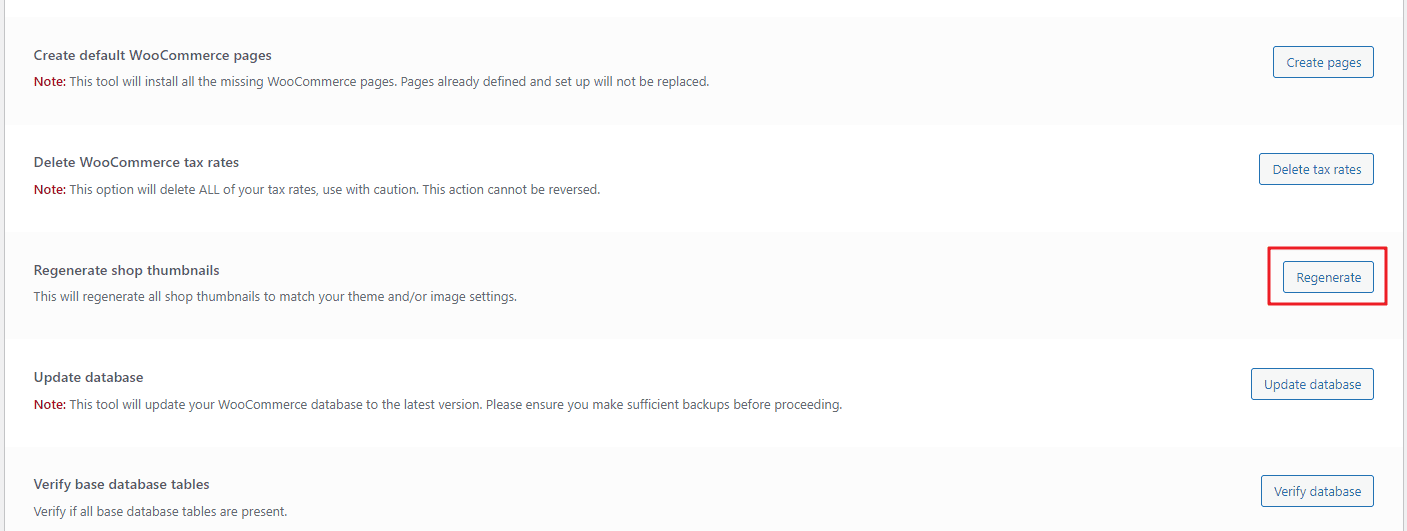
- Within the “Tools” section, locate the “Regenerate shop thumbnails” option.
- Click the “Regenerate” button associated with this option.
- The regeneration process may take some time, depending on the number of products and images on your site.
- Once the process is complete, you’ll receive a notification confirming the successful regeneration of thumbnails.
3. Checking variation images:
- Navigate to a product page that has variations and featured images.
- Verify that the thumbnails and featured images for variations are now correctly displayed.
4. Repeat as needed:
- If you continue to experience thumbnail-related issues, you can repeat the thumbnail regeneration process as necessary.
- Regularly regenerating thumbnails can also be beneficial when you make significant changes to your products or website design.
Enhancing your WooCommerce product variation display with plugins
Using plugins on your WooCommerce site allows you to enhance the display and functionality of your WooCommerce variable products.
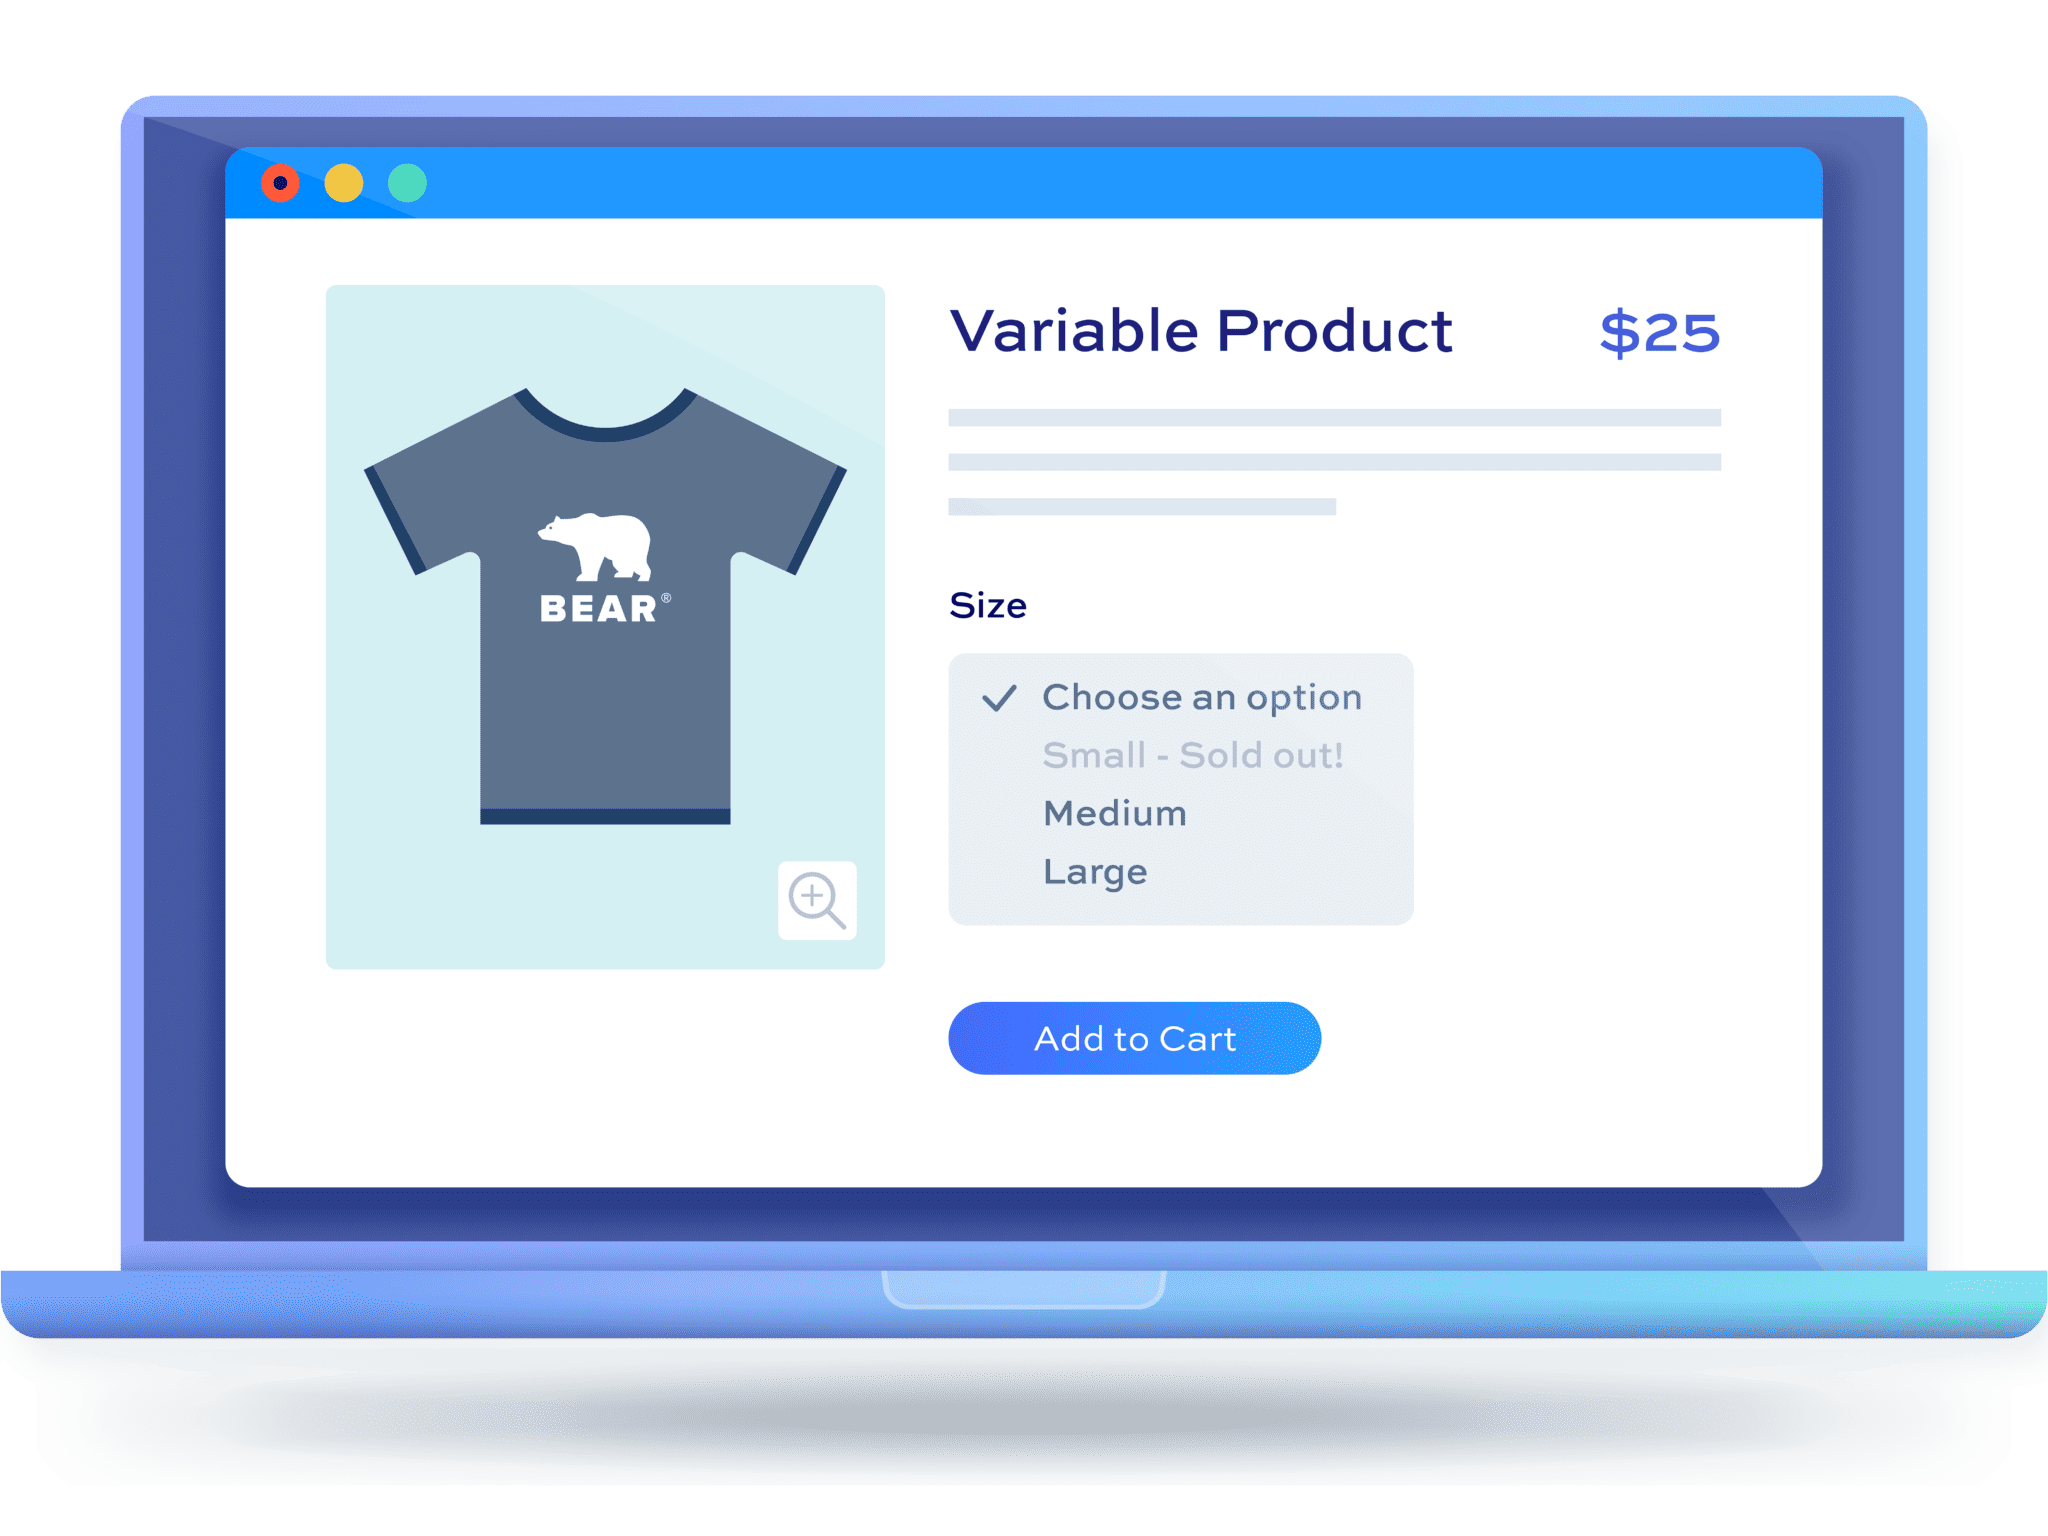
While WooCommerce’s default functionality for displaying variations is a good start, it only lets you show variations in a dropdown list. This isn’t the best for product discovery or user experience on your online store.
Next, let’s take a look at three recommended plugins that help you enhance your WooCommerce product variation display.
We’re going to see how the WooCommerce Variation Swatches, WooCommerce Product Table Ultimate and WooCommerce Better Variations plugins can help improve the display of your product variations.
Replace variation dropdowns with swatches
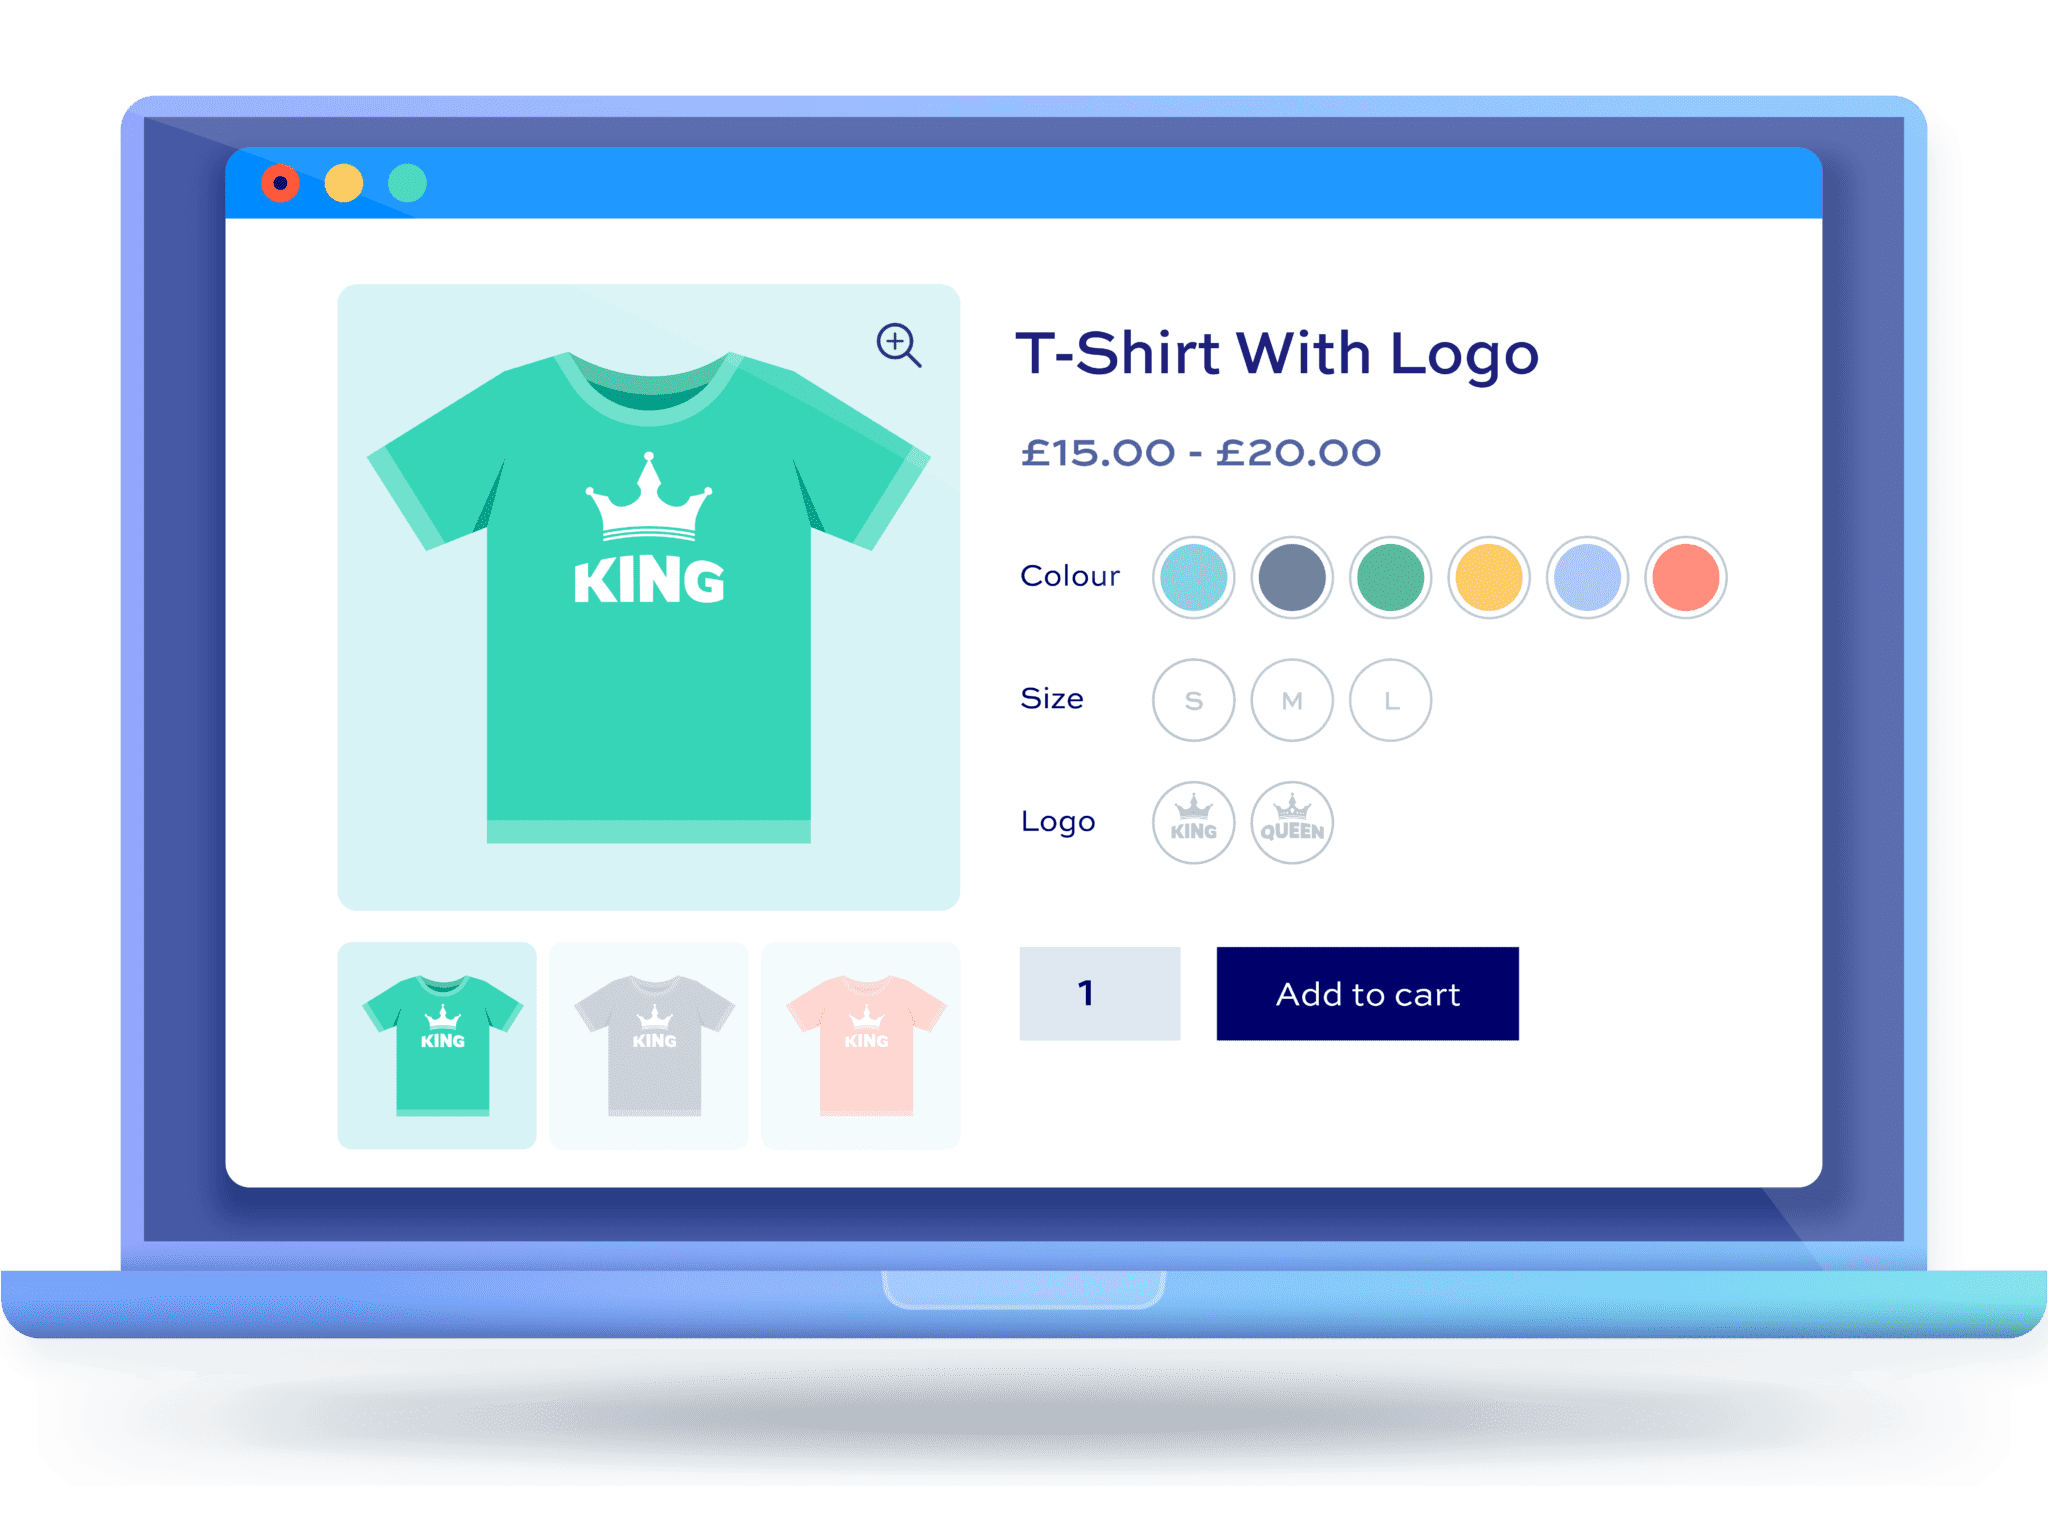
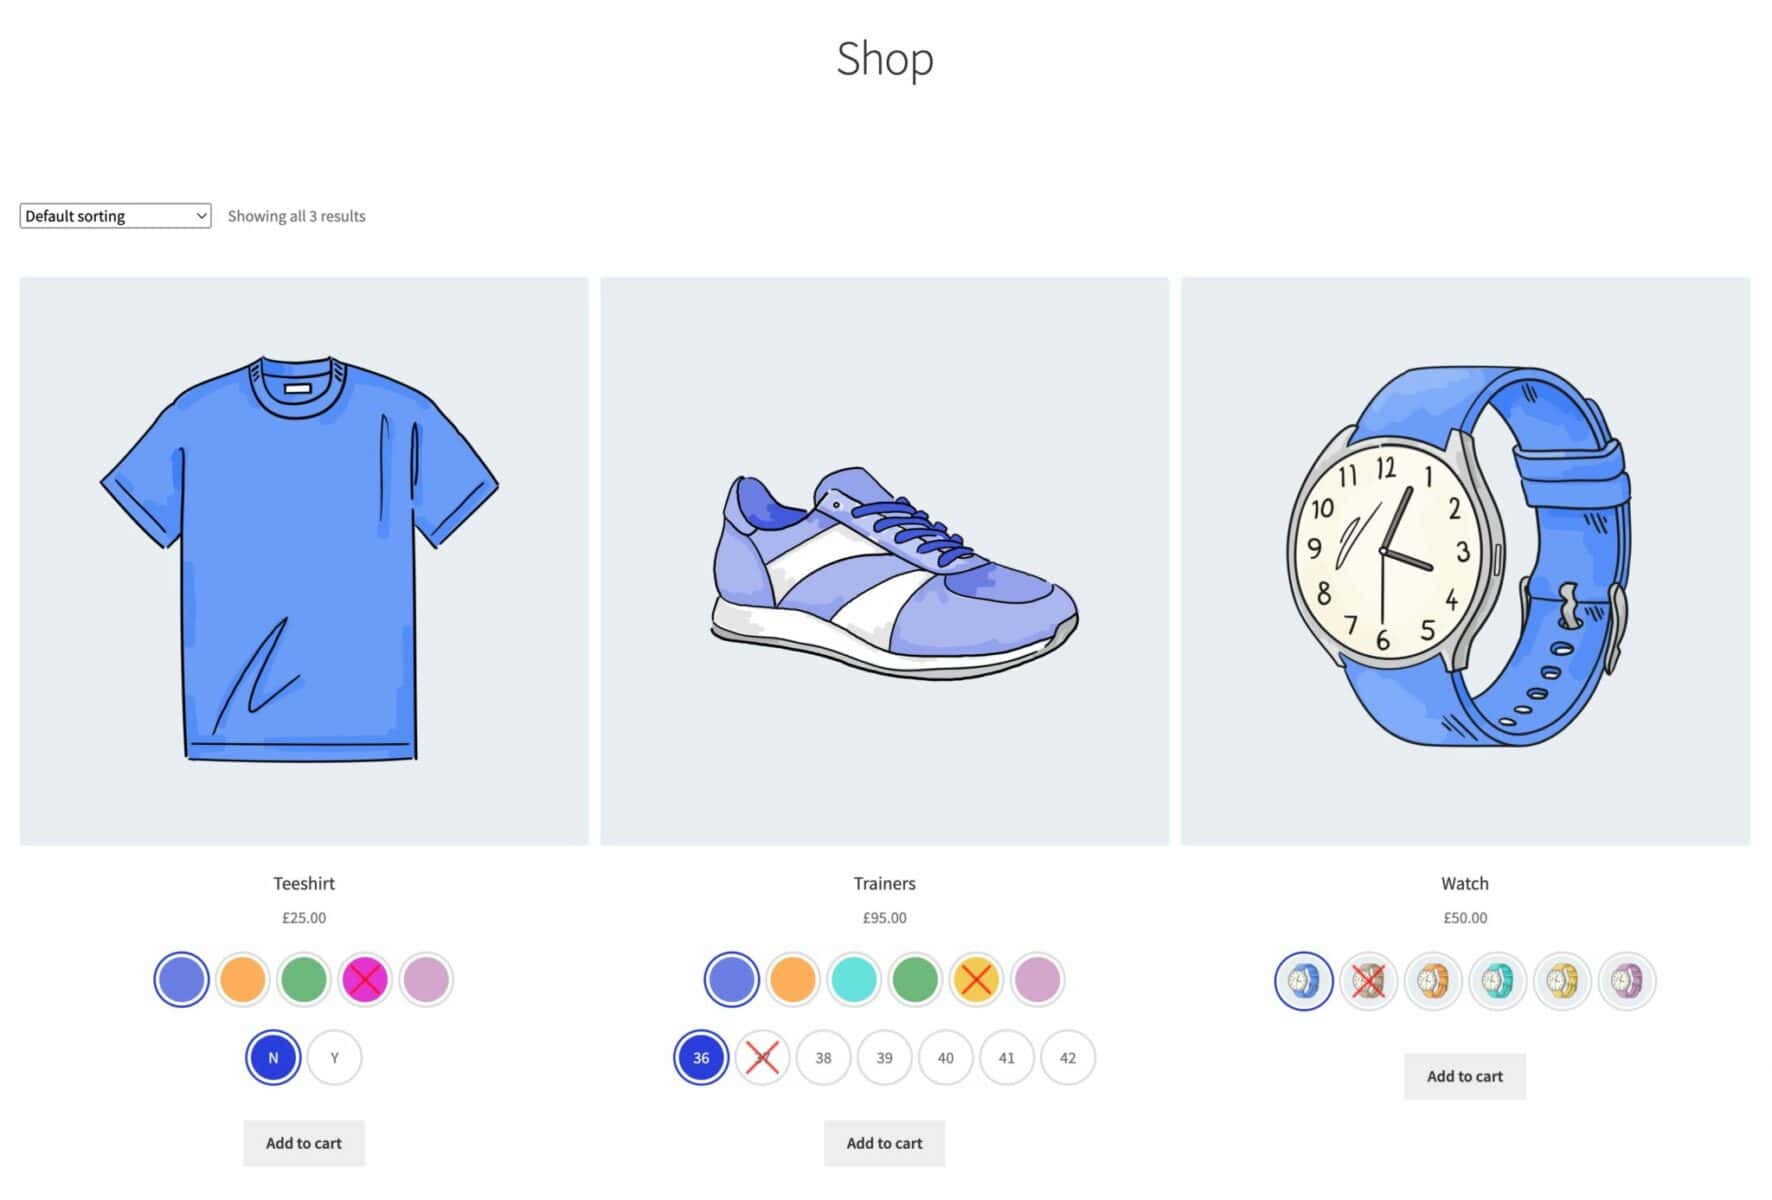
The WooCommerce Variation Swatches plugin allows you to replace the standard variation dropdown (select) fields with swatches.
Variation swatches are more visually appealing and more effective – requiring fewer clicks for the user to select their desired variation.
You have the choice of displaying color swatches, image swatches, text buttons or radio buttons. Styles can be easily customized from a single settings page.
You can also choose how to display disabled or out-of-stock variations – either hidden, faded, crossed out, or disabled.
The plugin is easy to configure. You can even display your product variations on shop and archive pages.
Benefits of Product Table Ultimate for displaying variations
The WooCommerce Product Table Ultimate plugin offers an all-in-one solution for enhancing the WooCommerce variations display on your online store.
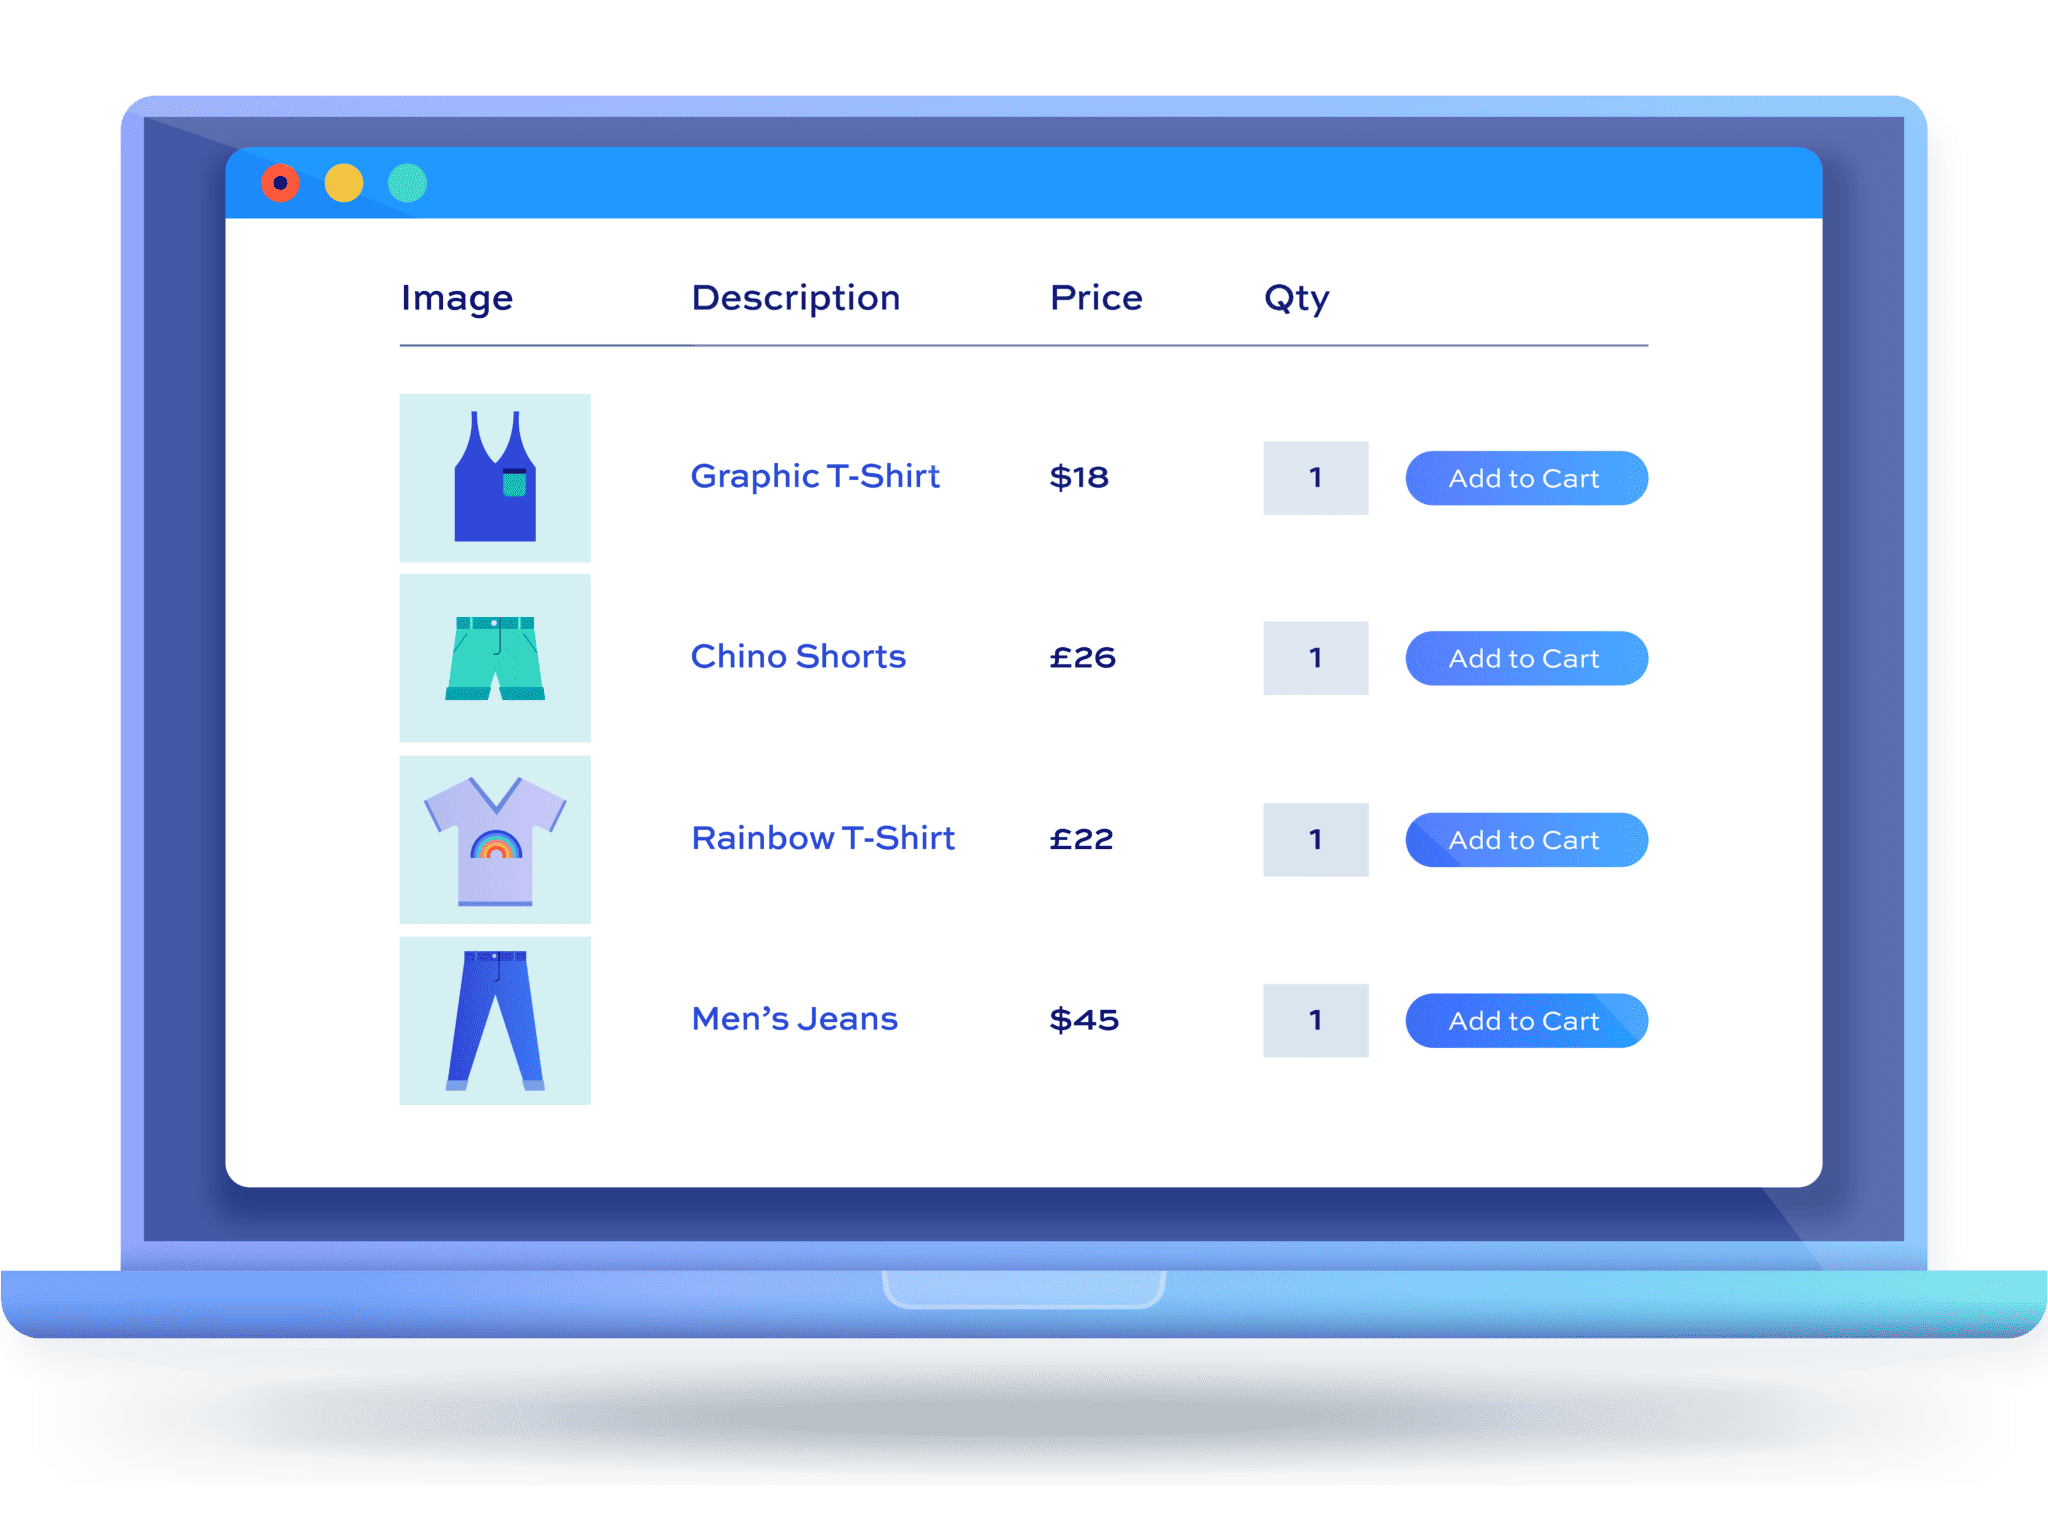
The plugin lets you list your product and product variations in a table-style layout that’s fully customizable. You can display product thumbnail images and other useful product information such as the short description in the product table. This makes it easier for your customers to compare multiple product variations and select the one that suits them the best.
The product tables created with WooCommerce Product Table Ultimate are also filterable and sortable. You can specify the sortable and filterable terms in the plugin’s settings so it offers a seamless product discovery experience for your customers.
In addition to this, you can also display add-to-cart buttons and quantity selectors on the product table. This way, your customers can easily add multiple items to their shopping cart with just a single click.
WooCommerce Product Table Ultimate product tables can be added anywhere on your WooCommerce site via a shortcode or using Gutenberg blocks. You can even replace the default WooCommerce shop or archive page layout with product tables.
Benefits of WooCommerce Better Variations for displaying variations
The WooCommerce Better Variations plugin is a professional product variation customizer that lets you display your WooCommerce variable product options better.
Using the plugin, you can disable and style out-of-stock variations on your WooCommerce site. This way, you can give your customers a clearer view of what is available or makes it easier to identify in-stock product variations.
You can also sort your product variations to prioritize in-stock variations and display them at the top of the dropdown list. This not only helps deliver a smoother customer experience but makes it easier for customers to differentiate between in-stock and out-of-stock variations.
The WooCommerce Better Variations plugin also lets you display your variations in a grid on single product pages of your online store. This way, you can let customers see variation information in one view and select quantities for different variations from the same page.
How to display product variations in a table with Product Table Ultimate
Here, we’ll show you how to display product variations in a table on your WooCommerce site with the WooCommerce Product Table Ultimate plugin.
For this, you will need a WordPress site with the WooCommerce plugin installed along with some products added to your site. You’ll also need the WooCommerce Product Table Ultimate plugin to display your WooCommerce variations in a table-style layout.
Step #1: Install and activate the Product Table Ultimate plugin
Once you get the WooCommerce Product Table Ultimate plugin, navigate to Plugins → Add New and upload the plugin’s ZIP file.
Click on the Install Now button and then Activate this plugin to continue. Once the plugin is installed and enabled, navigate to WooCommerce → Settings → Product Table Ultimate and click on the Licence link from the top.
Enter the license key given to you at the time of purchase and click on the Activate this license button to continue.
Step #2: Configure plugin settings
Next, it’s time to start optimizing the variations display.
To get started, navigate to WooCommerce → Settings → Product Table Ultimate and click on the General link from the top.
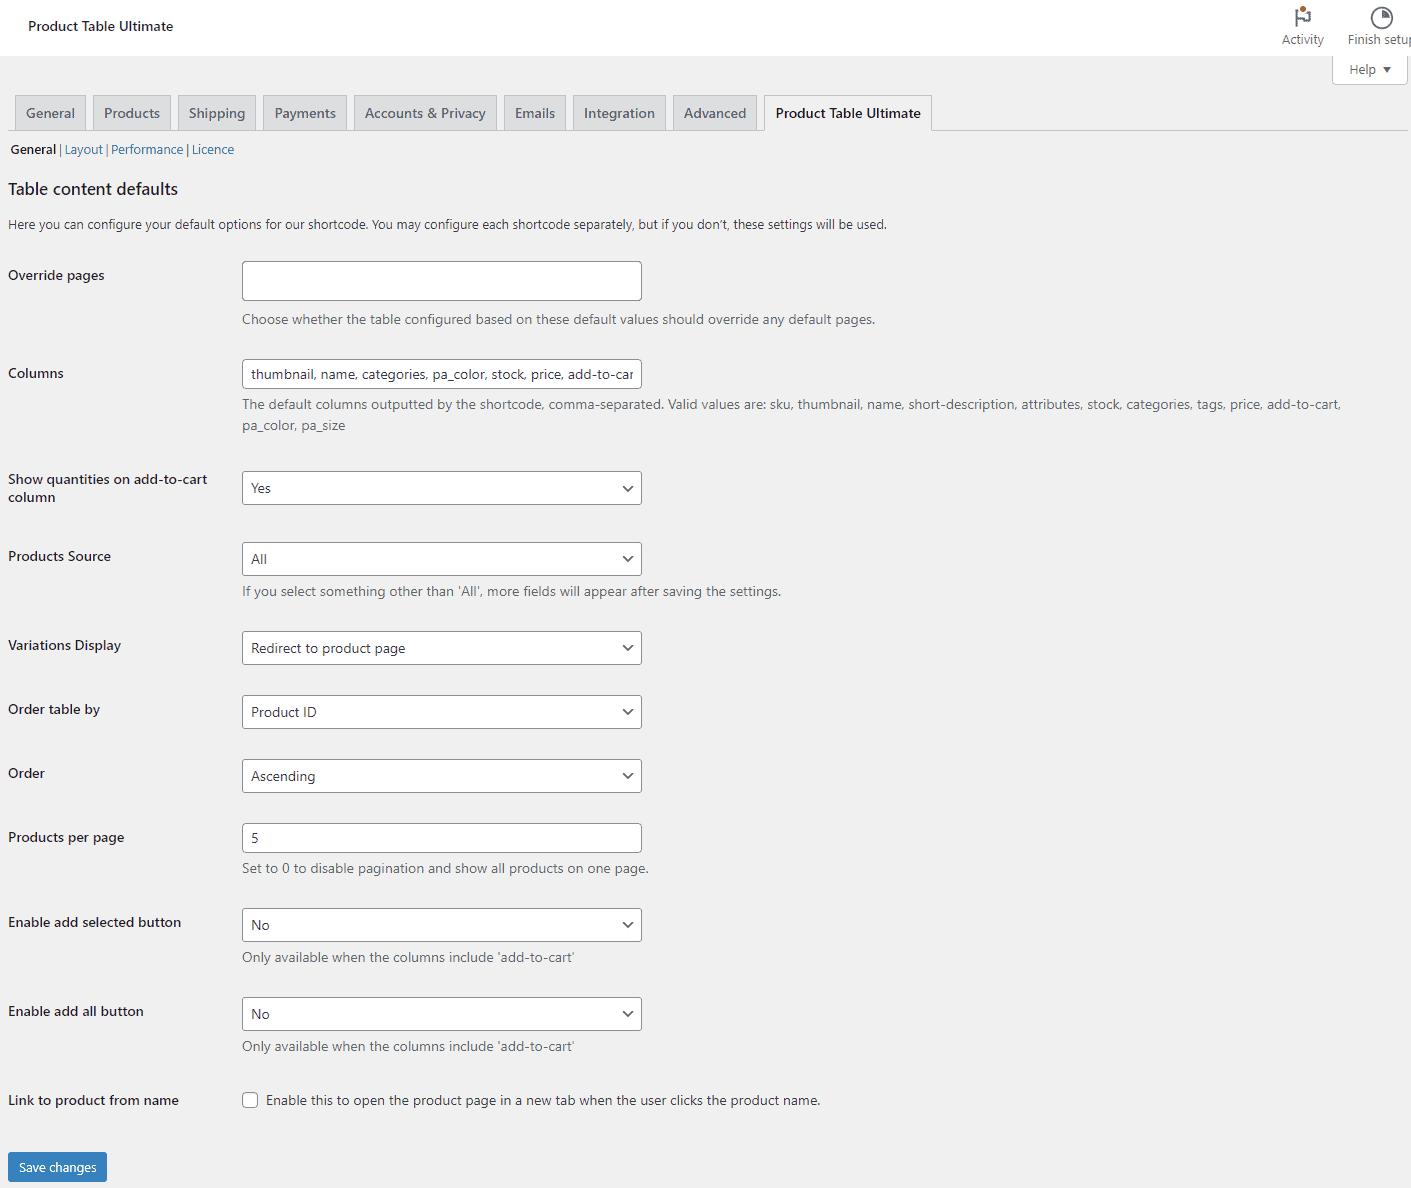
Here you can start configuring plugin settings and optimize the product table that your variable products will be displayed in. The Columns field lets you specify the column fields that will appear on your product table. This means you have full control over what appears on your WooCommerce variations product table.
The Show quantities on add-to-cart column dropdown menu lets you specify whether customers can set and add their desired product quantities from the product table to their shopping cart or not. You can also specify which products will be displayed in a table-style layout using the Product Source.
The WooCommerce Product Table Ultimate plugin also lets you show variations as separate rows, dropdown lists in the table itself, or set the table to redirect users to the product page when they select a variable product. You can specify how variations will be displayed in your product tables using the Variations Display dropdown menu.
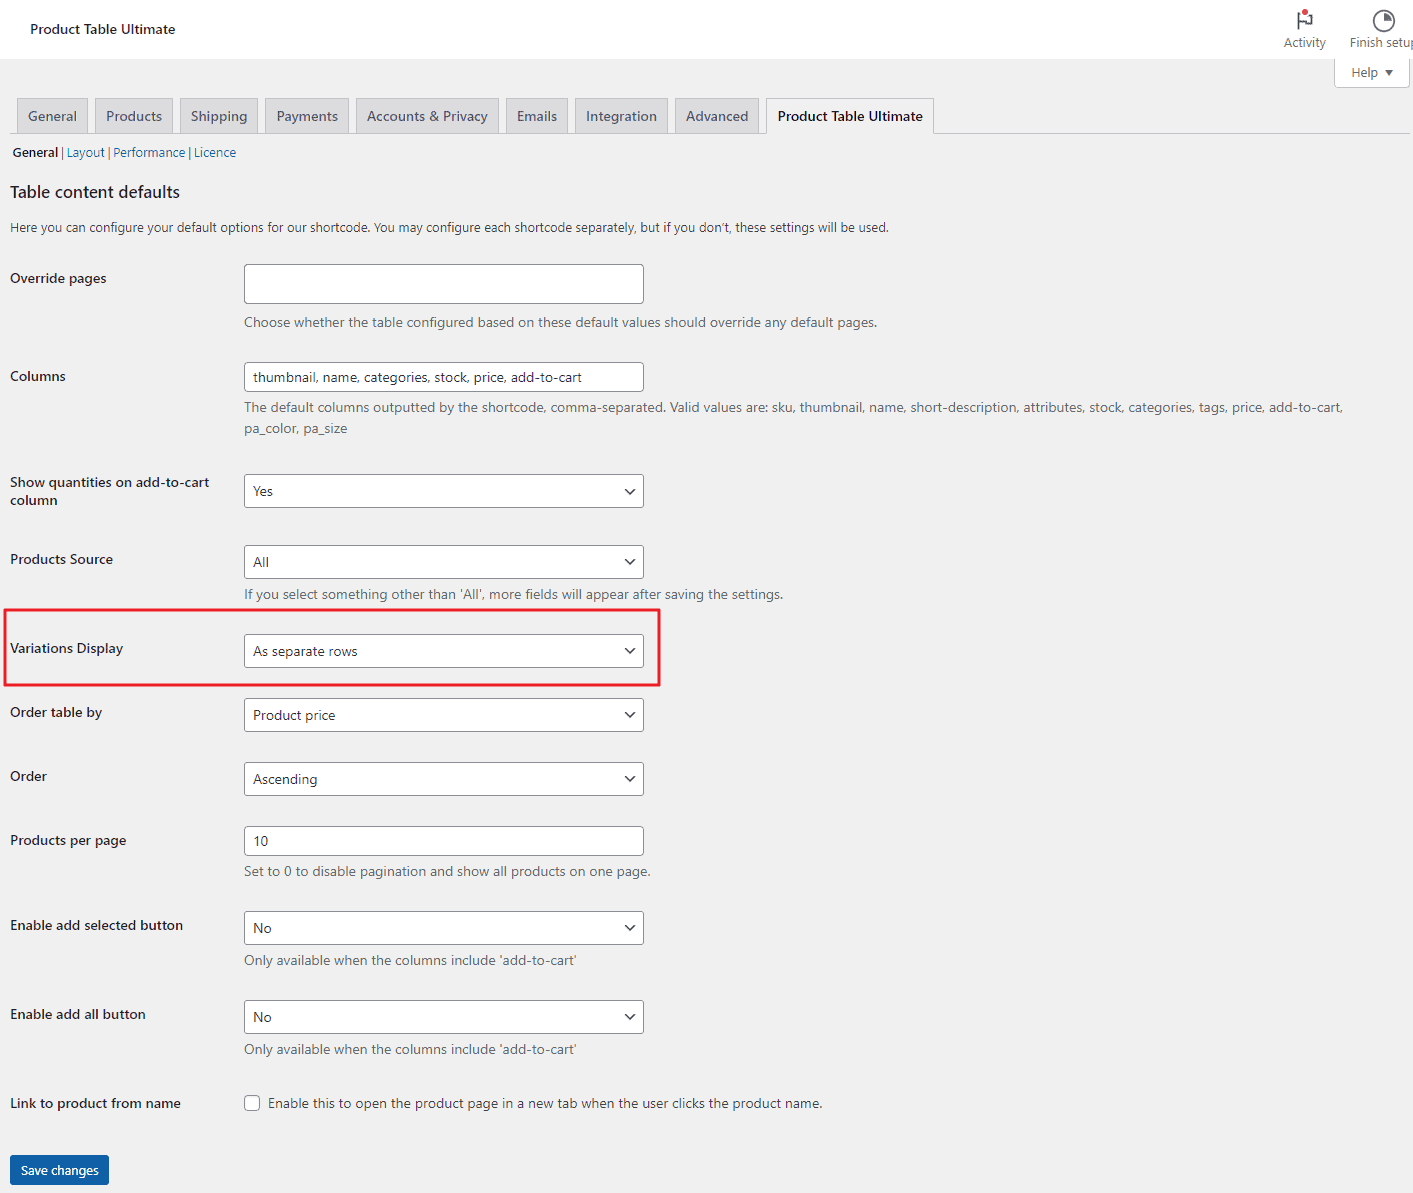
To provide the best customer experience and facilitate easy variation comparison for your customers, we recommend displaying them as separate rows or selecting the As separate rows option from the dropdown menu.
You can set the order rules and how products will be organized in the product tables using the Order table by and Order fields. You also have the option to display a custom number of products per page on your product tables by customizing the Products per page field.
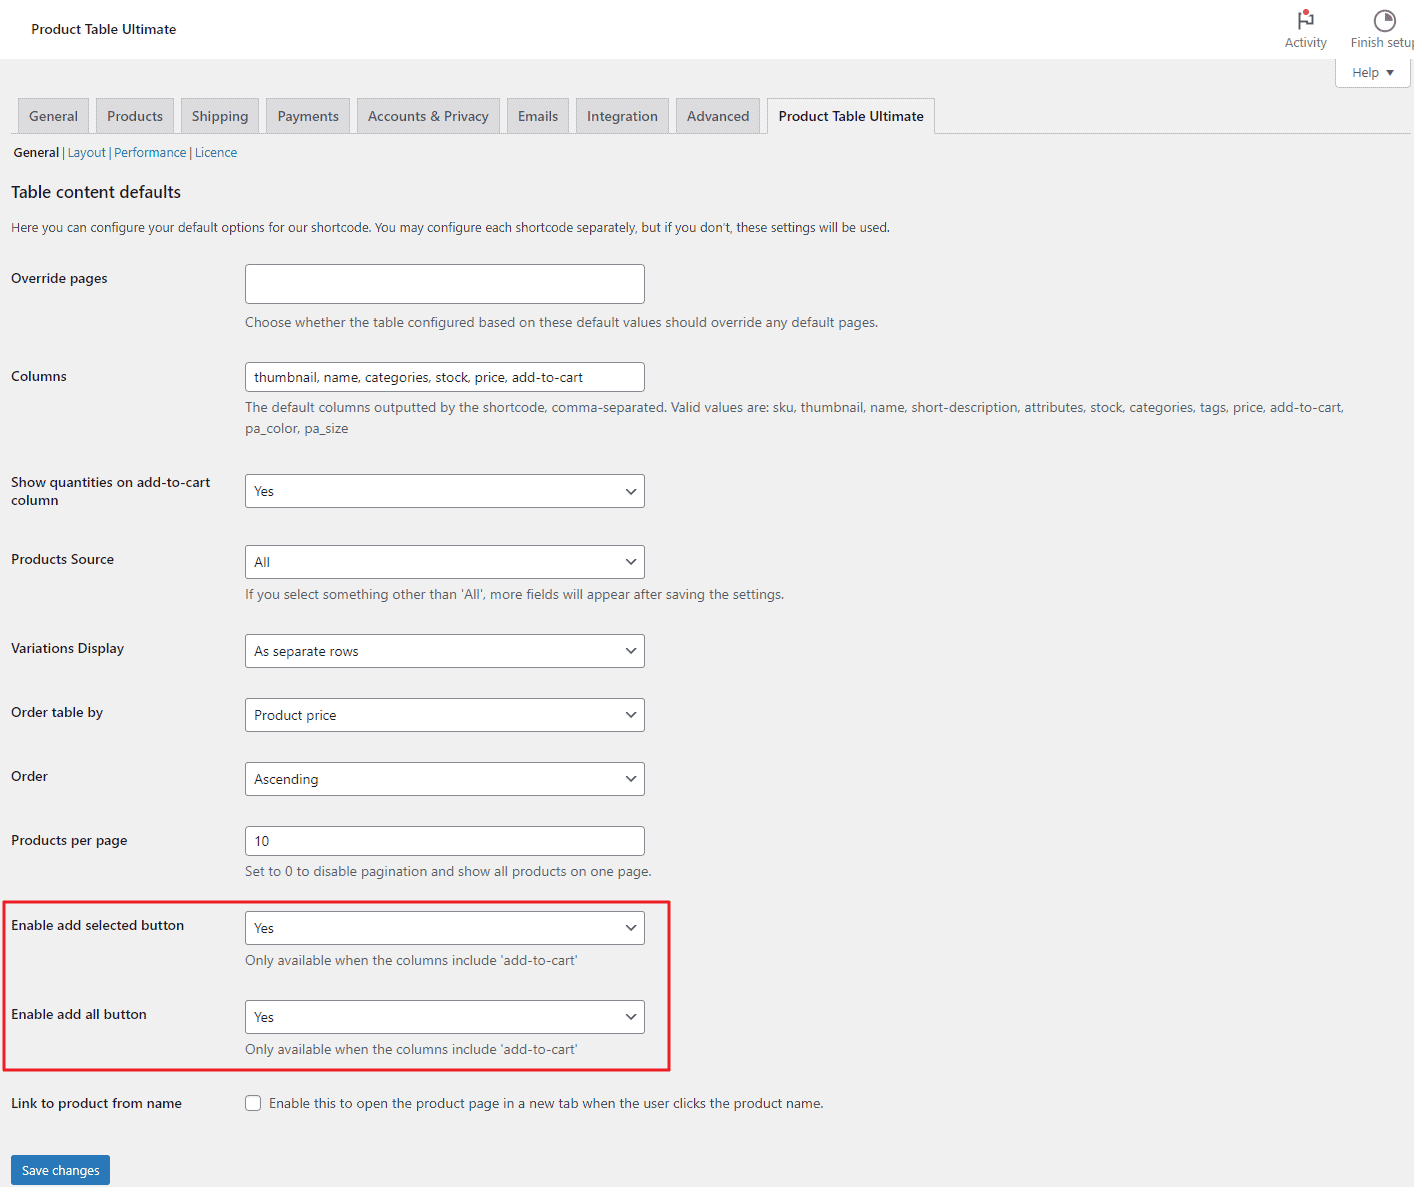
If you’re letting customers select their variation options directly from the product table, it’s a great idea to display checkboxes to let customers add multiple products to their cart at once. For this, make sure to select Yes for both Enable add selected button and Enable add all button drop-down fields.
Once you’re done setting up the product table, click on the Save changes button at the bottom to continue.
Step #3: Preview
You can display product tables anywhere on your WooCommerce site using shortcodes or Gutenberg blocks.

This way, customers can view multiple variation options for a single product in a table-style format which makes it easier for them to select multiple options at once.
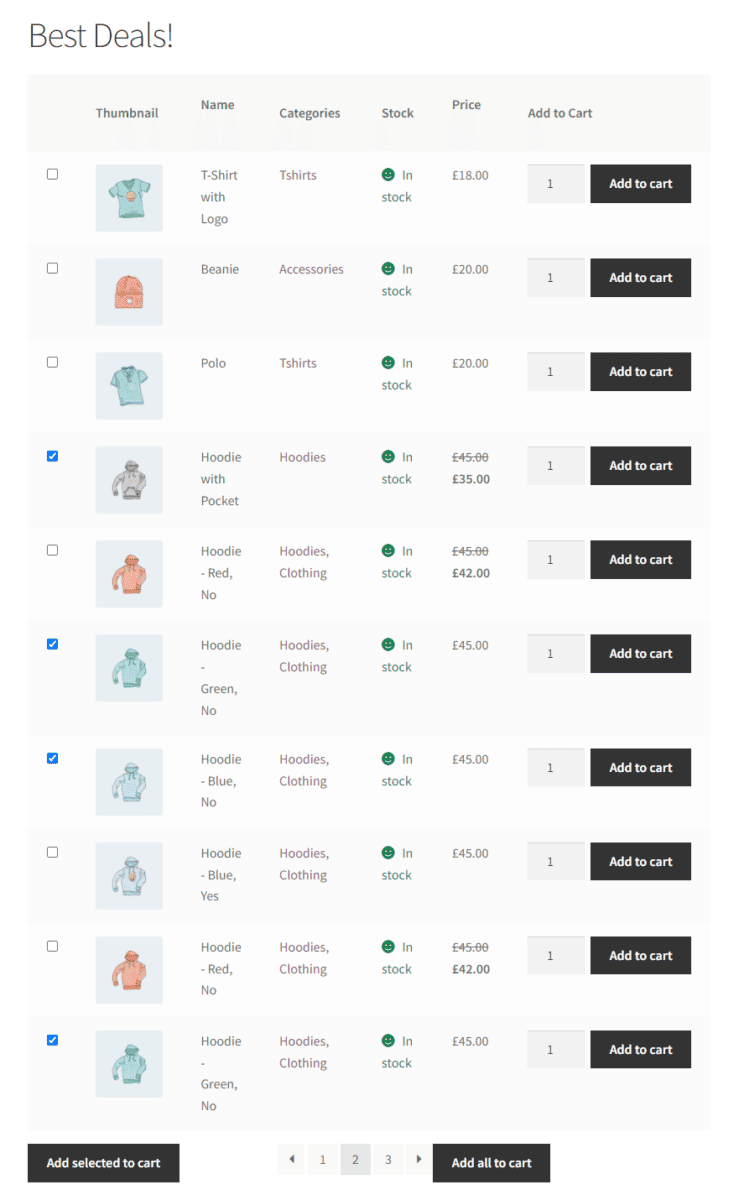
By clicking on a single button, customers can add multiple product variations to their shopping cart and checkout from your online store.
Maximize the impact of your product variations
Product variations are a vital aspect of WooCommerce, allowing online store owners to offer customers a wide range of choices and personalized options. Ensuring these variations display correctly is crucial for providing a seamless shopping experience and increasing sales. Promptly addressing any issues with their display is essential to avoid hindering product visibility and user satisfaction.
To fully harness the potential of product variations, dedicated plugins can be invaluable. Two exceptional choices for enhancing variation displays are Product Table Ultimate and Better Variations:
- Display variations as impactful swatches on product and shop pages using the WooCommerce Variation Swatches plugin
- The WooCommerce Product Table Ultimate plugin lets you display or list your variations in a table-style layout and display individual product variations in separate rows. This makes it easier for customers to compare multiple product variations and quickly add the ones that suit them the best.
- If you’re looking for a way to list your variations in a grid, WooCommerce Better Variations will do the job. The plugin offers functionality for disabling out-of-stock variations or styling them in a way that’s easily identifiable by customers.
Ready to optimize the way you display product variations in your WooCommerce store? Get started with WooCommerce Product Table Ultimate and WooCommerce Better Variations!
