How to accept tour bookings through WooCommerce
In this article, we’ll look at how to take tour bookings through your WooCommerce site. WooCommerce is the ideal platform for selling tours as it has huge flexibility on payment gateways.
We’ll take a look at three examples:
- Short tours that run several times a day at set times
- Regular tours, e.g. daily or weekly
- More occasional tours, on specific dates, with configurable extra options
- Regular tours with configurable extra options
Additionally, at the end, we’ll look at how to collect a deposit for the tours.
The methods covered in this tutorial can apply to any type of tour booking, e.g. walking tours, safaris, city tours, sightseeing, museum or historical tours, etc.
They can also be easily extended to any kind of bookable activity that takes place over a specific timeframe, e.g. yoga classes or mindfulness retreats, training courses, workshops, and so on.
For all the examples covered here, you’ll need the Bookings for WooCommerce plugin. Bookings for WooCommerce allows you to accept time- and date-based bookings through your WooCommerce store – and it integrates with all themes, page builders and payment gateways.
Example one: tours that run at set times during the day
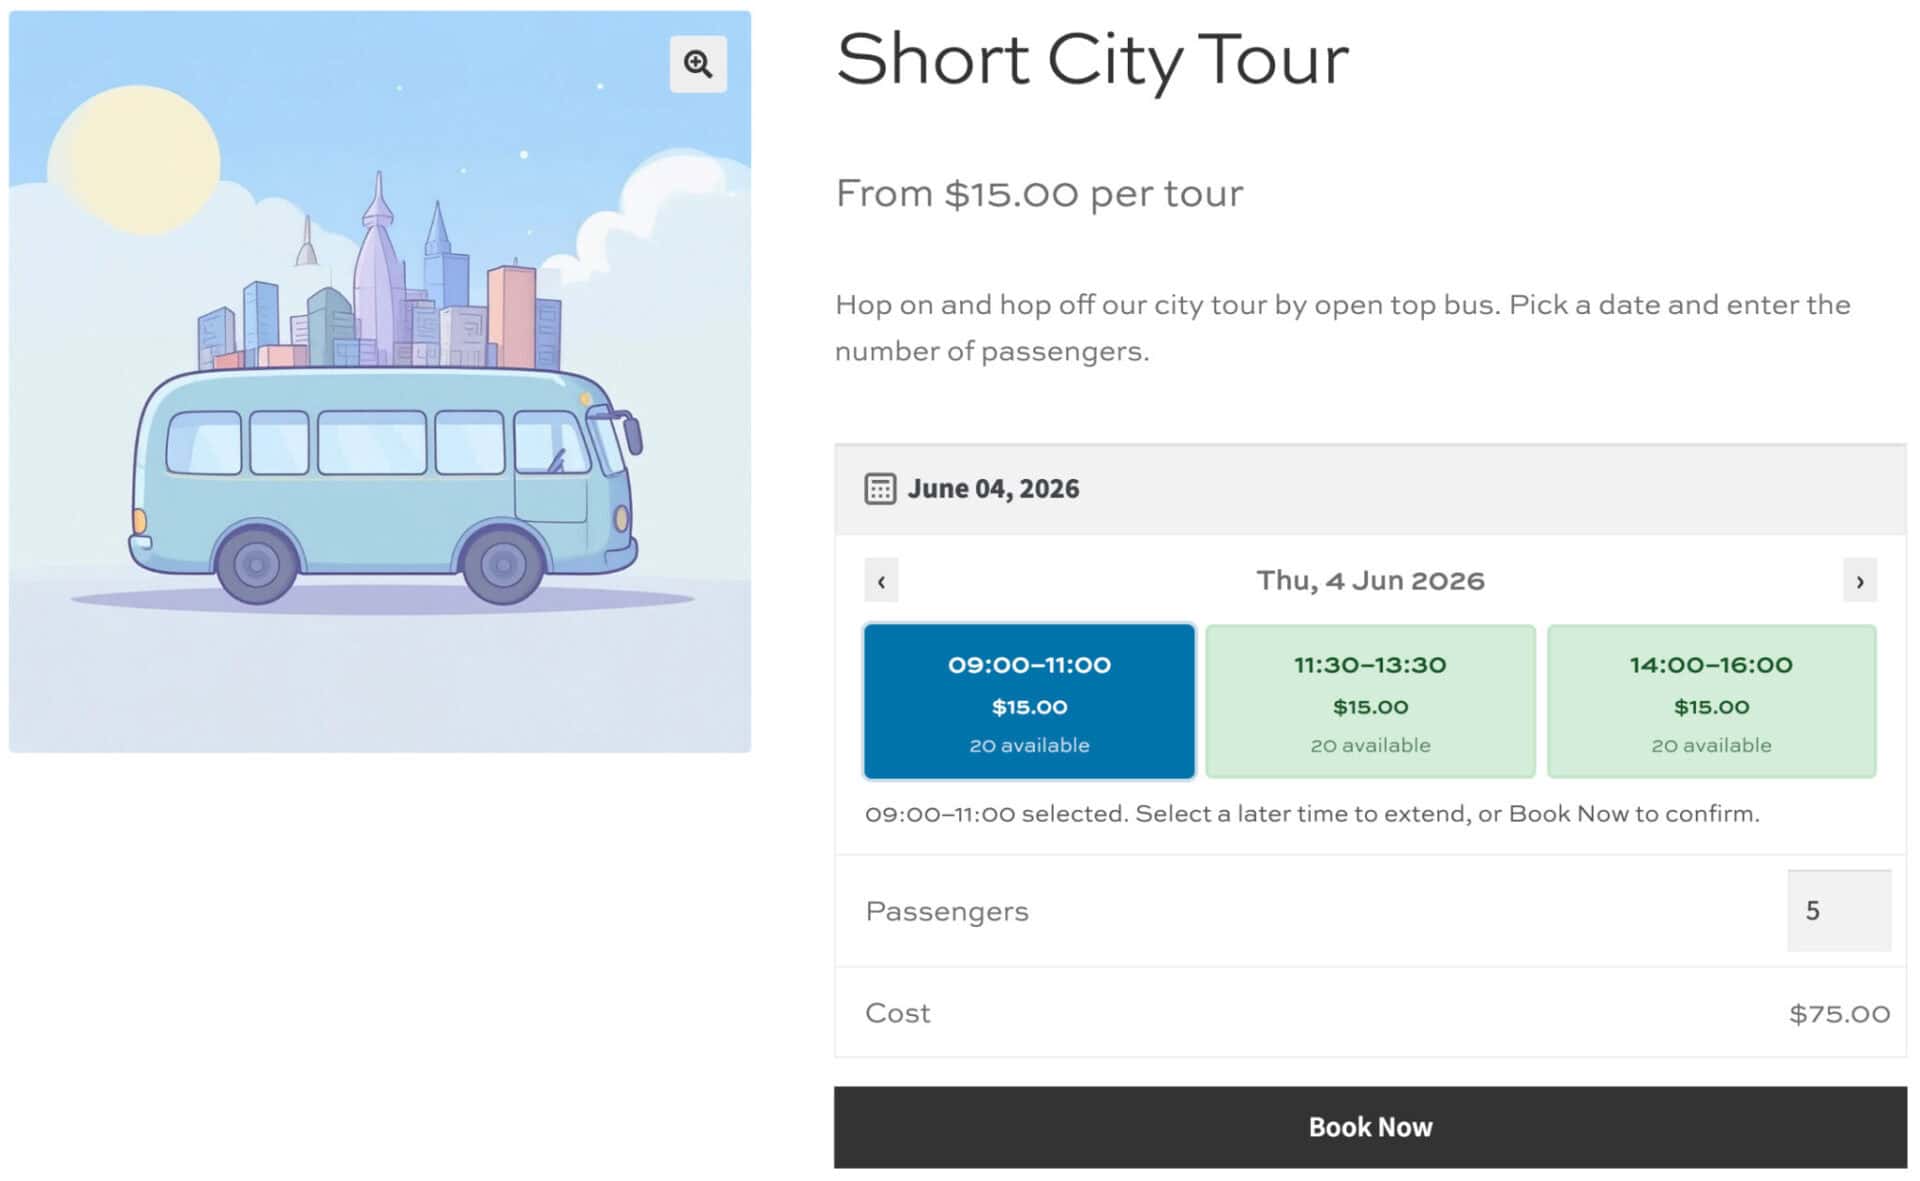
Time slots let you run a tour several times a day at fixed start times. This is ideal for short tours with multiple daily departures – for example, a two-hour city walking tour that runs at 9am, 11am, and 1pm.
Customers pick a date from the calendar, then choose the departure time that suits them. You set how many places are available on each departure.
This uses the time slots feature in Bookings for WooCommerce. Time slots divide a single bookable day into fixed-length windows, so customers book a specific slot rather than a whole day.
Step #1: Create the bookable tour product
Create a standard WooCommerce product, then set it up as a booking:
- Go to Products > Add New and create your product
- Give the product a title, e.g. ‘City walking tour’, and add your description, image, categories, and tags
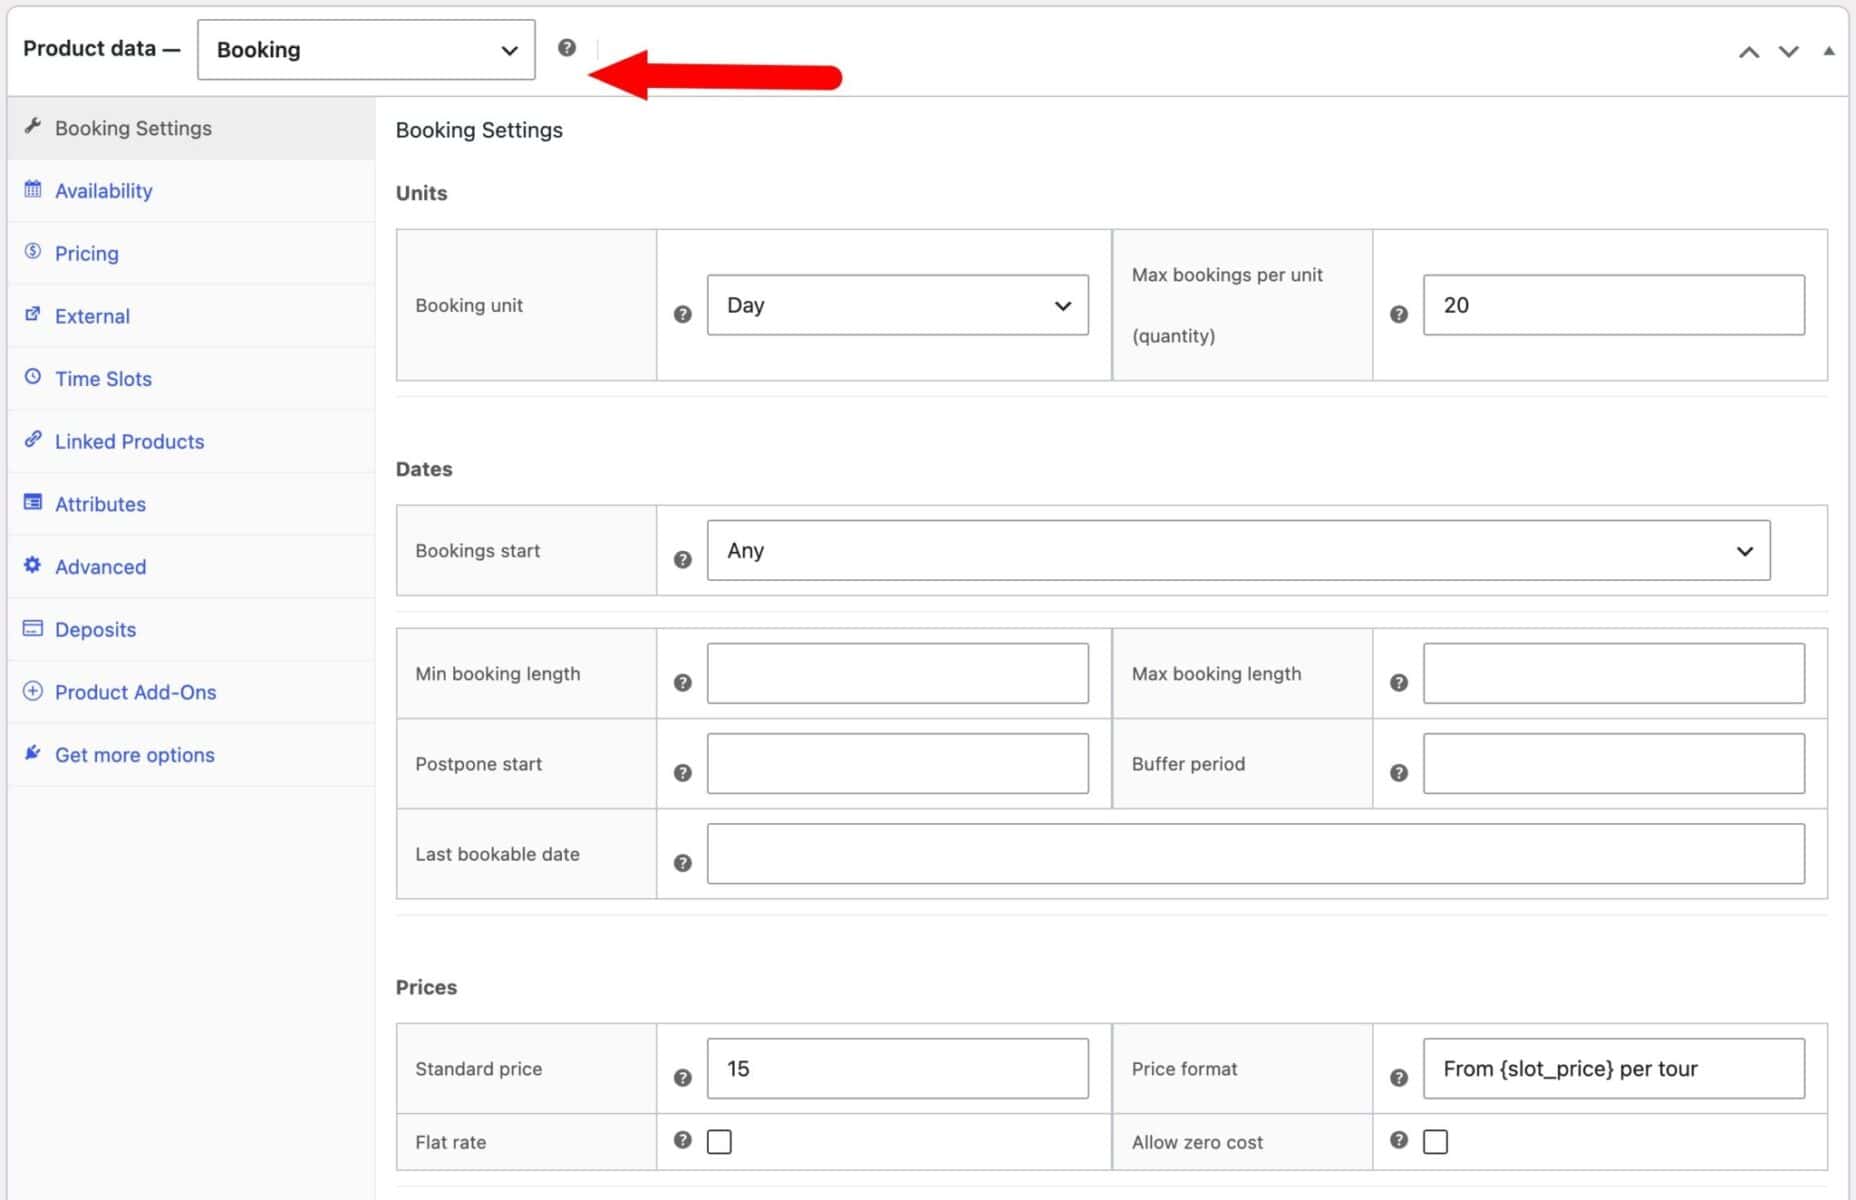
- Select ‘Booking’ in the ‘Product data’ dropdown
- Set the ‘Booking unit’ to ‘Day’ on the ‘Booking Settings’ tab – time slots are only available when the unit is set to ‘Day’
- Enter the number of places available on each tour in the ‘Max bookings’ field – if you have capacity for 20 people, enter 20 in this field. The user will be able to specify how many people they are booking for on the product page
You now have a bookable product set to the day unit. Next, we’ll divide each day into time slots.
Step #2: Enable and configure time slots
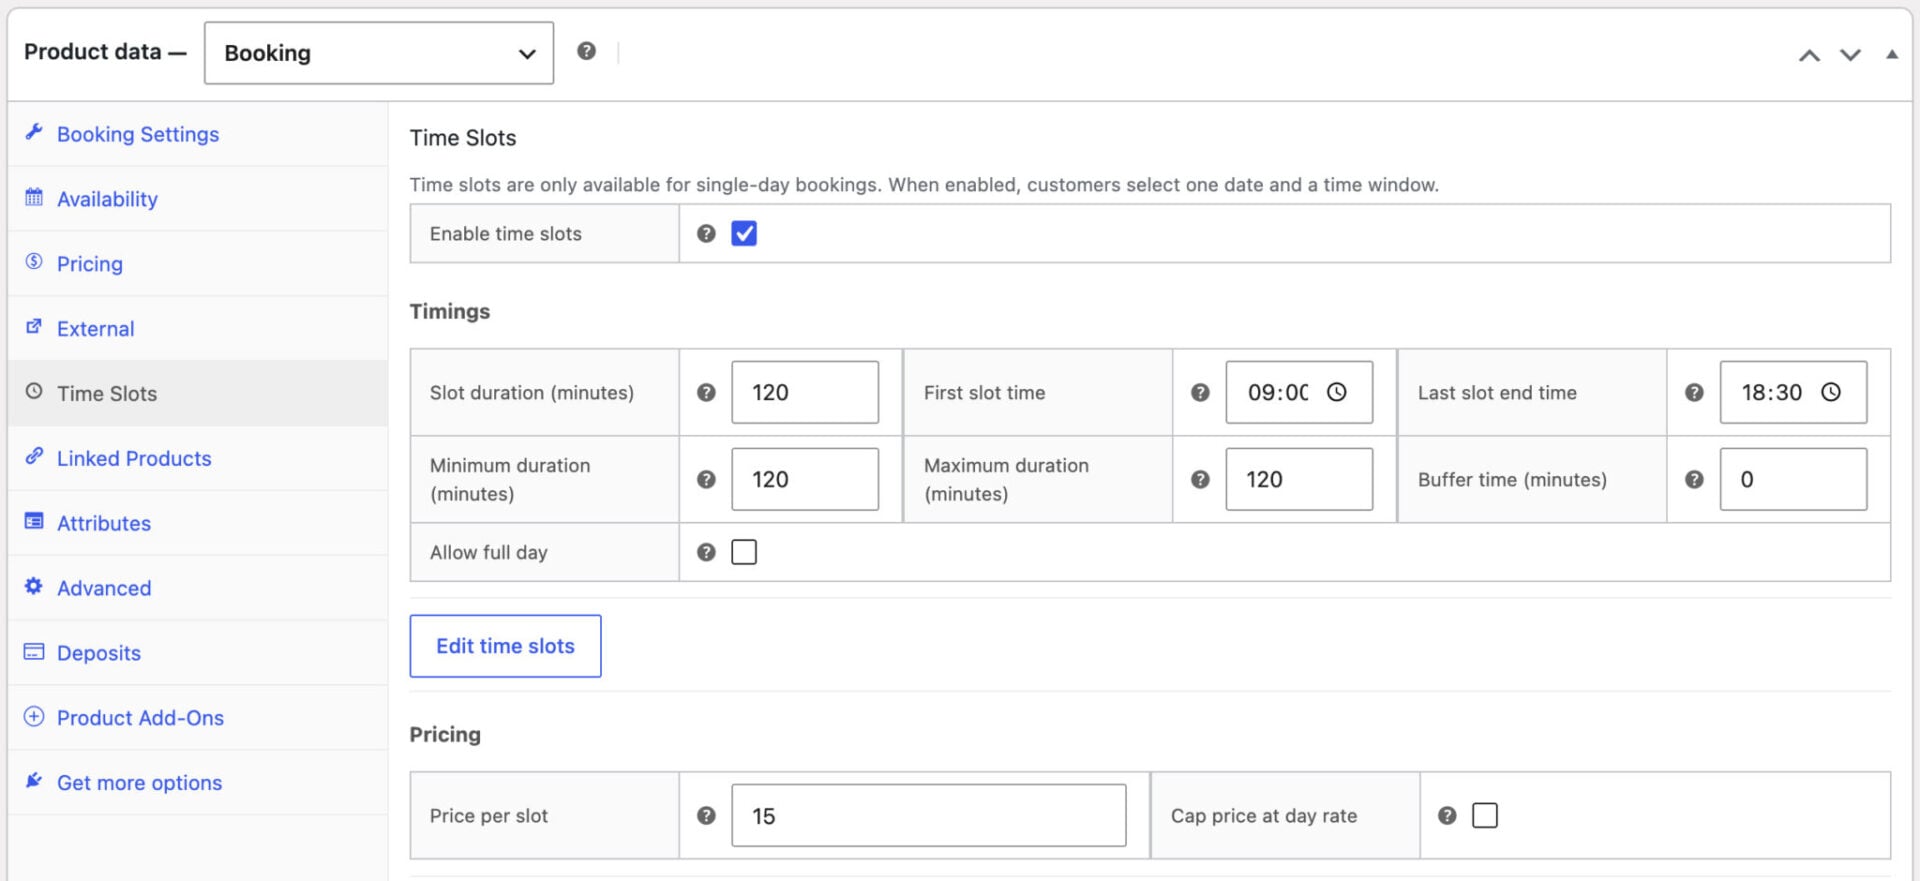
Open the ‘Time Slots’ tab and check ‘Enable time slots’. The remaining settings appear once this is enabled.
Set your timings to match your tour schedule:
- Slot duration (minutes) – the length of each tour. For a two-hour tour, enter ‘120’
- First slot time – when the first tour departs, e.g. ’09:00′
- Last slot end time – when the last tour must finish, e.g. ’18:30′
Set both the ‘Minimum duration’ and ‘Maximum duration’ to ‘120’ to fix each booking to a single two-hour tour. This stops customers combining slots into a longer booking.
Your day is now split into several fixed departures.
Step #3b: Optionally set irregular departure times
By default, slots run back to back from the first slot time to the last slot end time. However, if your tours run at separate times during the day – say 09:00, 11:30, 14:00 and 16:30 – click the ‘Edit Time Slots’ button in the ‘Timings’ section.
This opens a table with one row per slot. You can disable slots you don’t need, override individual start and end times, and restrict a slot to certain days of the week.
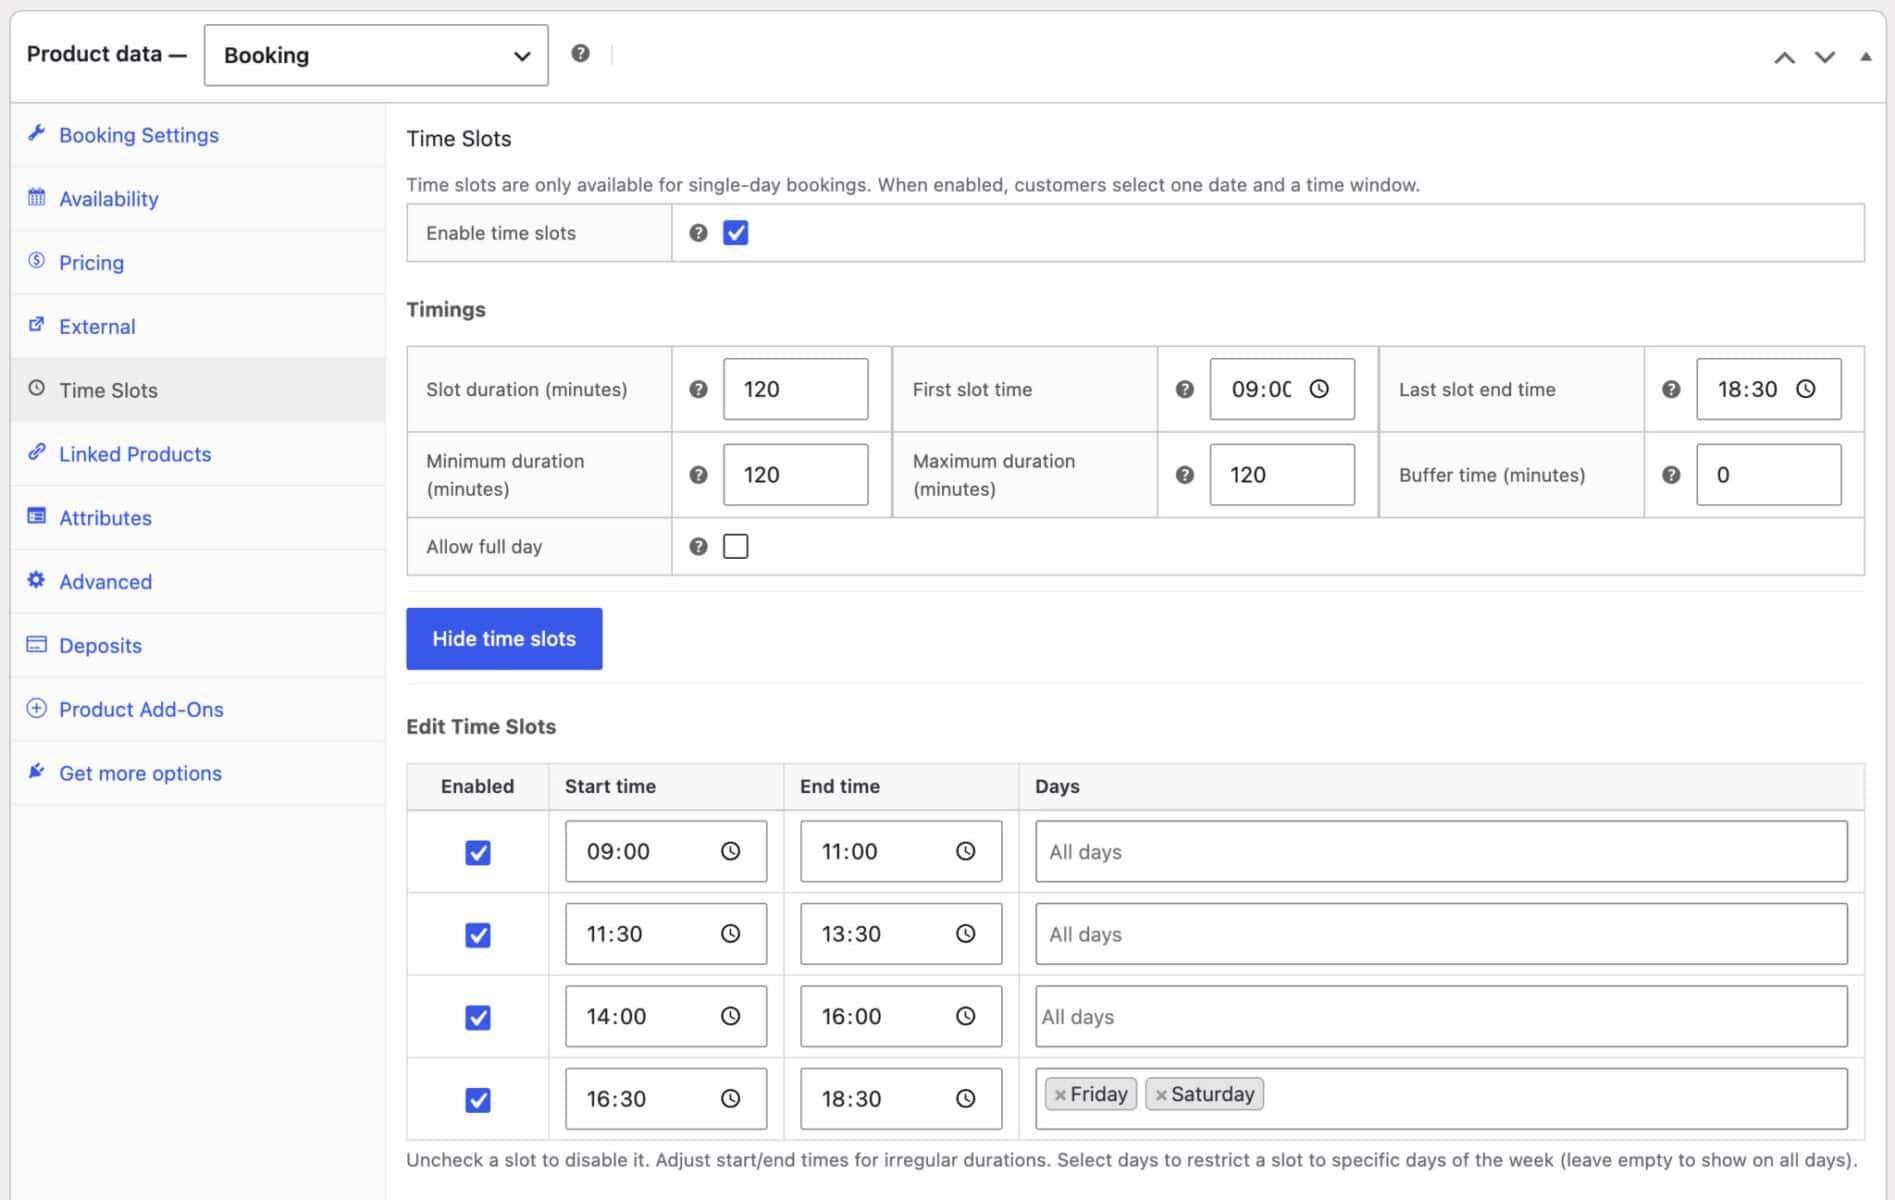
To restrict a slot to specific days, use the ‘Days’ column on that slot’s row. Select one or more days and the slot only appears to customers on those days. If you leave the column empty the slot will run every day.
This lets you offer a different timetable on different days. You could run all departures on weekdays, but show only the 09:00 and 14:00 slots at the weekend by clearing the 11:30 slot’s weekend days. You could also add an evening departure that runs on Fridays and Saturdays only.
This gives you full control over when each tour departs. Check out the demo product here.
Next, let’s look at how to set the price.
Step #3: Set the price per slot
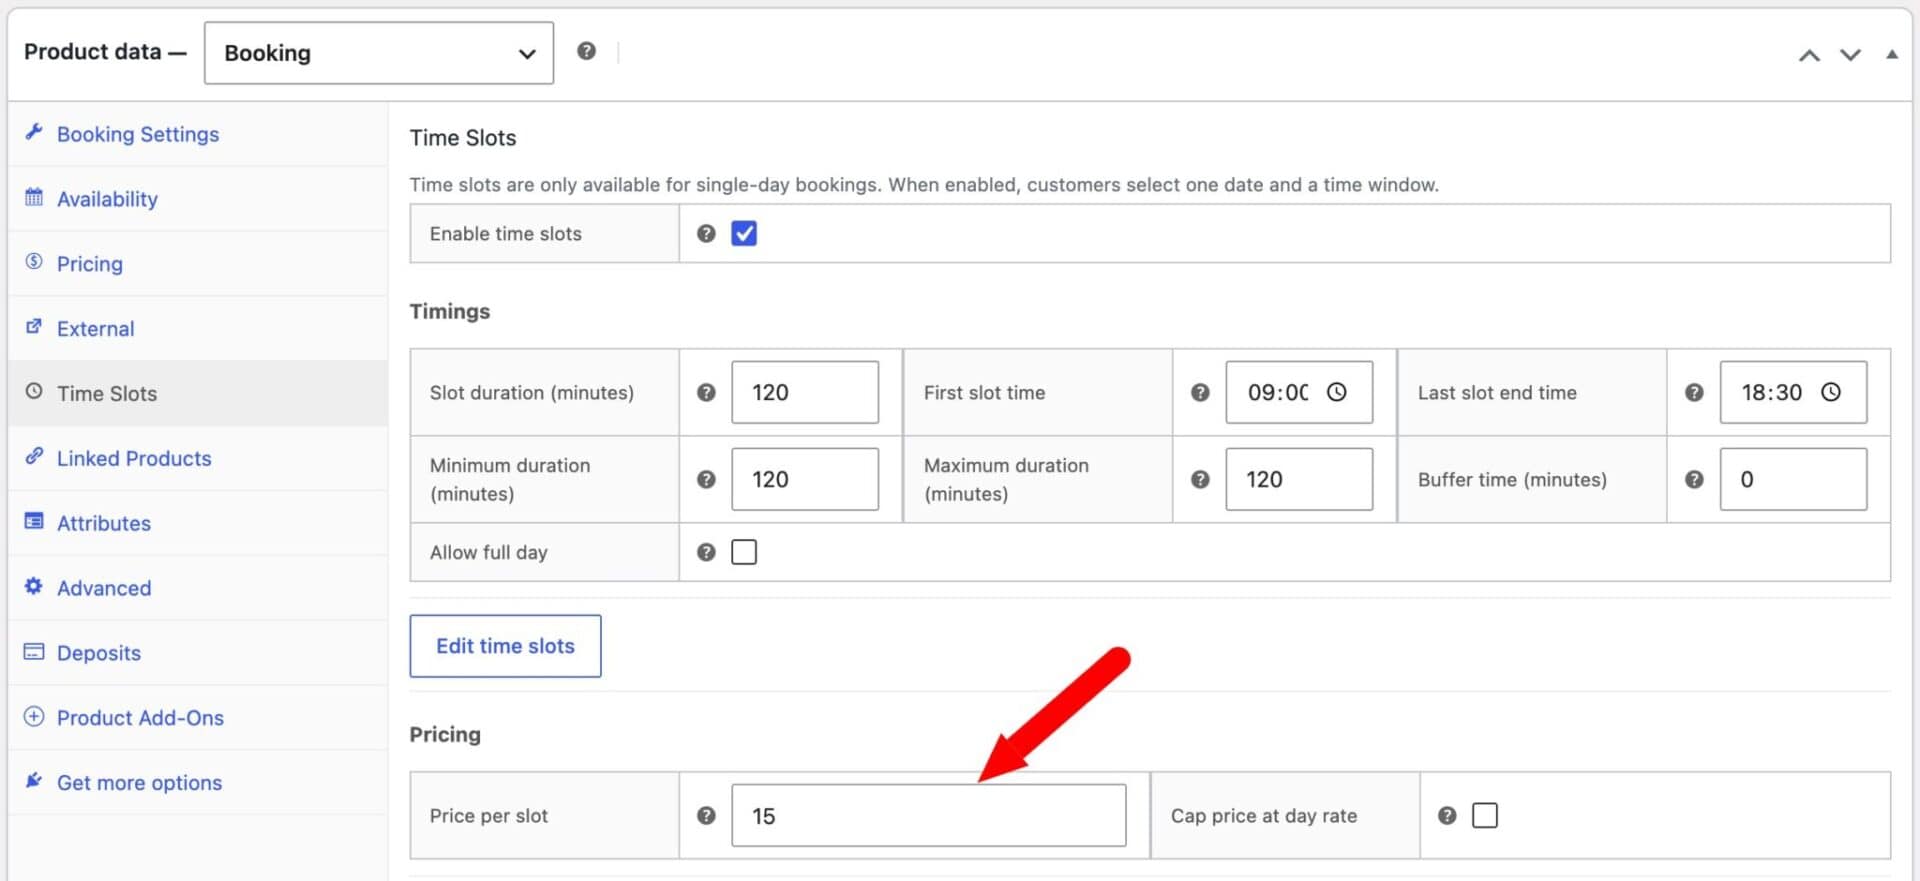
Enter the cost of one tour in the ‘Price per slot’ field, e.g. ‘25.00’. Each slot a customer books is charged at this rate.
Because each booking is fixed to a single slot, the customer pays this price per tour. If you leave the field blank, the product’s standard price is used instead.
Now each tour has a price. Finally, let’s choose how customers select their slot.
Step #4: Choose how customers select a time
Pick a layout in the ‘Time slot view’ field on the ‘Time Slots’ tab. For a tour with a few fixed departures, the ‘Time Picker’ works well – it shows each departure as a cell in a grid that customers click to select.
Other options include ‘Start time and End time’, which uses dropdowns, and a ‘Diary View’ that lists each slot with its availability. Choose whichever suits your tour best.
You can also set the ‘Time slots format’ to control how each slot is labeled, e.g. ’09:00–11:00′ or ‘From 09:00’.
Save and publish your product. Now customers can pick a date, choose a departure time, and book their places.
Now let’s look at another example.
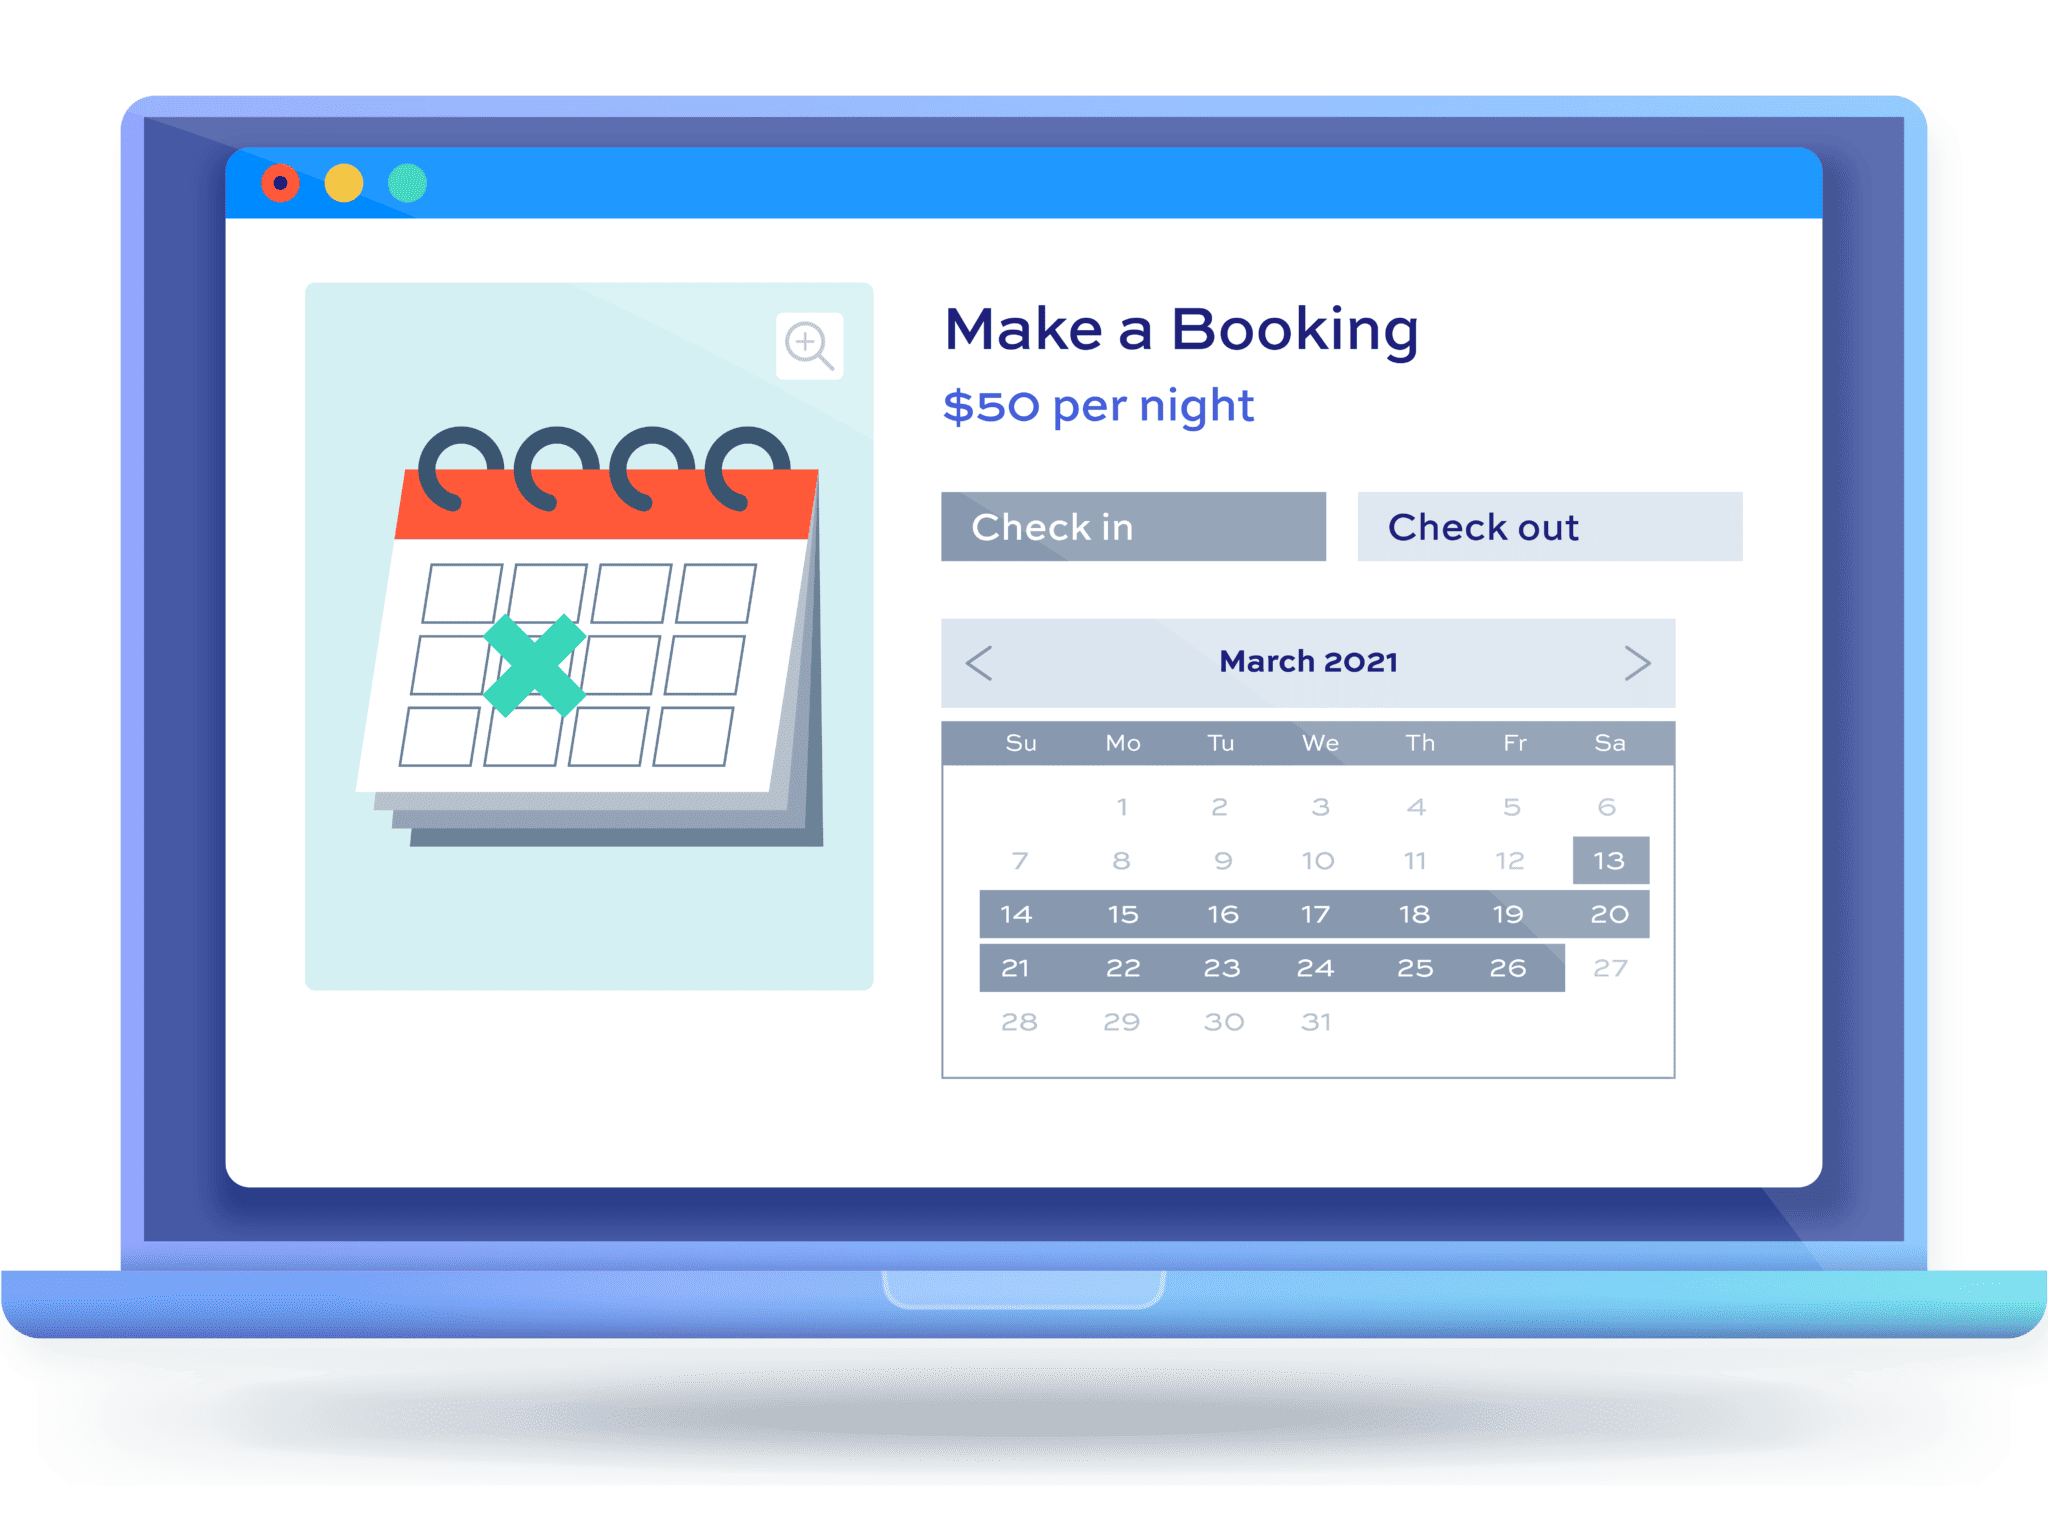
Example two: city sightseeing tours held on regular dates
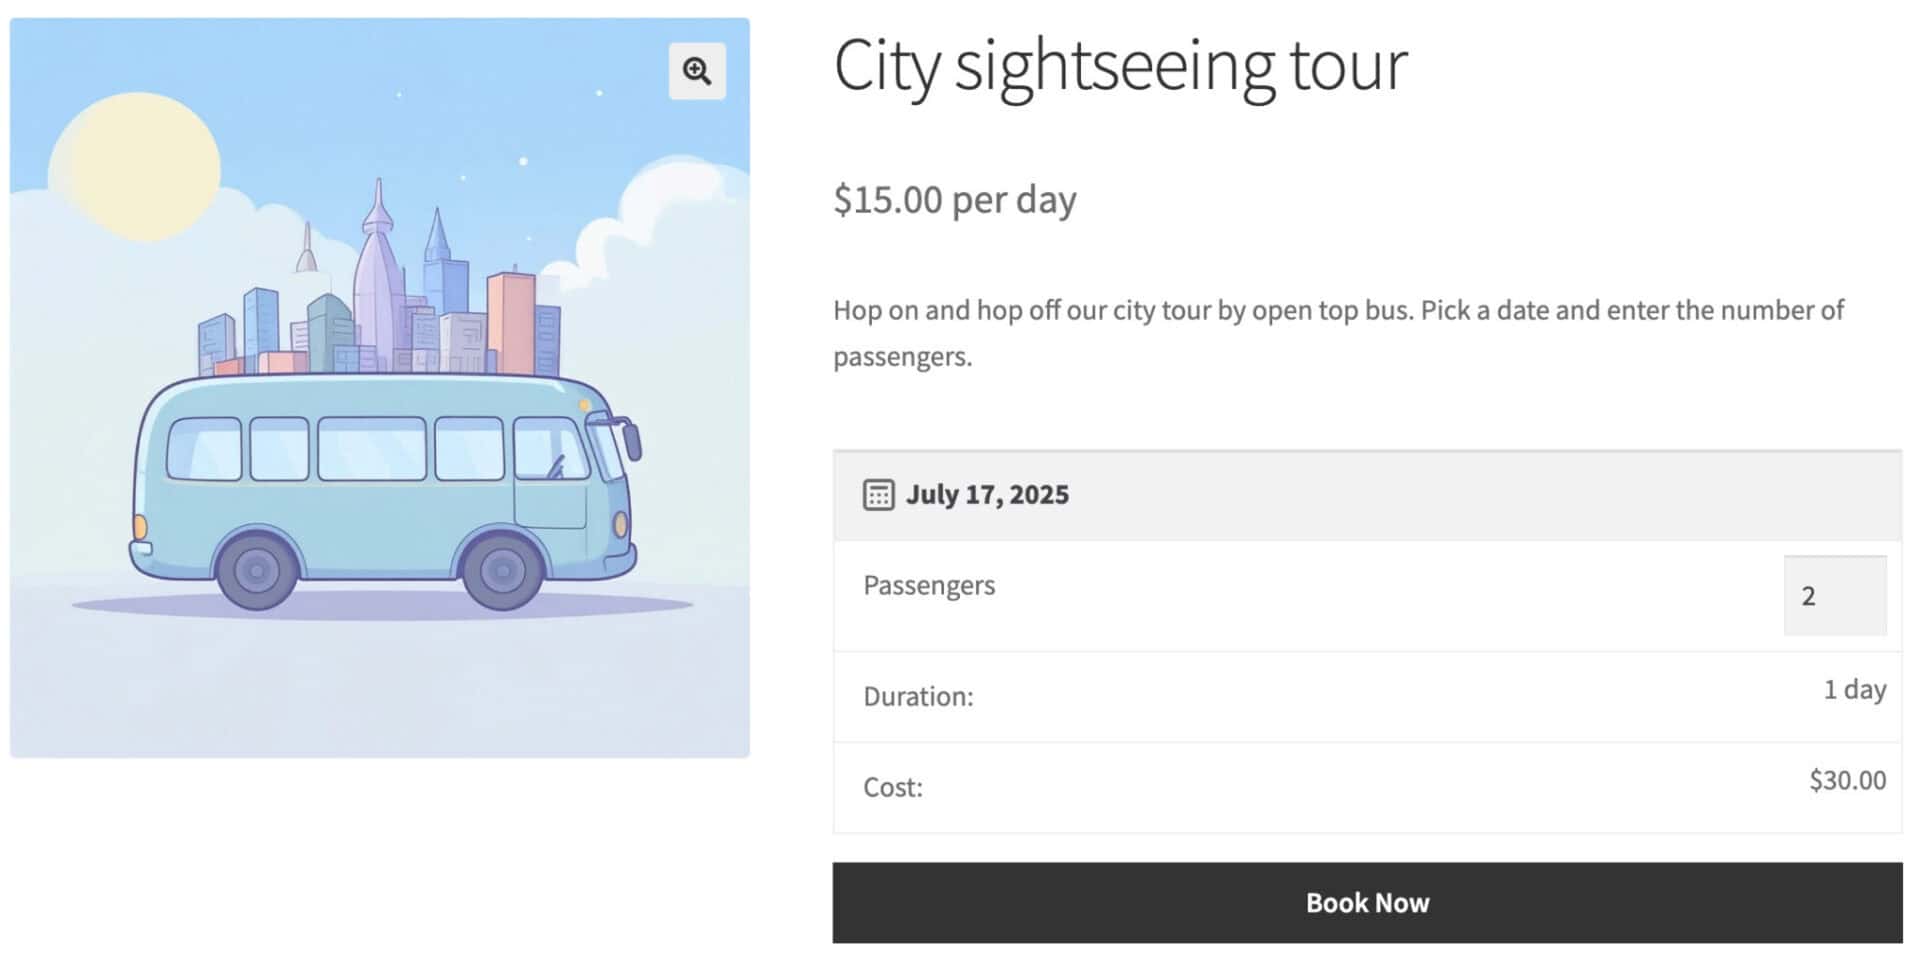
In this example, we’ll create a simple product for a city sightseeing tour. You’ll be able to set a maximum number of tickets that can be purchased each day. Users can specify how many passengers they’re purchasing for and the cost will be calculated accordingly. When a user buys a ticket, the number of available places remaining for that day is reduced.
Step #1: Create your tour booking product
With Bookings for WooCommerce activated, you can create your tour booking product in the same way you would any other product:
- Go to Products > Add New and create your product
- Give the product a title, e.g. ‘City sightseeing tour’, and enter any descriptive text you like
- Upload a featured image and define any categories or tags
Up to this point, everything is exactly the same as a standard WooCommerce product. To make it a bookable product:
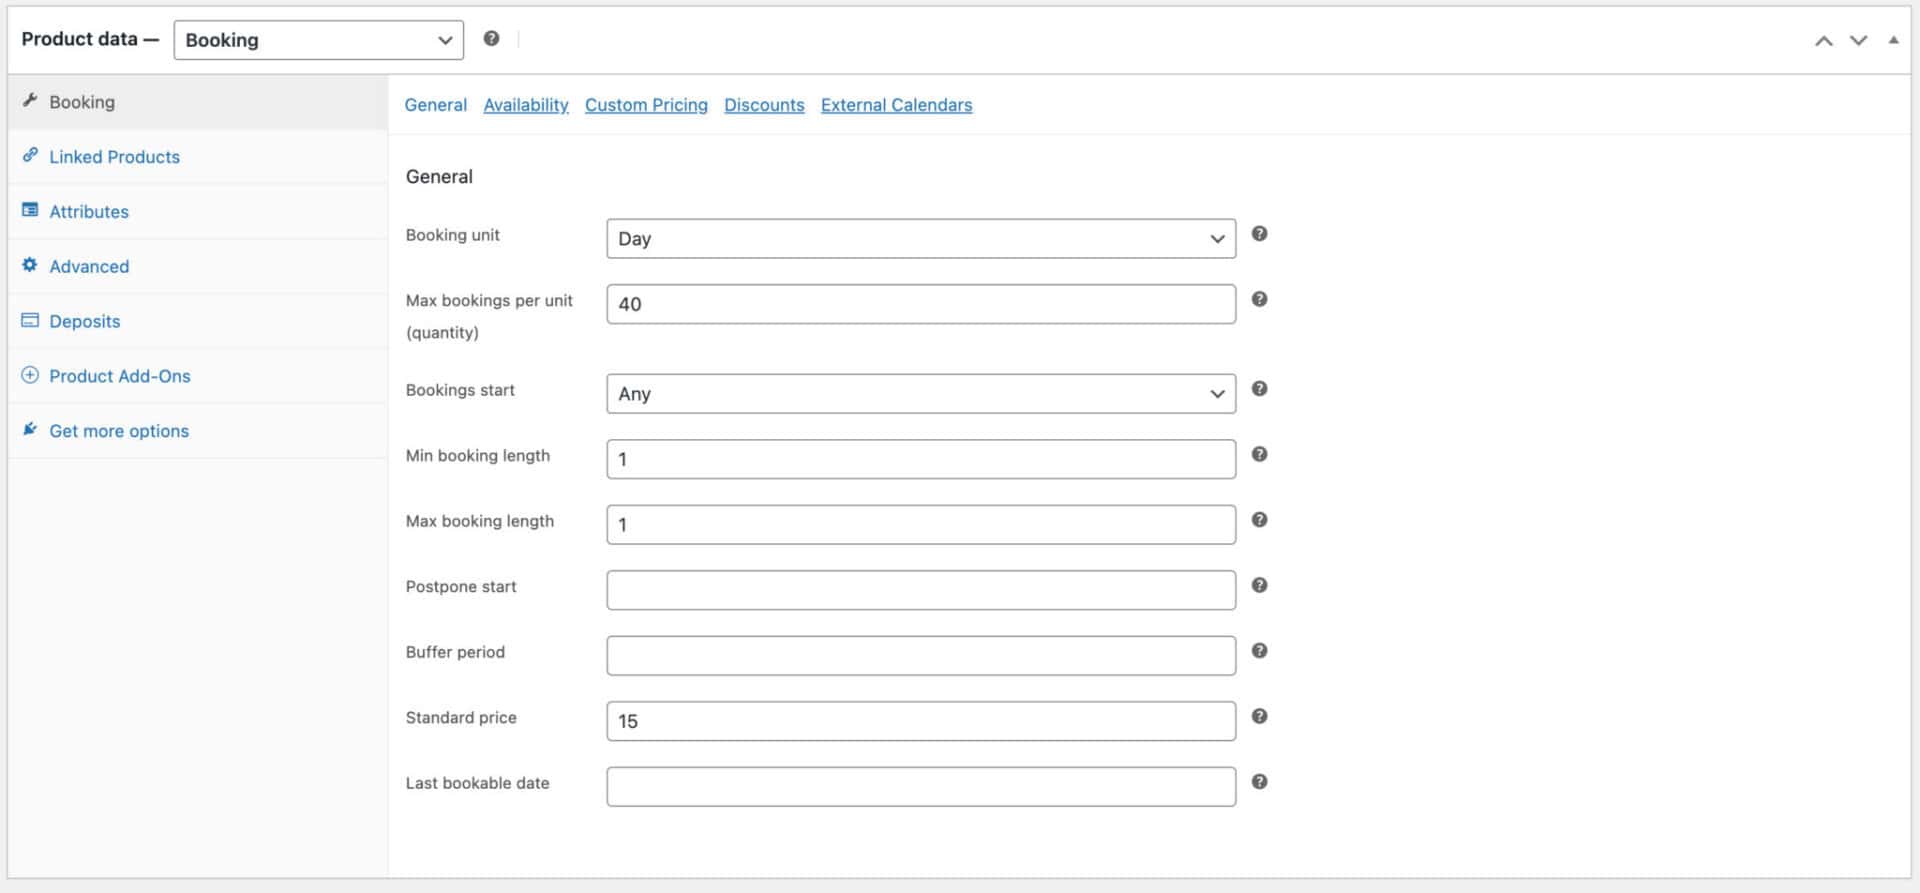
- Select ‘Booking’ in the ‘Product data’ dropdown
- Enter a ‘Booking Unit’ – in this case, we’ll enter ‘Day’ as the tours will take place during the day
- Define how many places are available per day on the tour in the ‘Max bookings’ field
- Set the minimum and maximum number of days that the tour will last. In our case, the tour is a single day so we need to enter ‘1’ in the ‘Max booking length’ field
- Finally, enter the cost per day of a single booking
Save and publish your product. Now users will be able to select the day of their booking, enter the number of passengers, and add the product to their cart. There’s a demo product here.
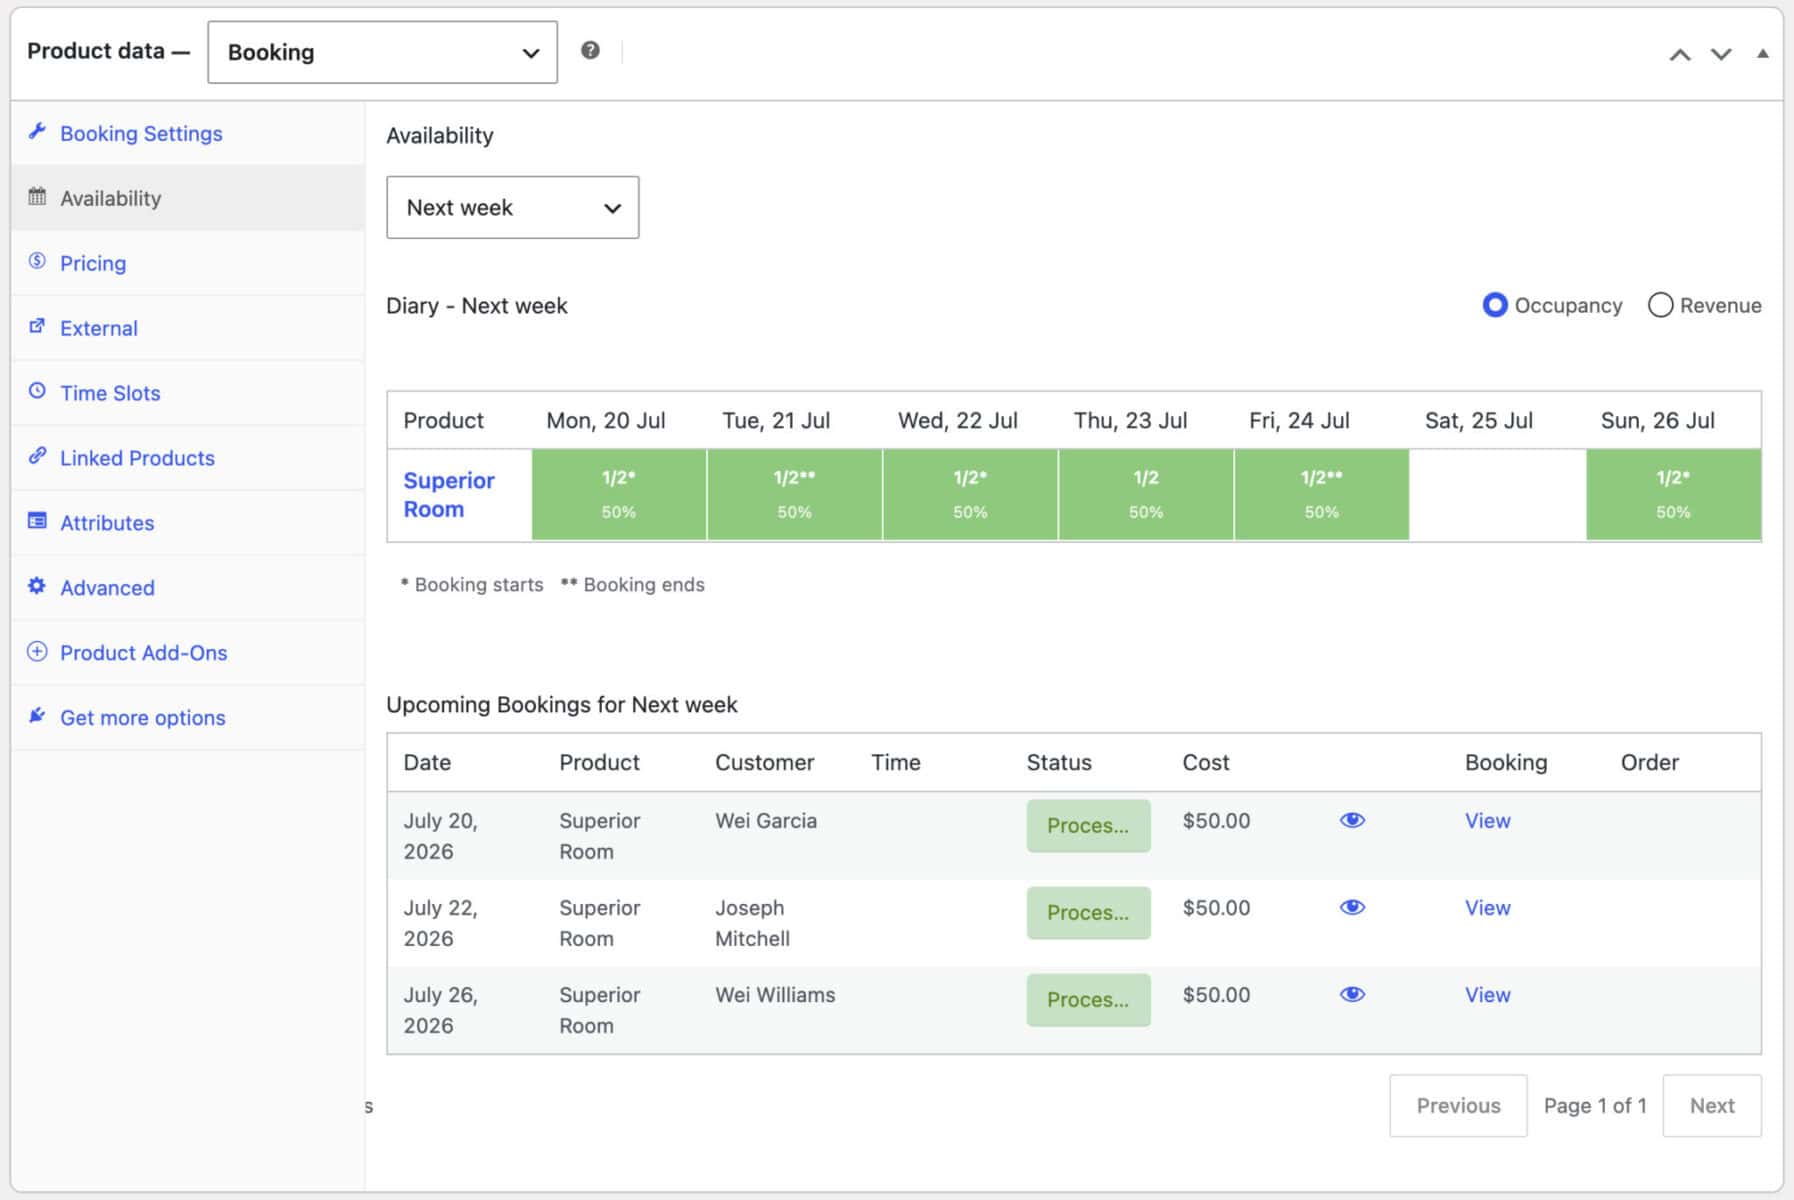
And you’ll be able to track how popular the tour is per day using the ‘Availability’ calendar in the back end.
That’s how to create a simple tour booking product in WooCommerce using the Bookings for WooCommerce plugin.
For some more advanced options using this plugin, take a look at example three
below.
Example three: tours held on specific dates
In this example, we’ll look at how to create specific products for each tour date. This is ideal if you offer tours on specific, infrequent dates: for example, you are offering a few tours on specific dates per month or year. We’ll also look at how to add optional extras to the tour.
Let’s look at how to create this using standard WooCommerce features, plus how to add optional extras using another plugin. There’s a demo product here so you can see it in action.
Step #1: Create your tour product
In this example, we’re just going to use a standard WooCommerce product for our safari:
- Go to Products > Add New and create your product
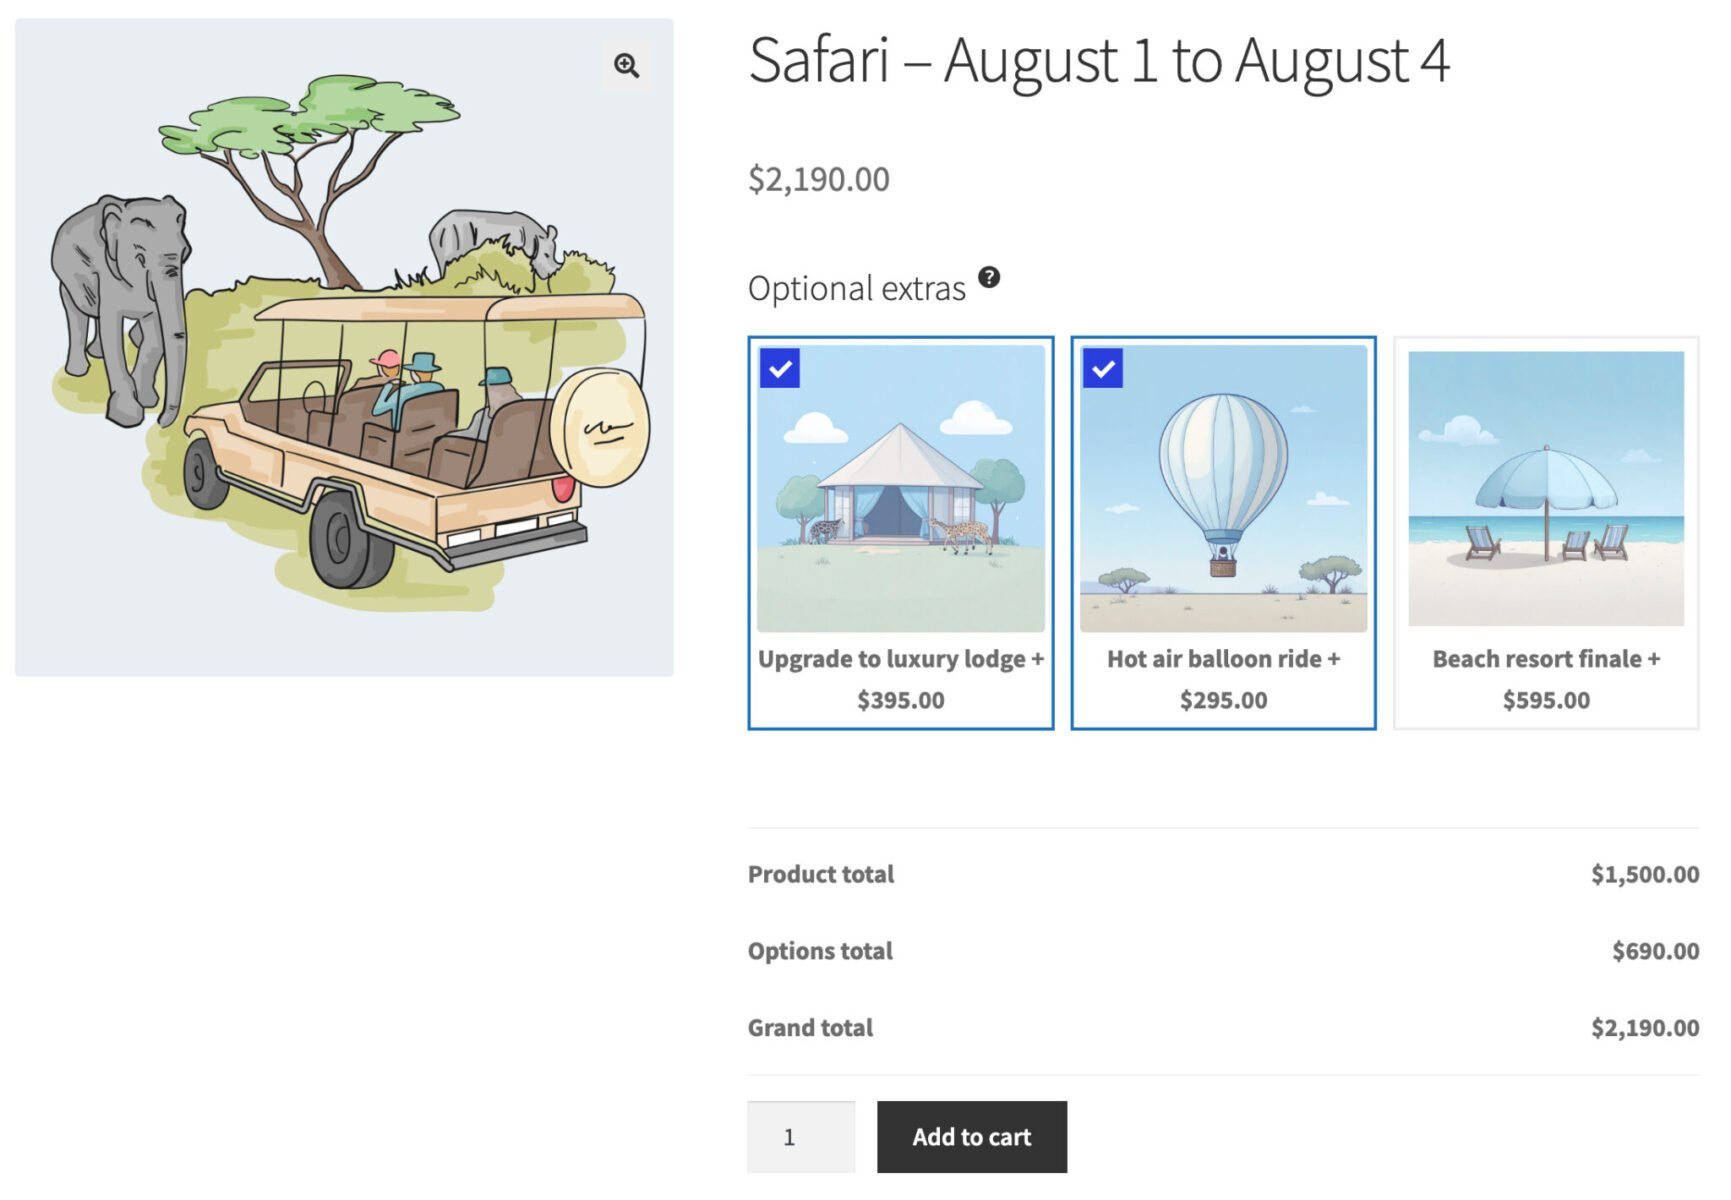
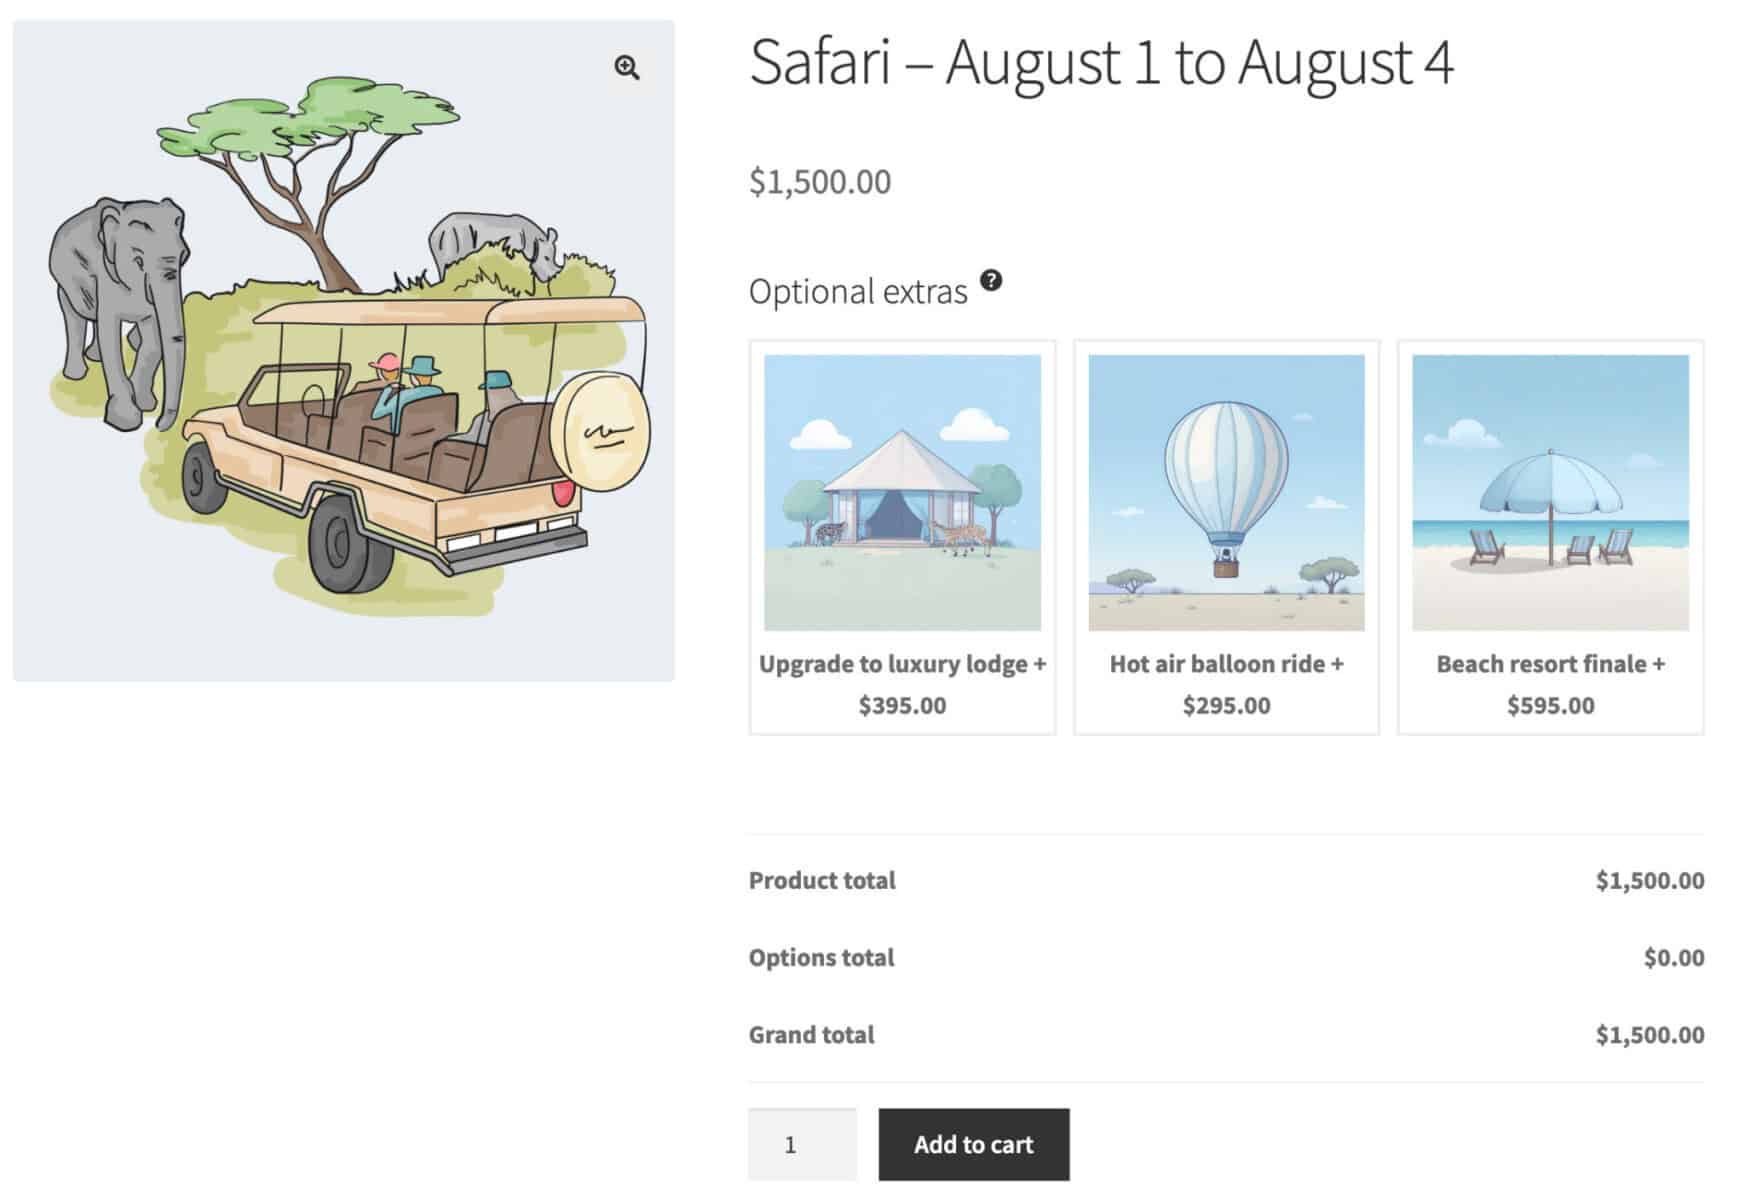
- Give the product a title, e.g. ‘Safari, August 1 to August 4’, and enter any descriptive text you like
- Upload a featured image and define any categories or tags
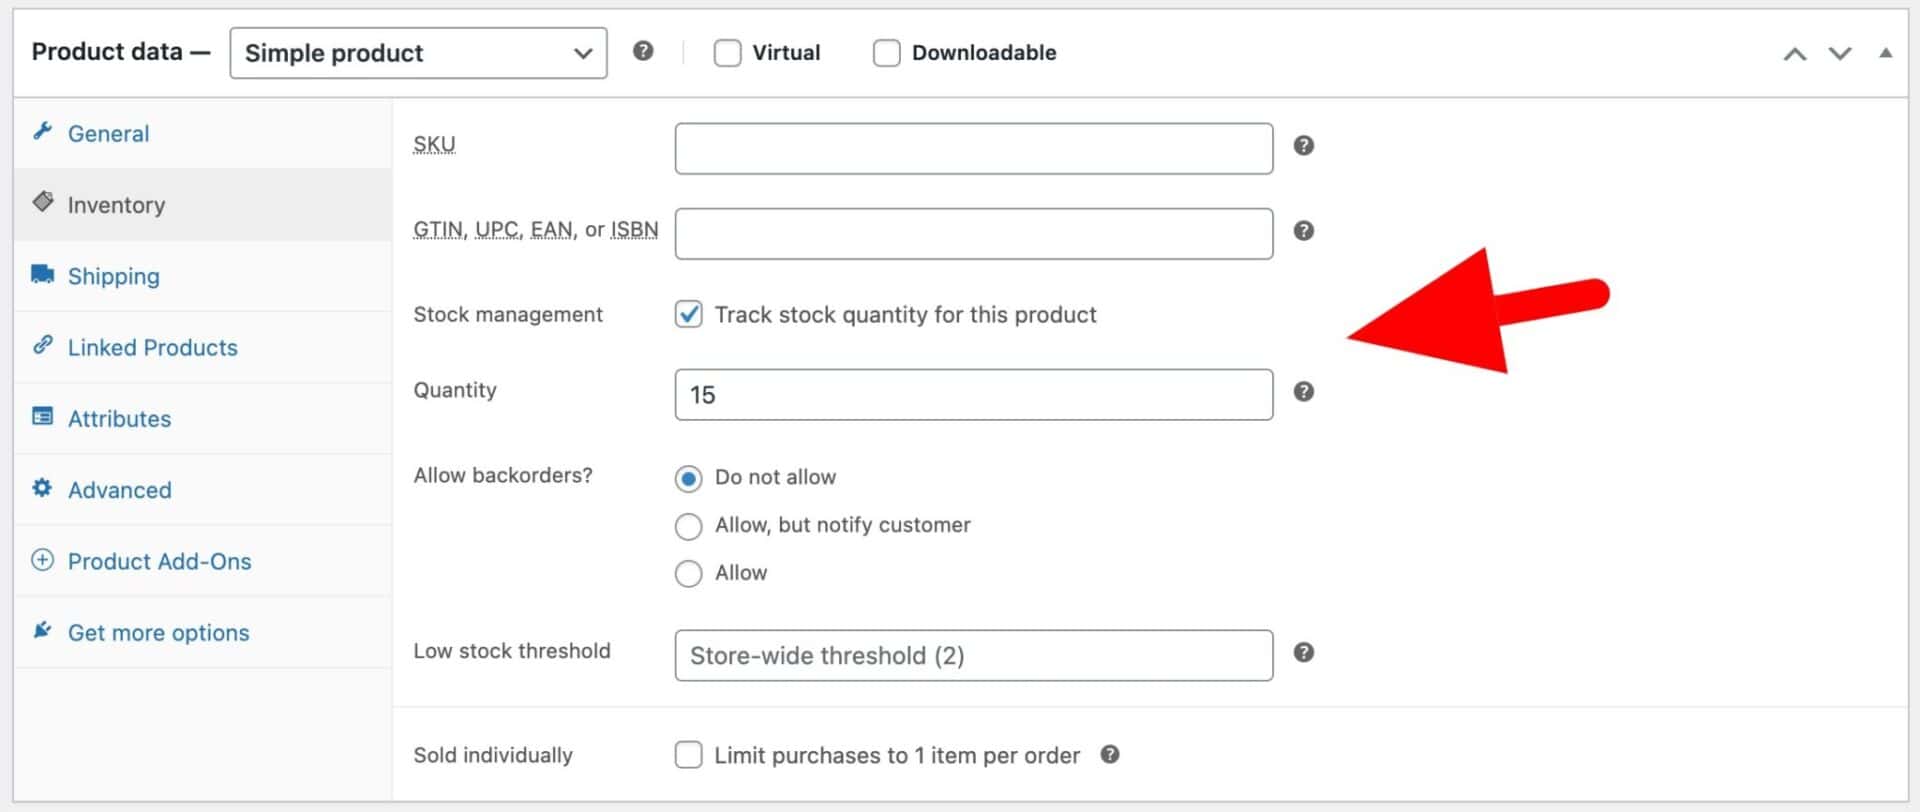
- To set how many places are available on the safari, just set an inventory level:
- Click the ‘Inventory’ tab in the ‘Product data’ section
- Enable the ‘Stock management’ option
- Enter the number of places available on the safari in the ‘Quantity’ field
Up to this point, everything can be achieved using standard WooCommerce functionality. Users can book and pay for one or more places on the safari – and you can manage the number of available places.
Now let’s look at how to add some additional features.
Step #2: Include optional extras on the booking product
Most tour providers will look to upsell options on their tours. You can do this easily using the WooCommerce Product Add-Ons Ultimate plugin.

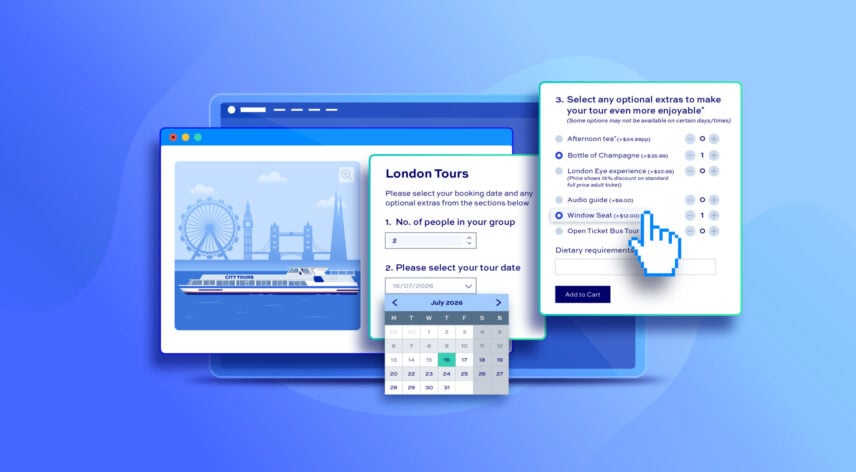
Product Add-Ons Ultimate gives you the option to add around 20 different field types to the product pages. So you could add checkboxes, select fields, text fields, radio buttons and so on to product page to allow users to personalize your products. In this example, we’re just going to use a single ‘Swatch’ field to allow the user to select one or more extra options to tag on to their trip.
To add extra options to your tour product:
- In the ‘Product data’ section click the ‘Product Add-Ons’ tab
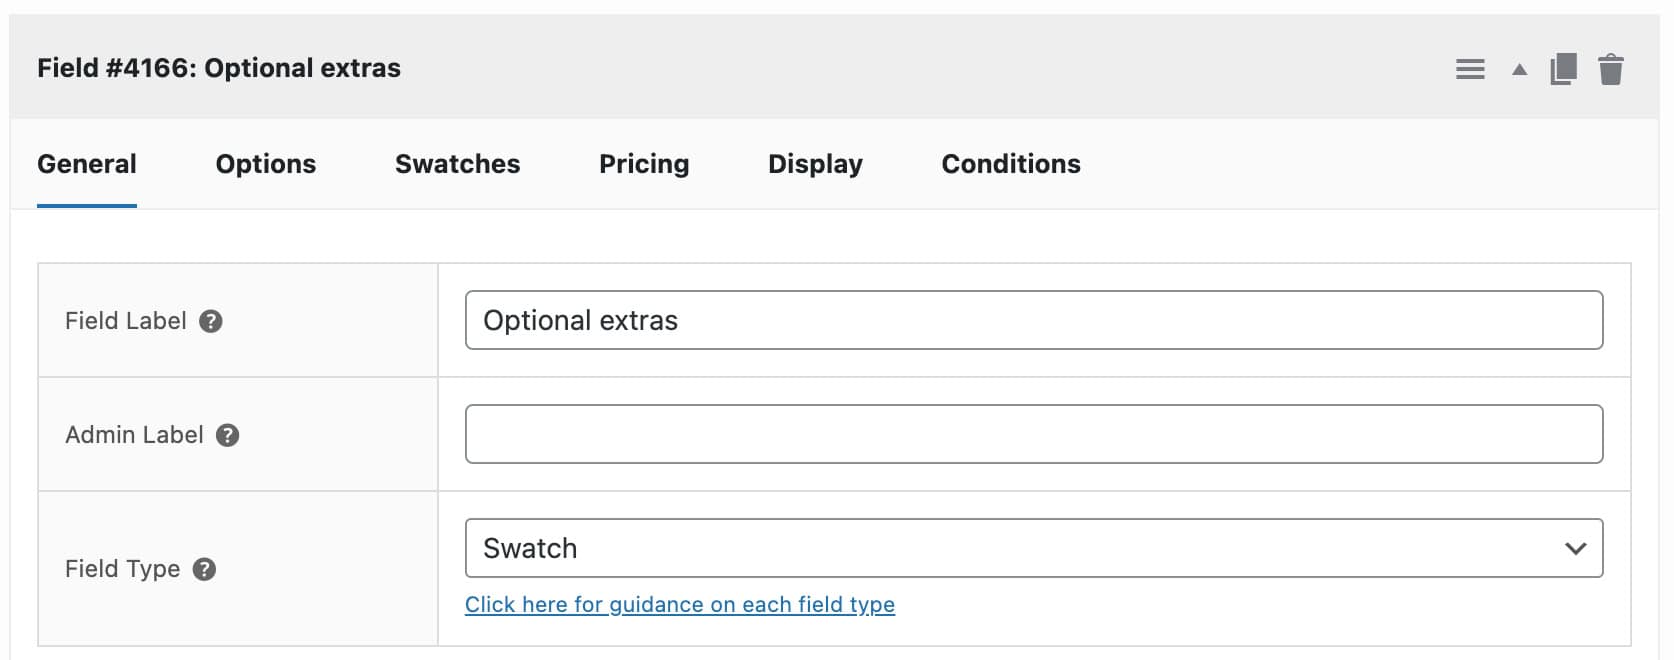
- Click ‘Add Group’ then ‘Add Field’
- Select ‘Swatch’ as your field type and give the field a label. You can also add some extra description if you like
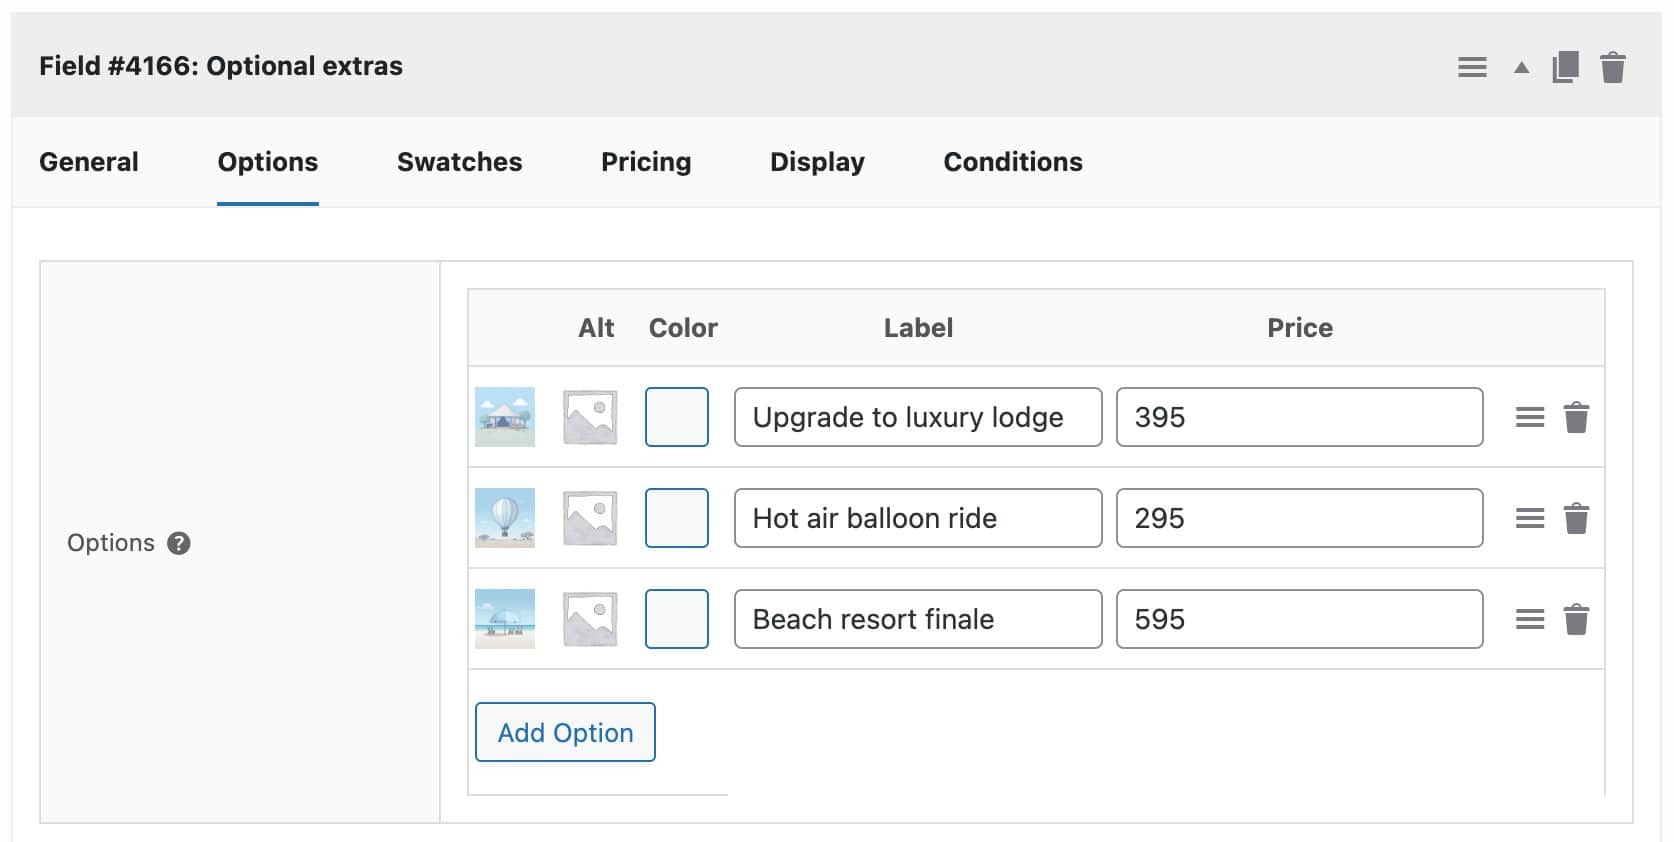
- Click the ‘Add Option’ button to create a new option. Upload an image to the image field on the left, enter a label for the option and a price if applicable
- Repeat for each option
- Enable the ‘Allow Multiple’ setting if you want the user to be able to select more than one option
Save the product. Now on the front end, the user can select some extra options:
That’s how to create a tour booking product in WooCommerce without an additional plugin. If you want to add optional extras to the tour, you’ll need the WooCommerce Product Add-Ons Ultimate plugin.
In the final example, let’s put the first two examples together and look at how to create a tour product that runs regularly – and which allows extra options.
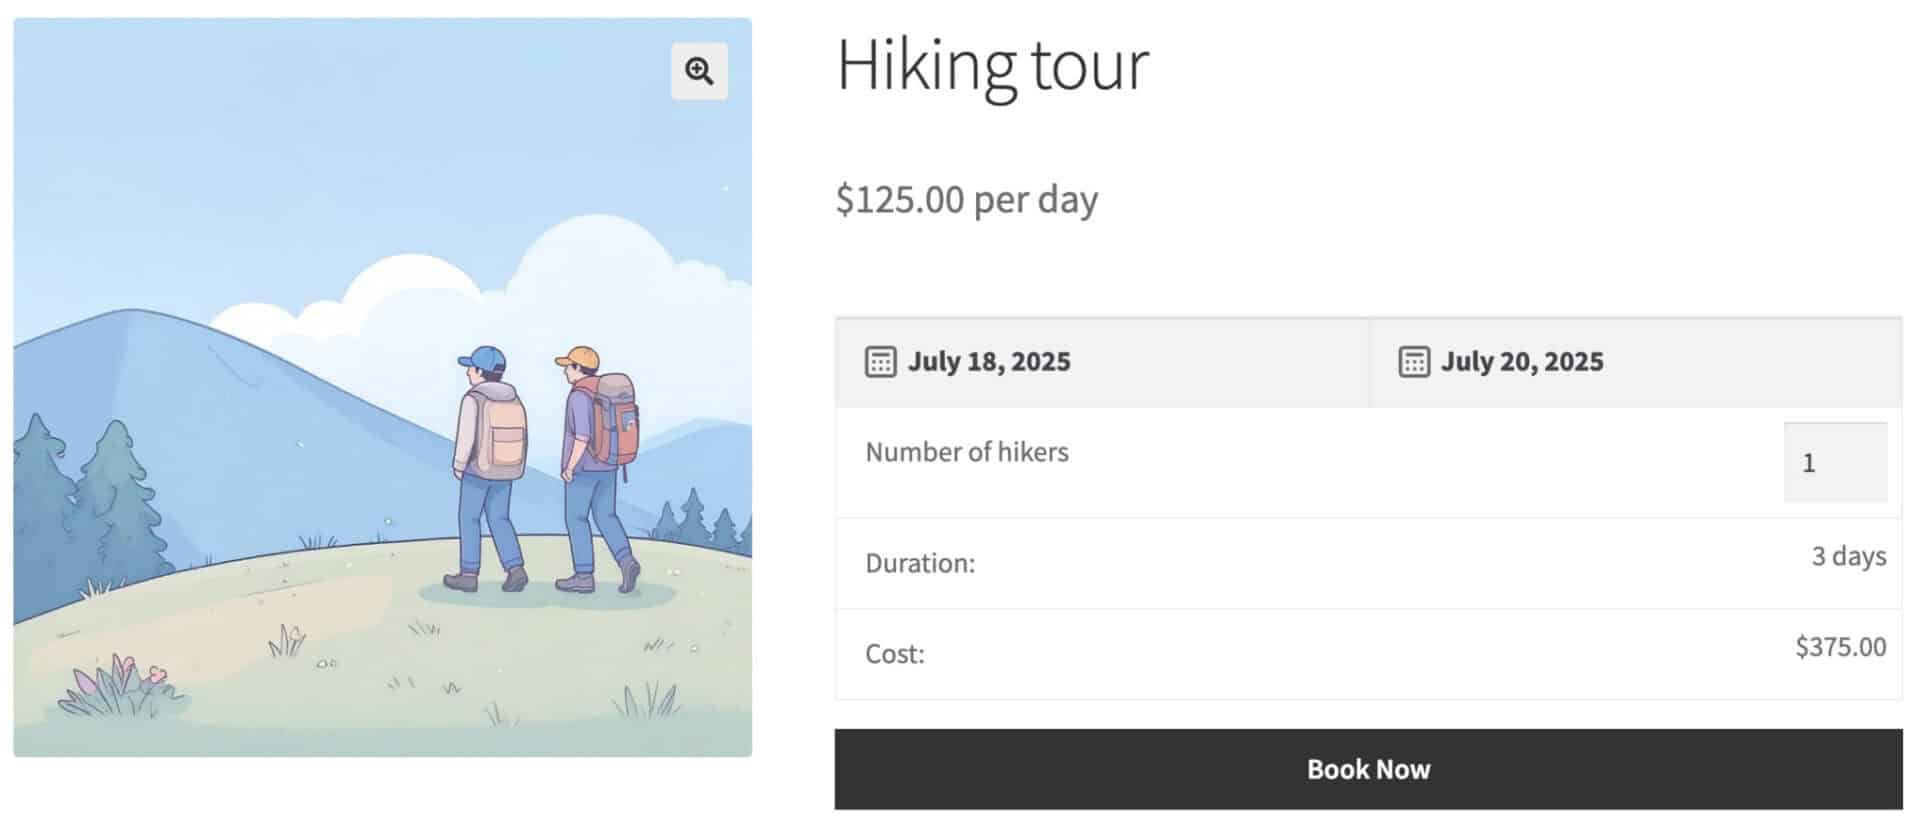
Example four: three-day hiking tour with optional extras
In the final example, we combine functionality from both Bookings for WooCommerce and WooCommerce Product Add-Ons. This will include the following features:
- Tours will run regularly (every week in this example)
- The tours will start on the same day each week (this is an optional feature)
- Users can specify the duration of the tour – in this case, either 2 or 3 days
- Numbers will be limited per tour
- Users will be able to supplement their tour with extra options
Step #1: Create the bookable tour product
Much as we did in the first example above, we just need to create a standard WooCommerce product then specify the booking details:
- Create a new WooCommerce product with a title, description, image and so on
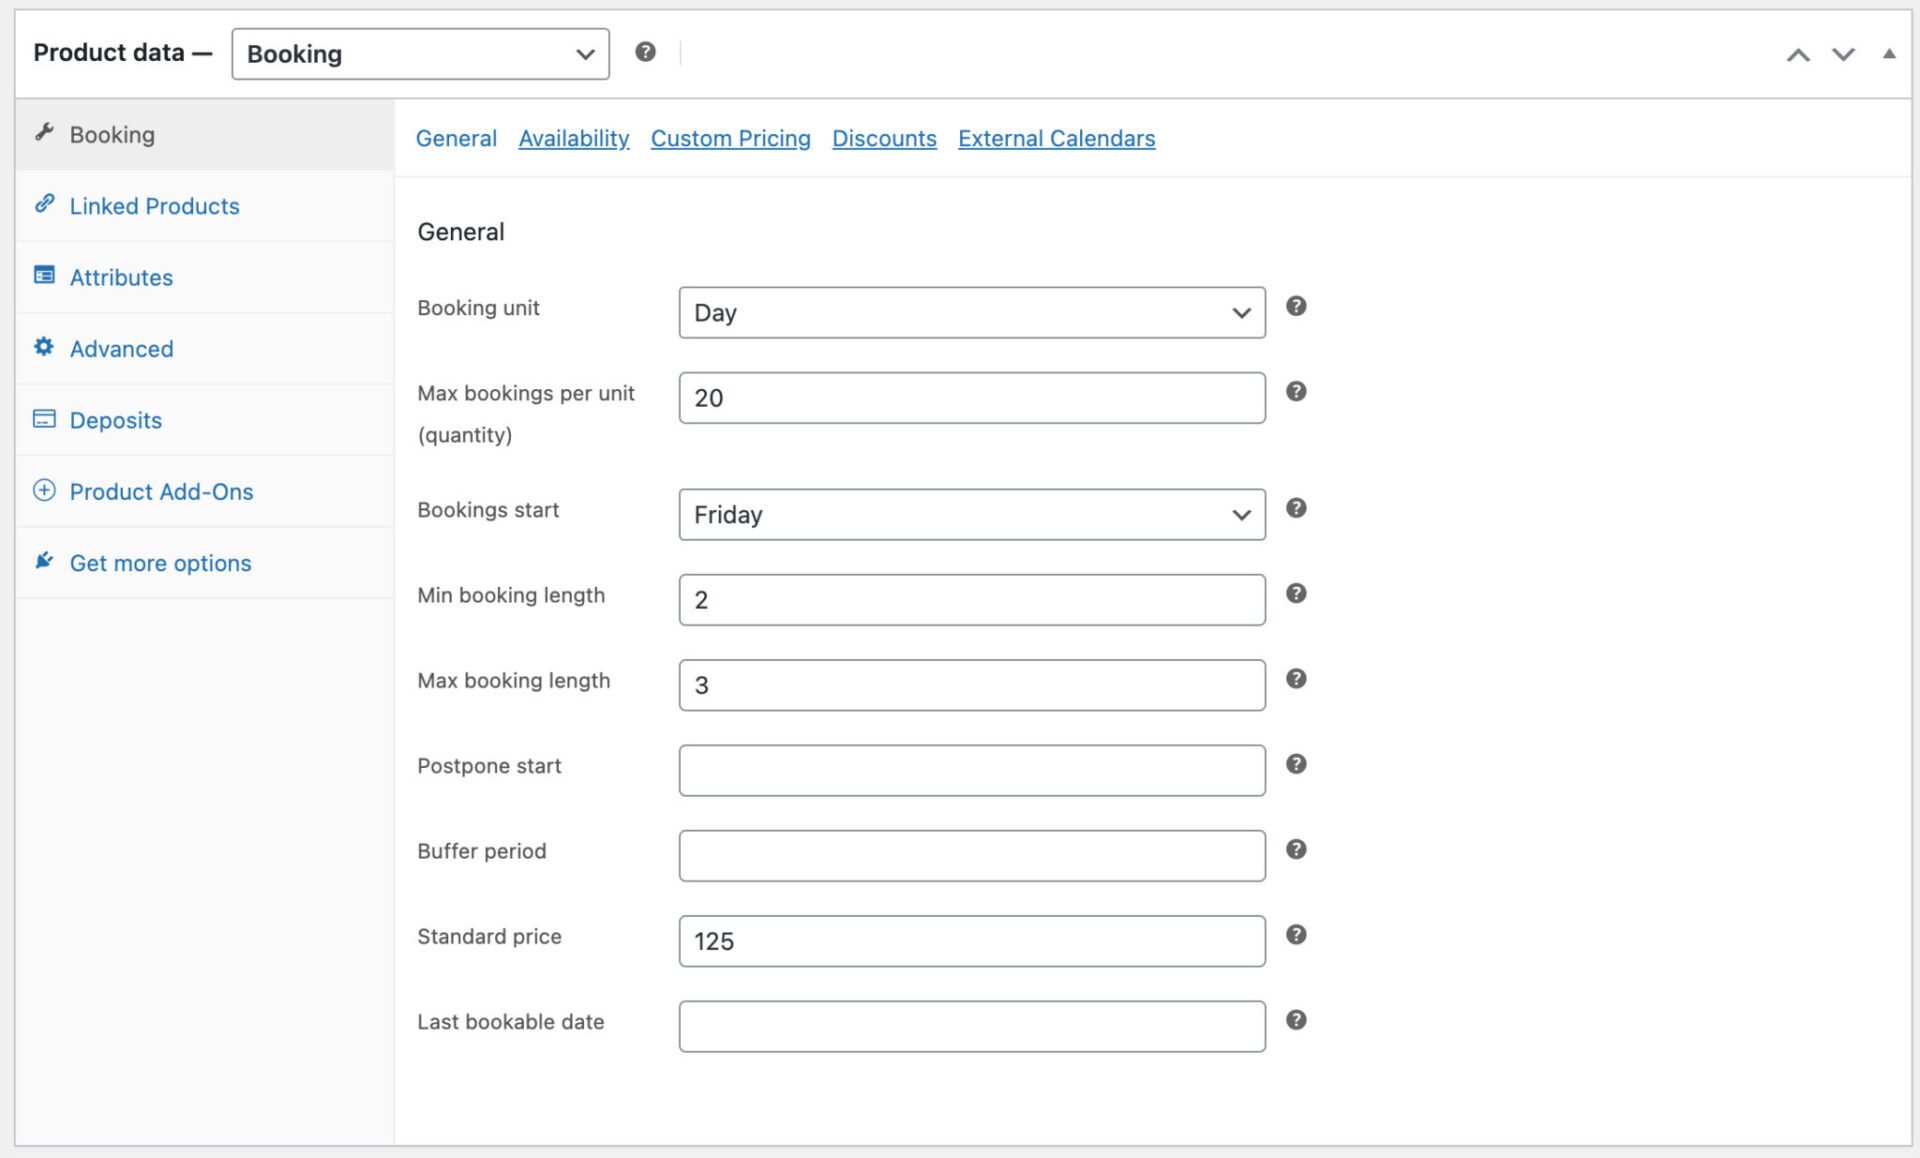
- Specify ‘Booking’ as the product type
- Set the ‘Booking unit’ to either ‘Day’, ‘Overnight’ or ‘Week’
- Enter the maximum number of participants per tour in the ‘Max bookings per unit’ field
- If the tour always starts on the same day of the week, select it in the ‘Bookings start’ field
- Enter a minimum and/or maximum duration for each tour
- Enter the price per day in the ‘Standard price’ field
Now users will be able to book one or more places per tour.
As with the first example, you’ll be able to track the current availability per tour in the back end.
Now let’s look at how to add some optional extras.
Step #2: Add optional extras to tour in WooCommerce
WooCommerce Product Add-Ons Ultimate is fully compatible with Bookings for WooCommerce. This means that you can add extra fields to booking products so that the user can customize their tours with additional options.
In this example, the user can select some simple checkbox options. There’s an additional cost for each one.
To add additional options to your tour product:
- Click the ‘Product Add-Ons’ tab in the ‘Product data’ section
- Click ‘Add Group’ then ‘Add Field’
- Enter a label for the field
- Select the field type – in this case, it’s a ‘Checkbox’ field
- Add an optional price on the ‘Pricing’ tab
- If the price should be multiplied by each participant, select the ‘Price per booking unit’ option
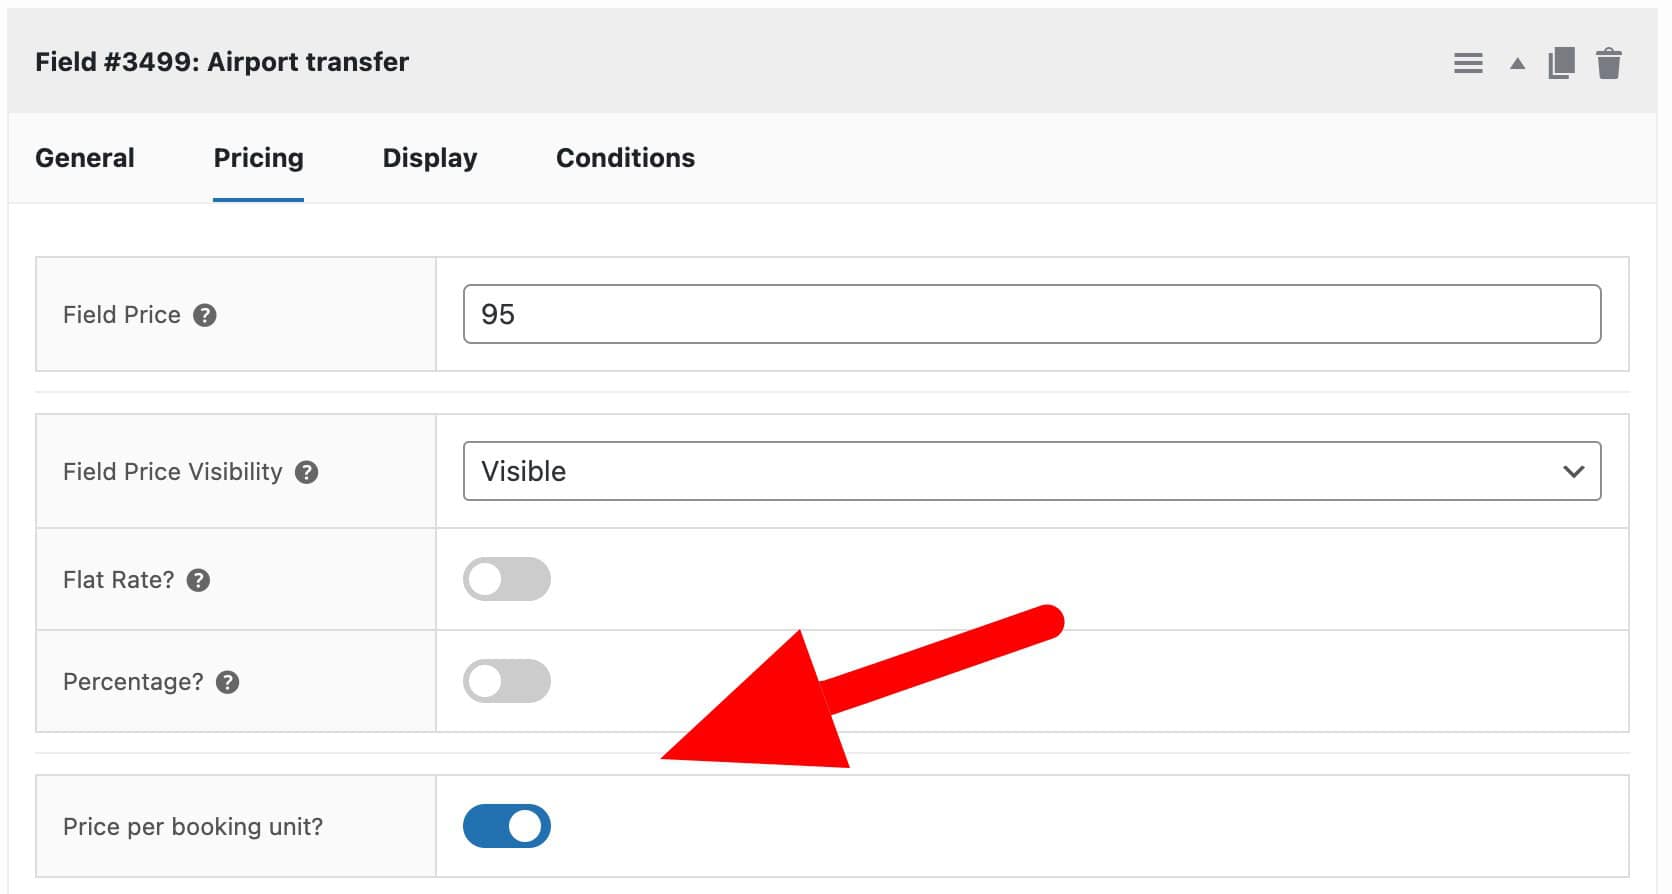
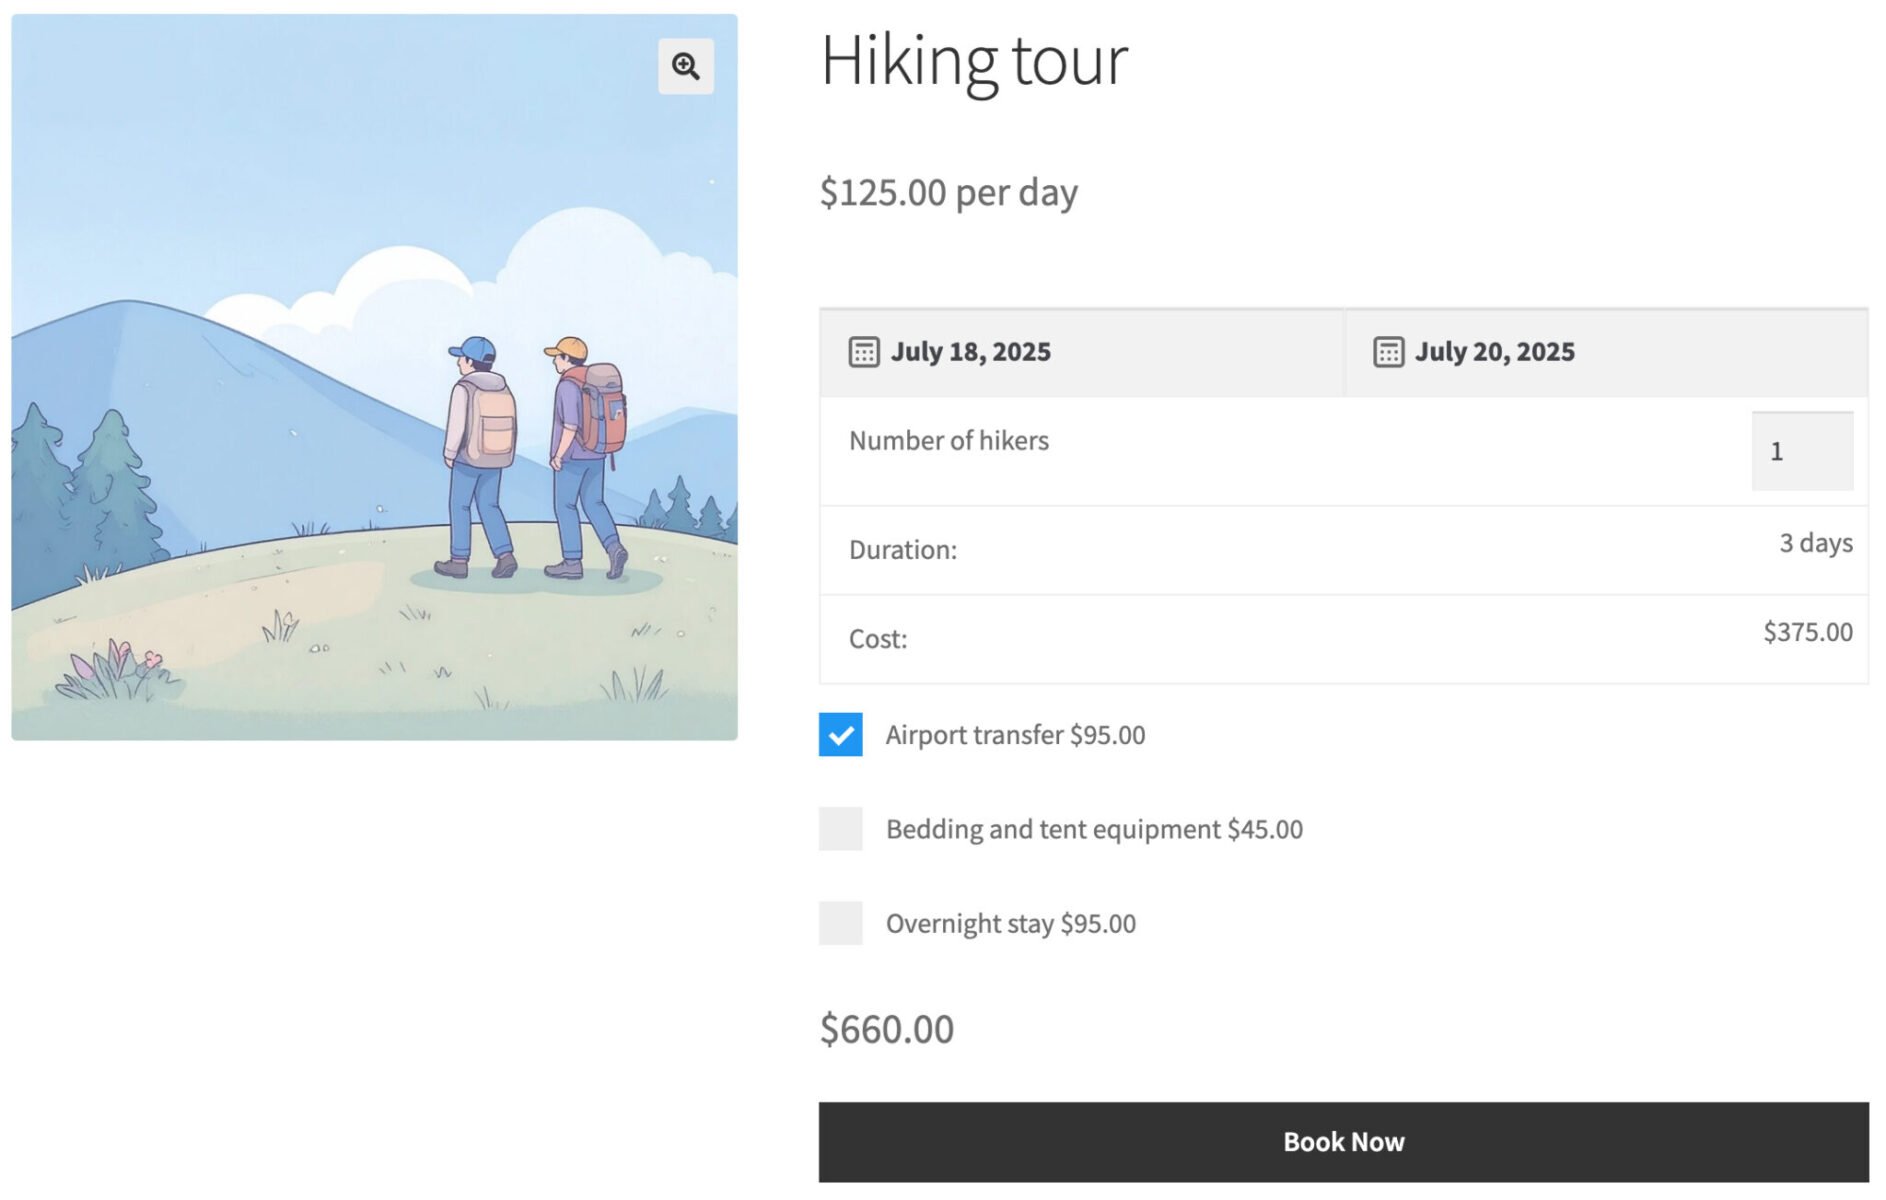
You can add as many custom fields as you like. Now, the user can add these options to their tour.
How do you manage your tour bookings?
Every tour booking appears as a standard order under WooCommerce > Orders, where you can view passenger details, take payment, and issue refunds just as you would for any other product.
To see how popular each tour is and track availability across your whole schedule, go to Bookings > Dashboard. Pick a date range and it shows a calendar, week diary, or single-day diary depending on the length you choose, with summary tiles for occupancy, bookings, and revenue so you can spot your busiest departures at a glance. Filter by tour or category to narrow this down if you run more than one.
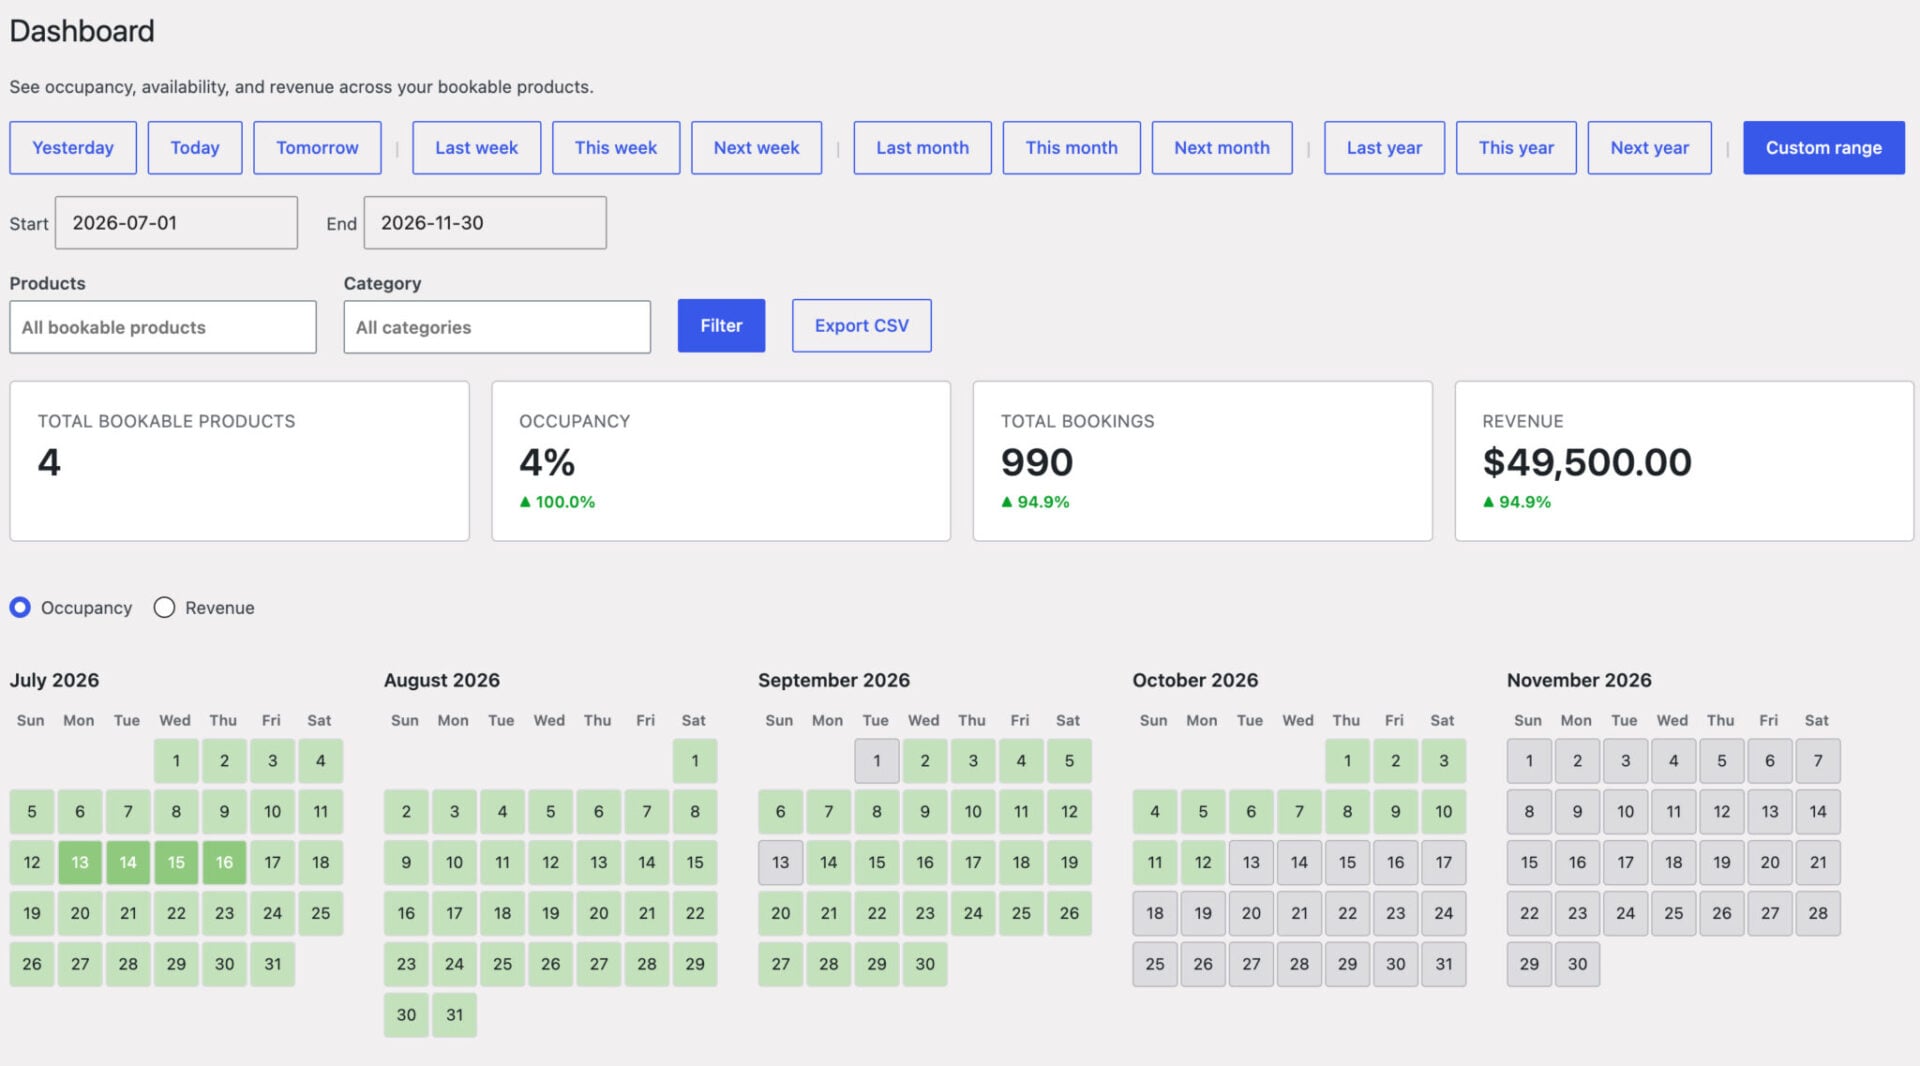
Click any date to open a panel showing every booking for that tour, with an ‘Add booking’ button for phone or walk-in customers. Each tour product also has its own ‘Availability’ tab with the same views scoped to just that tour, useful for a quick check without leaving the product edit screen.
For a manual booking from scratch, go to Bookings > Add Booking, select the tour, choose the date, and save.
Accept deposits on your tour bookings
A common requirement for bookable tours is the ability to collect a deposit. Again, by default WooCommerce doesn’t have this feature so you’ll need an additional plugin.
The WooCommerce Deposits and Part Payments plugin is fully compatible with both Product Add-Ons Ultimate and Bookings for WooCommerce. It allows you to specify a deposit amount for your tour product and a date for when the final payment must be made. You can also send out reminder emails if you wish.
Here’s a detailed tutorial on collecting deposits on bookable products.
WooCommerce tour products – recap
In this article, we looked at different ways to sell tours online. You can limit availability per tour, specify start and end dates, define time slots, add optional extras, and more.
WooCommerce Product Add-Ons Ultimate and Bookings for WooCommerce are both very flexible products. You can create all kinds of tour bookings using one or both of these plugins.
They’re compatible with all themes and page builders – and backed by a 14-day money-back guarantee so you can purchase risk-free.