How to sell personalized wedding gifts in WooCommerce

Selling personalized wedding gifts means letting a guest add the couple’s names, a photo, or a short message to a product before they buy it. This tutorial shows you how to do that in WooCommerce using the Product Add-Ons Ultimate plugin.
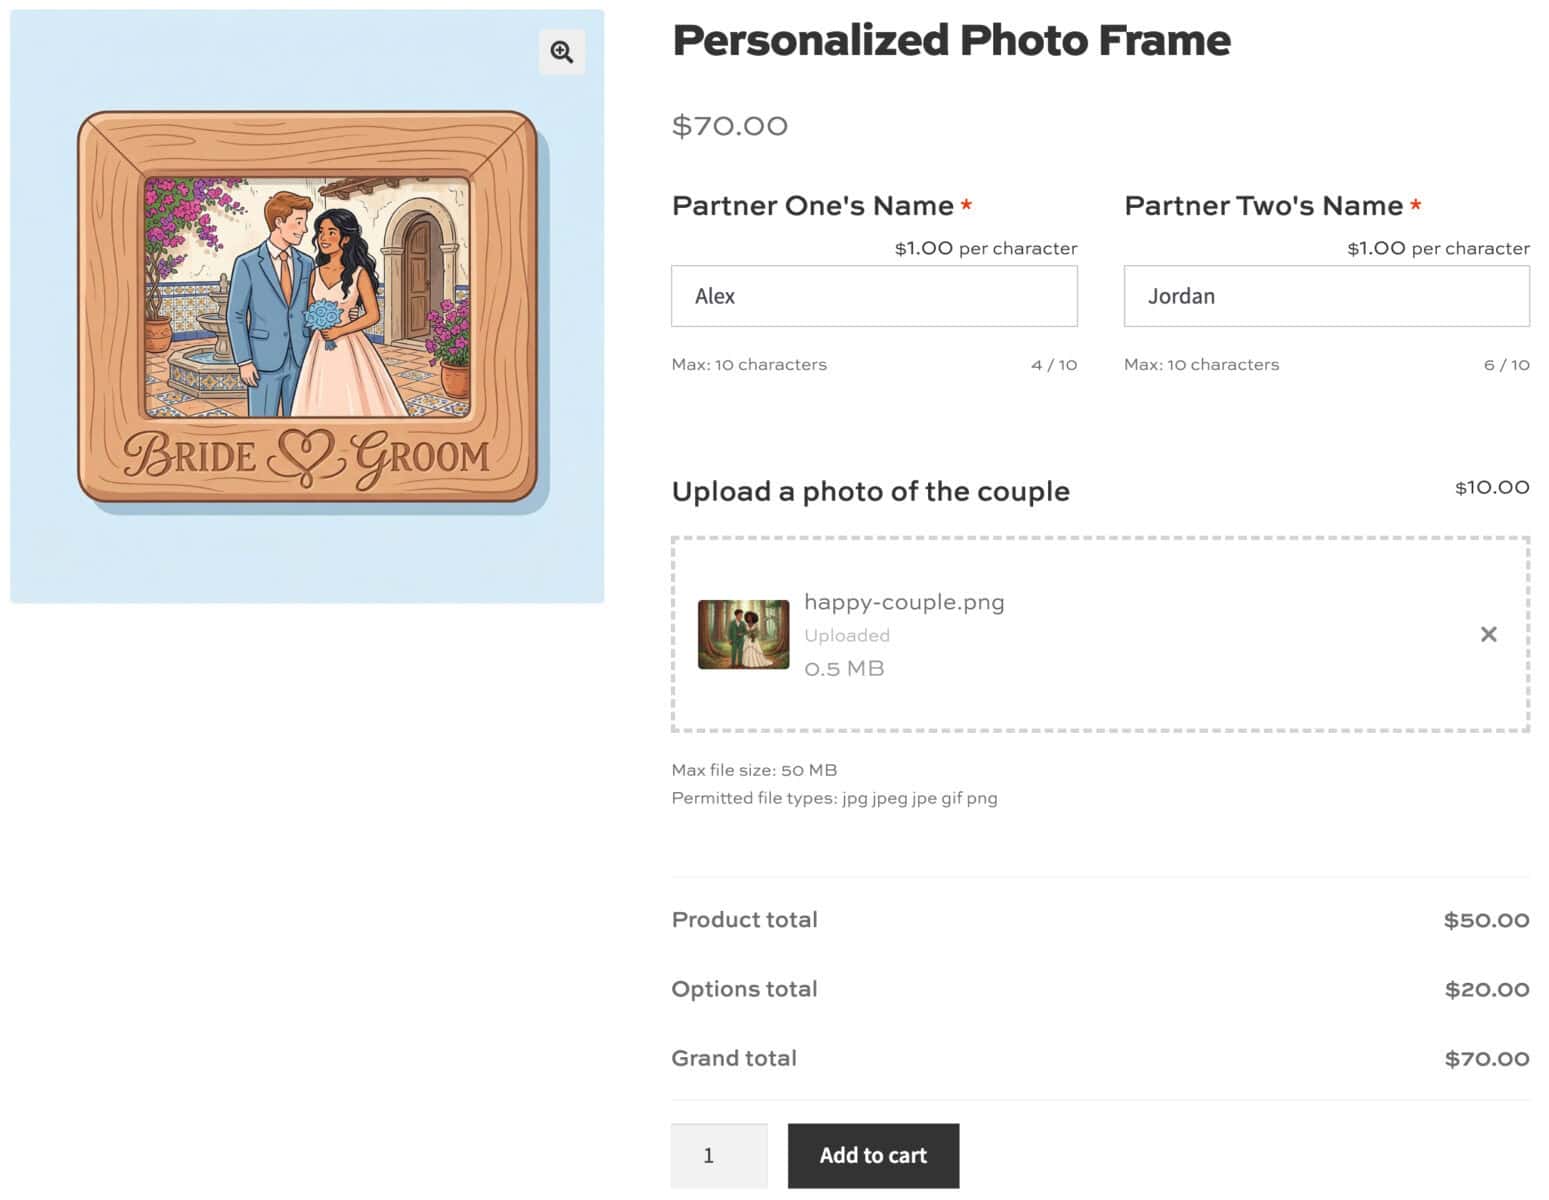
After completing this tutorial:
- Users will be able to:
- Enter the couple’s names to be printed or engraved on a gift
- Upload a photo of the couple for a personalized keepsake
- See a live preview of their personalization before buying
- As the store owner or admin, you’ll be able to:
- Charge extra for personalization, either as a flat fee or per character
- Set limits on text length and file size so orders stay production-ready
- See every personalization detail clearly on the order screen
Wedding guests spend real money on gifts, and they’re increasingly looking for something more personal than a registry item. According to The Knot’s Guest Study, guests spent an average of $150 on a wedding gift last year. Offering personalized wedding gifts allows you to charge more per item and increase your average order value.
What kind of wedding gifts can you personalize?
Almost any gift becomes more meaningful once it carries the couple’s names, date, photo or any other personalized information you want to allow. Here are some popular options.
- Engraved champagne flutes or whiskey glasses
- A personalized photo frame with the couple’s names and wedding date
- A custom cutting board or chopping block, engraved with their names
- Monogrammed towels or robes, for the couple to wear as “his and hers”
- An engraved jewelry box or watch
- A star map print showing the sky on their wedding date and location
- A personalized recipe book or “our story” journal
- A custom photo blanket
Some couples appreciate a gift with a sense of humor, too. A “marriage survival kit” jar personalized with their names – filled with joke items for common newlywed arguments like dish duty or remote control custody – makes a fun, memorable gift. A custom bobblehead pair modeled on the couple from an uploaded photo is another gift that guests remember giving.
Personalization options can add value to any of these wedding gifts.
Which field types suit which gifts?
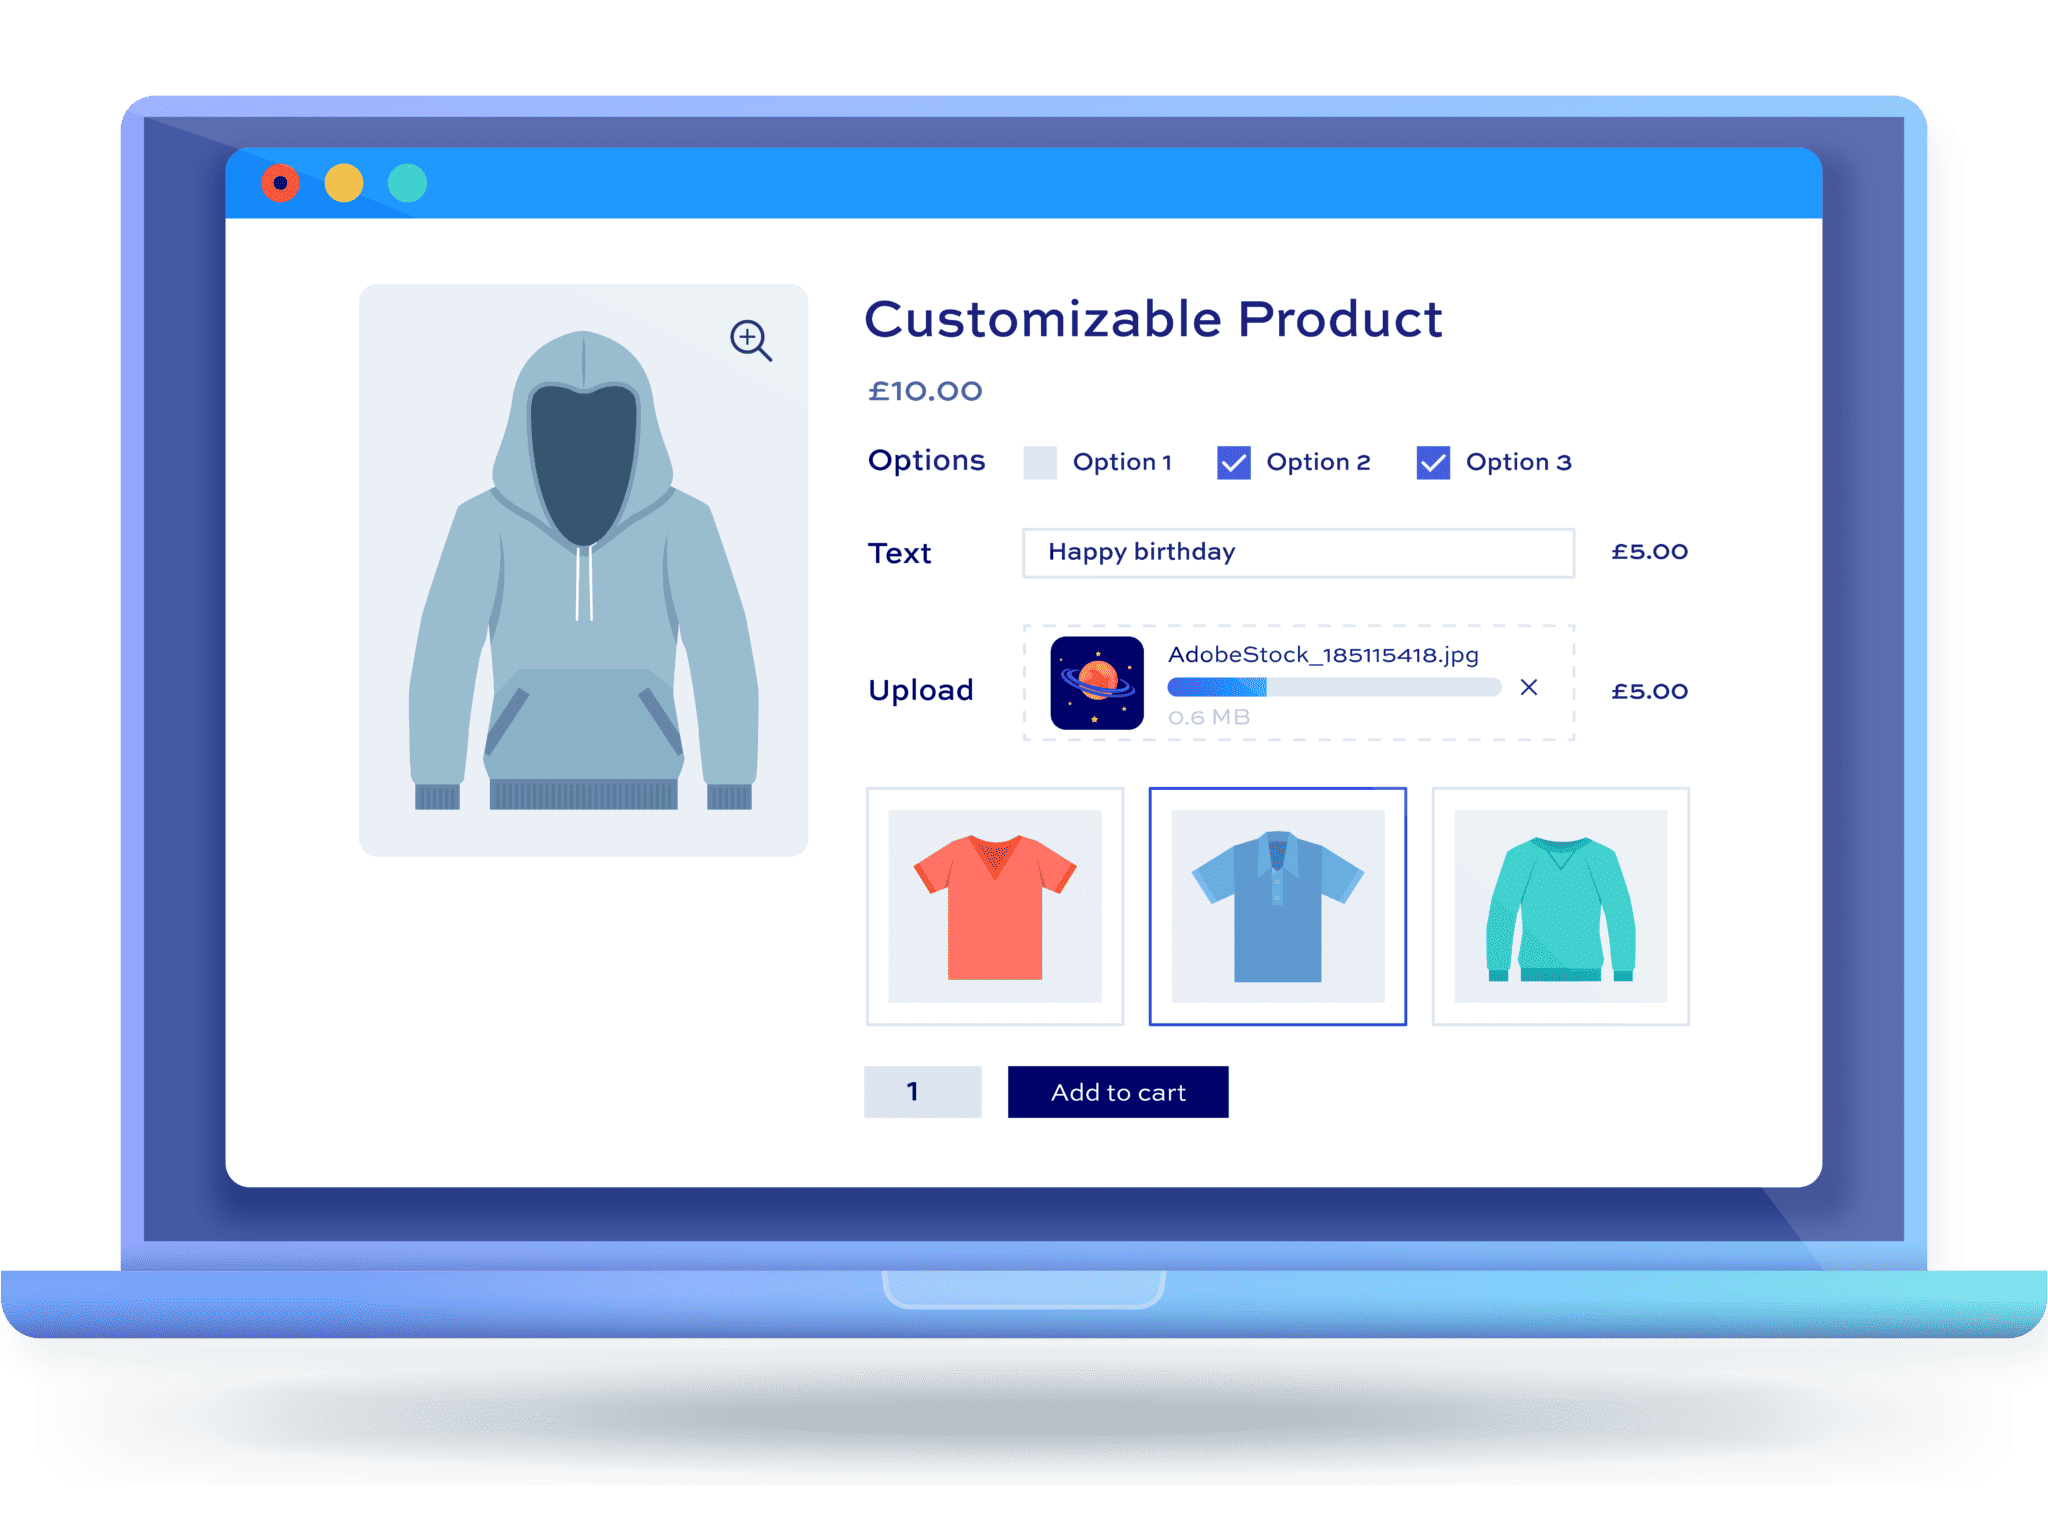
Product Add-Ons Ultimate gives you 20+ field types. Typical field types for personalizing gifts include:
- Text field: short entries like names, a wedding date, or monogram initials
- Textarea: longer entries like a personal message to accompany the gift
- Image upload: a photo of the couple, useful for portraits or bobblehead-style gifts
- Dropdown or radio buttons: preset choices like frame style, font, or color
- Checkbox: optional extras like gift wrapping or rush production
Other available field types include number fields, name-your-price fields, image swatches, and child products for bundling extra items with the gift.

I run a personalized print website and my customers need to be able to customize the products with their own photos and text. The Product Add-Ons Ultimate plugin provides a solution for all of these things in one place.
For the rest of this tutorial, we’ll build a personalized photo frame using just two field types: text fields for each partner’s name, and an image upload field for their photo. We’ll assume that you already have WordPress and WooCommerce installed and ready to go.
How do you set up a personalized photo frame product?
Once you’ve purchased WooCommerce Product Add-Ons Ultimate:
- Download the plugin’s zip file by clicking on the link on your order confirmation screen or in your welcome email. You’ll receive the email automatically a few seconds after you’ve completed the purchase
- Go to Plugins > Add New in your WordPress dashboard
- Click on the ‘Upload Plugin’ button
- Drag and drop the plugin’s downloaded zip file into the ‘Choose File’ area and click ‘Install Now’
- When the plugin has uploaded, click the ‘Activate Now’ button
With Product Add-Ons Ultimate activated, you can add personalization fields to your photo frame product.
Step #1: Create your product
Go to Products > Add New and create your photo frame product as you normally would. Add a title, description, images, and a base price, then publish it.
You now have a standard photo frame product ready for personalization fields. Now let’s add the fields guests will use to personalize it.
Step #2: Add two text fields, one for each partner’s name
Product Add-Ons Ultimate allows you to add custom fields to individual products or to multiple products from a single location. In this tutorial, we’ll just add the fields to a single product but if you want to apply the same fields to multiple products, you can create global groups and assign the fields to as many products or categories as you like.
Edit your photo frame product and go to the ‘Product Add-Ons’ tab in the ‘Product data’ section:
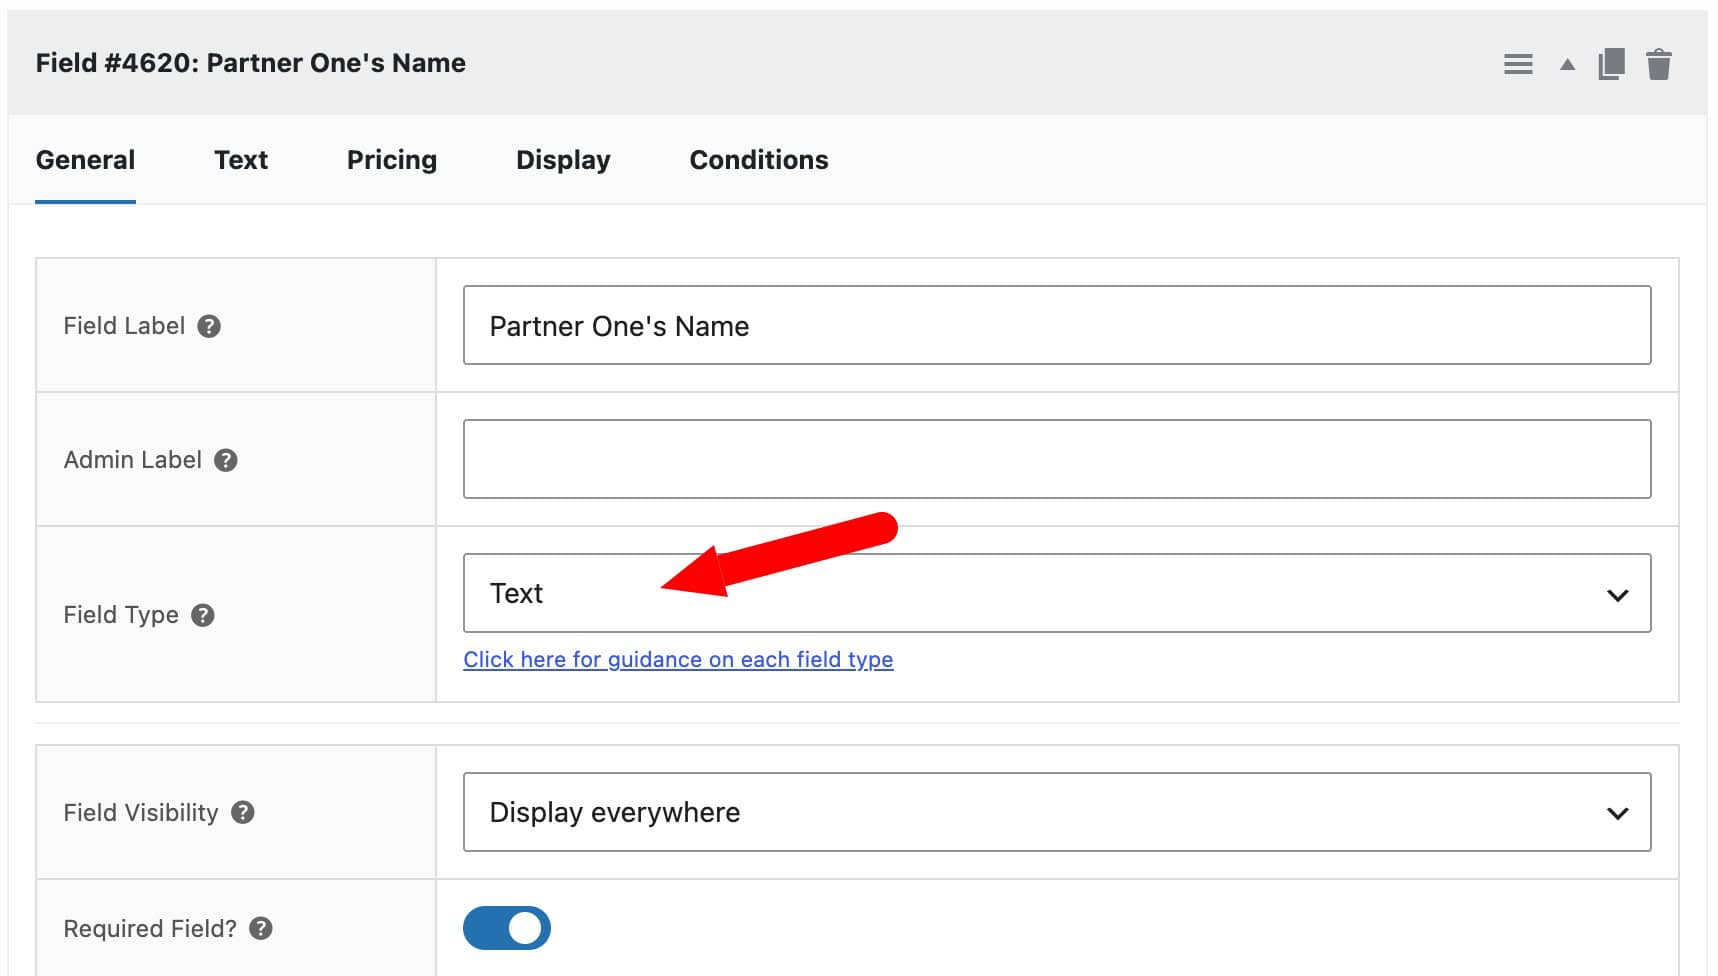
- Click ‘Add Group’ then ‘Add Field’
- Give the field a clear label, like “Partner 1’s name”, so guests know exactly what to enter
- Choose ‘Text’ as the field type
- Enabled ‘Required Field’ to ensure the customer enters a value in the field
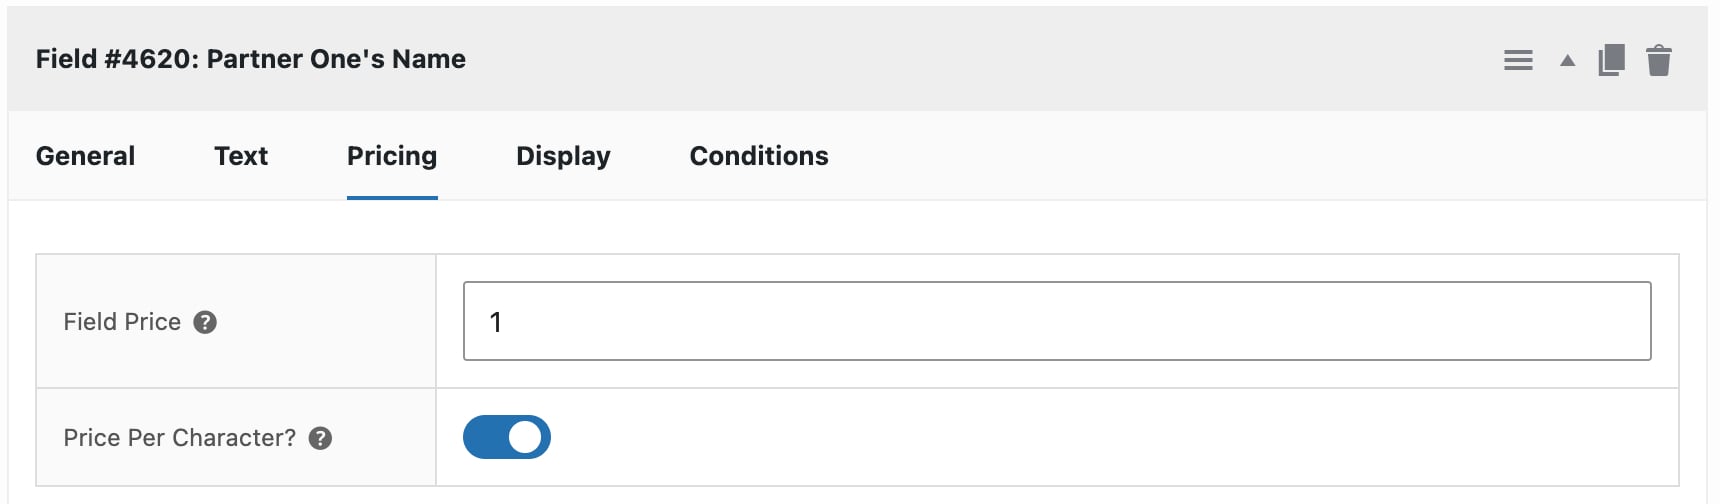
You can optionally charge for these fields, either as a flat fee or a per-character price if you want longer names to cost more. Click on to the ‘Pricing’ tab if you want to charge extra for the field:
- Enter the price of the field in the ‘Field Price’ setting
- Enable the ‘Price per Character’ field if you want to charge per character that the customer enters in the field
Now, cick on to the ‘Text’ tab and set some additional parameters for character limits:
- Enter the maximum number of characters allowed in the field in the ‘Max Characters’ setting
- Enable ‘Show Counter’ if you want to display a clear count of how many characters the user has entered and how many they’re allowed
- Define the number of ‘Free Characters’ allowed if you want to give the customer a certain number of letters for free
- Enable the alphanumeric options if you only want to allow or charge for alphanumeric characters (useful if you don’t want to charge for spaces or hyphens, for example)
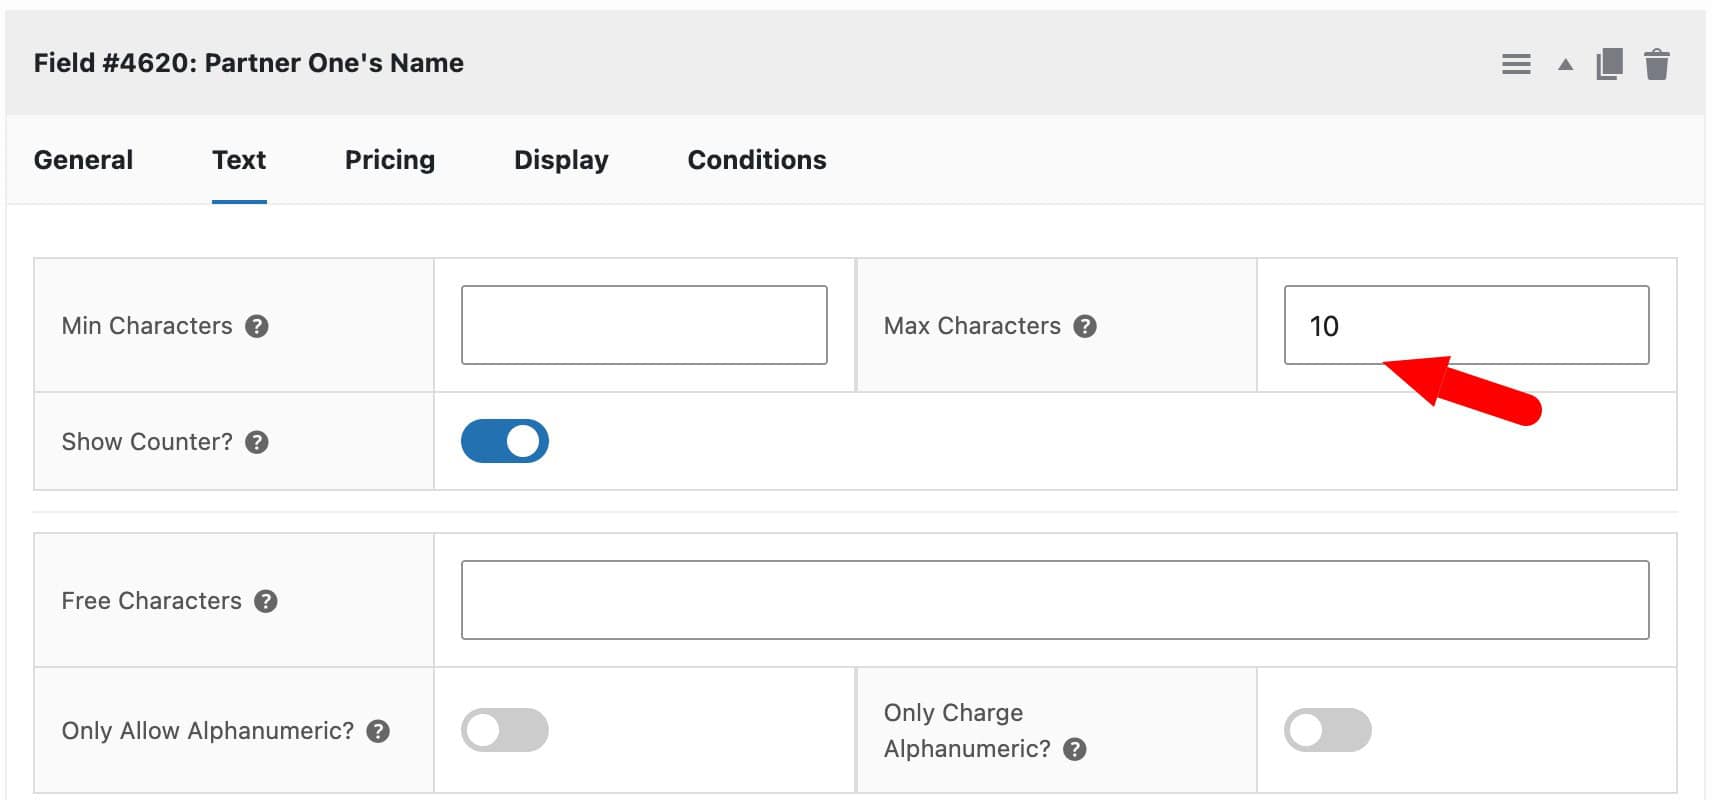
Repeat this to add a second text field labeled “Partner Two’s name”, with the same character limit.
Now you’ll have a WooCommerce wedding gift product that users can personalize by entering the names of the newlyweds.
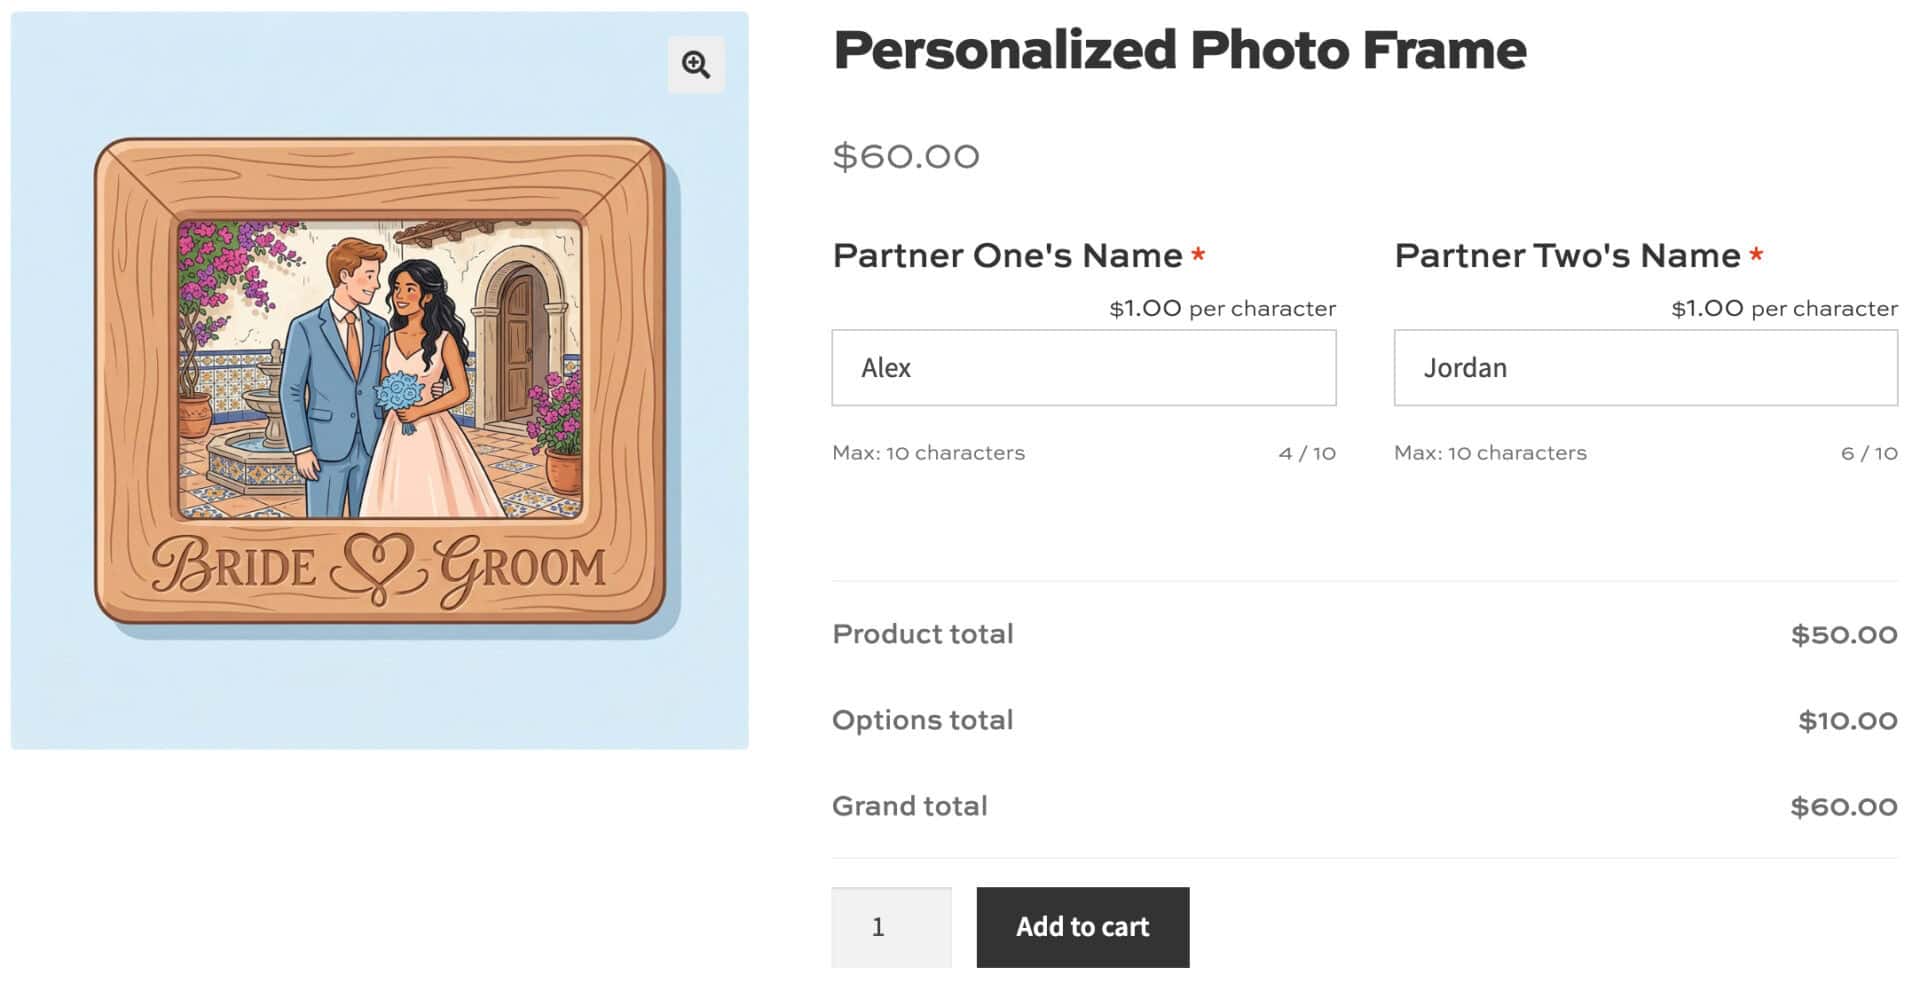
Step #3: Add an image upload field for the couple’s photo
Our personalized photo frame allows the customer to optionally upload an image of the couple as well.
To add an upload field to your gift product:
- Click ‘Add Field’ again
- Choose ‘File Upload’ as the field type
- Label it something like “Upload a photo of the couple”
- Click on the ‘Pricing’ tab and set a price for the print
Now your personalized wedding gift product has an upload field.
Step #4: Publish your product
Publish your changes, then view the product on the front end to check that the personalization fields display correctly and that the total price updates as expected when a guest fills them in.
You now have a working personalized photo frame product where guests can enter the couple’s names, upload a photo, and see the correct price before they buy. You can see the working demo product here.
Now, as an optional extra, let’s look at how to show the customer a live preview of the product while they add their text and image.
Bonus: how do you add a live preview to personalized wedding gifts?
A live preview shows the guest their uploaded photo and entered text rendered directly onto the product image, before they add it to their cart. This reduces mistakes – a guest can catch a typo in the couple’s names, or realize they’ve uploaded the wrong photo, before the order is placed. It’s also a proven method of improving conversion rate on the sale.
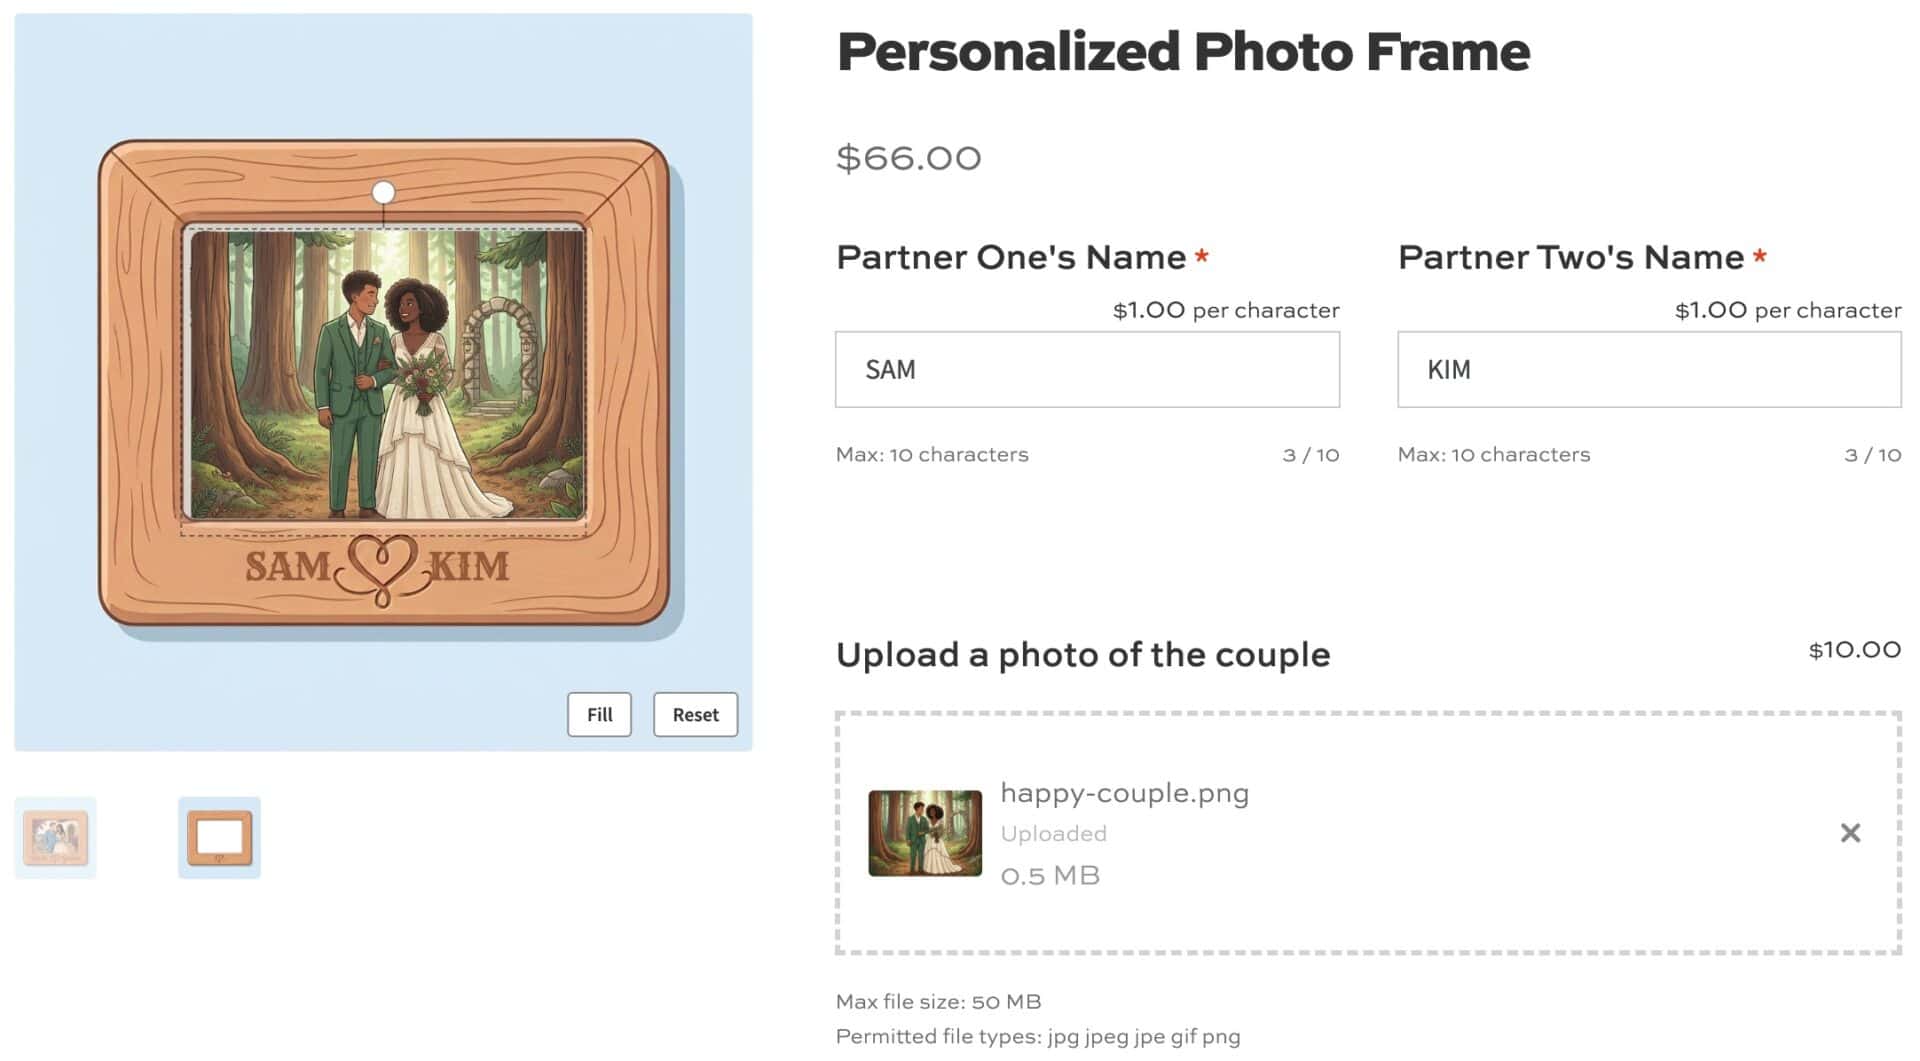
In this section, we’ll use two Product Add-Ons Ultimate extensions: Text Preview for the names fields, and Image Preview for the image field. These are optional and you can choose to use one or both.
Adding a live text preview for the names
Step #1: Change each name field’s type to ‘Text Preview’ instead of ‘Text’
Step #2: On the ‘Text’ tab, set the field’s horizontal and vertical position as a percentage of the product image, so the name appears in the right spot on the frame.
Step #3: Optionally let guests choose their own font, size, or color, or enable ‘Allow positioning’ and ‘Allow resizing’ so they can drag and resize the text themselves.
Adding a live image preview for the photo
Step #1: Prepare a base image of the photo frame with a transparent area where the photo should appear, and set this as the product image.
Step #2: On the upload field, go to the ‘Uploads’ tab and enable ‘Preview image’, then choose ‘Interactive – Behind image’ as the preview position so the photo sits inside the transparent area.
Step #3: Set the ‘Image center – X axis’ and ‘Image center – Y axis’ values to position the photo, and leave ‘Interactive’ enabled so guests can drag, resize, or rotate it to fit.
Save and publish once both previews are set up. Guests will now see their names and photo rendered live on the frame before they buy.
See this article for a full guide on creating a live preview in WooCommerce.
How do you manage personalized wedding gift orders?
Once you’re taking personalized orders, you’ll want to manage them easily from the back end.
View order details
Go to WooCommerce > Orders to see incoming orders. Each order shows the personalization details a guest entered, including their uploaded photo, alongside the standard order information.
Export details for production
If someone else prints or assembles your gifts, you will want to ensure that you get personalization details to them clearly. You can view and print individual orders directly from the WooCommerce order screen, or export order data in bulk if you’re working with a production partner who needs a batch of files at once.
Product Add-Ons Ultimate is also compatible with PDF and Pick List plugins.
Reviewing orders this way means nothing gets missed between a guest placing an order and your product reaching production.
Real world examples of personalized wedding gifts and favors
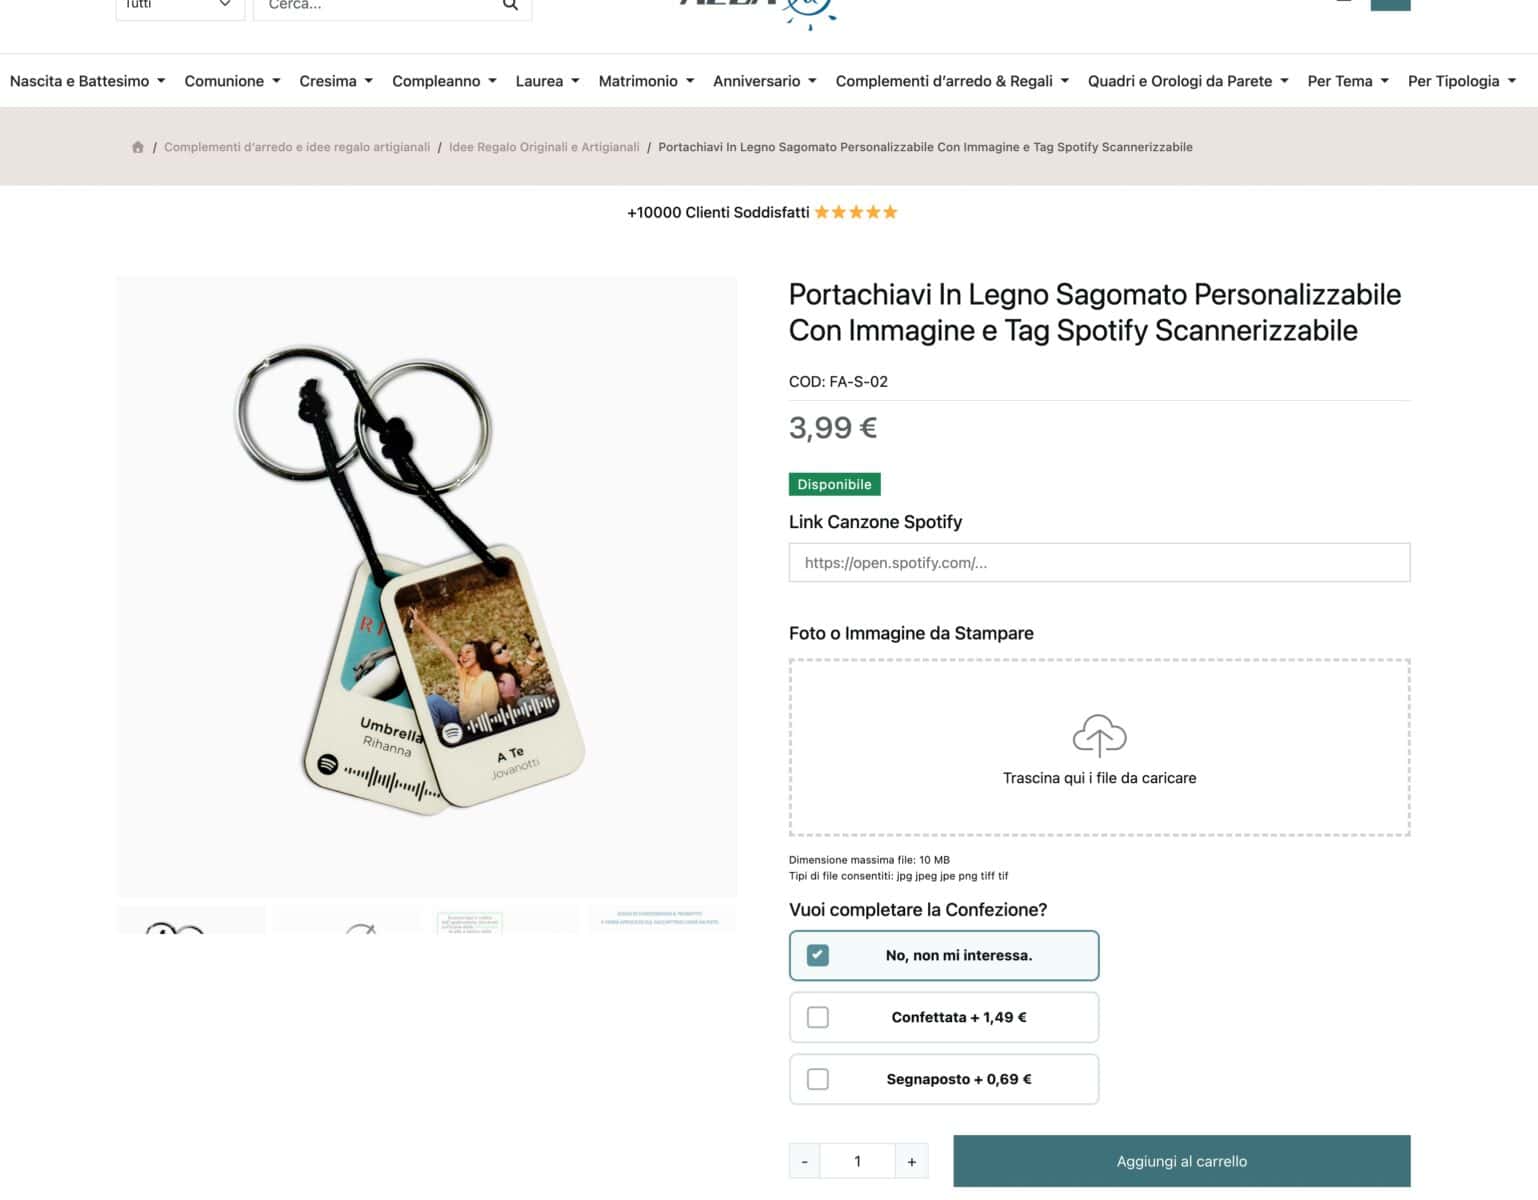
Albalù Bomboniere, an Italian wedding favor company, uses Product Add-Ons Ultimate to personalize their products.
Their personalized wooden keychain uses an image upload field for a photo and a text field for a Spotify song link, engraved as a scannable code on the wood. Guests can scan it to play the couple’s song.
And their Amore e Vita icon uses a textarea field where customers enter names, a date, or a short dedication, priced as an optional extra on top of the base product.
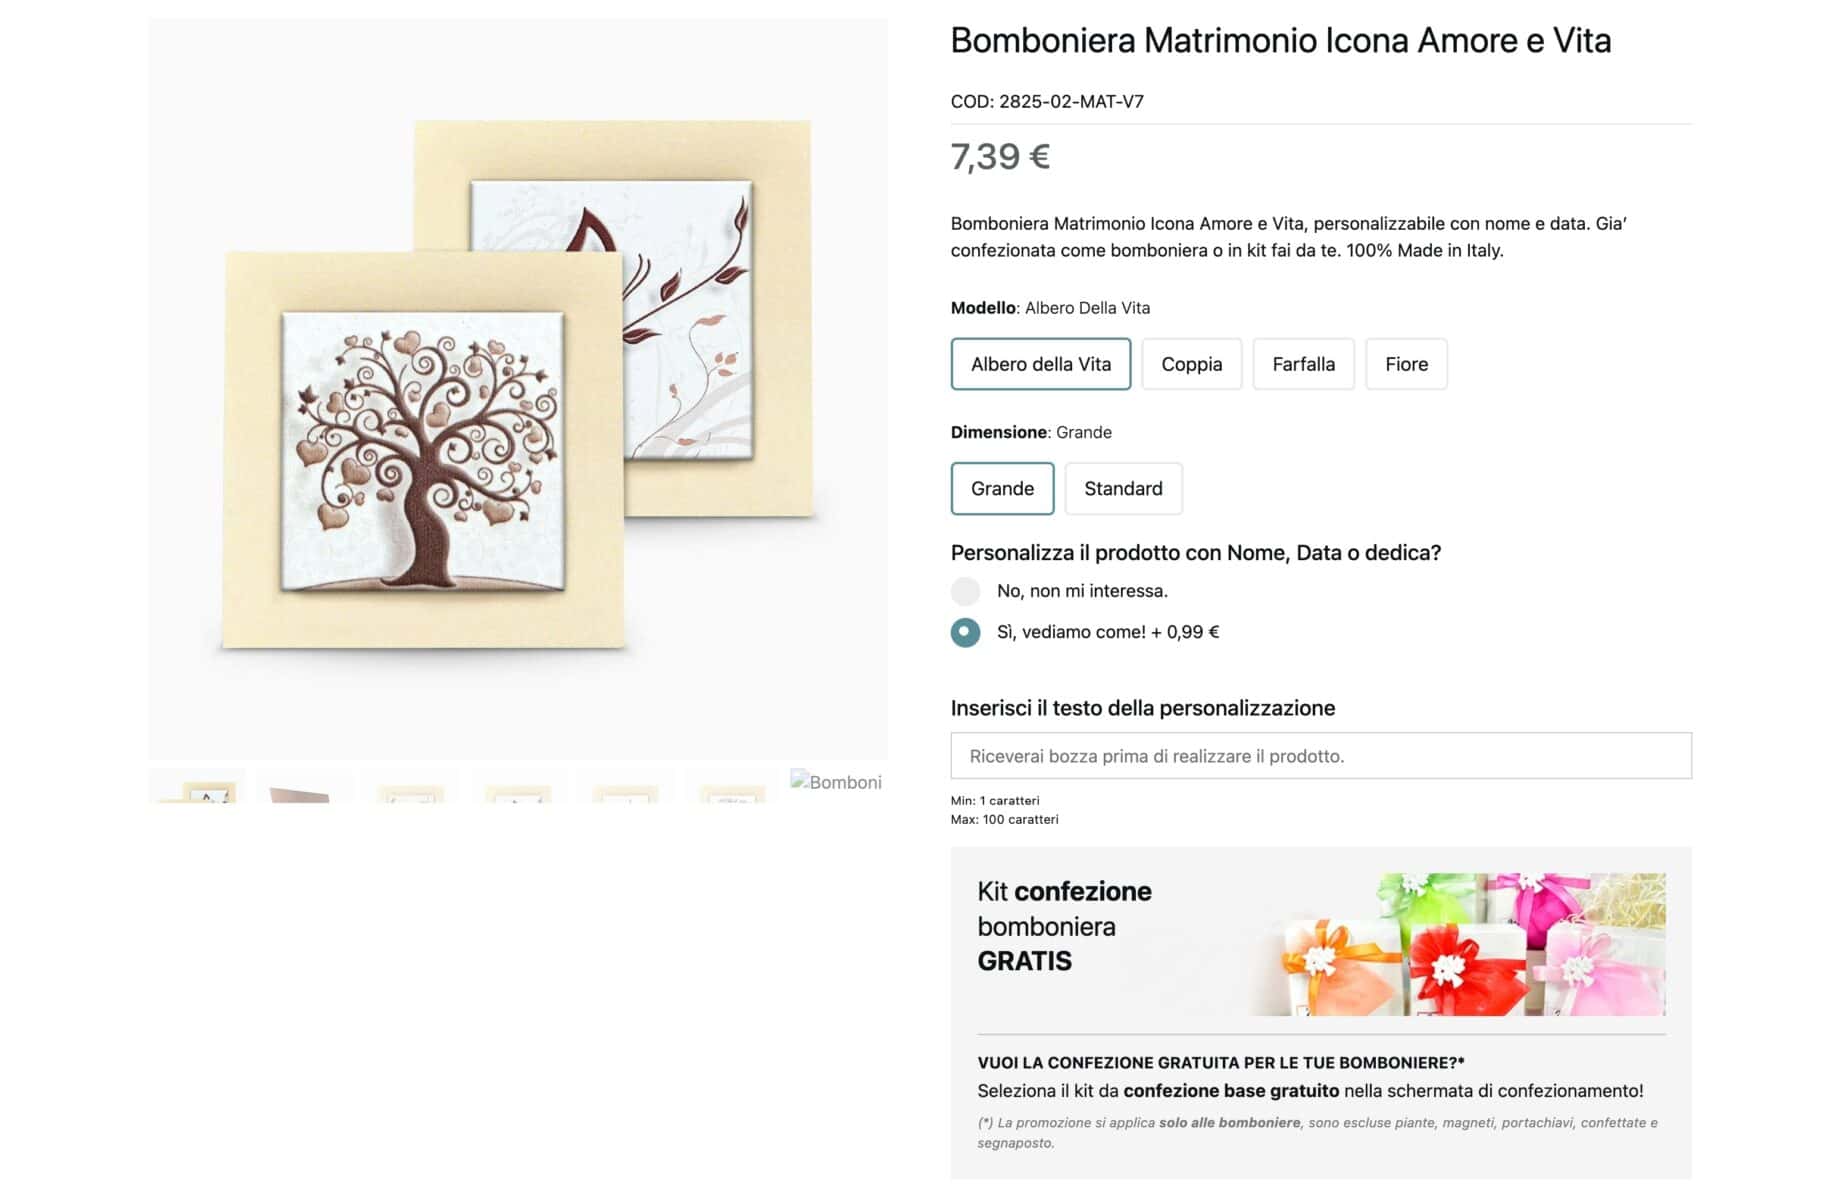
Both examples show the same principle from this tutorial: a small number of well-chosen fields, each with its own price, turning a standard product into something personal.
Wedding gifts – recap
So that’s how to sell personalized wedding gifts in WooCommerce. We looked at the kinds of gifts guests like to personalize, which field types suit which gifts, and how to build a personalized photo frame product using two text fields and an image upload field. We also looked at adding a live text preview and live image preview.
All our plugins are compatible with all themes and page builders, including Astra, Flatsome, and Woodmart, and page builders like Elementor and Divi. If you have any questions, our world-class support team is on hand to help. Our products are all backed by a 14-day money-back guarantee, so you can try them risk-free.