How to add a drag and drop multiple file uploader to WooCommerce

Depending on what type of store you’re running, you might want to give your customers the ability to upload one or multiple files to your WooCommerce product page using a nice drag and drop uploader. In this article, we’ll look at what a drag and drop uploader is and how you can easily add one to your product pages.
WooCommerce doesn’t have this feature built in, so you’ll need a plugin. The WooCommerce Product Add-Ons Ultimate plugin allows you to add a drag and drop file uploader to your product pages.

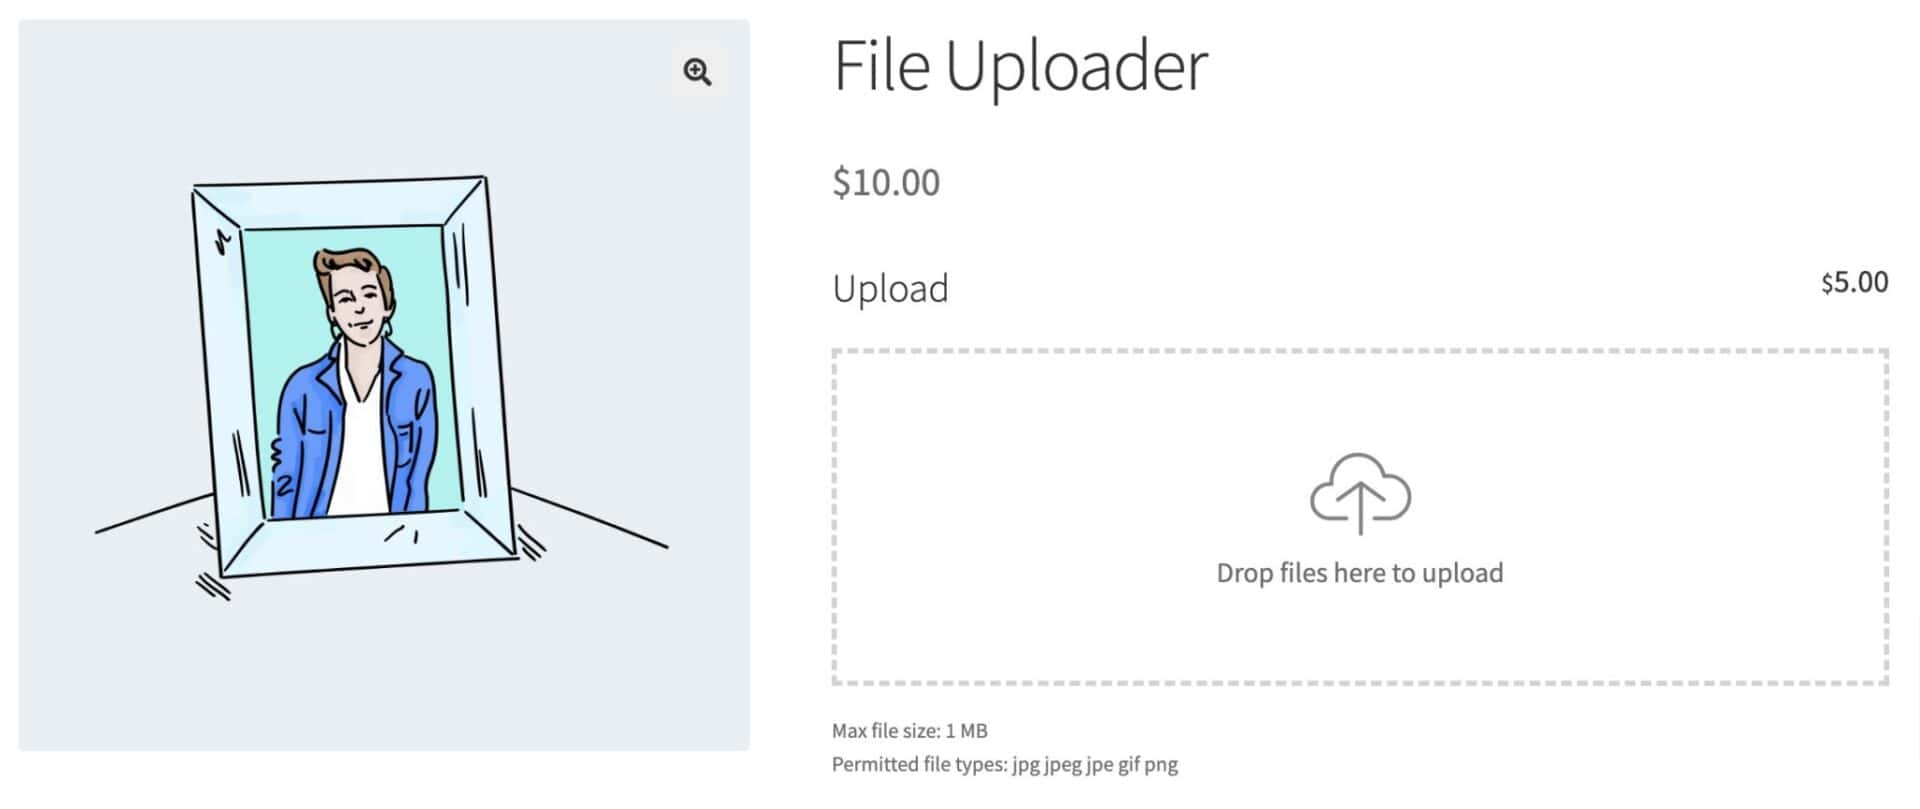
The Product Add-Ons Ultimate file uploader uses AJAX, which means that users can upload their files to your product page without needing to reload the page. The user can just drag files from the computer and drag them to the upload field on your product page.
The field has a slick, modern design which allows users to see the progress of each upload.
The uploader comes with stacks of options, including:
- Drag and drop upload field
- Multiple or single file uploads
- Charge per upload
- Set maximum file size
- Specify file types
- And more…
We’ll look at all these features.
Plus: the Add-Ons Ultimate plugin 20 other field types, including checkboxes, radio buttons, text fields, select fields.
This means that your drag and drop file uploader can be used as part of a wider range of product options.
How to add a drag and drop file uploader to WooCommerce
Installing and activating the plugin
After you purchase your copy of Product Add-Ons Ultimate:
- Download the zip file using the link in your welcome email
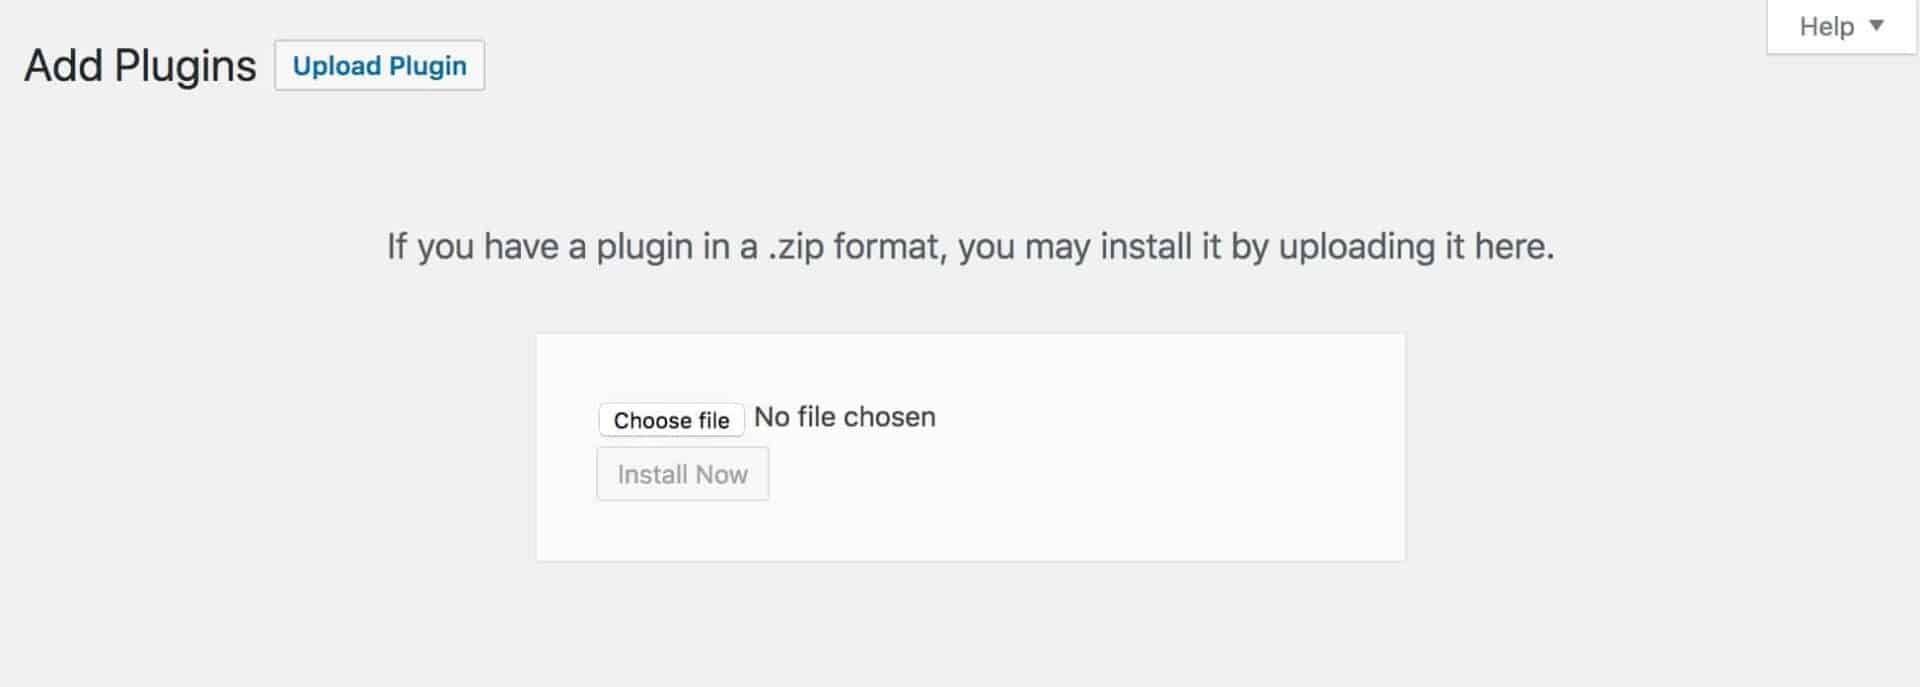
- Go to Plugins > Add New in your WordPress dashboard
- Click on the ‘Upload Plugin’ button
- Drag and drop the zip file into the ‘Choose File’ area and click ‘Install Now’.
When the file has uploaded, click on the ‘Activate’ button.
Adding an upload field
With Product Add-Ons Ultimate activated, you can add an upload field. To add a drag and drop uploader to your WooCommerce product page:
- Click on the ‘Product Add-Ons’ tab in the ‘Product data’ section
- Click ‘Add Group’ then ‘Add Field’
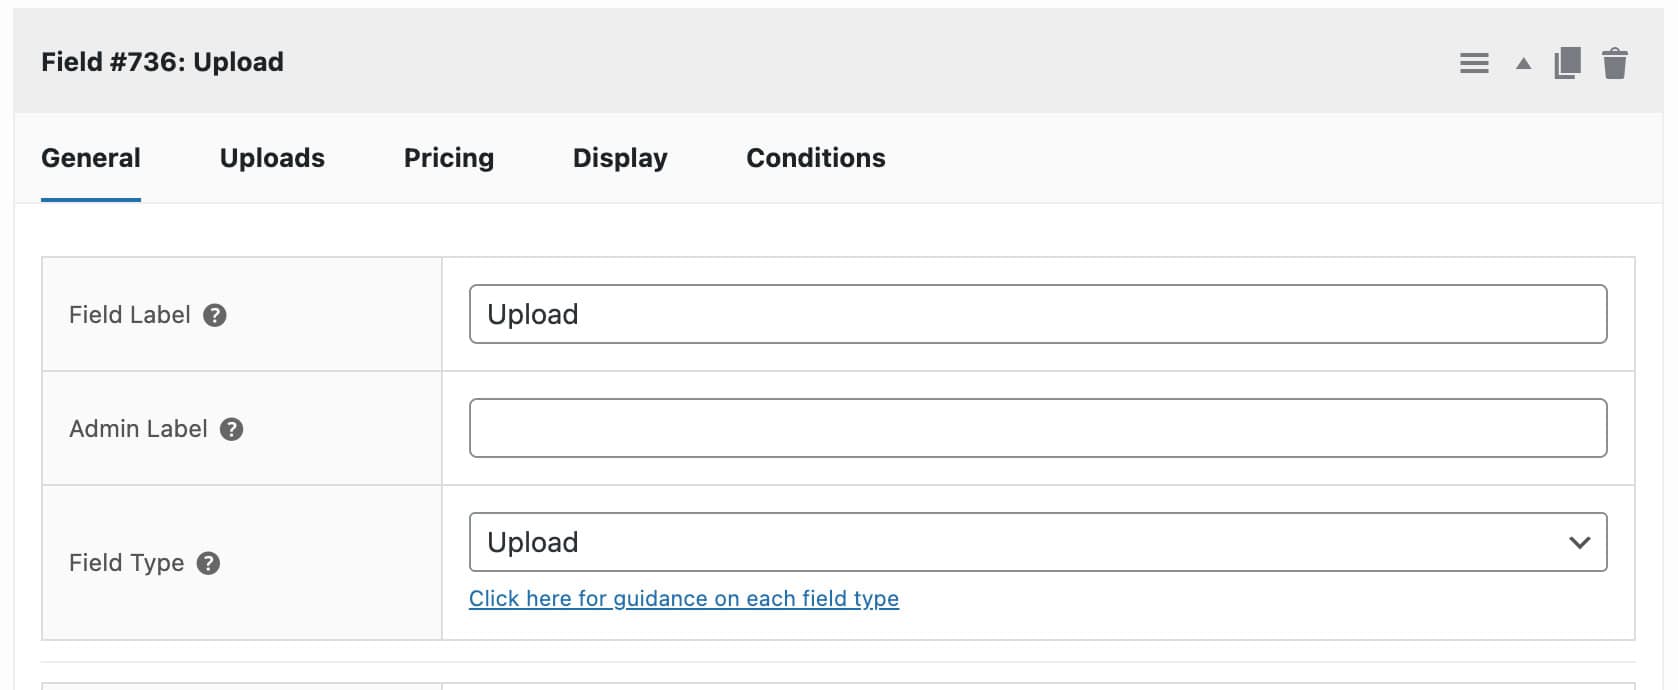
- Select ‘Upload’ as the ‘Field Type’
- Enter a label for the field in ‘Field Label’
Your AJAX drag and drop file uploader field is now ready to use.
Let’s look at how to configure some additional features.
AJAX drag and drop file uploader – additional option
If you’ve followed the steps above, then your file uploader should already be inserted on your product page. However, there are many other features that you can configure.
Setting a price for uploaded files
When you create your upload field, you can set a price for the upload. This will be added to the overall product price when the user uploads a file.
To add a price, just enter a value in the ‘Field Price’ setting on the ‘Pricing’ tab. If you would like to charge for each upload, then just enable the ‘Price per upload’ option:
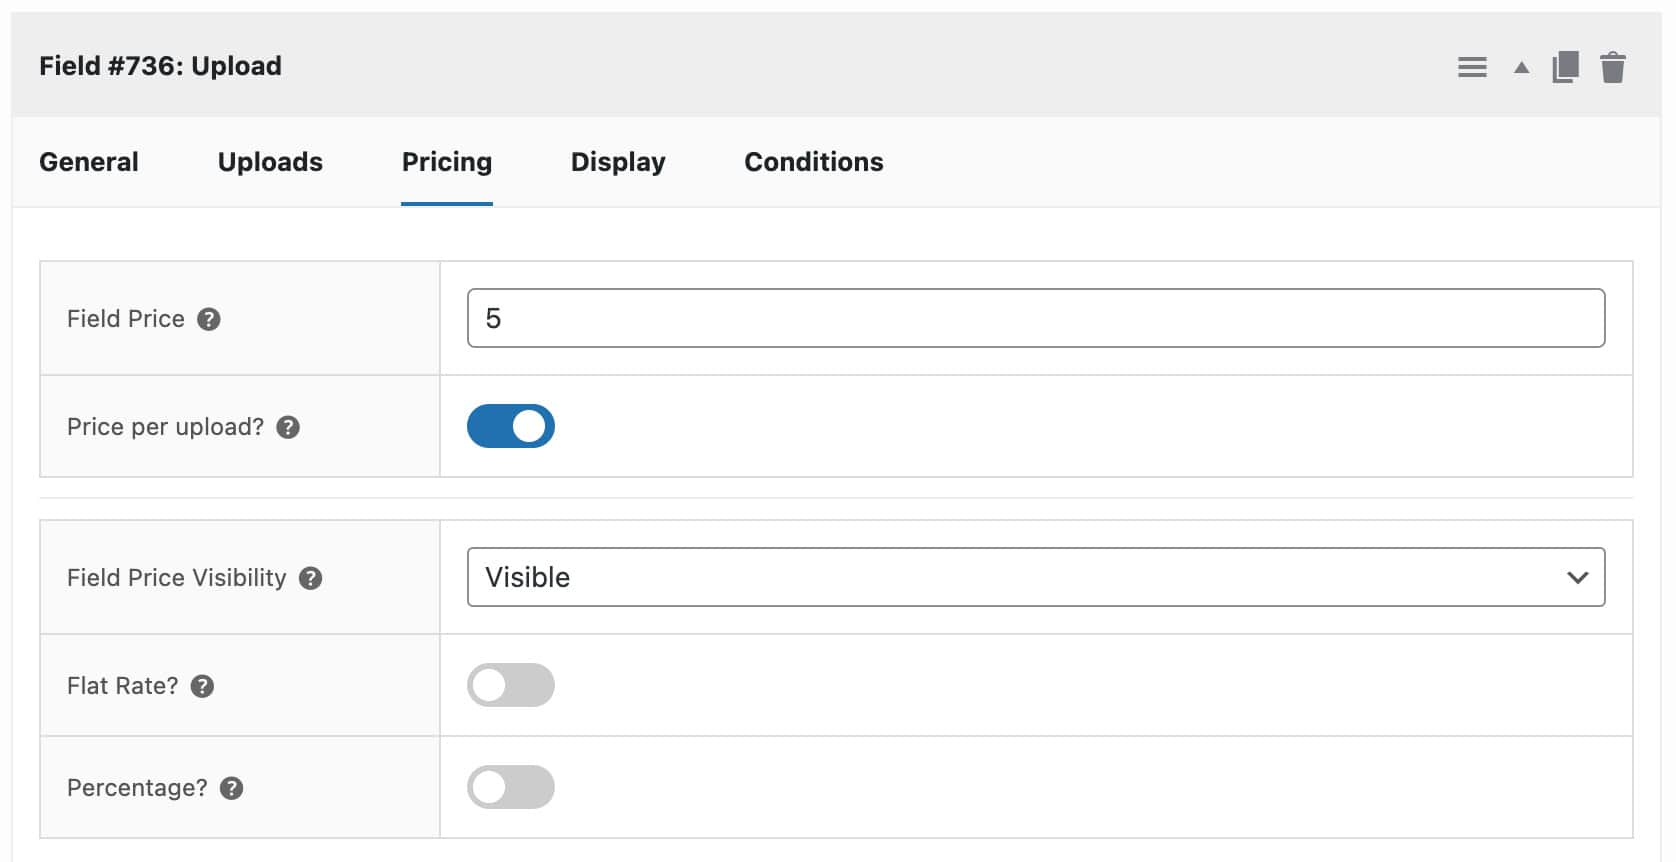
With this enabled, the price will increase per upload.
Allowing uploading multiple files
To allow the user to upload multiple files to the same field, you just need to select ‘Allow multiple uploads’ option.

Setting a maximum number of upload files
If you’d like to specify a limit to how many files the user can upload, just enter it in the ‘Max Files’ field.
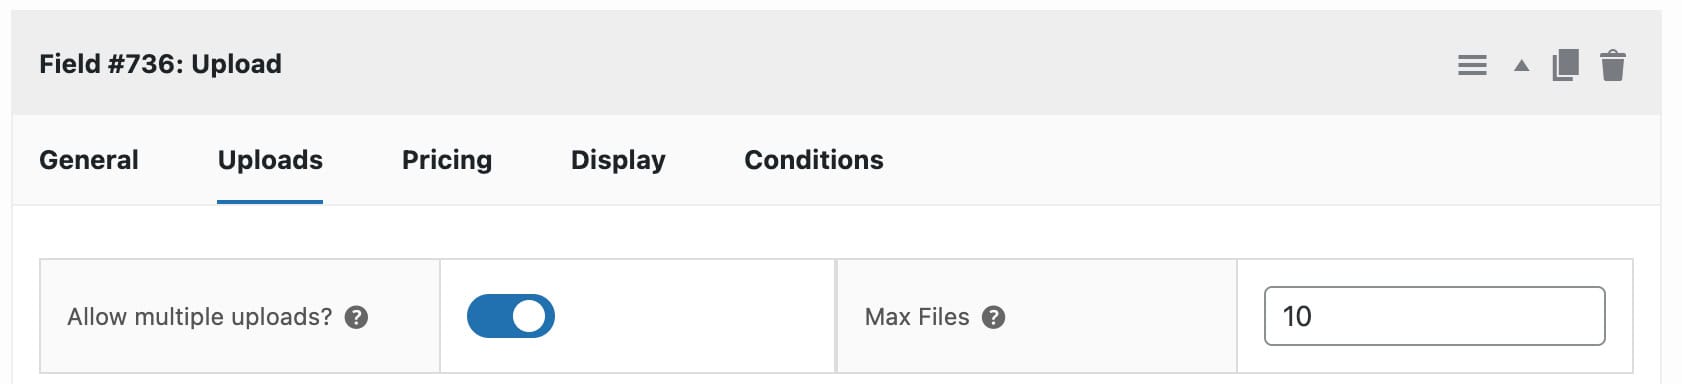
If you want to allow an unlimited number of files, you can leave this field empty or just enter ‘0’.
Accepting PDF files
By default, the Product Add-Ons Ultimate plugin accepts png, jpg/jpeg and gif files. If you’d like to allow the user to upload PDF files as well, just go to WooCommerce > Settings > Product Add-Ons > Uploads and enable the ‘Enable PDF uploads’ option.

Specifying file types
If you want to allow other file types, you can specify them in the ‘File types’ setting in WooCommerce > Settings > Product Add-Ons > Uploads.

This setting allows you to choose from a list of all file types – so you can select any file type you like for users to upload.
Limiting the permitted file size
To set a restriction on the maximum size of files that the user can upload, go to WooCommerce > Settings > Product Add-Ons > Uploads and update the value in the ‘Max file size’ field. The value you enter will be the maximum file size in MB.

Allowing users to add more files after the initial upload
Users can drag and drop multiple files to the uploader field. Once they’ve added some files, they might want to add extra files. They can do this by default. However, to make this clear to users, you can opt to retain the ‘upload’ icon on the field. This helps users understand that they can drag and drop additional files.
To do this, just select the ‘Retain Upload Graphic’ option.

Ensuring all files are uploaded
If users are uploading multiple files, they might try to check out before all the files have been uploaded. To ensure that users can’t do this, just select the ‘Disable Add to Cart Button’ option. The add to cart button will be inactive until all uploads have completed.

Organizing and accessing uploaded files
Once you’ve started receiving orders with multiple file uploads, you can decide how to organize and access them.
By default, uploaded files are listed as metadata per line item in the order.

You can access each download by clicking on it.
Organising uploads by order
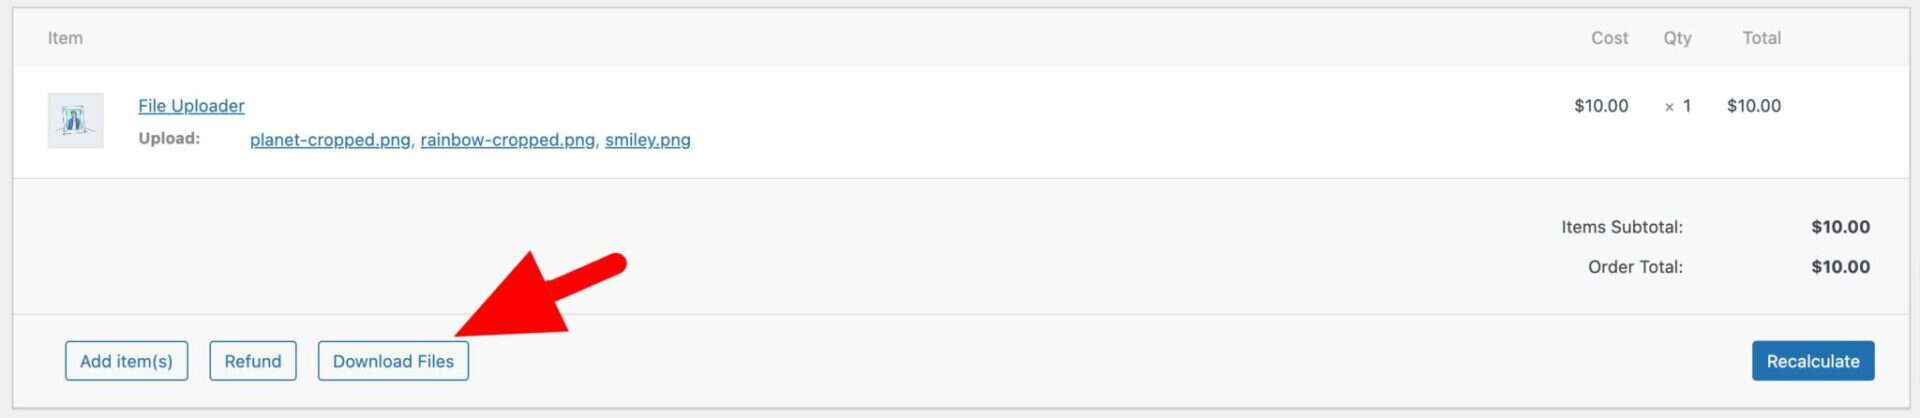
If you prefer, you can save all uploads in the order to a single zip file. Just select the ‘Organise uploads by order’ option.

Now, to access the files, select the order and click the ‘Download Files’ button. The files uploaded to that specific order will be available as a zip file.
Renaming uploaded files
You may want to rename uploaded files using a specific convention. You can do this in the ‘Rename files’ field using dynamic tags. These will automatically update the file name with specific information based on the tags you’ve chosen.
So if you want to rename each uploaded file to include the order number, product ID and the original file name, just enter the following into the ‘Rename files’ field:
{order_number}-{product_id}={original_file_name} The dynamic tags include:
{original_file_name}{order_number}{group_id}{field_id}{date}{product_id}{product_sku}
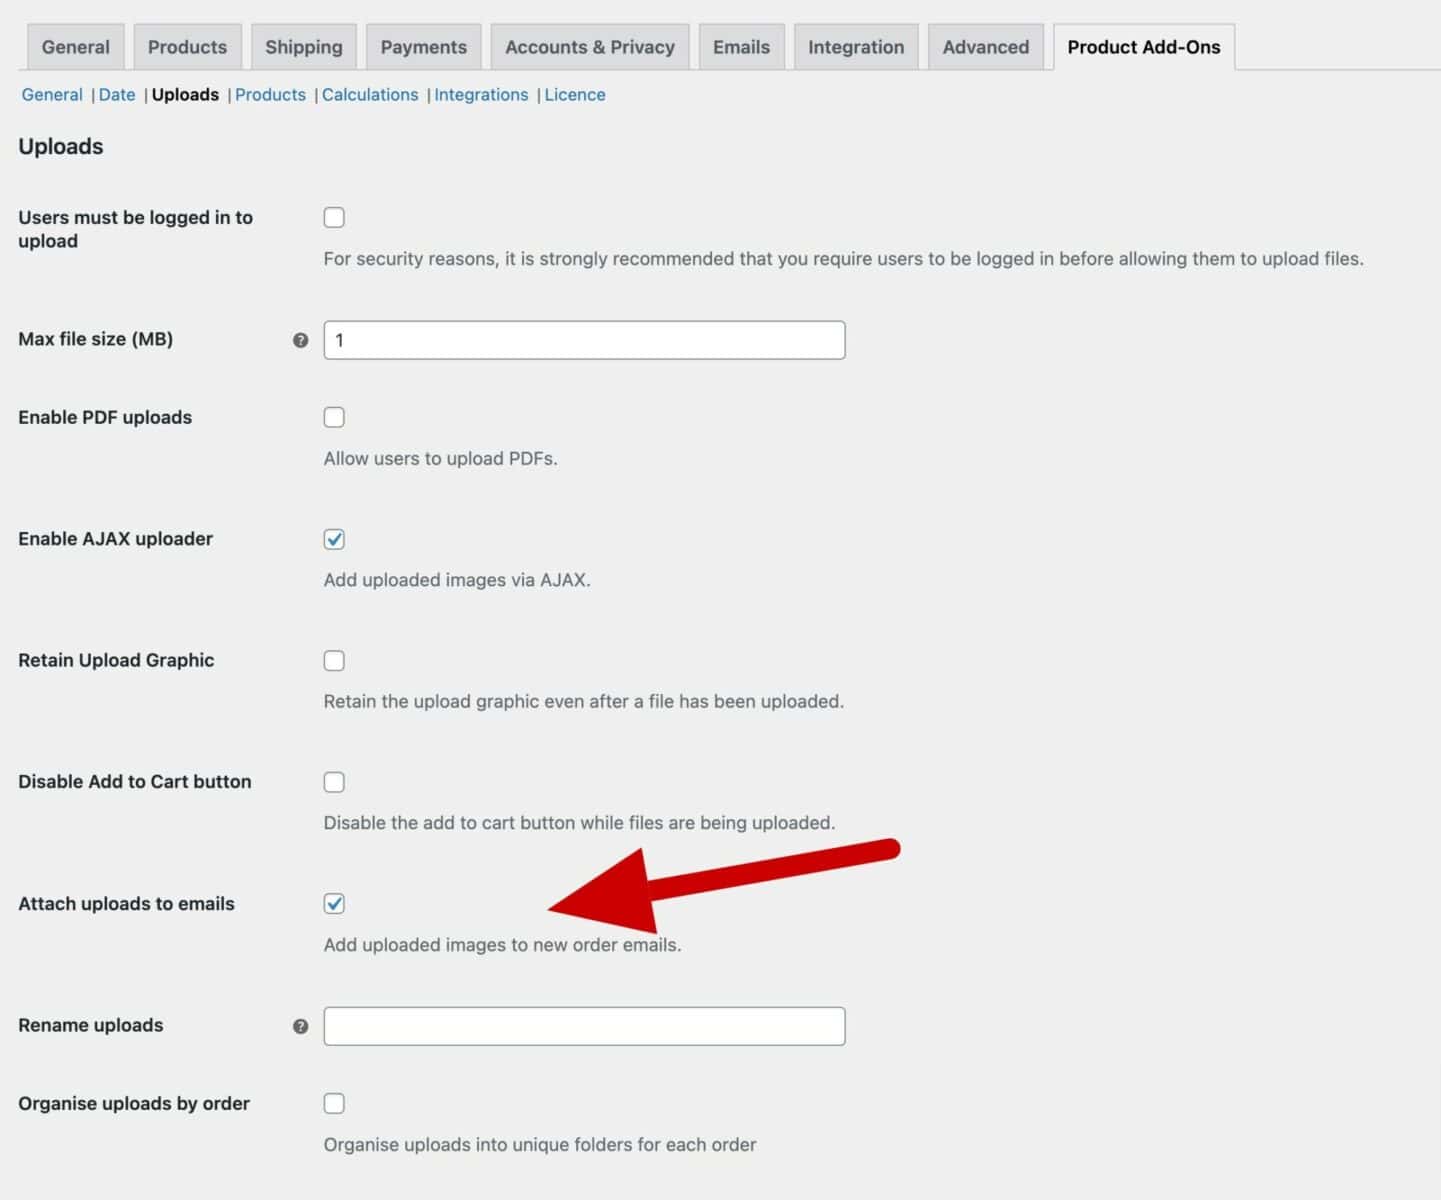
Attaching uploads to email
If you want to attach uploaded files to customer and admin emails, just select the ‘Attach uploads to emails’ option. You might want to avoid this if the user can upload a large number of files.
Extending the drag and drop file uploader
Now let’s look at some ways to extend the drag and drop multiple file uploader using some extensions for the WooCommerce Product Add-Ons Ultimate plugin.
Editing uploaded images in the browser
By default, when a user uploads an image, it will upload without any changes. However, you might want to be able to control certain parameters – e.g. height and width of the image – or allow the user to edit their images before uploading.
For this, you’ll need the Product Add-Ons Ultimate plugin plus the Advanced Uploads extension.
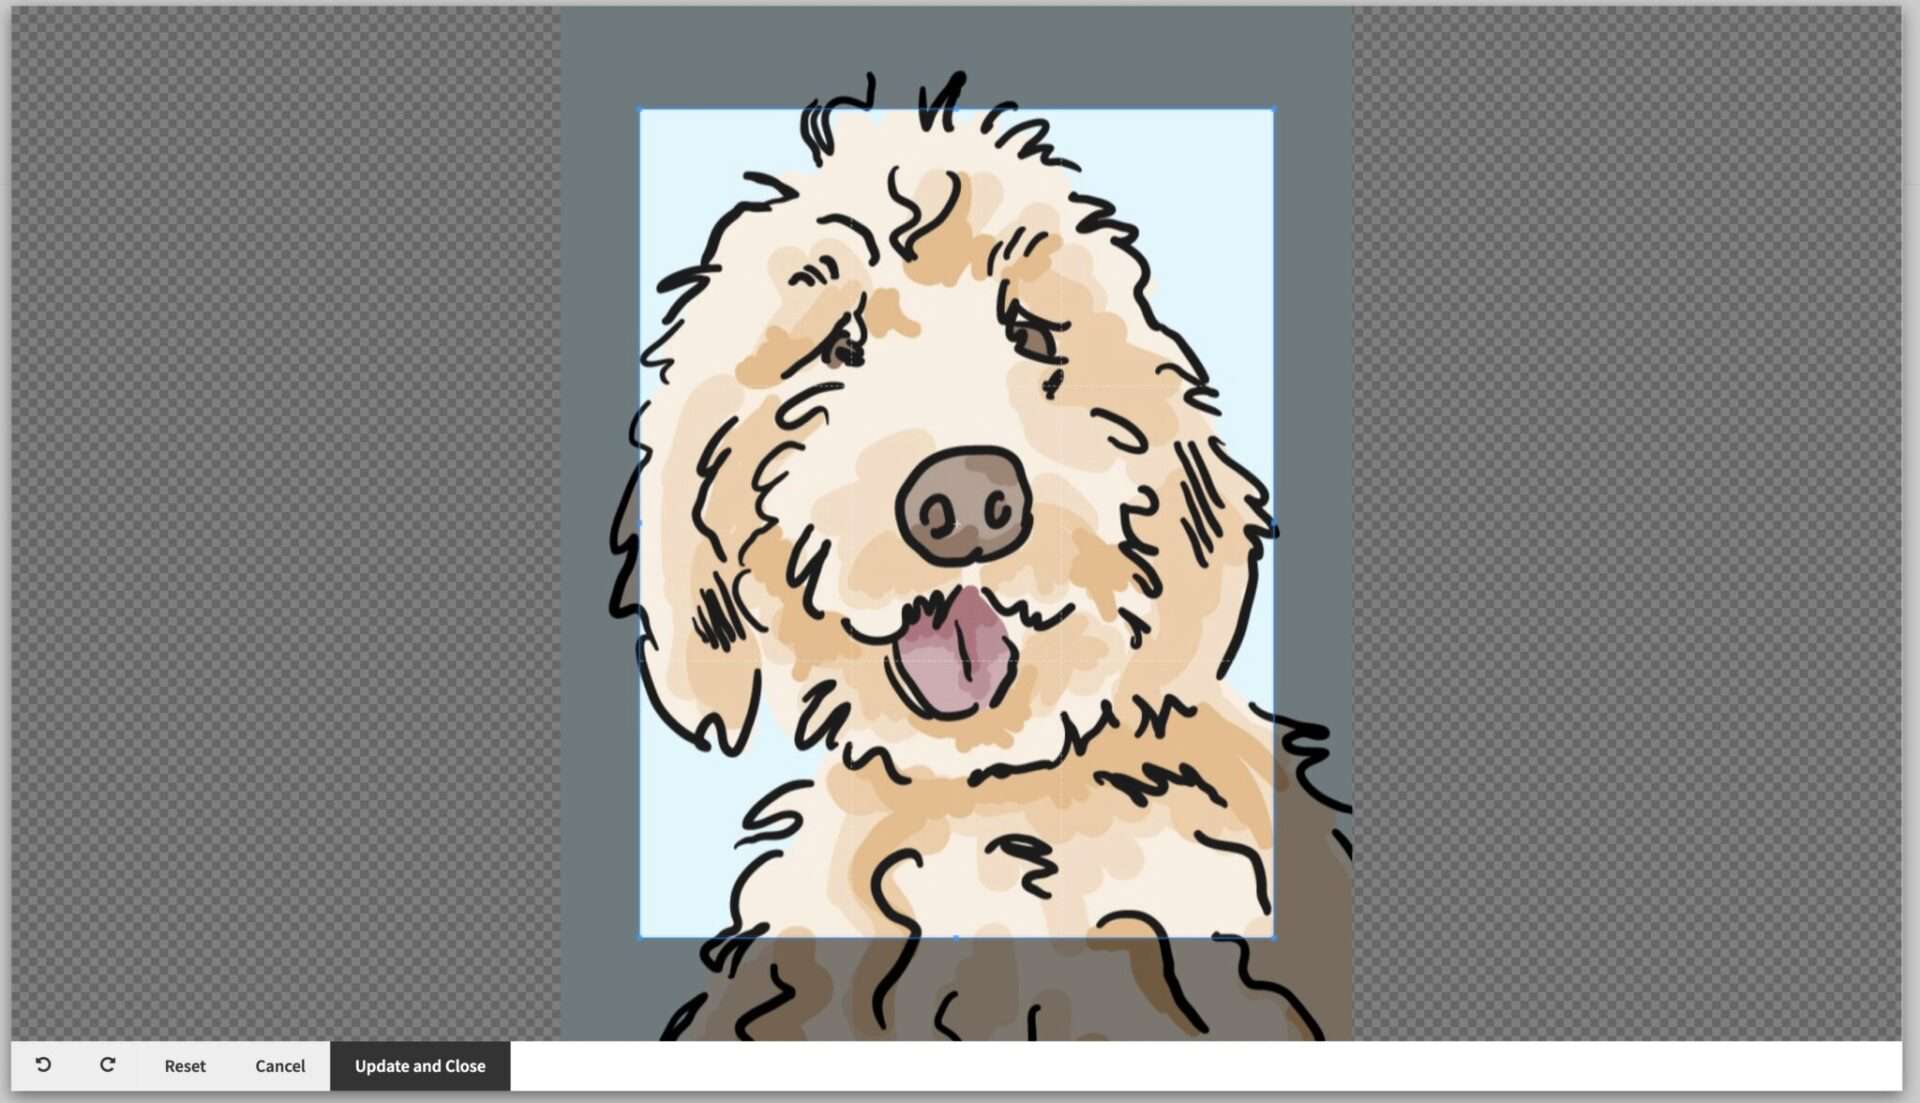
Advanced Uploads for Add-Ons Ultimate
Let users crop, size and rotate their uploaded files
With Advanced Uploads, the user is presented with an editing interface where they can update their image. The user can select an area, and crop or rotate the image.
You can specify a number of parameters including:
- Aspect ratio for the edited image – perfect if you require images in a certain proportion
- Maximum height of an image in pixels
- Maximum width of an image in pixels
- Image quality
Counting the number of pages in an uploaded PDF
Another neat feature in Advanced Uploads is the ability to count the number of pages in a PDF file uploaded by the user. You can then use this figure in a calculation field in Add-Ons Ultimate for pricing or any other calculation.
Previewing uploaded images in the main product image
You can also allow users to preview their uploaded images as part of the main image. For this, you’ll need Product Add-Ons Ultimate plus the Image Preview extension.
Image Preview for Add-Ons Ultimate
Preview uploaded images as part of the main product image
With Image Preview, users can upload their images and immediately see them as part of the complete product image.
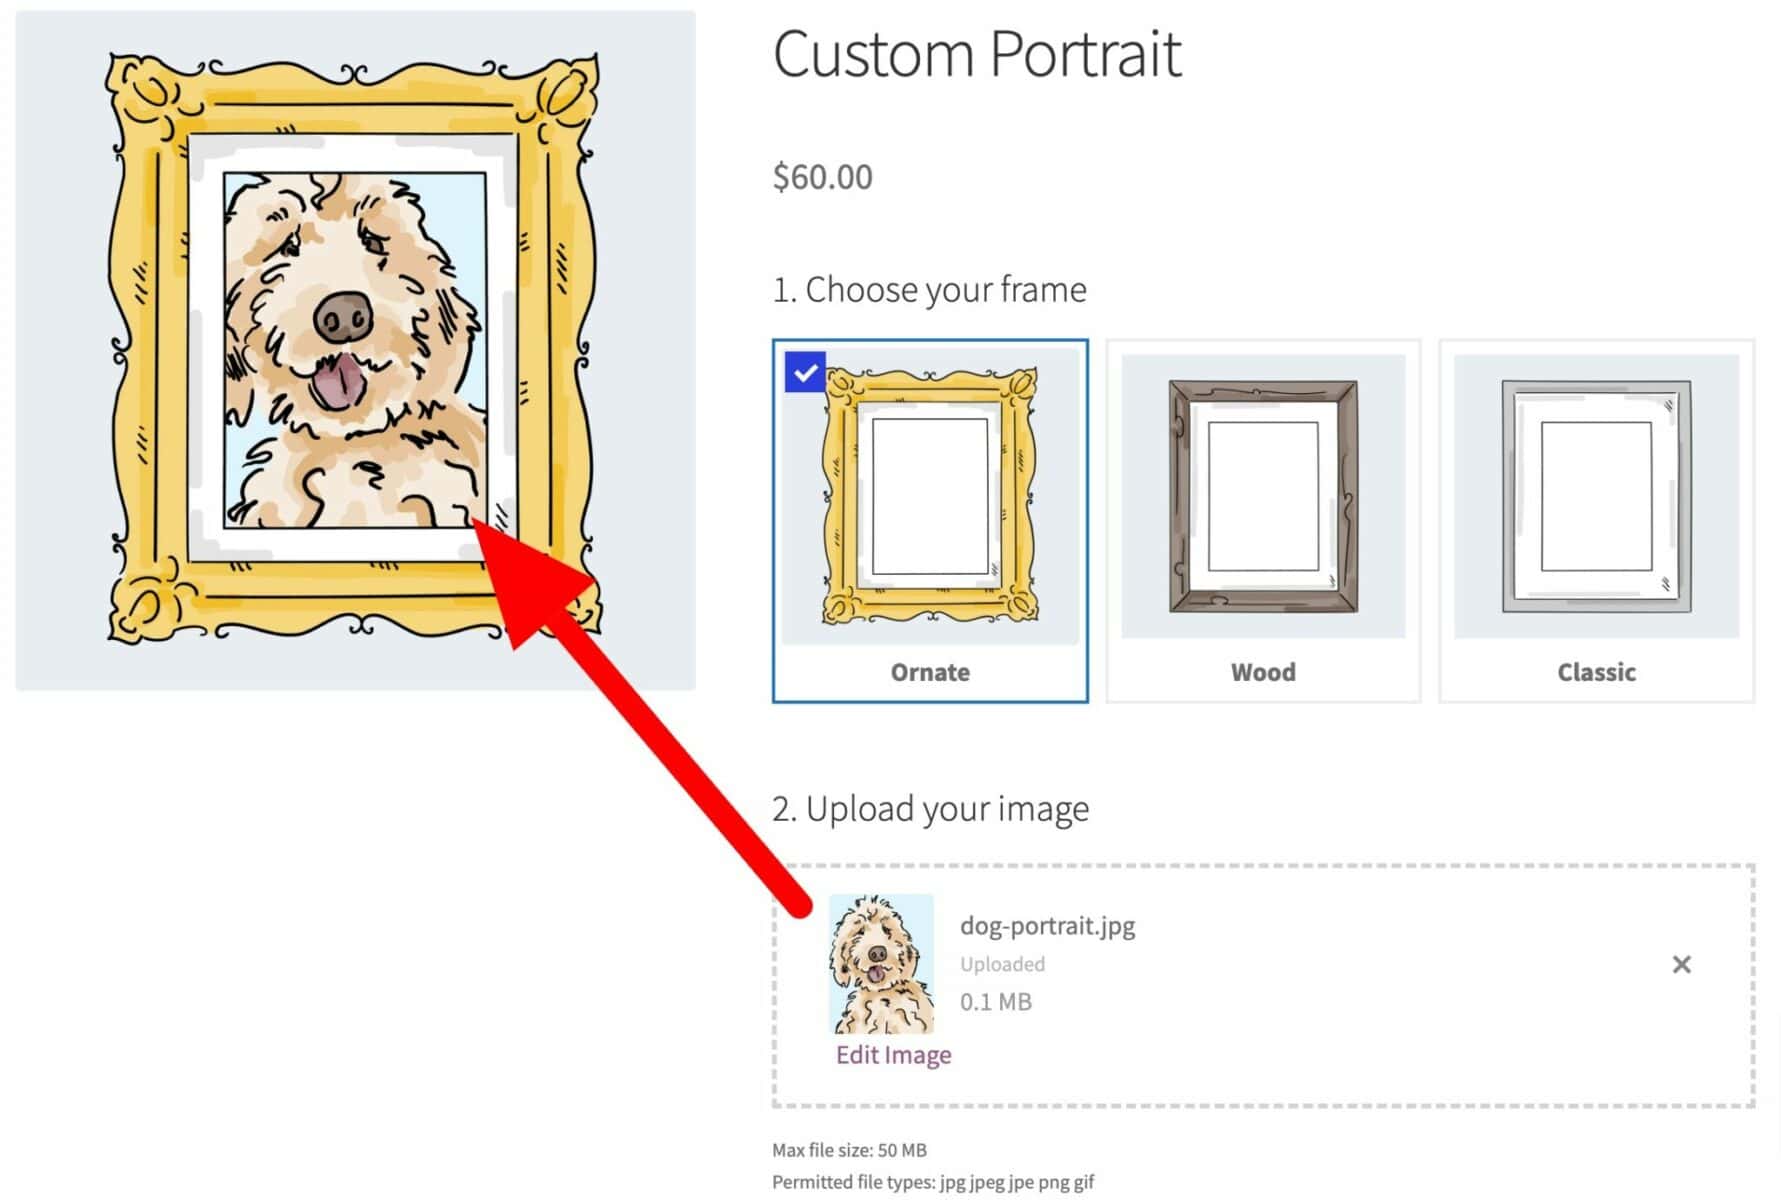
There are further details on using the Image Preview plugin in this tutorial on creating a custom framing product in WooCommerce.
WooCommerce drag and drop multiple file uploader – final words
WooCommerce Product Add-Ons Ultimate makes it easy for the user to drag and drop multiple file uploads on your WooCommerce product pages. You have multiple options to control parameter around the uploader – and it can even be extended to provide even more powerful functionality.
mE GUSTARIA SABER SI EL CLIENTE PUEDE EDITAR LAS IMAGEN COMO COLOR BRILLO O COSAS ASI´, PARA LUEGO YO PODER IMPRIMIRSELAS.
GARCIAS
Hi Carlos
With the Advanced Uploads plugin, the user can crop and rotate images but it’s not possible to edit color or brightness.
Thanks.
Comprendo,
Con el Con el complemento de cargas avanzadas, el usuario puede recortar y rotar imágenes, ademas podra tener una vista de cada imagen que suba con este complemento ( Vista previa de la imagen para Add-Ons Ultimate), porque en la demo solo puedo ver una sola foto.
se estas dos se pueden integrar y por 100 fotos que suba, el cliente puedo ver cada imagen que edita una y edita, seria algo de lo que busco.
Y al comprar estos complemnte tengo plantillas prediseñadas, por ejemplo para ver tazas, almuhadas, camisetas, lienzos, o debo crearlos o comprarlos??
LO que busco es un kiosko, fotografico, para album, foto print diferentes tamaños estees el que ma se usa con carga masiva para imprimir 10 x 15 – 15 x 20 -13 x 18 en papel brillo o mate , almohadas, tazas, lienzos, grabado en laser, calendarios, a eso me refiero si ya tienes las platillas prediseñadas para montar, tengo que hacer yo todo, y finalmente si tienes algunos ejemplo de tiendas fotograficas que esteen trabajando con tu pluging, asi puedo chequear un poco y ver que estamos hablando en la misma linea..
Muchas gracias.
Thanks Carlos.
Our plugins allow your users to upload their images, crop or rotate them, specify how many of each they way, specify sizes, paper type, etc. We don’t have templates for the products that the images will be printed on.
Thanks
Gareth
Podria el cliente tener Vista previa de cada imagen imagen, cuando subo 100 imagenes, si se puede que necesitaria comprar, me refiero a que pluging + que extención o extenciones?
Do you want to allow the user to upload multiple images and have each one previewed as part of the main image? If so, you would need the WooCommerce Product Add-Ons Ultimate plugin plus the Image Preview plugin:
https://pluginrepublic.com/wordpress-plugins/woocommerce-product-add-ons-ultimate/
https://pluginrepublic.com/wordpress-plugins/image-preview-for-add-ons-ultimate/
If you also want to allow the user to edit each image when they upload, you’ll also need the Advanced Uploads plugin:
https://pluginrepublic.com/wordpress-plugins/add-ons-ultimate-advanced-uploads/