You can use the page count and page size of an uploaded PDF in your product’s calculations. For example, you can charge per page for smaller documents and per meter for large-format prints. This lets you price printing, plotting and copy shop services automatically, based on the file the customer uploads.
After following this guide:
- Customers will be able to:
- Upload one or more PDFs to your product
- See the price update as soon as each PDF has been checked
- As the store owner or admin, you’ll be able to:
- Charge by the number of pages in a PDF
- Charge by the width, height, length or area of the pages
- Switch between pricing methods based on the page size
You’ll need WooCommerce Product Add-Ons Ultimate and the Advanced Uploads extension.
Which PDF tags can you use?
Use these tags in a Calculation field, replacing xxx with the ID of your Upload field:
| Tag | Value |
|---|---|
{field_xxx_pdf_count} | Total number of pages in all the uploaded PDFs |
{field_xxx_pdf_width} | Width of the widest page, in mm |
{field_xxx_pdf_height} | Height of the tallest page, in mm |
{field_xxx_pdf_length} | Longest side of the largest page, in mm |
{field_xxx_pdf_short_side} | Largest short side of any page, in mm |
{field_xxx_pdf_total_length} | Longest sides of all pages added together, in mm |
{field_xxx_pdf_area} | Area of all pages added together, in square meters |
Width and height are measured the way the page displays, so a landscape page is wider than it is tall. Length and short side ignore the orientation. An A0 page has a length of 1189mm and a short side of 841mm, whichever way round it is.
The short side is useful if you print on rolls. It’s the narrowest roll width that every page in the file will fit on.
How do multiple uploads work?
If a customer uploads more than one PDF, the tags combine every page from every file:
pdf_count,pdf_total_lengthandpdf_areaadd up all the pagespdf_width,pdf_height,pdf_lengthandpdf_short_sideuse the largest page
You can leave ‘Allow multiple uploads’ enabled on your Upload field.
Set up PDF pricing
Step #1: Enable PDF uploads and page counting
- Go to WooCommerce > Settings > Product Add-Ons > Uploads
- Check ‘Enable PDF uploads’
- Check ‘Enable PDF page count’. This setting also returns the page sizes, so it’s needed for all the PDF tags
- Check that AJAX uploads are enabled. There are more details in our guide to Upload field settings
- Click ‘Save changes’
Your store is now set up to read the page count and page size of every PDF that customers upload.
Step #2: Optionally choose which page box to measure
PDFs can contain several page boxes, each describing a different area of the page. Choose which one to measure from the ‘PDF page size box’ setting on the same settings page:
- Crop Box: the visible page area, as you’d see it in a PDF viewer. This is the default and it works well for most stores
- Trim Box: the finished size of the page after trimming. This is ideal for print shops that receive print-ready files with bleed
- Bleed Box: the trim size plus the bleed area
- Media Box: the full sheet, including any printer marks
- Art Box: the area containing the page’s meaningful content
If a PDF doesn’t include the box you’ve chosen, the plugin uses the Crop Box instead, then the Media Box. Most PDFs don’t include a Trim Box, so the Crop Box is the safest choice if you’re unsure.
Step #3: Add an Upload field
- Add an Upload field to your product
- Make sure the field accepts PDFs. If you’ve set the field’s ‘File types’ setting, include PDF in the list. If you’ve left it empty, the field accepts all the file types allowed in your global settings
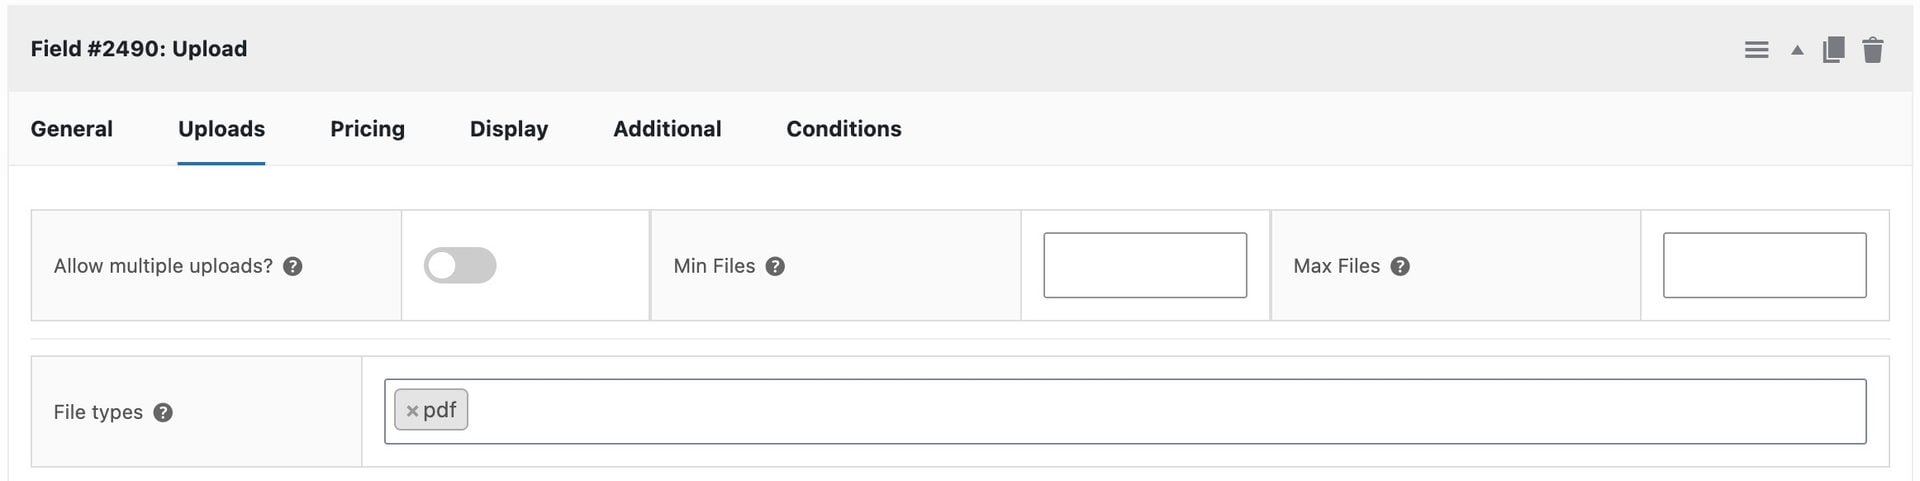
Now customers can upload PDFs to your product. Next, let’s use the PDF details in a calculation.
Step #4: Add a Calculation field
- Add a Calculation field to your product
- Open the formula builder and find your Upload field
- Click the buttons for the PDF values you want to use, such as ‘PDF page count’, ‘PDF length’ or ‘PDF area’. Hover over a button to see exactly what it measures
The PDF buttons only show for Upload fields that accept PDFs. If you can’t see them, check the field’s ‘File types’ setting from step #3.
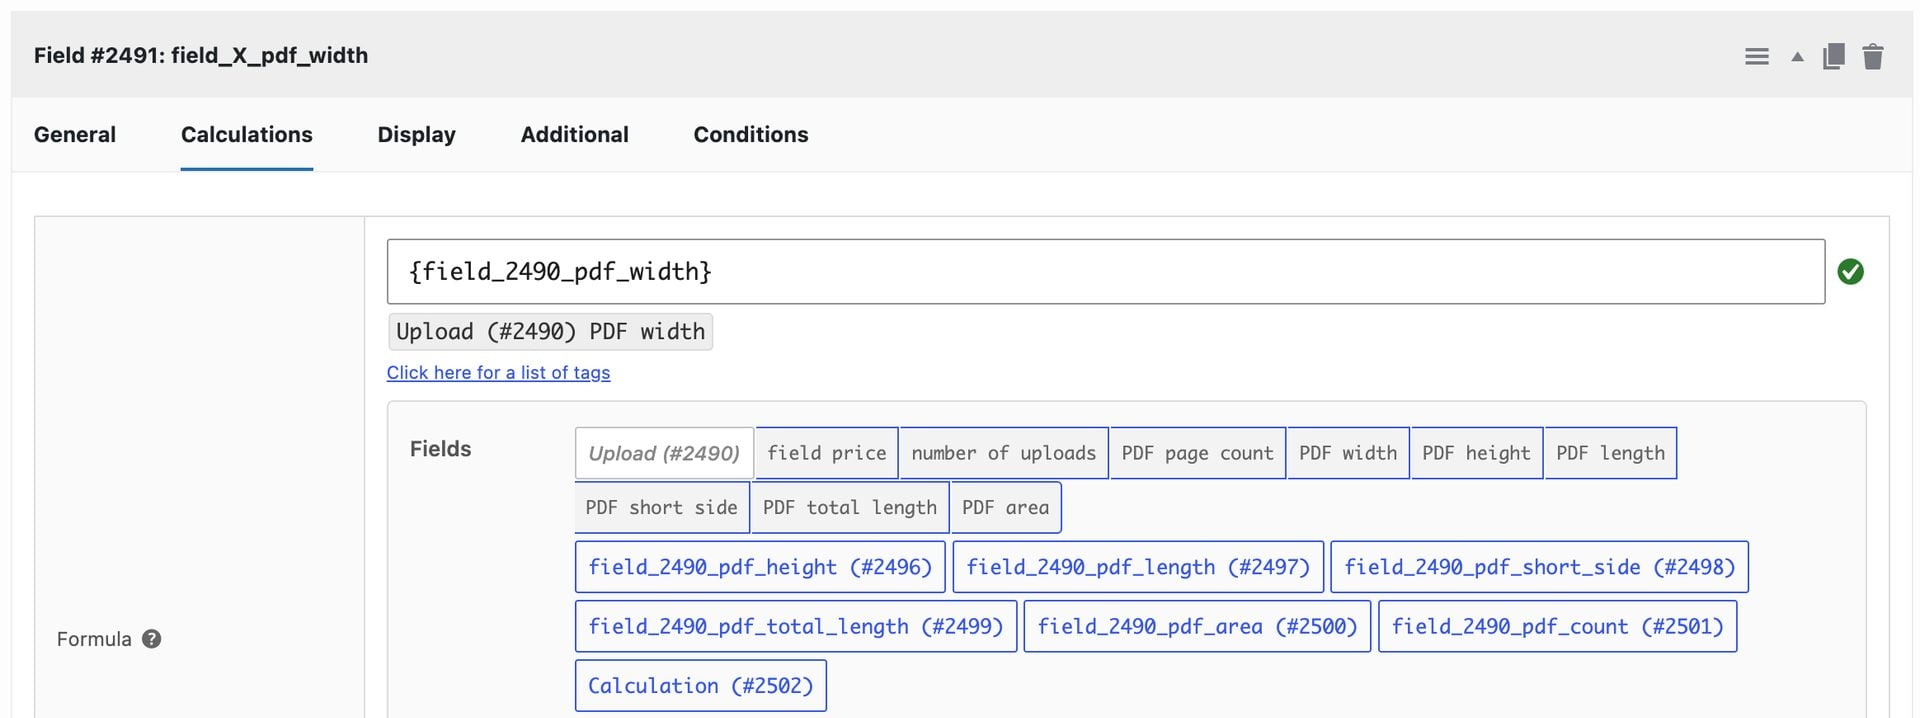
Save and publish your product. Now the price will update as soon as a customer uploads a PDF.
Example formulas
These examples use an Upload field with the ID 2490. Replace it with your own field’s ID.
Example #1: Charge per page
{field_2490_pdf_count} * 0.10This charges $0.10 for every page in the uploaded PDFs.
Example #2: Charge per square meter
{field_2490_pdf_area} * 12This charges $12 per square meter of printed area. A single A0 page is 1 square meter, so it costs $12.
Example #3: Charge per meter of roll length
({field_2490_pdf_total_length} / 1000) * 8This charges $8 per meter of roll used. Divide by 1000 to convert millimeters to meters.
Example #4: Switch pricing method based on page size
{field_2490_pdf_length} <= 1200 ? {field_2490_pdf_count} * 2.50 : ({field_2490_pdf_total_length} / 1000) * 8This formula checks the longest side of the largest page:
- If it’s 1200mm or less, the customer pays $2.50 per page
- If it’s longer than 1200mm, the customer pays $8 per meter of total length
For example, a 3-page sewing pattern printed on A0 sheets has a length of 1189mm. That’s under 1200mm, so it’s charged per page at $7.50. A single 1500mm-long pattern sheet is over the limit, so it’s charged by length: 1.5 meters at $8 is $12.
Troubleshooting
Customers see an error about the PDF page count
Some PDFs use a type of compression that the default page counting method can’t read. If customers see an error mentioning a compression technique, update the ‘PDF page count method’ setting in WooCommerce > Settings > Product Add-Ons > Uploads to ‘Imagick’. Note that you will need to have the the Imagick PHP extension installed on your server.
If you doesn’t, you can use ‘Basic text search’ instead. Your hosting company can tell you whether Imagick is available.
A PDF’s page size shows as 0
The plugin uses Imagick to measure the page size automatically if the default method can’t read the file, so installing Imagick on your server fixes most cases. If Imagick is used, the ‘PDF page size box’ setting is ignored and Imagick measures the page itself, which is usually the Media Box.
The page size isn’t what you expected
Check the ‘PDF page size box’ setting from step #2. Files with bleed or printer marks are larger than their finished size, so choose ‘Trim Box’ if you want to measure the finished page. Sizes are rounded to the nearest 0.1mm.