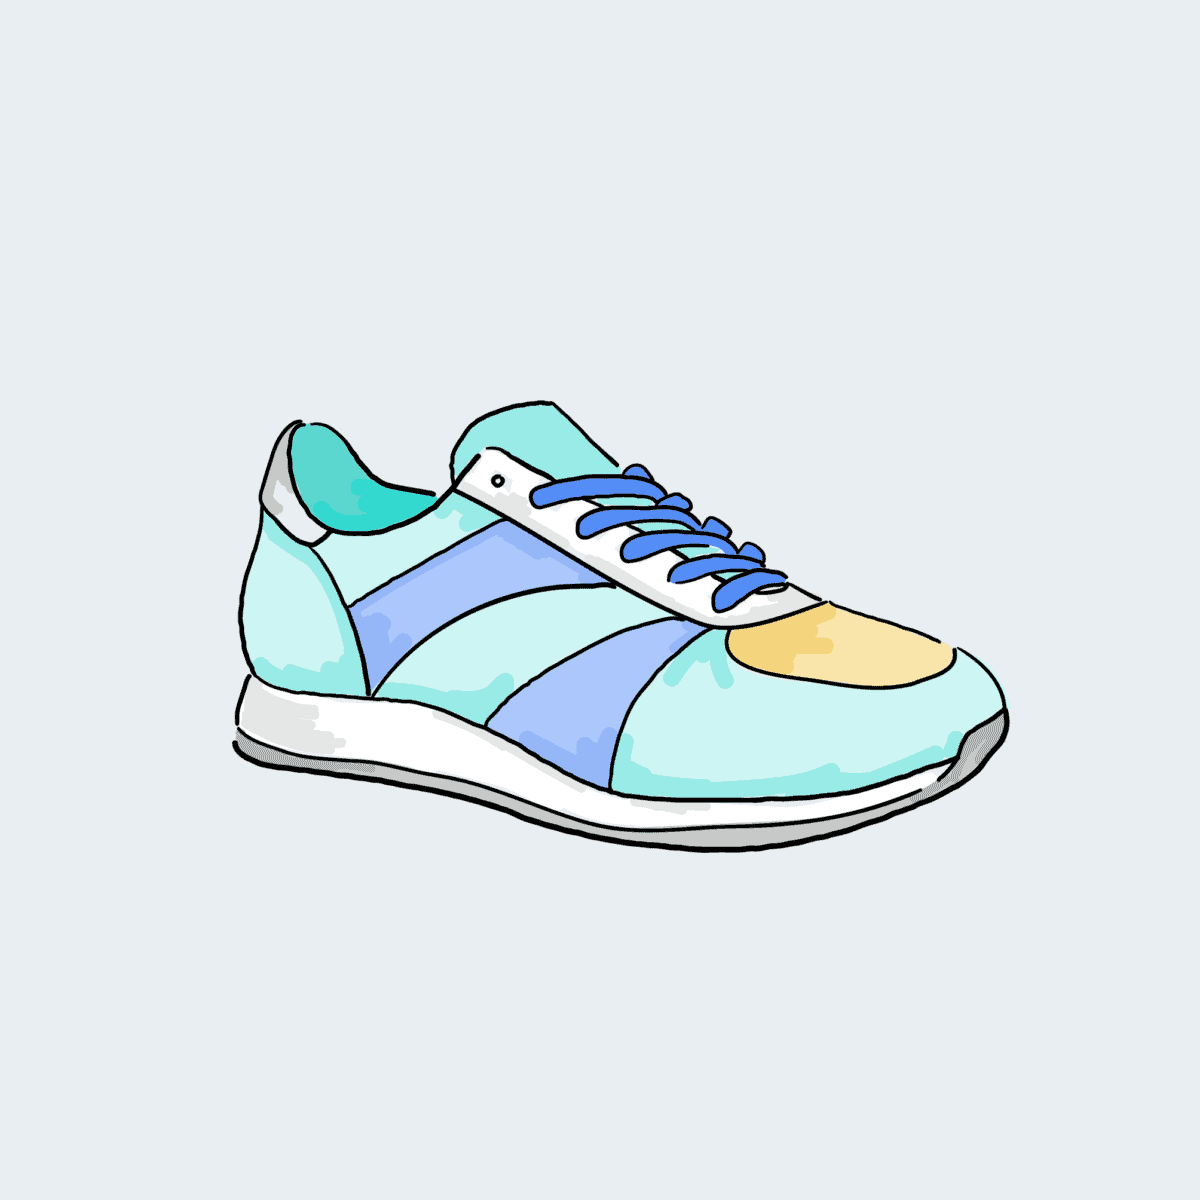
You can use the Swatches field in the Product Add-Ons Ultimate plugin to create image layers in your WooCommerce product. Take a look at the screenshot below. There are four swatches – each showing a colour selection. When the user selects a swatch, an element of the main image is updated with the corresponding colour/image.
Why use layered images in your WooCommerce product?
In the example product above, there are four separate components – Base, Stripes, Toe and Laces – with four colour options in each. If you had to create a separate image to represent each combination, that would be 4x4x4x4 – 256 images in all.
By using image layers, you just create a single image for each colour option and element – a total of 16 images in all. Then you display each image in layers, one on top of the other, to make a composite product image. It’s much quicker and easier than creating individual images for all combinations.
Image layers – live updates
Even better, when the user selects a new colour option, the main product image is updated live and the user can preview how their selection looks.
Once the user has decided on their options and adds the product to the cart, the layers are saved and a new thumbnail is generated in the cart showing the user’s unique configuration.
Setting up image layers
The image layers use transparent PNG files. You have a base product image – in our example, this would be an image of the trainer.
Here’s an example of the base image for our trainer product. This is added as the main product image.
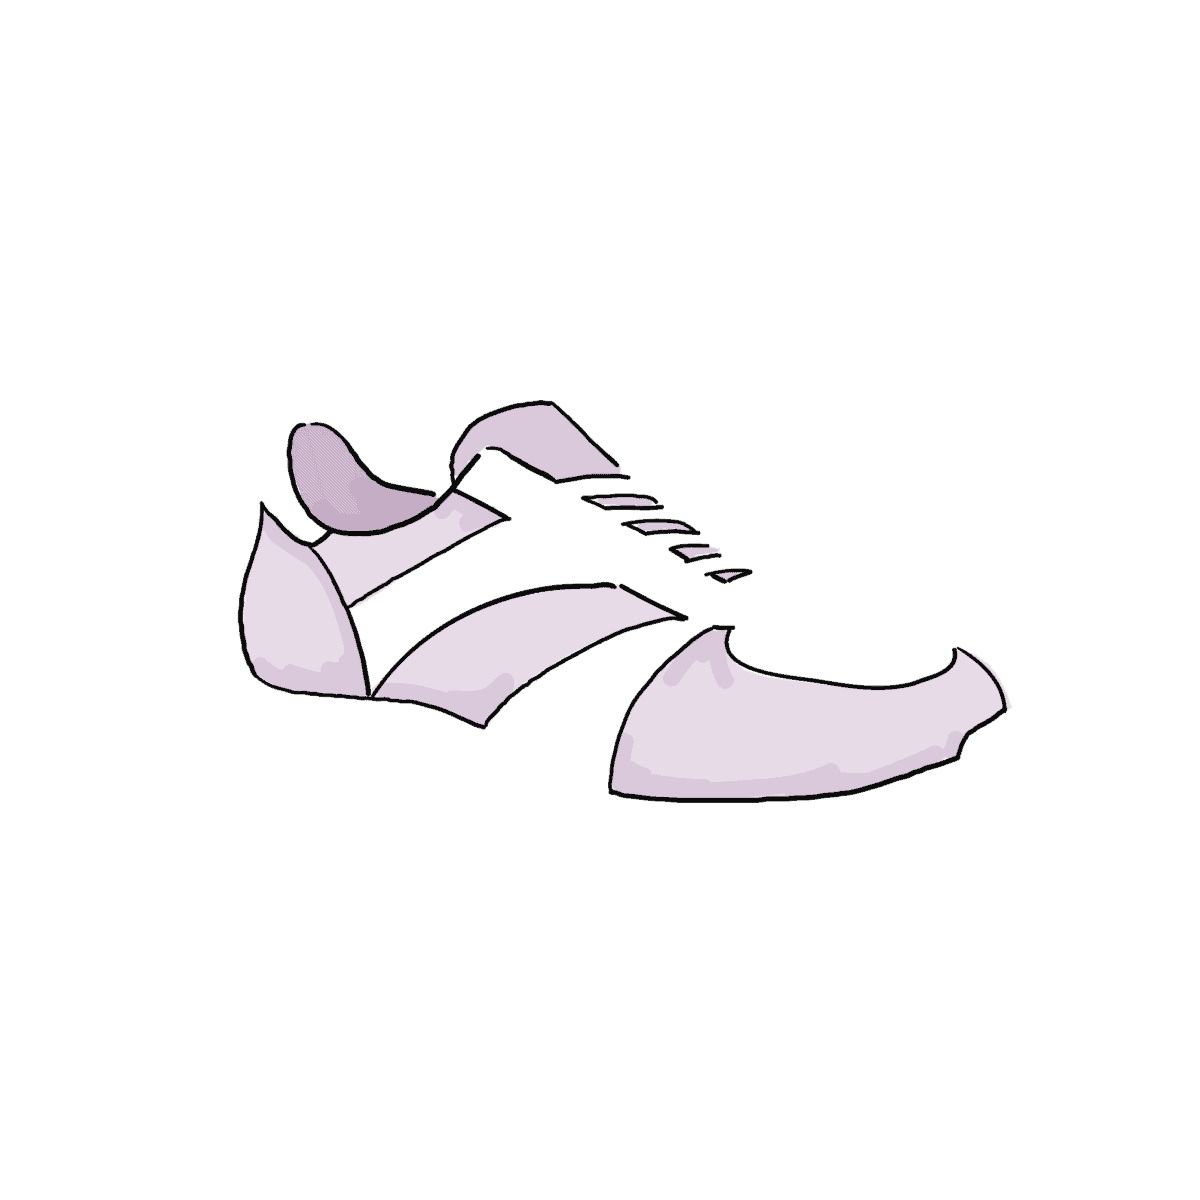
Then you have multiple images for each component of the trainer that can be updated via a swatch – for example, you would have images for each colour version of the trainer’s body. Each of these images would be isolated on a transparent background.
Here’s an example of an image of the lilac version of the trainer’s base component on a transparent background:
You’ll need separate images for each component of your product that the user can update. And these will need to be saved at the same dimensions as the main product image.
Setting up the image layers
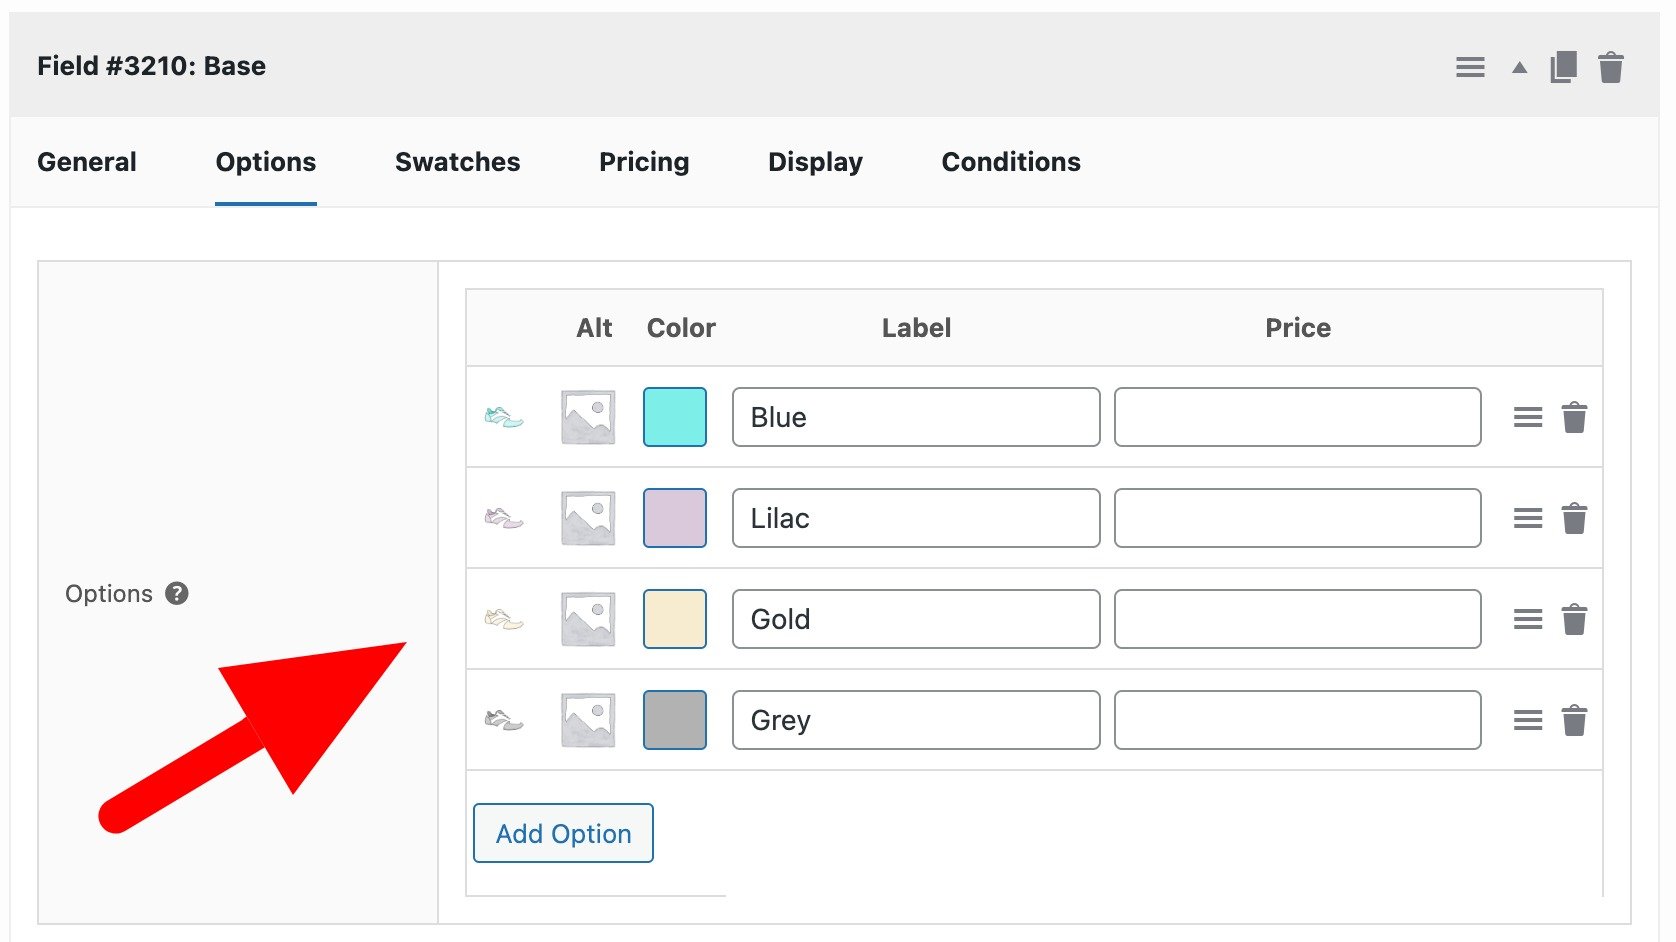
Once you’ve got your images ready, it’s easy to set up the swatches for your image layers. Follow the guidance on how to add swatches for each layer that can be updated. In our example, this means that you’ll have four Swatches fields: Base, Stripes, Toes, Laces. Here’s an example of the field settings:
Here are the steps to follow:
- Set the ‘Field Type’ to ‘Swatch’
- Click ‘Add Option’ on the ‘Options’ tab to add a new swatch
- Upload the image file for that specific component – e.g. for the first base colour (Blue) upload the PNG file of the blue base isolated on a transparent background
- If you want to display your swatch as a colour, enter a hex value for the colour in the ‘Colour’ field. If you prefer to display your swatch as an image, you can leave the ‘Colour’ field empty
- Enter a label for the swatch – e.g. ‘Blue’
- Optionally enter a price for this specific layer
Add a new Swatches field for each image layer.
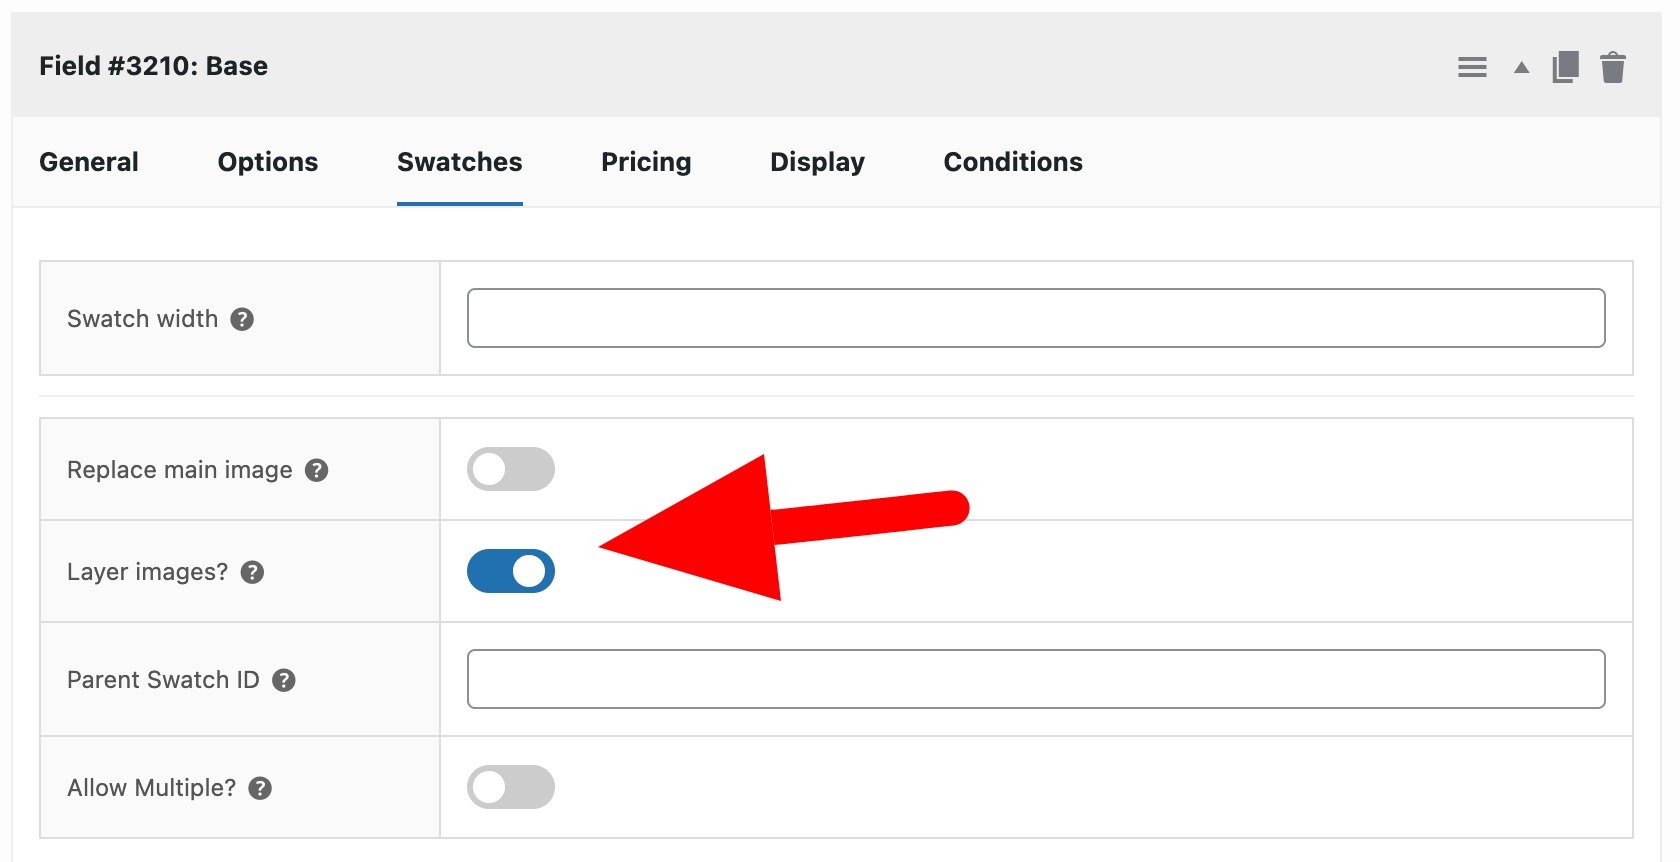
Finally, ensure that you check the ‘Layer images’ option on the ‘Swatches’ tab.
That’s how to create image layers in WooCommerce.