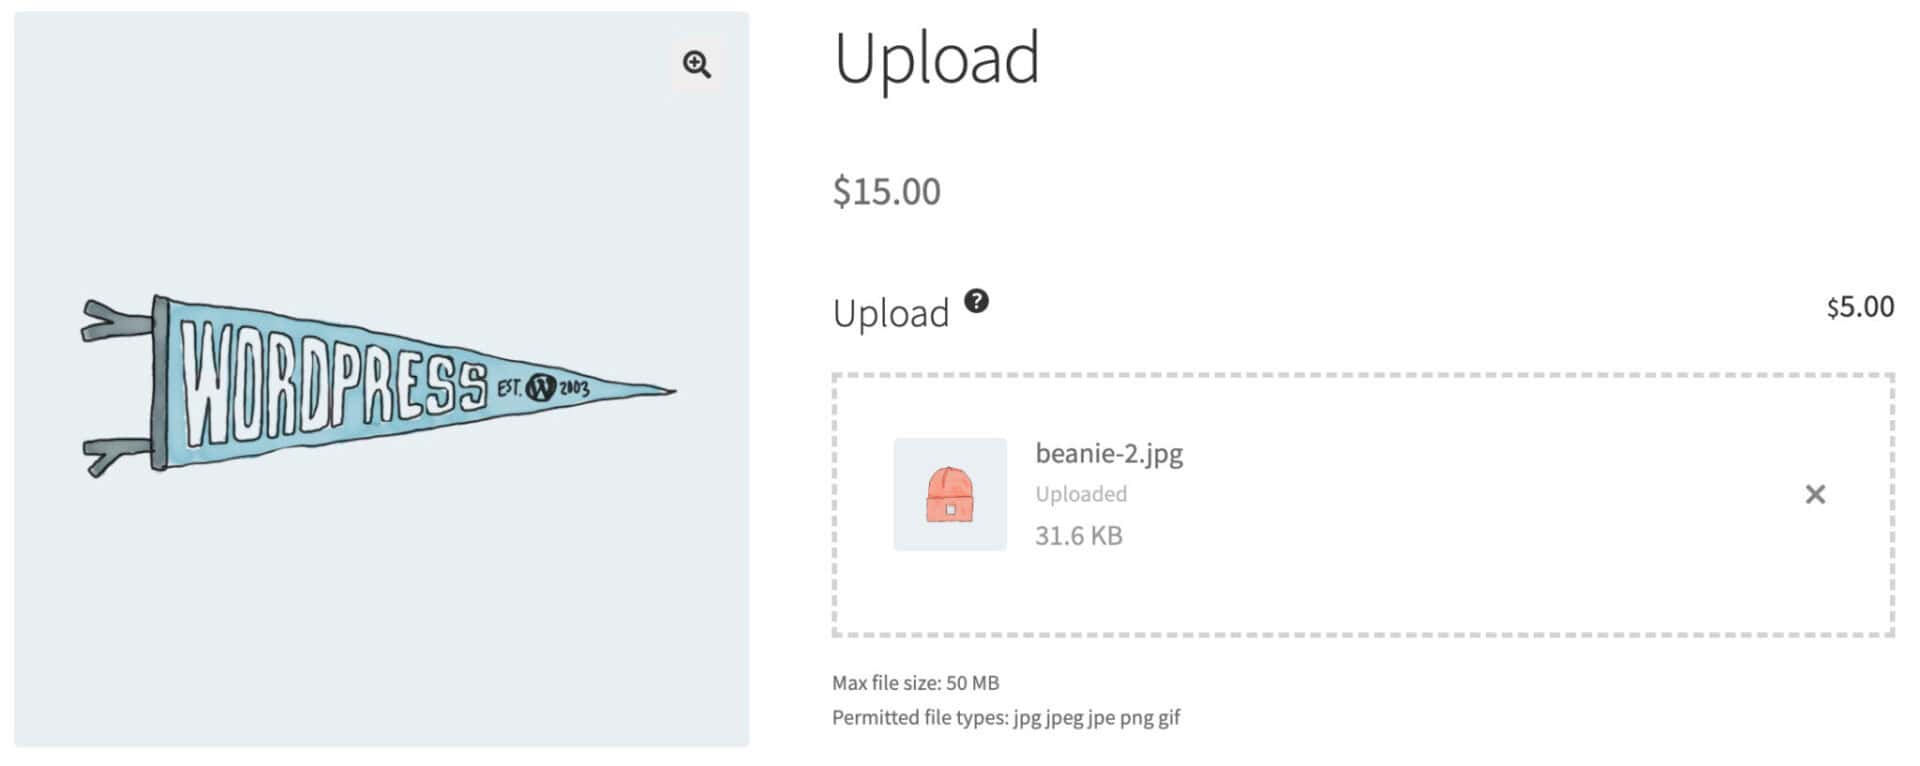
In the WooCommerce Product Add-Ons Ultimate plugin upload fields allow you to add upload fields to your WooCommerce product. There’s a demo product here. There’s also a complete tutorial on how to upload files and images to a WooCommerce product page here.
To add an upload field, just choose ‘Upload’ from the ‘Field Type’ dropdown list.
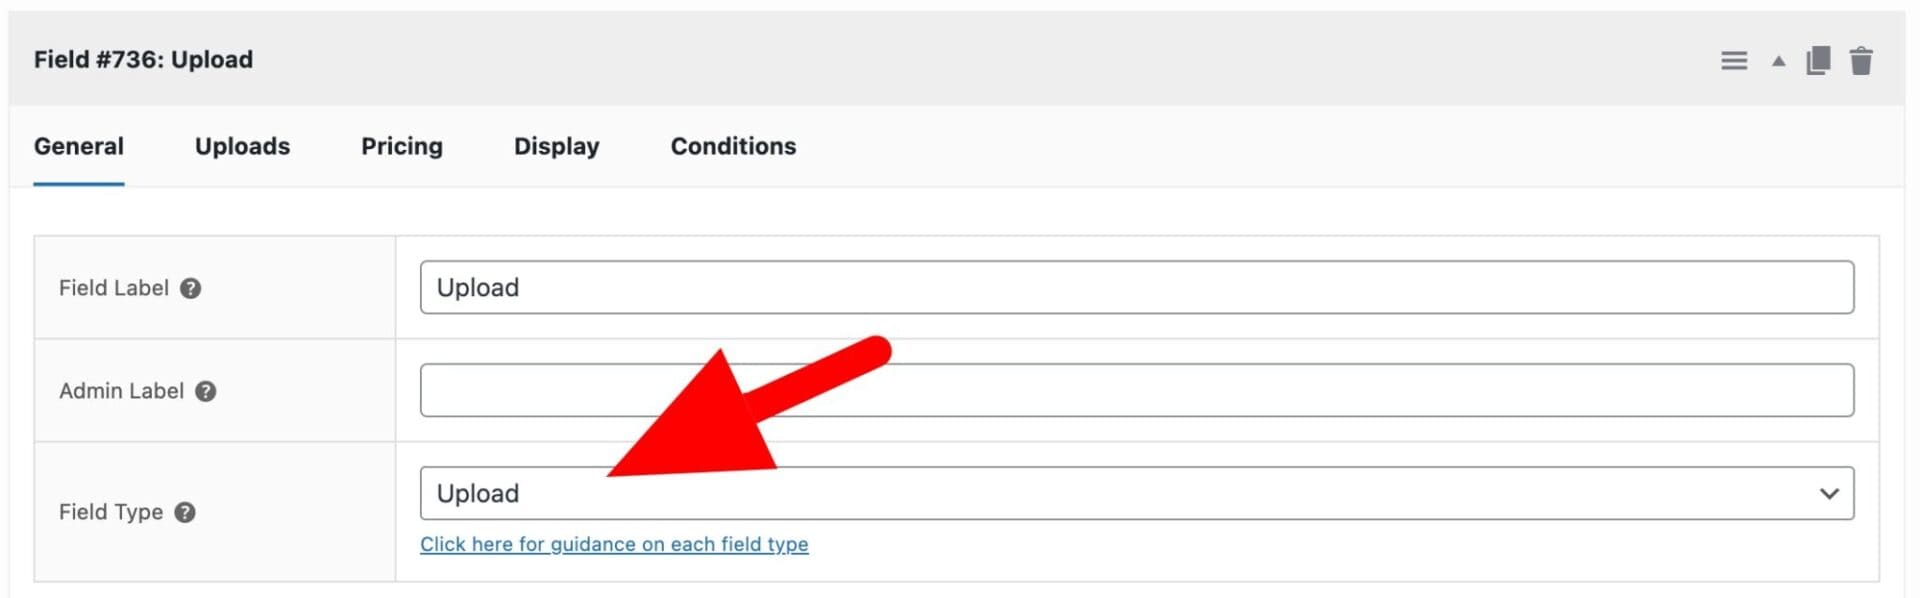
When you select ‘Upload’ as the field type, you’ll see a new ‘Uploads’ tab appear. Click on it to access further settings for the field.

Allow multiple uploads
Enable this option to allow the user to upload more than one file per upload field
Max Files
Specify the maximum number of files that can be uploaded to this field
Click on the ‘Pricing’ tab for more settings.
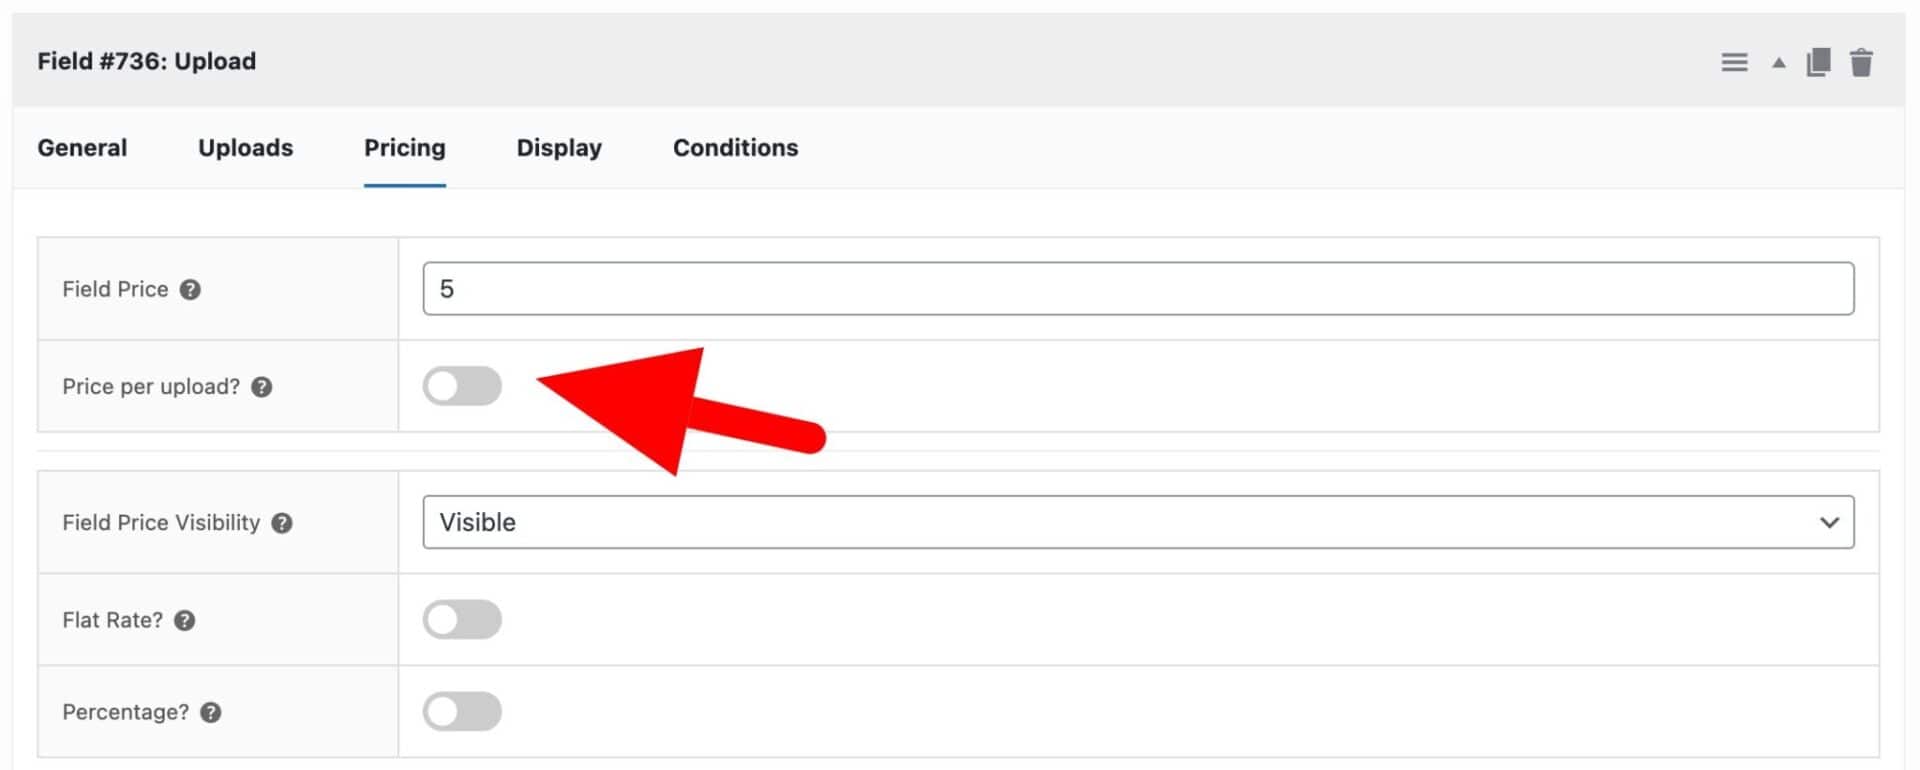
Field Price
Enter a value here if you want to charge the user for uploading files.
Price per upload
Enable this option to multiply the field price per the number of uploaded file
Global settings for upload fields
You can enable settings for all upload fields from WooCommerce > Settings > Product Add-Ons > Uploads.
AJAX uploads
If you’d like to enable AJAX uploads, check the ‘Enable AJAX uploader’. option

AJAX gives a better user experience, including displaying upload status and progress and thumbnails for all uploaded files.
It also allows you to charge a price per uploaded file and set the maximum number of uploaded files.
Show the ‘Upload files’ graphic
If you want to retain the ‘Upload files’ graphic to make it clear to the user that they can upload further files, just check the ‘Retain upload graphic’ option.

Disable add to cart button
You can opt to disable the add to cart button while files are uploading. This will prevent users trying to add the product to their cart before the upload is complete.

Attach uploads to emails
Check the ‘Attach uploads to emails’ option to ensure that thumbnail images are included in the email confirmations sent to admin and customer.
Where are uploaded files stored?
Files are uploaded to the wp-content/uploads/product-extras directory. If you prefer, you can upload files to directories based on order number.
To upload files to separate directories for each order, go to WooCommerce > Settings > Product Add-Ons and enable ‘Organise uploads by order’.

How to download uploaded files
You can access the uploads in a number of ways:
- You can view the files directly from the order screen
- If you have the ‘Organise uploads by order’ option selected, you can click the ‘Download files’ button to download all uploads per order in a single zip
- You can use FTP to access the uploads folder directly
How to rename uploaded files
You might want to rename uploaded files. You can do this by entering the new file name format in ‘Rename files’.

You can use a number of dynamic tags which will be replaced by information about the file, including:
- {original_file_name}
- {order_number}
- {group_id}
- {field_id}
- {date}
- {product_id}
- {product_sku}
Uploading different file types
By default, the plugin will allow you to upload the following file types:
- GIF
- JPEG
- PNG
Uploading PDF files
If you’d like to enable PDFs as a file type, go to WooCommerce > Settings > Product Add-Ons and check the option to ‘Enable PDF uploads’.

Uploading other file types
You can specify which file types are permitted in the ‘File types’ setting. By default, GIF, PNG and JPG image files are enabled.

If enabling file types that are not natively supported by WordPress, please see this article.
Setting the maximum file size for uploads
To increase the permitted upload file size, go to WooCommerce > Settings > Product Add-Ons > Uploads and update the ‘Max file size’ setting.

Uploading without logging in
As a security measure, users are required to log in before uploading a file. If you wish to allow any user to upload files, go to WooCommerce > Settings > Product Add-Ons and ensure the ‘Users must be logged in to upload’ setting is deselected.
Hiding uploaded images in the cart and checkout
If you’d like to hide uploaded files from the cart and checkout pages, you can use this snippet (assuming you are using the classic cart shortcode).
| <?php | |
| /** | |
| * Remove thumbs from cart | |
| */ | |
| add_filter( 'pewc_show_link_only_cart', '__return_true' ); | |
| /** | |
| * Remove thumbs from order page | |
| */ | |
| add_filter( 'pewc_remove_thumbs_in_order_page', '__return_true' ); |
Alternatively, you use this CSS to prevent the image from displaying (although the thumbnail still loads on the page in the background):
| .mini_cart_item dl img, | |
| .cart_item dl img, | |
| .pewc-upload-thumb-wrapper, | |
| .mini_cart_item dl br, | |
| .cart_item dl br, | |
| .pewc-upload-thumb-wrapper br { | |
| display: none | |
| } |
Change upload table layout
You can adjust the widths of the columns in the upload field by using this CSS:
| .dropzone .dz-preview.dz-image-preview { | |
| table-layout: fixed; | |
| } | |
| .dropzone table.dz-preview td.pewc-dz-image-wrapper { | |
| width: 20%; | |
| } | |
| .dropzone .dz-preview.dz-image-preview .dz-details { | |
| width: 60%; | |
| } |
Managing and clearing uploaded files
As more and more users upload files to your site, you will want to clean up any unwanted files. You can do this in a couple of ways.
Deleting files by order
Once you have processed and completed an order, you might not want to keep its uploaded files on your server. To remove all uploaded files associated with add-on fields in an order:
- Edit the order
- Click the ‘Delete files’ button

This will permanently delete the files uploaded to the order through an add-on upload field.
Deleting files from all completed orders
If you prefer, you can delete uploaded files from all orders with the status ‘Completed’:
- Go to Product Add-Ons > Clean Up Files
- Click the ‘Delete uploaded files from Completed orders’ button
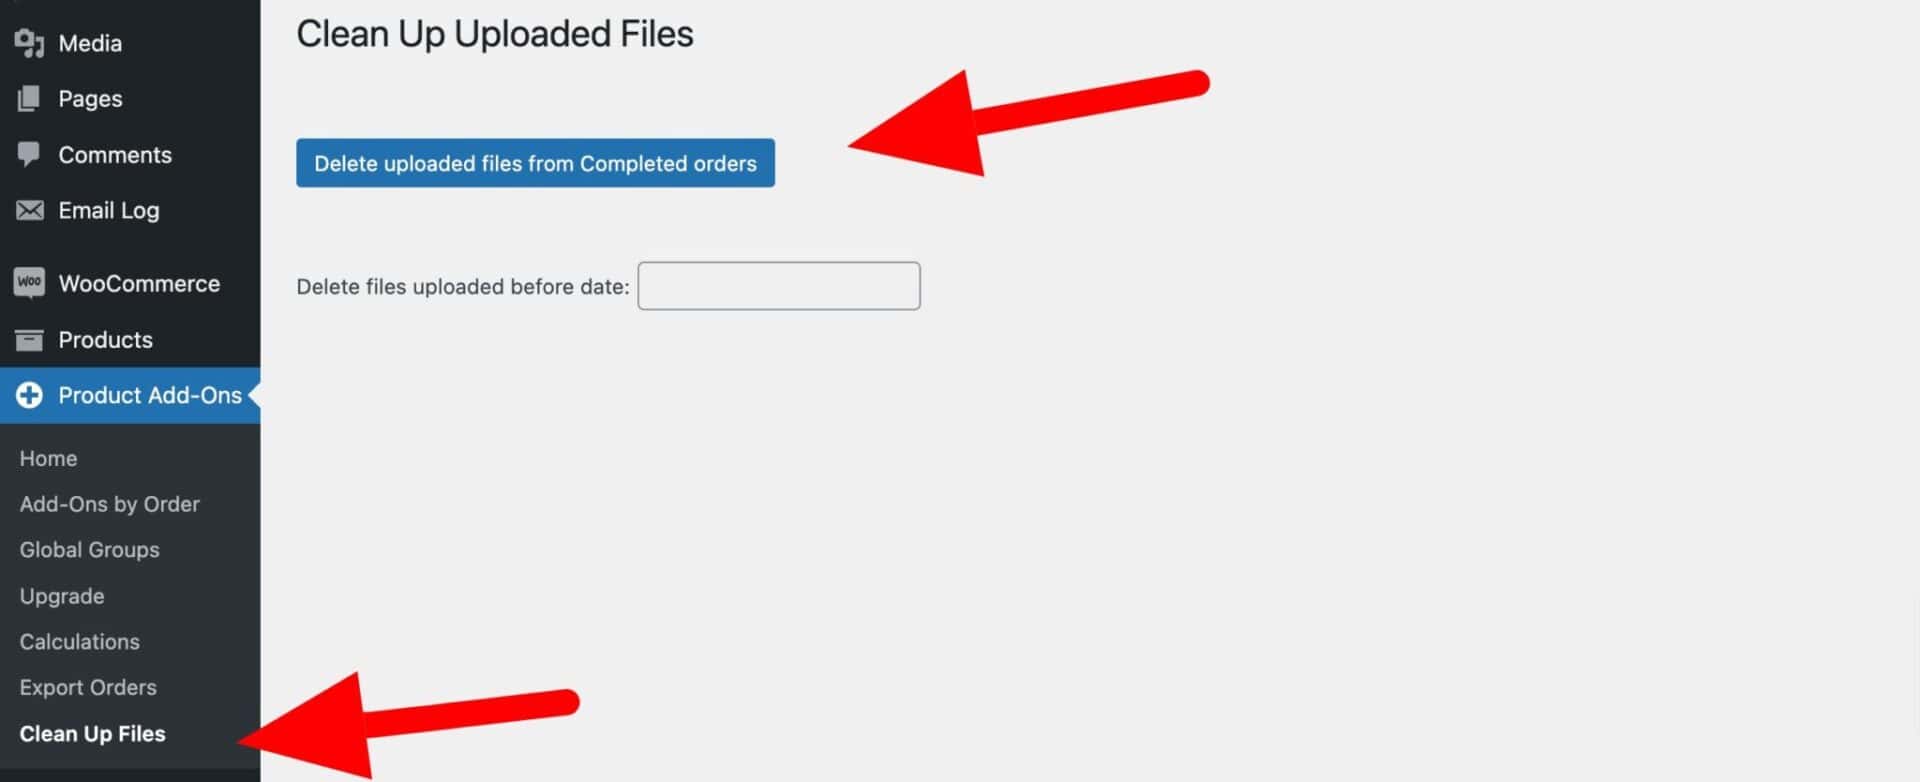
This will permanently delete the files uploaded through an add-on upload field from all completed orders.
Bulk deleting old files
Finally, you can also choose to bulk delete all files uploaded before a certain date. This will delete all uploads – whether they are associated with an order or not, and whether or not that order is completed.
- Go to Product Add-Ons > Clean Up Files
- Select a date in the ‘Delete files uploaded before date’ field. Files uploaded before this date will be deleted
- Click the ‘Scan files to delete’ button
- A list of all scanned files to be deleted will appear
- Click the ‘Confirm delete?’ button
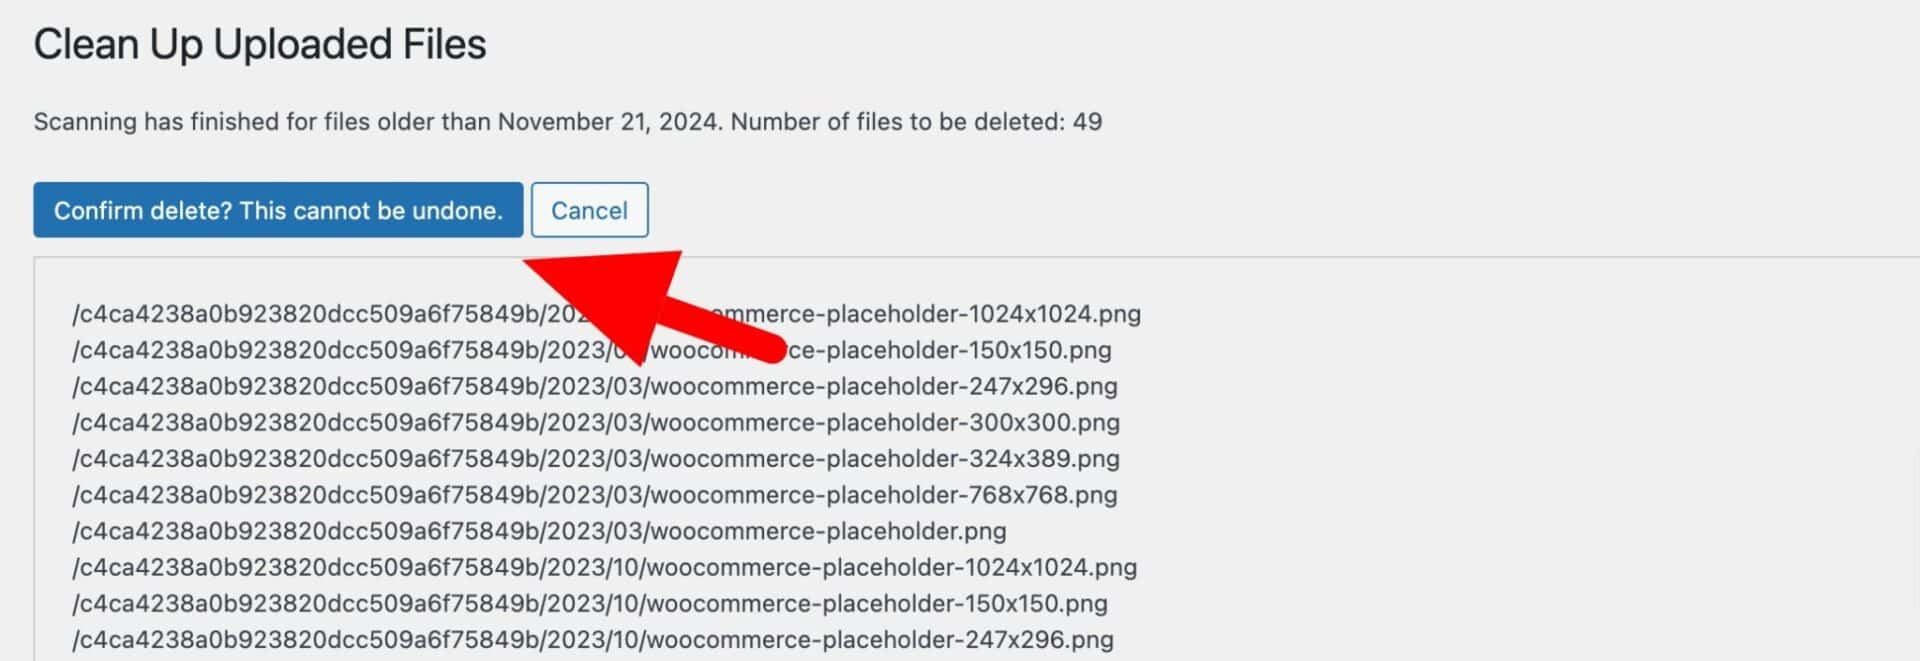
This will permanently delete the files uploaded through an add-on upload field to your site before the selected date.
How to offload uploads to third-party cloud storage
You can move your uploaded files from the default directory to third-party cloud storage providers like Amazon, Dropbox, Google Drive etc by following the steps in this article.
Tutorials and video
There’s an extensive tutorial on uploading files to WooCommerce products here.