The Advanced Calculations extension for Add-Ons Ultimate makes it easier to manage look up tables, allowing you to upload CSV files instead of needing to edit PHP snippets.
Formatting your CSV files
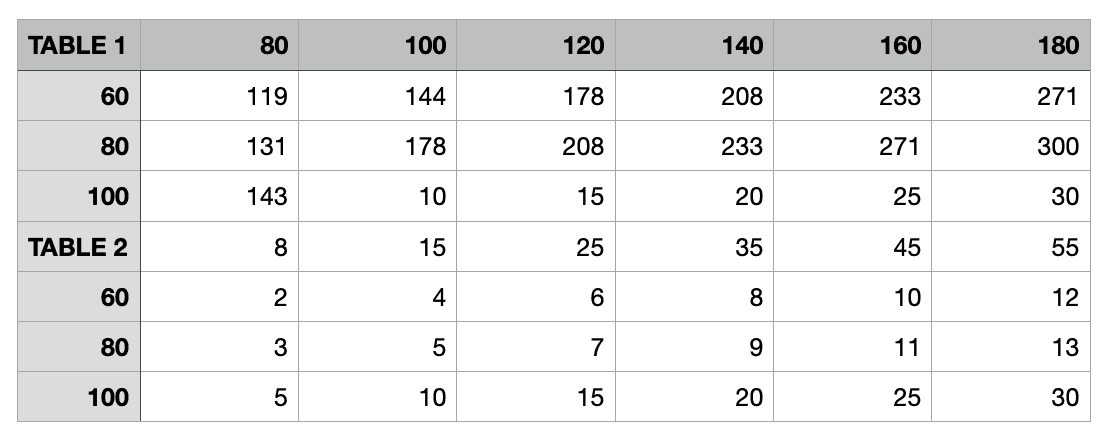
CSV files need to be formatted in a certain way.
- Give each table a unique name in the top left cell. Table names should be alphanumeric – they can’t just contain numbers
- Enter your X-axis values along the first row
- Enter your Y-axis values in the first column of each subsequent row
- If you have multiple tables, just add the next table as a subsequent row – the plugin will work out that this is a new table. Don’t leave any empty rows
This is how your CSV files should look:
Uploading your CSV file
To upload your CSV file:
- Go to Product Add-Ons > Calculations
- Click ‘Choose file’
- Navigate to your CSV file
- Click ‘Import’
Your CSV file will be uploaded and your tables displayed on the page:

Using look up tables
Look up tables are a type of calculation field in Add-Ons Ultimate. The Advanced Calculations extension makes it much easier to set up your look up tables.
Once you’ve imported your CSV file, you can edit a product with a look up table:
- Go to your product
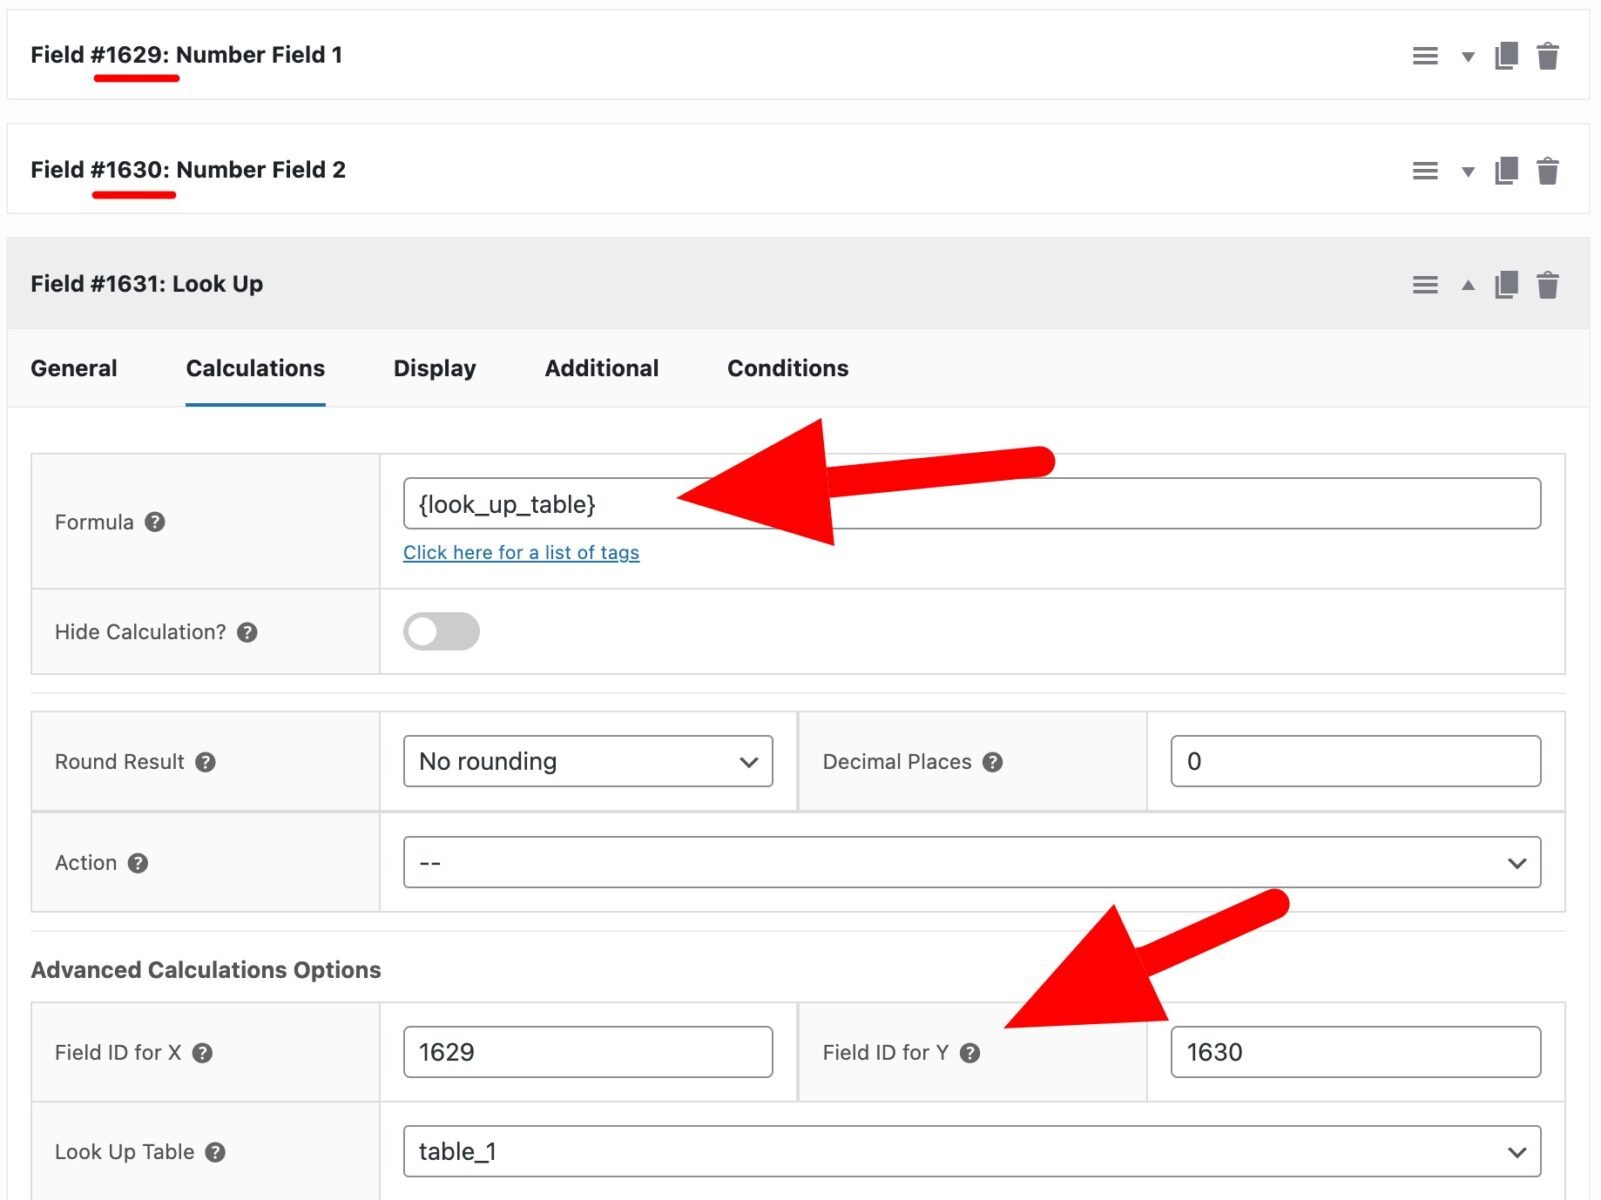
- Create two ‘Number’ fields so that the user can enter their dimensions. (Here’s how to use select fields instead of number fields and here’s how to use a single column CSV file with just one user input).
- Create a calculation field and enter
{look_up_table}as the formula - Enter the field IDs for the X and Y axes using the Number fields you’ve just created
- Select the pricing table from the dropdown
Publish your product.
Using exact matches for values
By default, Advanced Calculations will use the next available value on each axis. So if the user enters a value, the plugin will find the nearest next value.
However, you might want to use exact matches (e.g. if you want to return values for zip codes). Just check the ‘Exact match for X axis’ or ‘Exact match for Y axis’ to only use exact matches.
Further information
There’s a detailed tutorial on using look up tables in your calculations in this article.
Troubleshooting
Common problems with CSV files include:
- Formatting: if you find that the CSV file uploads but doesn’t look right, please try converting your Excel file to a CSV file via this link: https://www.zamzar.com/convert/xls-to-csv/
- Ensure that your X and Y axes only contain numeric values. Only the top left cell, for the table name, should contain any non-numeric characters
- Ensure that your CSV is actually comma-separated. Don’t use semi-colons or other character as the separator
- If you are finding that the calculation result isn’t returned immediately, ensure that you don’t have any empty rows in your CSV files – even between tables. The file should contain no empty rows.