How to add a form to WooCommerce product pages

Are you looking for a way to add a form to your WooCommerce product pages? Forms are easy ways for customers to configure your products exactly the way they want them; or users can enter their own information to submit.
WooCommerce doesn’t have a default method to add forms to products – so you’ll need a plugin. The WooCommerce Product Add-Ons Ultimate plugin allows you to add forms quickly and easily.

WooCommerce Product Add-Ons Ultimate
Add forms and custom fields to WooCommerce products
WooCommerce product forms
A form is just a set of fields where the user can input their own information or make choices about your products. So you could add a text field for the user to enter name, for example, or include some checkboxes for the user to select specific options relating to your product. The data from the form – i.e. whatever the user has inputted – will be saved when the user adds the product to the cart and submitted to the store owner as part of the order.
So if you want to collect information from users – e.g. names and phone numbers if you’re selling tickets for events – or if you want to allow users to customize your products, you’ll need to add a form to the product pages.

These are the two main reasons for adding a form to your WooCommerce product page:
- Accept information from the user: sometimes you might need the user to provide some further details. For instance, if you’re selling tickets for an event, you might want the user to fill in their name and contact details – plus the names of anyone else in their party. Having a form on the product page means that users can easily enter the necessary information in the fields provided.
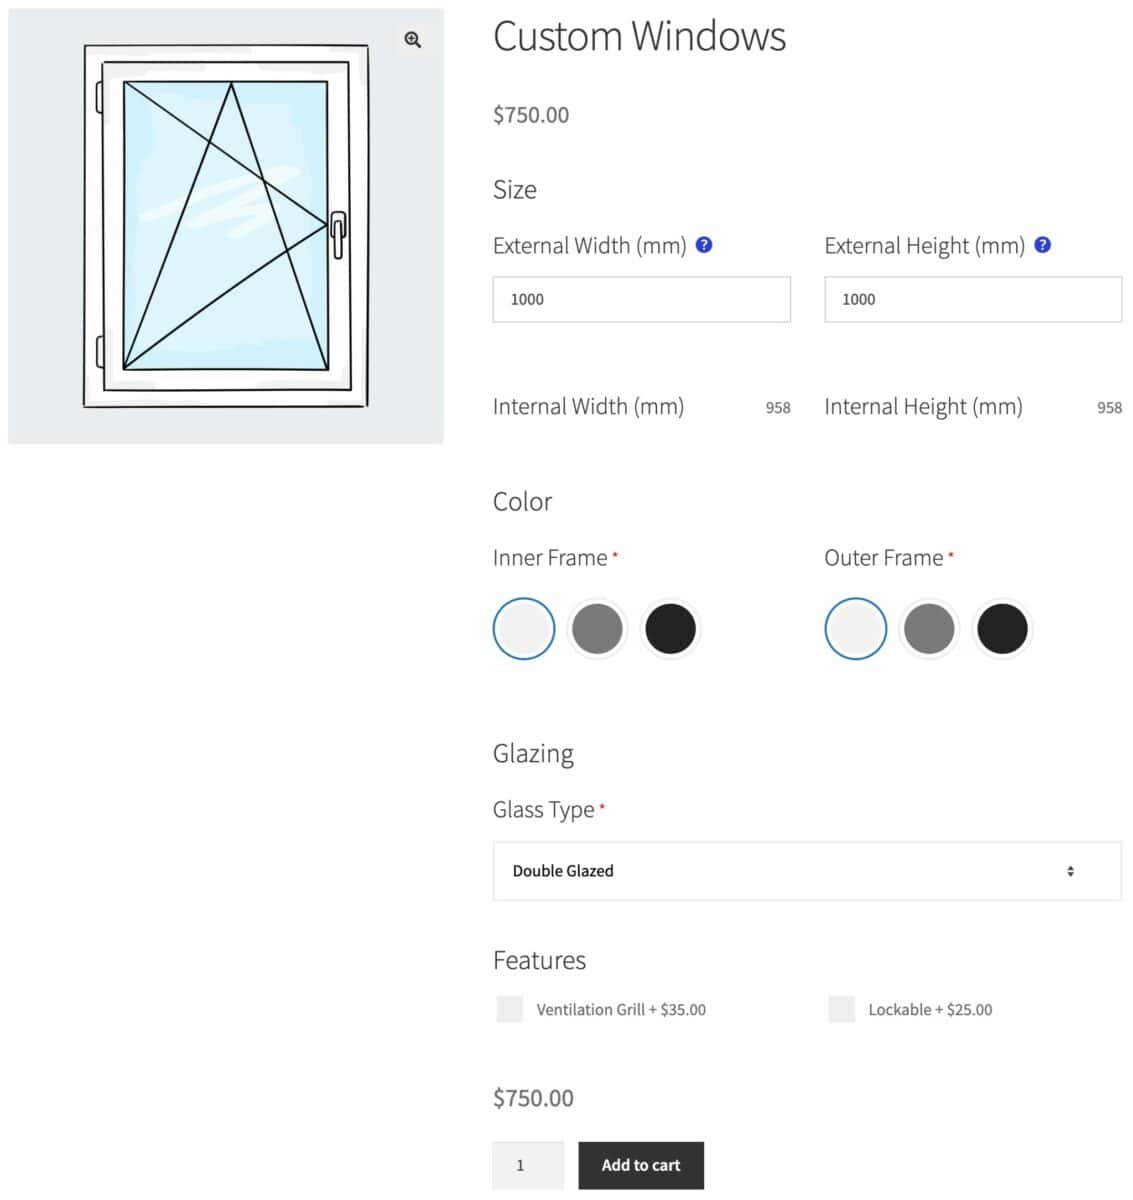
- Personalization: adding a form to your products allows you to present users with different options to customize your products. For instance, if you’re selling windows or doors, you can accept measurements from your users and allow them to choose certain specifications, like the type of glass or the material for the frame.
By adding the form to the product page, you can collect information that’s specific to the product. This makes more sense than adding extra fields to the checkout page or even following up with customers by email.
Why use WooCommerce Product Add-Ons Ultimate for your forms?
The WooCommerce Product Add-Ons Ultimate plugin is specifically designed to add form fields to your product page. You don’t need any technical or coding knowledge, it will work with any theme or page builder, and it’s backed by a 14 day money back guarantee – so you can try it risk-free.
You can add as many fields as you like to your product page. The fields within the form can be organized into different groups and displayed in different layouts. Other features include:
- Around 20 different input fields, including text and number fields, radio groups, select fields, checkboxes, etc
- Required fields – so users must enter a value or choose an option
- Conditional logic – so you can hide or show fields based on the values entered by users in other fields
- Default values – so you can specify defaults for fields if you like
- Set prices for fields which will increase the overall product price
Beyond that, the plugin has a number of advanced features including:
- Upload images and files
- Limits on values – e.g. maximum character counts in text fields
- Repeatable fields
- Create forms globally that can be applied to multiple products
- Calculation fields
- Copy groups and fields between products
- Import and export groups and fields via CSV
In this tutorial we’ll look at setting up a form on a product page using the plugin. It’s quick and easy. We’ll also look at some of the more advanced features later in the article.
Add a WooCommerce product form – tutorial
First, let’s look at how easy it is to add a form to a product page using the WooCommerce Product Add-Ons Ultimate plugin.
Step #1: Install and activate WooCommerce Product Add-Ons Ultimate
Assuming you already have WooCommerce set up, you just need to install and activate Product Add-Ons Ultimate.
- Once you’ve purchased the plugin, you can download its zip file by clicking on the link on your order confirmation screen or in the welcome email. You’ll receive this a few seconds after you’ve completed the purchase
- Go to Plugins > Add New in your WordPress dashboard
- Click on the ‘Upload Plugin’ button
- Drag and drop the plugin’s downloaded zip file into the ‘Choose File’ area and click ‘Install Now’
- When the plugin has uploaded, click the ‘Activate Now’ button
Now that the plugin is installed and activated, you’re ready to add a product page form.
Step #2: Create your first form
You can create forms on individual product pages – or you can create forms then apply them to multiple products. Let’s look at how to do both.
To add a form to an individual product page:
- Edit the product where you’d like to add the form
- In the ‘Product data’ section, click on the ‘Product Add-Ons’ tab
- Click ‘Add Group’. You can give the group a name and description that the user will see on the front end
- Click ‘Add Field’ to add a field within the group
- Give the field a label then choose the field type
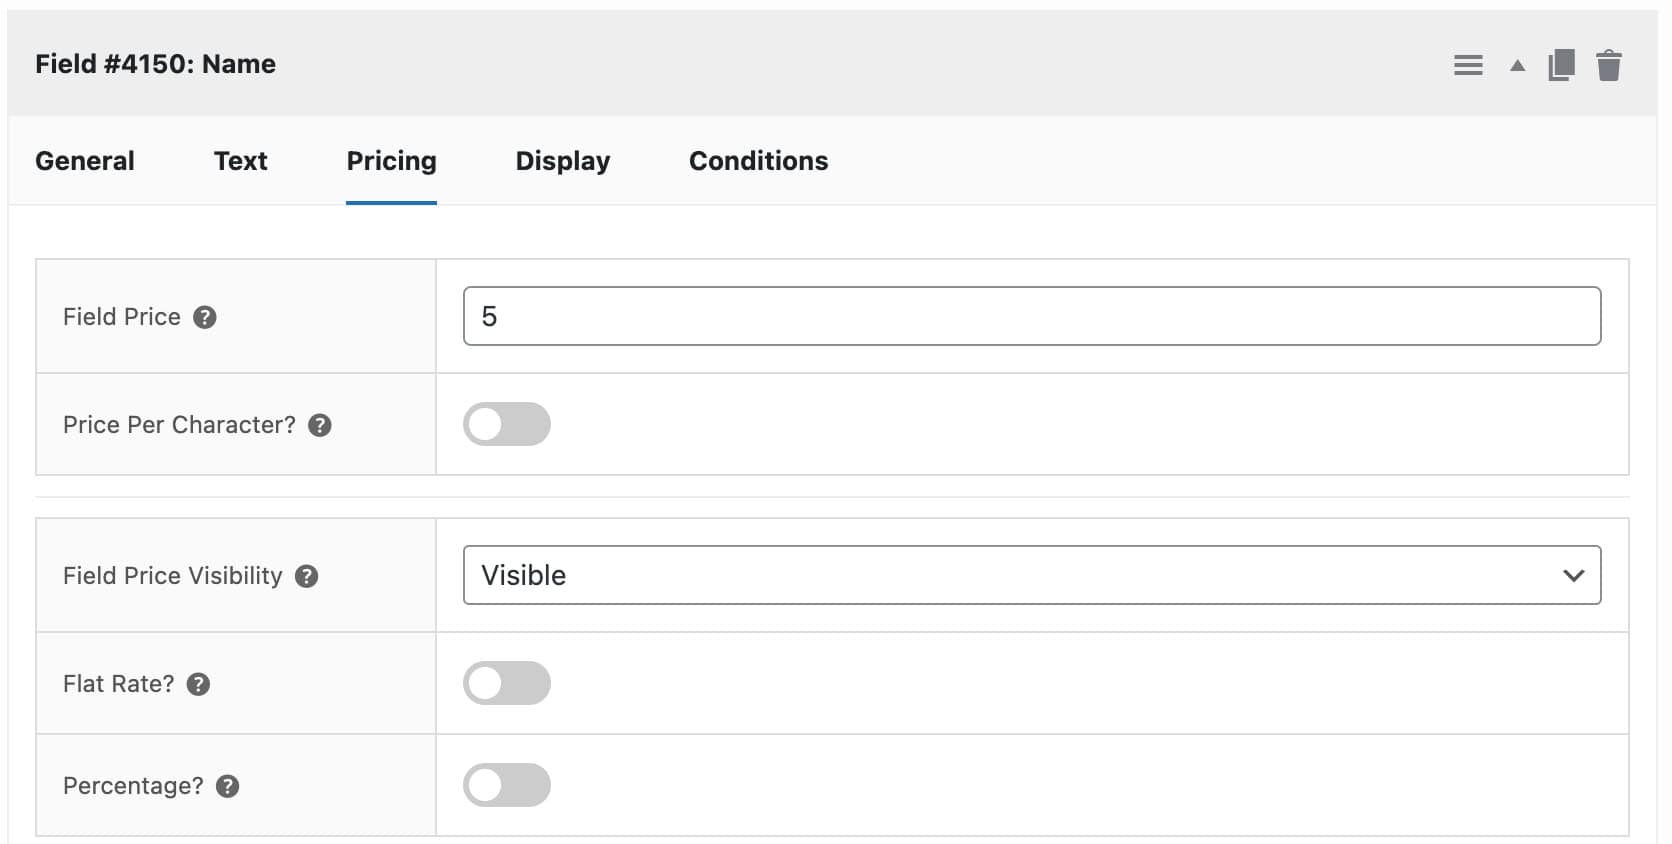
- Assign any other parameters that you like. For instance, you can make the field ‘Required’ or add a ‘Field Price’
- Add any further fields to this group or create a new group and add fields to that

If you’d like to create a form that will be applied to multiple products, you can follow a similar process:
- Go to Product Add-Ons > Global Groups and click the ‘Add Group’ button
- Select where you’d like the group to be displayed, either all products, specific categories, or specific products
- Then follow the steps above to add your fields
Let’s have a look at some ways you can specify additional parameters for your form fields.
Step #3: Configure your form fields
Product Add-Ons Ultimate has around 20 different field types that you can add to your forms. Many of these fields have unique parameters – for example, ‘Number’ fields allow you to specify a minimum and maximum value, ‘Swatch’ fields allow you to upload an image for each option, and so on.
However, there are some parameters that are common to all field types, including:
- Field Price: enter a value in this field if you’d like the overall product price to increase when the user completes the field
- Required Field: select this option if the user must enter a value in the field
- Default: enter the default value for the field if you wish
You can also choose where to display the field and its price. For instance, you can choose to hide the price from the user throughout the site, or only display it on the product page.
Step #4: Publish and preview
When you’ve finished adding all your form fields, you can update or publish the product. If you’re creating a global group, just save it.
When you view a product on the front end, you’ll see your form fields added. (Remember that the field styles will naturally follow your theme’s styles).
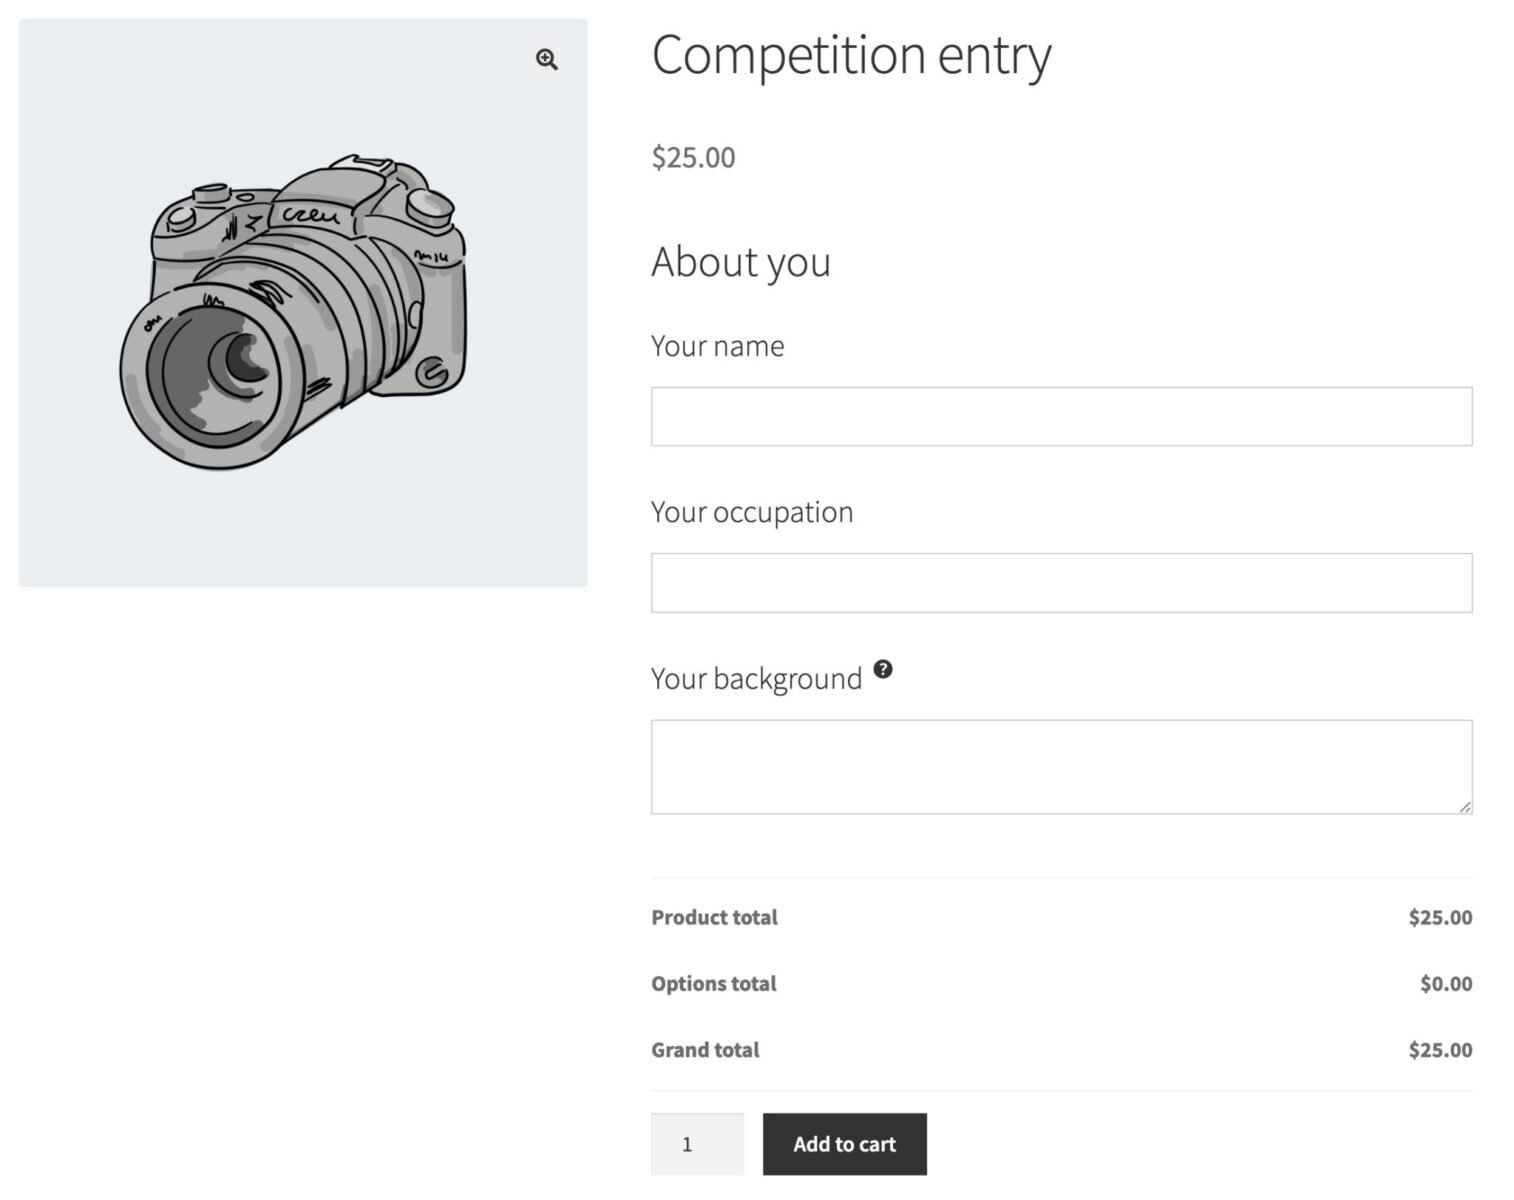
So, in the example above, we’ve added a couple of text fields and a textarea field to our form for users to fill in their details when they’re purchasing a competition entry. The information that they enter will be captured as part of the order so that the store owner can access it later.
Advanced product form features
Product Add-Ons Ultimate has a huge range of features. Let’s take a look at some you would typically want to use on a product form.
Conditional fields
Conditional fields are an essential feature of many forms. With conditional fields, you can specify whether to show or hide certain fields based on the value of other fields.
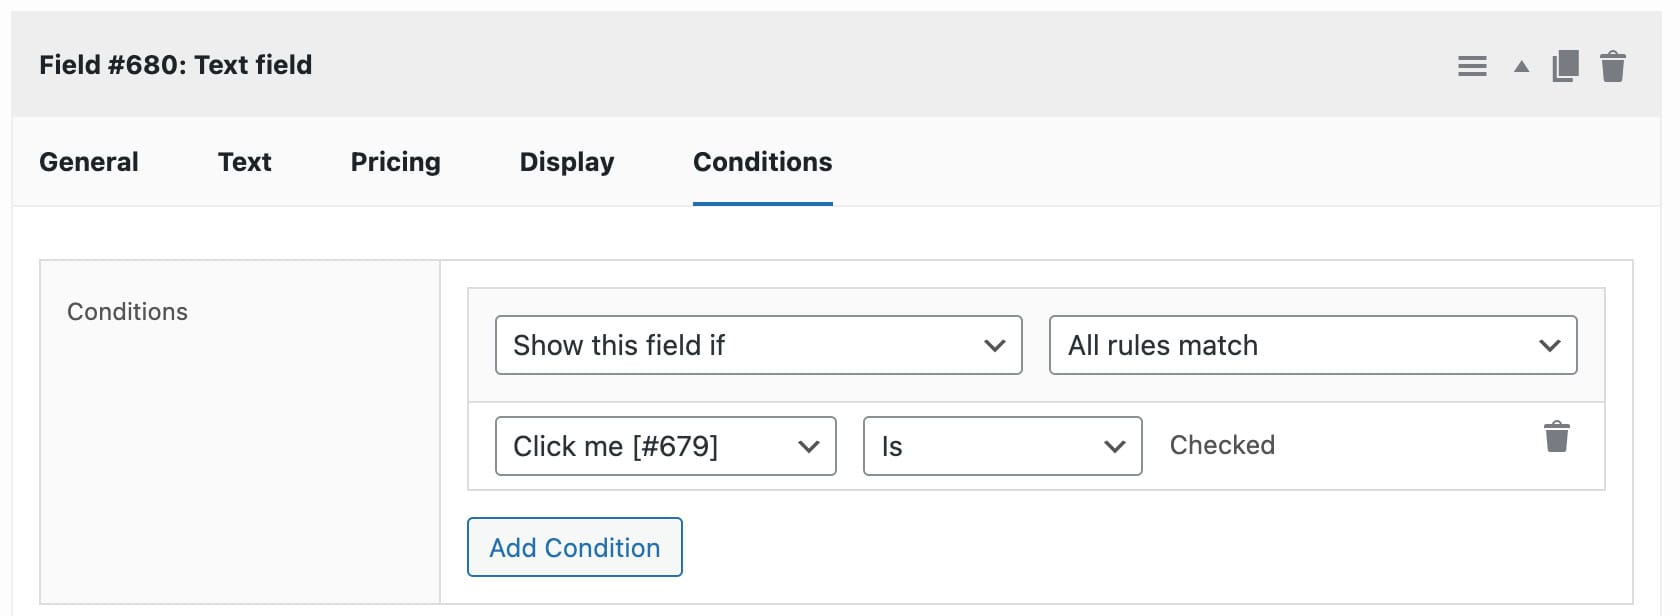
To add a condition to one of your form fields:
- Edit the field that you want to apply conditional logic to
- Click the ‘Add Condition’ button
- Decide whether to show or hide the field if the condition is true
- If you are creating multiple conditions, decide whether all conditions need to be true or just one by selecting either ‘All rules match’ or ‘Any rule matches’
- Select the field whose value the condition will be dependent on – in the screenshot below, we’ve chose the field ‘Click me’ with the ID 679
- Choose an operator, e.g. ‘Is’ or ‘Is not’
- Enter or select a value. In the screenshot below, the ‘Click me’ field is a checkbox so we just need to specify whether it is checked or not
There’s more information on setting conditional logic for product add-ons here.
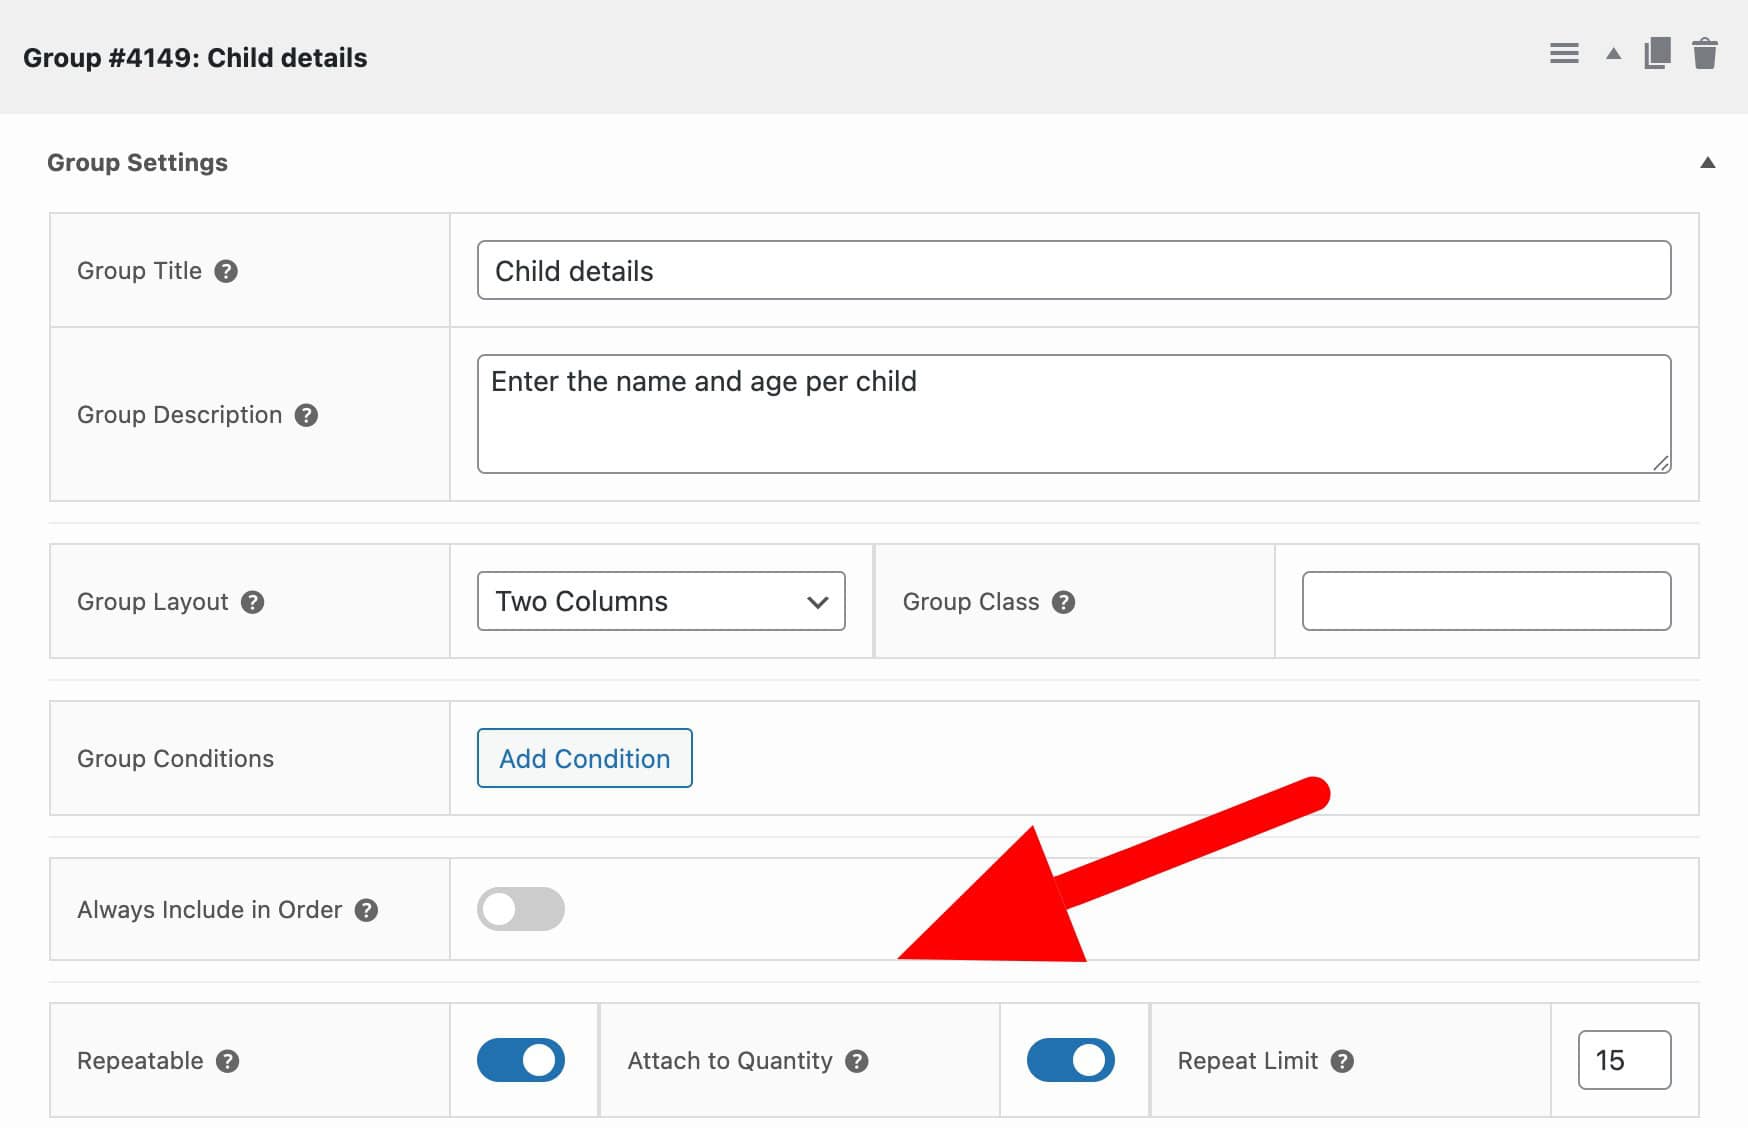
Repeater fields
Repeater fields are very useful if you need to collect sets of information. For example, if you need the names and contact details of multiple people, you can create one set of fields for the user to complete. When they need to add details for more people, they click the ‘Add’ button to generate another set of fields for the second user’s contact details, and so on.
To add repeater fields:
- Add all the fields that should be repeatable into the same group
- In the group settings, check the ‘Repeatable’ option
- If you’d like to tie the number of repeated groups to the product quantity, select the ‘Attach to Quantity’ option
- If you’d like to set a maximum number of repeated groups, enter a value in the ‘Repeat Limit’ setting
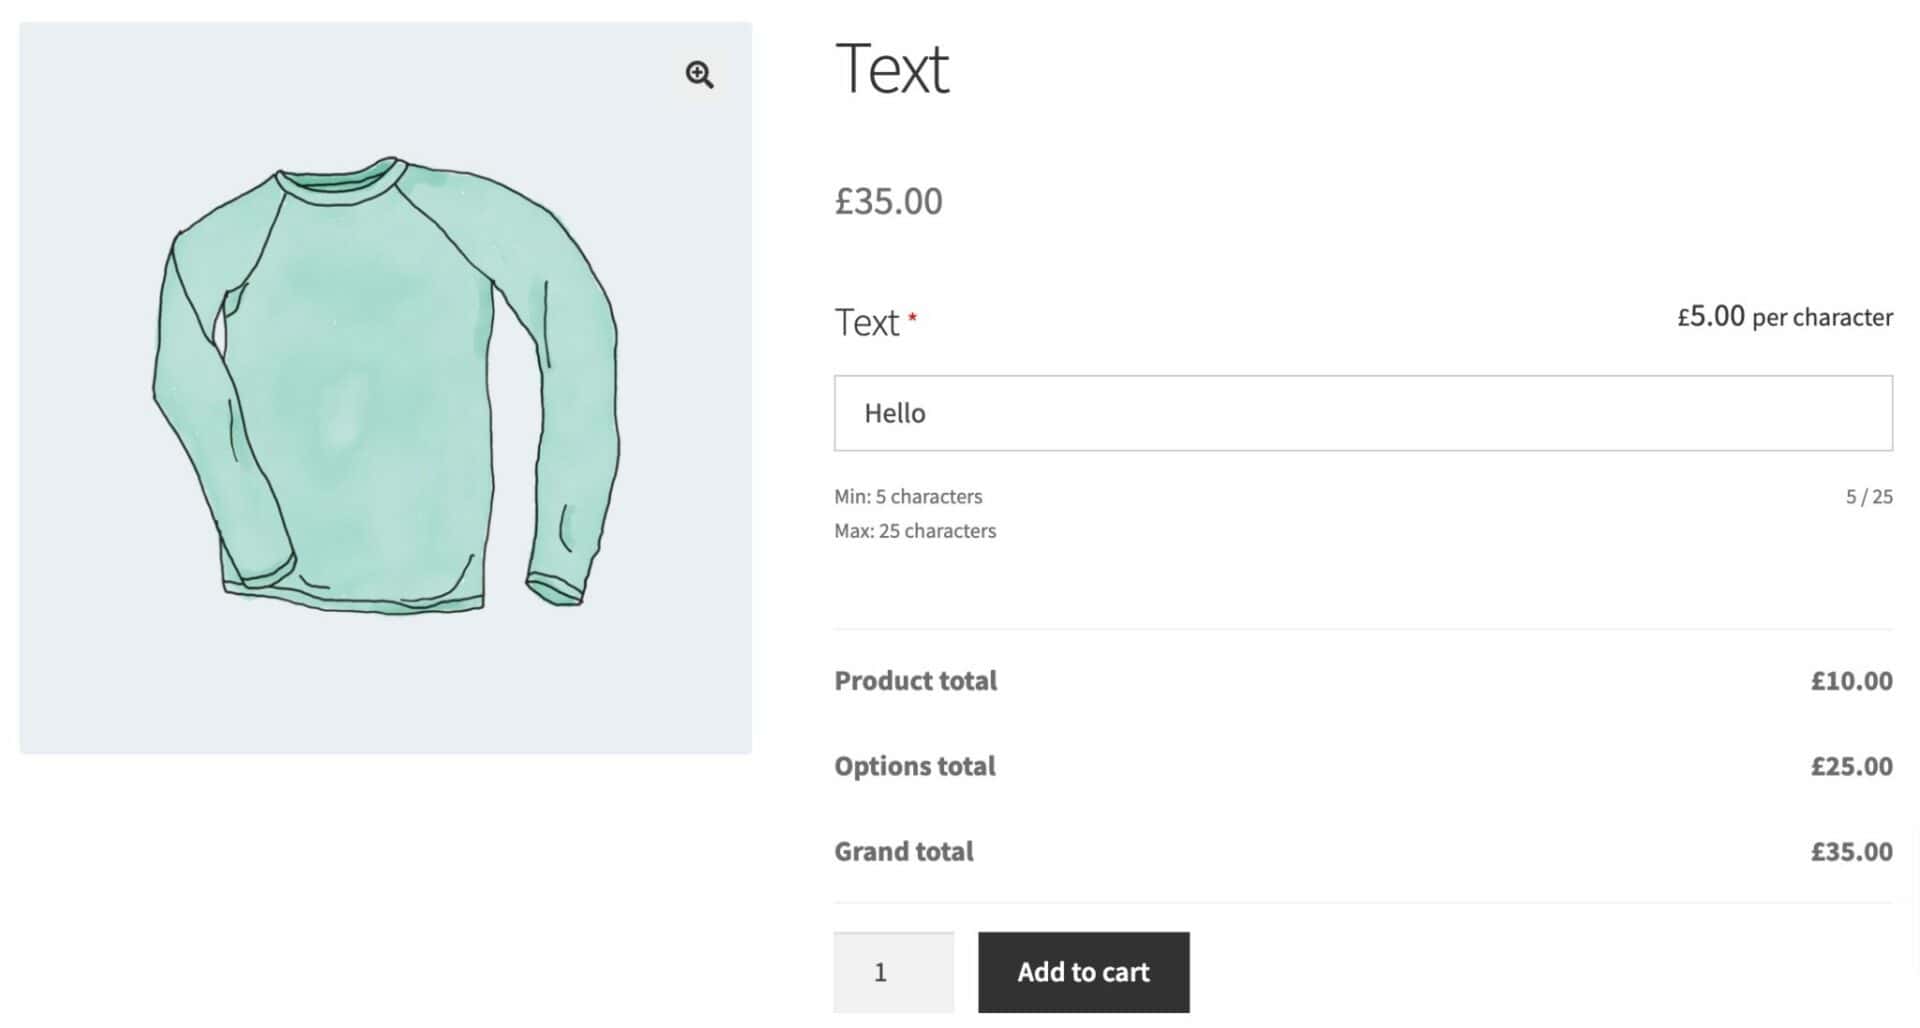
Maximum character counts in text fields
If you’re using text fields as part of your WooCommerce product forms, you might want to set certain limits on characters. With Add-Ons Ultimate, you can:
- Set a minimum and/or maximum number of characters that the user can enter in a text or textarea field
- Display a counter showing how many characters the user has entered against the maximum allowed
- Set a price per character
- Allow a certain number of free characters – then set a price for additional characters
- Only charge for alphanumeric characters
There’s more information here on character counts in text fields.
Calculation fields
Calculation fields are a powerful feature in the Add-Ons Ultimate plugin. With calculation fields, you can set values and prices using formulas. For example, you can use values entered by the user into ‘Number’ fields, values selected by the user from select fields, the product price, and many more factors when creating your formulas. You can also include product dimensions like weight, height, width etc in your formulas – and even set them as a result of the formulas.
You see this article for more information on setting prices by formula in WooCommerce.
Populate form fields with user data
Finally, you can also populate your form fields with user data. For this, you also need the WooCommerce Members Only plugin.
With these two plugins, you can automatically populate form fields with values from the user’s data – for example, the user’s name, billing email, or custom user field.
There’s more information on adding user fields to your product page in this support document.
WooCommerce product form fields – recap
In this article, we gave an overview of how to add forms to your WooCommerce product pages using the Product Add-Ons Ultimate plugin. It’s easy to add all kinds of form fields and has a number of powerful advanced features.
WooCommerce Product Add-Ons Ultimate
Add forms and custom fields to WooCommerce products
The plugin is compatible with all themes and page builders – and you don’t need any technical knowledge. It’s backed by our world-class support team and has a 14 day money-back guarantee – so you can try it risk free.