How do you sell pet accessories with custom engraving or printing in WooCommerce?
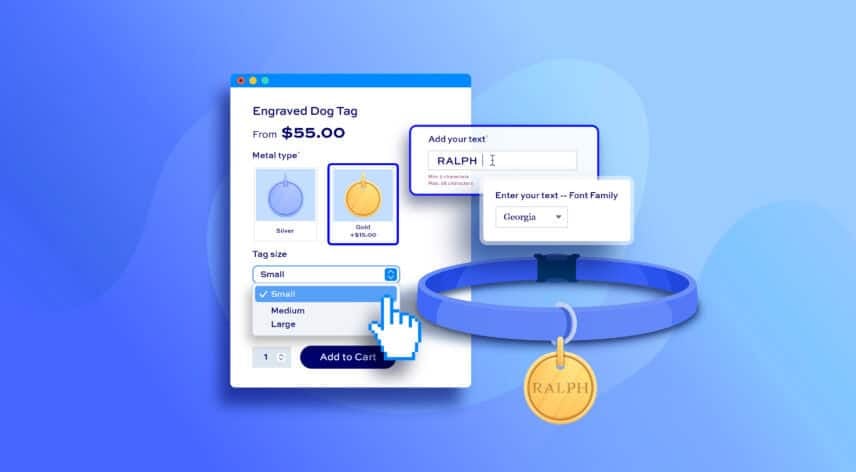
If you’d like to sell personalized pet accessories through your WooCommerce store – engraved tags, personalized beds, custom bowls, and more – you’ll need a way to let customers enter their pet’s details and see how the finished product will look. WooCommerce doesn’t offer this by default, so you’ll need a plugin. Our WooCommerce Product Add-Ons Ultimate plugin fits the bill perfectly.
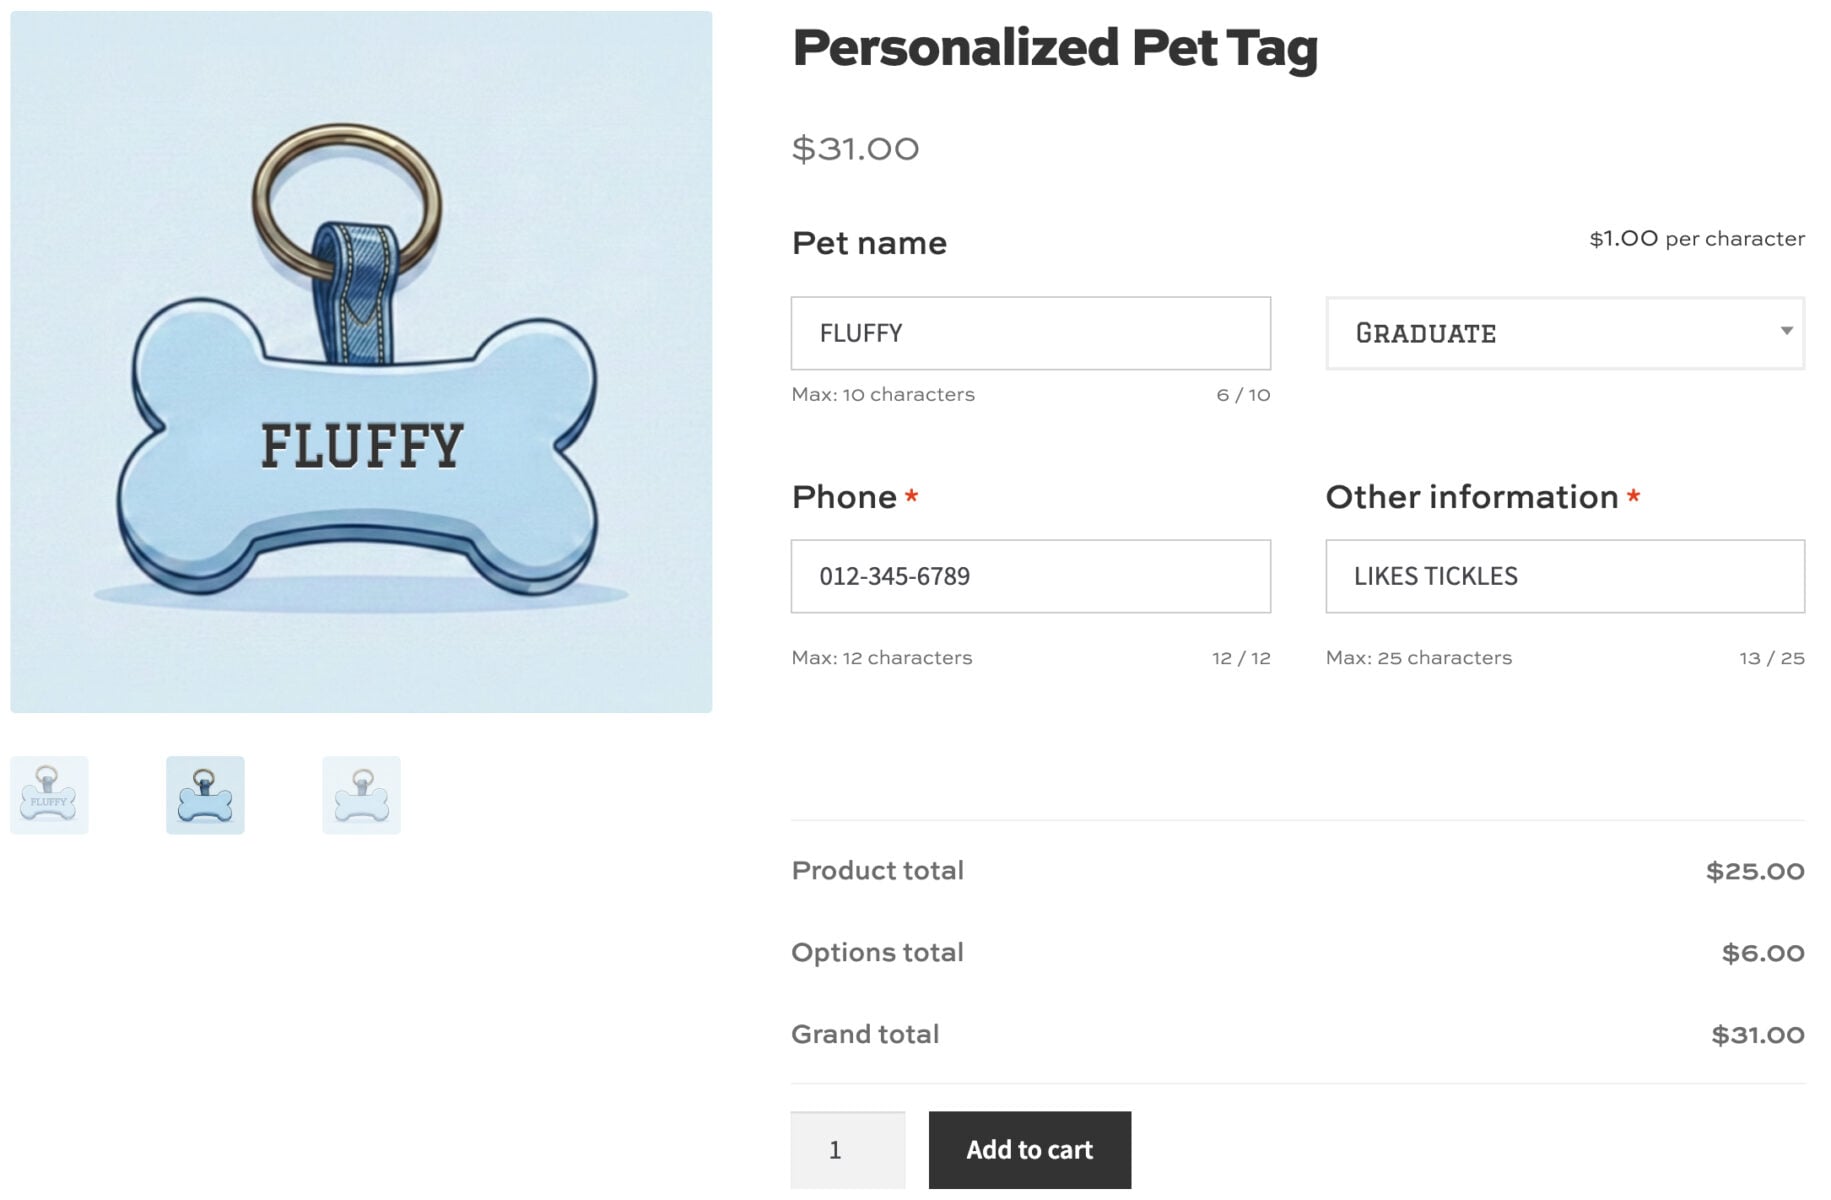
In this article, we’ll show you how to set up an engraved pet tag with fields for the pet’s name and the owner’s phone number, plus an optional upload field for a custom design. We’ll also look at how to add a live preview so customers can see their pet’s name and phone number directly on the product photo before they buy.
This same method can be easily adapted for any personalized pet product, such as personalized sleeves for leads and leashes, bowls, or beds. Just swap out the product and adjust the field labels to match.
The pet accessories market was valued at $21.9 billion in 2024 and is projected to reach $43.1 billion by 2034, according to Global Market Insights. Personalization is a straightforward way to make your product stand out to your customers – and increase your order value while doing so.
After completing this tutorial:
- Users will be able to:
- Enter their pet’s name and their own phone number on the product page
- Optionally upload their own design or image
- Preview their pet’s name and phone number live on the product photo
- As the store owner or admin, you’ll be able to:
- Set character limits and make fields required
- Charge extra for personalization or file uploads
- Manage every custom order from the standard WooCommerce order screen
As a bonus, we’ll also look at how to:
- Add a live preview so customers can see their pet’s name and phone number on the product image
In this tutorial, we’ll assume that you already have WordPress and WooCommerce installed and ready to go.
WooCommerce pet product personalization plugin
WooCommerce Product Add-Ons Ultimate lets you add custom fields to any WooCommerce product, including text fields, upload fields, swatches, and more. It’s compatible with any WordPress theme and is used on thousands of websites.
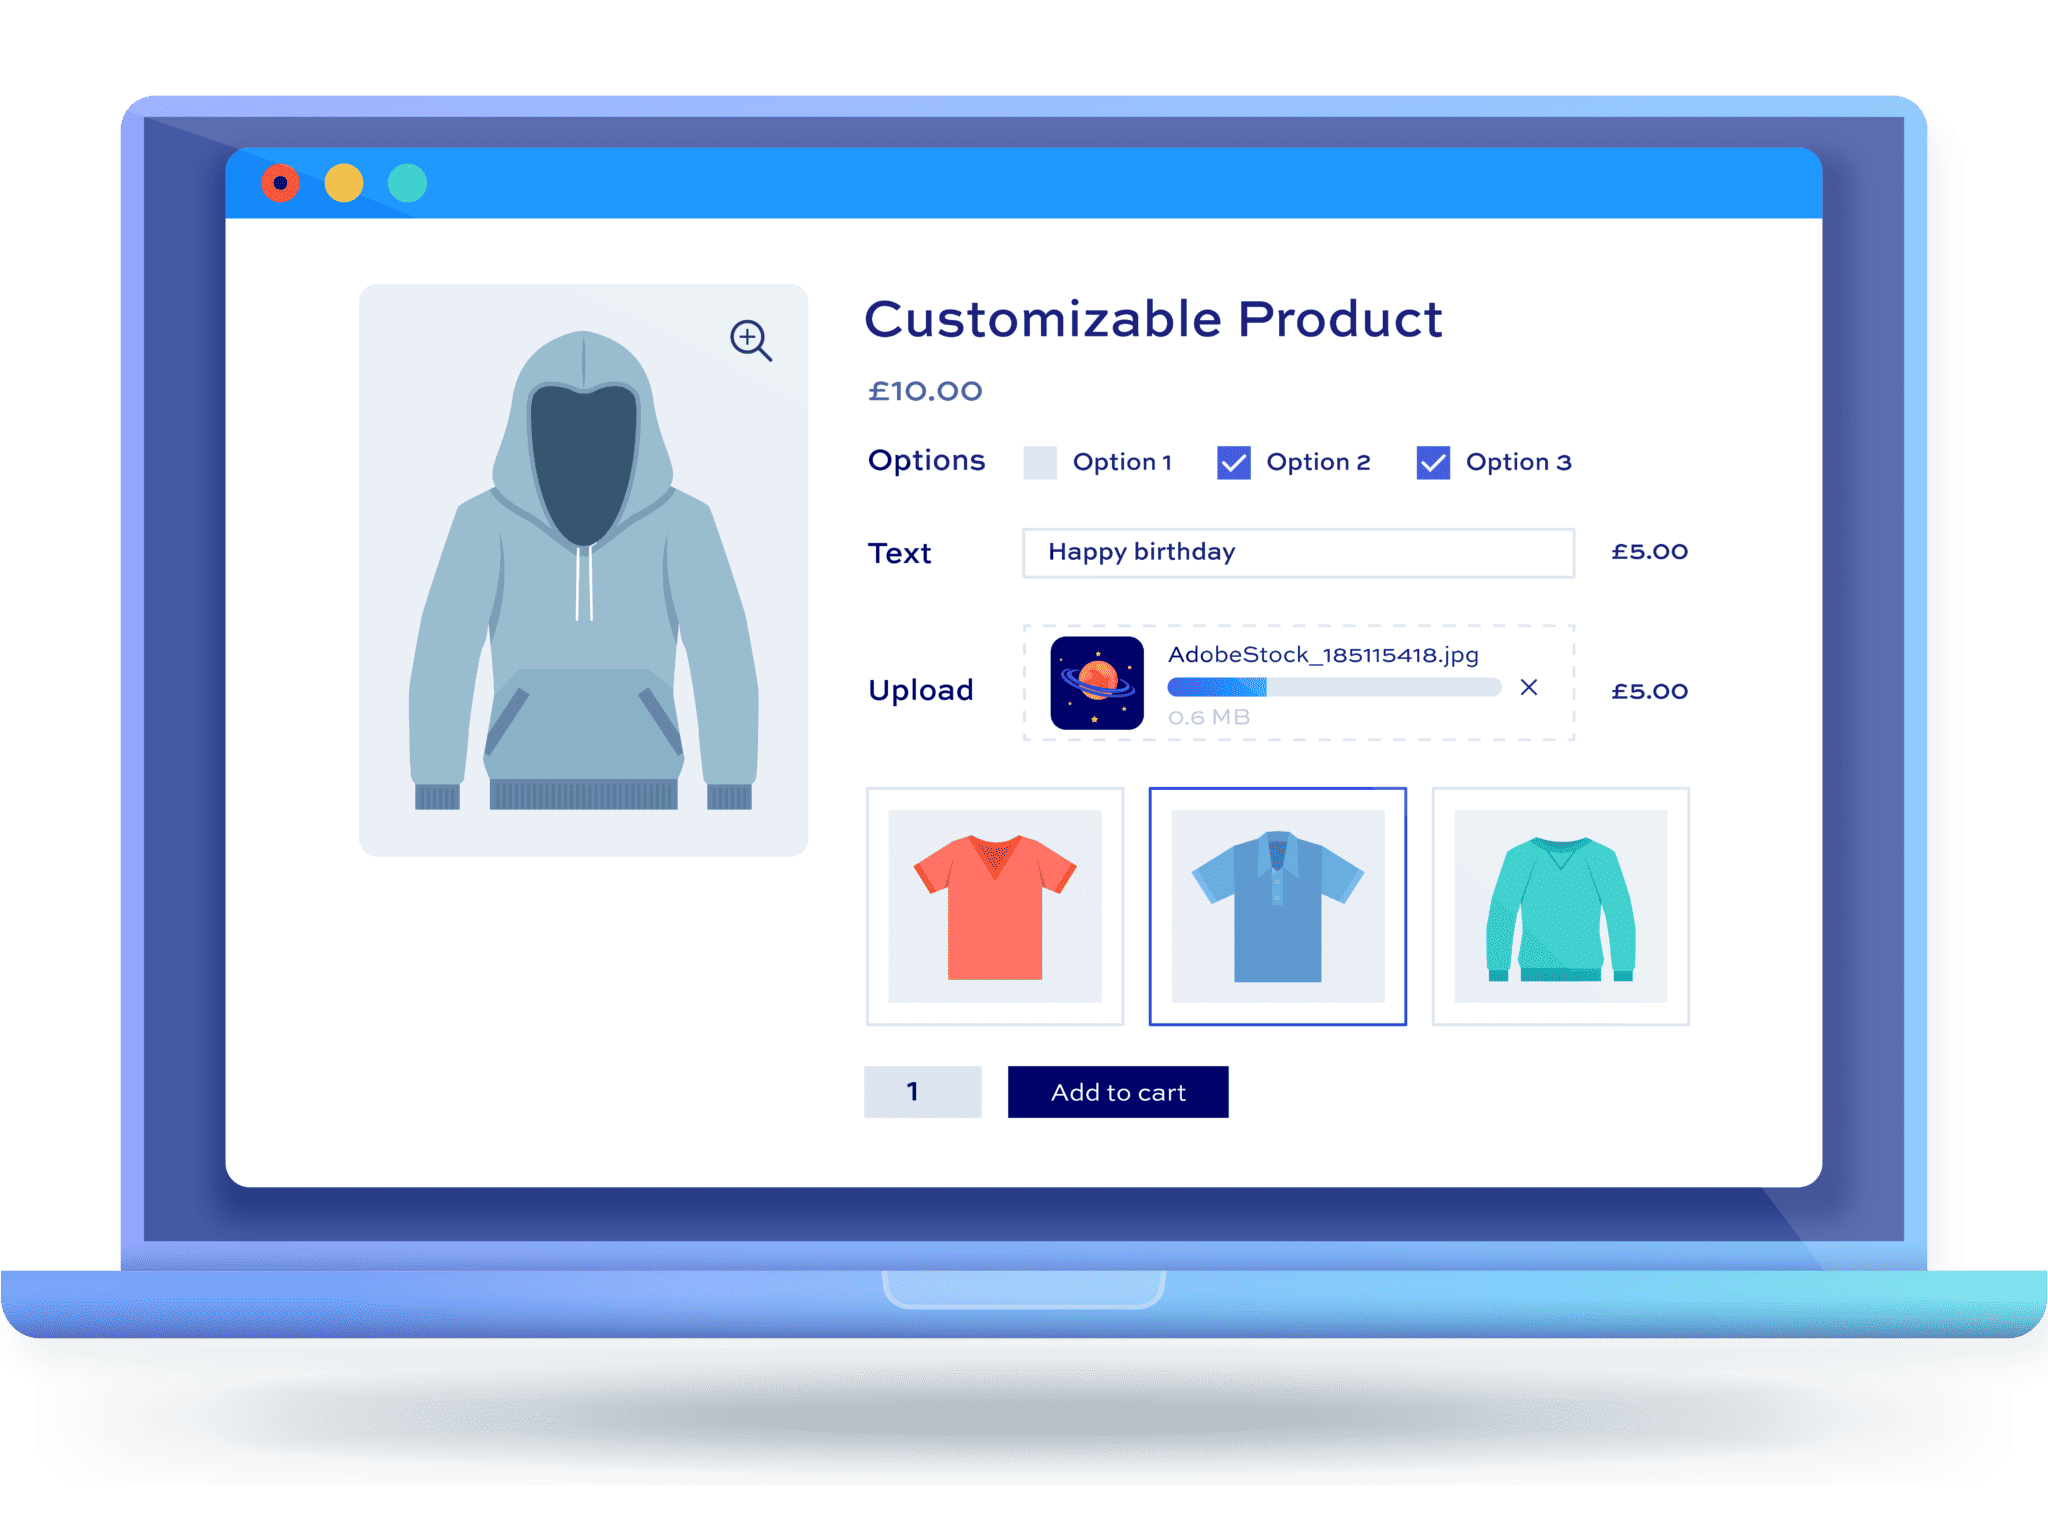
With Product Add-Ons Ultimate, you can:
- Add one or more text fields for the pet’s name, the owner’s details or a short message
- Add an upload field so customers can submit their own design or photo
- Set a minimum or maximum number of characters for each text field
- Charge a flat fee, a percentage or a price per character for engraving
- Include other options like color, material or size
There’s a working demo product here so you can see personalization fields in action.
How to create an engraved pet tag in WooCommerce
Here’s a quick guide on how to create personalized pet products in WooCommerce.
- Install and activate Product Add-Ons Ultimate
Add the Product Add-Ons Ultimate plugin to your WooCommerce store so you can start adding custom fields to your products.
- Create your engraved pet tag product
Set up a new WooCommerce product for your engraved pet tag, with a title, price and product image.
- Add a text field for the pet’s name
Let customers enter the name they want engraved, with character limits to match the space available on the tag.
- Add a text field for the owner’s phone number
Add a second text field so customers can include a contact number on the tag.
- Optionally add an upload field for a custom design
Let customers submit their own image or design file alongside the engraved text.
Now let’s look at each one of those steps in more detail.
How do you create an engraved pet tag in WooCommerce?
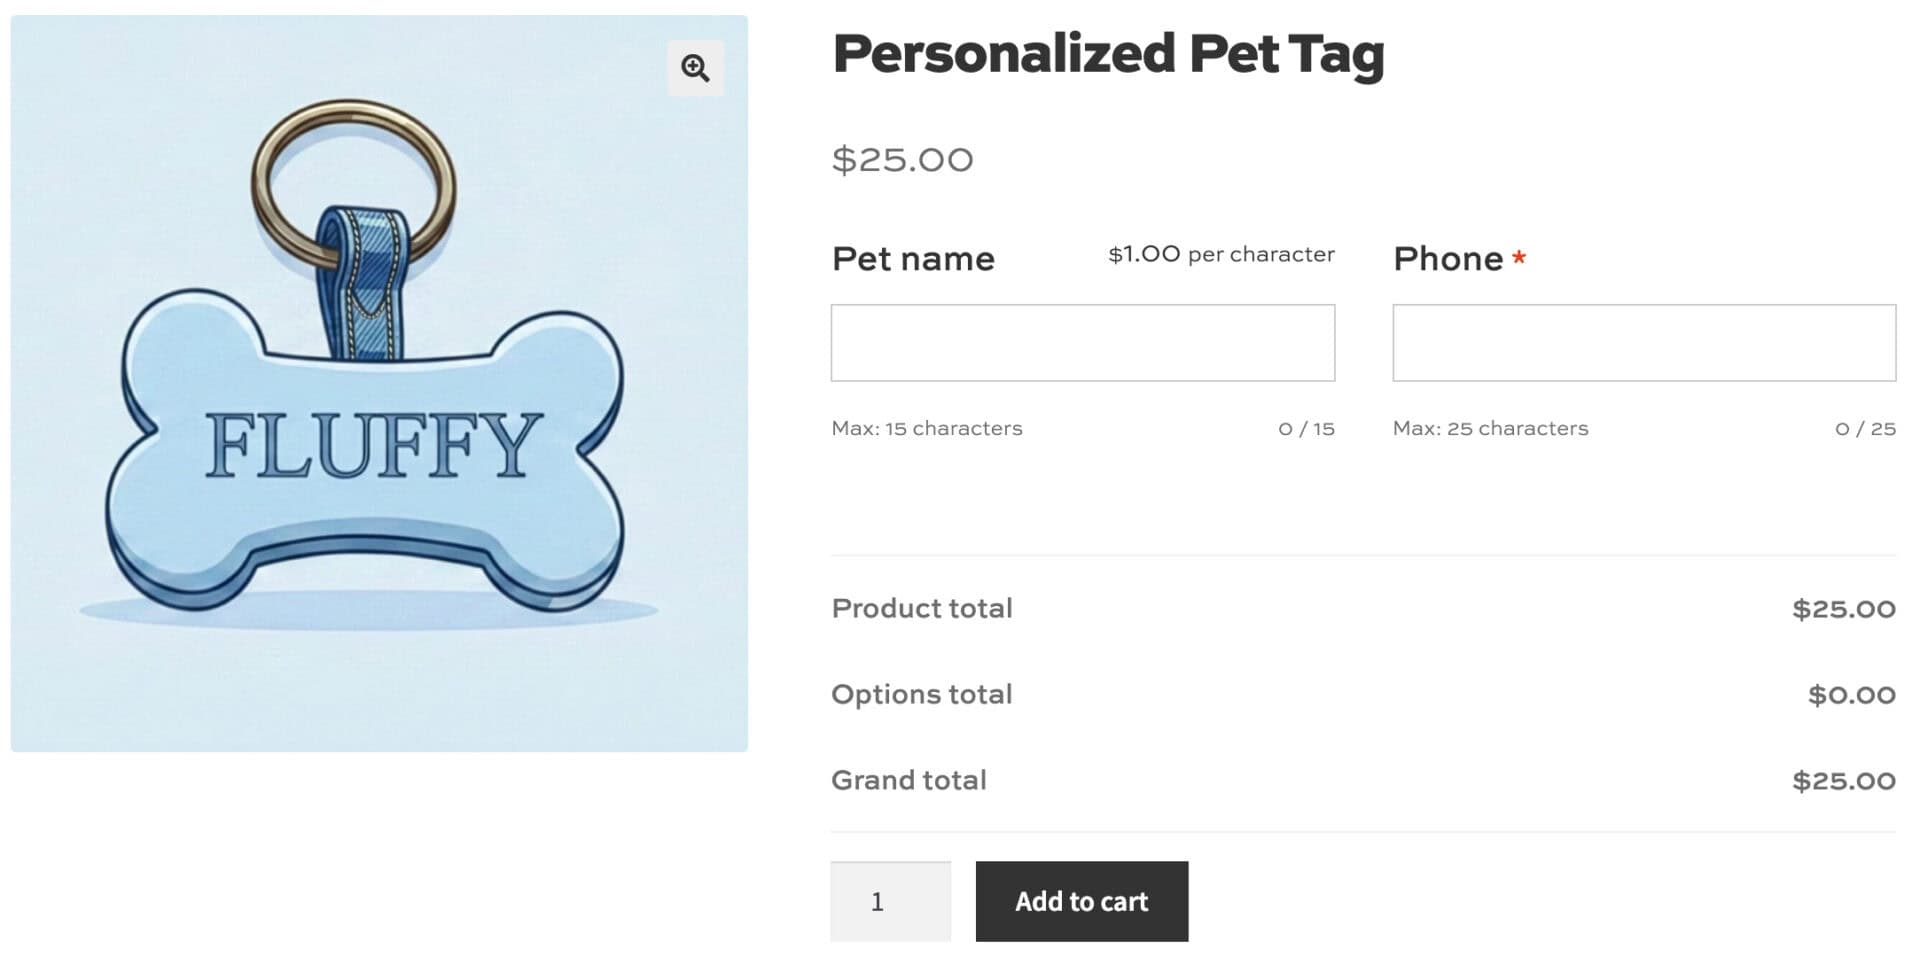
In our example, customers will enter their pet’s name and their phone number to be engraved on the tag, then optionally upload an image to be etched alongside the text. We’ve used the Storefront theme here, but any WordPress theme will work.
Step #1: Install Product Add-Ons Ultimate
Once you’ve purchased Product Add-Ons Ultimate:
- Download the plugin’s zip file by clicking on the link on your order confirmation screen or in your welcome email. You’ll receive the email automatically a few seconds after you’ve completed the purchase
- Go to Plugins > Add New in your WordPress dashboard
- Click on the ‘Upload Plugin’ button
- Drag and drop the plugin’s downloaded zip file into the ‘Choose File’ area and click ‘Install Now’
- When the plugin has uploaded, click the ‘Activate Now’ button
You’re now ready to start adding custom fields to your engraved pet tag product.
Step #2: Create your engraved pet tag product
If you haven’t already created your engraved pet tag product, add a new product now. Give it a title and price, upload one or more product images and add any other details you need.
Step #3: Add a text field for the pet’s name
To let customers enter the name they want engraved:
- Select the ‘Product Add-Ons’ tab in the ‘Product data’ section
- Click ‘Add Group’ then ‘Add Field’
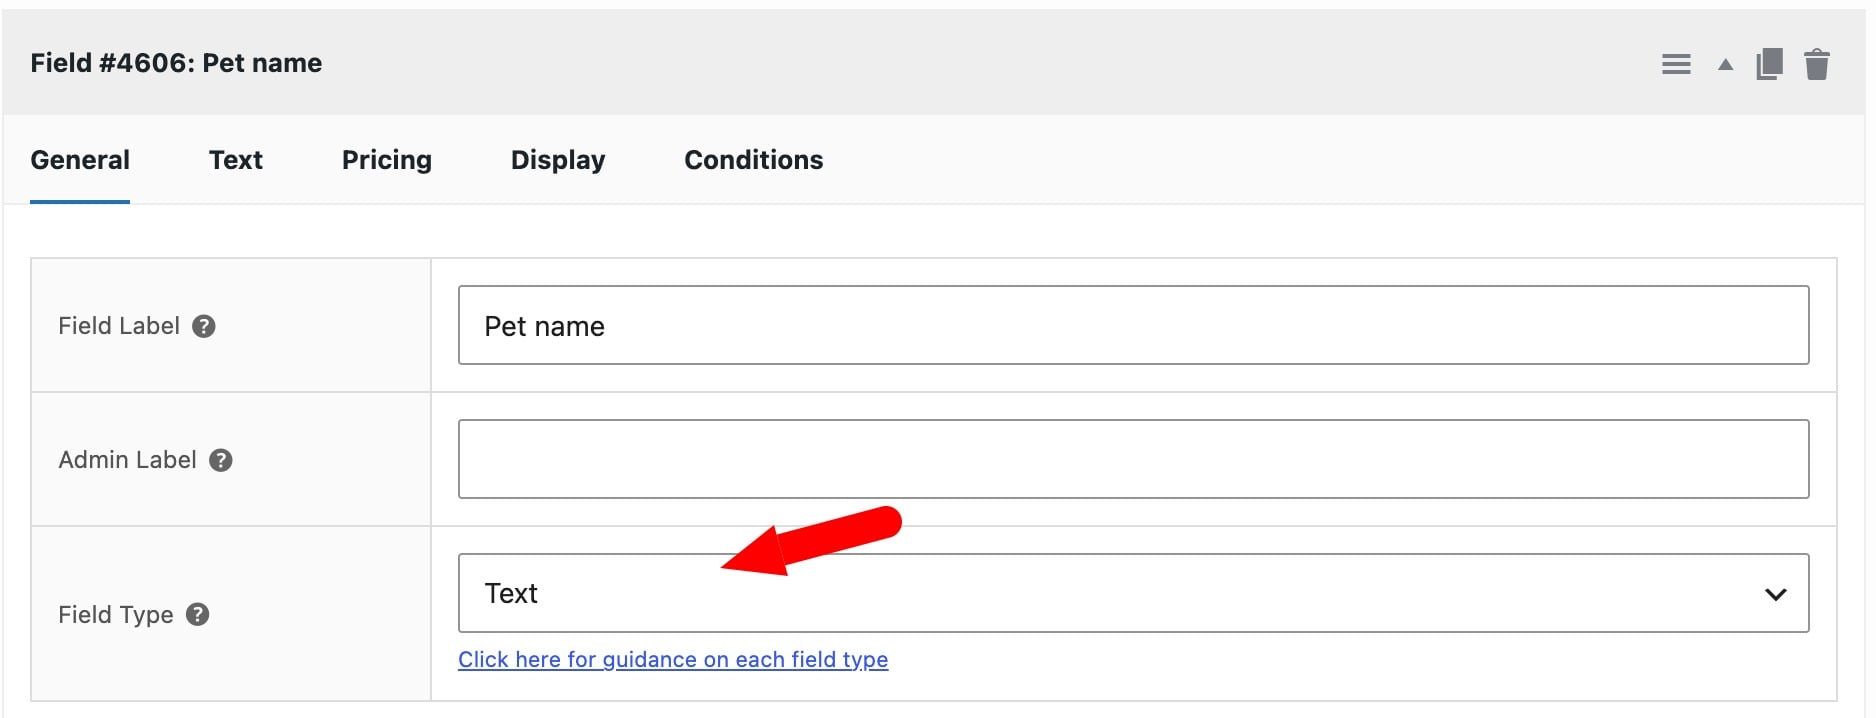
- Select ‘Text’ as the field type
- Enter a label, e.g. ‘Pet’s name’
- Set the ‘Required Field’ option to make sure the customer fills in the field
If you want to charge for the engraving:
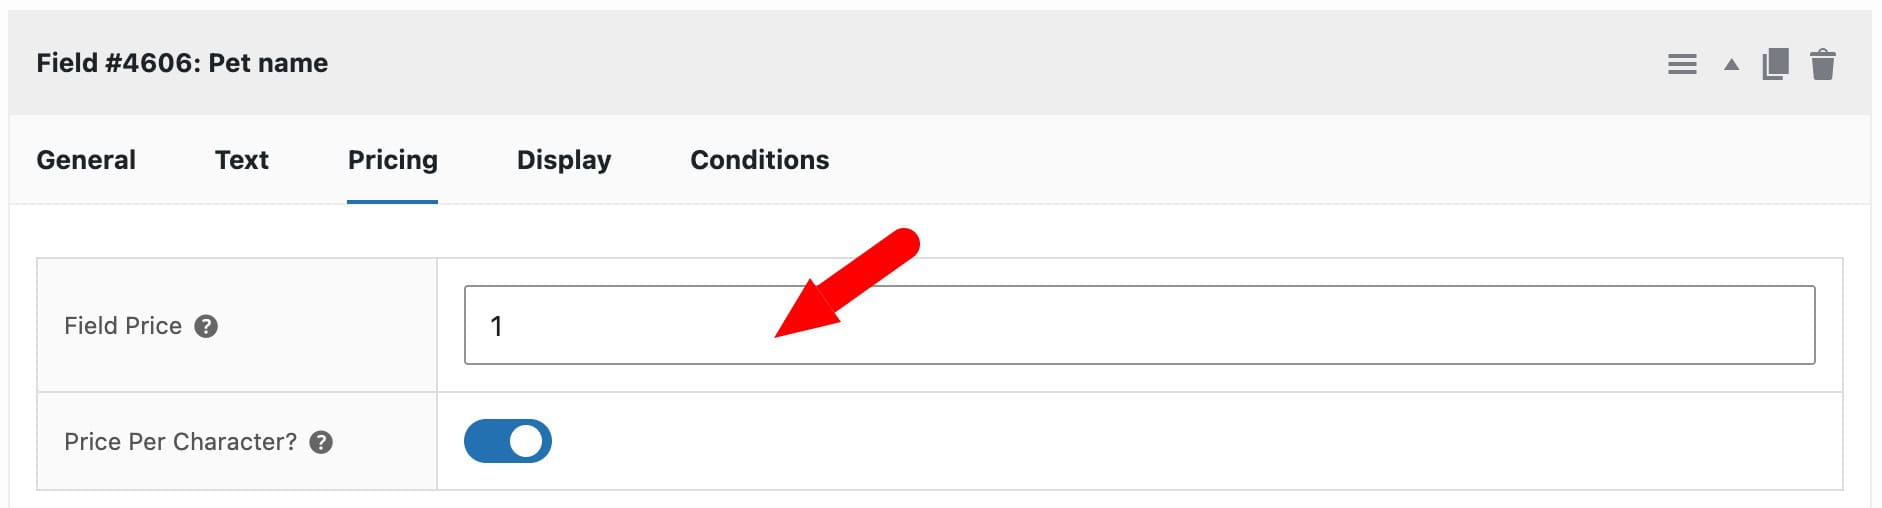
- Click on the ‘Pricing’ tab
- Enter a value in the ‘Field Price’ setting. As it stands, this would just be a flat price applied to the product
- If you want to charge per letter, enable the ‘Price per Character’. Then the customer will be charged for each character in their pet’s name
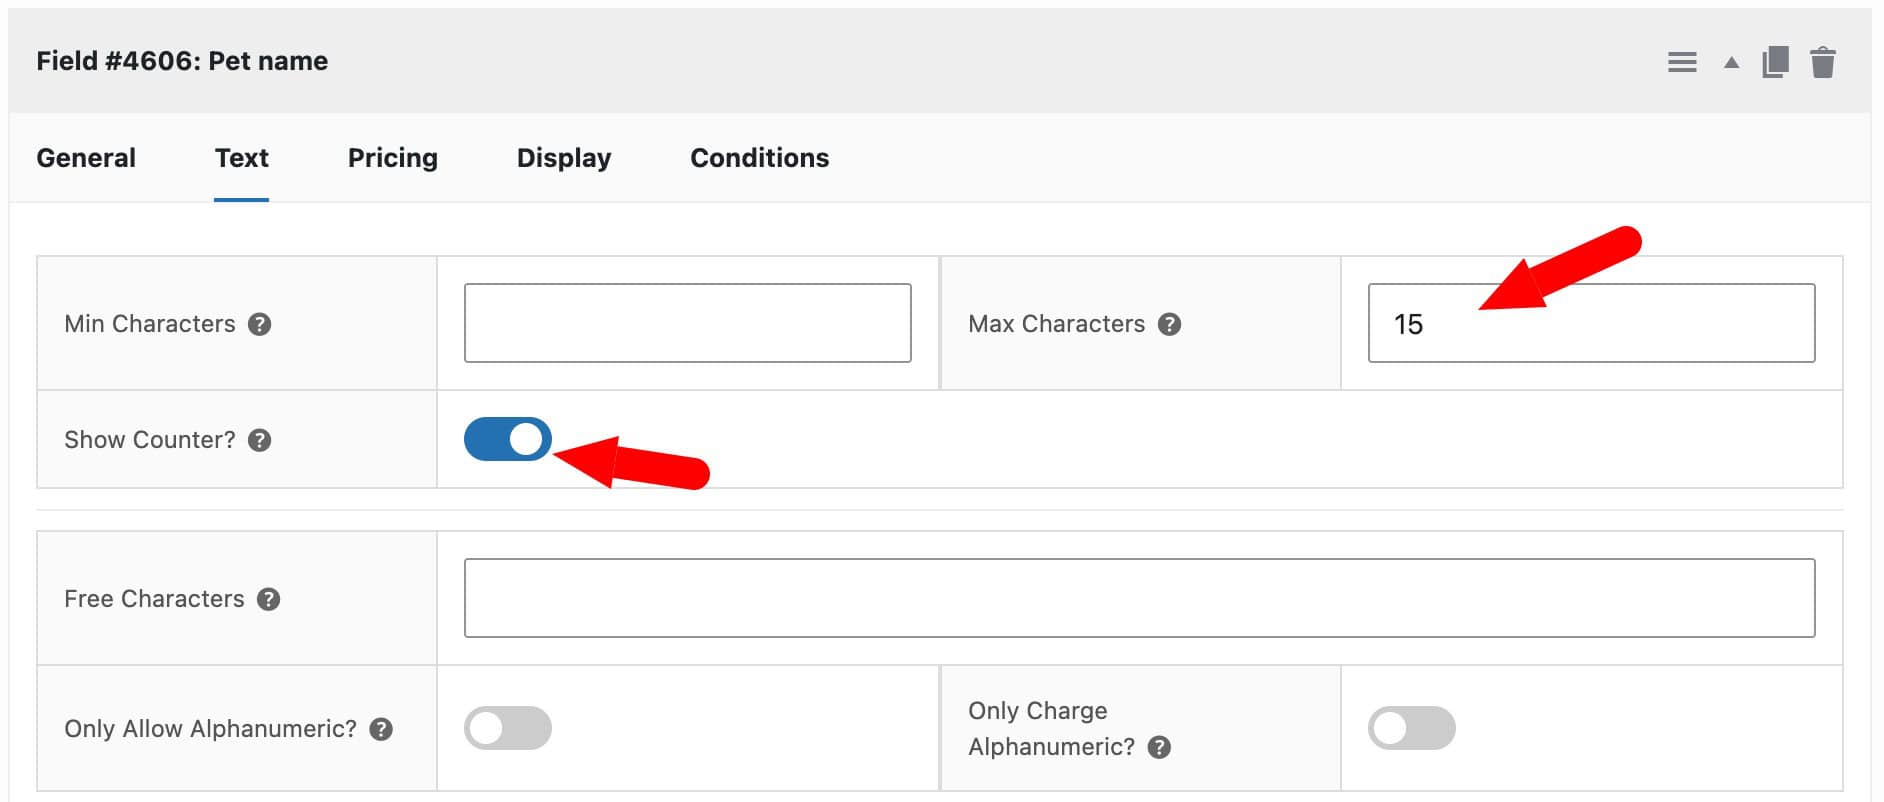
Now switch to the ‘Text’ tab. Because there’s limited space on the tag, you’ll probably want to set limits on the number of characters that the customer can enter. Set values for the following:
- ‘Min Chars’ and ‘Max Chars’: limit how much text a customer can enter
- ‘Show Counter’: let customers see how many characters they have left
- ‘Only Allow Alphanumeric’: prevent special characters
Save your product. Customers can now type their pet’s name directly on the product page, within the limits you’ve set.
Step #4: Add a text field for the owner’s phone number
You can repeat the same process for the phone number field – and for any other information that you want to capture.
- Click ‘Add Field’ within the same group, or start a new group if you prefer
- Select ‘Text’ as the field type
- Enter a label, e.g. ‘Owner’s phone number’
You can add as many text fields as you like, so feel free to add fields for an address, a short message, an emergency contact name, or the pet’s medical or allergy information. The only limitation is how much information can be printed/engraved on the tag itself.
Step #5: Optionally add an upload field for a custom design
If you’d like customers to be able to submit their own image or design:
- Click ‘Add Field’ and select ‘Upload’ as the field type
- Enter a label, e.g. ‘Upload your design (optional)’
- Leave the ‘Required’ option unchecked, since this field is optional
By default, the upload field accepts image files like GIF, PNG, and JPG, but you can restrict or expand the accepted file types in the field’s settings. You can also set a maximum file size and decide whether customers can upload more than one file.
Other pet accessories you can personalize
The same fields and techniques work for any pet product you’d like to engrave or personalize, including:
- Pet beds: add the pet’s name to a cushion or embroidered patch
- Bowls: engrave the pet’s name and a short message
- Dog sleeves: personalize with the pet’s name or a custom design
- Collars and leashes: engrave the pet’s name and a contact number
- Blankets and towels: add a name or a short phrase
- Toys: personalize with the pet’s name or a fun nickname
Personalized pet products don’t just have to be for the pets. Here are some more unusual pet-related products we found:
- Personalized socks: upload an image of your favorite pet and have it printed on a pair of socks
- Custom pet portraits: get a portrait of your pet, on canvas, paper, plates, etc.
- Personalized cat face cushion: upload a photo of your cat’s face and get it printed onto a cushion
Now let’s look at how to add a live preview so customers can see exactly what they’re ordering.
Bonus: Add a live preview of the pet’s name and phone number
So far, we’ve looked at how to create an engraved pet tag product with fields for the pet’s name, the owner’s phone number, and an optional upload. Now, let’s look at how to display the pet’s name on one product image and the phone number on another, so customers can preview both sides of a two-sided tag, for example.
For this, you’ll need an additional plugin: Text Preview for Add-Ons Ultimate.
Step #1: Install Text Preview
Once you’ve purchased Text Preview, install and activate it just like any other plugin, following the same steps as in Step #1 above. Text Preview requires Product Add-Ons Ultimate to be installed and active.
Step #2: Preview the pet’s name on the first gallery image
Add one or more images to your gallery. These will need to have a blank area for the custom text to be previewed.
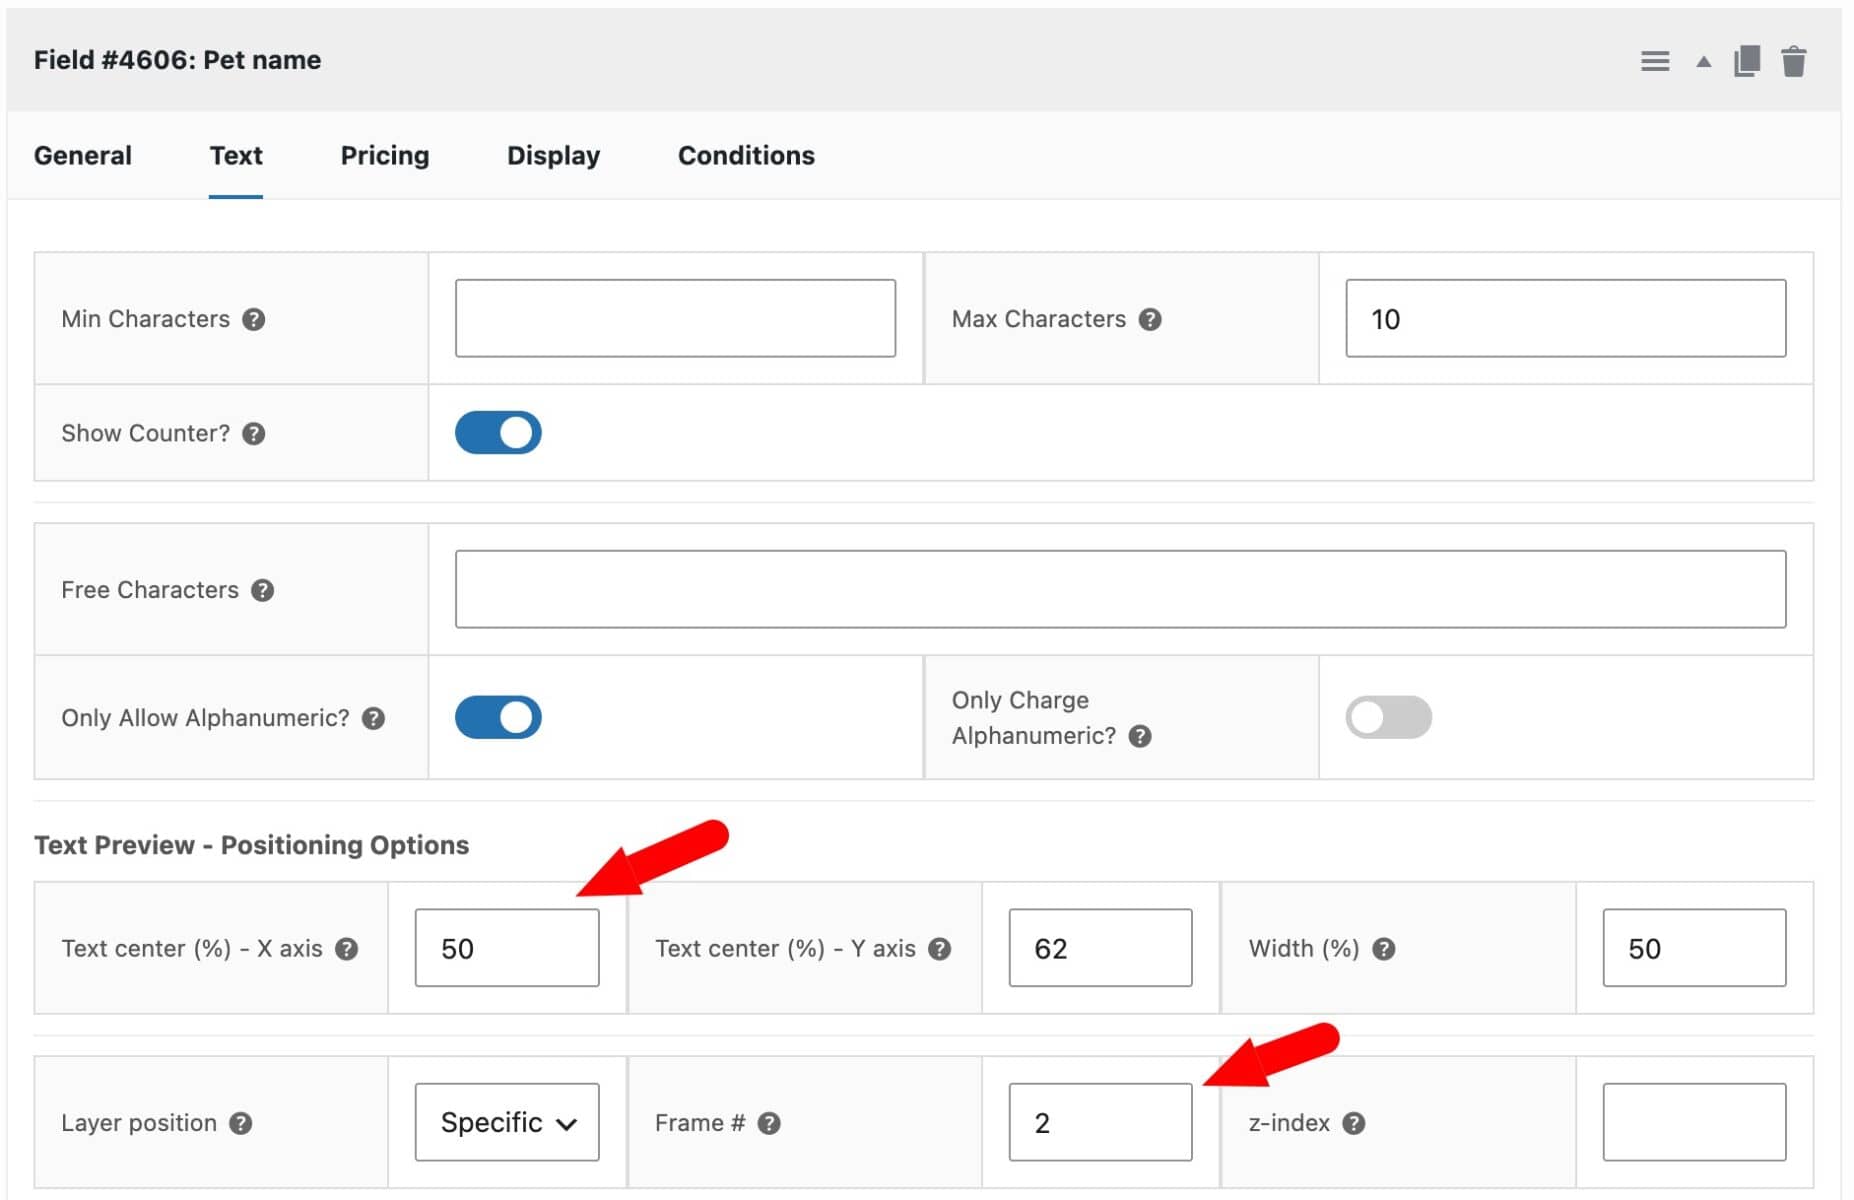
To make your text field into a previewable field, you need to change the field type to ‘Text Preview’. You’ll see some additional settings appear on the ‘Text’ tab.
A few settings are worth knowing before you start:
- ‘Text center (X axis)’ and ‘Text center (Y axis)’: position the text horizontally and vertically on the image, as a percentage from 0 to 100
- ‘Width’: sets how wide the text field is relative to the image
- ‘Layer position’: controls which product image the text appears on – choose ‘Specific Frame #’ to target a single image in the gallery, then enter its position in the ‘Frame #’ field
- ‘z-index’: sets which layer appears on top, if you have more than one text preview overlapping
Set ‘Layer position’ to ‘Specific Frame #’ and ‘Frame #’ to ‘2’ so the pet’s name appears on the first image in your gallery (not the main product image). Then use ‘Text center (X axis)’ and ‘Text center (Y axis)’ to position the name exactly where it should sit on that image. Start with values of 50 for each to center the preview field on the image.
Step #3: Preview the phone number on a different gallery image
Change the field type of your ‘Phone number’ field to ‘Text Preview’ as well. This time, set ‘Frame #’ to ‘3’ so it targets the third image in your gallery, and position the text as needed.
Customers will now see their pet’s name appear on the first product image as they type, and the phone number appear on the second image as they fill in that field.
Step #4: Optionally choose fonts and text color
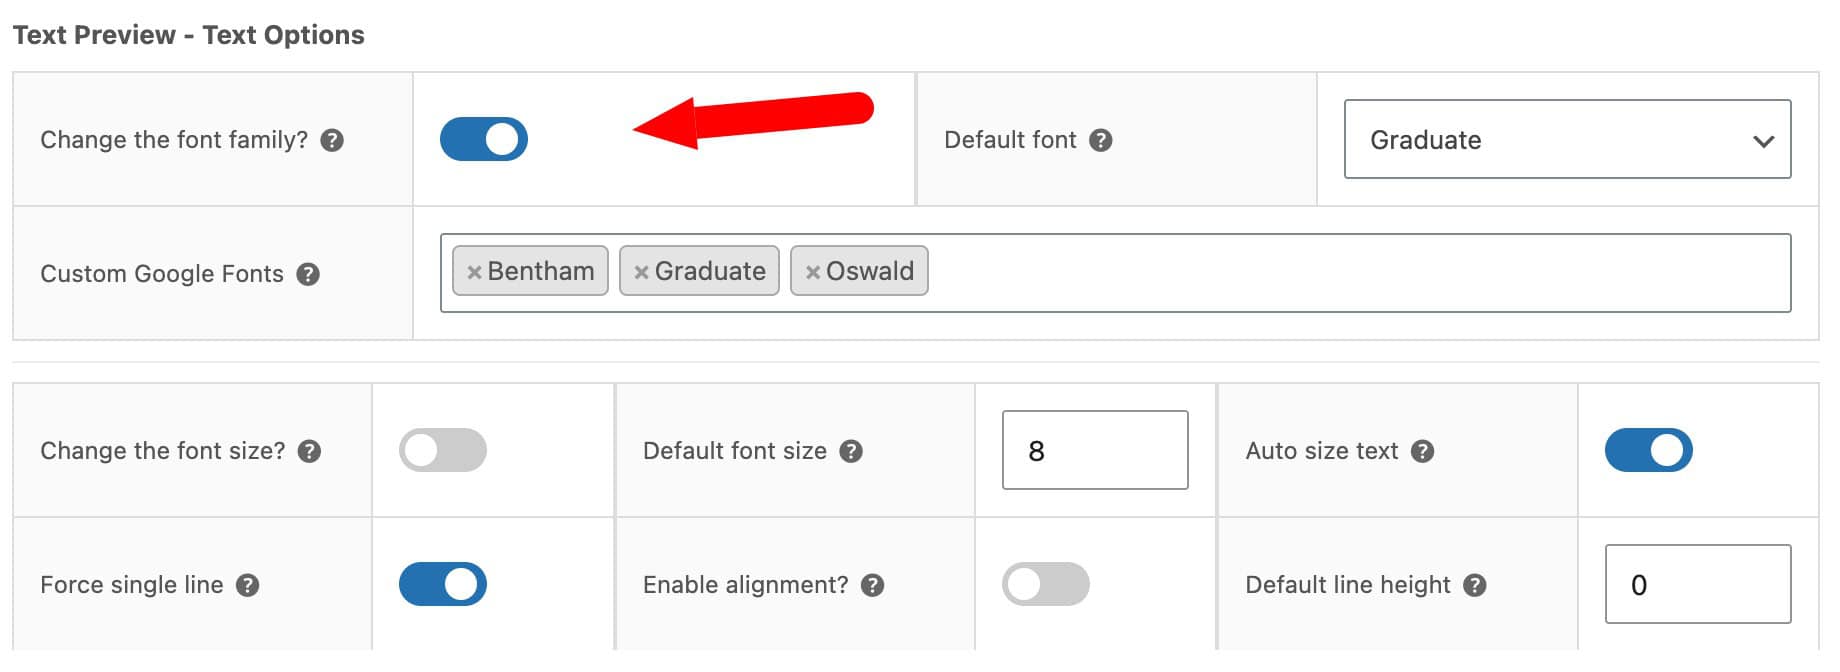
Text Preview gives customers access to hundreds of Google Fonts, or you can restrict them to a single font in WooCommerce > Settings > Product Add-Ons > Text Preview. If you’d like customers to be able to change the color of the engraved text, select the ‘Enable color picker’ option on the field’s settings.
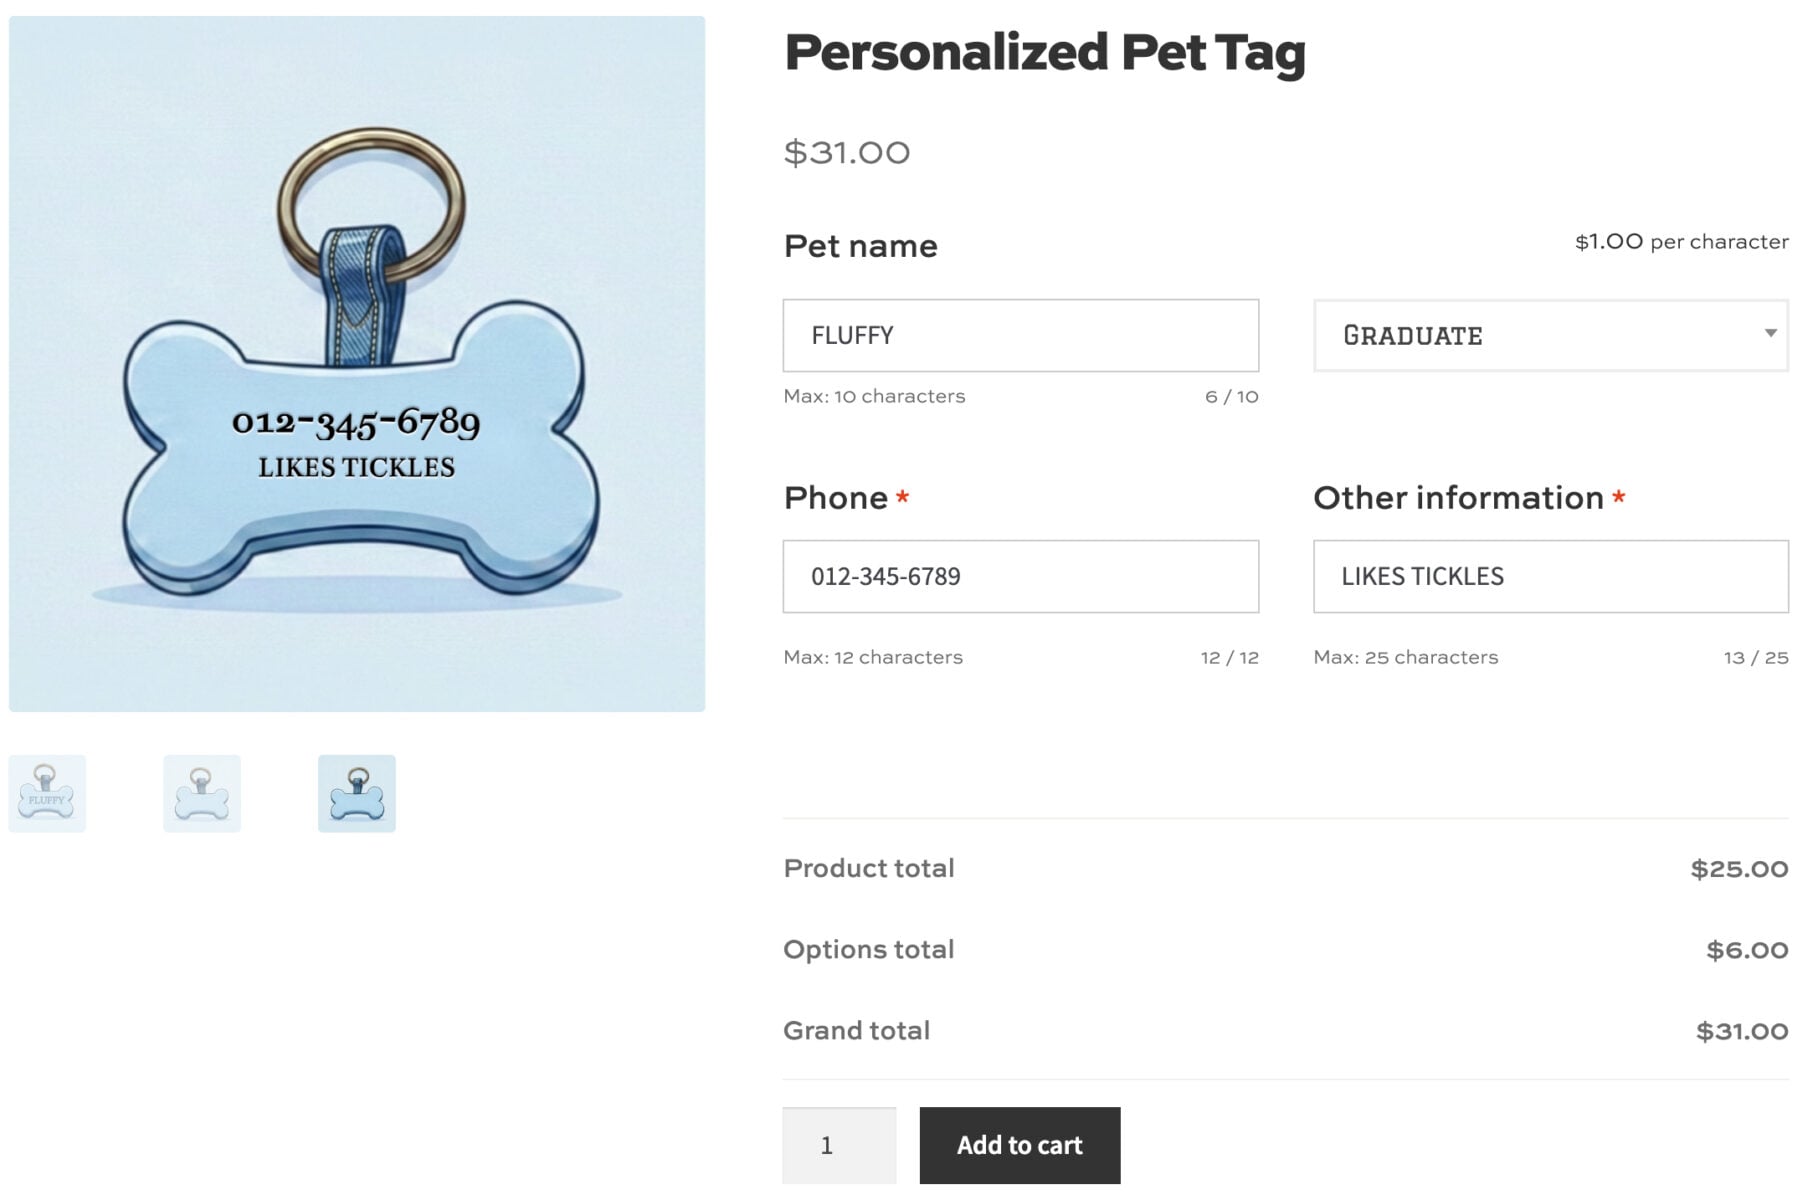
On the ‘Pet name’ field, we’ve allowed a limited selection of fonts for the user to select from.
Here’s a demo of the text preview feature in action. Type some text into the field and you’ll see it appear live on the product image.
Selling personalized pet accessories in WooCommerce – recap
That’s how to sell engraved or custom printed pet accessories in WooCommerce. You can use WooCommerce Product Add-Ons Ultimate to add fields for a pet’s name, an owner’s phone number and an optional design upload. We also looked at how to use Text Preview to show the pet’s name and phone number live on different images in the product gallery.
Our plugins are compatible with all themes and page builders, including Astra, Flatsome, and Storefront, and page builders like Elementor and Divi. If you have any questions, our world-class support team is on hand to help. And all our plugins are backed by a 14-day money-back guarantee, so you can try them risk-free.