How to add a date picker to a WooCommerce product page

If you would like your customers to be able to choose dates on the WooCommerce product page, then you’ll need to add a date picker field. Date pickers (or calendar fields) are not part of the default WooCommerce functionality so you’ll need an extra plugin.
WooCommerce Product Add-Ons Ultimate allows you to add around 20 different field types to your product pages – including date pickers. In this tutorial we’ll look at how to use the plugin and all its date-related features.
What is a date picker and when should you use one?
A date picker is an input field that allows users to select a date using a pop-up calendar.
When the user clicks on the date picker field, a calendar will pop up. The user can then scroll through month and years and click on a date to select it.
Here’s a simple example of a date picker on a product page.
When the user selects their date and adds the product to the cart, the date will be captured and displayed as part of the line item in the cart and checkout. When the user completes the transaction, the date will also be passed to the order so that the store owner will see it. It’ll also be included on WooCommerce emails.
Example businesses that might use date pickers
Any online stores who want to allow customers to choose a date and time for delivery, pickup, or any other purpose may need a date picker field. Let’s take a look at some use cases:
- Florists. If you run an online store that sells flowers, you’ll need to add a date picker to the product page to let customers book the day they want their flowers delivered. This can help customers visually see the dates available for booking.
- Restaurants. Restaurants and businesses in the food industry that offer deliveries to customers can use a date picker to let patrons choose the date they want their meal to be delivered. Check out our WooCommerce restaurant ordering tutorial to learn more about how restaurants can benefit from including additional fields on the product page.
- Wellness centers. Wellness centers can use a date picker that will let users specify dates for various services by selecting any of the available timing slots. This can help you better communicate availability and make it easier for customers to book a slot.
- Consultants. If you run a consultancy firm or provide consultancy services to people, providing a date picker on your online store might be beneficial. Customers will be able to specify dates that suits them best.
If you are looking for a way to accept bookings on your site, check out this tutorial on creating bookings in WooCommerce.
Advantages of using a date picker calendar field
Allowing users to select their dates from a field with a pop-up calendar is preferable to asking them to enter a date into a text field because it avoids any issues with typos or formatting. Using a date picker field with a calendar ensures that you can receive the date in the format that you want.
It’s also better than an HTML date input field which can be cumbersome to use and less visually appealing.
How do I add a date picker in WooCommerce?
- Install the WooCommerce Product Add-Ons Ultimate plugin
- Edit the product where you’d like to add the date picker
- Click the ‘Product Add-Ons’ tab in the ‘Product data’ section
- Click ‘Add Group’ then ‘Add Field’
- Choose ‘Date’ as your field type and set price and other parameters as you wish

How to add a date picker field to WooCommerce
Follow the steps below for detailed guidance on adding a date picker field to your product.
Step 1: Install and activate Product Add-Ons Ultimate
When you purchase Product Add-Ons Ultimate, you’ll receive a link to download the plugin zip file. Upload this to your WooCommerce site and activate the plugin.
Step 2: Create a date picker field
To add a date picker field to a single product, follow this step.
- Edit the product where you want to add the field then click on the ‘Product Add-Ons’ tab in the ‘Product data’ section.
- Click ‘Add Group’ to add a section containing your fields then click ‘Add Field’ to add your first field
- Choose ‘Date’ as the field type
- Enter a label for your field
- Update or publish the product – your date picker field will now appear on the front end
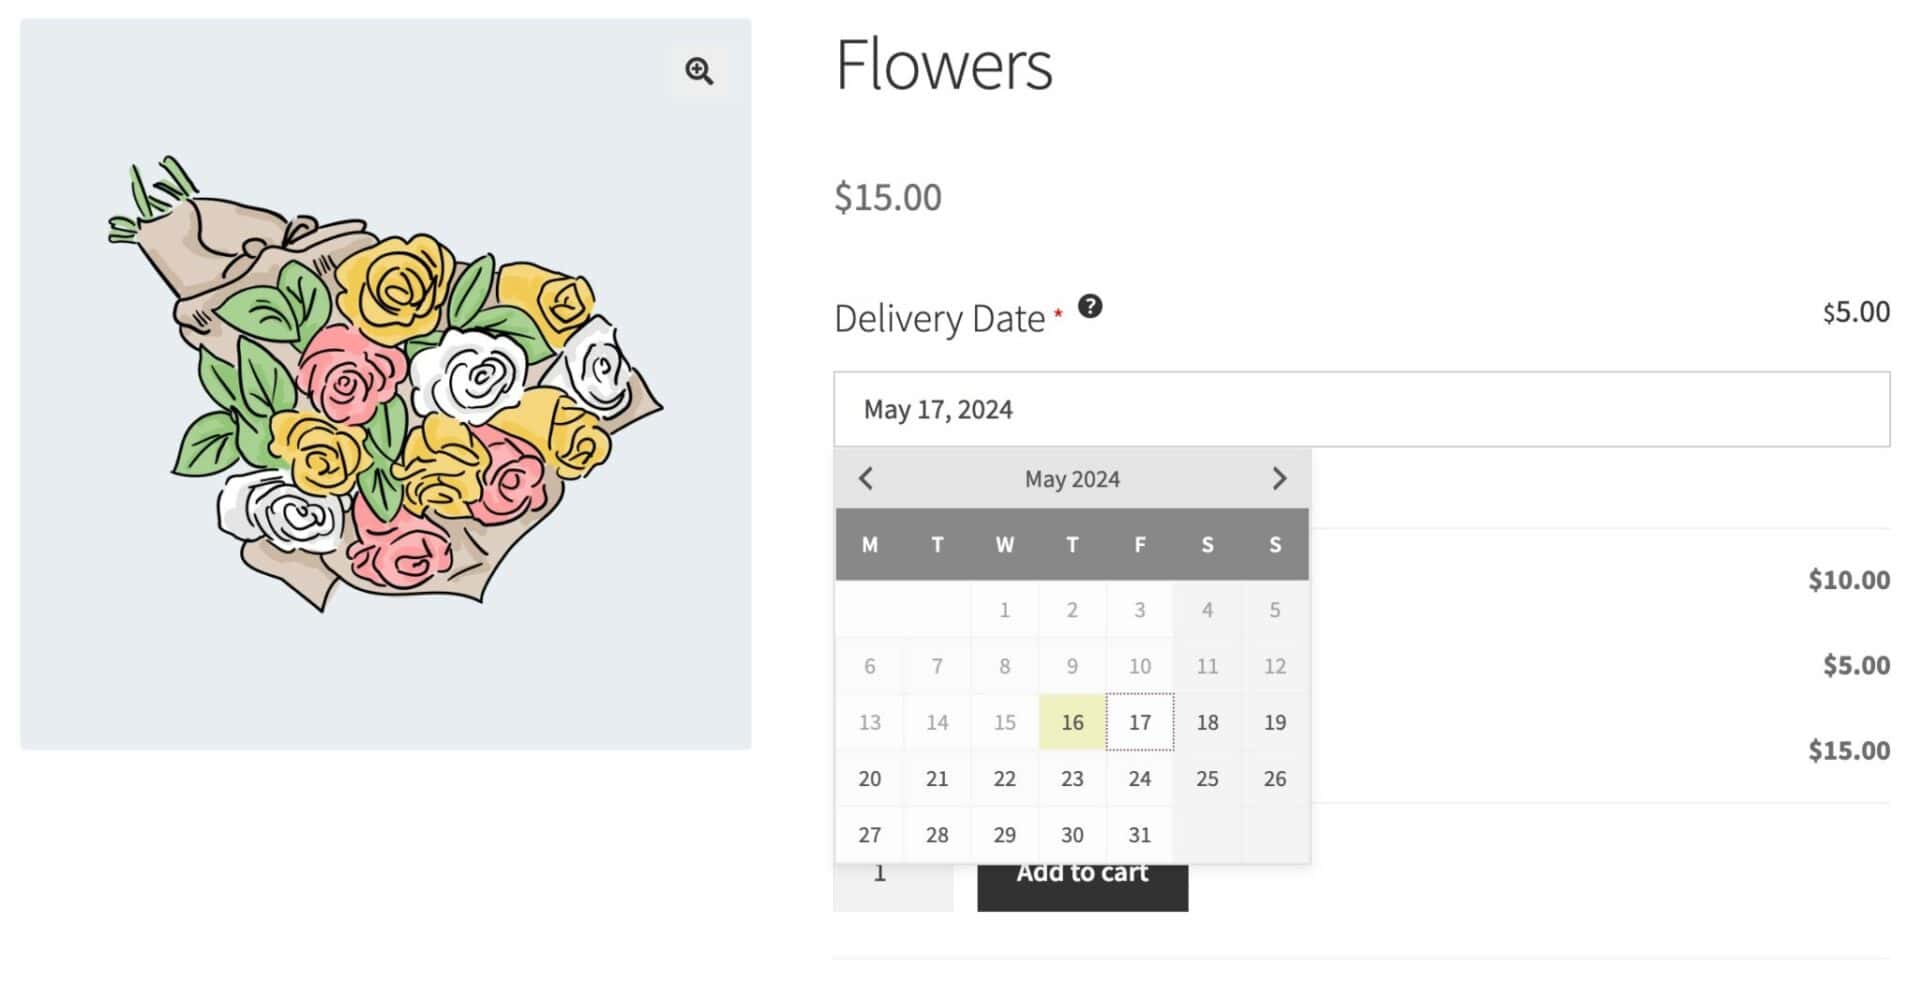
Users can click into the field to display a calendar. They can scroll through months and years, then select a specific date.
To add a field to multiple products, follow the step below for adding fields globally.
Step 3: Set a price for your field
If you would like to charge the user when they select a date, you can assign a price to the date picker field. Just enter a value in the ‘Field Price’ setting.
When the user selects a date, this value will be added to the overall product price. So, for example, if you are offering delivery for your product, you can charge your users a fee when they select the delivery date.
Adding a price to your date picker is optional.
Step 4: Ensure that the user selects a date
If you want to force the user to select a date, you can enable the ‘Required Field’ option. With this enabled, the user will not be able to add the product to the cart unless they have selected a date.

Step 5: Set date parameters and restrictions
There are a few restrictions that you can apply to the calendar on the front end:
- Disable any dates in the past: in most cases, you probably won’t want to let the user select a date in the past. Just enable the ‘Min date today’ setting to ensure that all dates before the current date are disabled
- Set the earliest allowable date: by default, with the above setting enabled, the first available date will be the current day. If you’d like to set the first available date to some time in the future, just enter the date in the ‘Min date’ field. (See Step 6 below if you want to set an offset value for this).
- Set the last available date: you can enter the last available date in the ‘Max date’ field. All dates after that will be disabled
Step 6: Additional parameters
There are some further parameters that you can apply. To configure these extra parameters, you’ll first need to enable at WooCommerce > Settings > Product Add-Ons > Date.
- Days of the week: select this option to display a list of the days of the week in the field setting. You can then choose which days of the week to disable in the calendar. So if you want to block the user from selecting a date on the weekend, for example, just select ‘Saturday’ and ‘Sunday’ in this setting

- Enable offset: if you would prefer to set the first available date as an ‘offset’ from the current date, instead of setting a specific minimum date, you can use this option. The ‘Min date’ option will be replaced by an ‘Offset days’ option. The first available date on the calendar will be offset by the number of days you enter here – so if you don’t want users to be able to book today or tomorrow, enter 2 here

- Enable blocked dates: if you’d like to specify certain dates that can’t be selected, enter them in this field as a comma-separated list. Dates should be entered in the YYYY-MM-DD format. Any dates you enter here will not be available in the calendar. It’s useful if you want to block out public holidays or other dates.
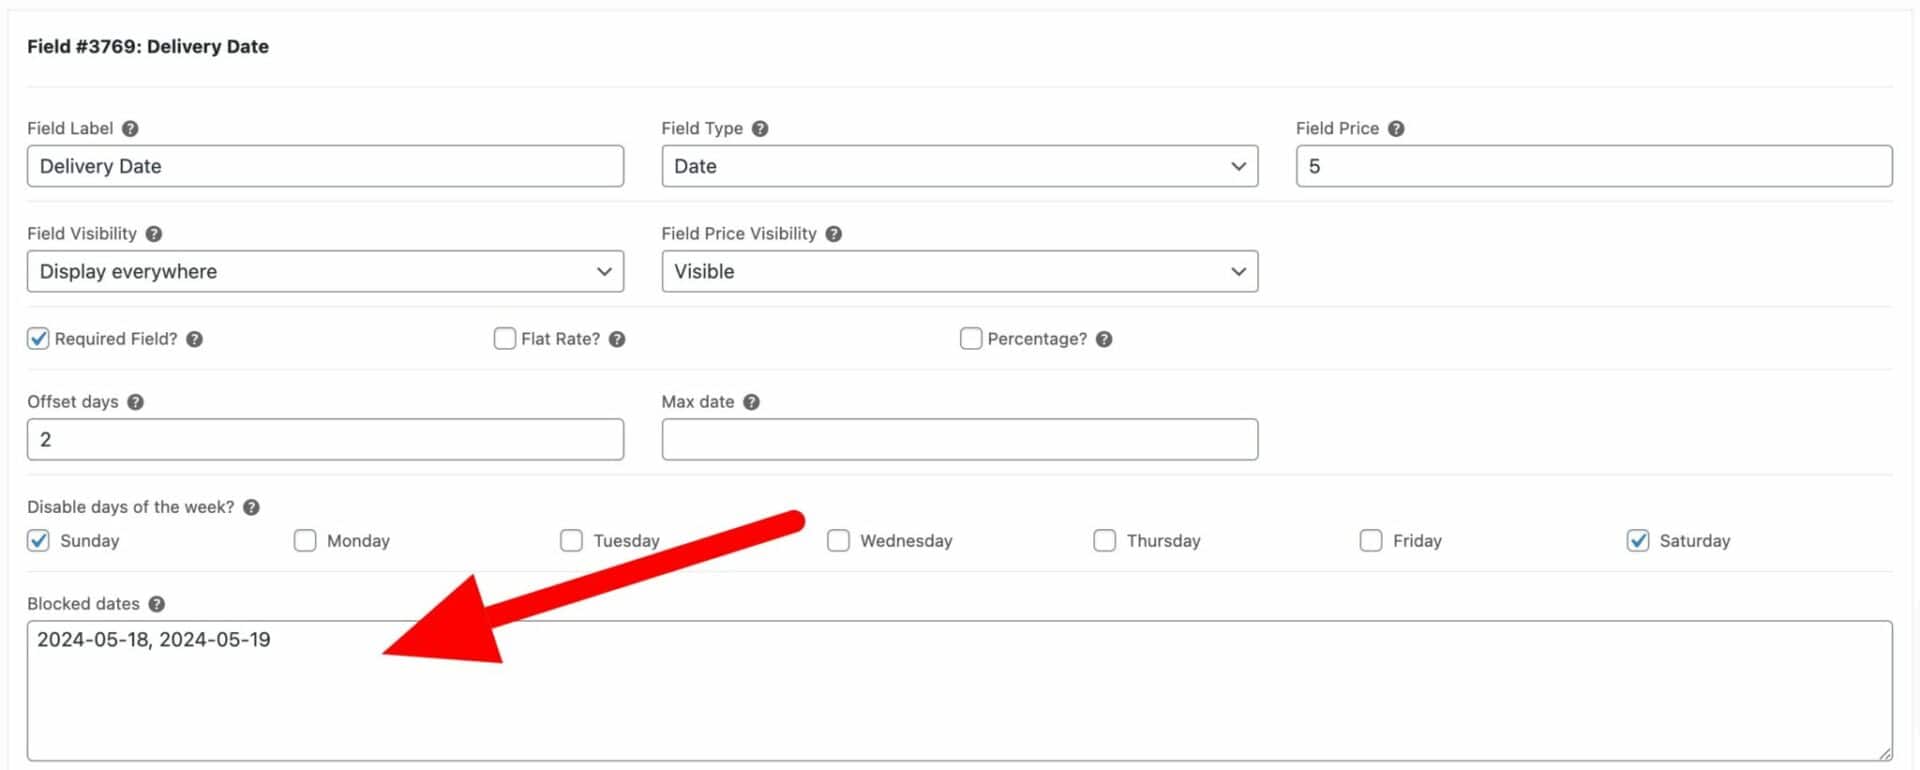
That’s how to add your date picker field. Let’s look at some other options.
How to display a date picker conditionally
The Product Add-Ons Ultimate plugin allows you to display fields using conditional logic.
This means you can hide or show date picker fields on your product page based on the value of other fields. For instance, you can create a checkbox for users to specify that they would like delivery on a certain day. If they check the box, the date picker field will be displayed.
To create a date picker with conditional logic:
- Create a ‘Checkbox’ field for the user to select if they want to specify the date of their delivery
- Add a date picker field for customers to select their date
- In the date picker field settings, click ‘Add Condition’
- Select ‘Show this field if’ and ‘All rules match’ under ‘Conditions’
- Now select the checkbox field we created from the drop-down menu and ‘Is’ from the drop-down menu next to it

You can add multiple conditions to your date picker fields if you’d like.
How to add date picker fields to multiple products
So far, we’ve looked at how to add date pickers to individual product fields. But if you’d like to add a date picker field to multiple products, you can do this using ‘Global Groups’.
In your WordPress back end, go to Product Add-Ons > Global Groups and add a new group. Add your date picker field.
You can choose where to display the field, either:
- On all products: check this option to display your date picker on every product page on your site
- By product: choose this option to specify multiple products to display the field
- By category: choose this option then pick one or more product categories. The field will be displayed on all products within the categories

You can create multiple global groups and display them on different products and categories.
Advantages to adding a date picker to the product page, not the checkout page
There are advantages to adding the date picker field on the product page rather than the checkout page.
For one thing, adding a date to a specific product ensures the date is associated with that product rather than just generally as part of the order. This is particularly important if the user could be ordering more than one product with a date.
Display date fields in a product table
So far, all the examples shown above have just used the Product Add-Ons Ultimate plugin to add a date field to the product page itself.
But what about if you’d like to list multiple products on a single page and let the user select a date against each product? Users might need to choose different delivery dates for each product, for example.
You can do this using Add-Ons Ultimate plus the Product Table Ultimate plugin.
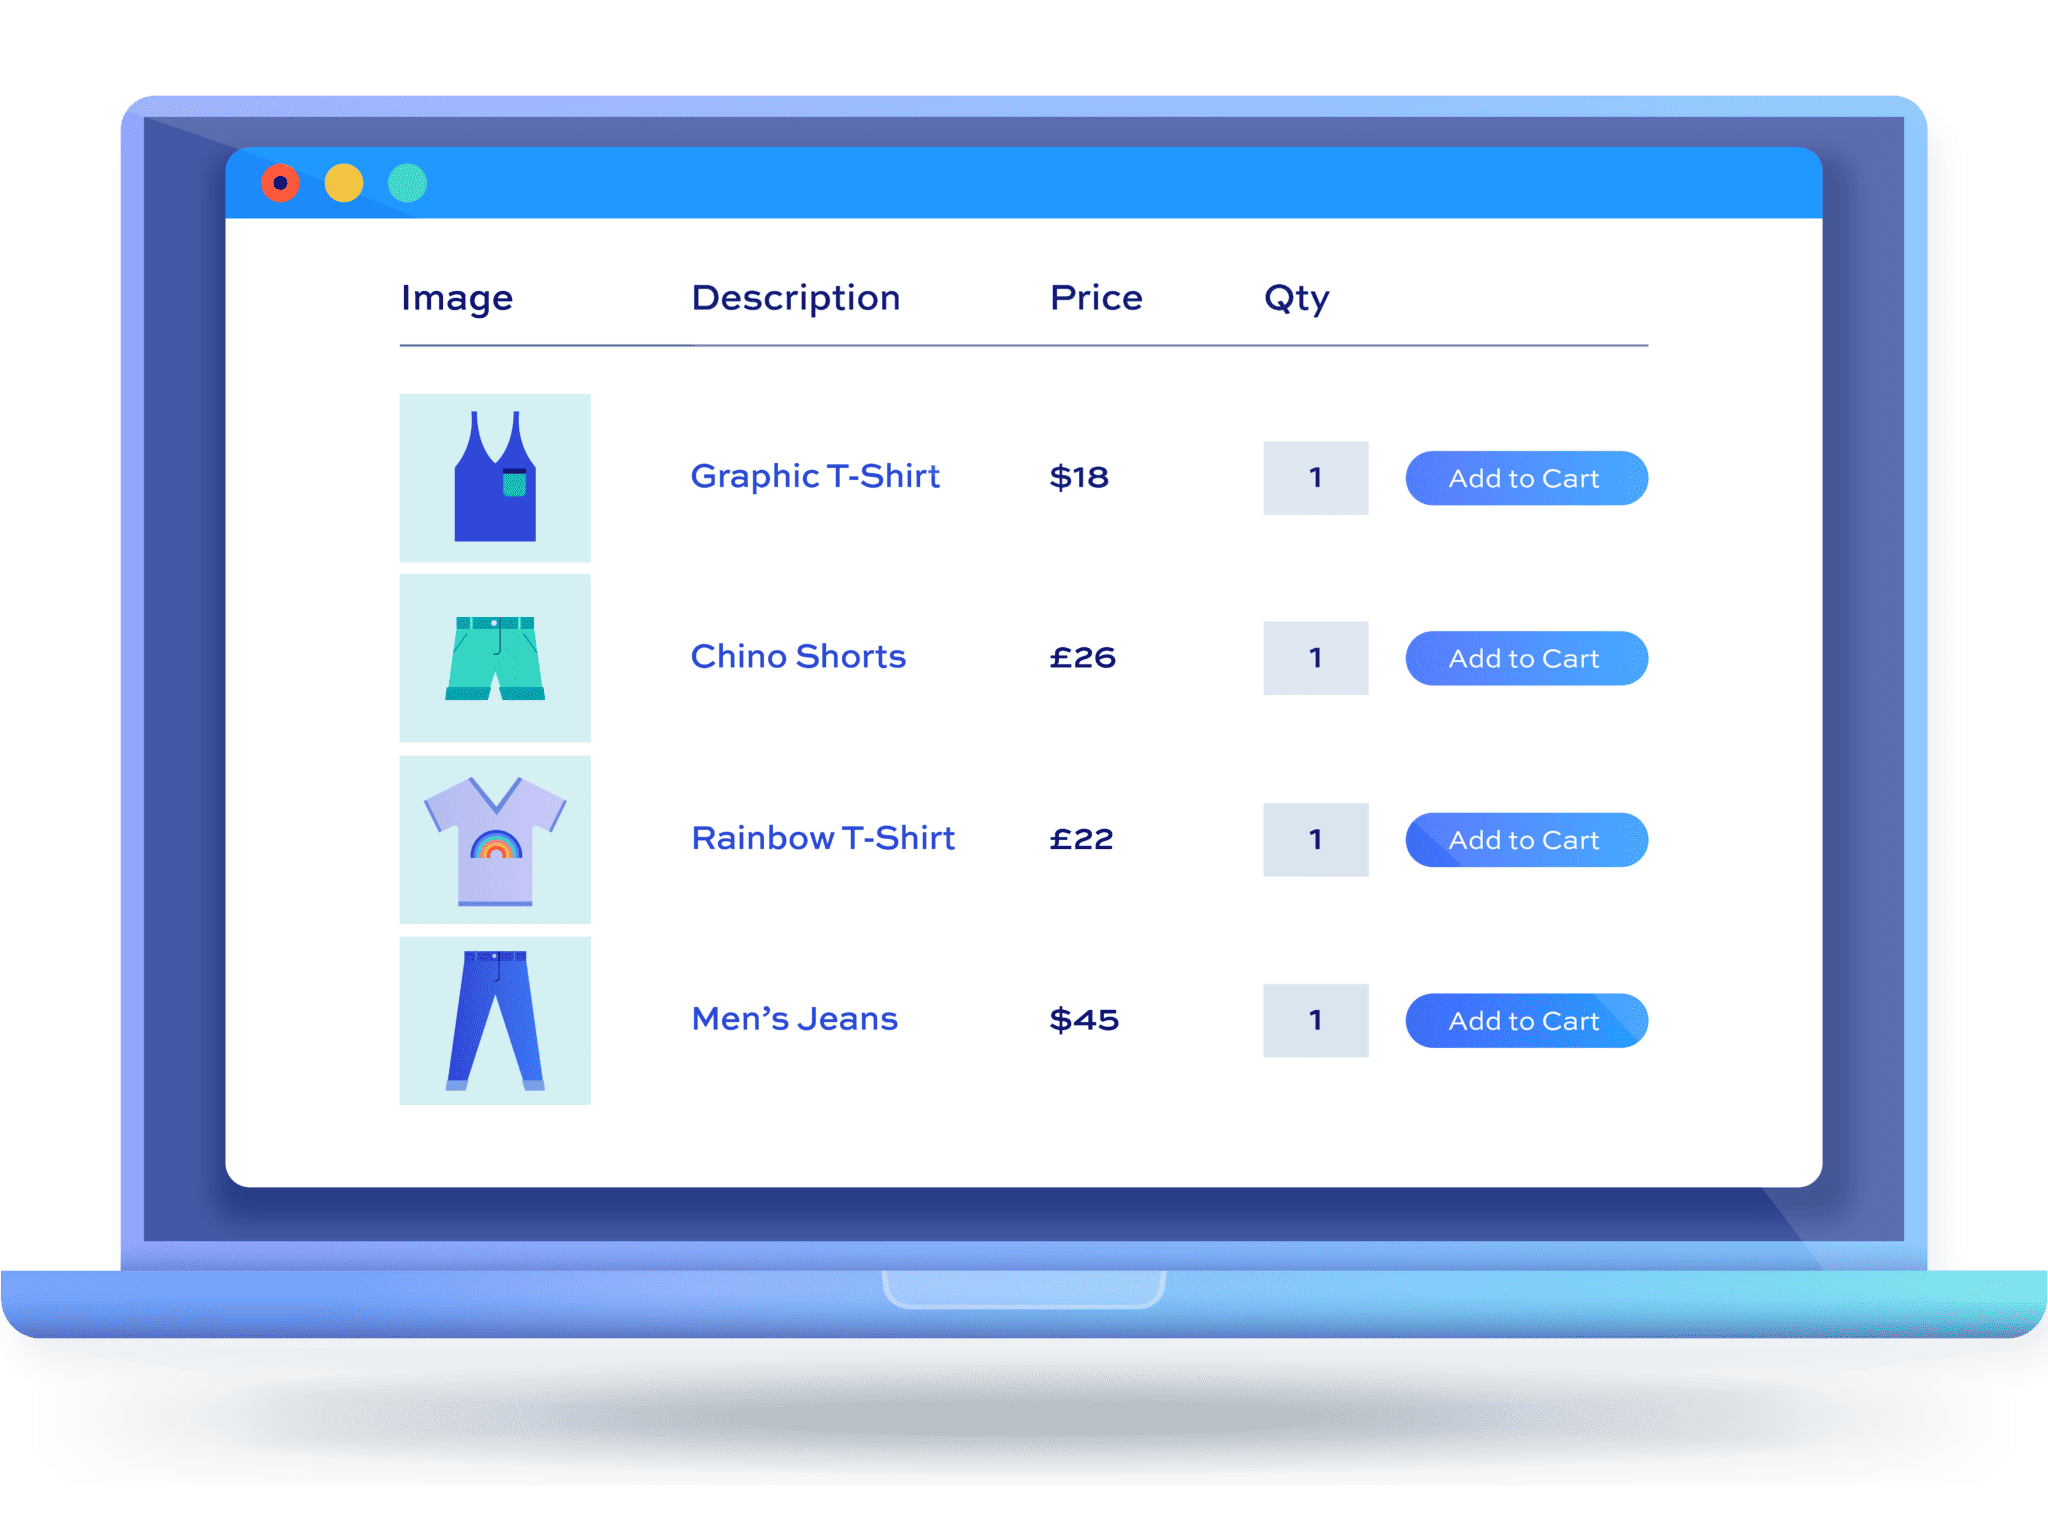
Product Table Ultimate allows you to display your products in a table format, making it easier for your customers to add multiple products to the cart in one click.
How to display a date field as a column in a product table
Product Table Ultimate allows you to specify different column types for your table, e.g. product name, price, image, stock, description, etc.
If you have date fields you’d like to display in a column, you just need to add them as a column type. You’ll get something similar to the screenshot below.
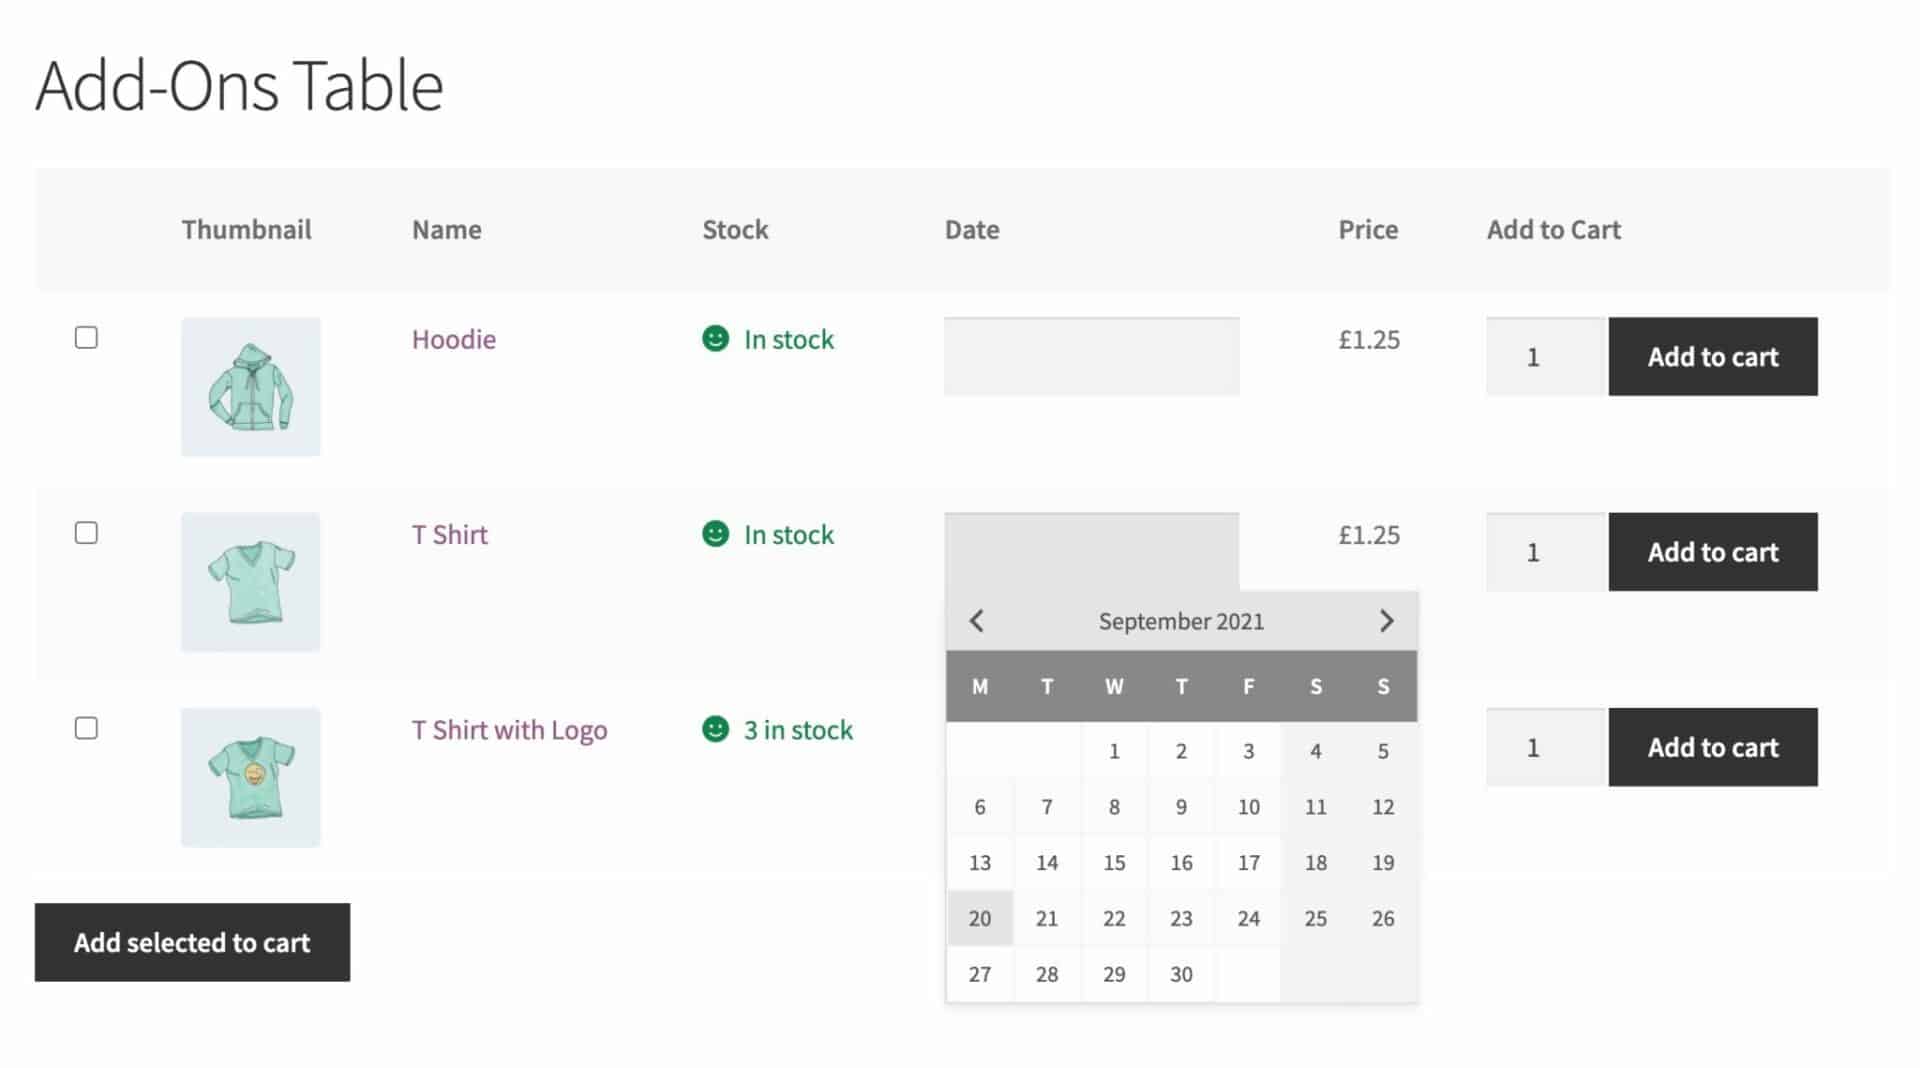
It’s possible to add date fields that are specific to each product – or you can add a date field globally that will be applied to multiple products in your table. For more information, you can see this support document.
Adding extra fields to your product pages
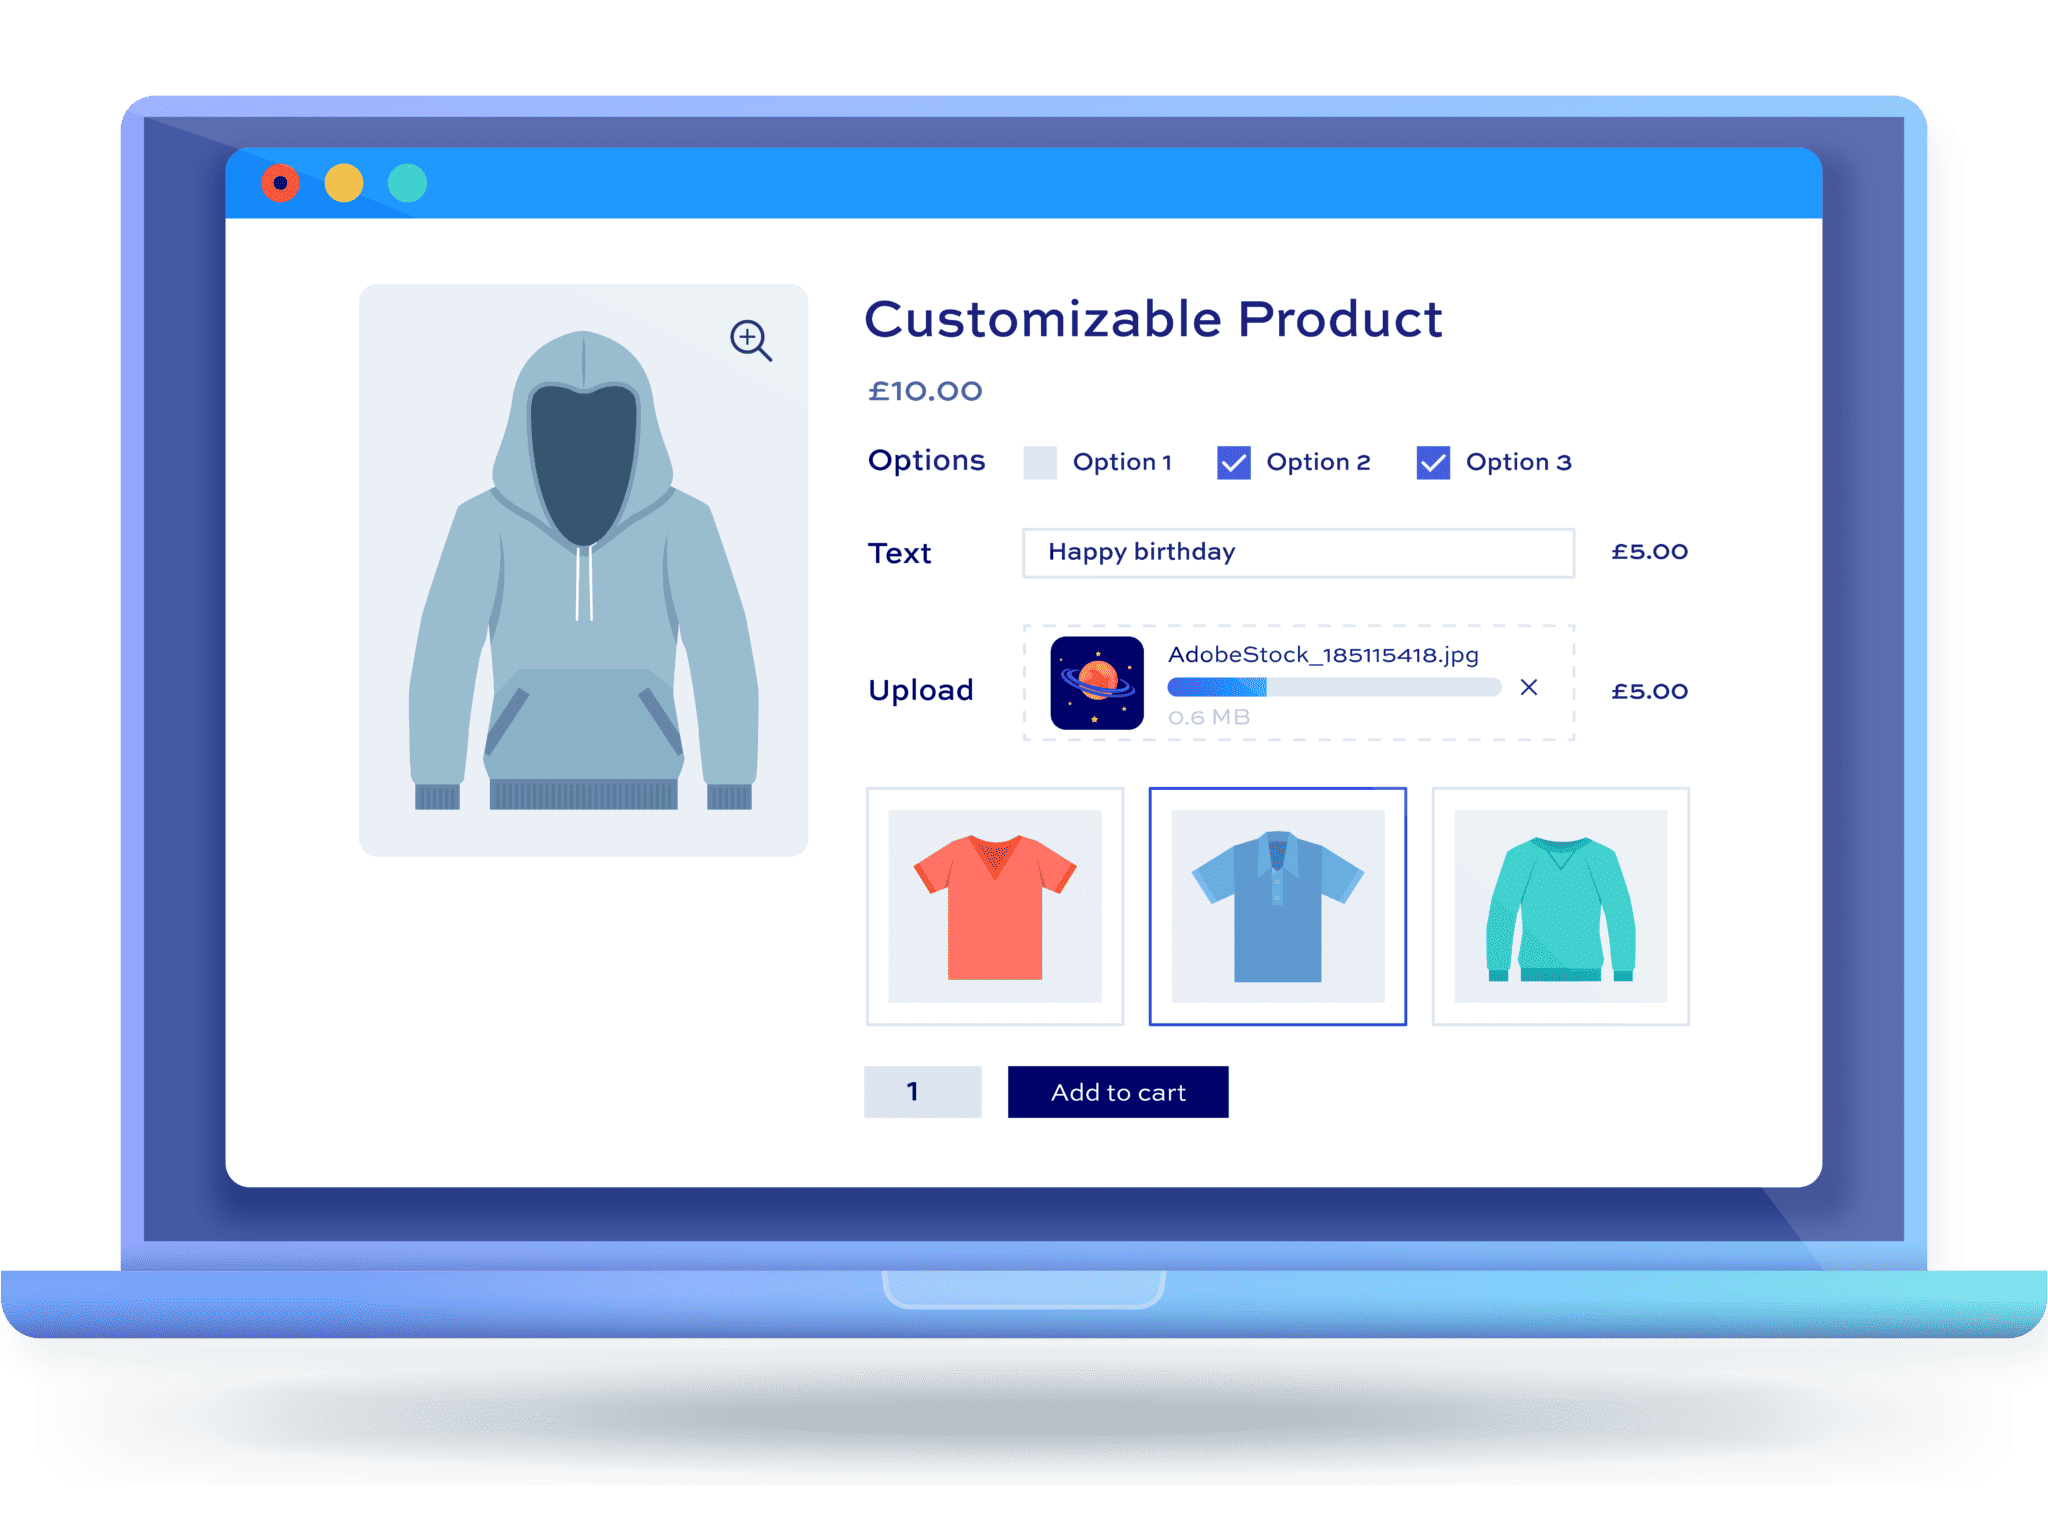
You can use Product Add-Ons Ultimate to add more fields than just date pickers to your product pages. You can use it to add all kinds of custom product option. For instance, you can also add:
- Checkboxes, radio buttons and select fields
- Text fields and textarea fields
- Swatches – like image buttons, color swatches, and text buttons
- Child products – so you can use other products as add-on options
- Upload fields – for users to upload files direct to the product page
- Calculation fields – so you can set prices and perform other calculations based on user inputs
Date picker FAQs
Have you still got questions about using date picker fields in WooCommerce? Here’s a recap of what we’ve looked at so far.
What is a date picker field?
A date picker is a field which allows customers to select a date from a calendar. The date chosen will be saved as part of the order and visible in the cart and checkout pages, as well as in the admin order page.
How can I add a date picker field to a WooCommerce product page?
To add a date picker field, install and active the Product Add-Ons Ultimate plugin. You can add date pickers to individual products or globally to multiple products.
Will adding a date picker field affect page speed?
The date picker field requires a very small script to be loaded to the page. Any impact on performance will be minimal.
Can selecting a date affect the product price?
Yes, if you wish you can assign a price to the date picker field. When the user selects a date, the product price will increase by the field price.
Ready to add a date picker to your WooCommerce product page?
By adding a date picker field to your product pages, you can make it easier for customers to book a slot or select a delivery date.
Ready to start adding a date picker to your WooCommerce products? WooCommerce Product Add-Ons Ultimate is compatible with all themes and comes with a 14 day money-back guarantee – so you can try it risk free.
Get WooCommerce Product Add-Ons Ultimate today!
Hi,
Will this plugin work for a car rental website to have 2 dates to pick from?
Can I use it to add insurance per day to each car?
Hi Maria
If you would like to have a start date and end date, I recommend using the Bookings for WooCommerce plugin: https://pluginrepublic.com/wordpress-plugins/bookings-for-woocommerce/. This will allow you to rent cars and track availability per day. You can still use the Add-Ons Ultimate plugin to add options like insurance: https://pluginrepublic.com/wordpress-plugins/woocommerce-product-add-ons-ultimate/.
Please let me know if you need any more information.
Thanks.
I have a customer who offers training courses but only on certain days of the year (maybe 10 days per year spread over all the months). Will I be able to set this up accordingly?
Hi
Yes, you can block out dates – though a better method might be to use the Bookings for WooCommerce plugin, which would allow you to control the number of available places as well: https://pluginrepublic.com/wordpress-plugins/bookings-for-woocommerce/
Thanks.