WooCommerce bookings deposit – how to accept down payments on products
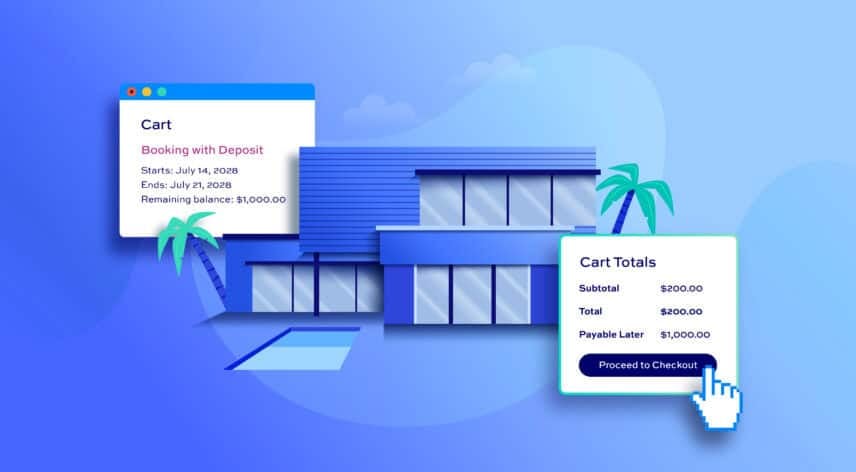
Taking a deposit allows your customers to secure a booking in your WooCommerce store without paying the full amount upfront. However, WooCommerce doesn’t have native bookings or deposits features – so you’ll need additional plugins. In this tutorial, you’ll learn how to create bookable products with Bookings for WooCommerce then take deposits and collect the remaining balance automatically with WooCommerce Deposits and Part Payments.
The products themselves can be anything that can be booked. That includes properties like holiday villas and rentals, equipment hire or time-based appointments. We’ll use the example of a holiday villa in this article.
After completing this tutorial:
- Customers will be able to:
- Pick their booking dates from a calendar
- Choose whether to pay a deposit or the full amount
- Pay the remaining balance later from their account
- As the store owner or admin, you’ll be able to:
- Take a fixed or percentage deposit on each booking
- Set a due date for the remaining balance
- Manage bookings and balance payments from the back end
- As a bonus, we’ll also look at how to:
- Send reminders before the balance is due
- Offer a discount for paying in full
- Let customers pay off the balance in installments
- Stop offering deposits after a set date
There’s a demo product here so you can see it in action.
Note that this tutorial covers deposits as down payments, not security deposits. A security deposit is a refundable amount you hold against damage, rather than part of the booking price – see this article on security deposits for WooCommerce rentals to find out how to set one up.
In this tutorial, we’ll assume that you already have WordPress and WooCommerce installed and ready to go.
How do you set up a WooCommerce bookings deposit?
Here’s how to create a bookable product and take a deposit on it using Bookings for WooCommerce and WooCommerce Deposits and Part Payments.
- Install the plugins
Install and activate Bookings for WooCommerce and WooCommerce Deposits and Part Payments. You need both to take deposits on bookings.
- Create a bookable product
Go to Products > Add New and select ‘Booking’ in the ‘Product type’ field. This adds the booking settings to the product.
- Configure the booking settings
Choose ‘Day’, ‘Night’, or ‘Week’ as the booking unit. Set ‘Max bookings per unit’ to the number of items customers can book on each date. Enter a minimum and maximum booking length. Then enter the price per booking unit in ‘Standard price’. You can now publish the product. Customers can now book dates and see the cost calculated automatically.
- Choose which products accept deposits
Go to WooCommerce > Settings > Deposits and set ‘Accept Deposits?’ to ‘Some Products’ or ‘All Products’ – depending on whether you want to offer down payments on all your products
- Configure the deposit type and amount
Choose a fixed amount or a percentage in ‘Deposit Type’, then enter a value in ‘Deposit Amount’. You can also select ‘Deposit’, ‘Pay In Full’, ‘Deposit Only’, or ‘Custom Amount’ in ‘Default Payment Method’. This decides what customers options the customer has on the product page.
Here’s each step in more detail.
Tutorial: What do you need to take deposits on bookings?
To take deposits on bookings in WooCommerce, you’ll need two plugins: Bookings for WooCommerce and WooCommerce Deposits and Part Payments.
Bookings for WooCommerce allows you to accept date-based and time-based bookings through standard WooCommerce products. It’s compatible with all themes and page builders and with all WooCommerce payment gateways.
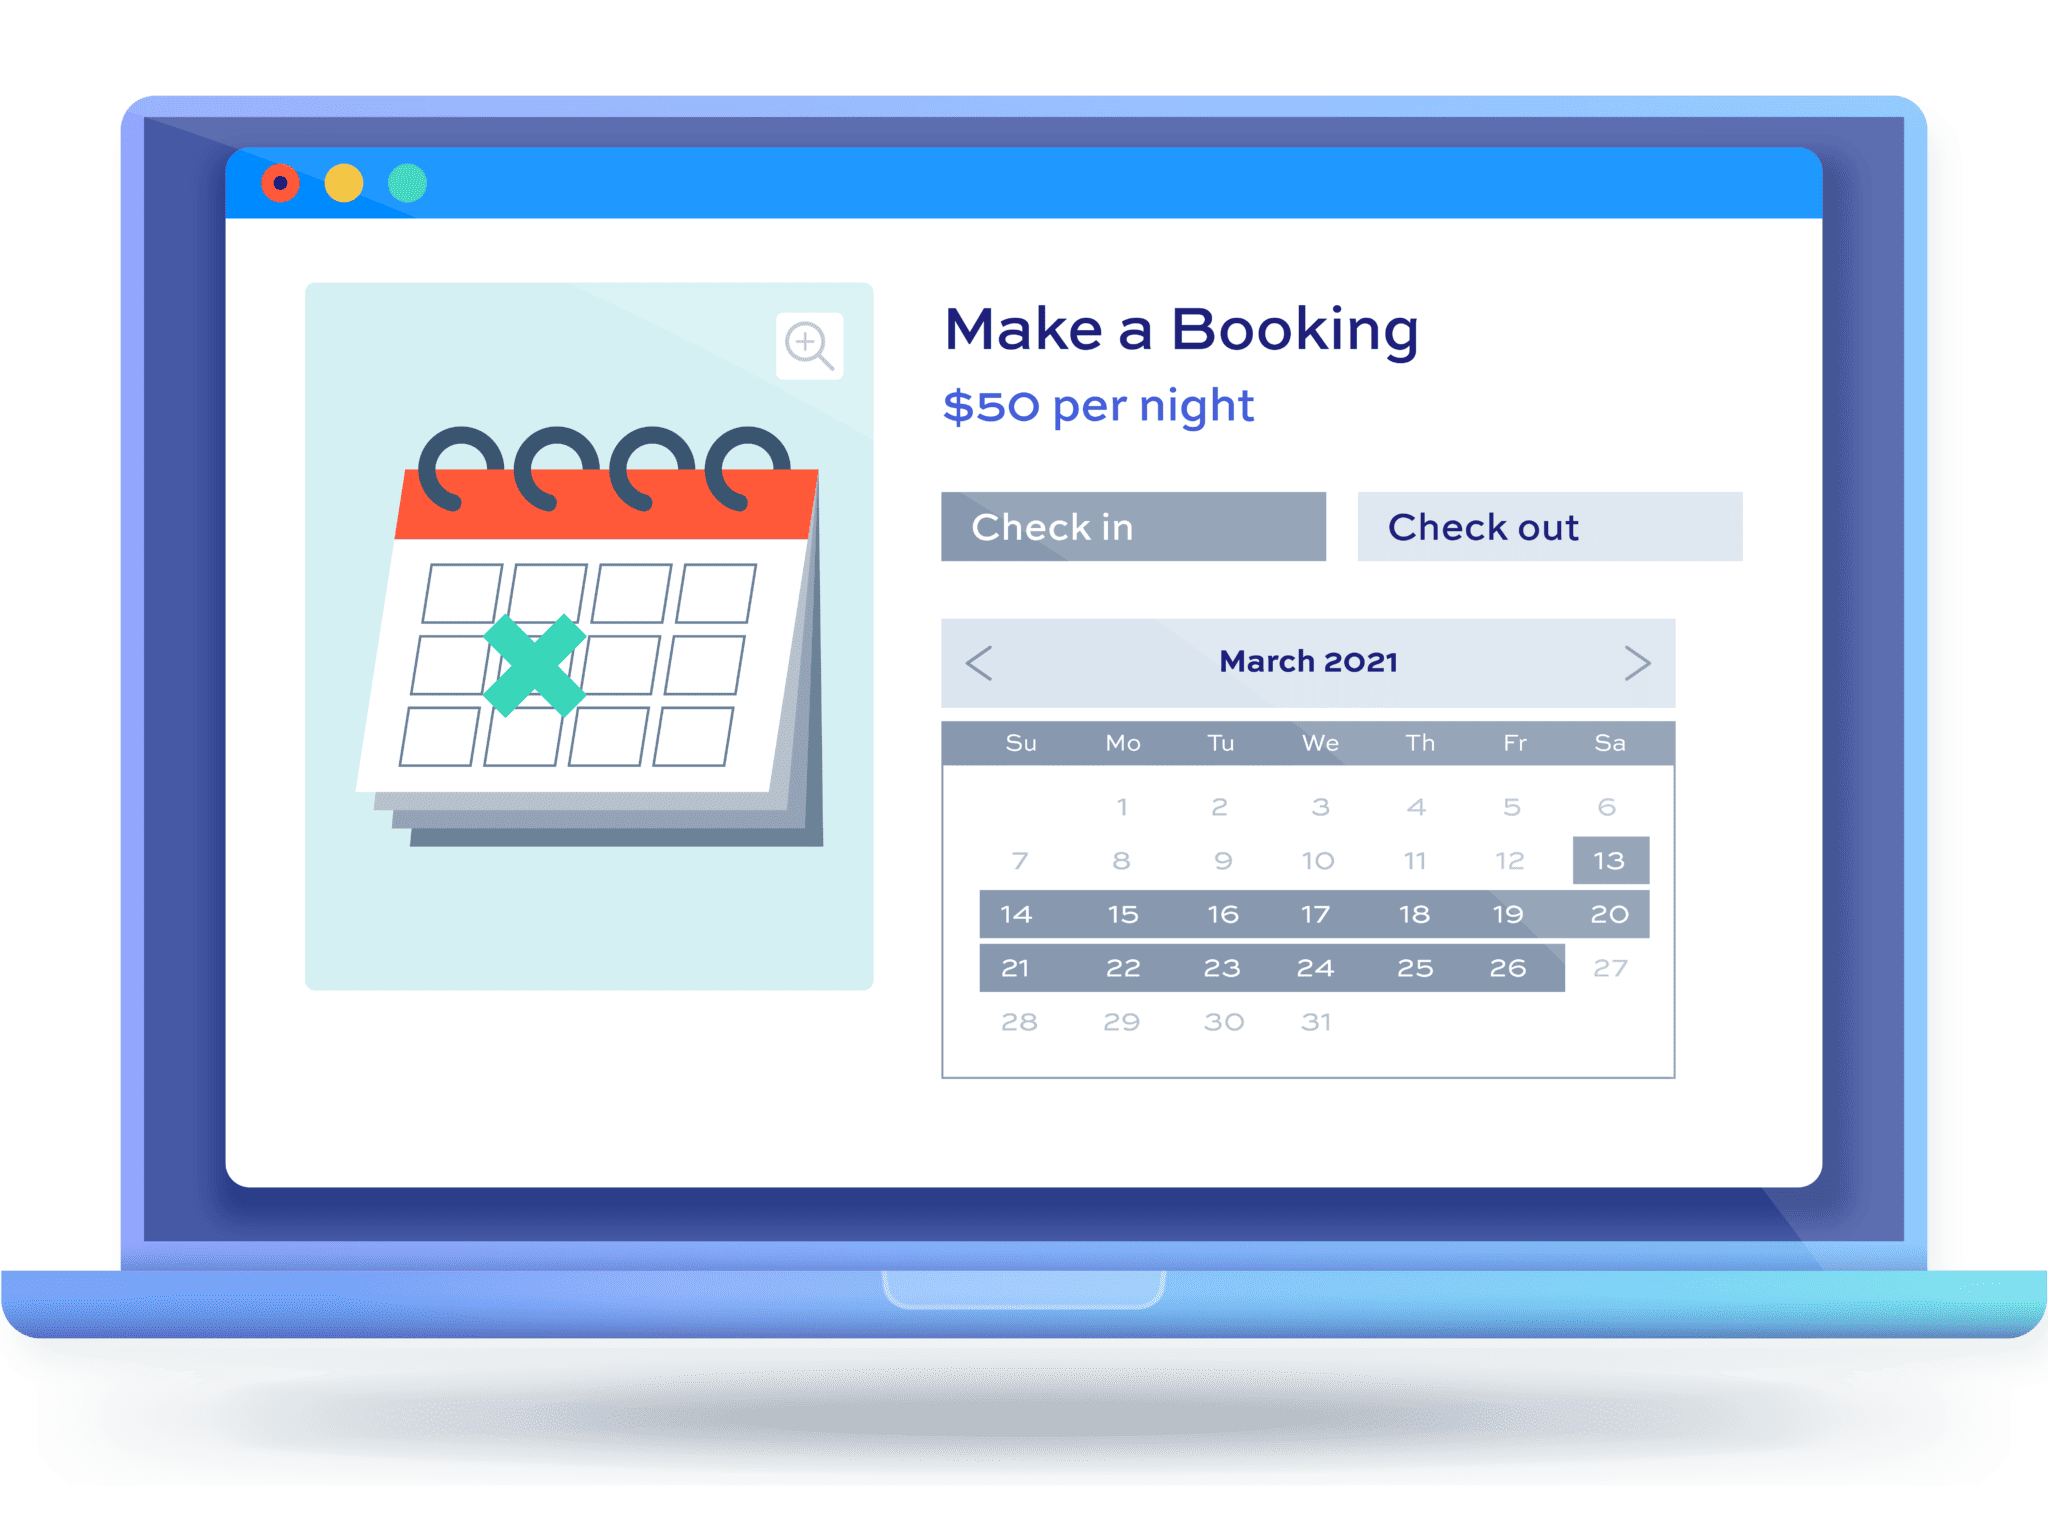
WooCommerce Deposits and Part Payments lets customers pay part of the price now and the rest later. It sets the deposit amount, creates a scheduled order for the balance, and reminds customers when payment is due.
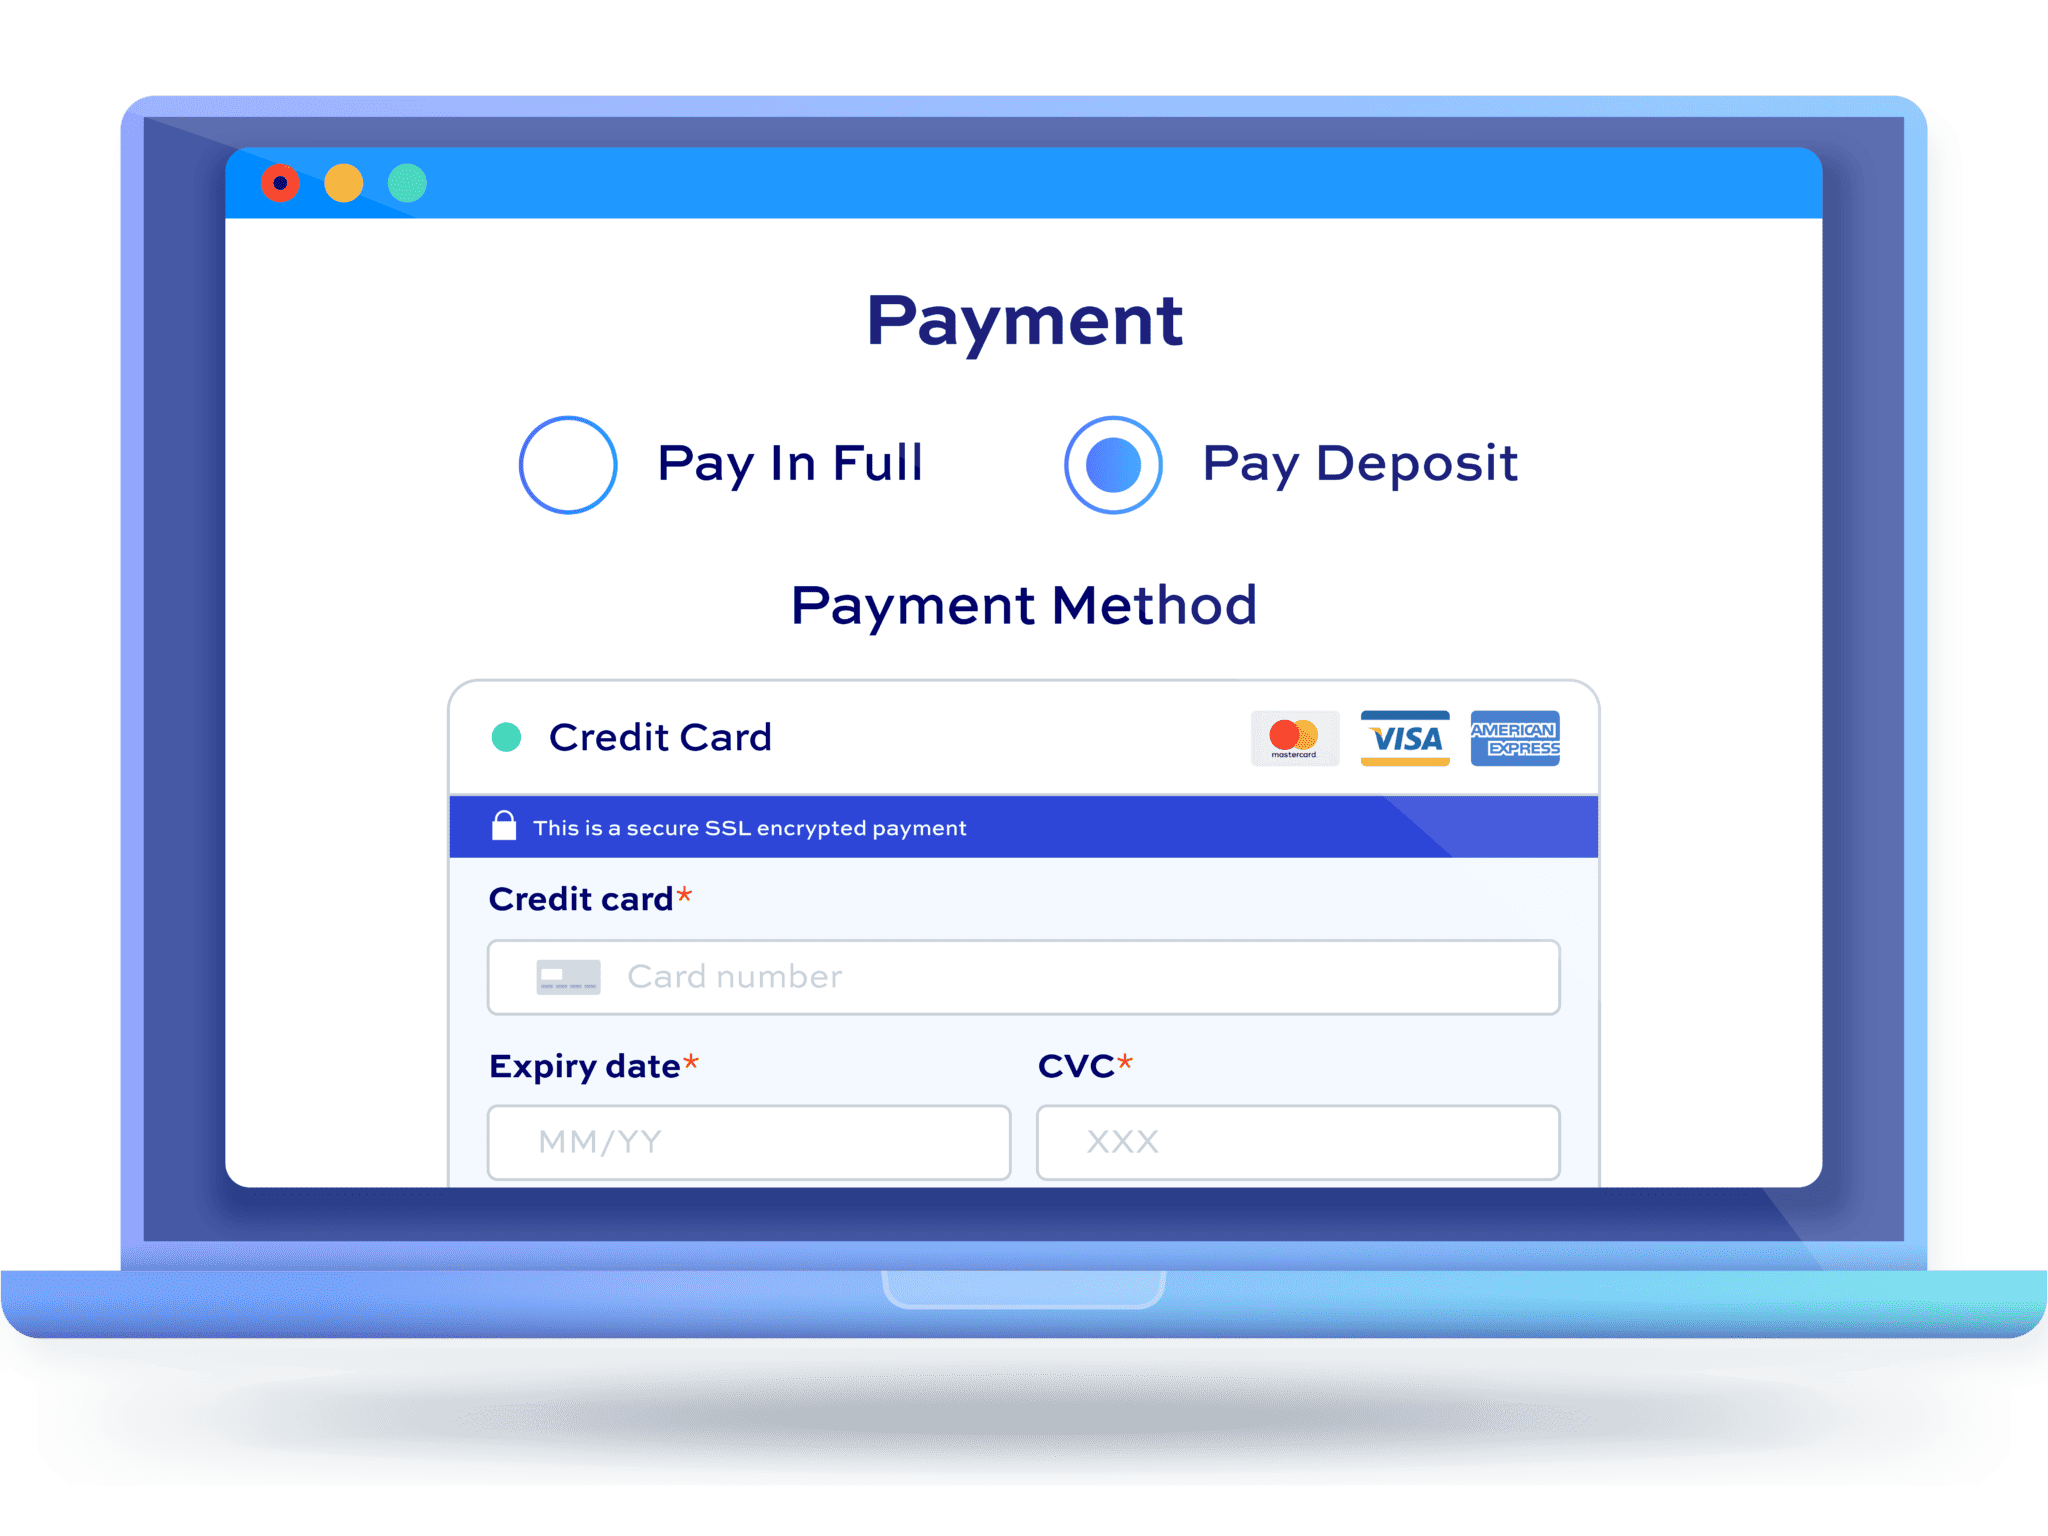
WooCommerce Deposits and Part Payments
Provide flexible payment options on products and orders
Step #1: Install the plugins
Once you’ve purchased Bookings for WooCommerce and WooCommerce Deposits and Part Payments:
- Download each plugin’s zip file by clicking on the link on your order confirmation screen or in your welcome email. You’ll receive the email automatically a few seconds after you’ve completed the purchase
- Go to Plugins > Add New in your WordPress dashboard
- Click on the ‘Upload Plugin’ button
- Drag and drop the plugin’s downloaded zip file into the ‘Choose File’ area and click ‘Install Now’
- When the plugin has uploaded, click the ‘Activate Now’ button
- Repeat for the second plugin
Both plugins are now active. Let’s create the bookable product.
How do you create a bookable product in WooCommerce?
We’ll use a holiday villa as our example. The villa can be booked by the day for between 7 and 21 days, at a cost of $150 per day.
Step #2: Create the product
With Bookings for WooCommerce activated, you can create your bookable product in the same way you would any other product:
- Go to Products > Add New
- Enter the product name, description, and images
- Select ‘Booking’ from the ‘Product type’ field in the ‘Product data’ section

You’ll see a set of booking tabs appear in the ‘Product data’ section. Now let’s set the booking parameters.
Step #3: Set the booking unit and availability
On the ‘Bookings Settings’ tab, set the following:
- Booking unit: select ‘Day’. You can also choose ‘Night’ or ‘Week’
- Max bookings per unit (quantity): enter 1. This means each date can only be booked once, which is what you want for a single villa
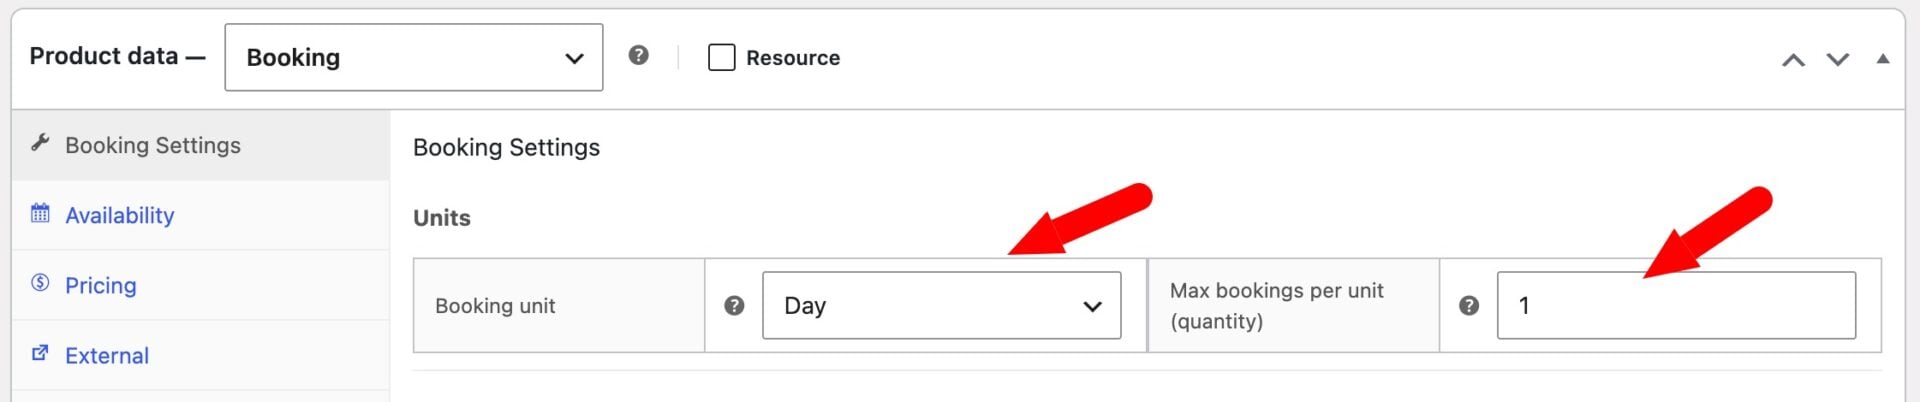
If you’re renting out several identical items, like 10 bikes, enter that number in ‘Max bookings per unit’ instead. Your product now has a unit and a quantity, so let’s set the dates.
Step #4: Set the booking dates
In the ‘Dates’ section of the same tab:
- Min booking length: enter 7
- Max booking length: enter 21. Leave this blank if you don’t want a maximum
- Postpone start: enter a number of days if you need notice before a booking starts. For example, enter 2 to stop customers booking within the next two days
- Buffer period: enter a number of days to block after each booking, for example to clean and prepare for the next guests
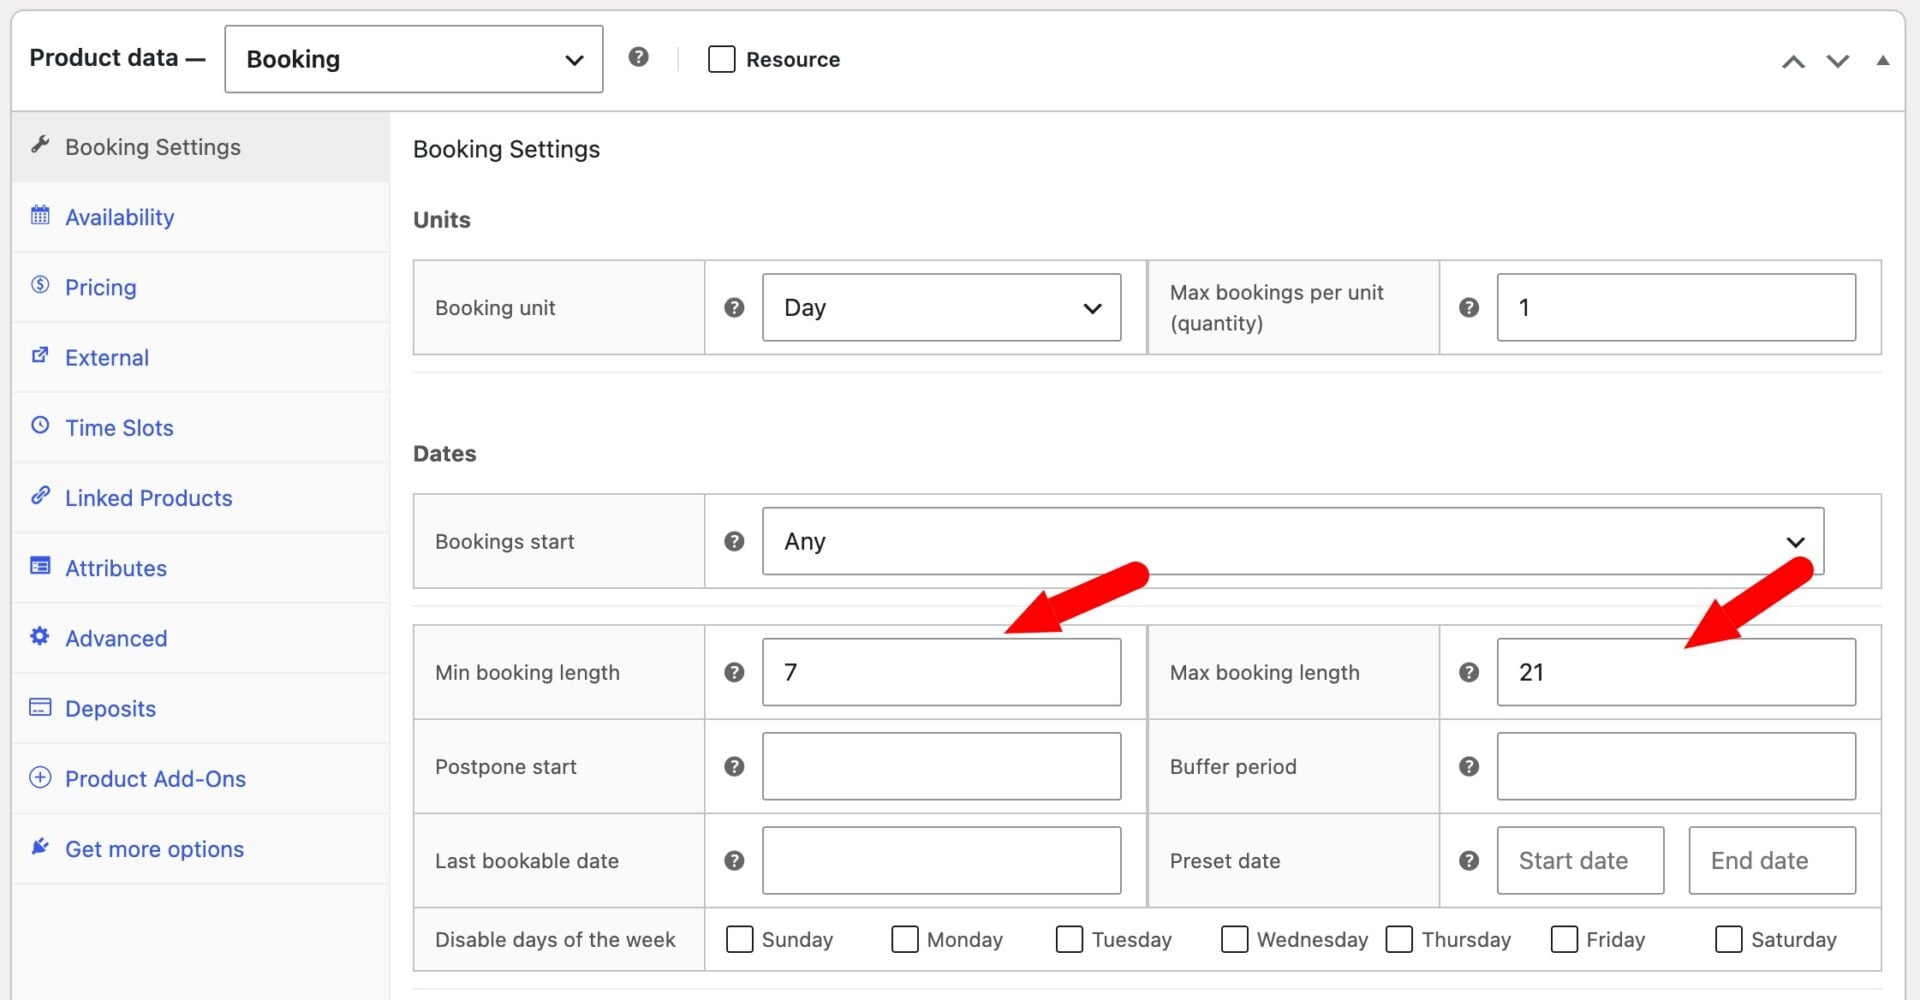
There are some optional date settings too. Use ‘Bookings start’ to make every booking start on a particular day of the week, ‘Last bookable date’ to stop bookings beyond a certain date and ‘Disable days of the week’ to block specific days.
Step #5: Set the price
In the ‘Prices’ section, enter 150 in the ‘Standard price’ field. This is the price per booking unit, so a 7-day booking costs $1,050.
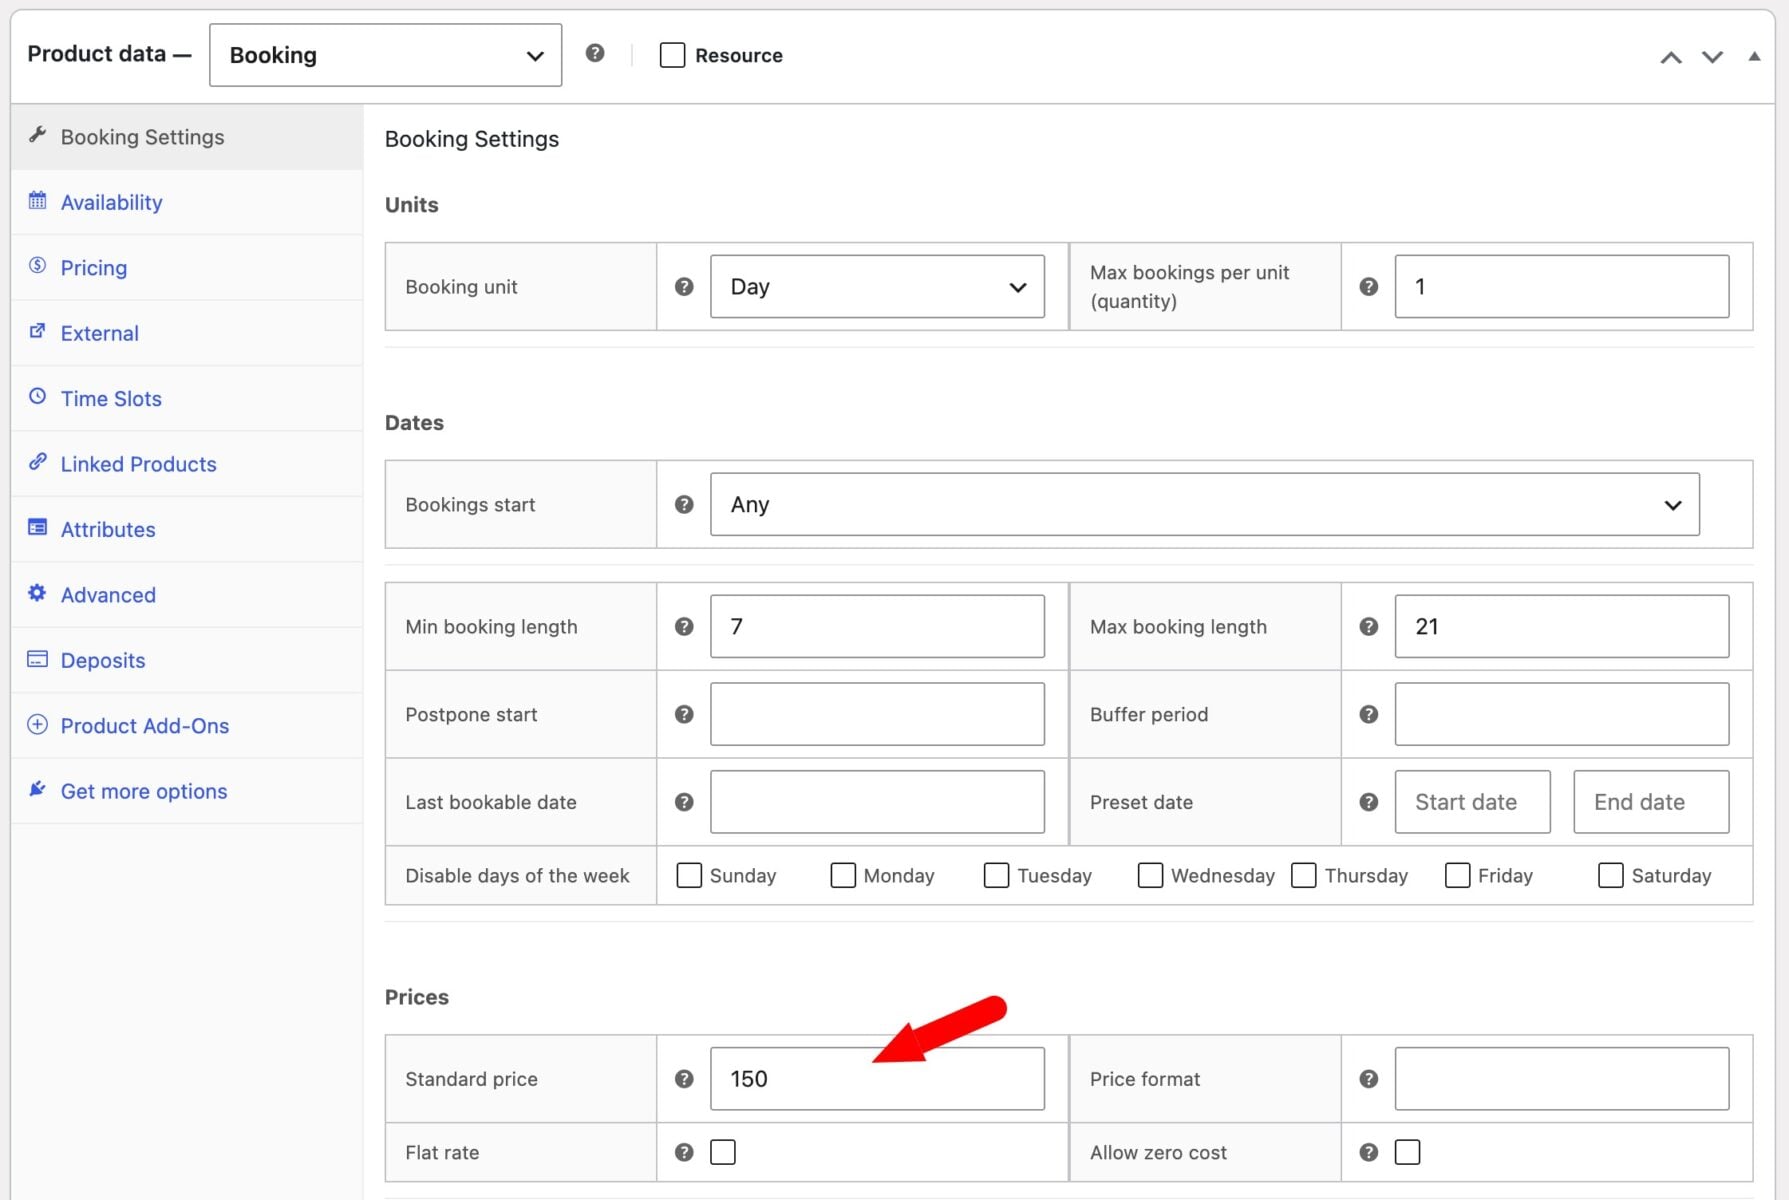
You can override the standard price for specific dates, such as peak season, on the ‘Pricing’ tab. You can also add discounts for longer bookings there.
Publish your product. You now have a bookable villa where customers can pick their start and end dates from a calendar and see the cost calculated automatically.
If you need time-based bookings rather than daily ones, you can set up time slots instead. Deposits work in exactly the same way. Now let’s add the deposit.
How do you set up deposits for your bookings?
Once you’ve got your bookable product set up, you can set up deposits.
The deposit settings live in two places: global settings for the whole store and a ‘Deposits’ tab on each product.

This single WooCommerce extension for accepting deposits and partial payments is pretty perfect.
Step #6: Choose which products accept deposits
Go to WooCommerce > Settings > Deposits and choose an option in the ‘Accept Deposits?’ field:
- Some Products: only products you’ve enabled individually will accept deposits
- All Products: every product in your store will accept deposits
- Entire Order: the deposit applies to the whole order at checkout, not to individual products
Step #7: Set the deposit type and amount
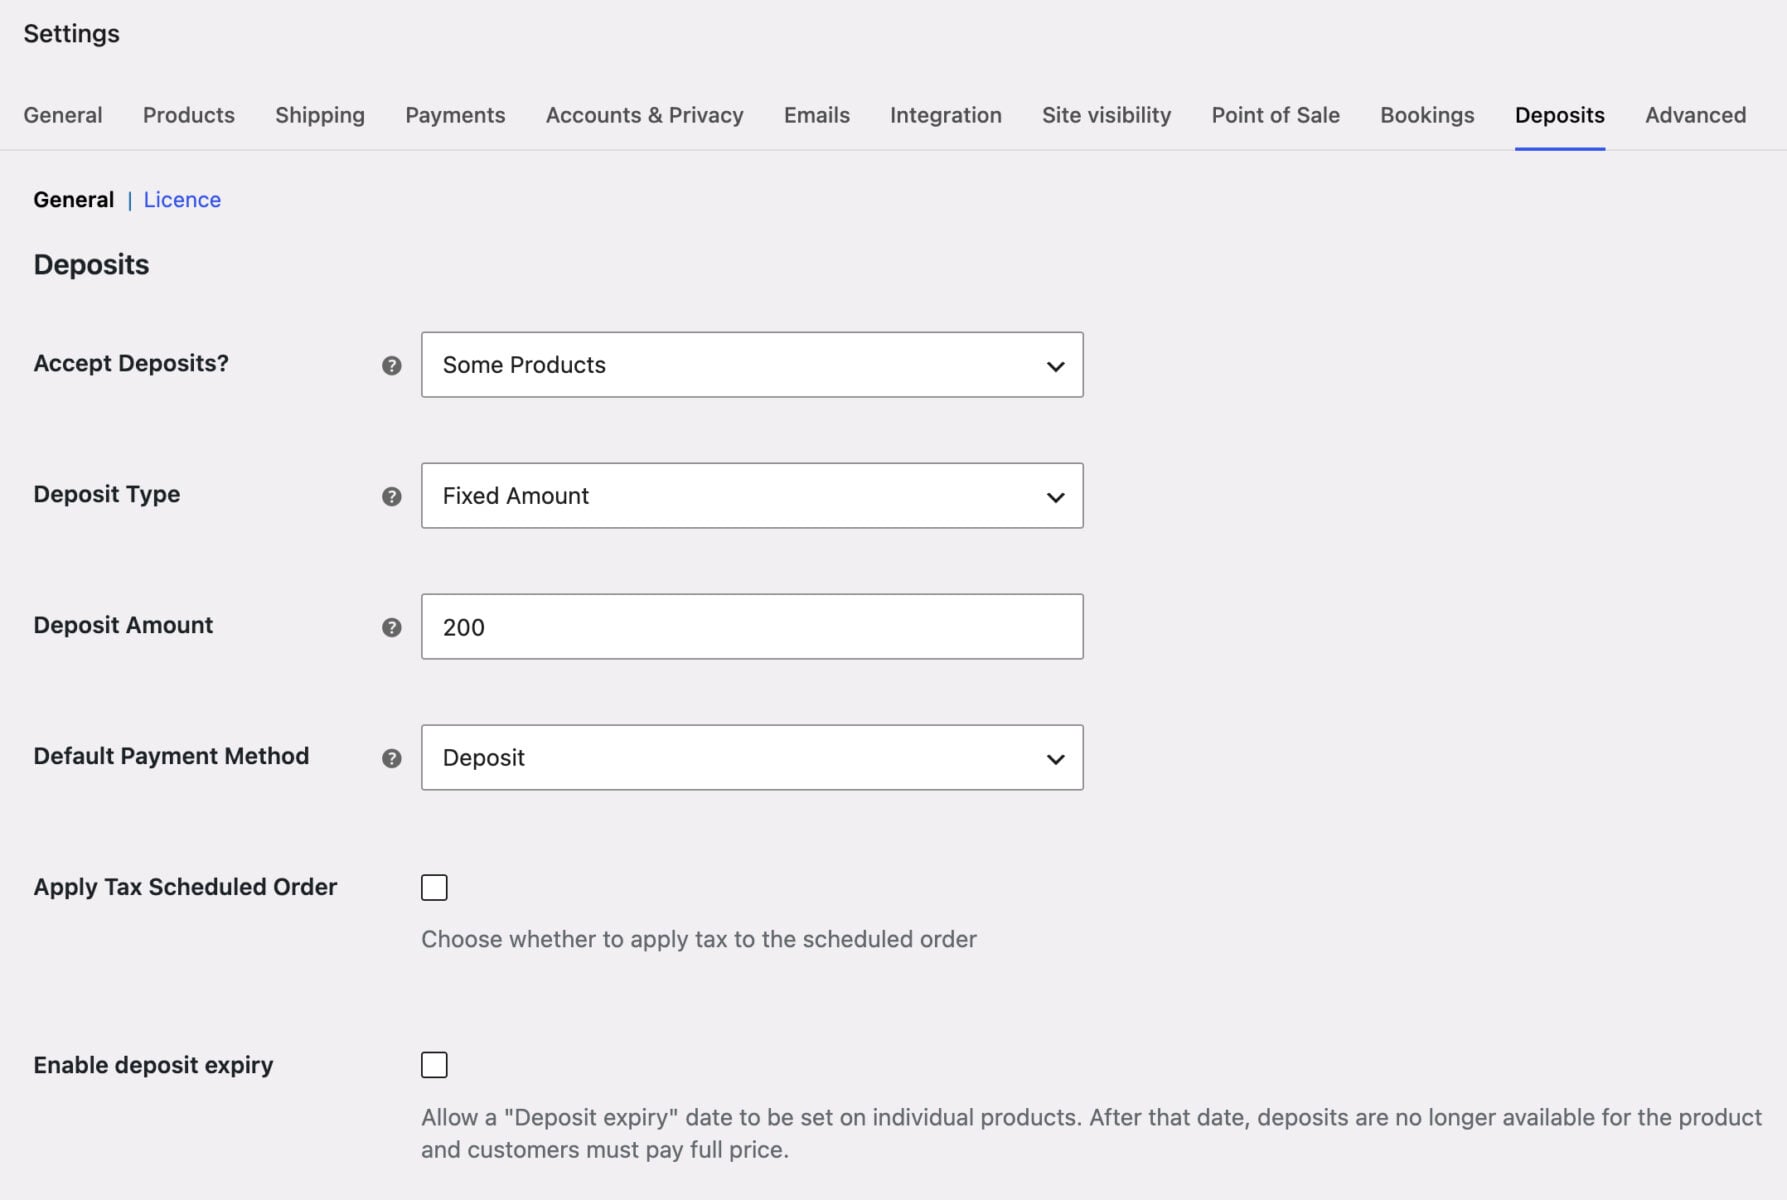
Choose a deposit type in the ‘Deposit Type’ field, then enter a value in the ‘Deposit Amount’ field.
Option #1: Take a fixed deposit. Select the fixed amount option and enter 200. Every booking will take a $200 deposit, whatever its length.
Option #2: Take a percentage deposit. Select ‘Percentage’ and enter a value, for example 20. A 7-day booking at $1,050 would take a $210 deposit, while a 21-day booking would take $630.
Step #8: Choose the default payment method
Select an option in the ‘Default Payment Method’ field:
- Deposit: the deposit is selected by default, but customers can switch to paying in full
- Pay In Full: paying in full is selected by default, but customers can switch to the deposit
- Deposit Only: customers have no choice and are always charged the deposit at checkout
- Custom Amount: customers enter their own amount to pay now, within minimum and maximum limits you set
Choose your preferred option then save your settings. Customers will now see the deposit as the default option, with paying in full as an alternative.
Step #9: Enable deposits on your bookable product
If you’ve chosen ‘Some Products’ in the ‘Accept Deposits’ field, you need to edit your villa product and click the ‘Deposits’ tab in the ‘Product data’ section:
- Check the ‘Enable deposits’ option
- Optionally, enter a value in ‘Deposit amount’ to override the global amount for this product. The deposit type isn’t overridden, so this is a fixed amount or a percentage depending on your global setting
- Optionally, set a ‘Remaining balance due date’ for the outstanding balance
- Optionally, set a ‘Reminder date’ to email the customer before the balance is due
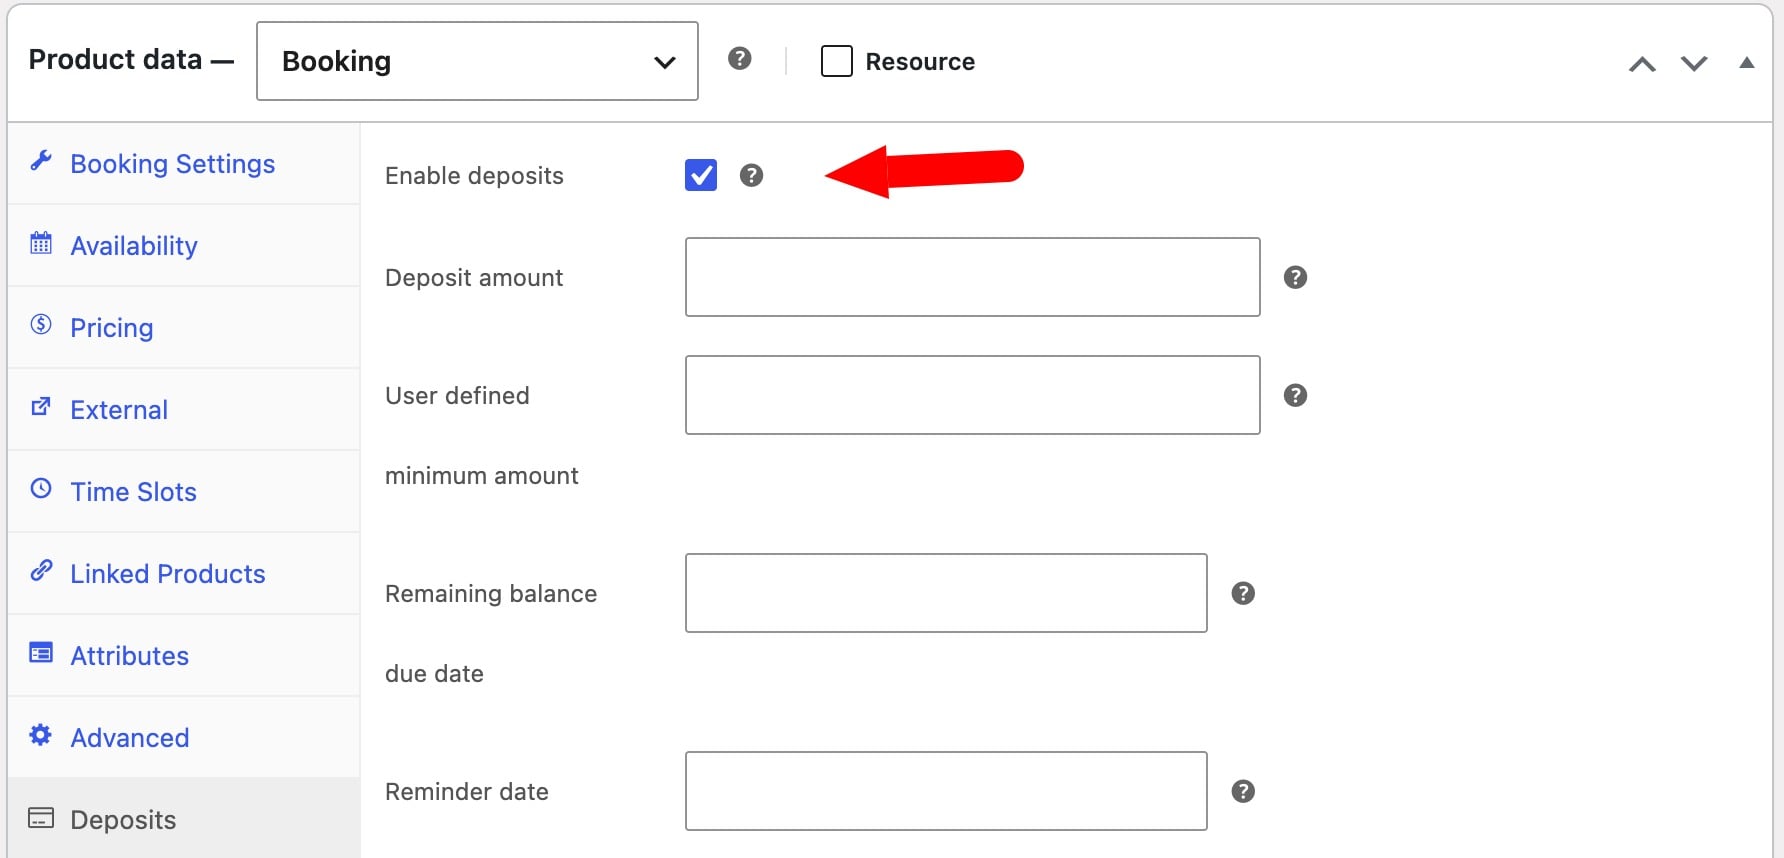
Update your product. Your villa now takes a $200 deposit on every booking.
What happens when a customer books with a deposit?
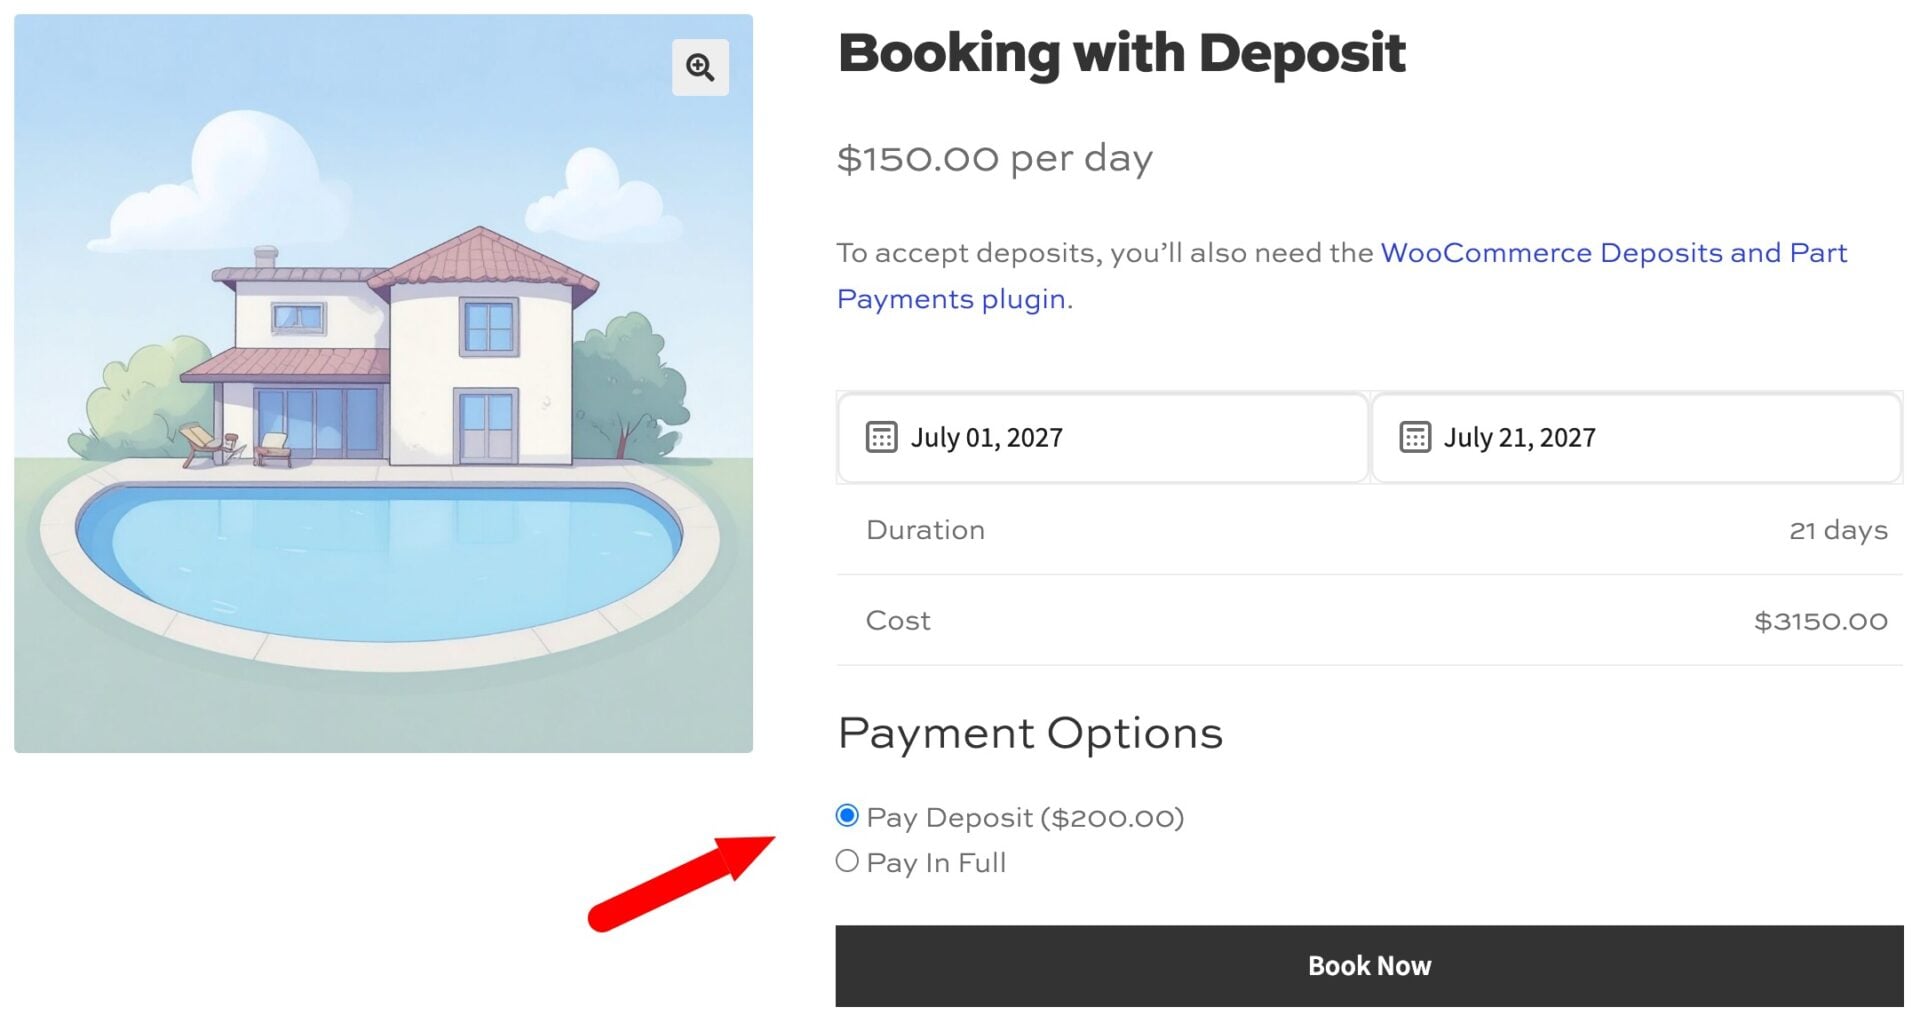
Customers choose their dates on the product page, then select ‘Pay Deposit’ or ‘Pay In Full’ under ‘Payment Options’. They check out through the normal WooCommerce process.
In the cart, the line item shows the booking dates and the deposit amount. The remaining balance is shown separately under the cart totals, so customers can see exactly what they’ll pay later.
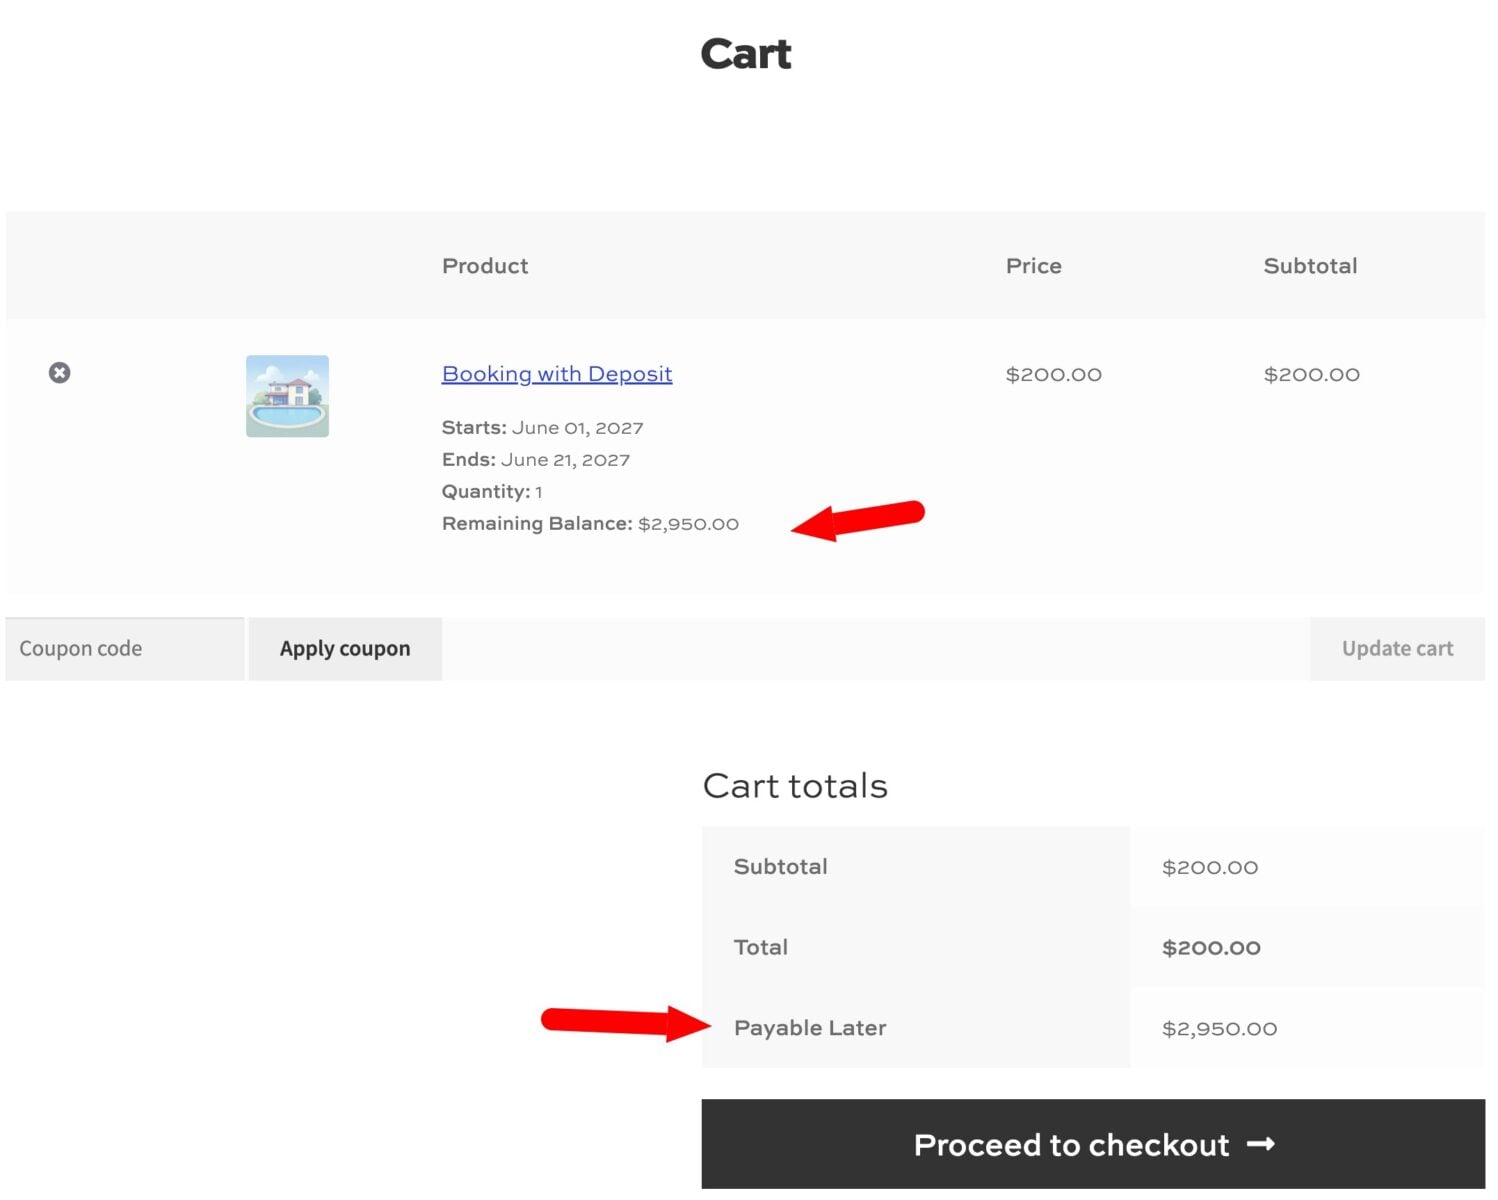
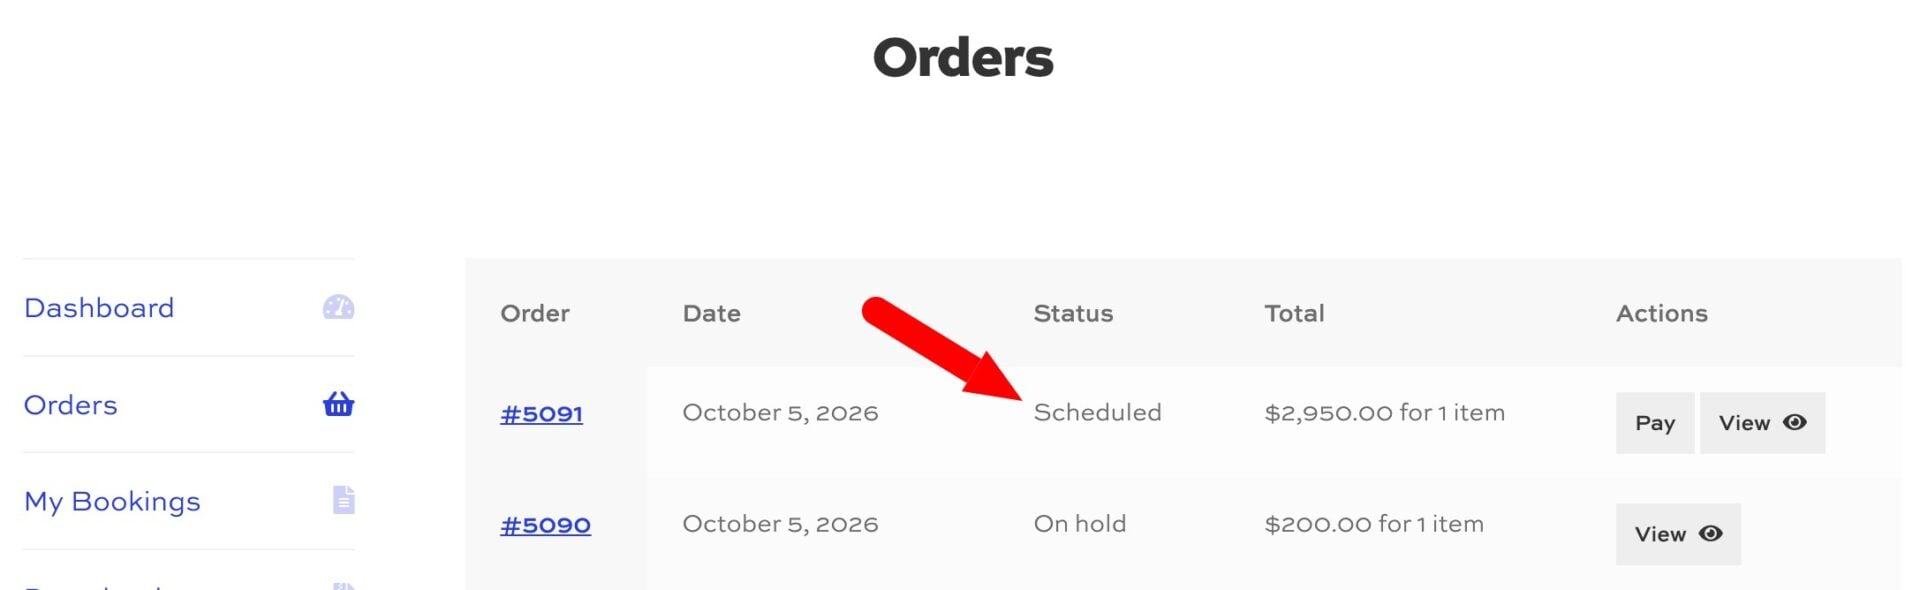
When the customer places the order, Bookings for WooCommerce blocks out their dates so other customers can’t book them. Deposits and Part Payments creates two orders: one for the deposit, and a second order for the remaining balance with the status ‘Scheduled’.
Customers can pay the scheduled order at any time from the ‘Orders’ tab on their account page. There’s also a link to pay the remaining balance in their order confirmation email.
Now let’s look at some extra ways to manage the balance payment.
Bonus #1: Send reminders before the balance is due
Reminder emails help you collect the balance before your guests arrive. Go to WooCommerce > Settings > Deposits and scroll to the ‘Emails’ section:
- Check ‘Send Reminder Emails’ to email customers before their balance is due
- Enter a period in ‘Reminder Email’, for example 2 weeks before the due date
- Check ‘Scheduled Order Paid’ to get an email when a customer pays their balance
The global ‘Due Date’ setting only applies when deposits are set to ‘Entire Order’. For bookable products, set the ‘Remaining balance due date’ and ‘Reminder date’ on each product’s ‘Deposits’ tab, as in Step #9.
Bonus #2: Offer a discount for paying in full
A pay-in-full discount encourages customers to settle the whole booking upfront. In the ‘Pay In Full Discount’ section of the Deposits settings:
- Choose ‘Percentage’ or ‘Fixed’ in ‘Pay In Full Discount’
- Enter the discount value in ‘Pay In Full Discount Amount’
- Optionally, add text to ‘Pay In Full Discount Label’ so customers know a discount applies
Save your settings. Customers who choose to pay in full will now see the discount applied to their booking.
Bonus #3: Let customers pay the balance in installments
Customers can pay off their balance in smaller amounts if you enable part payments. In the ‘User Defined Options’ section of the Deposits settings:
- Check ‘Optional Part Payments’
- Enter a value in ‘Optional Part Payment Minimum Amount’ to set the smallest amount a customer can pay at a time
Each time a customer makes a part payment, a new scheduled order is created for whatever balance remains. When the balance reaches the minimum amount, the customer must pay it off in full.
Bonus #4: Stop offering deposits after a set date
You might want customers to pay in full for bookings close to the start of the season. Check ‘Enable deposit expiry’ in the Deposits settings, then pick a date in the ‘Deposit available until’ field on the product’s ‘Deposits’ tab.
Deposits remain available up to and including that date. From the next day, the deposit option is hidden and customers must pay the full price.
How do you manage bookings and balance payments?
Once your bookings are coming in, you’ll want to manage them from the back end.
- Manage orders: go to WooCommerce > Orders to see deposit orders and their scheduled balance orders
- View all bookings: go to Bookings > Dashboard to see occupancy, revenue, and upcoming bookings across every product
- View product availability: click the ‘Availability’ tab on any bookable product to see that product’s bookings on a calendar
- Add bookings manually: go to Bookings > Add Booking to create a booking for a phone or in-person enquiry
- Show bookings to customers: check ‘Enable My Bookings tab’ in WooCommerce > Settings > Bookings to add a ‘My Bookings’ tab to the customer’s account page
FAQs
Install Bookings for WooCommerce and WooCommerce Deposits and Part Payments, then create a bookable product. Go to WooCommerce > Settings > Deposits, set ‘Accept Deposits?’ to ‘Some Products’, and choose your deposit type and amount. Finally, check ‘Enable deposits’ on the product’s ‘Deposits’ tab. Customers can then pay a deposit at checkout and the balance later.
WooCommerce can’t take deposits by default. It charges the full price at checkout unless you add a plugin. WooCommerce Deposits and Part Payments adds deposits to individual products, all products, or the entire order. It works with bookable products from Bookings for WooCommerce, so you can take a deposit on any booking.
Go to WooCommerce > Settings > Deposits and check ‘Send Reminder Emails’. Enter a period in ‘Reminder Email’, for example 2 weeks, to email customers before their balance is due. For bookable products, set the ‘Remaining balance due date’ and ‘Reminder date’ on each product’s ‘Deposits’ tab. You can also check ‘Scheduled Order Paid’ to get an email when a customer pays their balance.
Yes. Check ‘Optional Part Payments’ in the Deposits settings and customers can pay off their balance in smaller amounts. Set ‘Optional Part Payment Minimum Amount’ to control the smallest payment they can make. A new scheduled order is created for the remaining balance after each part payment.
WooCommerce bookings deposit – recap
In this article, we looked at how to accept deposits on WooCommerce bookings. We created a bookable villa with Bookings for WooCommerce, then used WooCommerce Deposits and Part Payments to take a deposit and schedule the remaining balance.
We also looked at how to send balance reminders, offer a discount for paying in full, accept installments, and stop offering deposits after a set date. Bookings for WooCommerce handles your dates, prices, and availability, while WooCommerce Deposits and Part Payments handles the payments.
Both plugins are compatible with all themes and page builders, including Astra, Flatsome, and Storefront, and page builders like Elementor and Divi. If you have any questions, our world-class support team is on hand to help. And they’re backed by a 14-day money-back guarantee, so you can try them risk-free.