How to add a file upload to a WooCommerce product

If you would like to give your customers the option of a file upload on your WooCommerce product pages, you’ll need to use an extra plugin.
The WooCommerce Product Add-Ons Ultimate plugin will allow you to add a file upload field to your WooCommerce product page. Customers will be able to easily upload any kind of file you specify.

WooCommerce Product Add-Ons Ultimate
Easily add a file upload field to your WooCommerce product pages
File uploads for your WooCommerce customers
The standard WooCommerce product page features a product image, name, price, description, and add to cart button. Using Add-Ons Ultimate, you can add a slick file uploader.
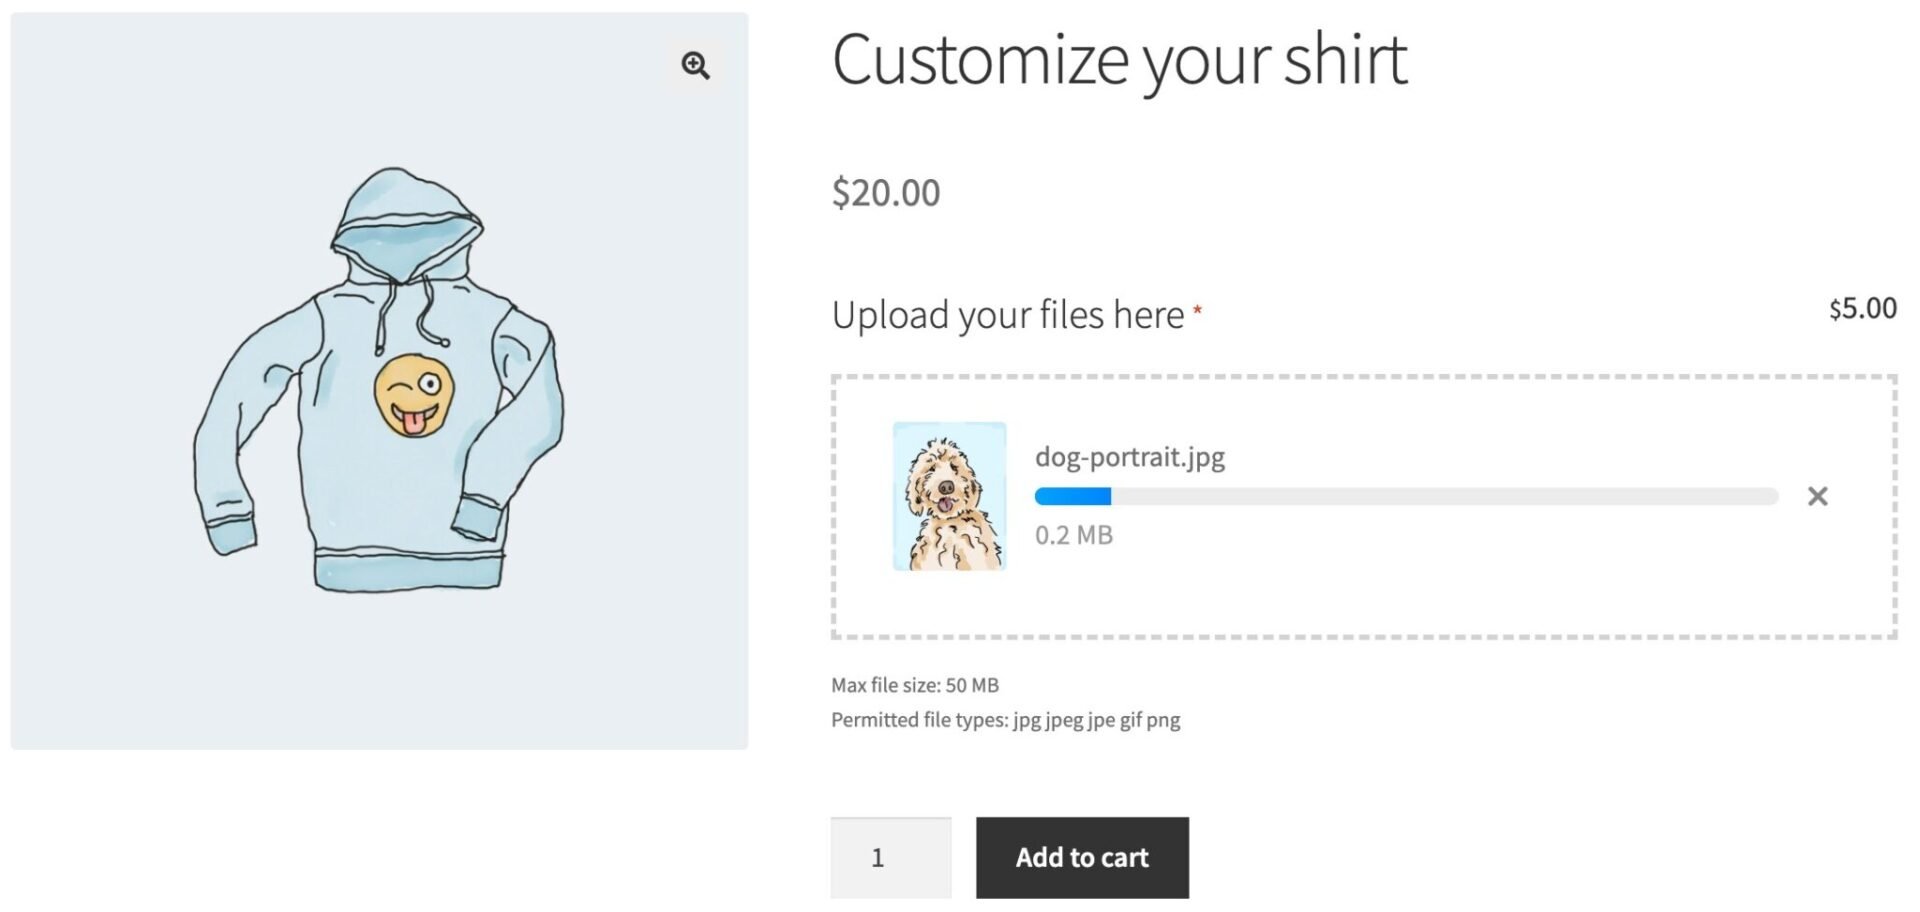
You can decide whether to make the field ‘required’ – meaning that users must upload one or more files. You can also a price so that the overall product price increases when users upload files.
In this article, we’ll cover:
- Setting prices by the number of files uploaded
- Defining a maximum number of files
- Creating upload fields per product or for multiple products
- Defining file types and maximum file size
- Organizing and managing uploads
- And much more…
See this article if you want to find out how to create a file approval process in WooCommerce so that your users can approve edits you make to their files.
How to add a WooCommerce file upload to a product page
It’s easy to add a file upload to a WooCommerce product page:
- Install and activate WooCommerce Product Add-Ons Ultimate
- Edit the product where you want to add the file upload
- Click on the ‘Product Add-Ons’ tab in the ‘Product data’ section
- Click ‘Add Group’ then ‘Add Field’
- Choose ‘Upload’ as the ‘Field Type’
- Update your product and view it on the front end
Let’s take a look at this process in more detail.
Step #1: Install and activate Product Add-Ons Ultimate
After you purchase your copy of Product Add-Ons Ultimate:
- Download the zip file using the link in your welcome email or from your Account page
- Go to Plugins > Add New in your WordPress dashboard
- Click on the ‘Upload Plugin’ button
- Drag and drop the zip file into the ‘Choose File’ area and click ‘Install Now’.
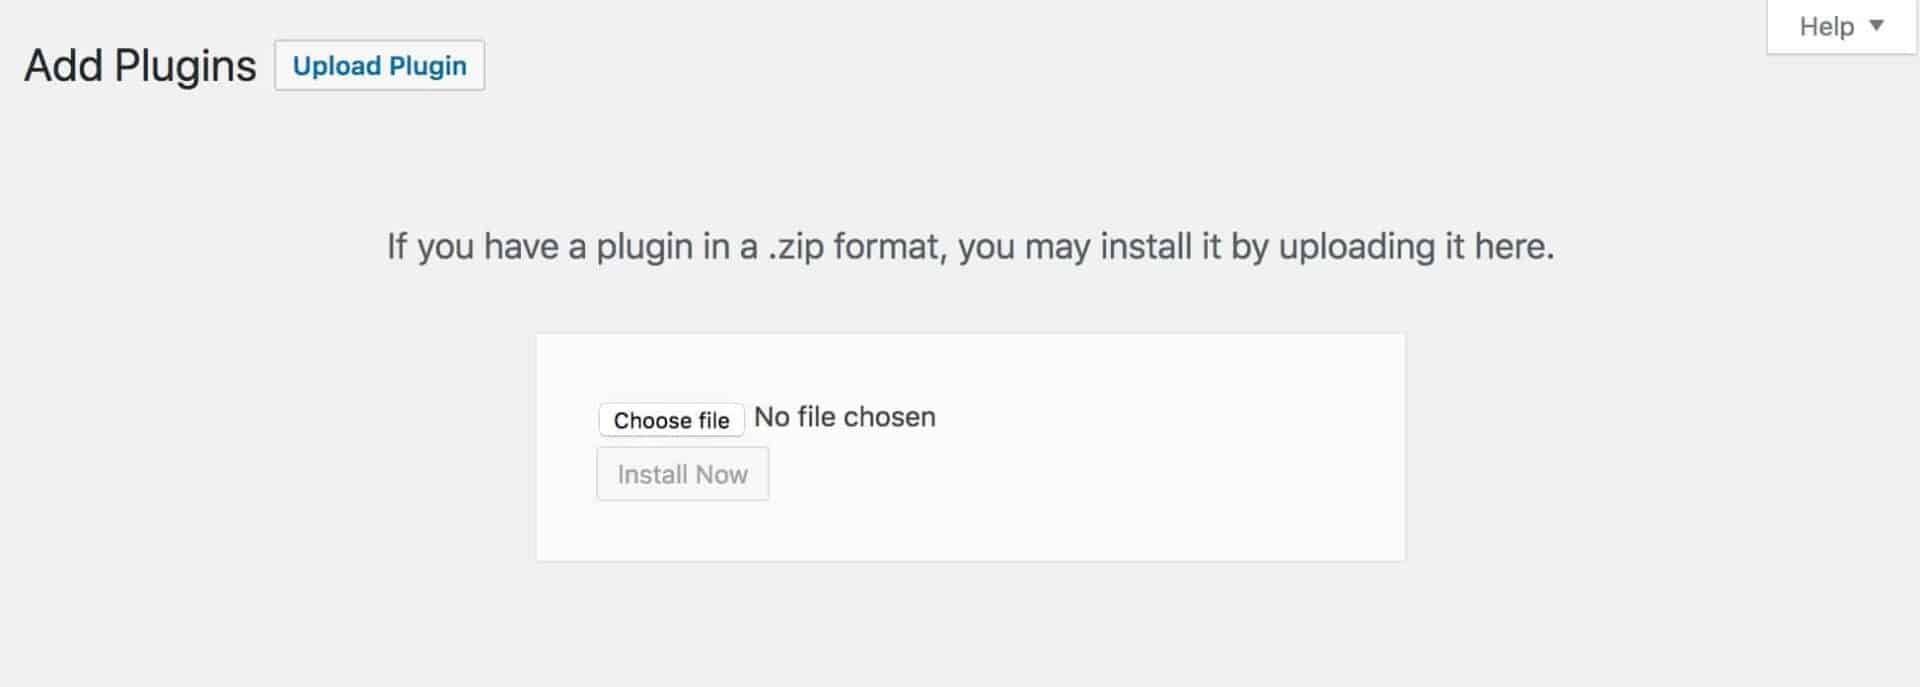
Once the plugin has been installed, you can activate it straightaway.
Step #2: Add the file upload field to your product
You can add file upload fields to specific products or globally to multiple products.
To add your file upload field to a specific WooCommerce product:
- Edit the product where you’d like to add the field
- Click on the ‘Product Add-Ons’ tab in the ‘Product data’ section
- Click ‘Add Group’ then ‘Add Field’
- Select ‘Upload’ as the ‘Field Type’
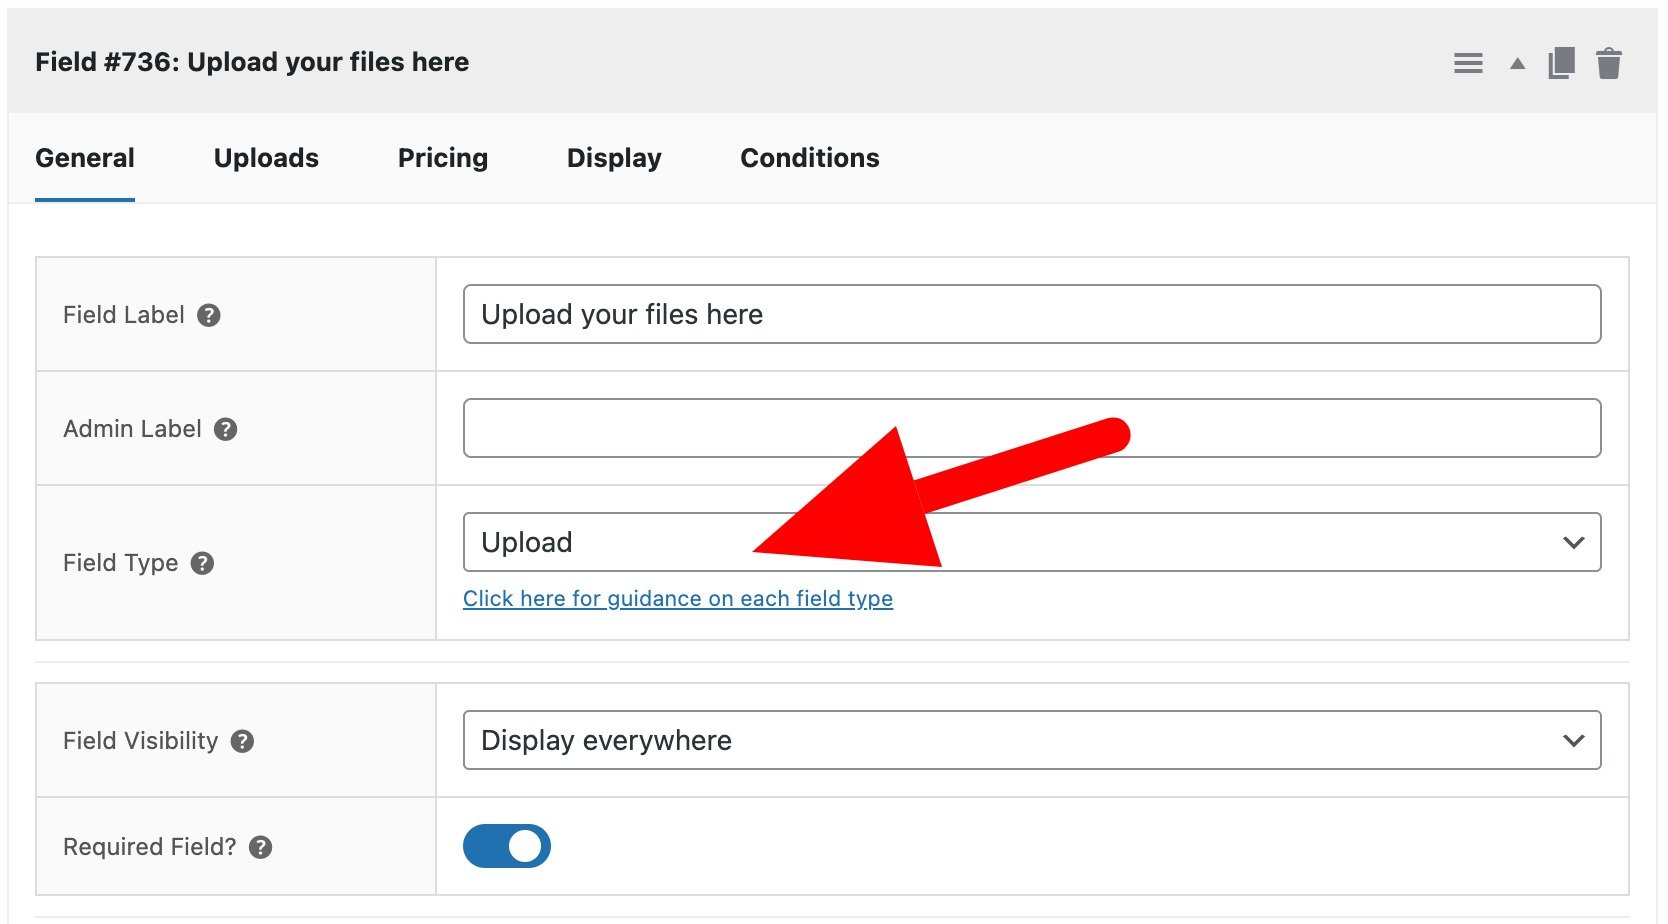
You can update the other settings as follows:
- Field Label – enter a label that will appear on the product page
- Field Visibility – leave this at ‘Display everywhere’ to ensure the file upload field is always available to the user
- Required Field – enable this to ensure that the user must upload a file before adding the product to their cart
Switch to the ‘Uploads’ tab for some more options.
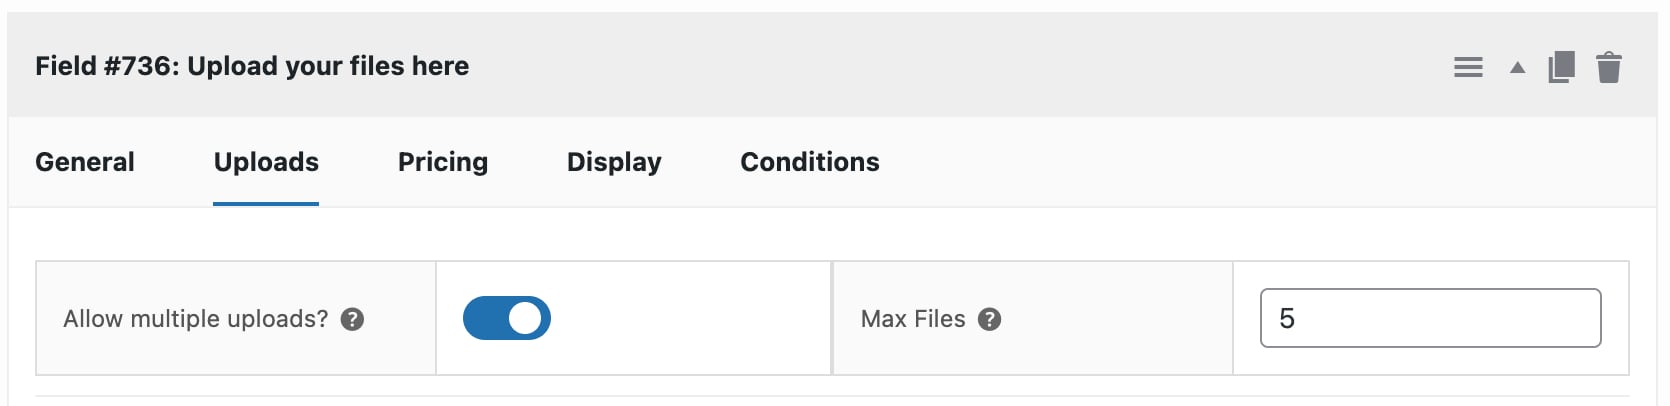
- Allow multiple uploads – enable this to allow the user to upload more than one file to the same upload field
- Max Files – define the maximum number of files that the user can upload to the same field
Step #3: Define pricing for your file upload field
If you want to charge your customers for uploading files, switch to the ‘Pricing’ tab.
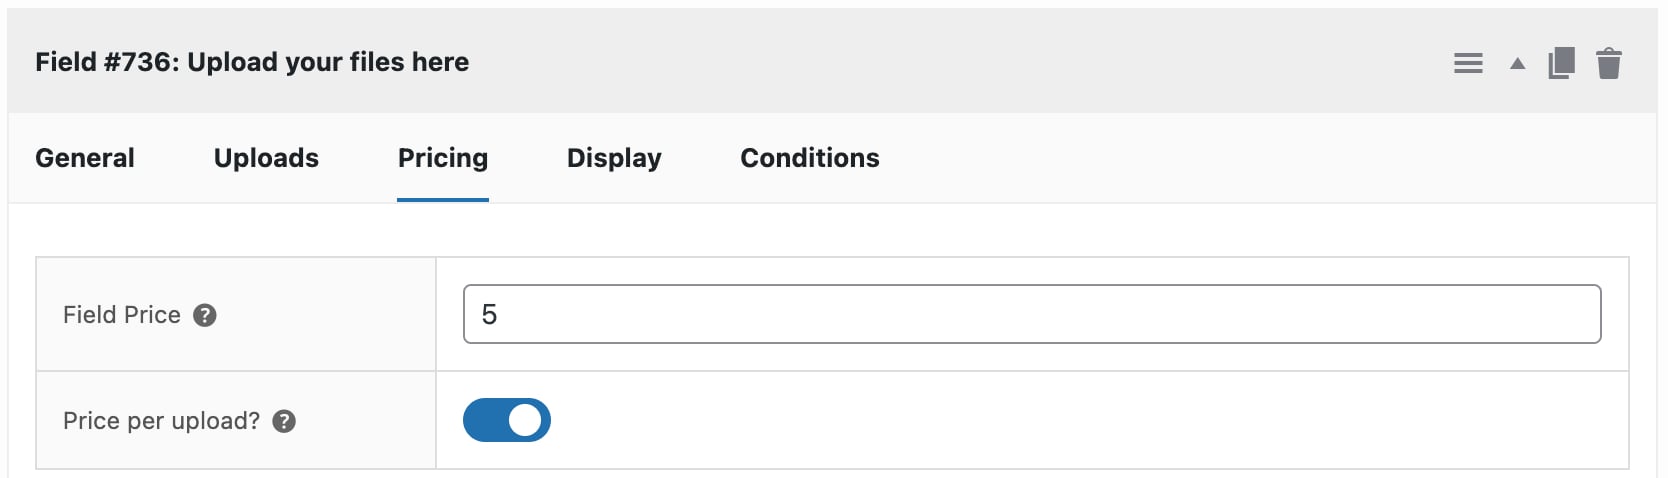
- Field Price – enter an amount here to charge the user when they upload a file
- Price per upload – enable this option to charge the user the amount set in ‘Field Price’ for every file they upload. You’ll need the ‘Allow multiple uploads’ option enabled
Step #3b: Optionally create global file upload fields
If you prefer, you can create your file upload fields in a single location and apply them to multiple products. This makes it much easier to manage if you want to add the same field with the same settings to lots of different products.
To create a global file upload field:
- Go to Product Add-Ons > Global Groups and click the ‘Add New Group’ button
- Click ‘Add Field’ and follow the steps above
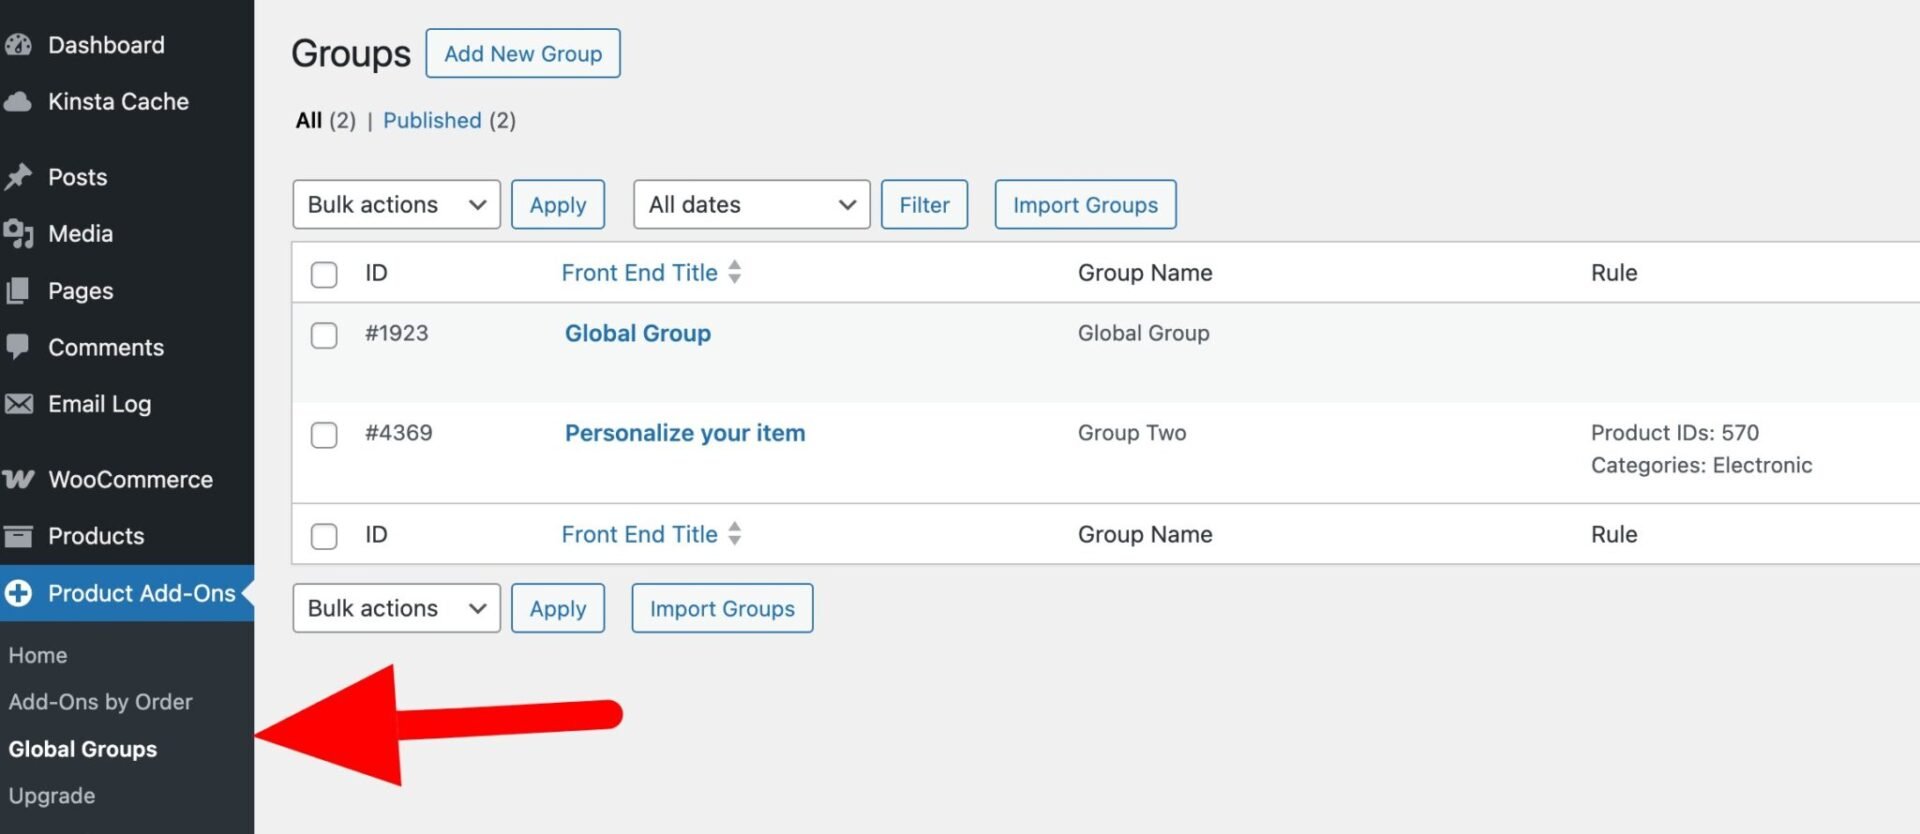
When you’ve created your file upload field you can decide where to display it. Select an option in ‘Applies To’ to display the group on all products, specific products, or specific categories.

Step #4: Define file types, maximum upload size and other settings
As well as defining settings for each upload field you add, you can define some global for things like permitted file types, maximum upload size, and so on. Go to WooCommerce > Settings > Product Add-Ons > Uploads to set the following:
- Maximum file size – enter a value a maximum file size in MB for customer file uploads
- Enable PDF uploads – select this option to allow the user to attach PDFs to the product page
- Enable AJAX uploader – disable this option to replace the drag and drop uploader with a standard file input field
- Retain upload graphic – enable this option to keep the upload icon visible on the upload field even after the user has uploaded a file. This lets the user know that they can upload further files
- Disable Add to Cart button – enable this option to prevent the user from trying to add the product to their cart while files are still being uploaded
- Attach uploads to emails – enable this option to attach uploaded files to customer and admin order emails
- File types – select which file types to permit the user to upload
Manage uploaded files
Let’s have a look at some options for managing your file uploads to WooCommerce products.
Rename files on upload
You may prefer to name uploaded files according to a specific convention – e.g. you want to include the date and time they were uploaded. You can do this by using tags, listed below. Just enter them in the ‘Rename uploads’ setting.

You can include any of the following tags:
{original_file_name}{order_number}{group_id}{field_id}{date}{product_id}{product_sku}
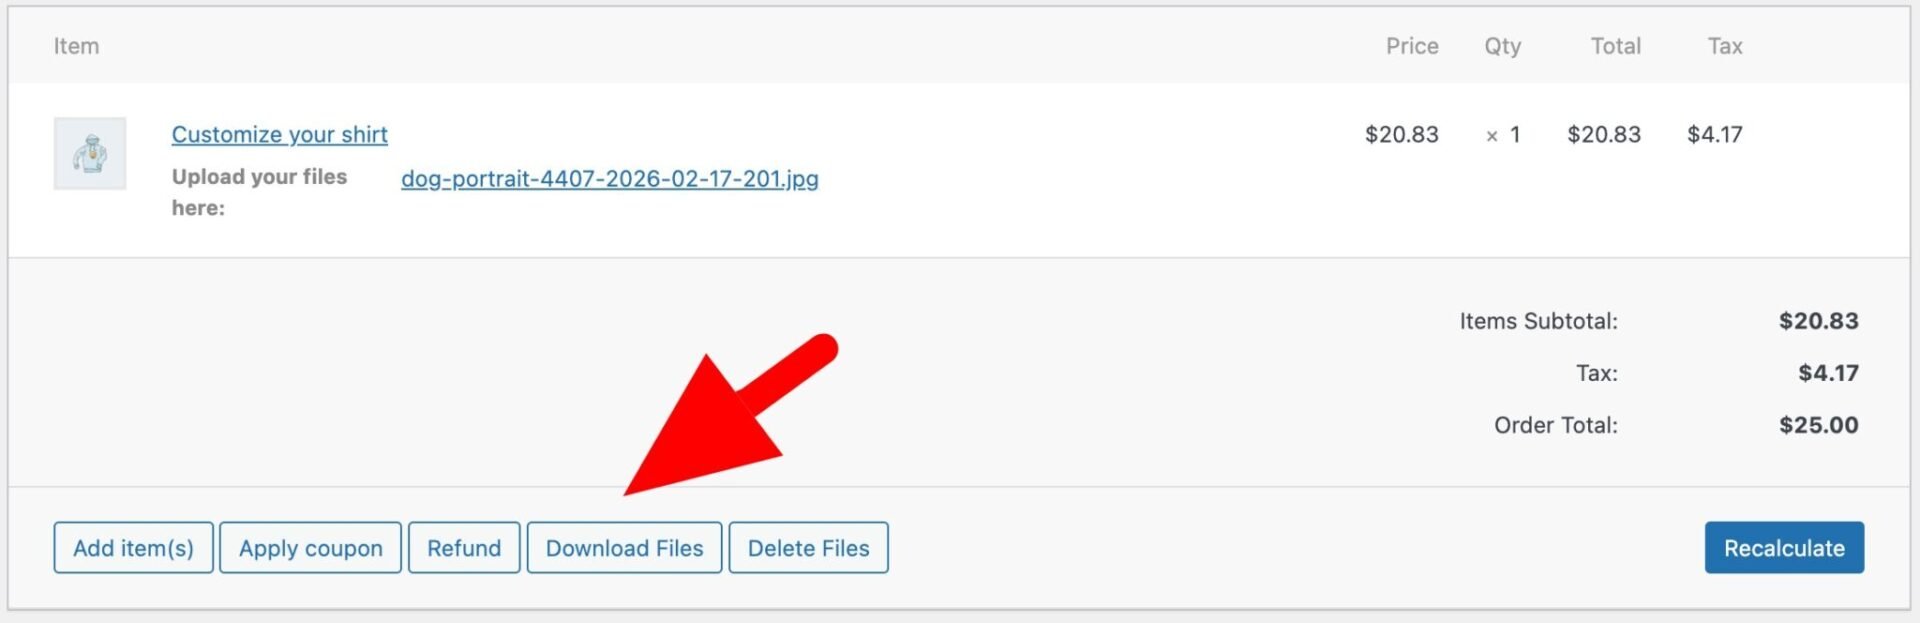
Organize files by order
By default, any files uploaded by the customer to your product page will be saved to a directory that is unique to the customer. If you would prefer to organize uploaded files according to order, just enable the ‘Organize uploads by order’ setting.
When you enable this setting, all files uploaded to an order will be available as a single zip file from the order screen.
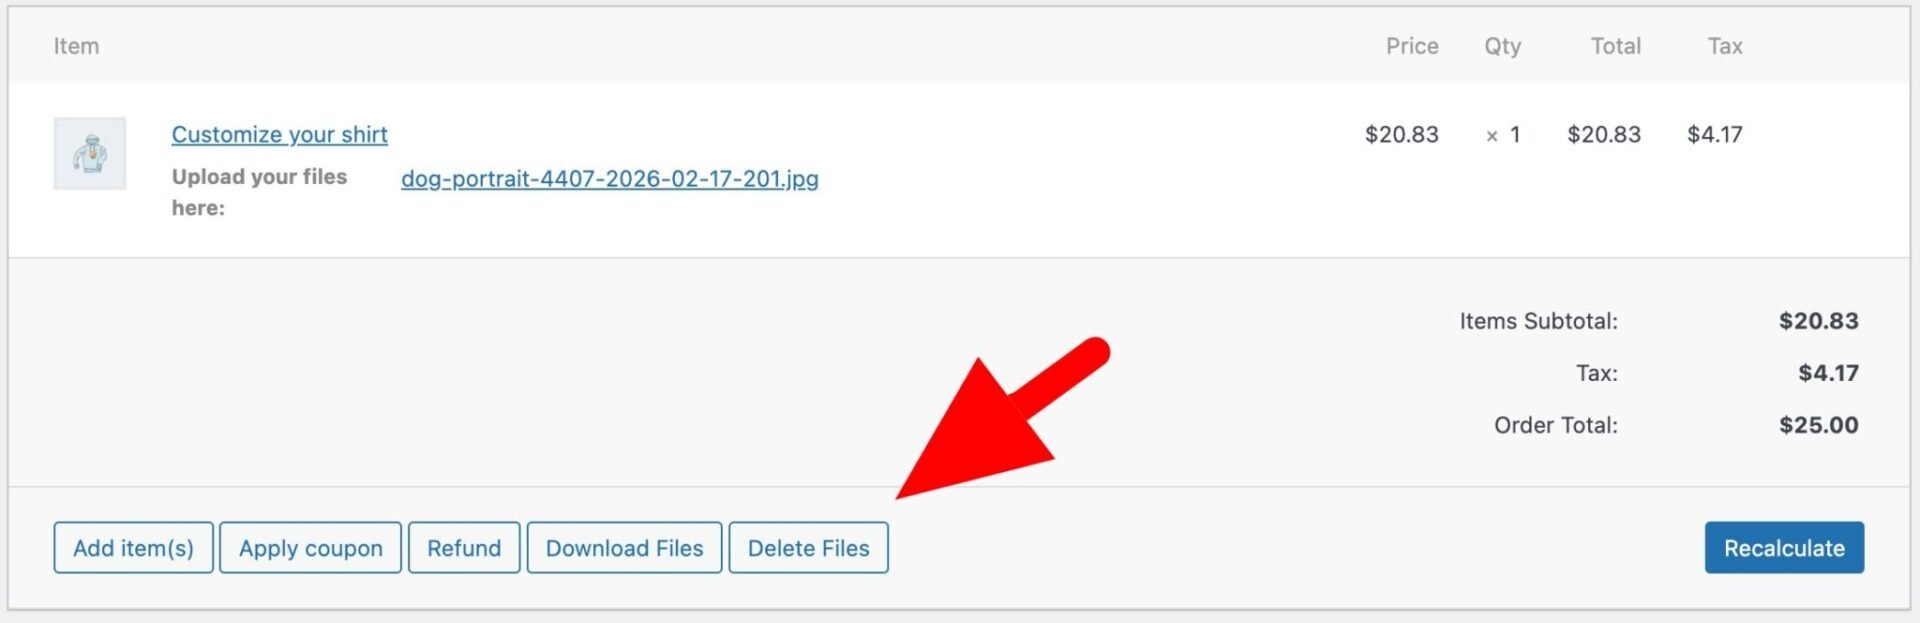
Delete unwanted files
Customer file uploads can quickly consume a lot of server space. Once you’ve downloaded a zip file, you can delete those files by clicking the ‘Delete Files’ button.
You can also bulk delete uploaded files:
- Go to Product Add-Ons > Clean Up Files
- Choose ‘Delete uploaded files from Completed orders’ to delete all images uploaded to orders that have been marked ‘Complete’
- Alternatively, select a date and delete all images uploaded before that date
WooCommerce product file uploads – recap
Hopefully this article has shown how easy it is to add configurable file uploads to your product page. You just need the WooCommerce Product Add-Ons Ultimate plugin to allow your users to upload any kind of file you specify. It’s ideal for an online print shop or any WooCommerce store that needs to allow users to upload images to product pages.
WooCommerce Product Add-Ons Ultimate
Easily add a file upload field to your WooCommerce product pages
All our plugins are backed by a 14 day money back guarantee – so you can purchase risk-free. They’re compatible with all themes and page builders – and backed by a world-class support team ready to answer any questions you might have.