Bookings for WooCommerce allows store administrators to create and modify bookings directly from the WordPress dashboard without the customer going through the front-end checkout. This is useful for phone or in-person enquiries, correcting booking dates after the fact, or managing capacity manually.
Adding a booking manually
Step #1: Create a new order
The recommended approach for a manual booking is to start by creating a WooCommerce order. This ensures the booking is properly linked to a customer record and that payment can be collected in the normal way.
- Go to WooCommerce > Orders in your WordPress admin.
- Click Add order.
- Complete the customer details, either search for an existing customer or fill in the billing information manually.
- Click Add item(s) and then Add product. Search for and select your bookable product.
- Set the quantity and adjust the price if needed.
- Click Save to create the order.
Once the order is saved, the booking details metabox will appear in the order. The booking itself is created separately – see below.
Step #2: Create the booking
- Go to Bookings > Add Booking in your WordPress admin.
- A product search field will appear in the booking details table. Use it to find and select the bookable product.
- Once a product is selected, the calendar will load showing availability for that product.
- Enter the start date and, if applicable, the end date using the date pickers. Unavailable dates will be greyed out.
- Set the quantity (number of bookings) if the product allows more than one booking per date.
- Fill in any additional customer or booking details in the fields below the table.
- Click Publish to save the booking.
After publishing, the booking will appear in your Bookings list and its dates will be marked as booked in the calendar.
Linking the booking to an order
Once a booking has been published, you can link it to the order you created in Step 1. Open the booking and you will see an Order details section. Enter the order ID there to connect the two records. Alternatively, open the order and the booking reference will appear once the booking has been created with the matching order ID stored against it.
Adding a time slot booking manually
f your bookable product uses the Time Slots feature, you can create a manual booking directly from the product itself.
- Go to Products in your WordPress admin and open the bookable product.
- Click the Availability tab on the product edit screen.
- A calendar will appear showing availability for the product. Click the date you want to book.
- The time slots for that date will be displayed below the calendar, showing current availability for each slot.
- Find the slot you want and click Add booking.
- The booking will be created and will appear in your Bookings list.
Editing an existing booking
To modify a booking that has already been made, whether placed by a customer or created manually:
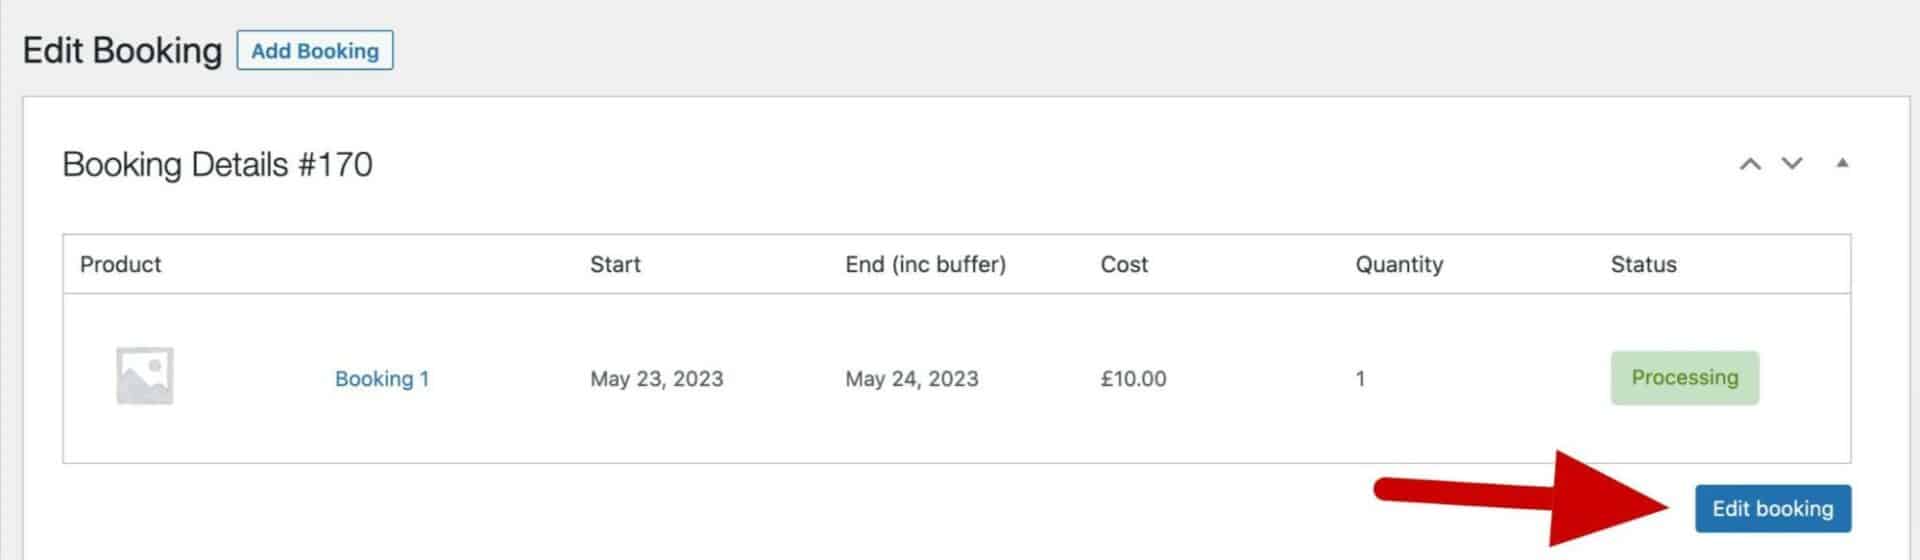
- Go to Bookings in your WordPress admin.
- Find the booking you want to edit and click on its title to open it.
- Click the Edit booking button in the booking details table.
- The date fields and quantity field will become editable.
- Update the start date, end date, and/or quantity as needed.
- Click Update to save the changes.
The button is only available if the booking has a status of Pending or On hold. Confirmed and cancelled bookings cannot be edited this way — you would need to cancel the booking and create a new one.
Note: Editing a booking does not automatically update the associated WooCommerce order, adjust pricing, or re-send confirmation emails. If you need to reflect a price change, update the order manually in WooCommerce > Orders.
Cancelling a booking
To cancel a booking, open it and change the Status to Cancelled using the status selector. This will free up the dates so they become available again for other customers to book.
If the booking came from an order and that order is cancelled in WooCommerce, the booking will be cancelled automatically and the dates will be restored.