This article walks through how to let users upload multiple images to a single upload field for printing and specify how many of each print they require. The user can upload multiple files and enter a quantity against each one. There’s a working demo product here.
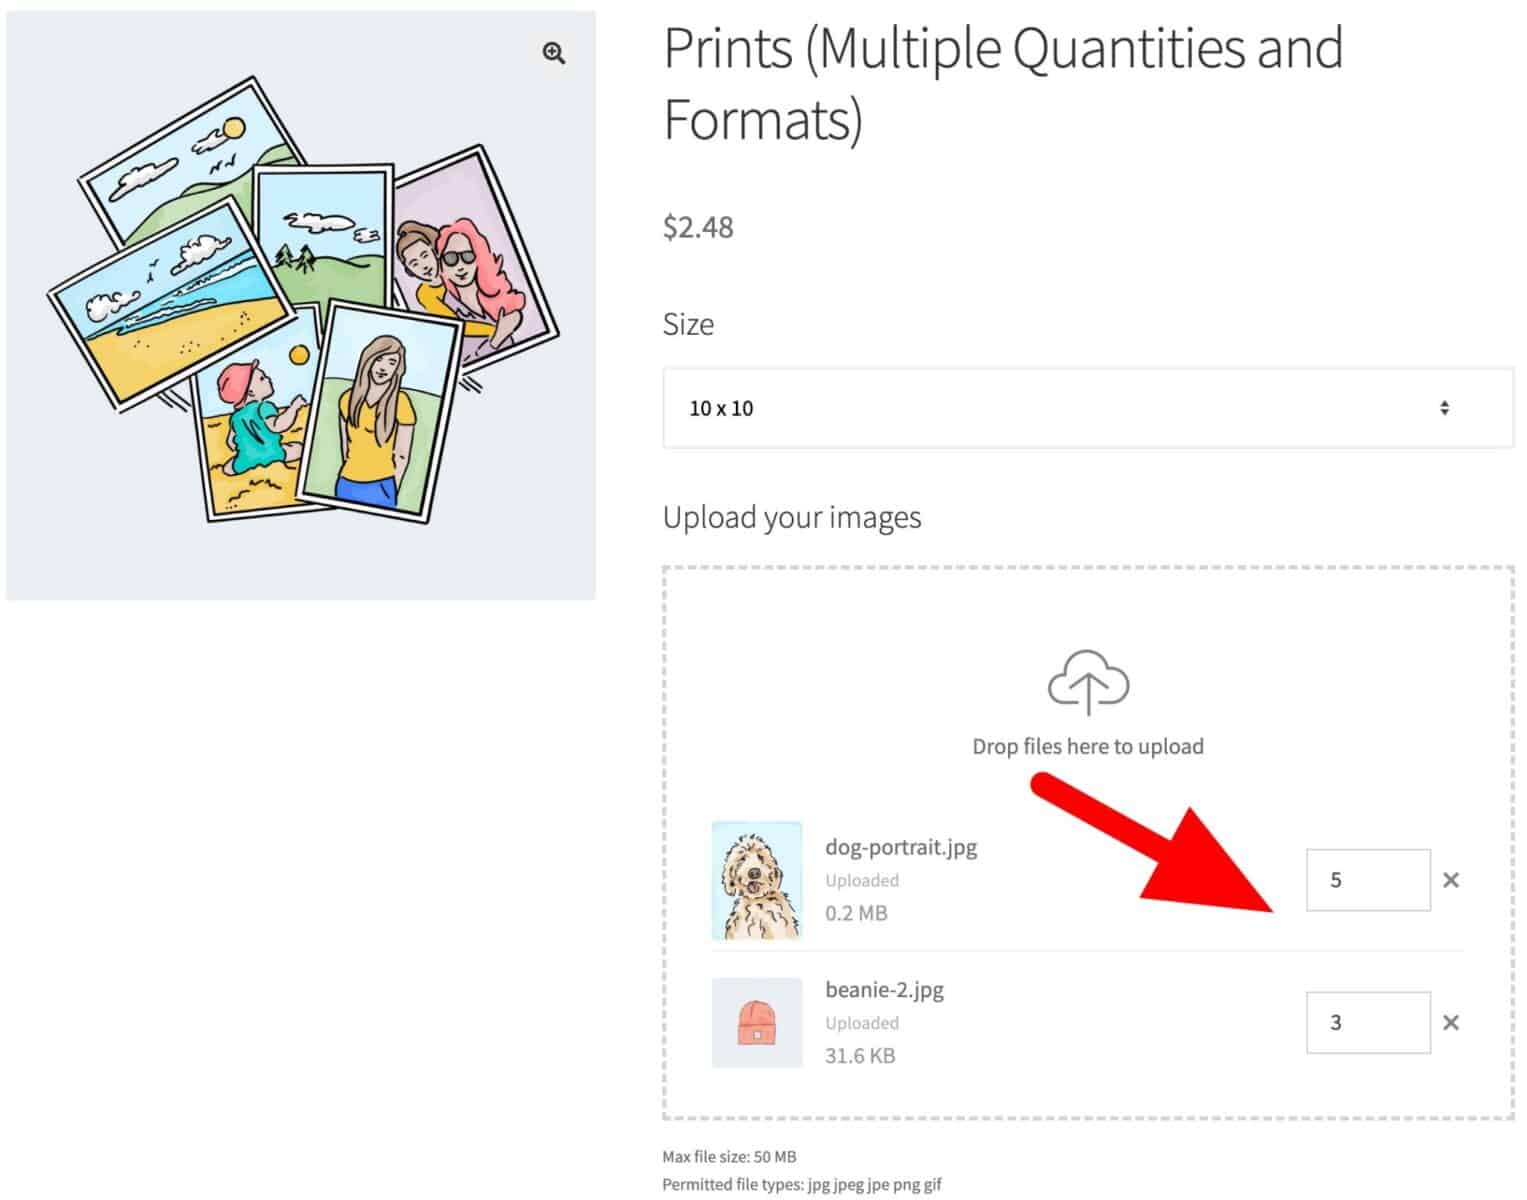
There’s also a pricing table which shows the price per print based on the total quantity of prints ordered. This table can change based on the size of print selected. For example, if the user wants prints at 10 x 10 they’ll be cheaper than prints at 20 x 20.
Let’s take a look at how to set this up. You’ll need Product Add-Ons Ultimate, Advanced Uploads and Advanced Calculations. These are available as part of the Product Add-Ons Ultimate Bundle.
Adding quantity fields per upload
For this feature, you’ll need the WooCommerce Product Add-Ons Ultimate plugin and the Advanced Uploads extension.
The first task is to create a ‘Number’ field that will store the combined quantity of prints.
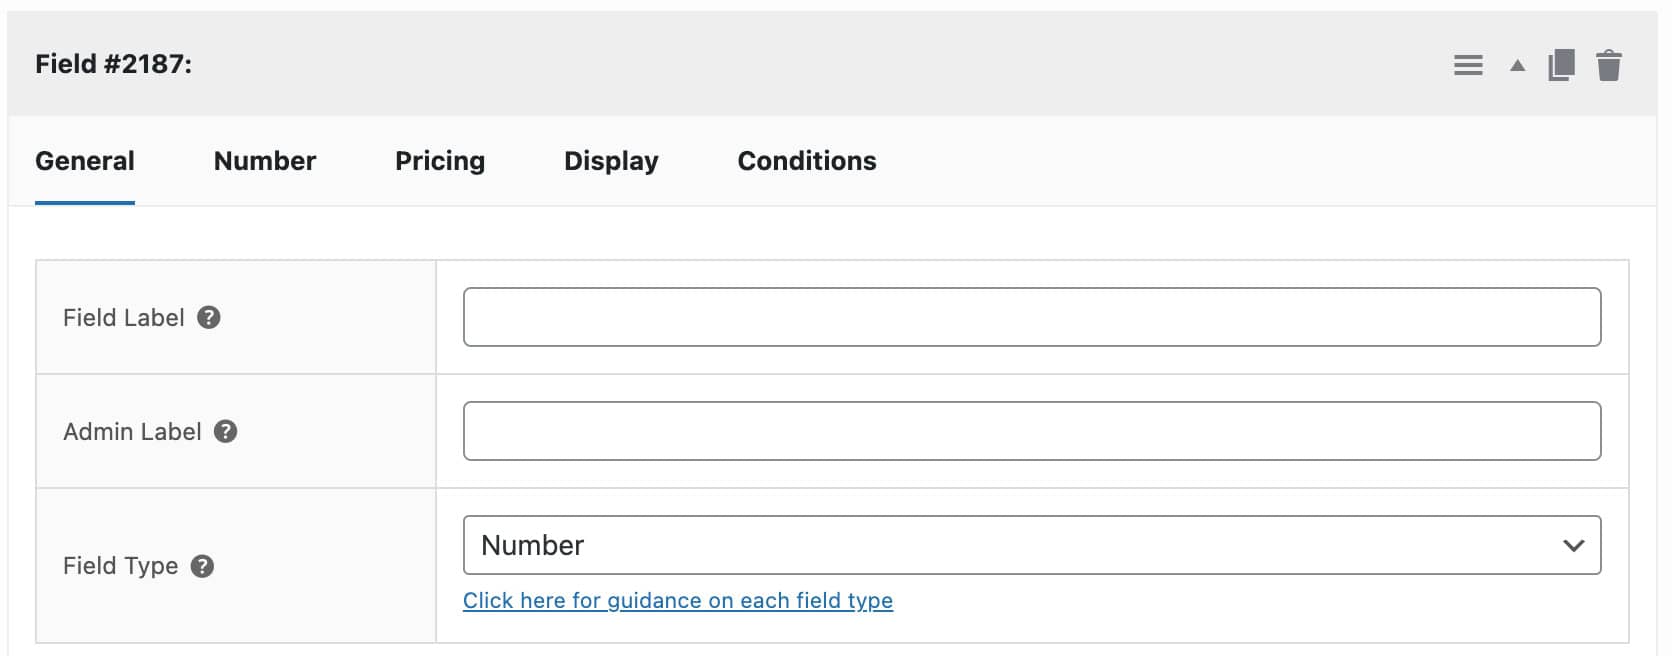
You don’t need to give the field a label, just set the ‘Field Type’ to ‘Number’ and make a note of the ID number. Note that the plugin will automatically hide this field on the front end, so you may not see it on the product page.
Next, create a new upload field. With the Advanced Uploads extension installed, you’ll see some extra parameters in your upload field:
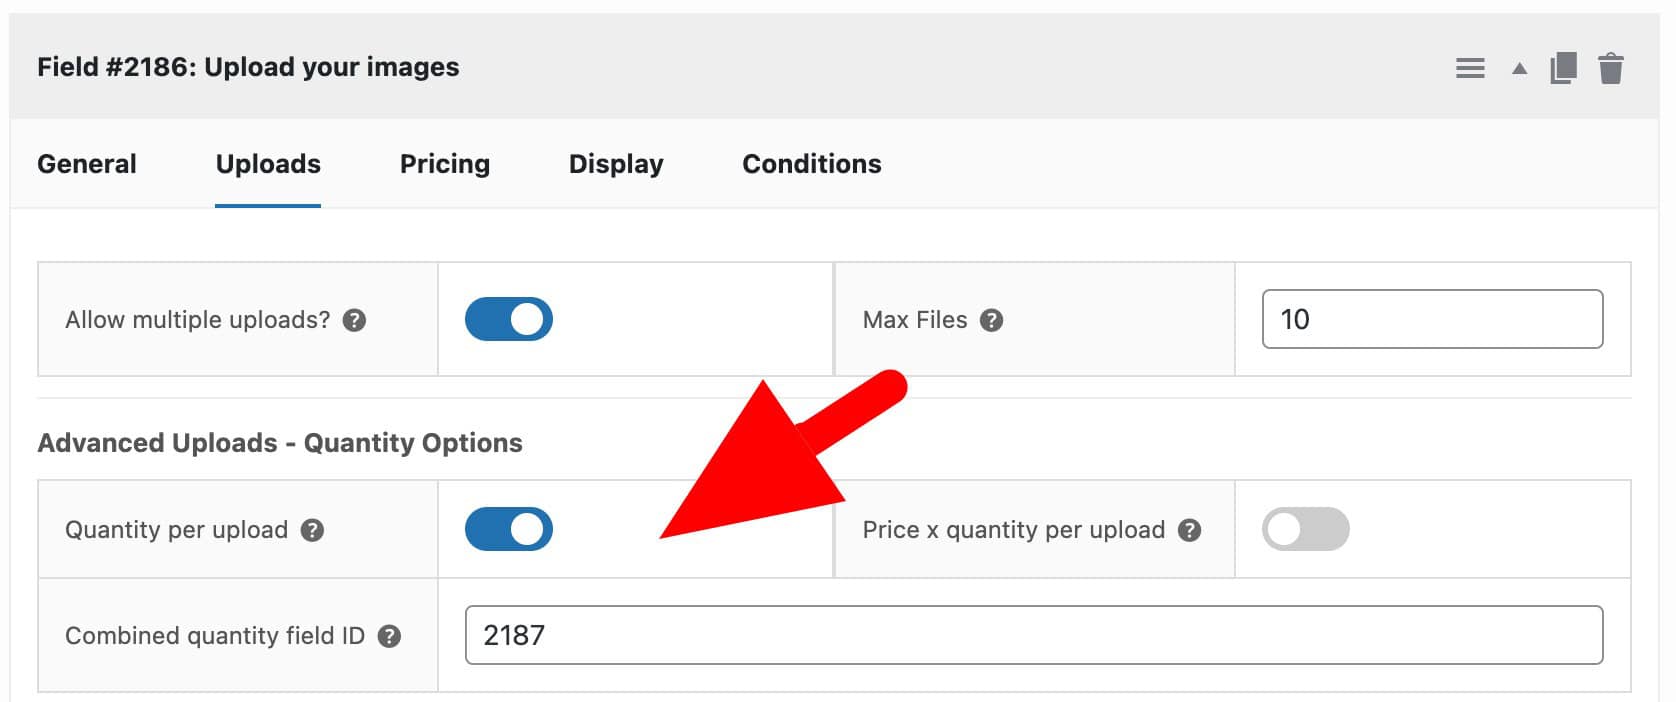
You’ll need to set the following parameters:
- ‘Allow multiple uploads?’
- ‘Price per upload?’
- ‘Quantity per upload’ (this will enable the quantity field for each uploaded file)
- ‘Combined quantity field ID’, which will be the same ID of the number field from a previous step. The plugin will use this field to store the total quantity of prints required
Now, when you preview this product, you’ll see a quantity field input for each uploaded file. The total quantity for all inputs will fill the number field, and you won’t see it display.
You can use the number field in calculations as in the examples earlier in this article. However, you might also want to create some pricing tables for your prints.
Using a pricing table to set a price per print (depending on the total quantity of prints required)
Pricing tables let you get a price based on a user input. While there are different types of pricing table, in this case we’re using a ‘lookup table’.
To use this feature, you’ll need another extension for Add-Ons Ultimate, Advanced Calculations:
With the Advanced Calculations extension, you can upload a CSV file with multiple price tables. Then, you’ll have some extra parameters in your calculation fields. This means you can use the table to get a price for the prints based on the total quantity selected.
A simple pricing table could show an initial column displaying ranges of quantities, with another column showing a corresponding price.

So if the combined quantity is between 10 and 49, the plugin will return 0.25 as the print price. If the combined quantity is between 50 and 399, the plugin will return 0.20 as the price. For more information on lookup tables, we have a dedicated tutorial that explains everything you need to know.
Upload your CSV file and add a calculation field for the ‘price per print’
First, upload your CSV file containing your price tables to the ‘Product Add-Ons’ > ‘Calculations’ page. You’ll want to make sure that your tables are in the correct format.
Next, add a new group for the calculation fields you’re going to add. You can click ‘Add Group’, then insert a ‘calculation’ field in your new group. We’ll use this field to calculate the price of each print.
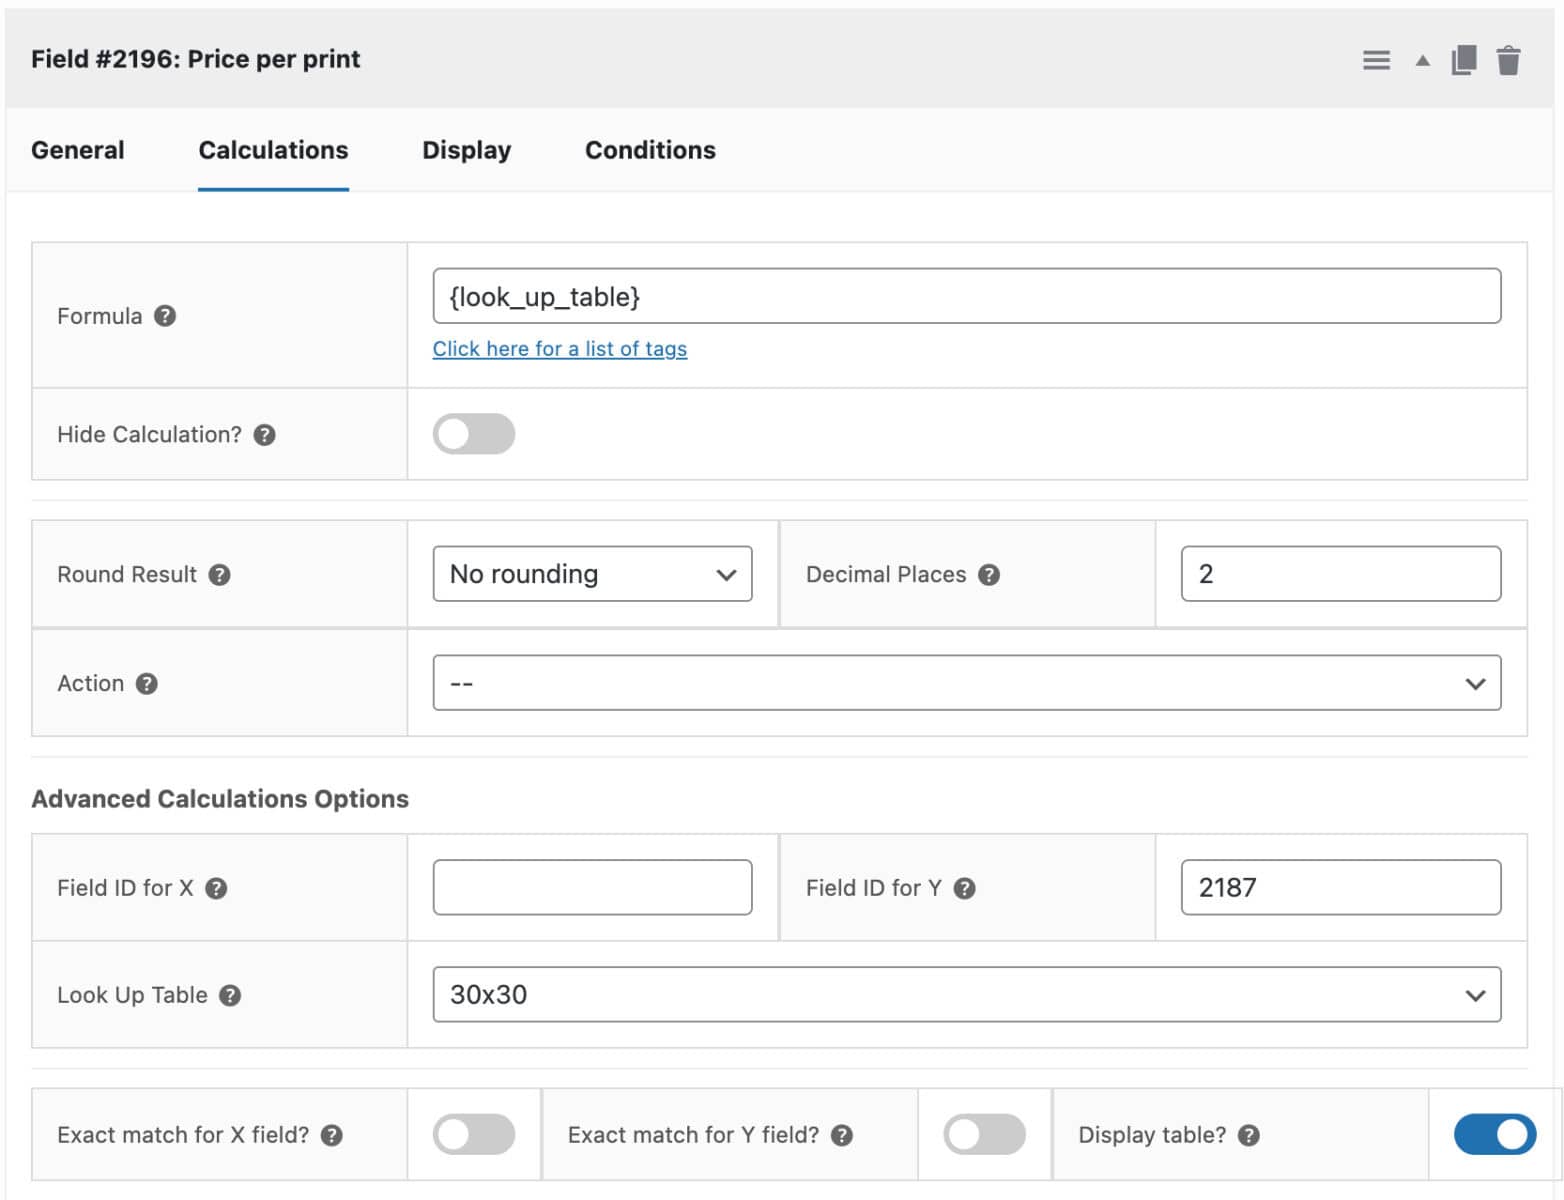
You can see that we set the field type to ‘Calculation’ and in the ‘Formula’ field we enter {look_up_table}. This tells the plugin that it’s going to get a result from one of the table uploads.
Next we enter the ID of the number field we created above in the ‘Field ID for Y’ field. You need to use the ‘Combined quantity field ID’ here that you entered when you created the upload field above.
Finally, choose the price table from the ‘Look Up Table’ field. This field will now fetch the total combined quantities entered by the user for each upload. It will use this value in the specified lookup table. Then it will return the price per print.
Setting the overall product price
Last of all, we’re going to use the price from the lookup table to set the overall product price. Let’s say the user has specified a total quantity of 10 prints and our cost per print for 10 prints is 0.25. We need to multiply 10 * 0.25 for our overall product price.
To do this, add one more calculation field as follows:
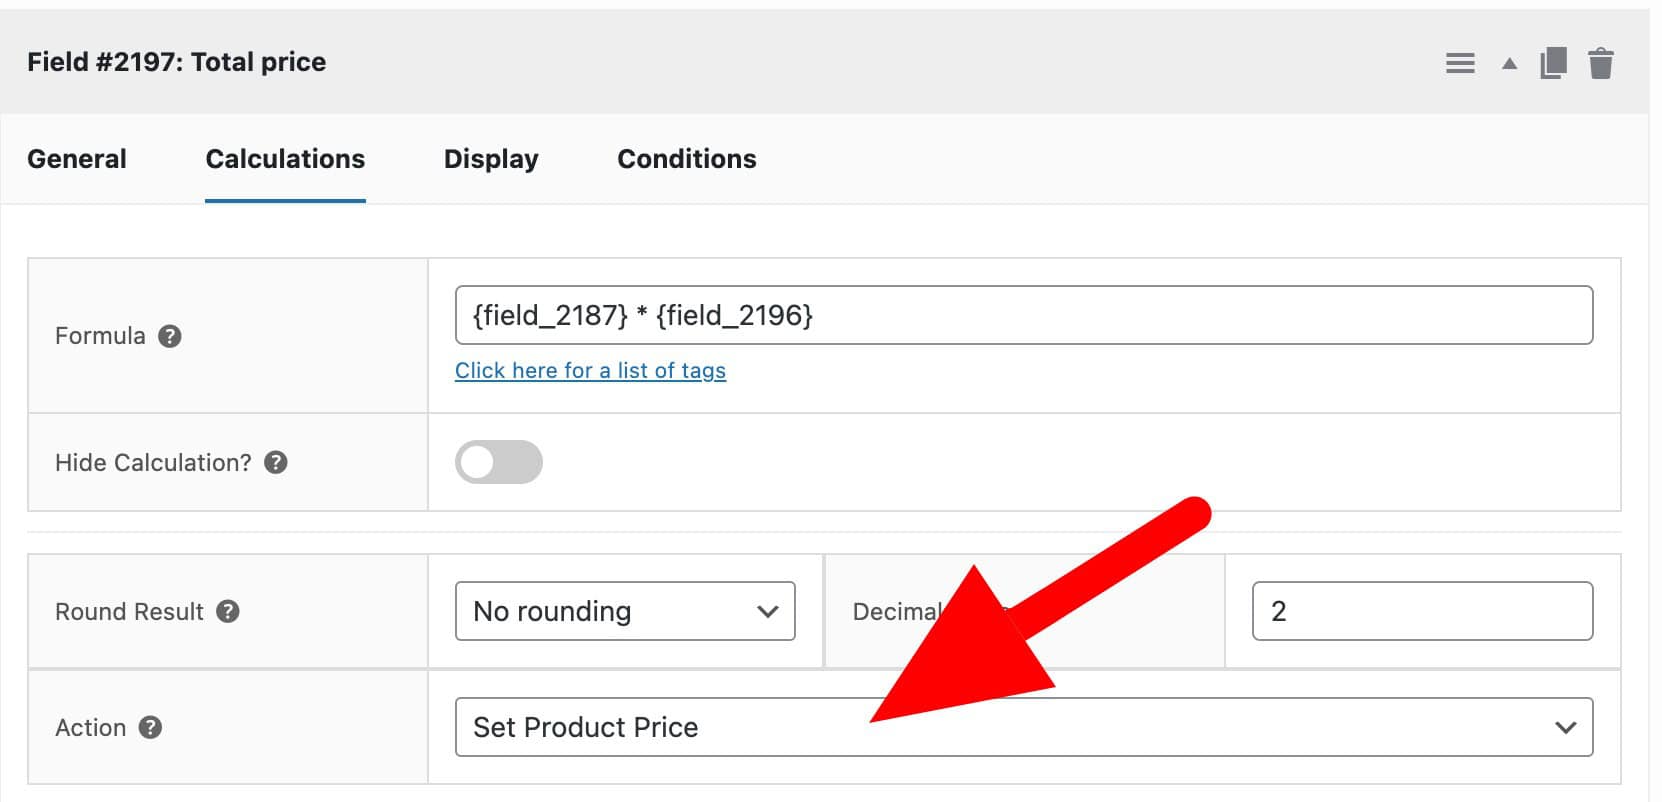

We set the field type as ‘Calculation’ then in the ‘Formula’ field we multiply the combined quantity field by the price per print field. Next, set the ‘Action’ to ‘Set Product Price’ in order to use the result of this calculation field as the product price.
As always, you can take a look at the demo product to get a feel for what we’re achieving.
Getting different print prices based on size or format
Just in case you want to return different prices based on another user selection, such as the print size or format, you can add conditions to groups.
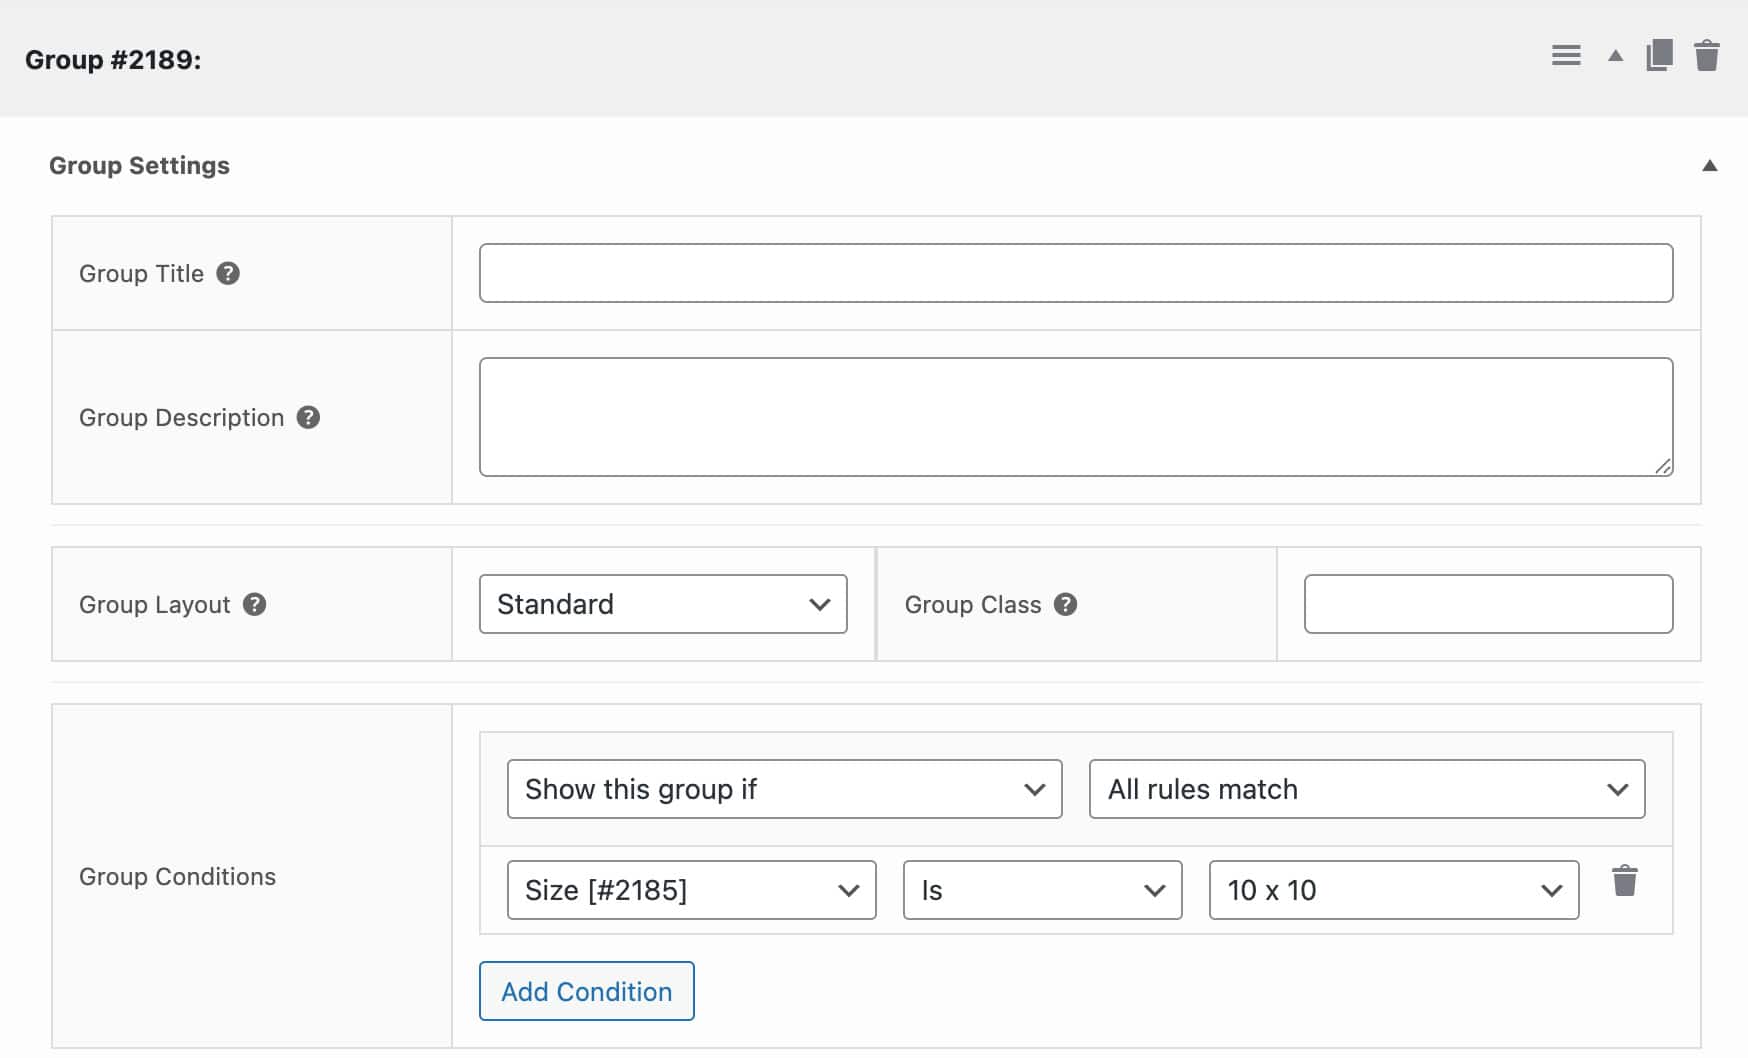
Here, we add our calculation fields into a group. Then, we set a condition on this group to show only if the user selects ’10 x 10′ in the ‘Size’ option field.
You can then duplicate this group and choose to display the duplicated version if the user chooses a different option. You can also change the look up table used in each group.