How to accept bookings for yoga or pilates classes with WooCommerce
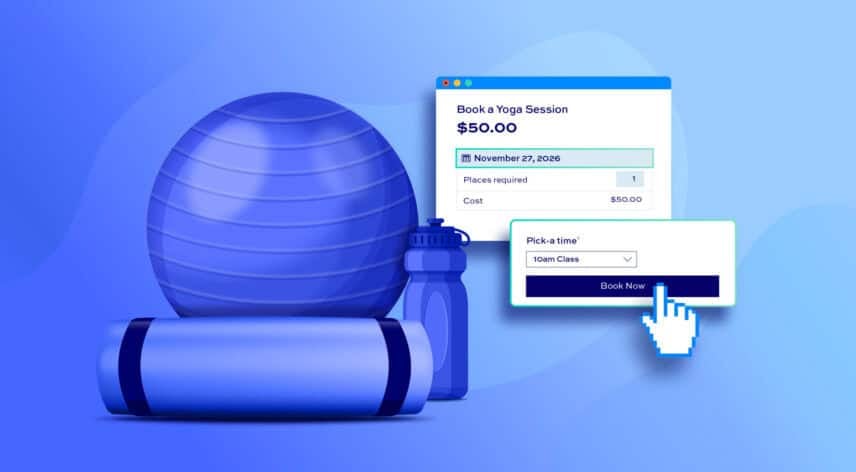
In this article, we’ll look at a couple of different methods for accepting bookings for yoga or pilates classes through WooCommerce.
Because WooCommerce isn’t designed for bookable products by default, you’ll need an extra plugin. Our Bookings and Product Add-Ons Bundle contains everything you need to start taking bookings for your yoga classes.
WooCommerce Bookings and Product Add-Ons Bundle
Create the ultimate bookings site in WooCommerce
You’ll be able to:
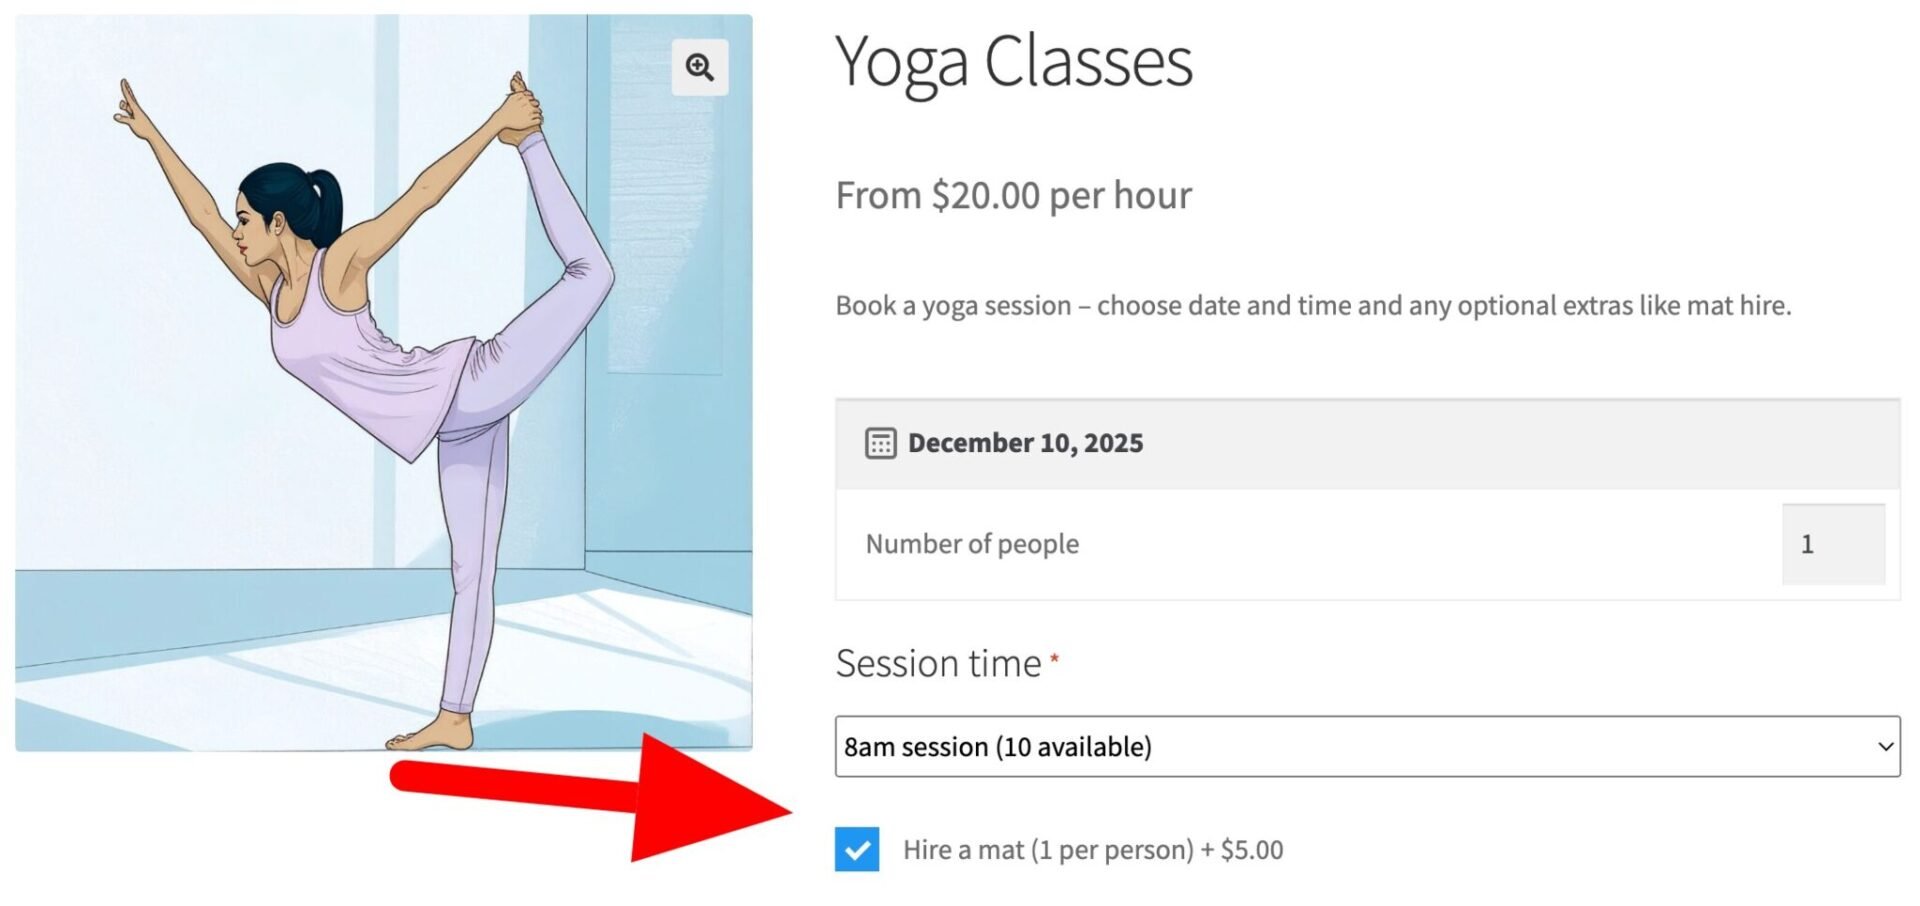
- Display a calendar for the user to select the date of their class
- Allow them to specify how many places they want to book
- Let them choose the time of their session
- Add extra options like mat hire
Further, you’ll be able to:
- Accept bookings for multiple sessions each day – e.g. 9am, 10am, etc
- Set the maximum capacity for each class
- Disable certain days of the week
- Set different prices for different session times if required
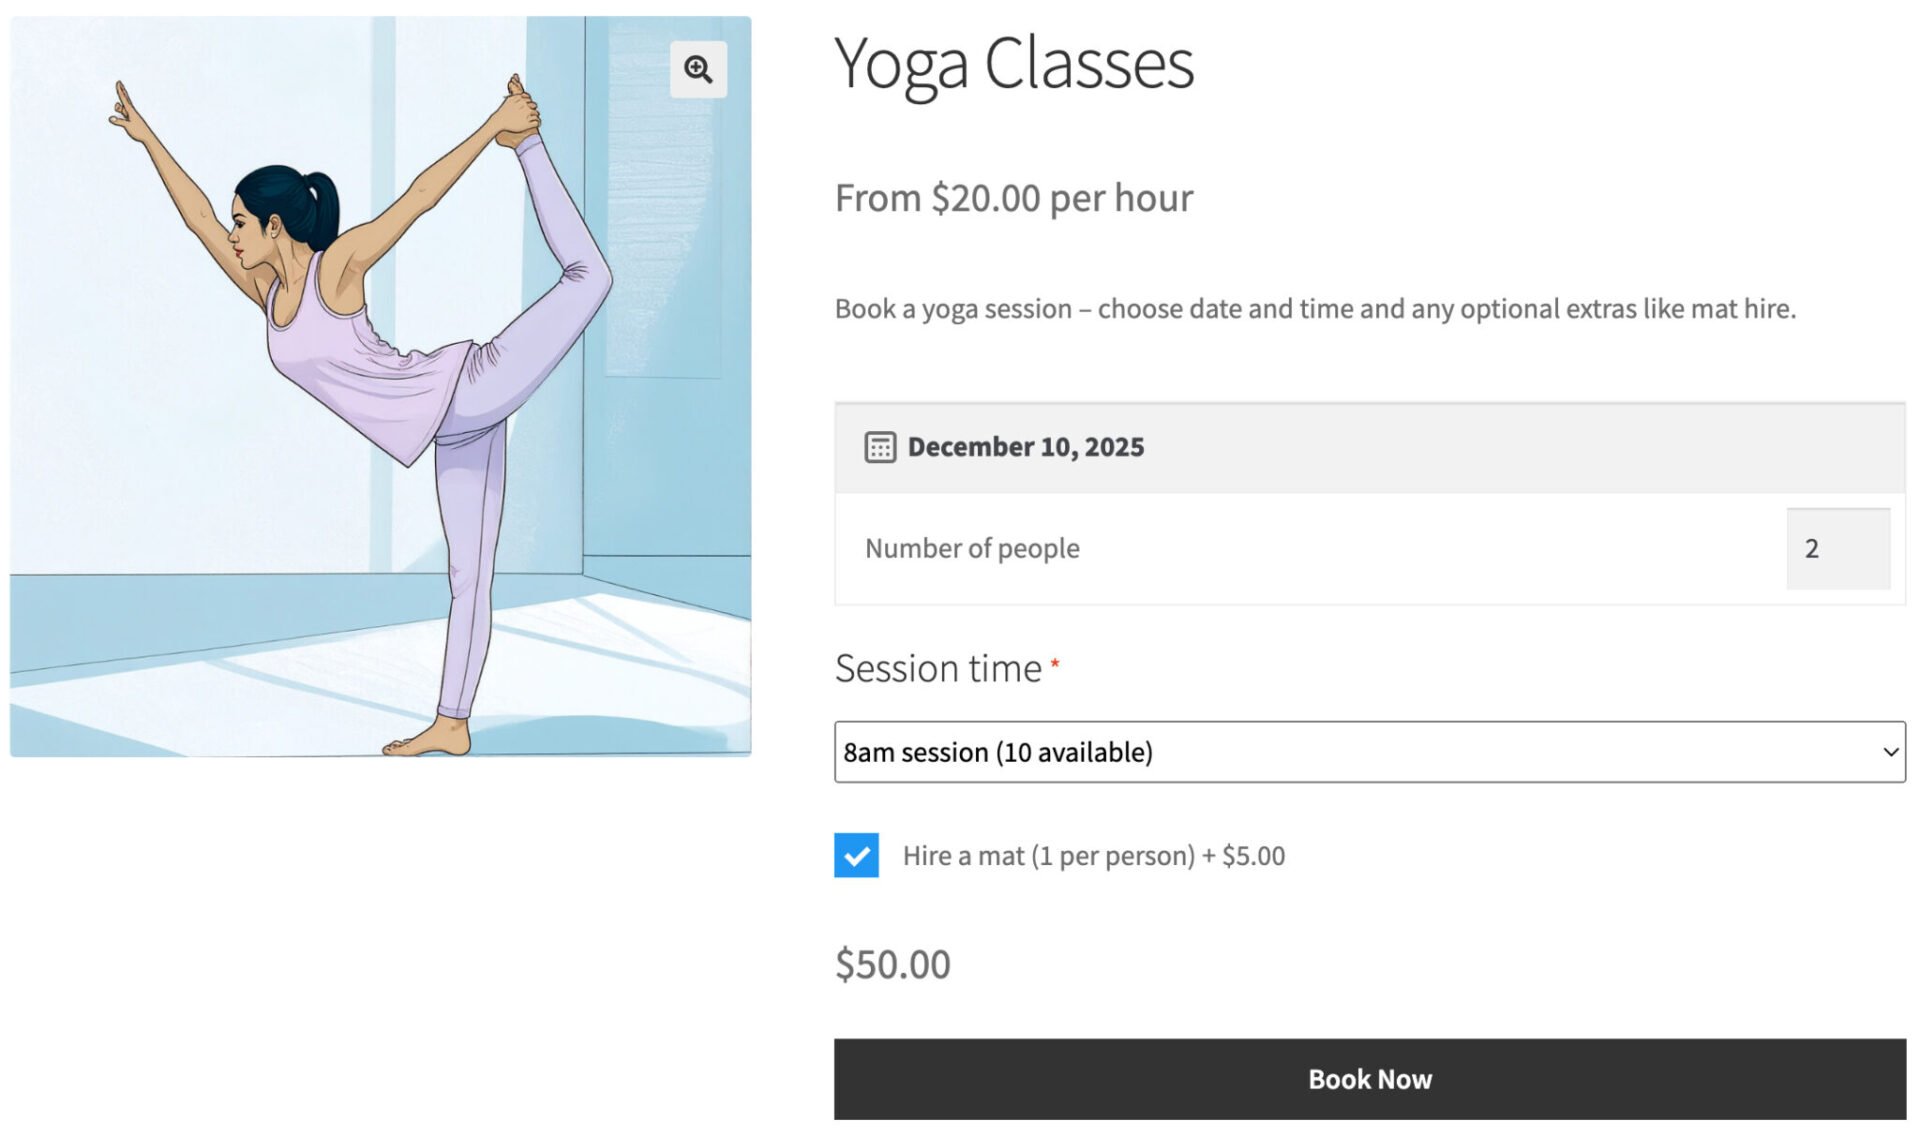
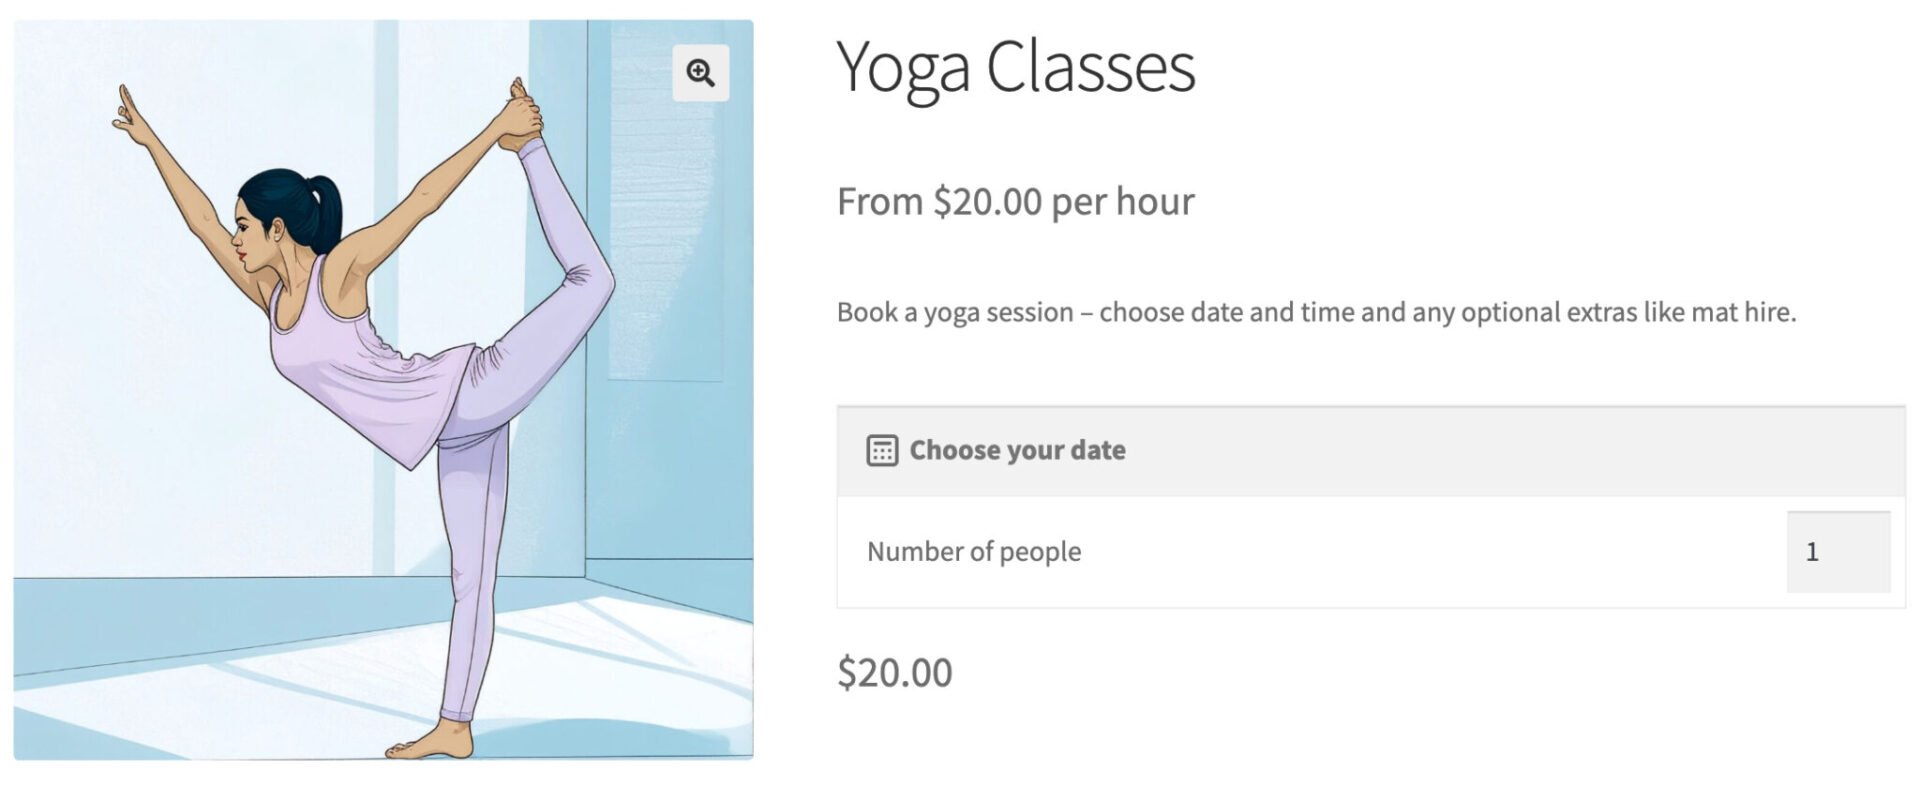
There’s a demo product here. You can test it out by selecting a date, choosing the number of places you want to book, picking a time and optionally choosing to hire a mat.
Accept yoga class bookings in WooCommerce – tutorial
To create products in WooCommerce where users can book yoga or pilates sessions, you’ll need the Bookings and Product Add-Ons Bundle. This includes two separate plugins:
- Bookings for WooCommerce: this allows you to accept date-based bookings on your site
- WooCommerce Product Add-Ons Ultimate: this allows you to add extra options to your products as well as extending Bookings for WooCommerce so that you can accept time-based bookings
When you buy the Bookings and Product Add-Ons Bundle, you receive both these plugins at over 25% discount.
Let’s look at how we use these plugins to accept bookings for yoga classes.
Step #1: Install and activate both plugins
When you purchase the Bookings and Product Add-Ons Bundle you’ll get an email with links to two zip files – one for each of the plugins above.
Install Bookings for WooCommerce by following these steps:
- Download the plugin’s zip file by clicking on the link on your order confirmation screen or in your welcome email. You receive the email automatically a few seconds after you’ve completed the purchase
- Go to Plugins > Add New in your WordPress dashboard
- Click on the ‘Upload Plugin’ button
- Drag and drop the plugin’s downloaded zip file into the ‘Choose File’ area and click ‘Install Now’
- When the plugin has uploaded, click the ‘Activate Now’ button
Repeat the process for Product Add-Ons Ultimate.
Step #2: Create products for time slots
Once you’ve got the plugins installed and activated, you can start creating time slots for each yoga session you run in a day. Each time slot will be a ‘child product’ for our main Yoga Classes product (see Step 3 below) so there’s not much information we need to enter here.
- Go to Products > Add New
- Add a title to reflect the time of the class, e.g. ‘8am session’.
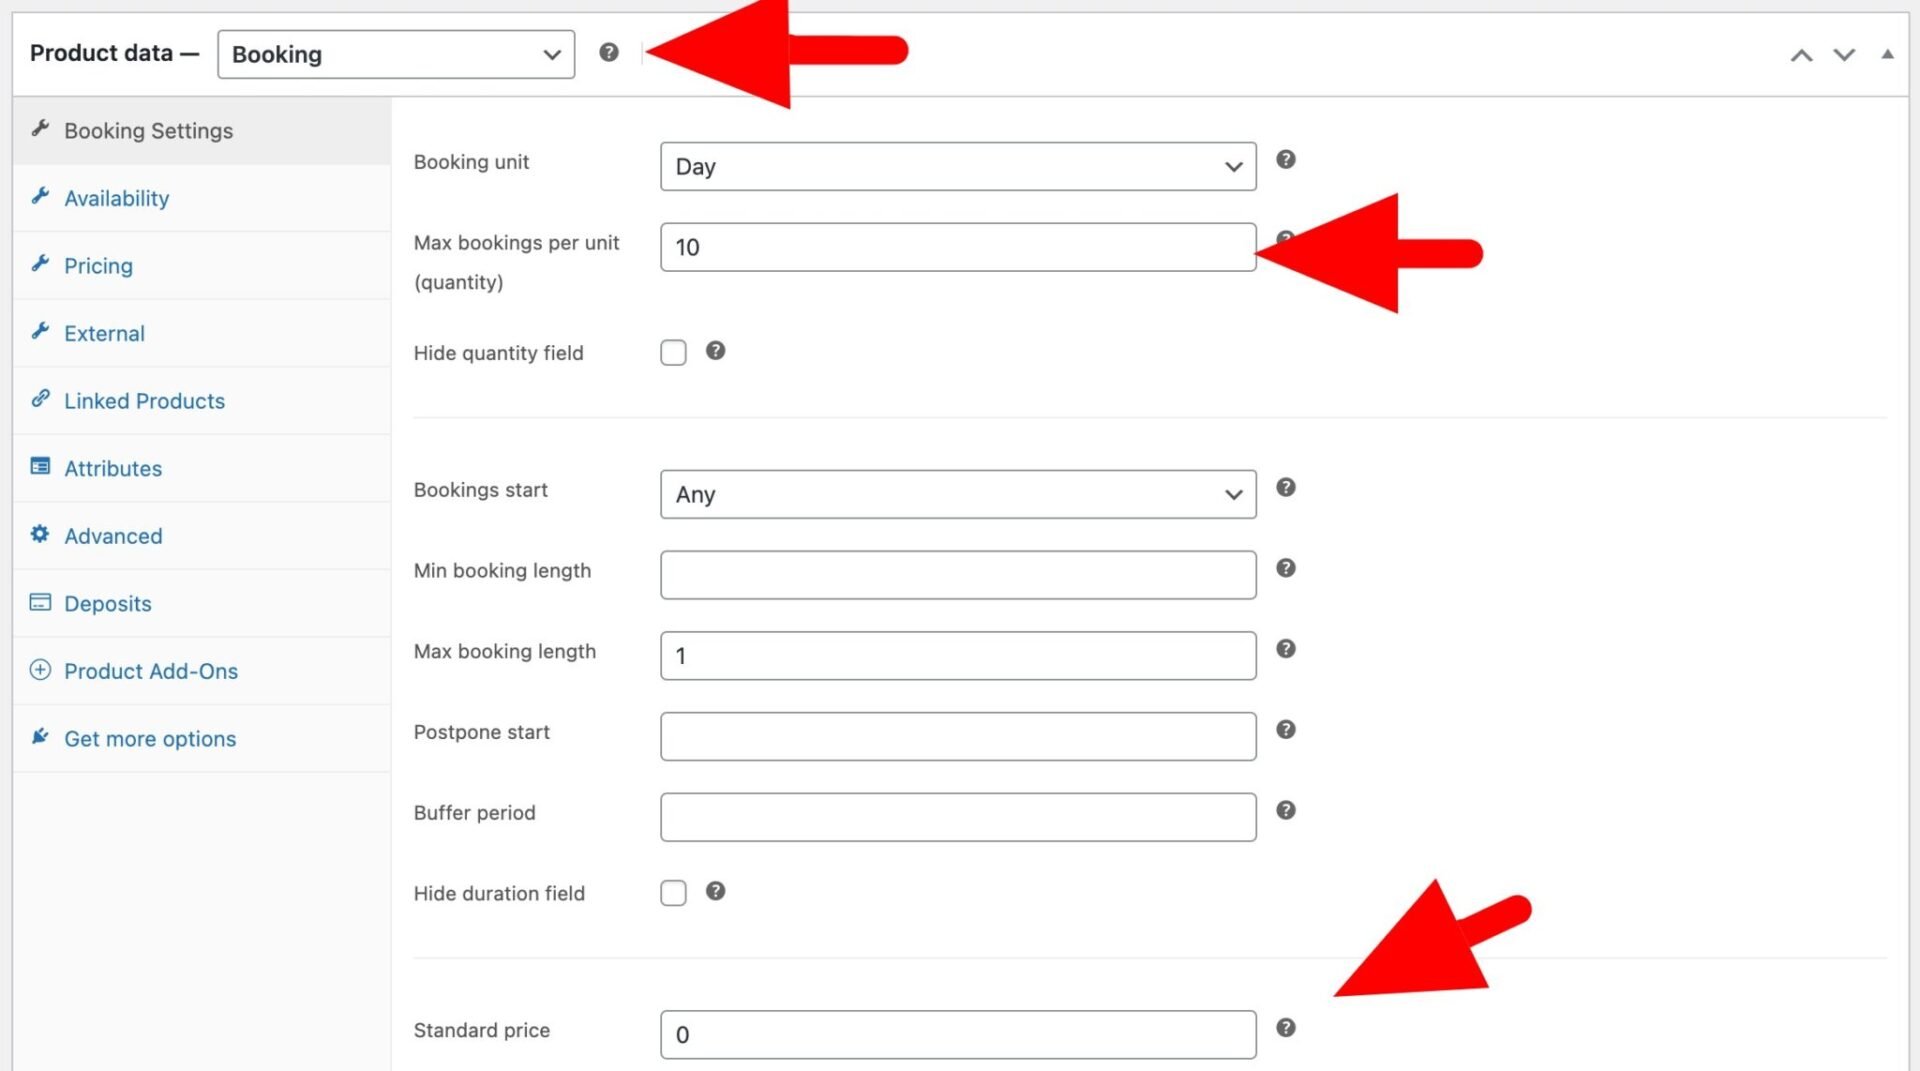
- Change the ‘Product type’ to ‘Booking’
- Set the number of places available for this session in the ‘Max bookings per unit’ field – so if only 10 places are available for this class, enter 10 in this field
- Finally, enter a price. The standard price per session will be set by the main Yoga Classes product – so you can just enter 0 here if this session does not have an additional charge
- Because this product is just a child product of your main Yoga Classes product, you can hide it by following the steps here
- Repeat for each time-slot you’re running during the day
Step #3: Create your main product
With each time slot created, we can now create our main product for booking yoga classes.
- Go to Products > Add New
- Give your product a name, e.g. ‘Yoga Classes’, add a description and featured image – plus any other details you like
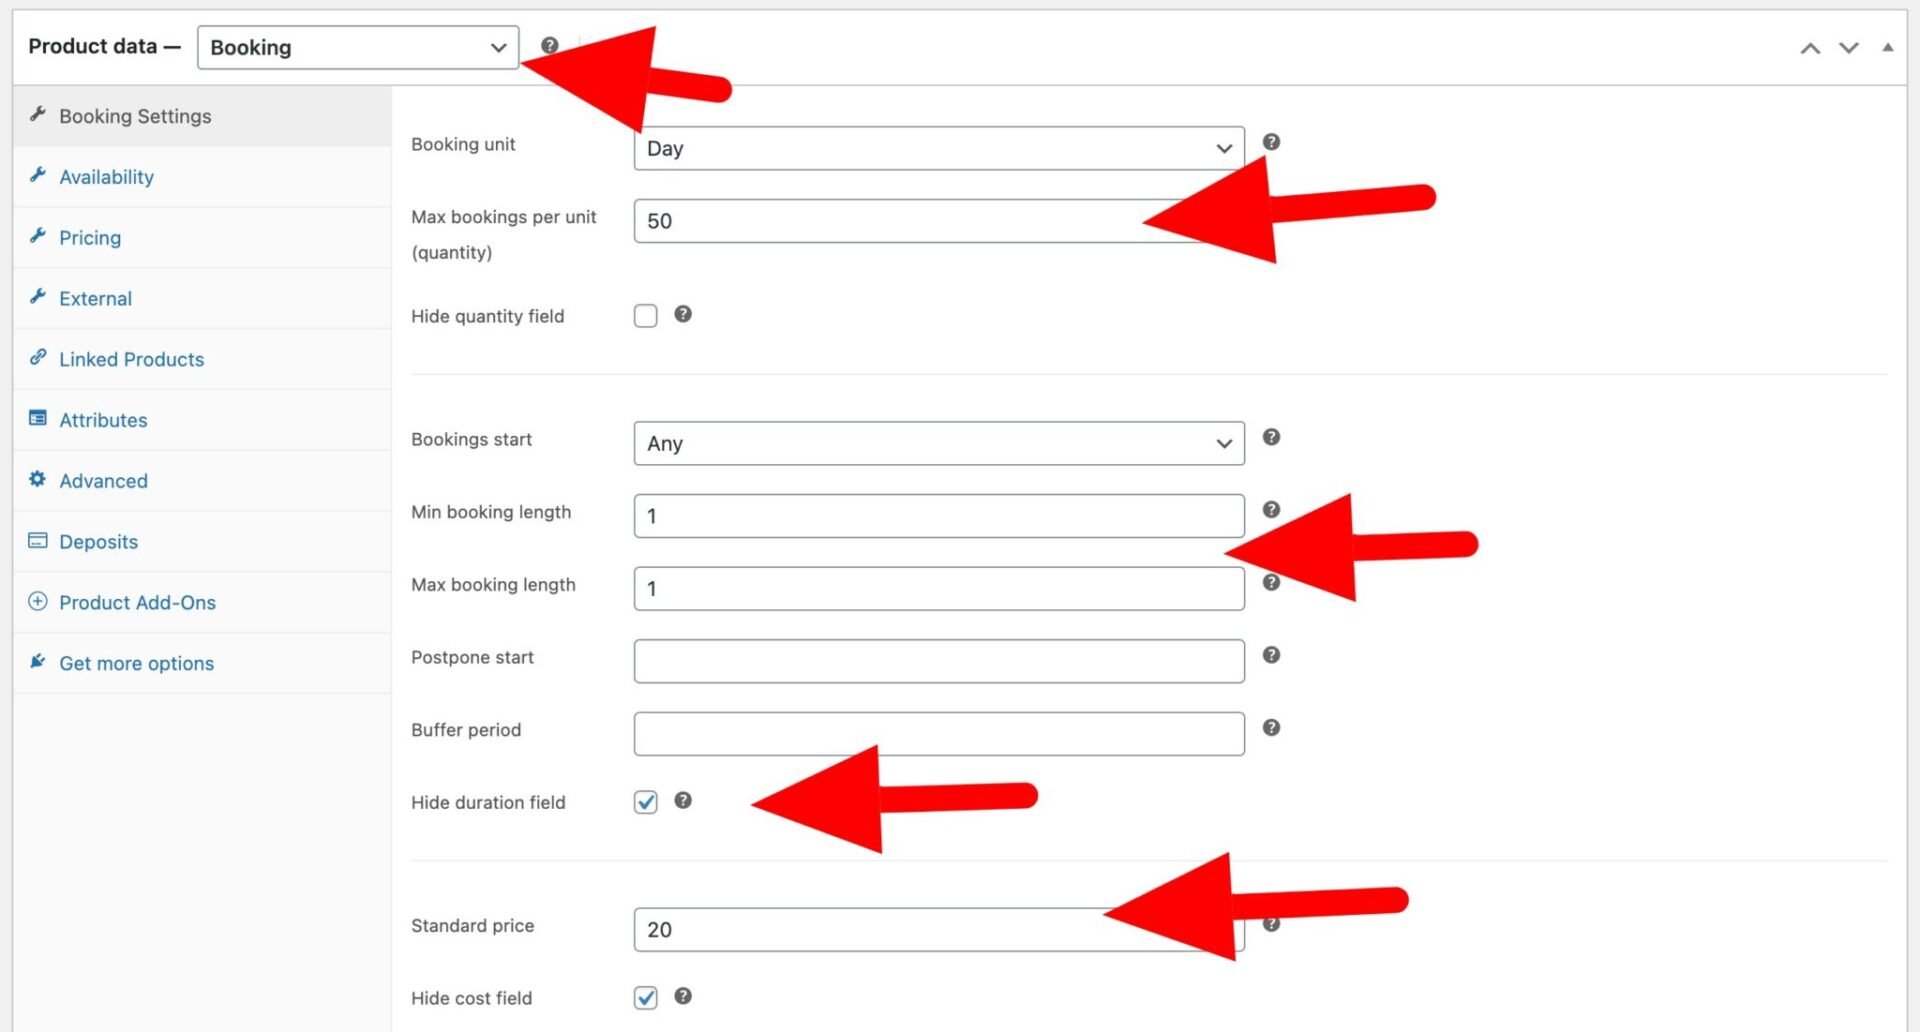
- Change the ‘Product type’ to ‘Booking’
Once you’ve changed the product type to ‘Booking’ you can enter details on the ‘Booking Settings’ tab. This will allow the user to select the date of their session and ensure you don’t overbook.
- Enter the maximum number of places across all sessions in the ‘Max bookings per unit’ field. So if you have 5 sessions per day with 10 places per session, enter 50 in this field
- Set the ‘Max booking length’ to 1
- Enable the ‘Hide duration field’ setting
- Enter the price per session in the ‘Standard price’ field
- Enable the ‘Hide cost field’ setting
Now, you just need to add the sessions that you’ve created in Step 2. This will create a dropdown field for users to select the time of their session and showing how many places remain for that slot. (Note that this field doesn’t appear until the user has selected a date).

To create a dropdown list for class times:
- Click the ‘Product Add-Ons’ tab in the ‘Product data’ section
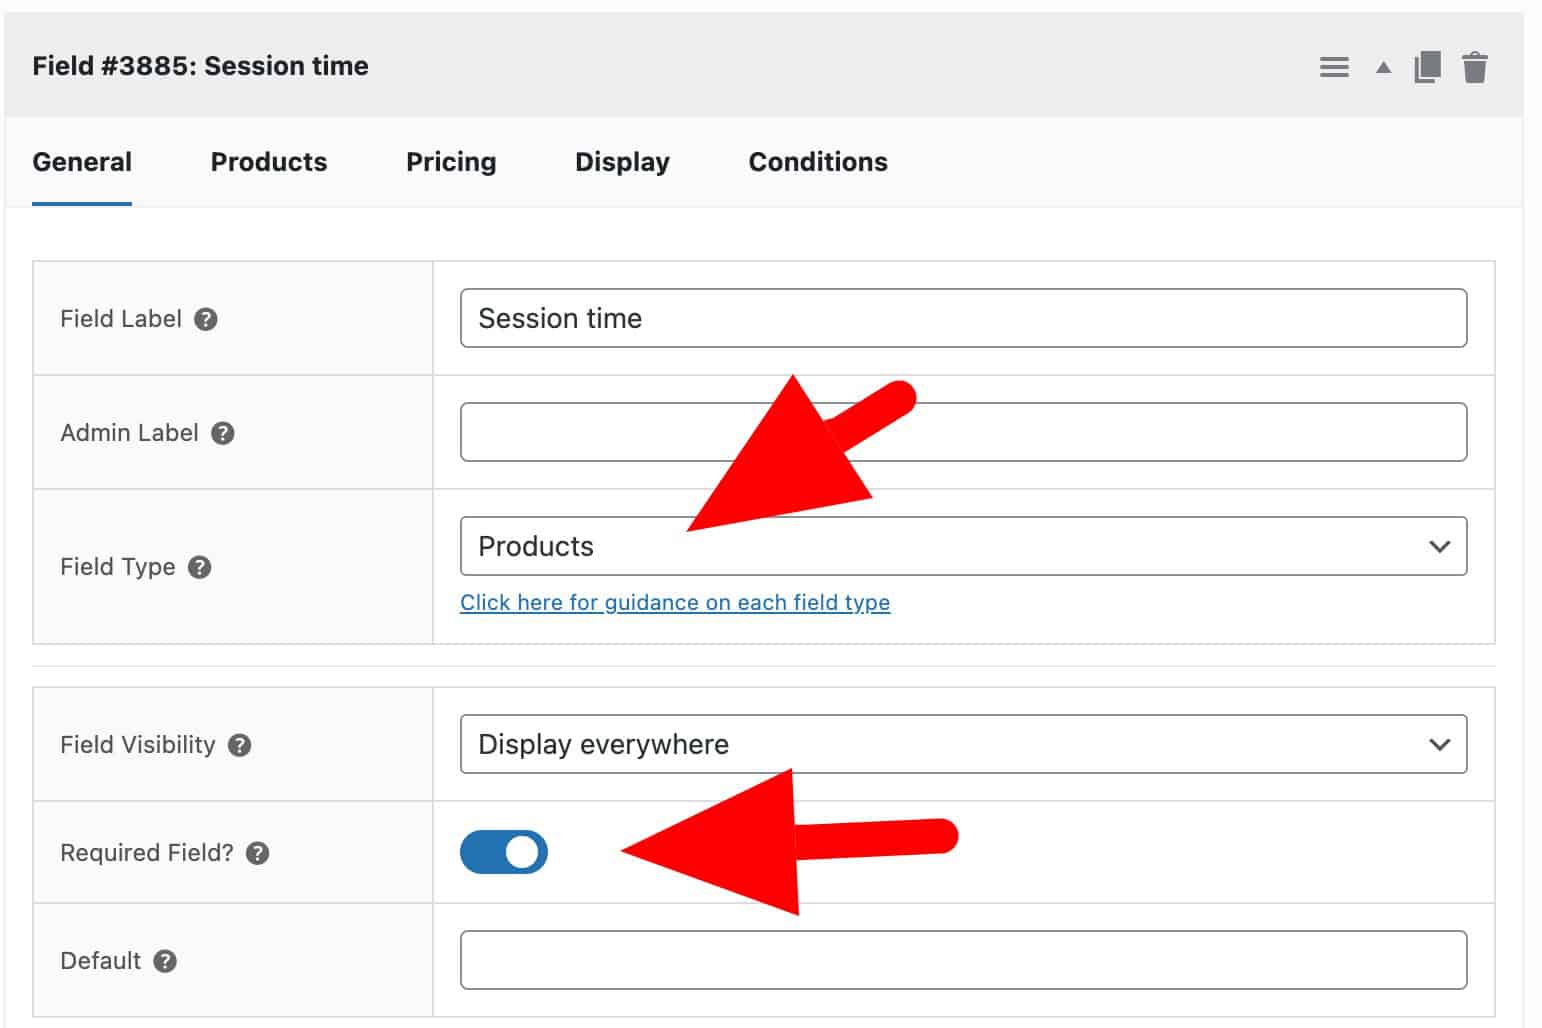
- Click ‘Add Group’ then ‘Add Field’
- Enter a label for your field, e.g. ‘Session time’
- Select ‘Products’ as the ‘Field Type’
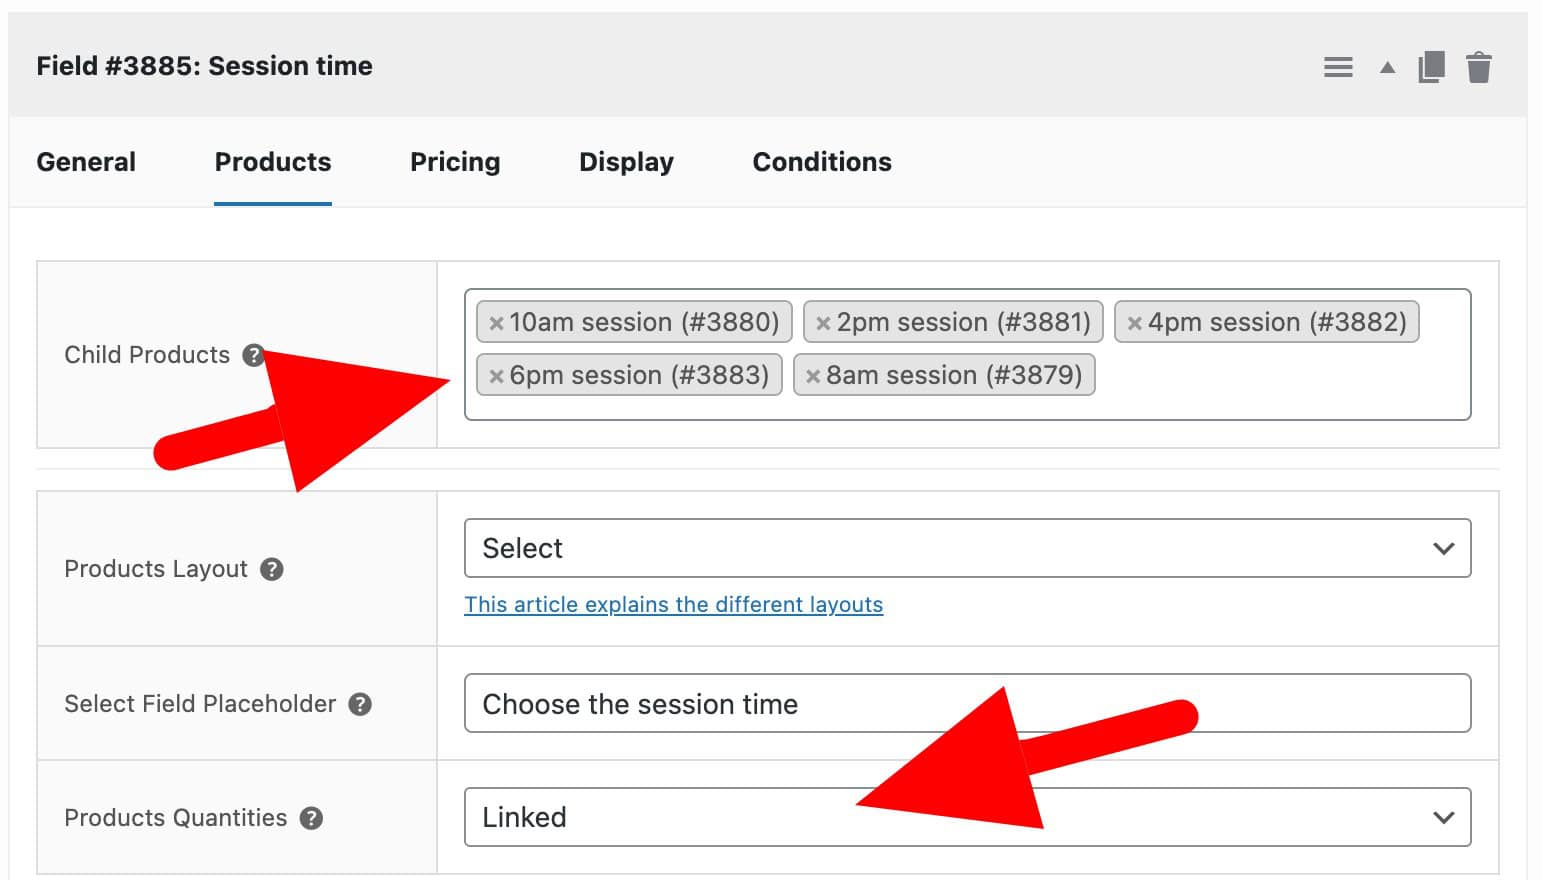
- In the ‘Child Products’ field, enter each of the session times that you created in Step 2
- Choose ‘Select’ as the ‘Products Layout’
- Choose ‘Linked’ as the ‘Products Quantities’
- Enable the ‘Required Field’ setting
You can save or publish your product at this point. Now, users will be able to pick a date for their yoga class, decide how many people they are booking for, and choose a time. When they make the booking, the availability for their selected time slot will be updated so that other users won’t be able to overbook your sessions.
Step #4 (optional): Offer extra options
You might like to upsell some options to your clients. In this example, we’ll give them the option to hire a yoga mat from you for their class. To add this feature:
- In the ‘Product Add-Ons’ tab, click ‘Add Field’
- Enter a label, e.g. ‘Hire a mat’
- Choose ‘Checkbox’ as the ‘Field Type’
- Enter the price in the ‘Field Price’ setting

Now, users will be able to select this as an extra option.
So that’s how to create a product to accept date and time-based bookings for your yoga classes in WooCommerce.
WooCommerce yoga classes – additional options
Now let’s look at some additional options you can use.
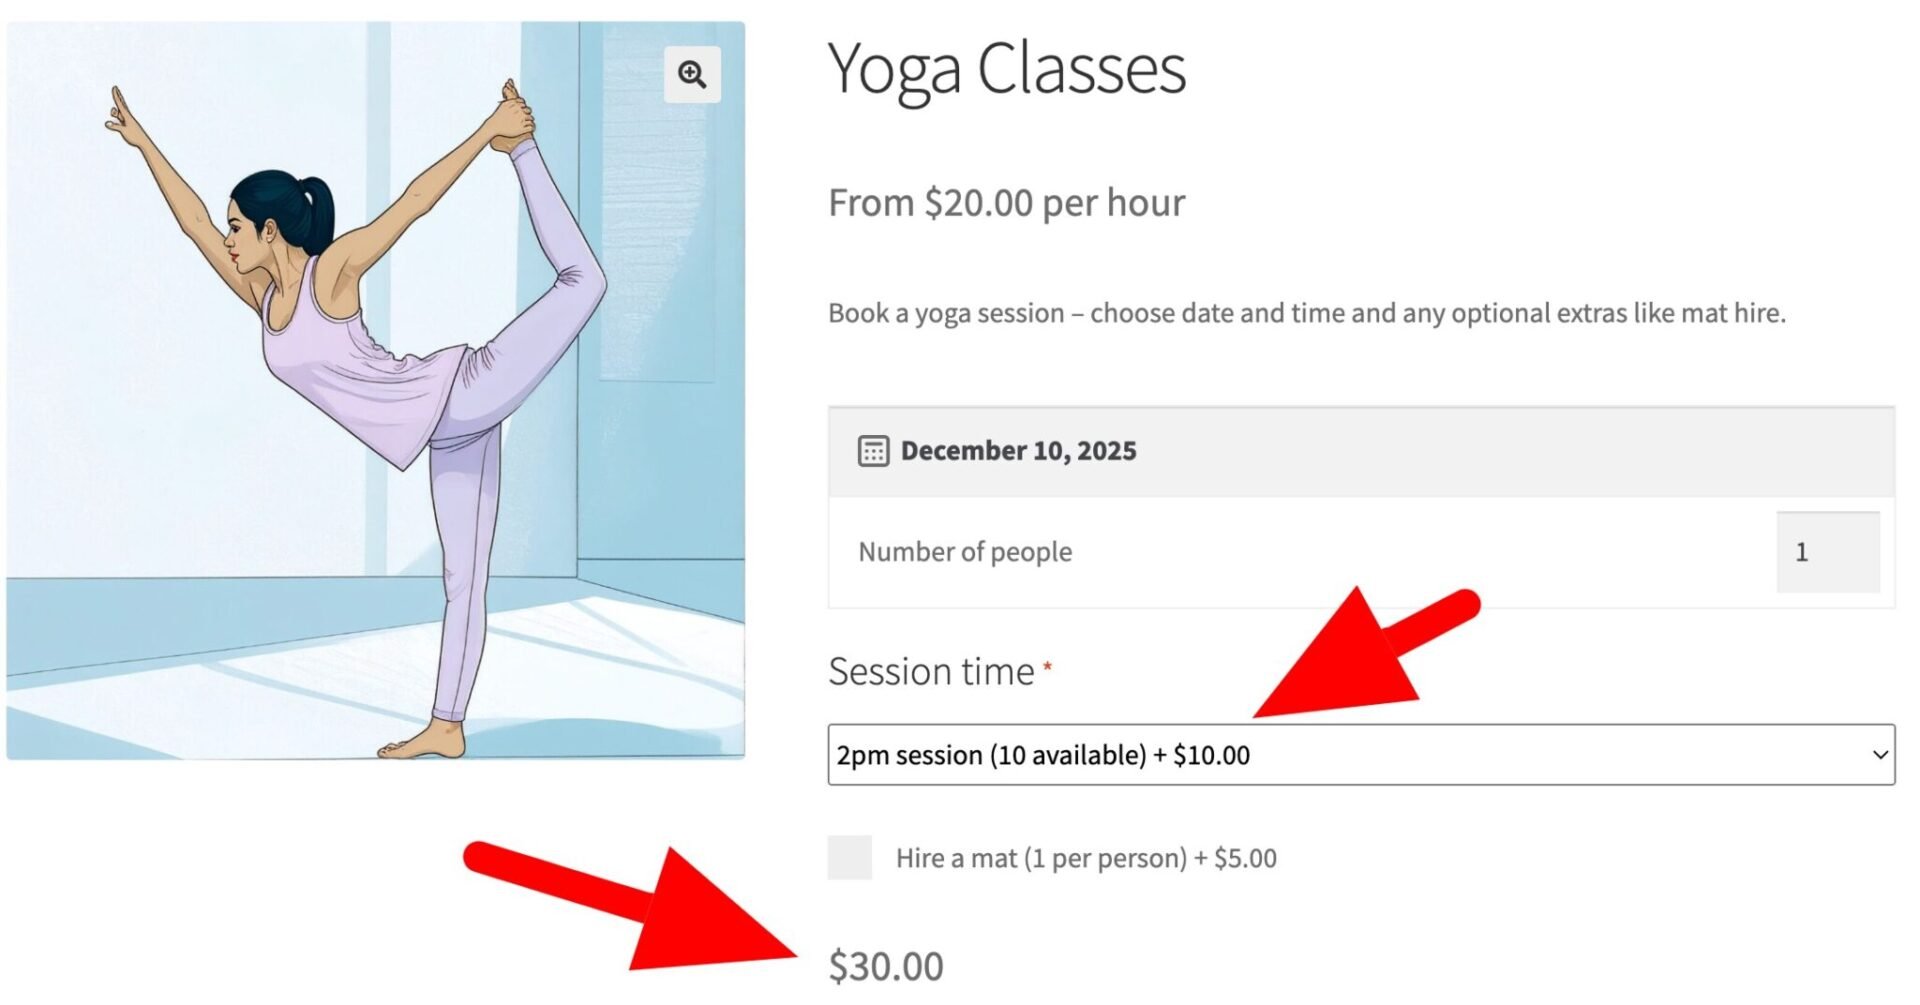
Set different prices for different session times
If you’d like to charge extra for certain sessions, you just enter the extra cost in the ‘Standard price’ field for the specific session (see Step 2 above). The extra cost will be displayed in the dropdown field against the session time. When the user selects that session, the extra cost will be added to the overall price.
Set the price label
By default, the price label will use the main product price. If you want to add some dynamic text for the price label:
- Edit the main product, e.g. Yoga Classes
- In the ‘Price format’ field enter some free text. Use the {price} tag to display the product price dynamically as part of your text – for example, enter ‘From {price} per hour’

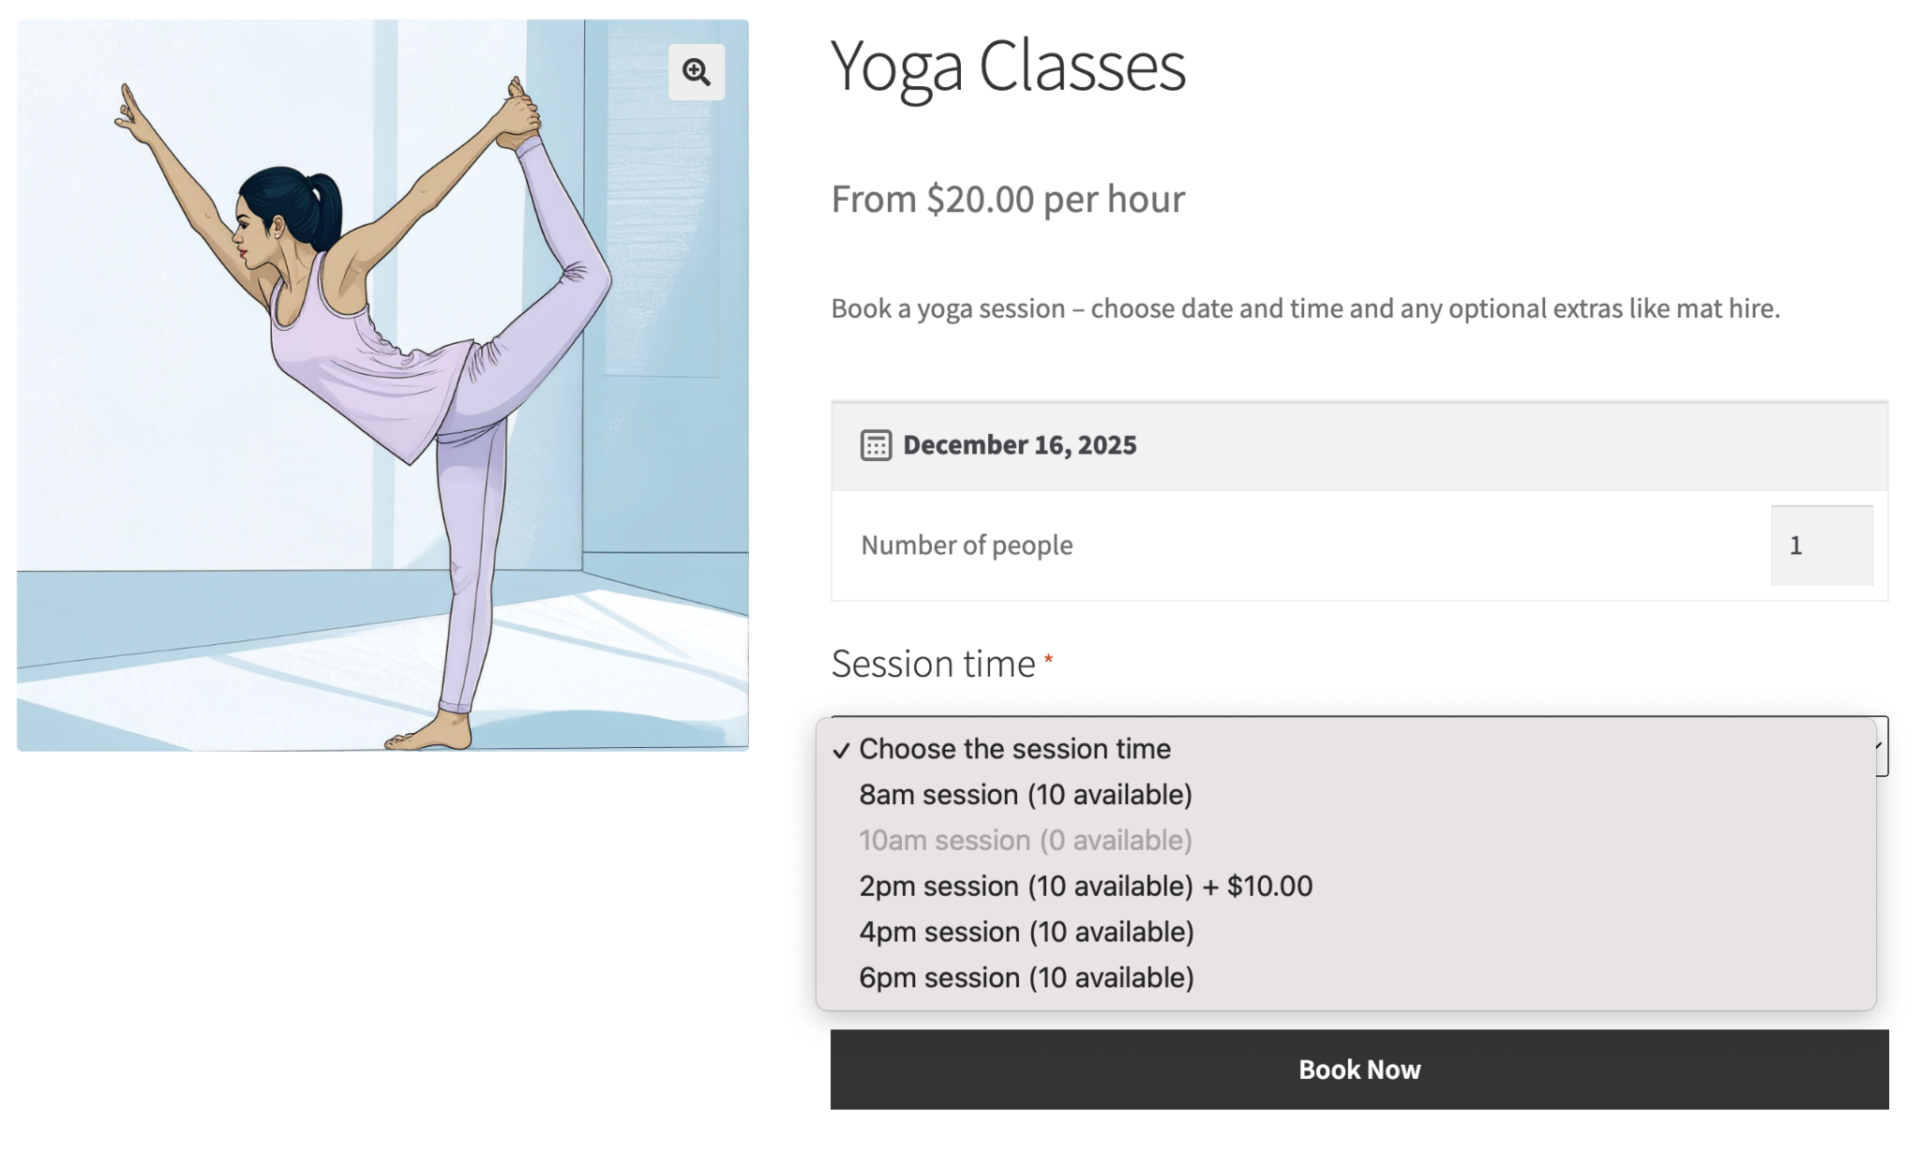
What happens if a session is booked out?
If one or more sessions has been fully booked for the day the user has selected, they’ll be disabled in the dropdown field.
Disable certain days of week
If your yoga studio is closed on certain days of the week, you can easily prevent users from booking classes on those days.
- In the ‘Product data’ section of your main product, Yoga Classes, click the ‘Availability’ tab
- Select which days of the week to disable

Now users won’t be able to make any bookings on those days.
Check availability
Still on the Availability tab, you can view availability and bookings for your yoga classes per day through a calendar.

How to manage your bookings
Once you’ve got your product online and users are booking classes, you will need to manage bookings.
View bookings as orders
When a user chooses the date and time of their class, they go through to the checkout page just the same as any other WooCommerce product. When they complete the purchase, you’ll receive an email and an order will be created in exactly the same way as for any other product.
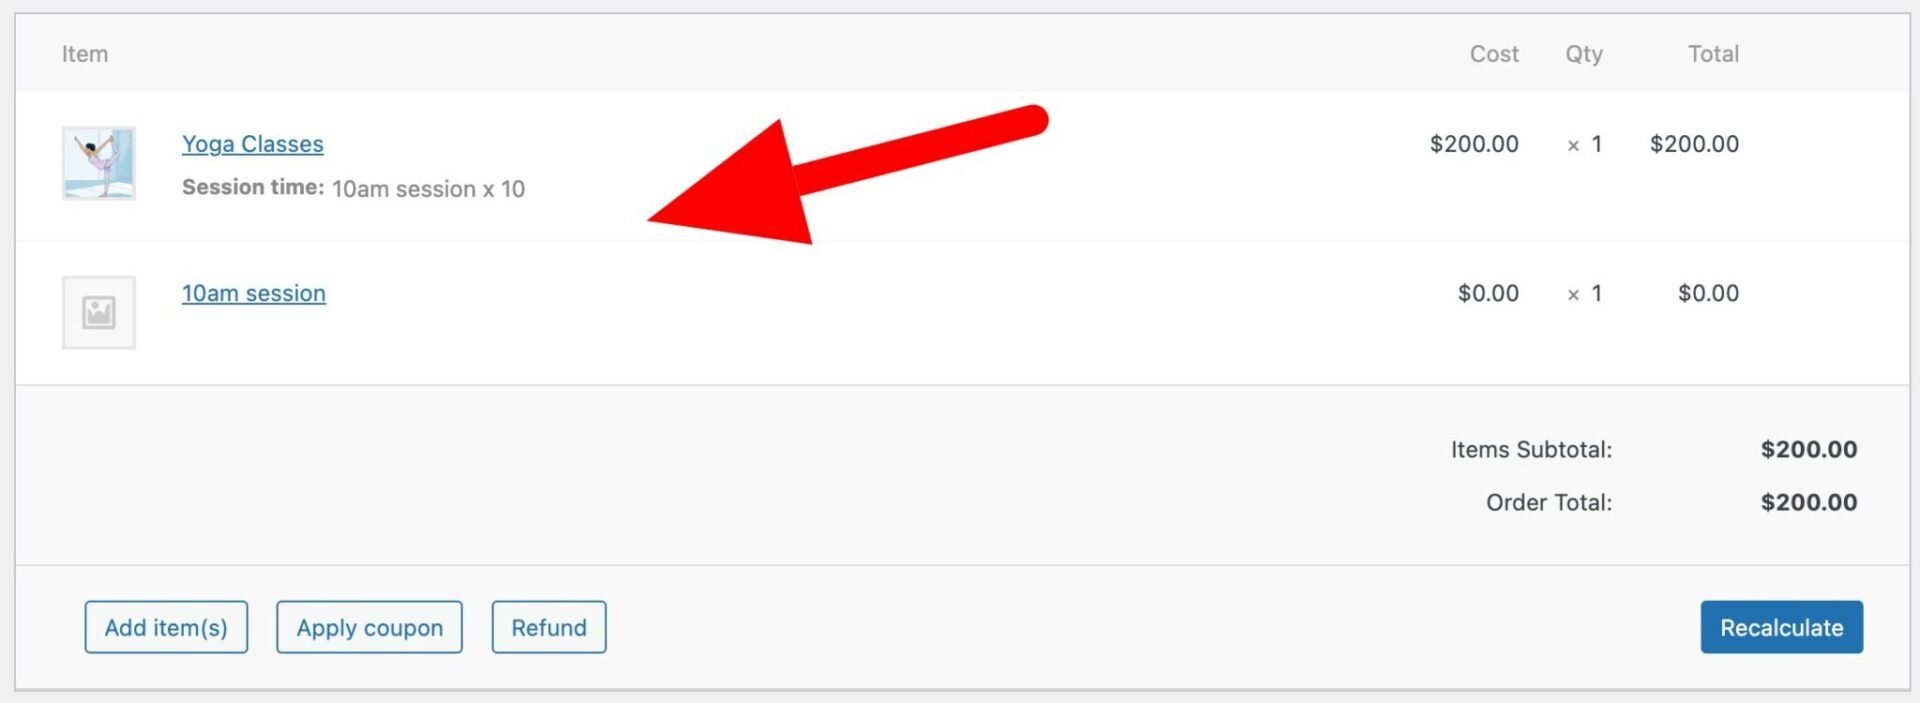
The date and time will be listed as separate line items.
Edit bookings
If you need to change the details of any bookings, you can go to the ‘Bookings’ menu item in the WordPress dashboard. Find the booking that you want to edit and update details as you wish.
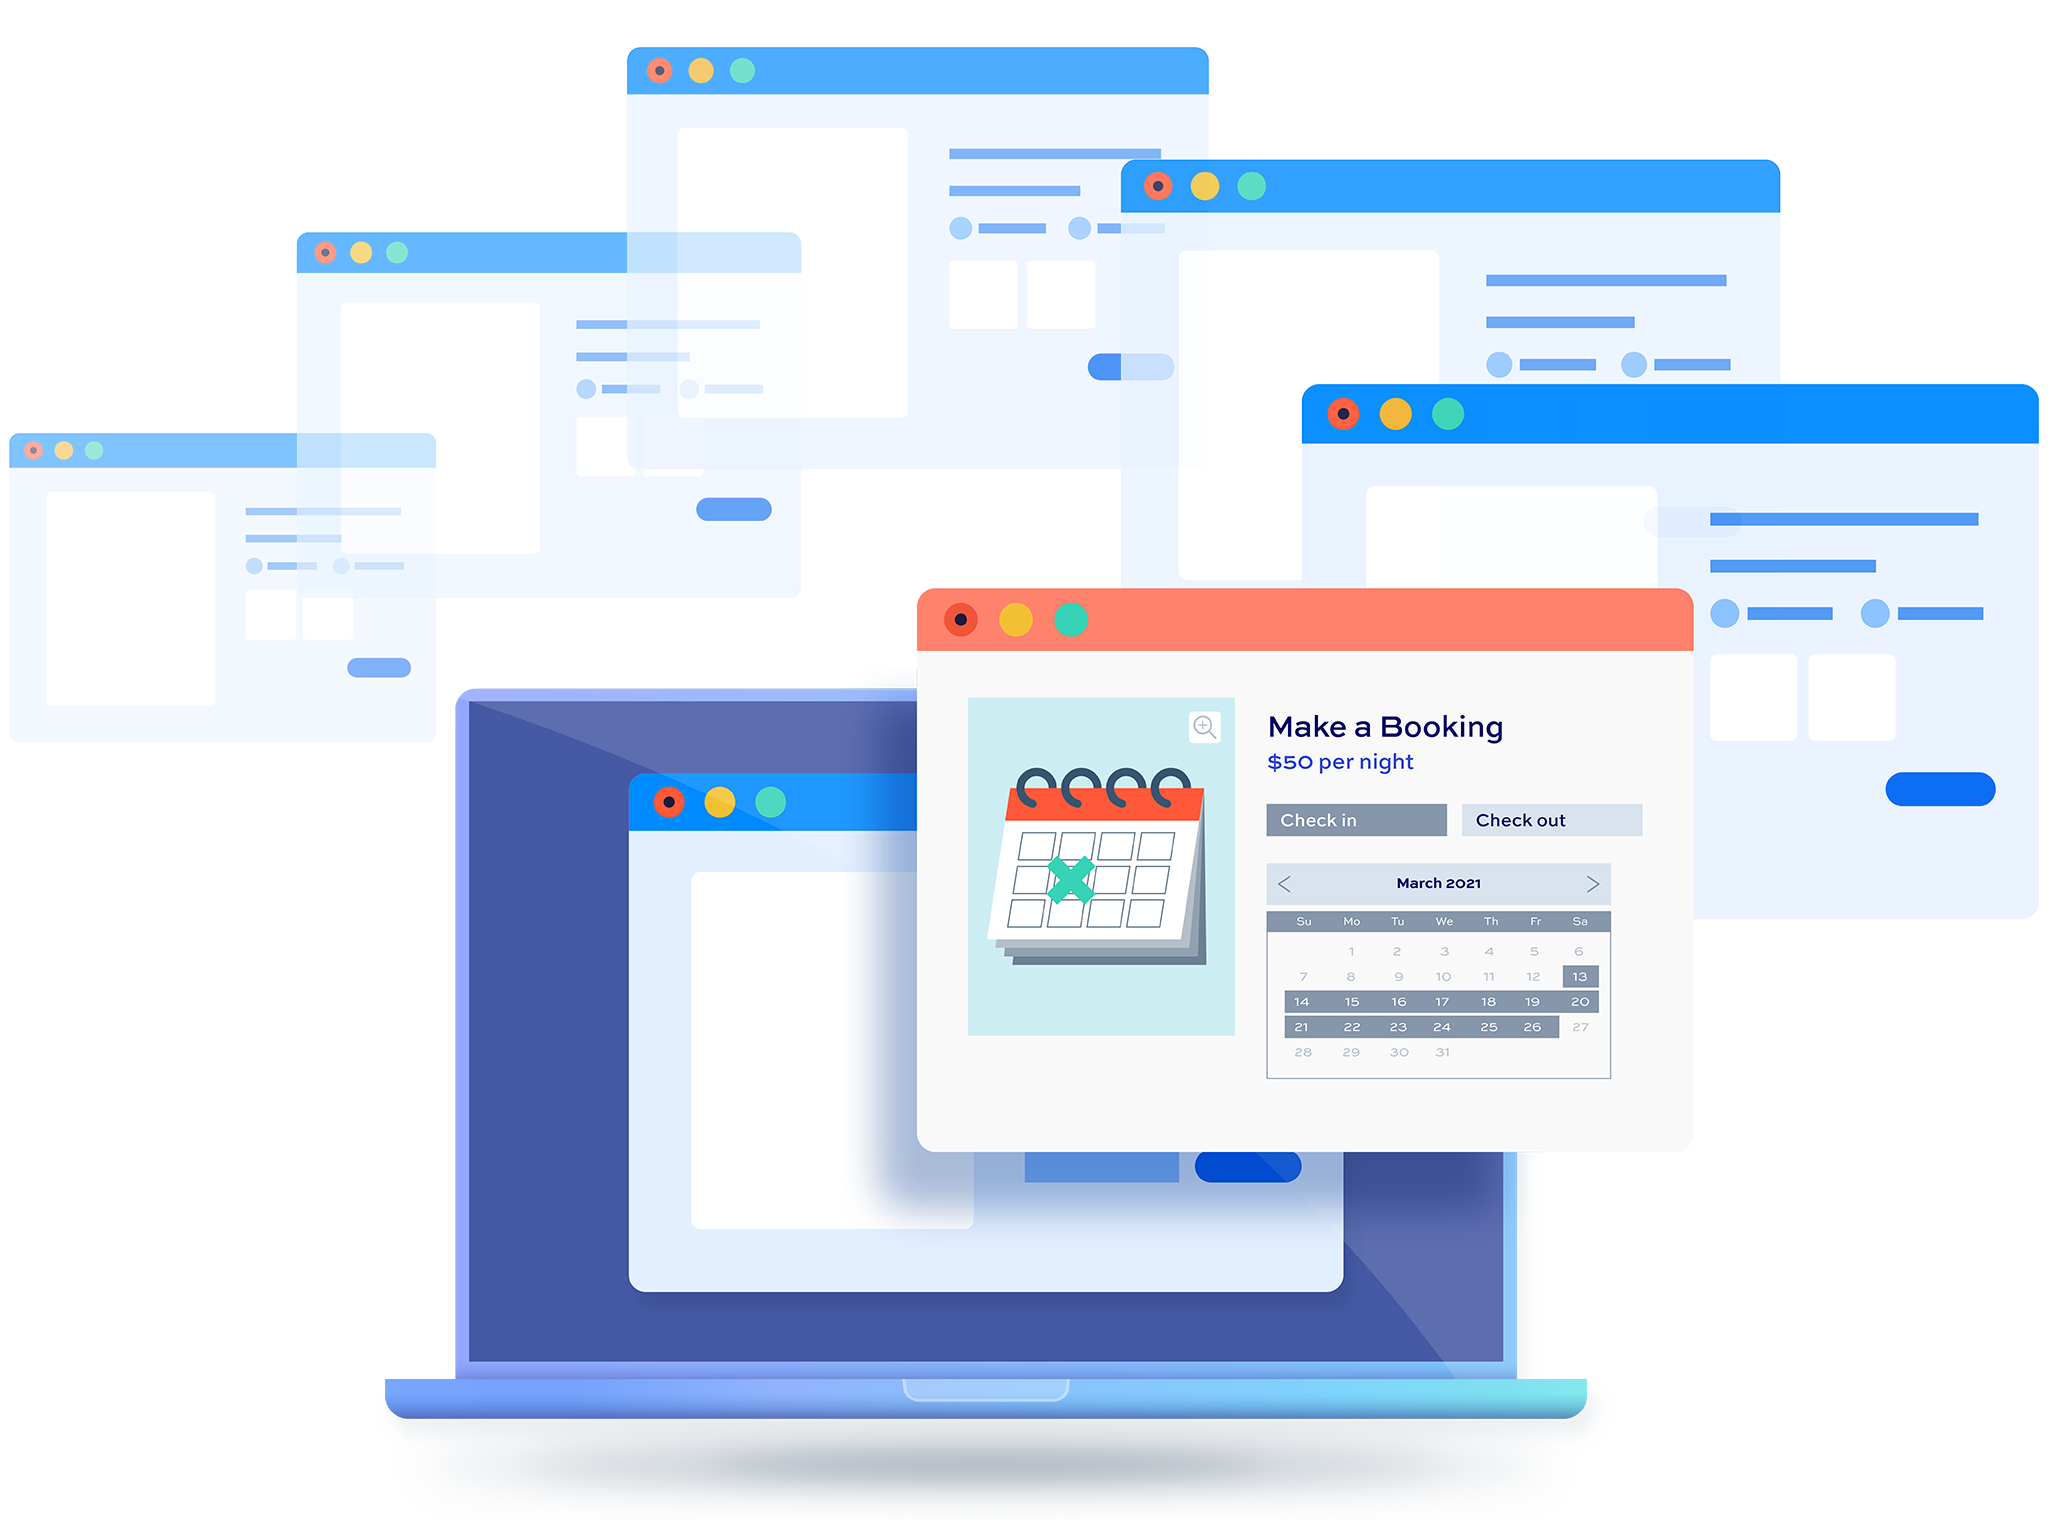
Book yoga classes through WooCommerce – recap
In this article, we looked at how to use the Bookings and Product Add-Ons Bundle to accept bookings for yoga or pilates classes through WooCommerce. This bundle contains two plugins – Bookings for WooCommerce and WooCommerce Product Add-Ons Ultimate.
With Bookings for WooCommerce, you can create date-based bookable products allowing your users to select the date of their class.
With Product Add-Ons Ultimate, you can create time-based bookable sessions, allowing you to offer different timed classes.
The plugins are available separately or together at a discount:
WooCommerce Bookings and Product Add-Ons Bundle
Create the ultimate bookings site in WooCommerce