How to add a checkbox to a WooCommerce product page

To add a checkbox field to your WooCommerce product pages you’ll need a plugin. Out of the box, WooCommerce doesn’t let you add checkboxes to product pages – so you’ll need the WooCommerce Product Add-Ons Ultimate plugin.

In this tutorial, we’ll look at how easy it is to add a checkbox to product pages in WooCommerce. Plus, we’ll look at more advanced stuff like assigning a price to checkboxes, adding conditions to fields, and adding groups of checkboxes.
Why you’d want to add a checkbox to WooCommerce products
Here are a few examples of when you might want to add checkboxes to products on your WooCommerce store:
- Offer gift wrapping with orders. Customers can select the option to either pack their order in gift wrap or order it as-is. Shoppers can select the checkbox next to the “Gift Wrap” option and have their order wrapped in wrapping paper. Customers looking for gifts for friends and family will be more likely to buy from your store.
- Give customers the option to extend the warranty for their product. When adding the WooCommerce product to their cart, customers can select if they want an extended warranty for the product. You can let customers select from multiple checkboxes and add a small fee to each warranty checkbox.
- Offer engraving on products. If you sell personalized jewelry or offer custom printing on apparel items, you can let customers select a checkbox to add an engraving to their product. This way, when the customer selects the checkbox, a text field will appear prompting customers to enter the initials or message they want to have engraved on the WooCommerce product.
- Age verification for certain products. A checkbox is a great way to set up age verification for certain products on your WooCommerce store. For instance, if you sell alcoholic beverages such as wine, beer, or spirits, you need age verification so only people above the legal drinking age can buy from your store.
How to add a checkbox to your WooCommerce products
We’ll assume you already have a WordPress site ready to go along with some WooCommerce products added to the store. We’ll also assume that you have already downloaded and installed the Product Add-Ons Ultimate plugin to your site.
To add a checkbox field to your WooCommerce product:
- Edit the product where you’d like to add the checkbox field
- Click on the ‘Product Add-Ons’ tab in the ‘Product data’ section
- Click ‘Add Group’ then ‘Add Field’
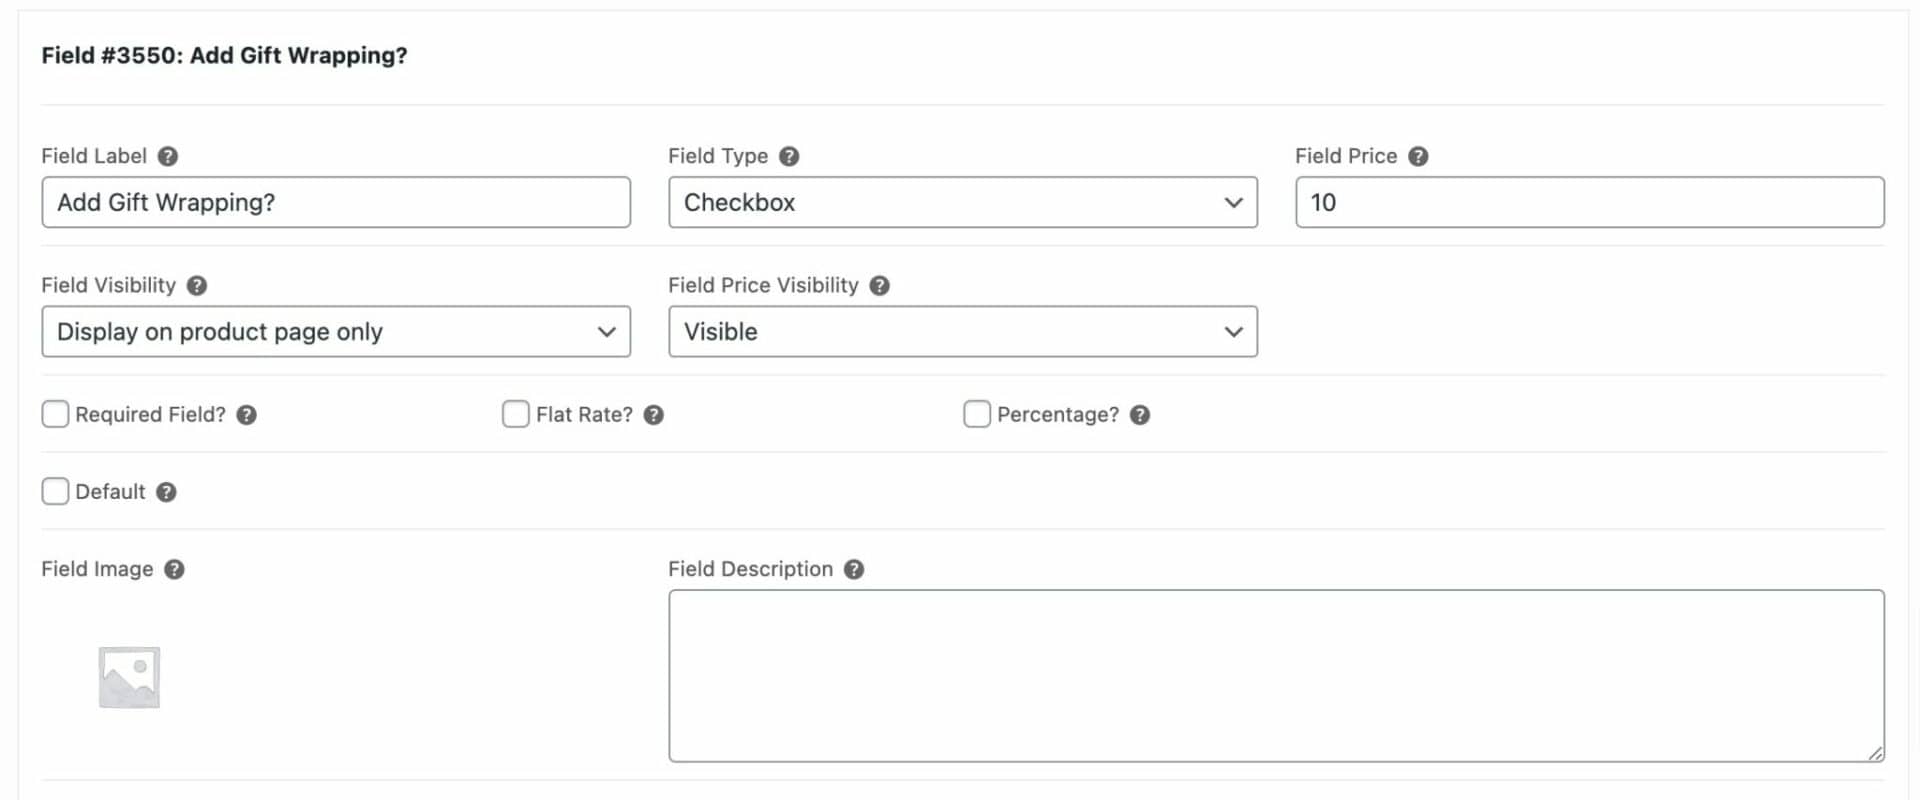
- Select ‘Checkbox’ in the ‘Field Type’ setting
- Enter a name for your field in the ‘Field Label’ setting. This is the text that will appear against the checkbox
- If you want to add to the product price when the checkbox is selected, enter a value in the ‘Field Price’ setting. The product price will increase by this amount when the checkbox is selected by the user on the front end
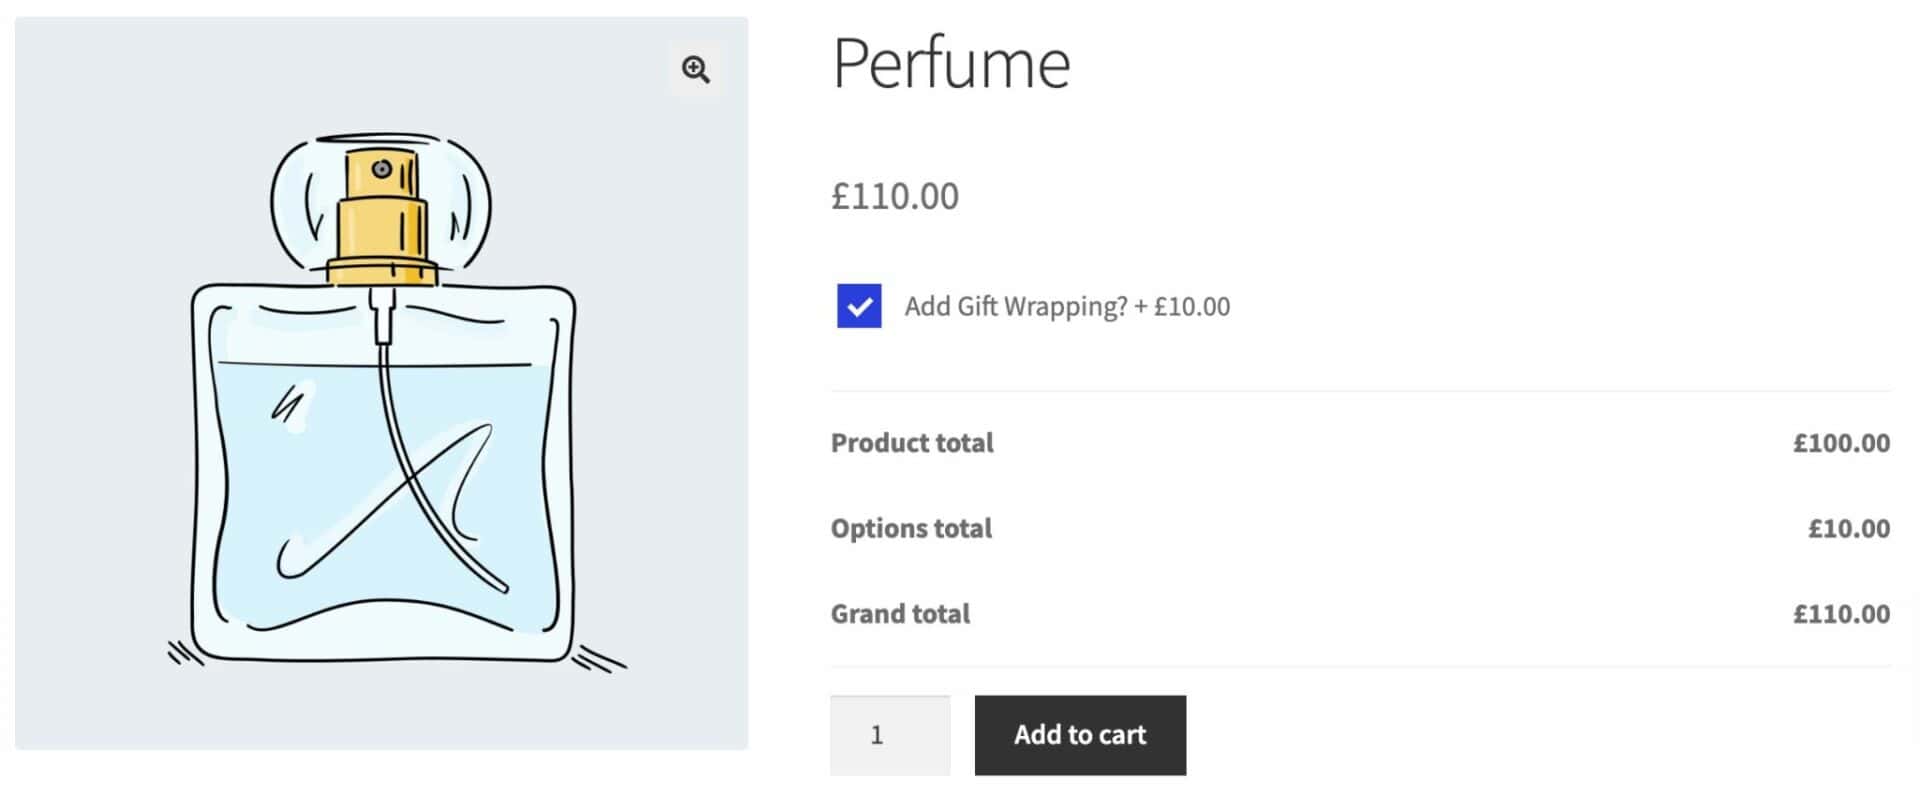
That’s all you need to do. Save your product and take a look on the front end.
Adding prices to checkbox fields
If you’ve added a price to the field, users will see the product price increase when they select the checkbox.
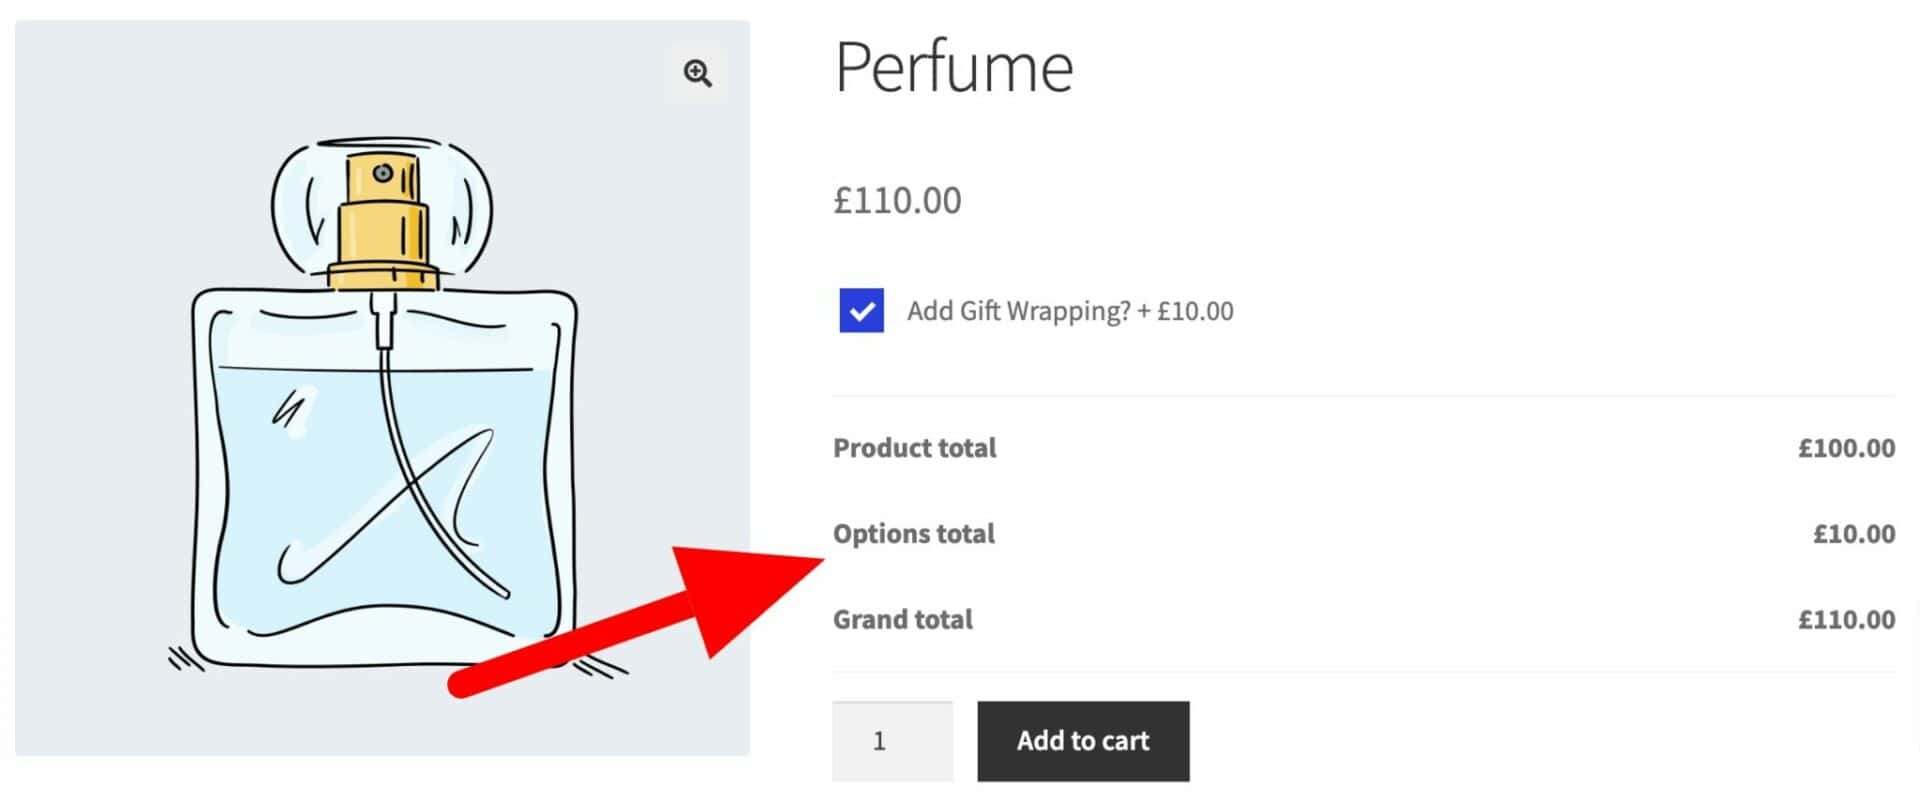
Add-Ons Ultimate provides the user with breakdown of the product price. At the bottom of the product page, just above the ‘Add to Cart’ button, there’s a summary showing the base product price and the combined cost of any add-on fields – including checkboxes. This summary can edited if you wish.
Additional settings for checkbox fields
You might want to define some extra settings for your checkbox fields.
Choosing which screens to display the checkbox value on
By default, the checkbox will appear on the product page and if the user selects it, they’ll see this indicated in the cart, checkout and order pages.
If you prefer, you can choose just to display the checkbox on the product page and hide its value in the cart, checkout and order.
To do so, just choose ‘Display on product page only’ in the ‘Field Visibility’ setting.
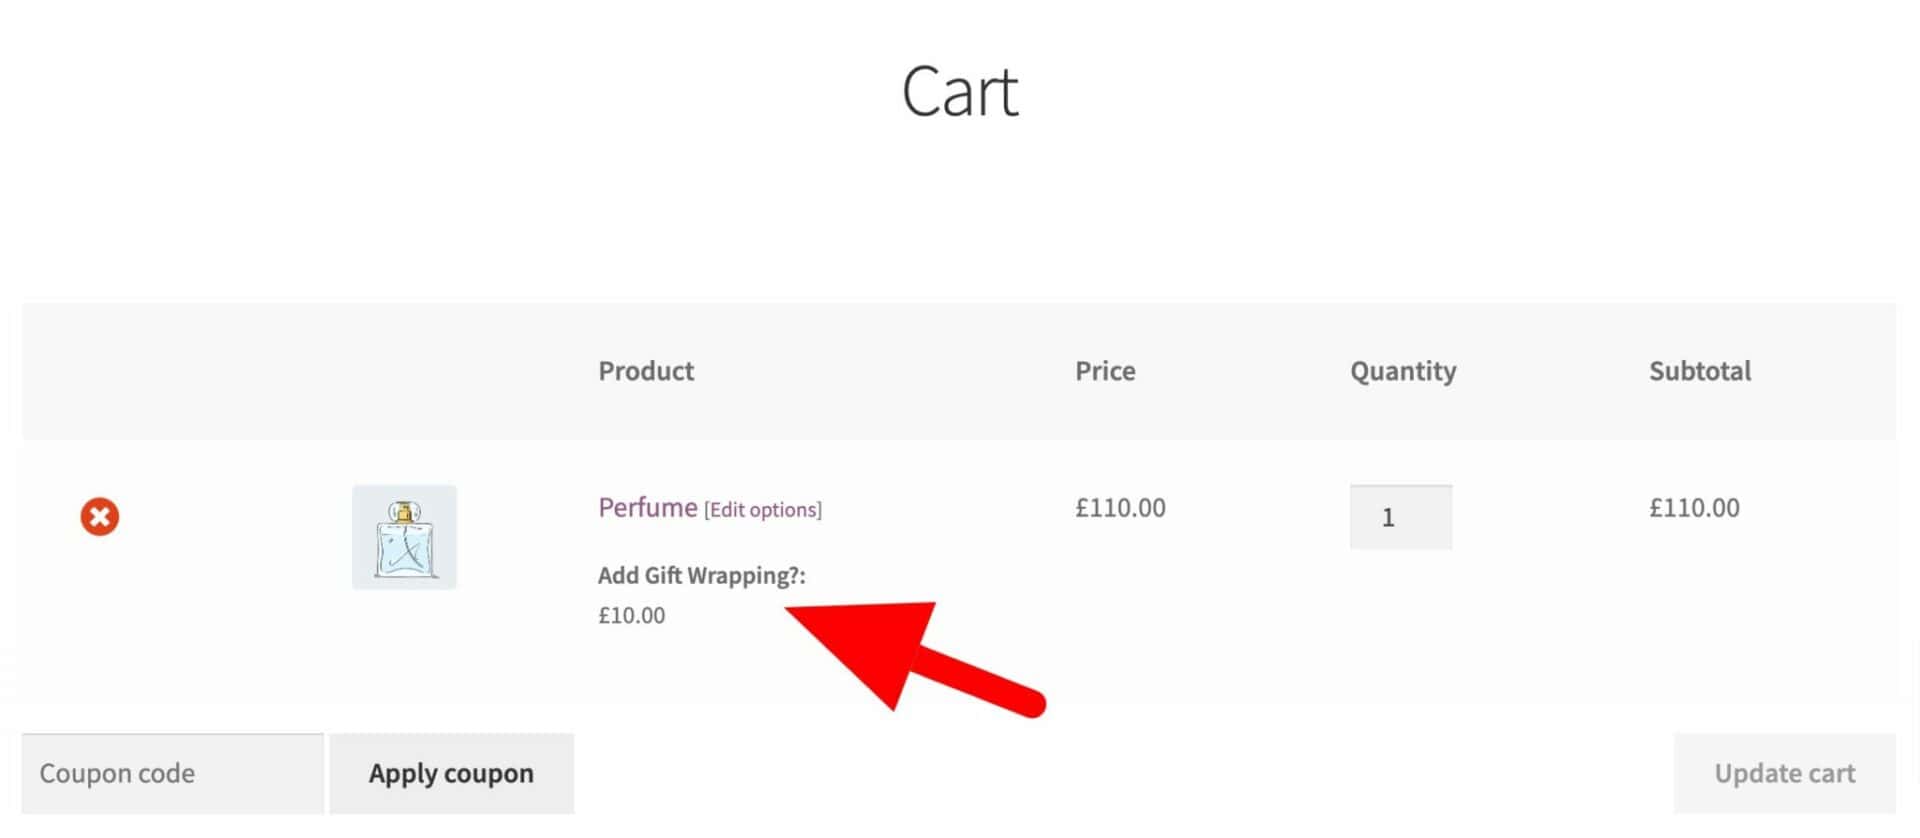
If you’ve decided to display the checkbox field value on the cart and checkout pages, the user will see it as part of the product line item. The field label and any price will be listed under the product title.
Choosing which screens to display the checkbox price on
Likewise, you might want to choose where you display any price associated with the field. Use the ‘Field Price Visibility’ setting to define where the field price is displayed.
Setting the price as a flat rate
If you have assigned a price to your field, this will be added to the product price for each quantity of the product that the user adds. If you would like to add the checkbox field price only once to the order, no matter how many items the user orders, then select the ‘Flat Rate’ option.
This is useful if you want to charge a one-off handling or processing fee.
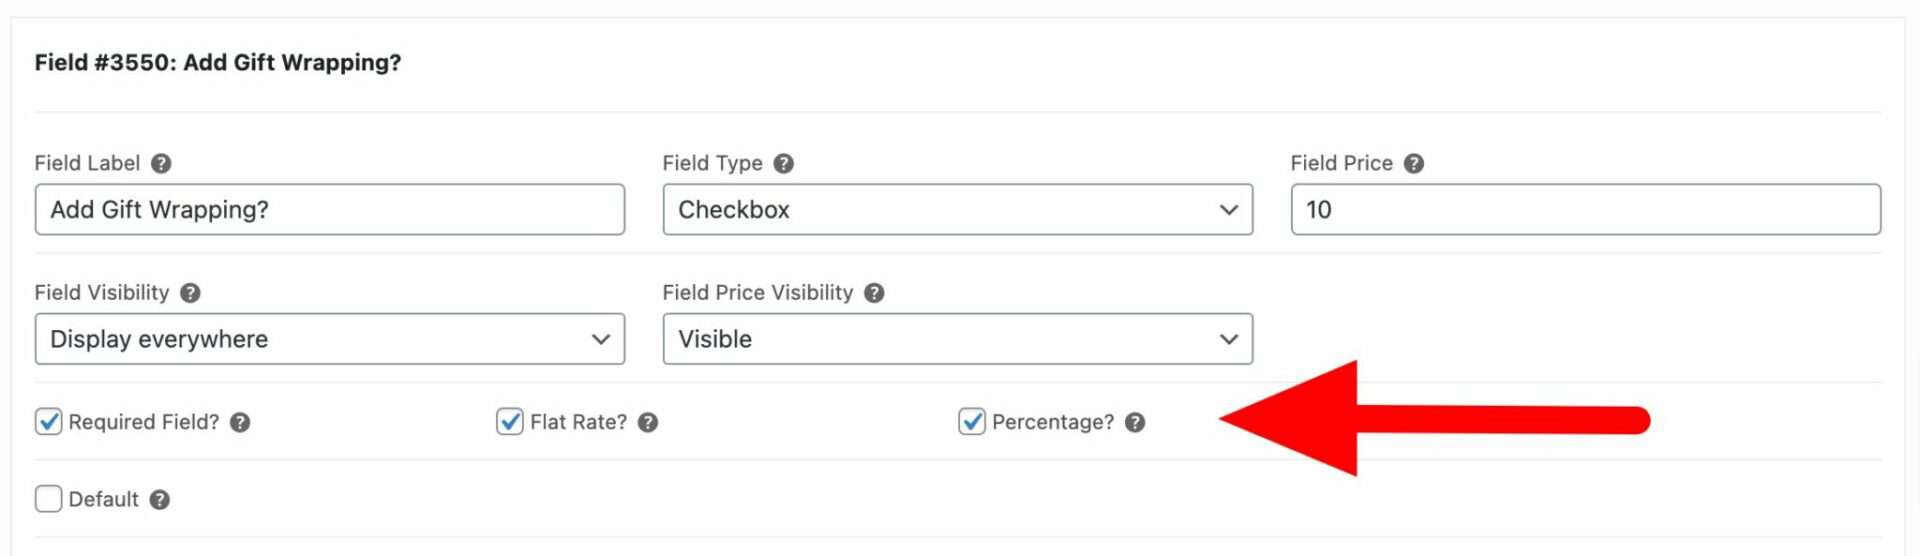
Defining the checkbox price as a percentage of the product price
If you’d like to set the field price as a percentage of the product price, check the ‘Percentage’ option.
Ensuring that the checkbox is selected by the user
Sometimes, you might want to ensure that the user selects the checkbox before they can add the product to the cart. For example, if the user needs to verify that they are over 18 you can enable the ‘Required’ setting.
Setting the checkbox to selected by default
If you would like the checkbox field to be selected by default, just check the ‘Default’ option.
Adding extra information to the field
You can assign an image and additional description to the field.
Displaying a checkbox as a button or text swatch
If you prefer, you can choose to display a checkbox field like a “button” or text swatch. Just select the ‘Display as Swatch?’ parameter.
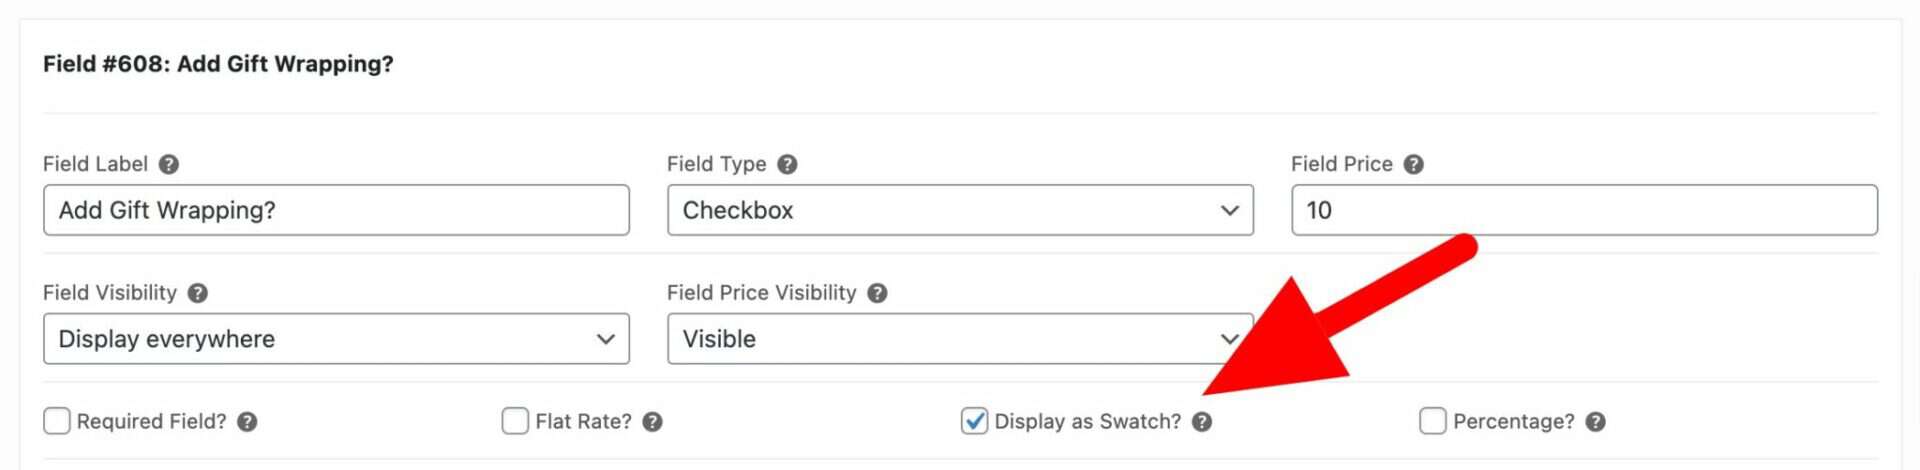
Your checkbox will now display as a button that users can toggle on and off.
How to add a checkbox group to your WooCommerce product page
We’ve seen how to add a single checkbox field to your product. You can add as many of these as you like to your products.
However, you might want to create a checkbox group. This is a single field with multiple checkboxes as options. It’s slightly different from adding multiple single checkbox fields because you can set extra parameters – like ensuring that the user picks a minimum or maximum number of options.
Adding a checkbox group to your product
To add a checkbox group:
- Edit the product where you’d like to add the checkbox group
- Click on the ‘Product Add-Ons’ tab in the ‘Product data’ section
- Click ‘Add Group’ then ‘Add Field’
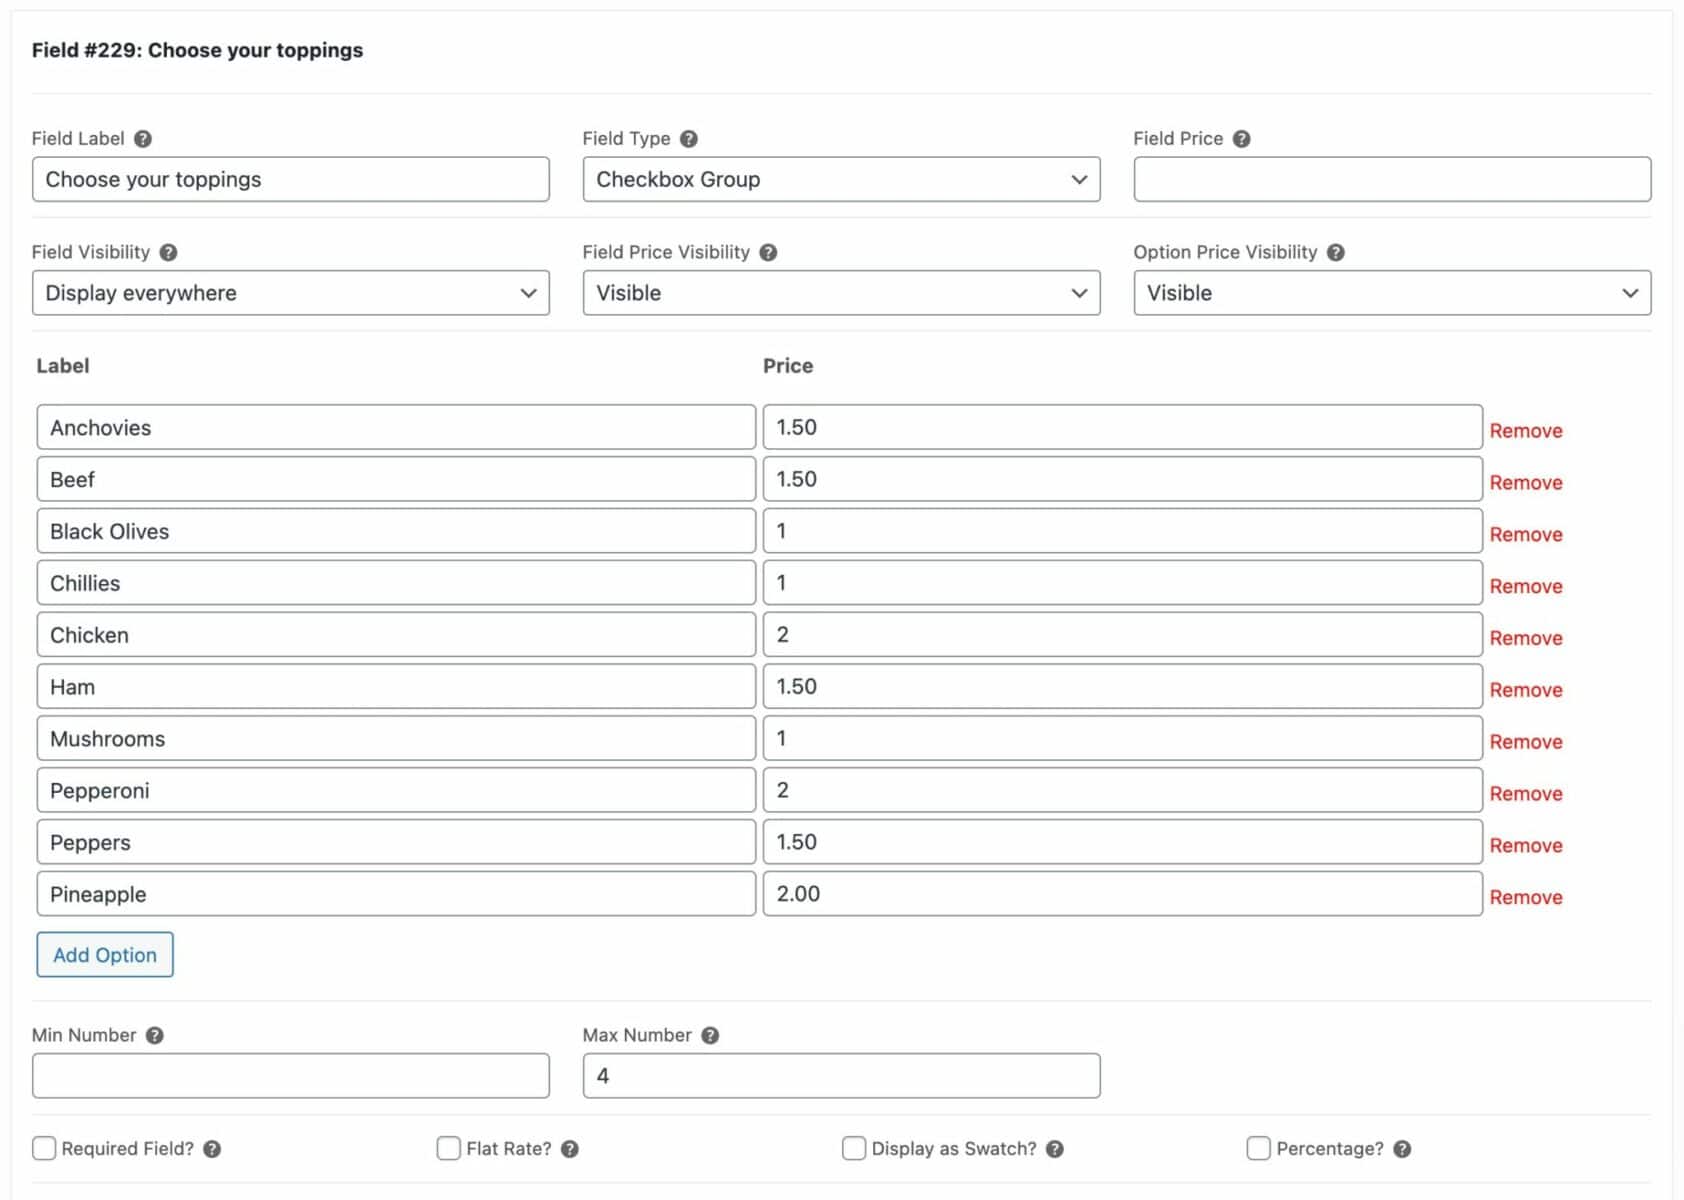
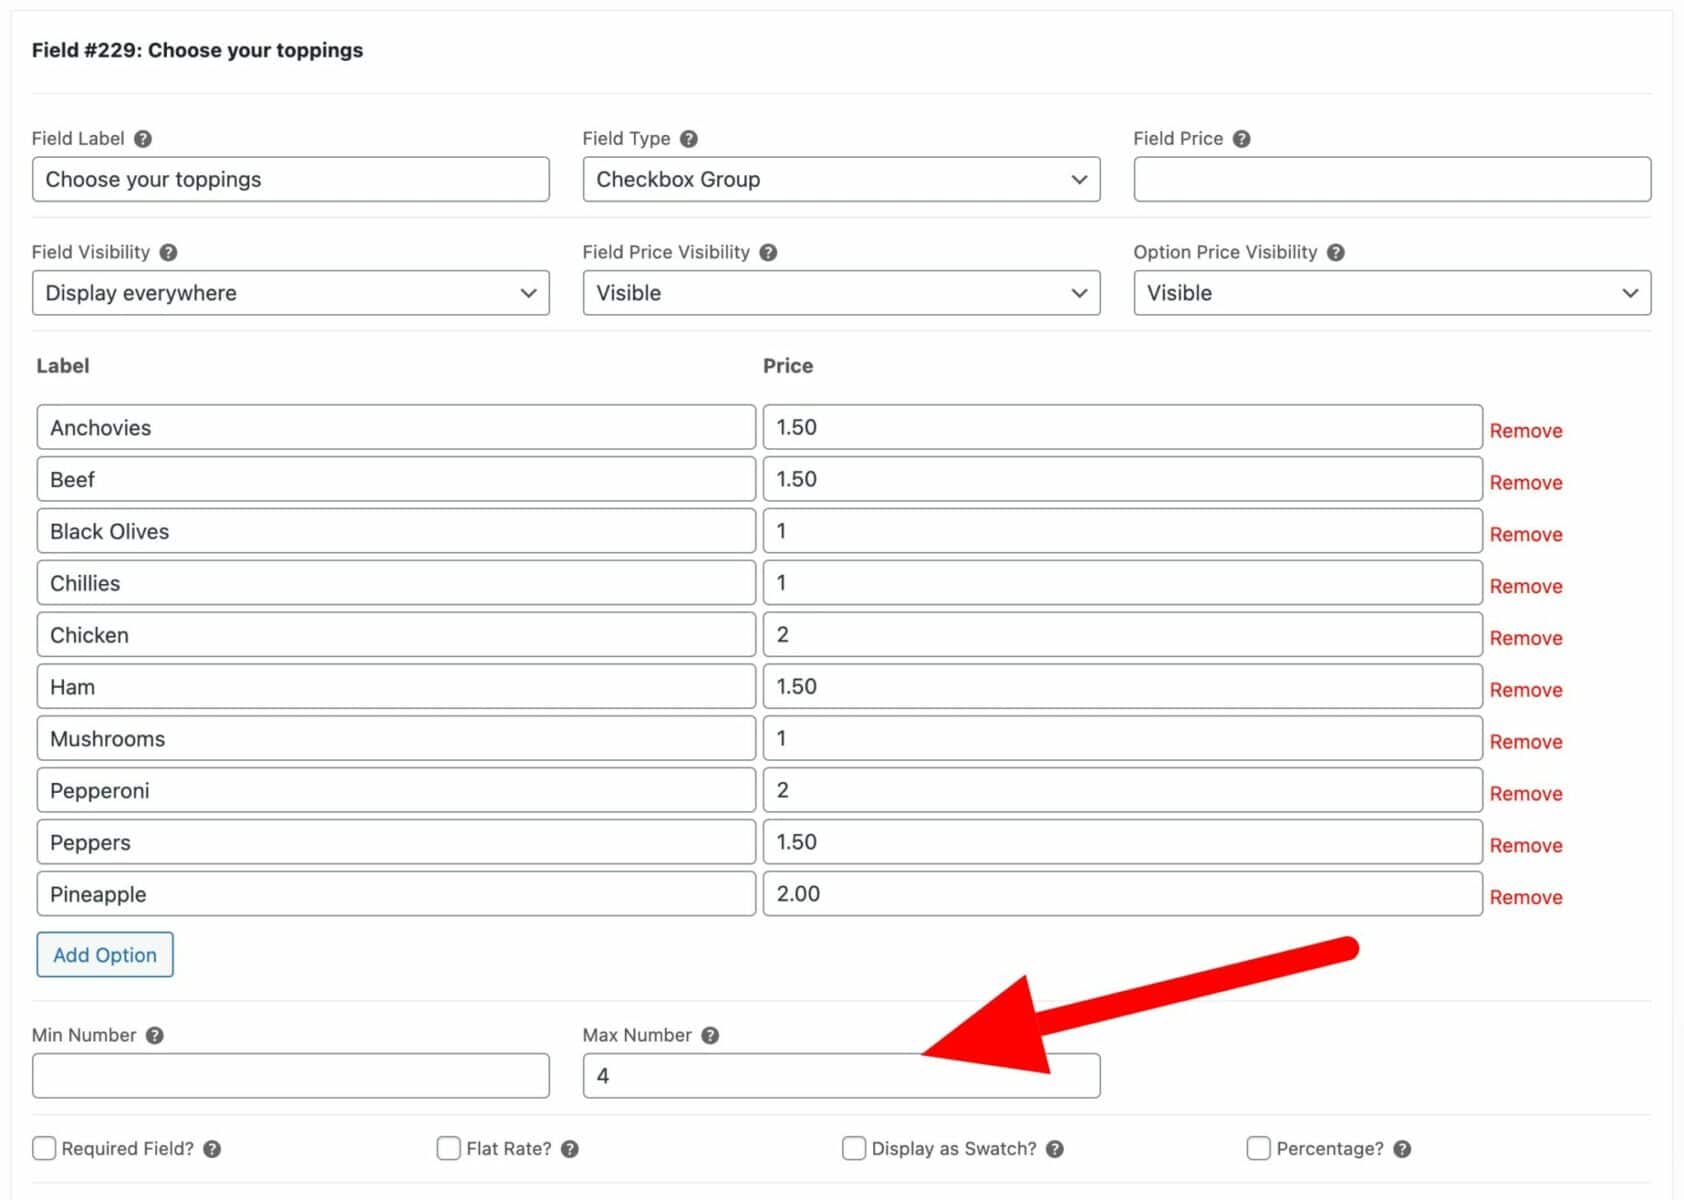
- Select ‘Checkbox group’ in the ‘Field Type’ setting
- Enter a name for your field in the ‘Field Label’ setting
- Click the ‘Add Option’ button. Each option will be a separate checkbox within the group
- Enter a label and price for each checkbox
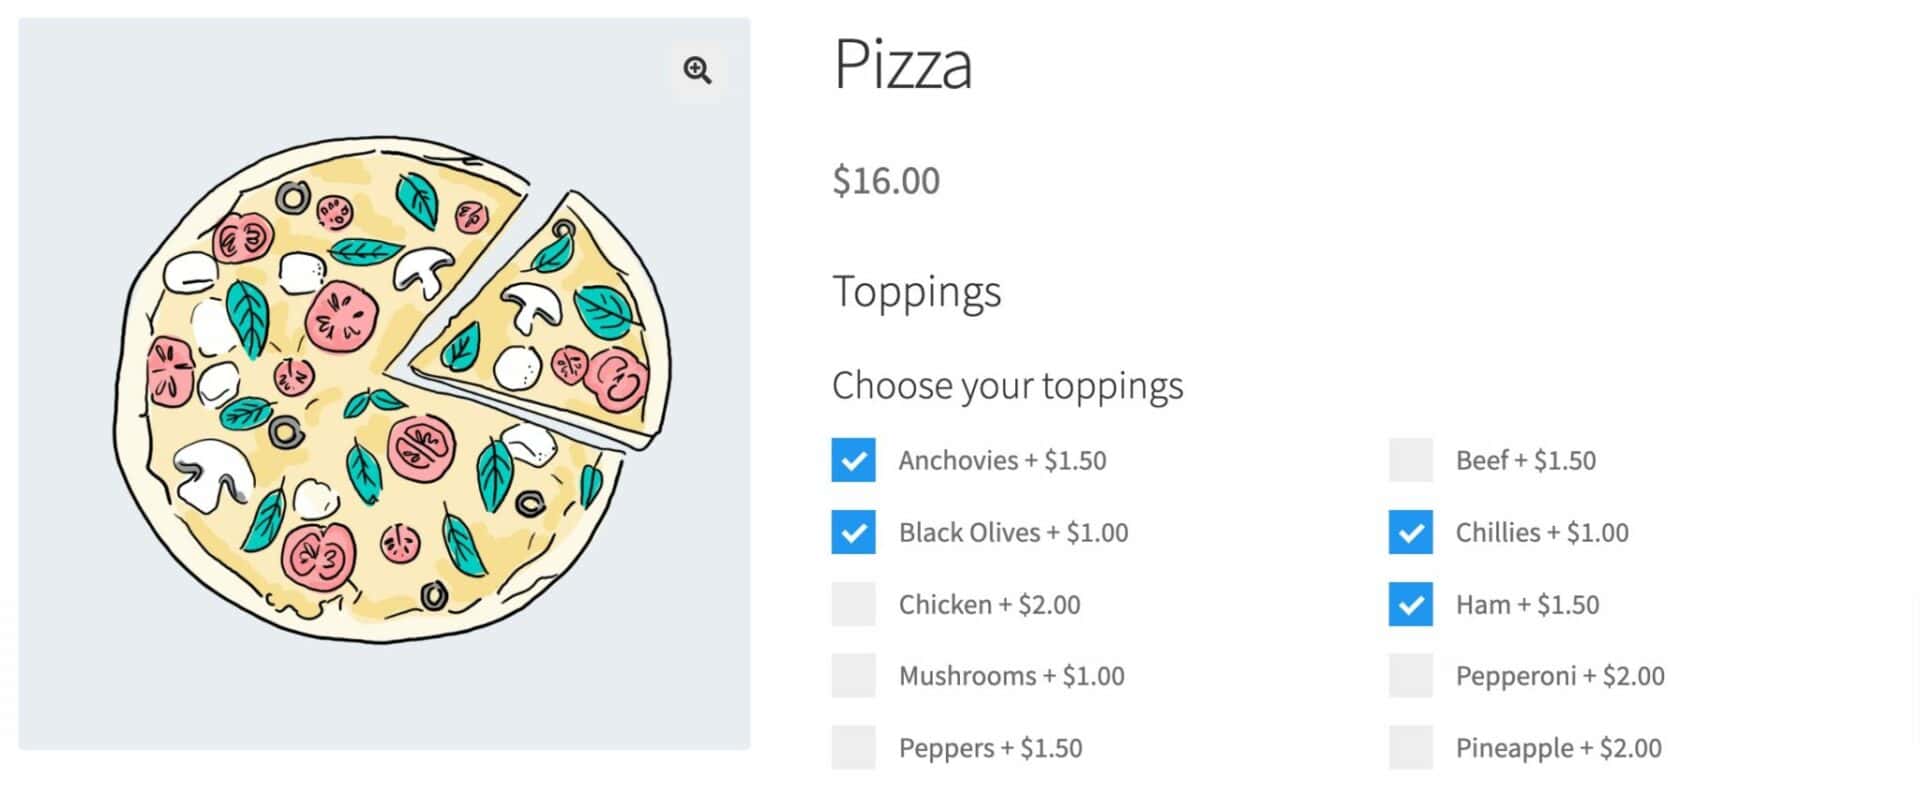
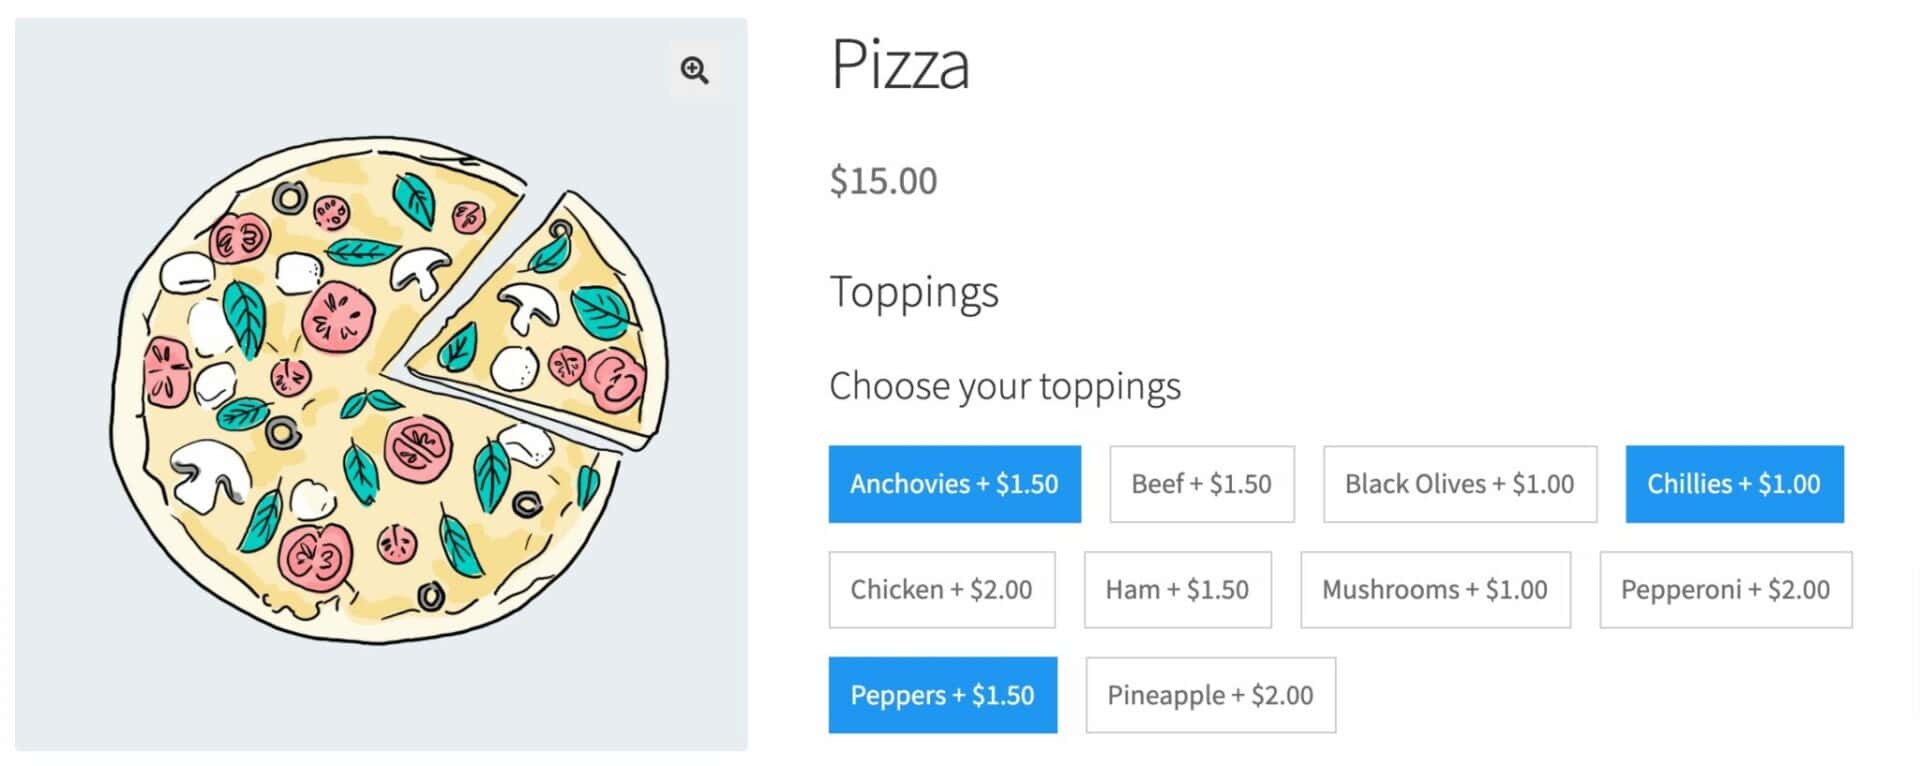
This is how a checkbox group will look on the front end.
Extra settings for checkbox groups
There are some additional features that are unique to checkbox groups.
Adding prices to checkbox groups
Just as with a single checkbox, you can add a price to a checkbox group field. Just enter a value in the ‘Field Price’ setting. This price will apply if the user selects any of the checkboxes in the group.
For a more granular approach, you can also assign prices to each option – so the price for Option A will only be added to the product price when the checkbox for Option A is selected.
Minimum and maximum numbers
If you want to ensure that your users select a certain number of options within a checkbox group, you can use the ‘Min Number’ and ‘Max Number’ settings. Enter a value in ‘Min Number’ to ensure that users pick a minimum number of options from the group; and/or enter a value in ‘Max Number’ to limit the total number of options they can pick.
Displaying checkbox groups as buttons
Just as with single checkboxes, you can also display checkboxes in a group as “buttons” or text swatches. Just select the ‘Display as Swatch?’ option.
Using conditional logic with checkbox fields
You can use conditional logic in a couple of different ways with checkbox fields. You can display other fields depending on whether the user selects the checkbox or not; or you can display the checkbox field depending on the value of other fields.
Let’s have a look at both options.
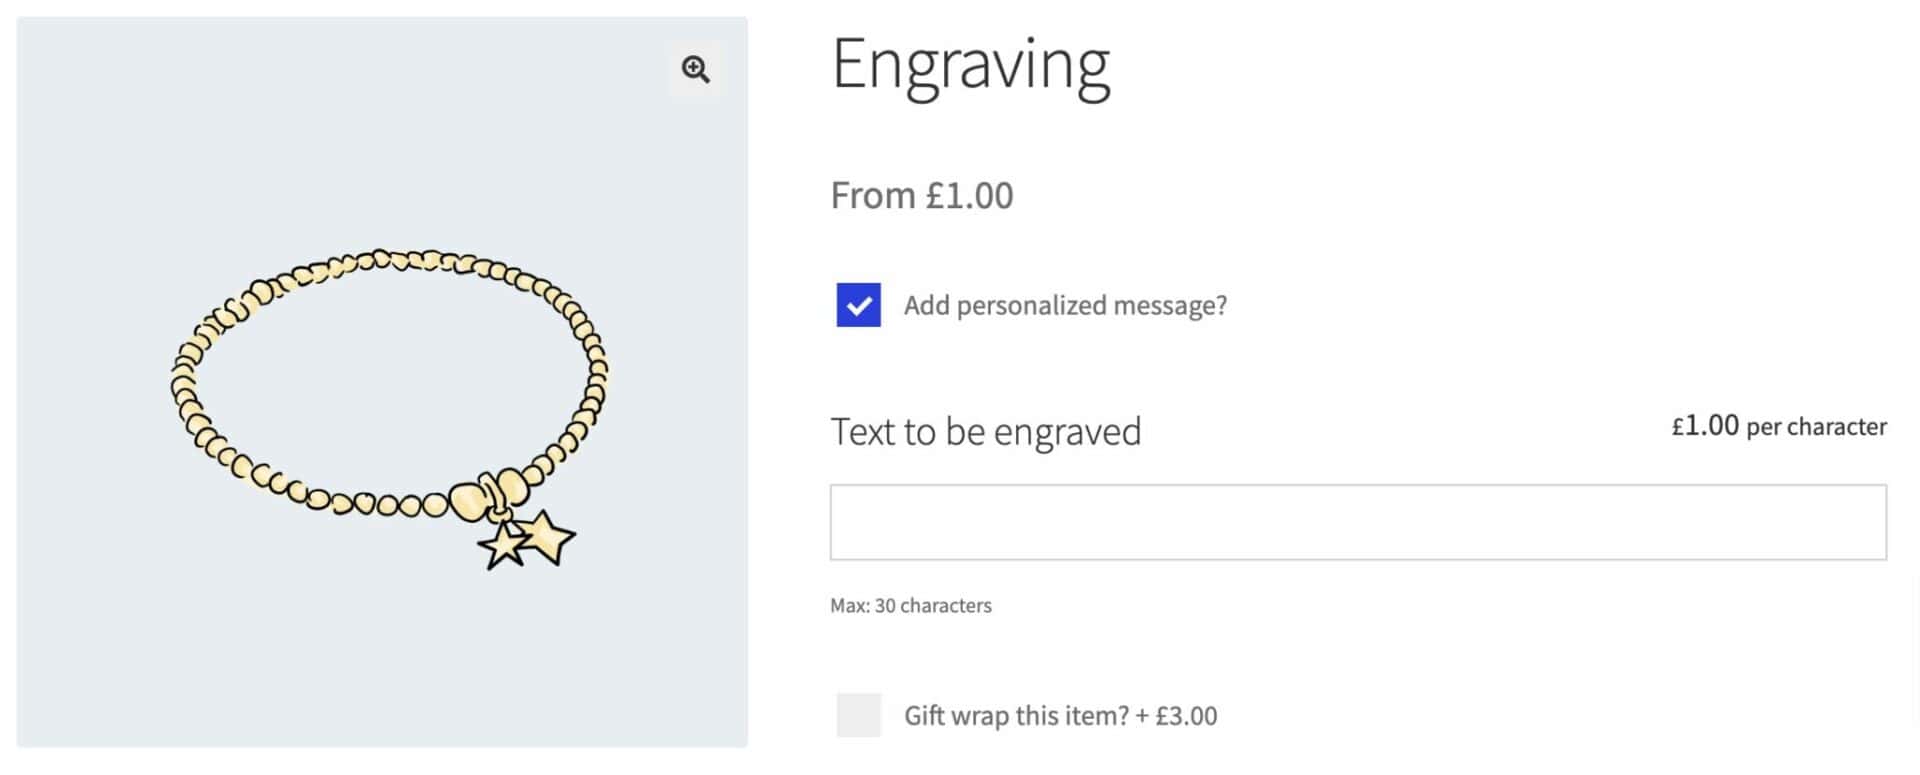
In this product, we’re offering the option to the user to have text engraved on an item of jewelry. So we’ve got a checkbox field for them to select the option then, if the checkbox field is selected, a text field will display.
To set this up, we add a condition on the text field like this.
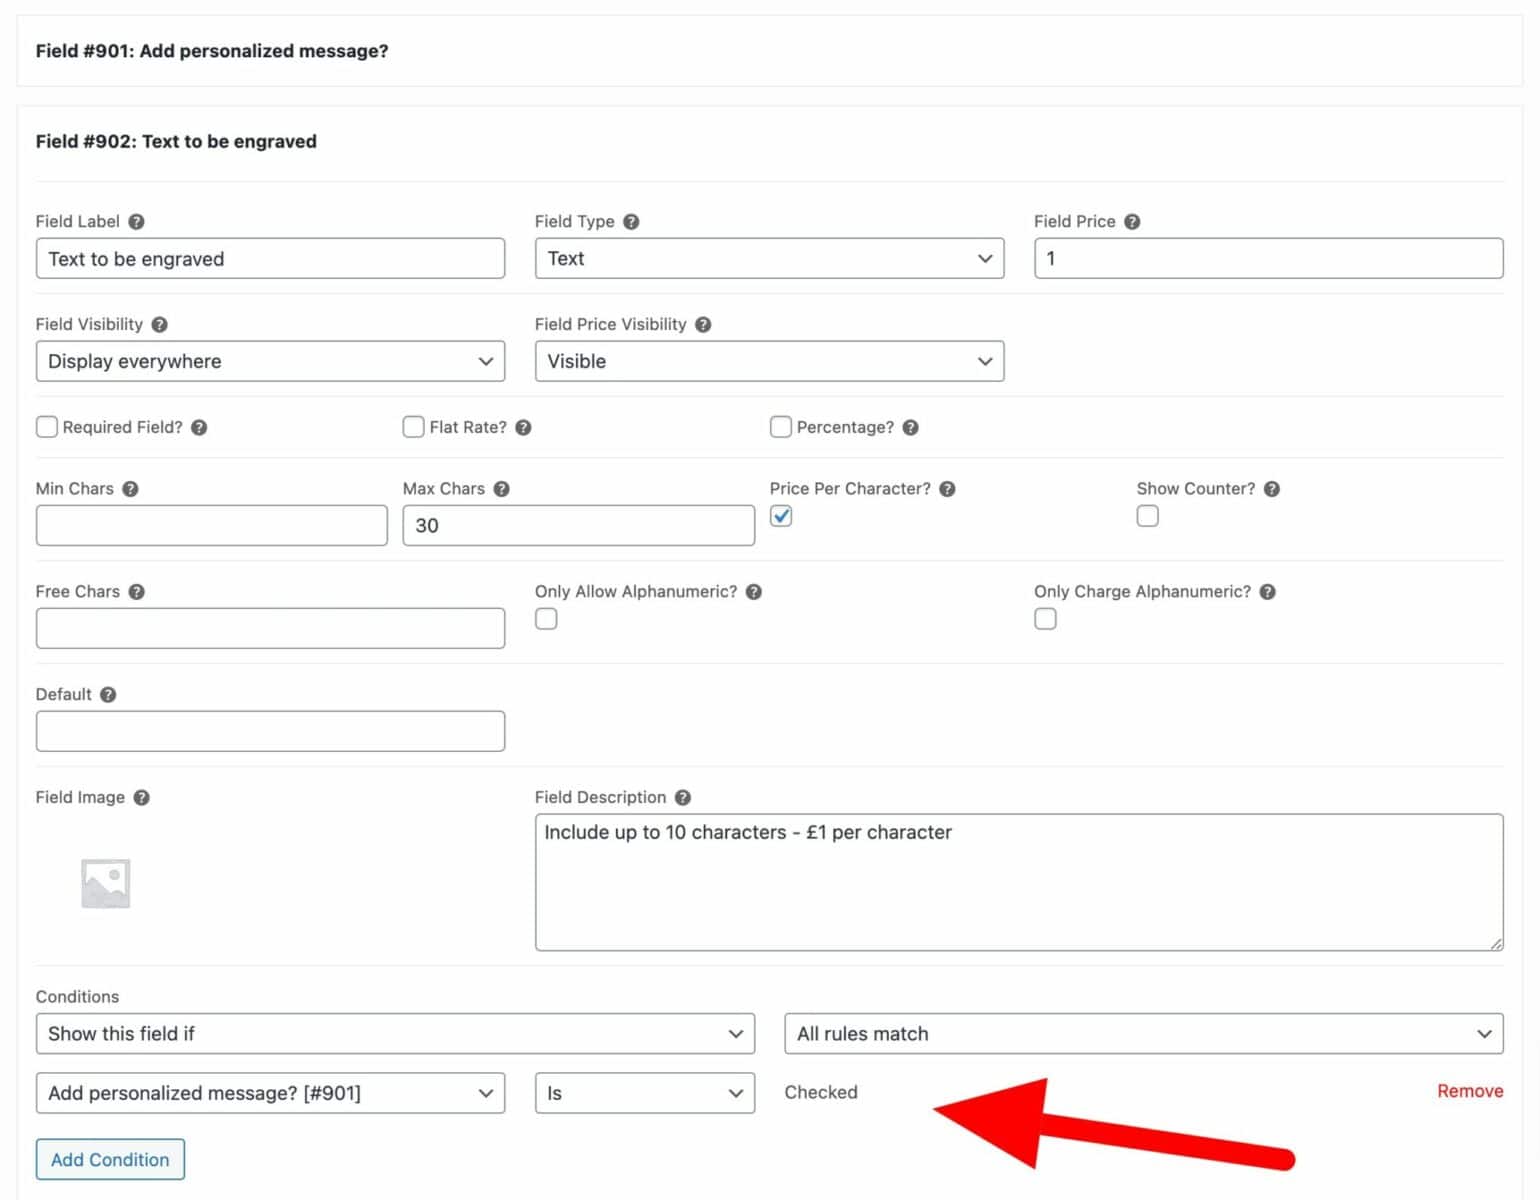
You can see that the text field is set to show if the value of the checkbox field is ‘checked’.
We can also decide to display a checkbox field if the user has selected a certain value in another field. So a checkbox field would only be displayed when the user selects specific text in a text field.
Adding checkbox fields to multiple product pages in WooCommerce
Let’s say you need to add the same checkbox field to some or all your products. For example, you’d like to offer an extended warranty on all your tech items.
Instead of adding a field to each product individually which could be laborious and time-consuming, you can create a field globally and add it to multiple (or all) products in one hit.
Go to Product Add-Ons > Global Groups and add your group and field as above. Then pick which products to display the field on. You can choose from:
- All products: your checkbox field will display on every product on your site
- By product: choose specific products to display the field on
- By category: choose specific categories. The field will display on all products within those categories
Adding other field types with Add-Ons Ultimate
Product Add-Ons Ultimate isn’t confined to just adding checkboxes to your product forms. It allows you to add around 20 custom product options, including:
- Calculation fields
- Checkboxes
- Dropdown lists (select fields)
- Datepickers
- File uploads
- Number fields
- Radio buttons
- Products (use other products as options)
- Swatches
How to add a checkbox to a product page in WooCommerce – video tutorial
Check out this video on adding checkboxes to WooCommerce product pages:
Adding checkboxes to WooCommerce product pages
Adding checkboxes to WooCommerce products is a great way to offer free and premium product add-ons. This way, you can add more value to existing products and offer a more personalized shopping experience on your WooCommerce store.
To add checkboxes, you’ll need the WooCommerce Product Add-Ons Ultimate plugin. It’s compatible with all WordPress themes and is backed by a 14 day money back guarantee – so you can try it risk-free.
Hi, does the plugin work with discount codes ? I mean, I want genuine client to pay $15 for an option but if they have a discount code, they won’t pay this $15 option. I don’t know if i made myself clear
Hi
We don’t currently have an option to remove the cost of an add-on if a discount code is applied.
Thanks.