WooCommerce car rental: the complete guide (+ best plugins)
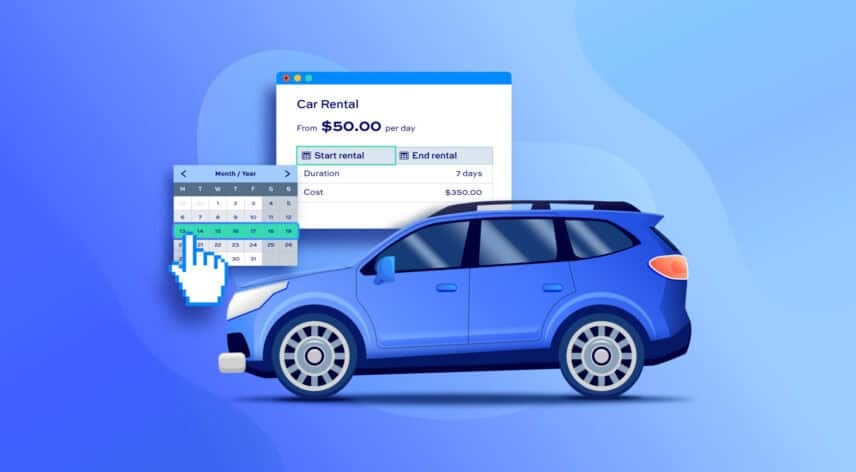
If you run a car rental business and want to take bookings online, WooCommerce is a powerful and flexible platform to build on. In this guide, we’ll show you how to set up a fully functioning car rental website – with real-time availability, automatic pricing, fleet capacity management, and optional extras like car seats and insurance waivers.
We’ll be using Bookings for WooCommerce as the core plugin throughout the tutorial. We’ll also cover seasonal pricing, security deposits, and how to manage bookings once they start coming in. At the end, you’ll find a comparison of the best WooCommerce car rental plugins to help you make the right choice for your business.
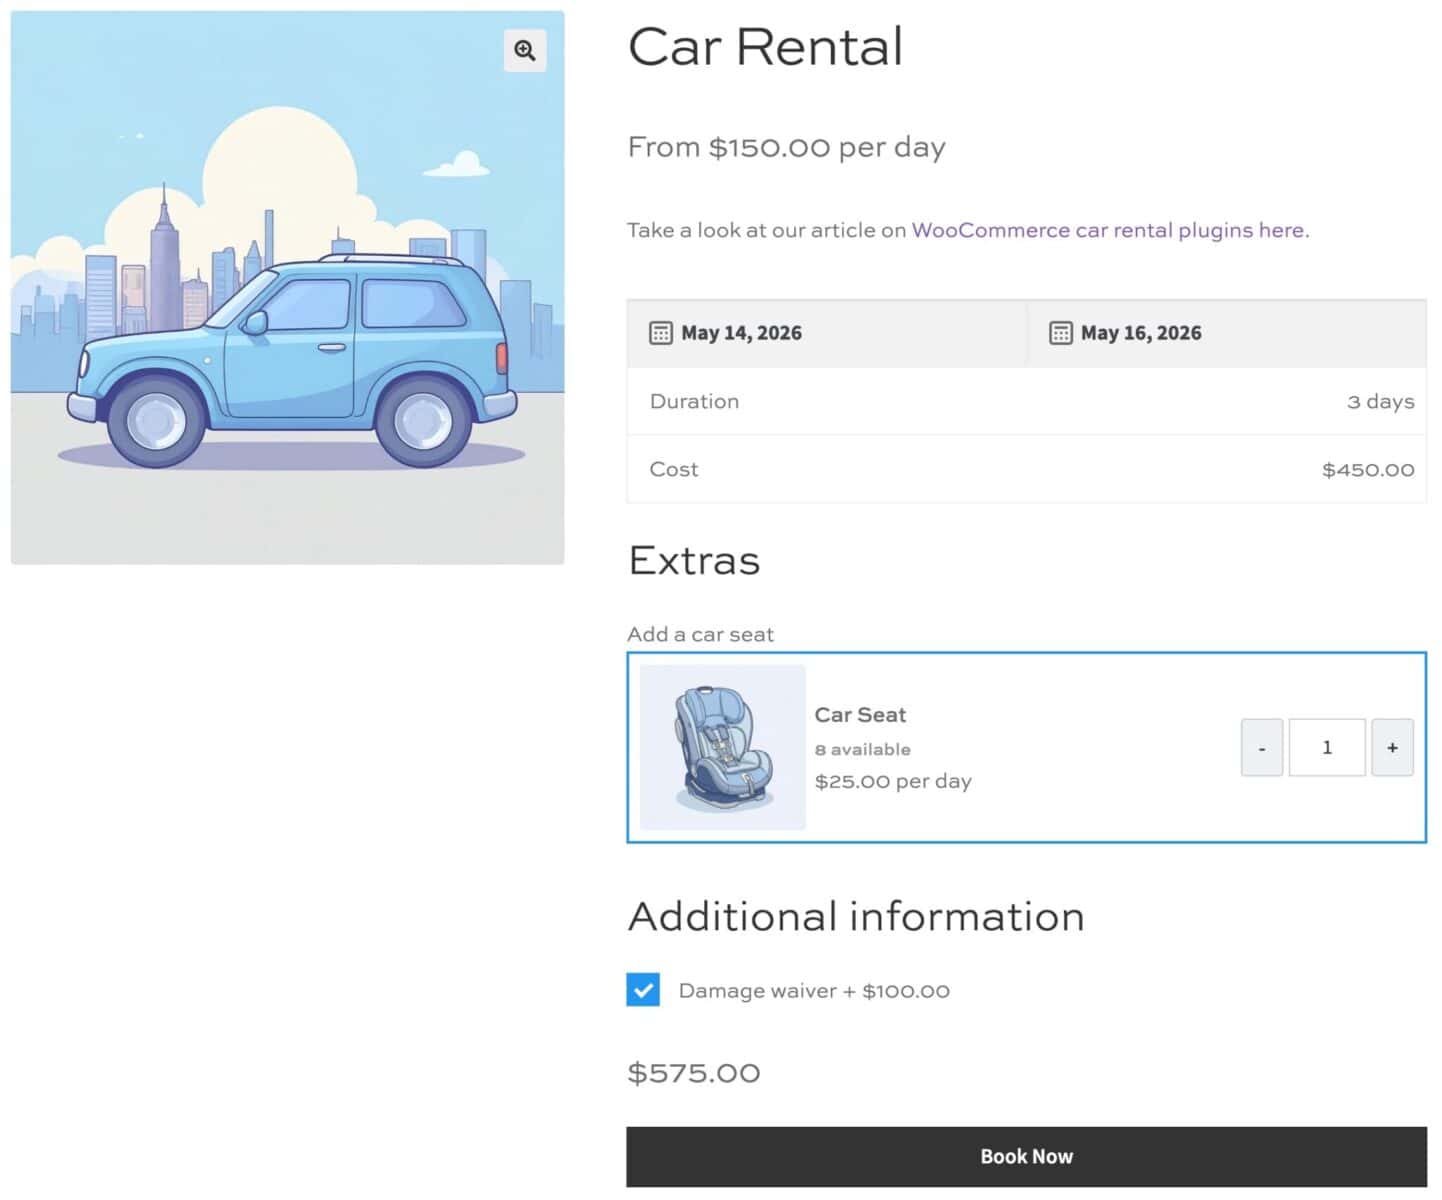
We’ll assume you already have WordPress and WooCommerce installed and running.
Is online car rental a good market to be in?
According to Statista, the global car rentals market is projected to reach US$106.37bn in revenue by 2025, growing at around 5% annually to US$135.75bn by 2030. And the shift to online is well underway – online bookings already account for around 75% of the market, a share expected to grow at a CAGR of over 6.9% through 2035.
A well-built booking website puts you in front of customers who are ready to search, compare, and pay online – without relying on third-party platforms that take a cut of every booking.
Why use WordPress and WooCommerce for car rental?
There are plenty of dedicated car rental SaaS platforms out there, but WooCommerce gives you advantages that are hard to match:
- Full ownership of your site and data – no platform lock-in
- No transaction fees or revenue cuts on every booking
- Flexible and extensible with plugins for almost any requirement
- A huge ecosystem of themes, payment gateways, and add-ons
- Lower long-term cost compared to monthly SaaS subscriptions
- Strong SEO potential from a self-hosted WordPress site

Simple, effective and easy to understand plugin that made it easy for customers to quickly book their car on our car rental site. Seasonal rates and general discounts are automatically calculated. Not to forget the support is excellent
Why do you need a dedicated booking plugin?
WooCommerce is a great foundation, but it doesn’t include the features a car rental business needs. That’s where Bookings for WooCommerce comes in. It adds everything you need directly inside WooCommerce:
- A date picker so customers can select their start and end dates
- Real-time availability management and a color-coded calendar
- Automatic pricing calculation based on rental duration
- Buffer time between bookings for cleaning and inspection
- Double-booking prevention through fleet capacity controls
- A front-end availability search so customers can find vehicles by date range before they book
Customers can search your entire fleet by date range to see what’s available, select their rental period, and get an accurate price – all before they reach the checkout. On the admin side, you get full booking management built directly into WooCommerce.
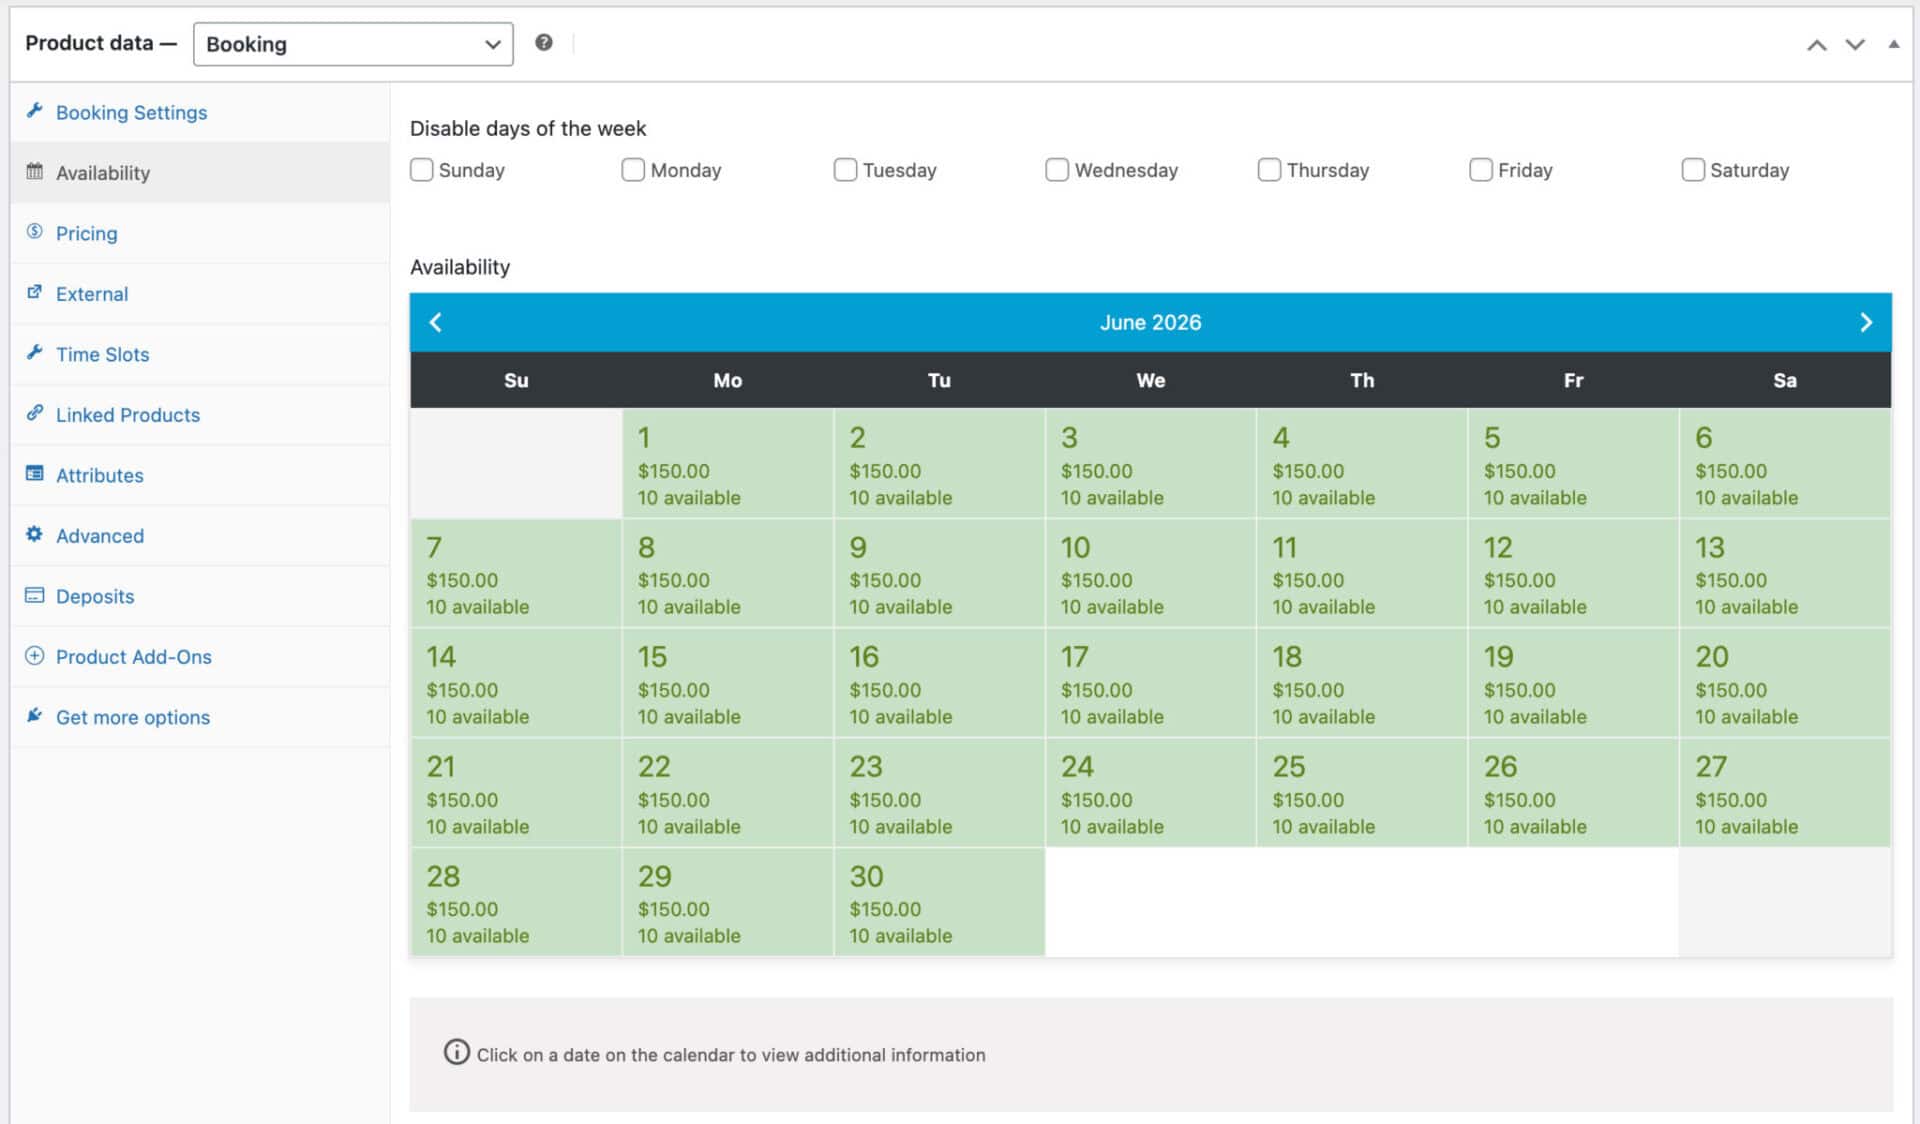
You can also take a look at our fully functioning demo product.
What does a car rental website need?
Before we get into the tutorial, let’s look at what a car rental site actually requires:
- A date picker so customers can choose their start and end dates
- Real-time availability to prevent double bookings
- Automatic price calculation based on rental duration
- Vehicle listings with photos, specs, and descriptions
- Fleet capacity management by vehicle type
- Optional extras at checkout – car seats, insurance waivers, and so on
- Security deposit handling
- Clear confirmation emails and booking management in the admin
- Payment integration
Bookings for WooCommerce handles all of this, either natively or in combination with Product Add-Ons Ultimate. We’ll cover each requirement as we go through the tutorial.
WooCommerce Bookings and Product Add-Ons Bundle
Create the ultimate bookings site in WooCommerce
How to set up a WooCommerce car rental website
How to structure your vehicle listings
Before you create any products, let’s think about the best way to set up your fleet. You could create a separate product for every individual car, but that’s rarely the right approach. If you have 10 identical Minis, managing 10 separate product pages – each with its own availability calendar, pricing rules, and content – is a lot of unnecessary work.
The better approach is to create one product per vehicle type and use the Max bookings setting to tell the plugin how many units of that type you have. So your 10 Minis become a single Mini product with Max bookings set to 10. Bookings for WooCommerce tracks availability across all 10 units automatically, preventing overbooking without any manual management.
The only time it makes sense to create a product per individual car is if each one is genuinely distinct – different specs, different pricing, or a specialist vehicle where customers are choosing a specific car rather than a type. A typical fleet setup using the type-based approach might look like this:
- Mini (city car) – 10 units, $49/day
- Family SUV – 6 units, $89/day
- Luxury sedan – 2 units, $149/day
Each product has its own photos, description, specs, and daily rate. With that in mind, let’s build the first one.
Step #1: Install and activate the plugin
Once you’ve purchased Bookings for WooCommerce, download the zip file from your account. Go to Plugins > Add New > Upload Plugin, select the zip file, and install it. Activate the plugin, then enter your license key when prompted.
Step #2: Create a bookable product for your first vehicle type
Go to Products > Add New. Give the product a name – for example, “Mini (city car)” – and add a description, photos, and any other details you’d include on a standard WooCommerce product page.
In the Product data panel, open the product type dropdown and select Booking. You’ll see a set of new tabs appear for configuring your booking settings.

Step #3: Configure booking type and duration
In the Booking Settings tab, set the Booking unit to Day. This tells the plugin to calculate availability and pricing on a daily basis, which is standard for car rental.
You can also set a minimum and maximum rental length here if needed – for example, a 1-day minimum and a 28-day maximum. Leave these blank if you don’t want to restrict rental duration.
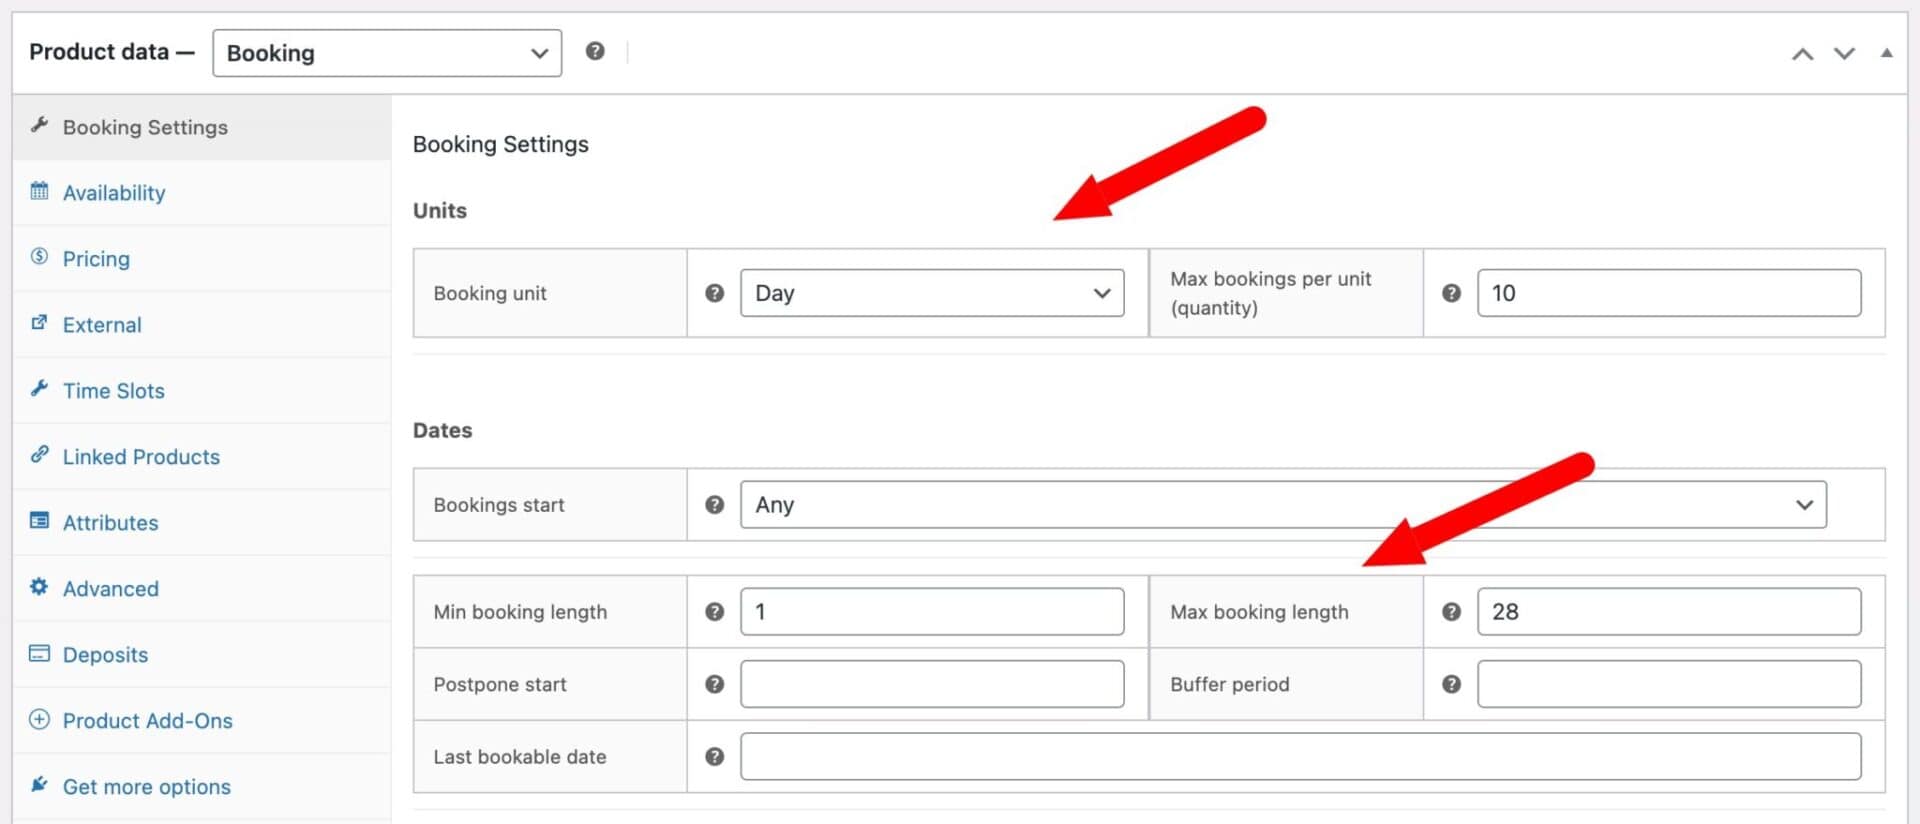
Step #4: Set fleet capacity and prevent double bookings
Find the Max bookings per unit field and set it to the number of that vehicle type in your fleet. For 10 Minis, enter 10; for 6 family SUVs, enter 6.
Once all units are taken for a given date range, those dates become unavailable and customers can’t book them. Repeat this process for each vehicle type product, setting the appropriate capacity figure for each.
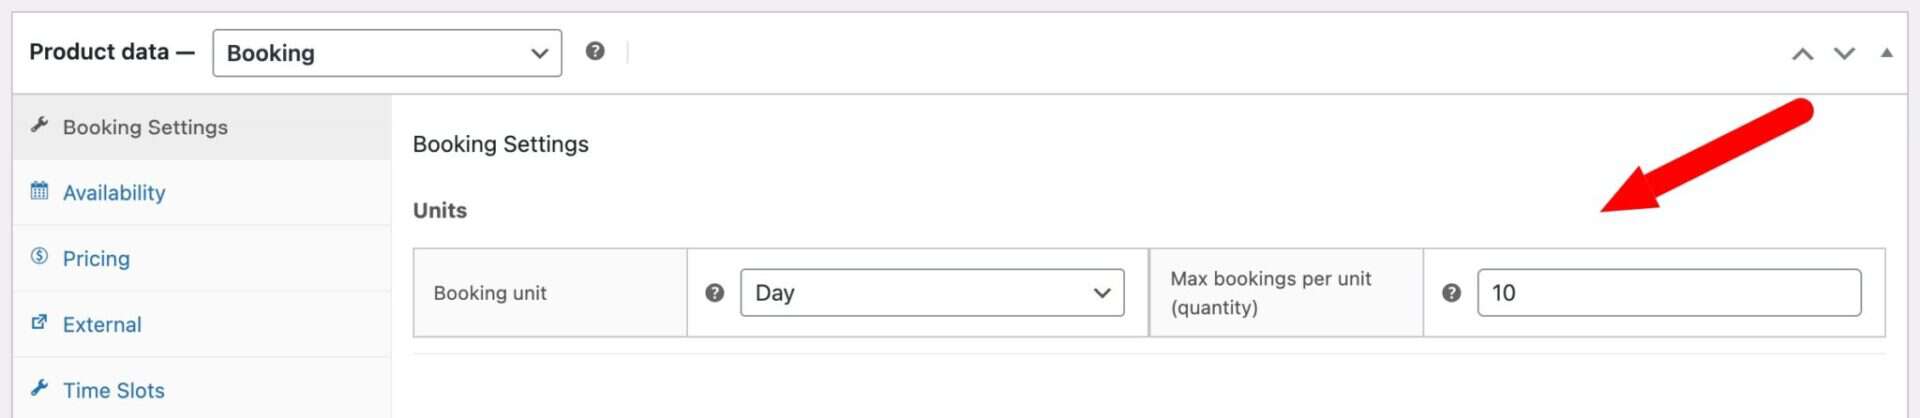
Step #5: Set your pricing
Enter the base daily rate in the Standard price field. This is the price per day that customers will see on the product page, and it’s what Bookings for WooCommerce uses to calculate the total cost as customers select their dates.
You can add custom pricing rules for peak periods – weekends, school holidays, summer rates – using the Pricing tab. We’ll cover that in more detail in the seasonal pricing section below.
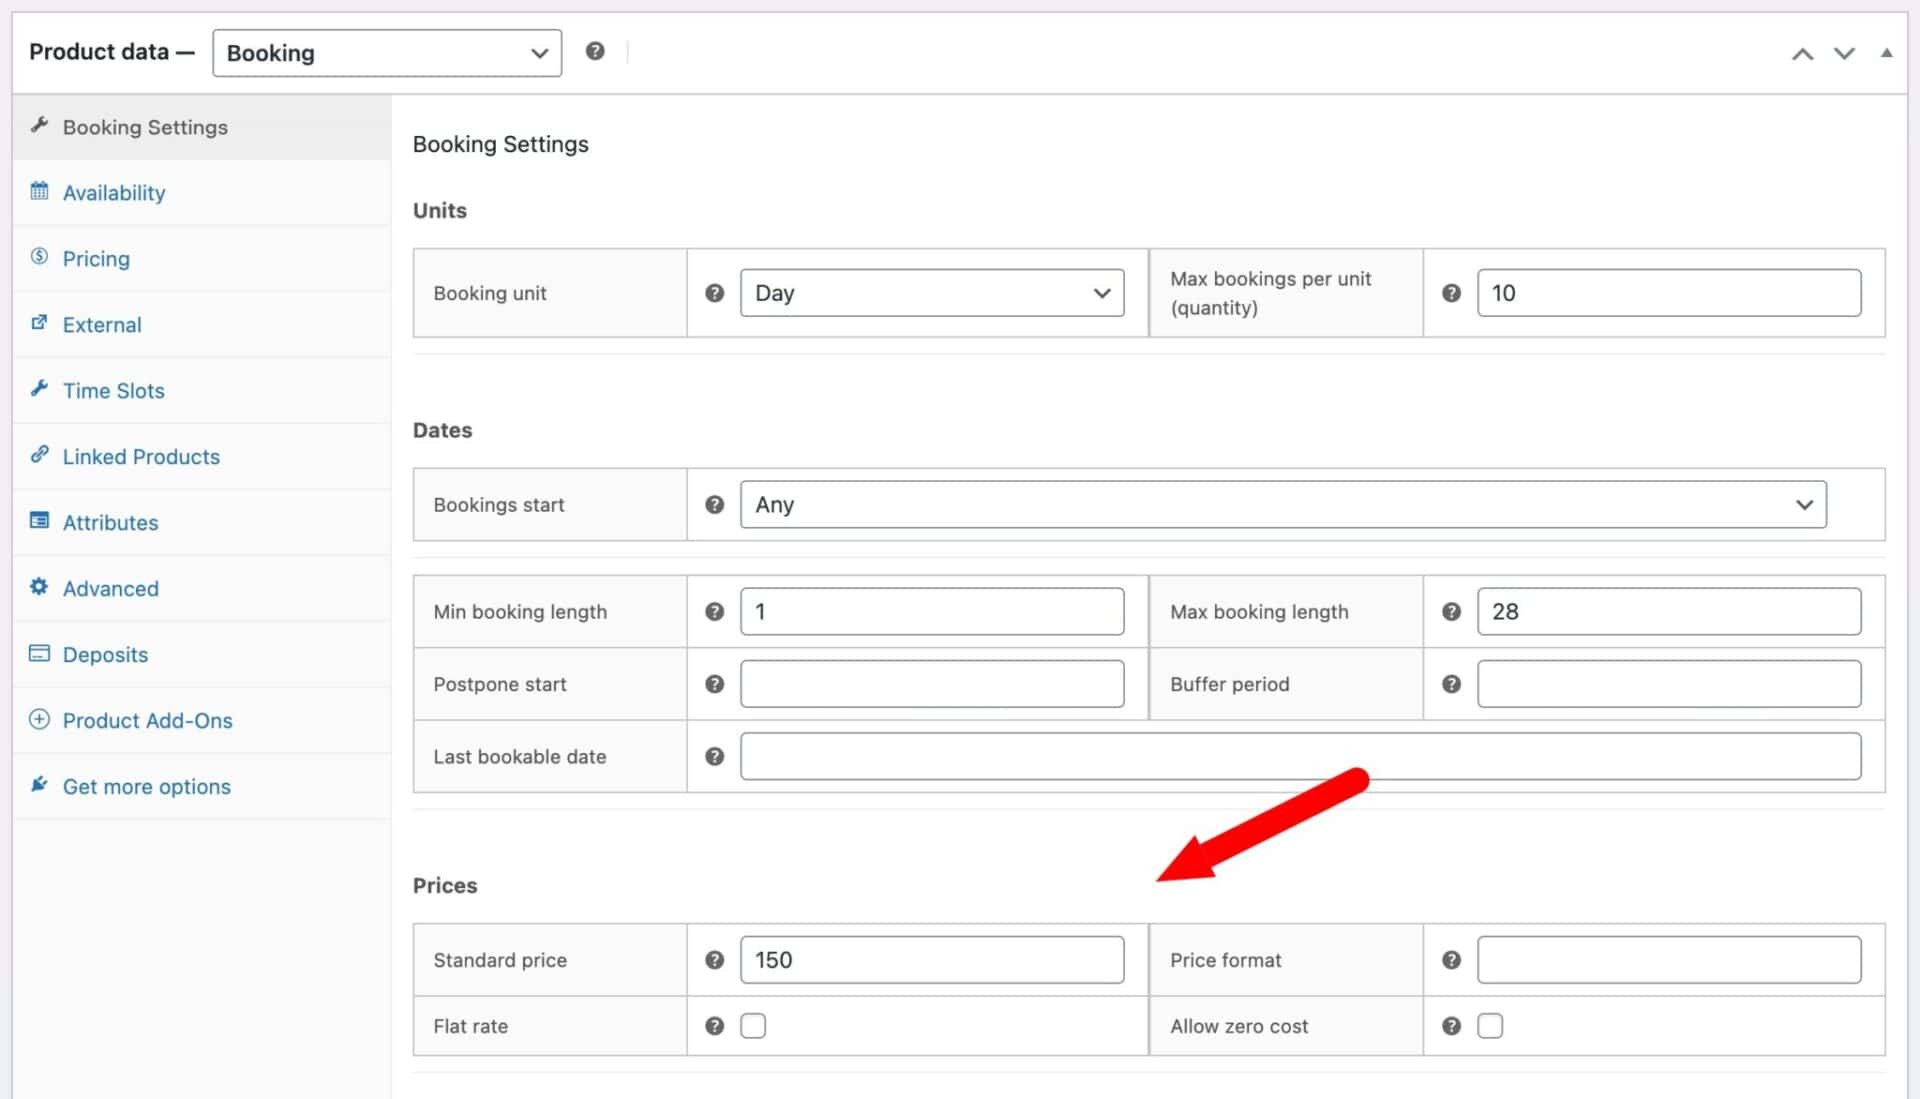
Step #6: Add buffer time between bookings
If you need time between rentals for cleaning, inspection, or refueling, set a buffer period in the booking settings. This blocks out a set number of days after each booking so the vehicle can’t be re-booked immediately.
Set the buffer to 0 if you’re happy for back-to-back bookings, or to 1 if you need at least one clear day between rentals.
Step #7: Configure confirmation emails
WooCommerce sends an order confirmation email automatically when a booking is placed. Go to WooCommerce > Settings > Emails to review the default templates and customize the content for your rental business – for example, adding pickup instructions, terms, or contact details.
You don’t need to set up anything extra in the booking plugin for this; it uses WooCommerce’s standard email system.
Repeat these steps for each vehicle type you’re offering.
Seasonal pricing and longer-rental discounts
Bookings for WooCommerce has a dedicated Pricing tab on each vehicle product where you can set custom pricing rules and length-of-rental discounts – no extra plugin needed.
How do I set seasonal pricing for car rentals?
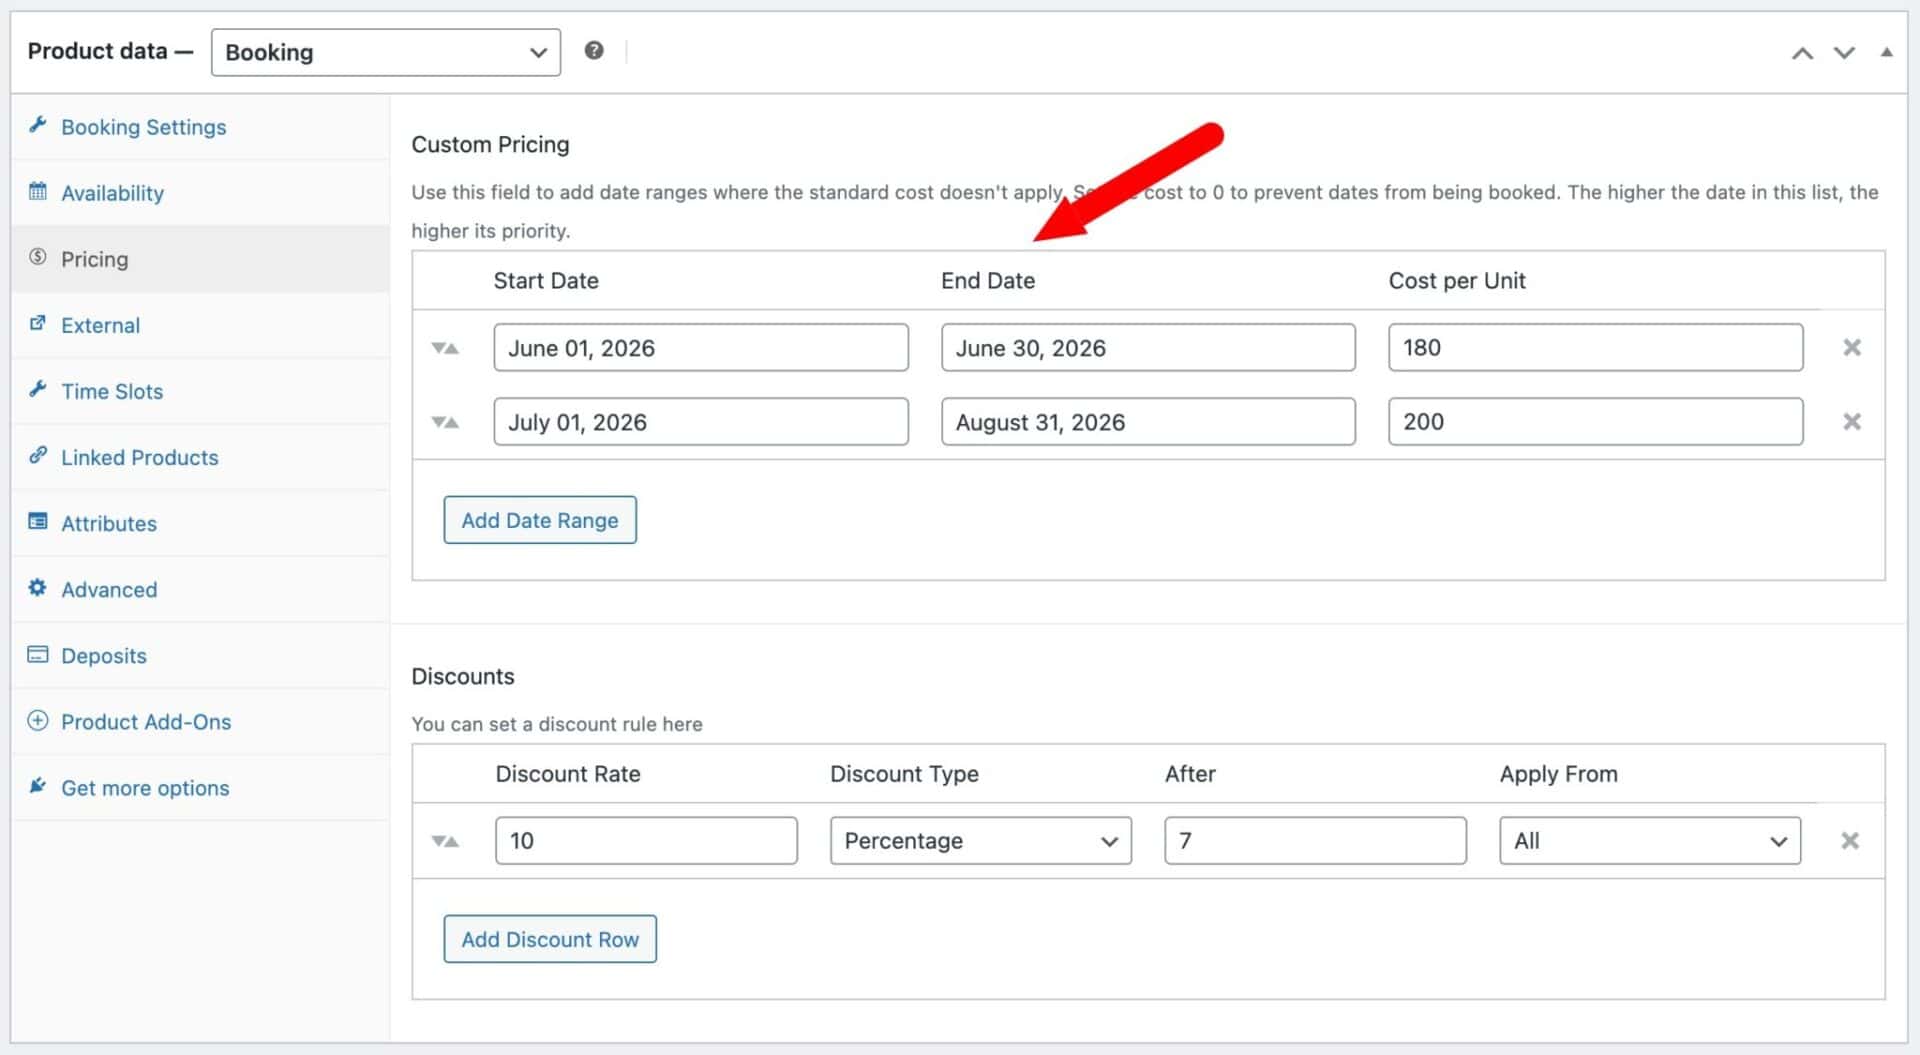
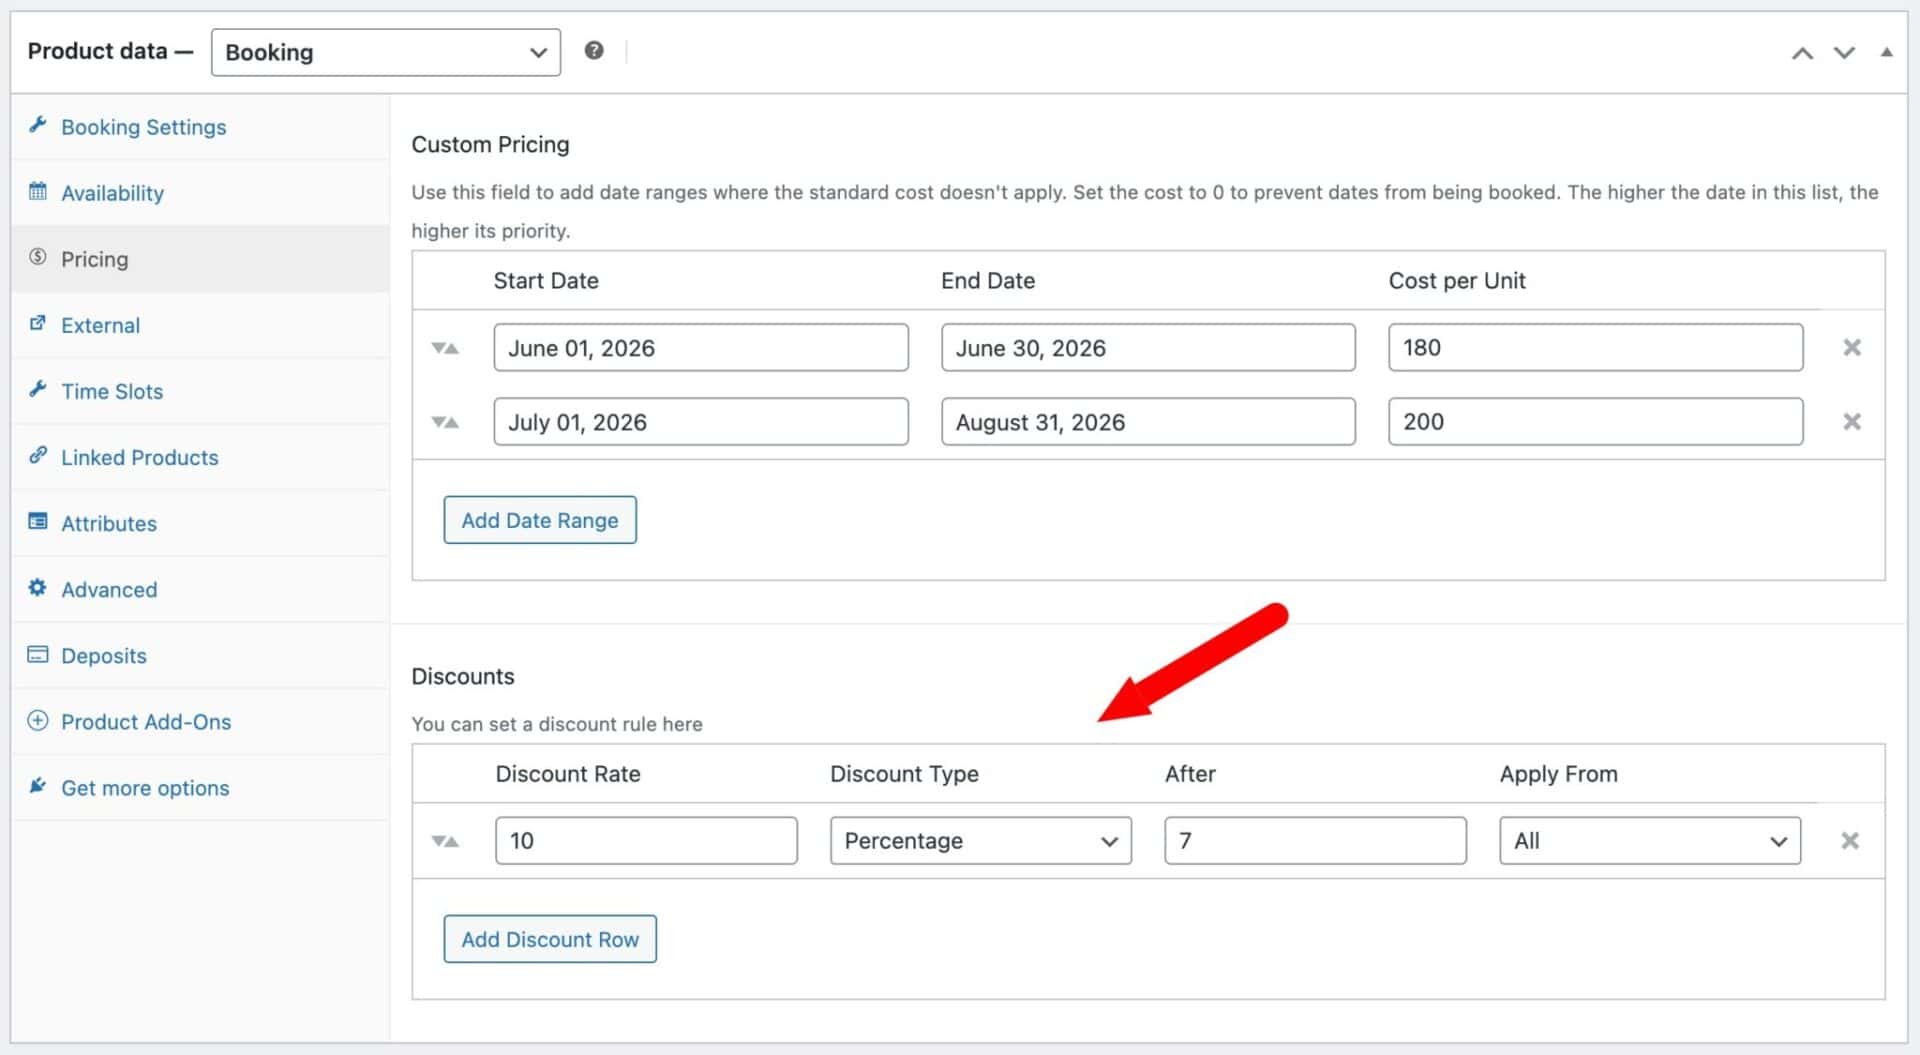
Use the Custom Pricing section to define date ranges where a different daily rate applies. Each rule takes a start date, end date, and a cost per day. Rules higher in the list take priority, so if date ranges overlap, the topmost matching rule wins.
Setting the cost to 0 on a date range blocks those dates entirely – useful for closed periods, annual maintenance, or vehicles temporarily off the fleet.
How do I offer discounts for longer rentals?
Use the Discounts section to apply automatic reductions when a booking reaches a certain number of days. Each discount rule has four settings:
- Discount rate – the size of the discount
- Discount type – percentage, fixed amount, or per unit
- After – the number of days the booking must reach before the discount kicks in (e.g.
7means the discount activates on bookings of 8 days or more) - Apply from – whether the discount applies to the whole booking, or only to the days beyond the threshold
You can stack multiple tiers – for example, 10% off after 3 days and 20% off after 7 days – to reward customers who book longer rentals.
Now let’s look at some other features that your car rental site might need.
Bonus #1: How to upsell extras like car seats and insurance
Product Add-Ons Ultimate lets you attach optional or required extras to any vehicle product. You can buy it together with Bookings for WooCommerce at a discount as the WooCommerce Bookings and Product Add-Ons Bundle.
The type of extra determines how you set it up.
Extras with limited availability – e.g. child car seats
Some extras have a finite number of units, just like the vehicles themselves. A child car seat is a good example: if you have 8 in stock, you can’t assign the same seat to two customers on the same dates.
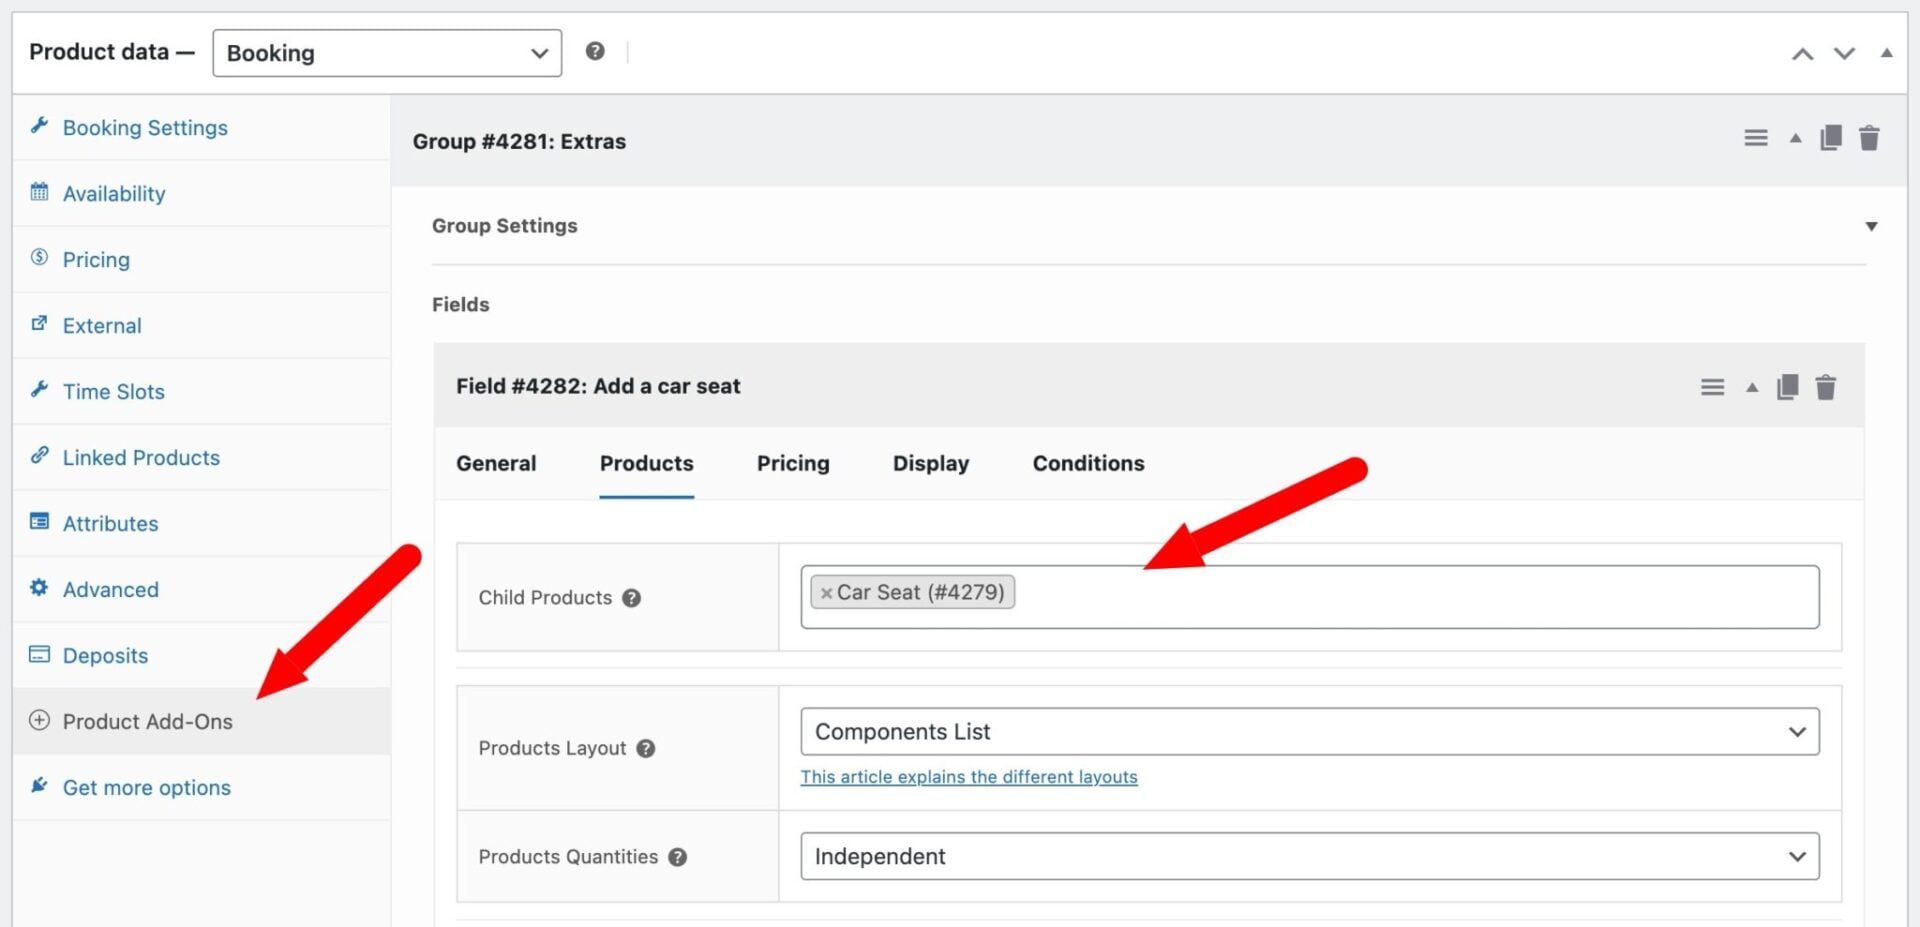
For this type of resource, create a separate bookable product for the extra – set Max bookings to the number of units you have – then attach it to the vehicle product as a child product using Product Add-Ons Ultimate. Bookings for WooCommerce tracks availability for the extra independently, so it will show as unavailable once all units are booked for the chosen dates. You can see this approach in action in our surfboard hire tutorial, which uses exactly the same setup for wetsuit hire.
Extras with no capacity limit – e.g. insurance waivers, fuel prepayment
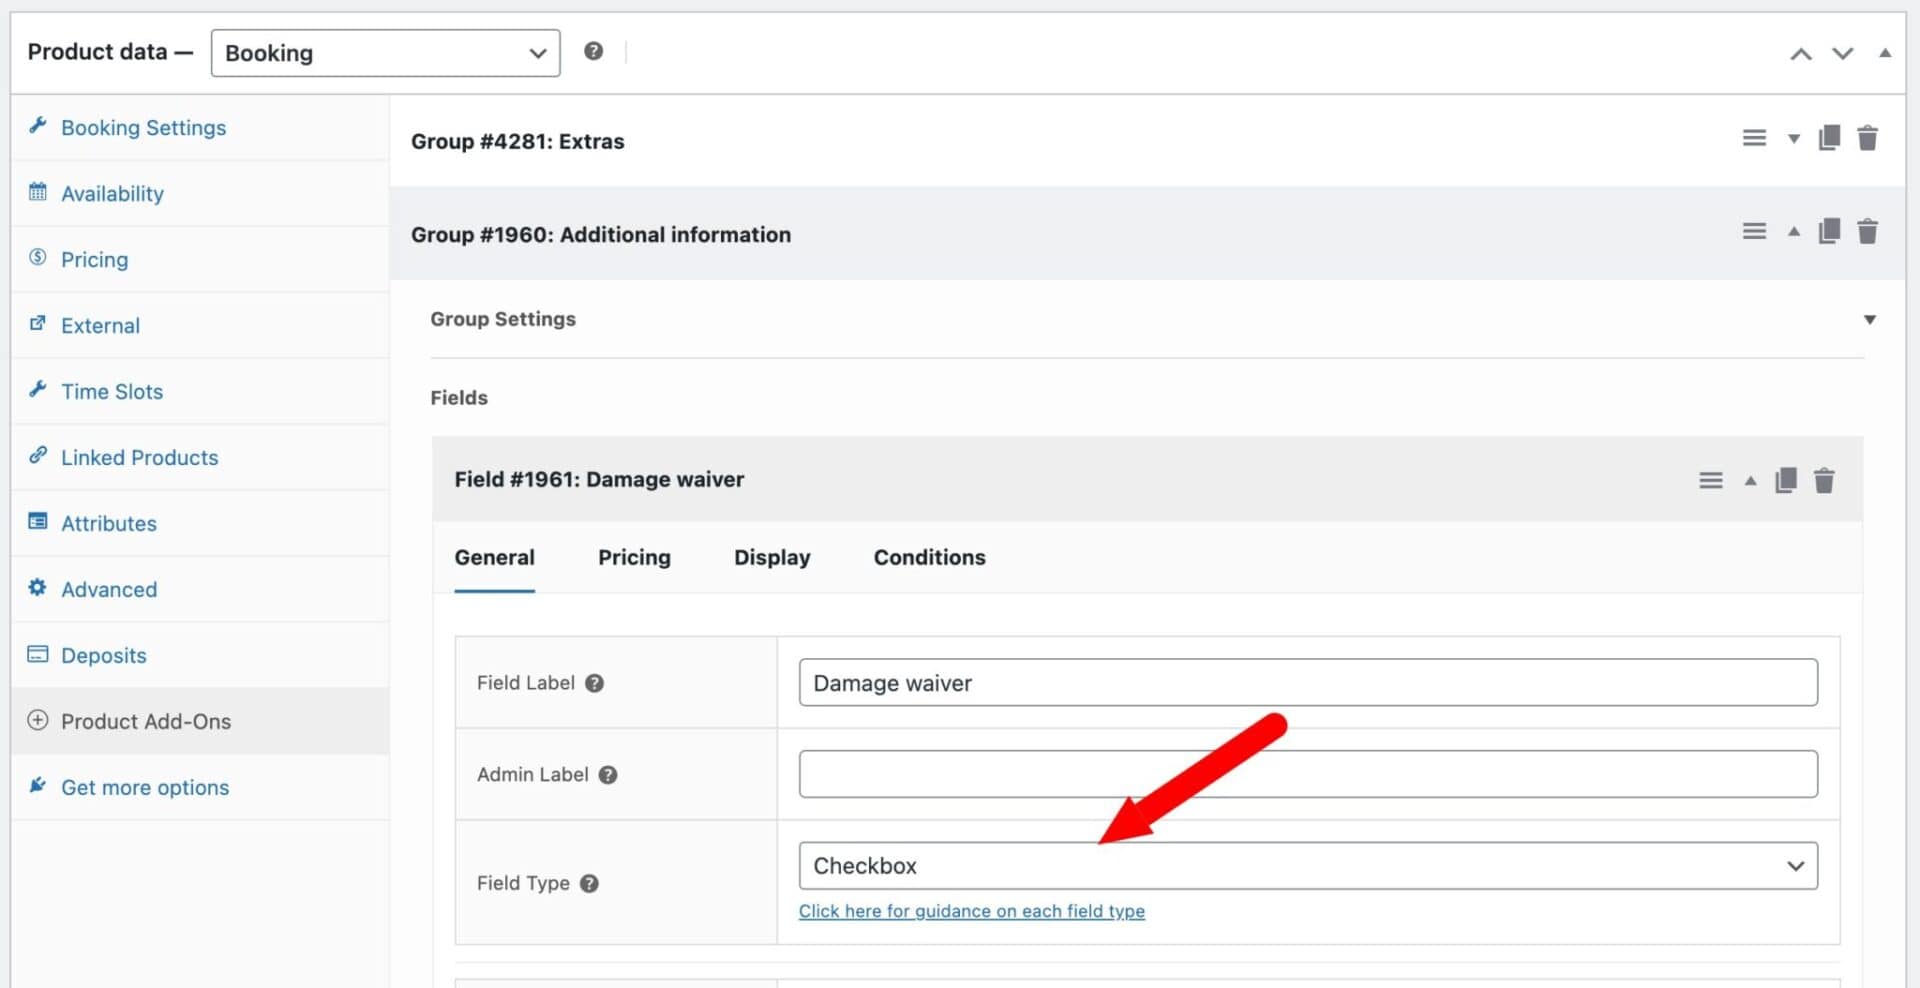
For extras that don’t have limited stock – like a damage waiver or a fuel prepayment option – use a straightforward Product Add-Ons Ultimate field instead. A checkbox or radio button that adds a fixed or percentage cost to the order is all you need. No availability tracking required; the customer simply selects the option at checkout and the price updates automatically.
Bonus #2: How to take a security deposit
When you’re lending out a high-value asset like a car, a security deposit protects you against damage, excess mileage, or fuel charges.
How does a WooCommerce security deposit work?
A fixed deposit amount is collected alongside the rental payment when the customer checks out. It appears as a separate line item in the cart and order, which makes it straightforward to manage refunds afterward.
Once the vehicle is returned in good condition, you issue a refund from the WooCommerce order screen. If there’s damage or another deduction to make, you can refund part of the deposit and retain the rest – the separate line item makes this clean and transparent for both you and the customer.
Step #1: Set up a security deposit
The full tutorial is on our WooCommerce security deposits for rentals page. Here’s a summary of the key steps:
- Create a simple product for the deposit amount and set its catalog visibility to Hidden so it doesn’t appear in your shop
- Create your bookable vehicle product using Bookings for WooCommerce
- Use Product Add-Ons Ultimate to attach the deposit product to the vehicle as a required child product
- The deposit appears as a separate line item in the cart and order at checkout
- After the rental, go to WooCommerce > Orders, open the order, and issue a full or partial refund on the deposit line item
How to manage and edit bookings
Once bookings start coming in, you can view and manage everything directly from your WordPress admin, including a dedicated Dashboard for checking fleet-wide availability at a glance.
Viewing your bookings
All bookings are accessible from the WooCommerce orders screen. Each booking is associated with an order, and you can filter, search, and sort by booking.
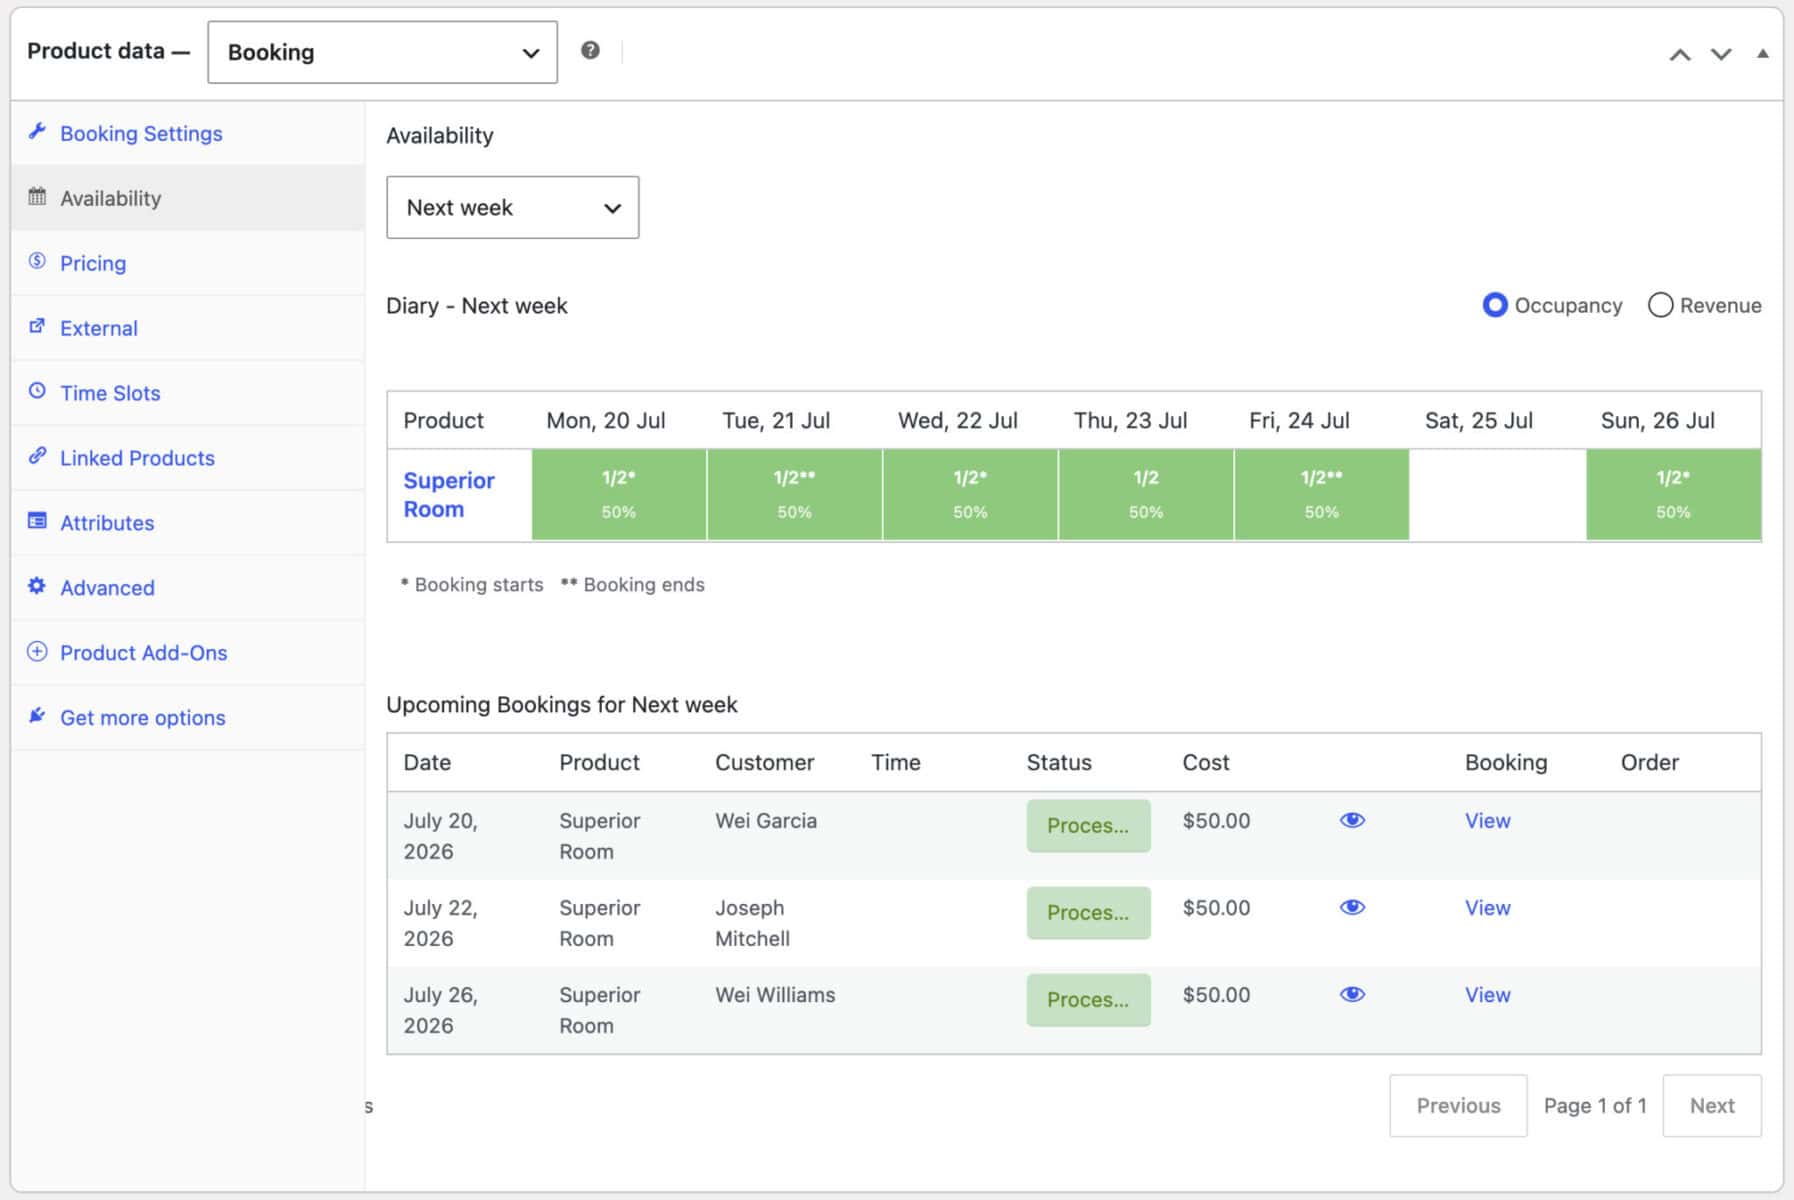
For a fleet-wide view, go to Bookings > Dashboard. Choose a date range and it shows a calendar, week diary, or single-day diary depending on the length, color-shaded by occupancy or revenue, so you can see capacity at a glance – which vehicles are fully booked, which have availability remaining, and which are completely open. Filter by vehicle type or category to narrow this down.
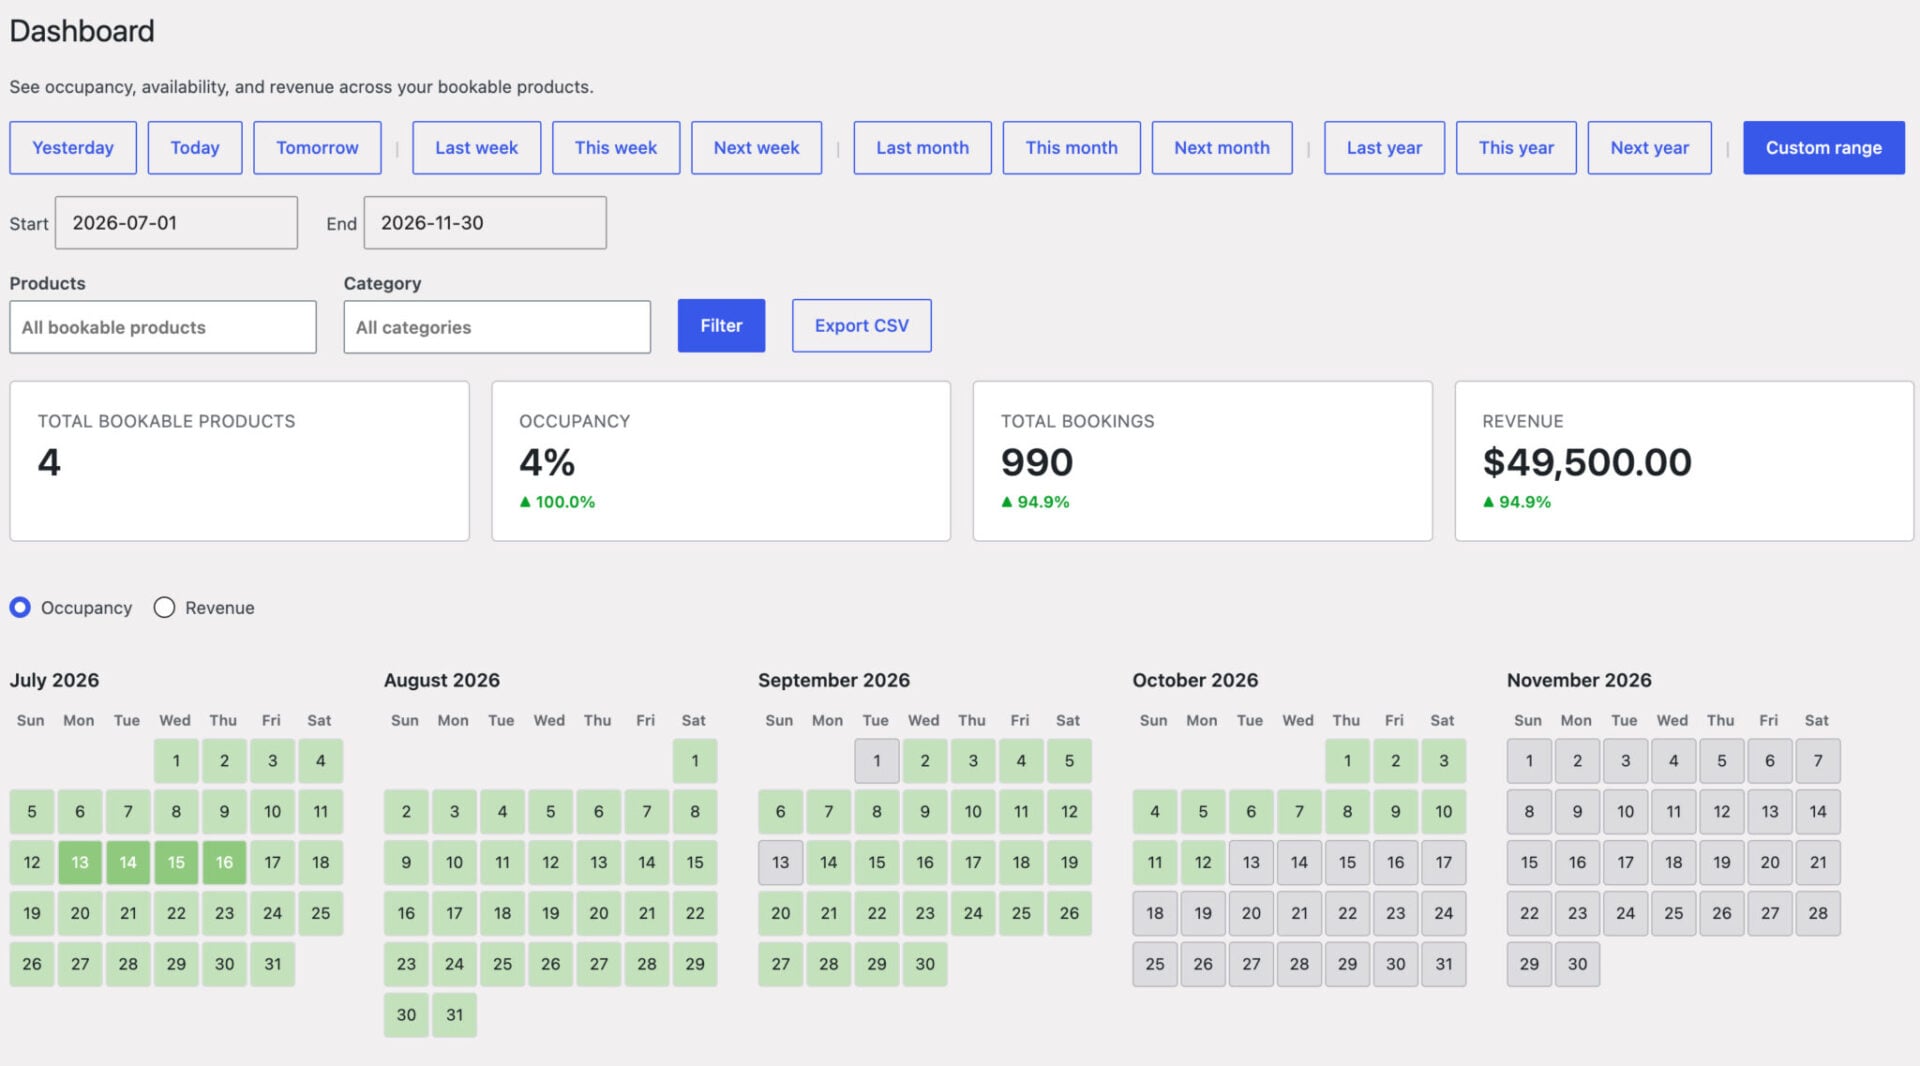
Each vehicle product also has its own ‘Availability’ tab showing the same views scoped to just that vehicle type, useful for a quick check without leaving the product edit screen.
Editing a booking
Open any order to see the full booking details – vehicle type, rental period, extras, and deposit. You can edit the start and end dates directly from the order screen if a customer needs to change their dates, and any pricing adjustments can be made manually from the same screen.
Blocking dates and managing availability
If a vehicle needs to come off the fleet temporarily – for maintenance, repairs, or any other reason – you can block dates directly from the product’s availability settings. Go to Products > [vehicle product] > Booking Settings > Availability and add a blocked date range. This is separate from customer bookings, so the dates will show as unavailable without affecting any existing orders.
Cancellations and refunds
To cancel a booking, update the order status to Cancelled in the usual WooCommerce way. Refunds – including partial refunds on security deposits – are handled from the order screen. Make sure your cancellation and refund policy is clearly stated on your product pages and in your confirmation emails so customers know what to expect.
What are the best WooCommerce car rental plugins?
Several plugins can handle car rental bookings in WooCommerce. Here’s how they compare.
| Plugin | Best for | Pricing model | Key features | Extras support |
|---|---|---|---|---|
| Bookings for WooCommerce (Plugin Republic) | Car rental, equipment hire | Annual / lifetime | Daily/overnight bookings, availability calendar, fleet capacity, seasonal pricing, iCal sync, availability search | Yes – via Product Add-Ons Ultimate |
| WooCommerce Bookings (Automattic) | Appointments and services | Annual subscription | Time slots, staff, resources | Limited |
| YITH WooCommerce Booking | General bookings | Annual subscription | Calendar, resources, services | Via add-on |
| Amelia | Appointments, events | Annual subscription | Staff management, multi-location | Limited WooCommerce integration |
| Rent a Car & Bike – WooCommerce Rental Plugin | Vehicle rental specifically | One-off | Vehicle-specific fields, rental periods | Basic |
Bookings for WooCommerce is our recommended choice for car rental because it lives entirely inside WooCommerce – there’s no separate platform to learn, and it works with your existing products, orders, payments, and emails.
It handles fleet capacity by vehicle type, supports flexible seasonal pricing and length-of-stay discounts, syncs with external calendars via iCal, and integrates with Product Add-Ons Ultimate for extras and security deposits.
It’s the most complete solution for rental businesses that want to run everything through WooCommerce.
WooCommerce car rental – recap
In this guide, we’ve covered how to set up a car rental website using Bookings for WooCommerce – from structuring your fleet as bookable products and configuring availability, to adding seasonal pricing, extras, and security deposits. We’ve also shown how to manage and edit bookings from the WooCommerce admin once your site is live. And we’ve covered how to use the WooCommerce Product Add-Ons Ultimate plugin for upsells and extra bookable resources.
These plugins are available together at a discount as part of the WooCommerce Bookings and Product Add-Ons Bundle.
WooCommerce Bookings and Product Add-Ons Bundle
Create the ultimate bookings site in WooCommerce
Bookings for WooCommerce is compatible with all themes and page builders – and it’s backed by a 14-day money-back guarantee and world-class support, so you can try it risk-free.
Hello. I have 2 questions.
1. Is the automatic date disabled after successful payment?
2. Can administrators make bookings on the backend?
Hi
1. Are you asking whether the date is blocked out when a user books? If so, yes.
2. Yes, admins can make manual bookings on the backend.
Thanks.