WooCommerce private store: three easy steps to protect your content
There are many reasons for wanting to create a WooCommerce private store. In this article, I’m going to walk you through the easiest way to do it and look at some of the reasons why you’d want to.
What is a WooCommerce private store?
This might seem like an obvious question but what do we actually mean by a private store?
In essence, a private store has restricted access to some or all of its content. Access might be restricted by a password or user role.
There are several reasons why you might want to create a private store – and we’ll look at those below. First, though, let’s look at:
How to create a WooCommerce private store in 3 easy steps
Creating a private store in WooCommerce is simple and should take you less than 10 minutes:
- Install the WooCommerce Members Only plugin
- Define who should be able to view your content
- Decide which content you want to make private
That’s it.
Bonus content
Maybe you want more than this? I’ve also included simple guidance for:
Step 1: Install WooCommerce Members Only
WooCommerce Members Only is a simple plugin that will help you to create a private store.
- Download the zip file from the email you receive after purchase
- Go to Plugins > Add New > Upload Plugin
- Upload the zip file
- Click ‘Install Plugin’
- Activate the plugin
Configuring the plugin
As it happens, Members Only will work perfectly for you immediately on activation. However, to configure it in exactly the way you want, browse to WooCommerce > Settings and click on the Members Only tab.
Step 2: Define who can view your content
The first step is to decide who is authorised to view your content. From the settings, click the ‘Restriction Method’ select field to view your options:
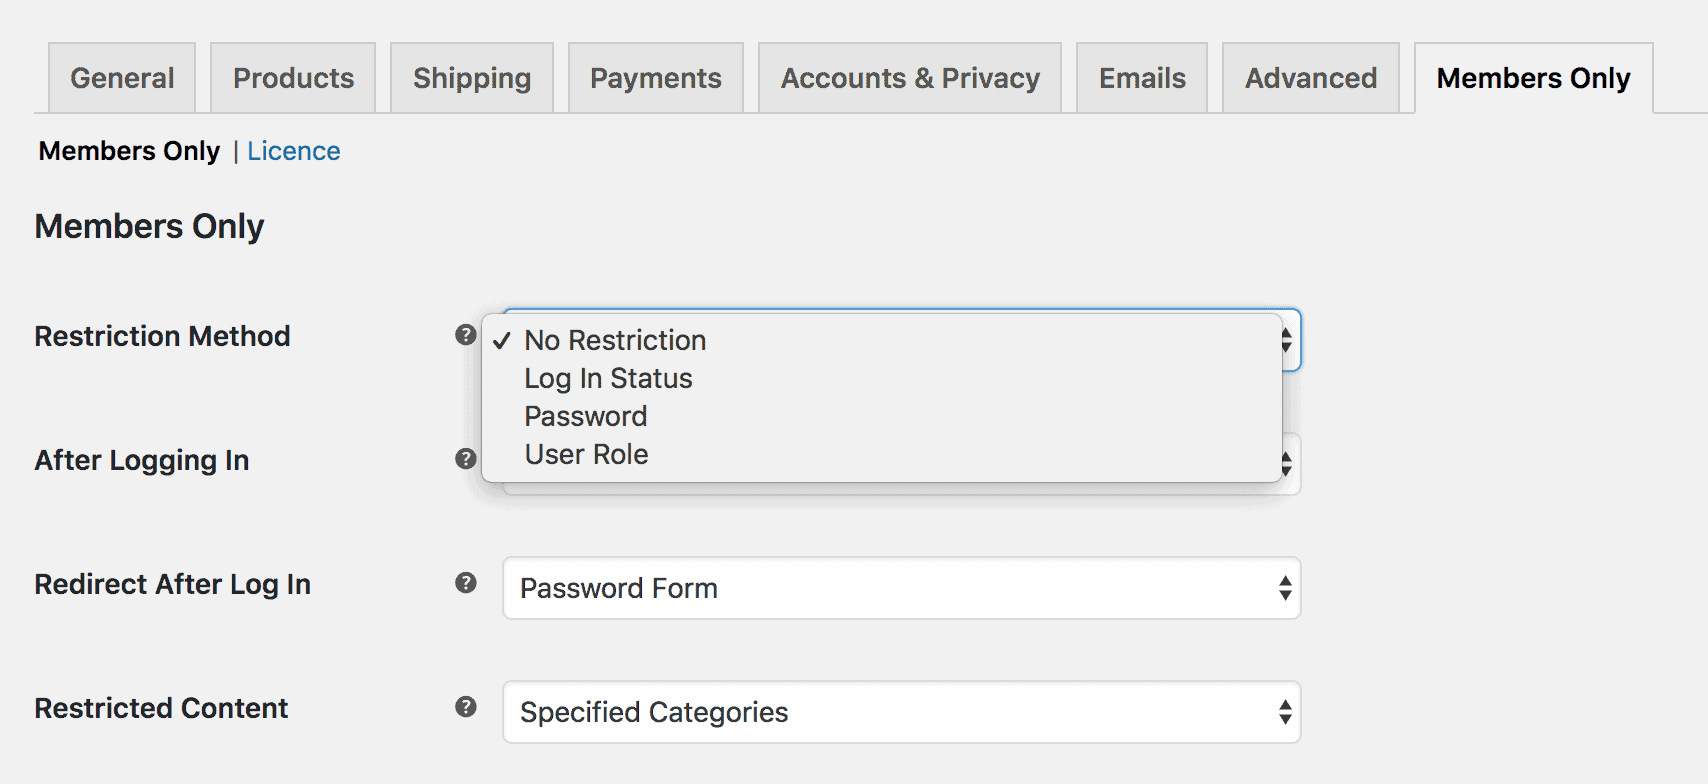
No Restriction
By default, there is no restriction method set. If you want to make specific products or categories private, then keep this setting. See below for more information on private products and categories.
Log In Status
A very simple way of deciding who can access your content is to make private to any user who is not logged in. If you’re logged in, the content is available; if you’re not logged in, it’s private.
Password
Having a password-protected store has a couple of advantages: for one thing, your users don’t need to have created a user account.
Members Only lets you create multiple passwords so you could give everyone the same password, or you could give users individual passwords. Whatever works best for you.
User Role
Protecting content by user role is maybe the most powerful method of keeping your store private. It’s the first step towards creating a members only store and in conjunction with private products and/or categories, it means you can easily manage different content viewing permissions for different users.
I wrote more on the comparative benefits of passwords and log-in status/user role in this article.
What happens when an unauthorised user tries to access private content?
Let’s say a user tries to access a private product – either because they have the URL or because you’re displaying private products openly (just restricting the access).
With Members Only, you can redirect users away from private content to any page on your site.
Click the ‘Redirect After Restricted’ field to pick any of the pages on your site.
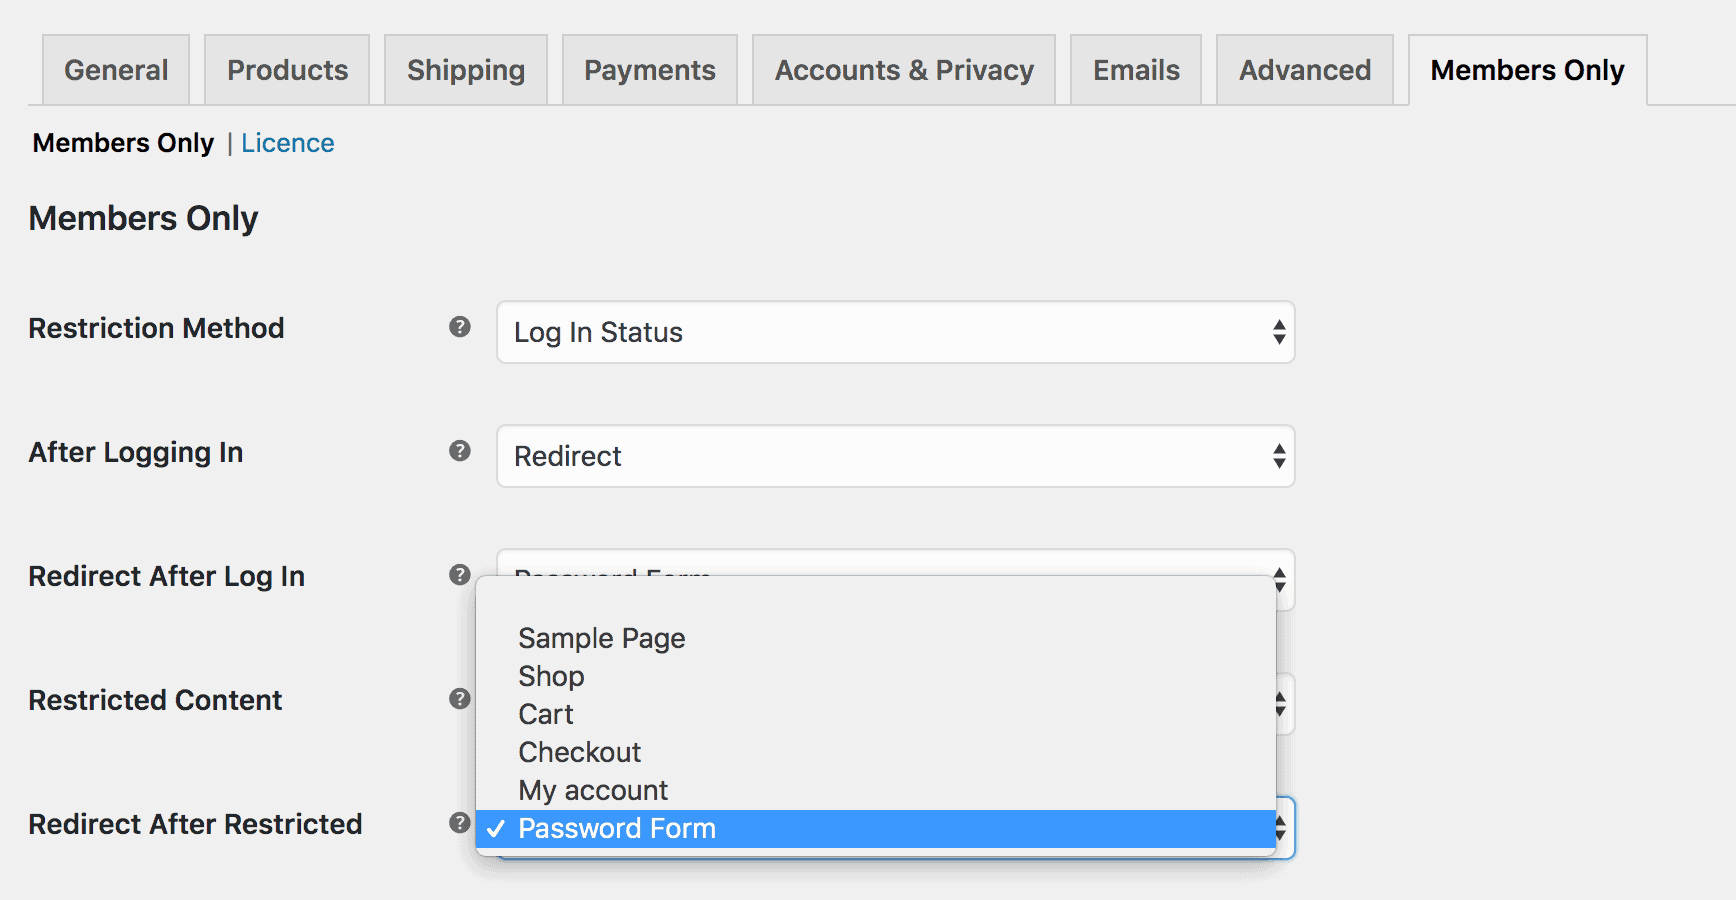
One of the convenient features of the Members Only plugin is that it will automatically create a page with the password form. So, if you’re using passwords to keep your store private, you can redirect users to a password form whenever they try to access private content.
Alternatively, you can send them to the WooCommerce account page, where they can log in. Or you can just direct them to the home page or a dedicated landing page – perhaps where you sell them the benefits of membership.
Step 3: Decide which content to make private
Members Only gives you several options on which parts of your store you’d like to make private.
Click on the ‘Restricted Content’ dropdown to see what content you can make private.
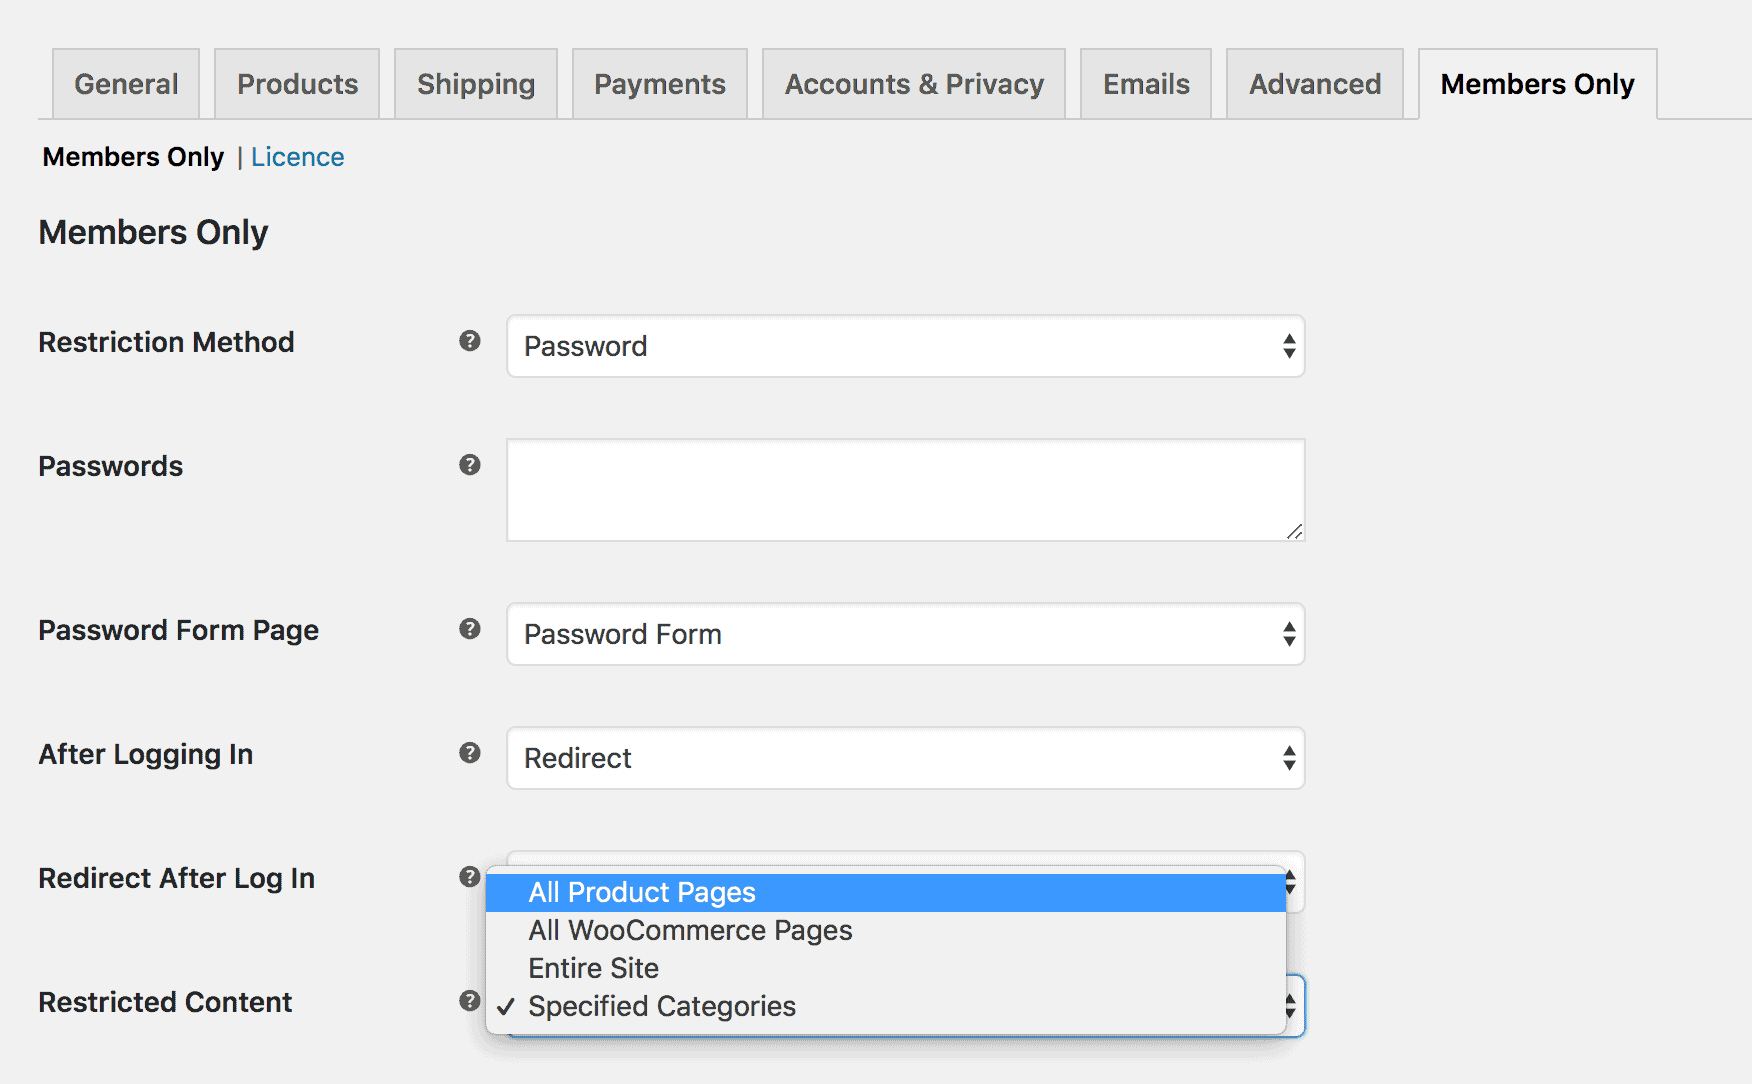
All Product Pages
If you just want to make your product pages private, click the ‘All Product Pages’ option. This option will protect all your product pages and nothing else.
See below for guidance on how to make individual products private.
All WooCommerce Pages
If you’d like to keep all aspects of your store private, including products, categories and archives, then choose ‘All WooCommerce Pages’.
Entire Site
This is the nuclear option. Not only are you keeping your products and WooCommerce pages private, you’re protecting all the content on your site.
You might use this option if you’re running a WooCommerce membership site. Any user who is blocked from your content will get redirected to your homepage (or other page of your choosing).
Specified Categories
You can make certain WooCommerce categories private with this option. You might choose this if you have a store that’s open to all users, but you just want to keep certain products private.
At this stage, having chosen which users can view which content, you can click the ‘Save’ button and you’re all done. I genuinely don’t think this will take more than about 5 minutes.
However, you might need to be a bit more specific in how you’re creating your private store. In which case, read on.
WooCommerce private products
Let’s say you don’t want to make your entire store private, you just want to make one or two products private. In that case, you don’t need to follow the steps above. Instead, you can do everything you need from the product page.
If you’d like a more detailed tutorial on WooCommerce private products, check out this post.
Go to a product you’d like to make private and click on the ‘Members Only’ tab in the ‘Product data’ section:
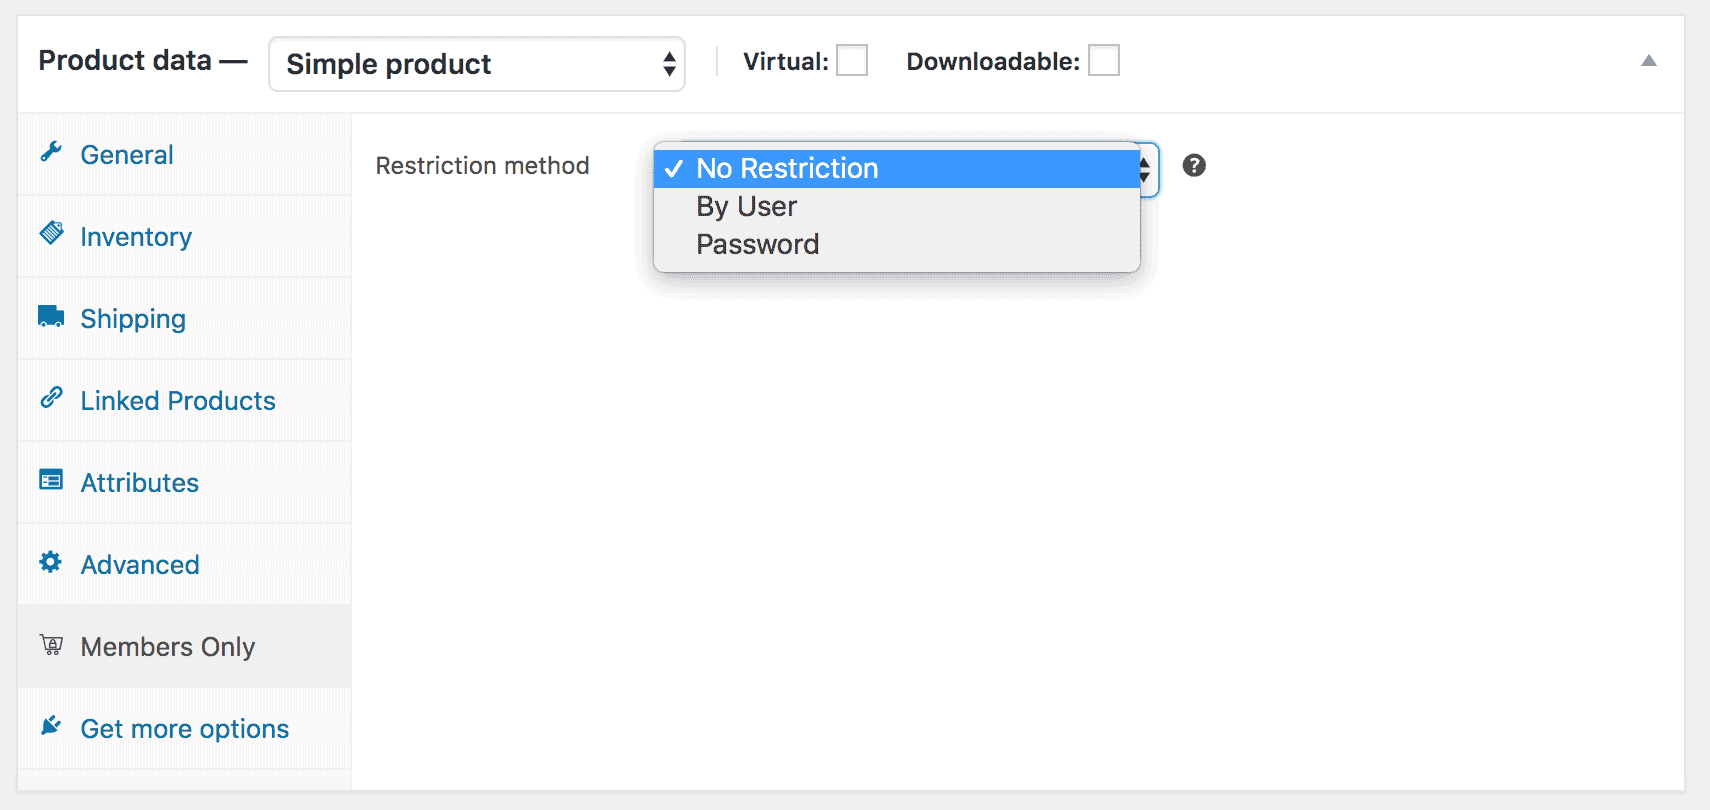
In the ‘Restriction Method’ field, you’ll see that you have three options.
No Restriction
‘No Restriction’ means that your product isn’t private. It’ll be available to all users like every other product (unless you’ve set other restrictions globally).
By User
The ‘By User’ setting is only available to individual products; it’s not available to the global settings. If you select this option, you can restrict access to this product to specified users.
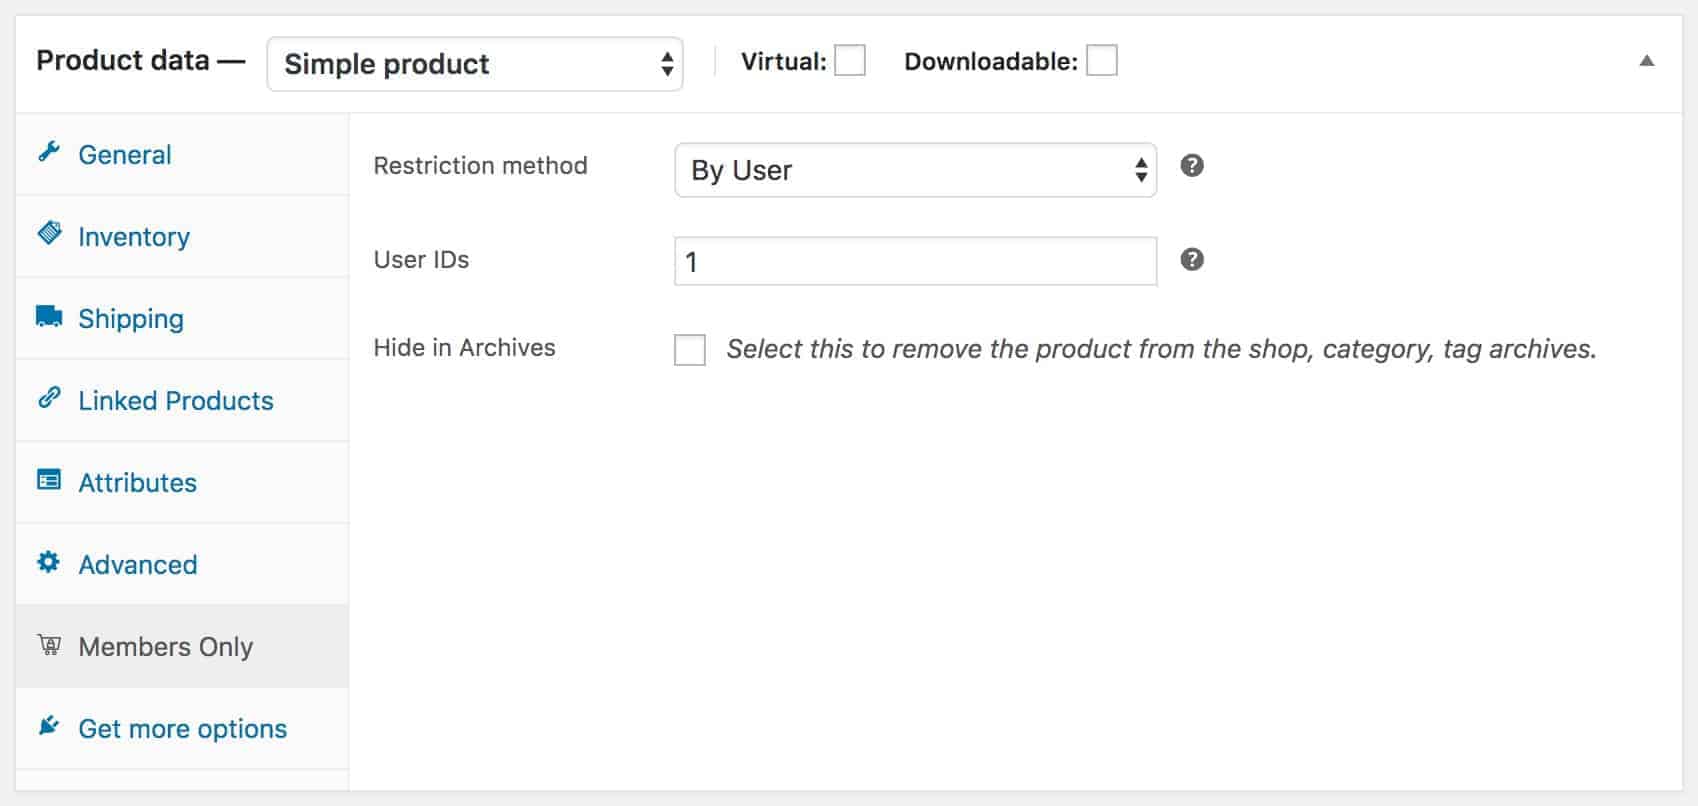
Just enter the user IDs that should have access to this product in the ‘User IDs’ field.
Making a product private in this way is a great way to create client-specific products.
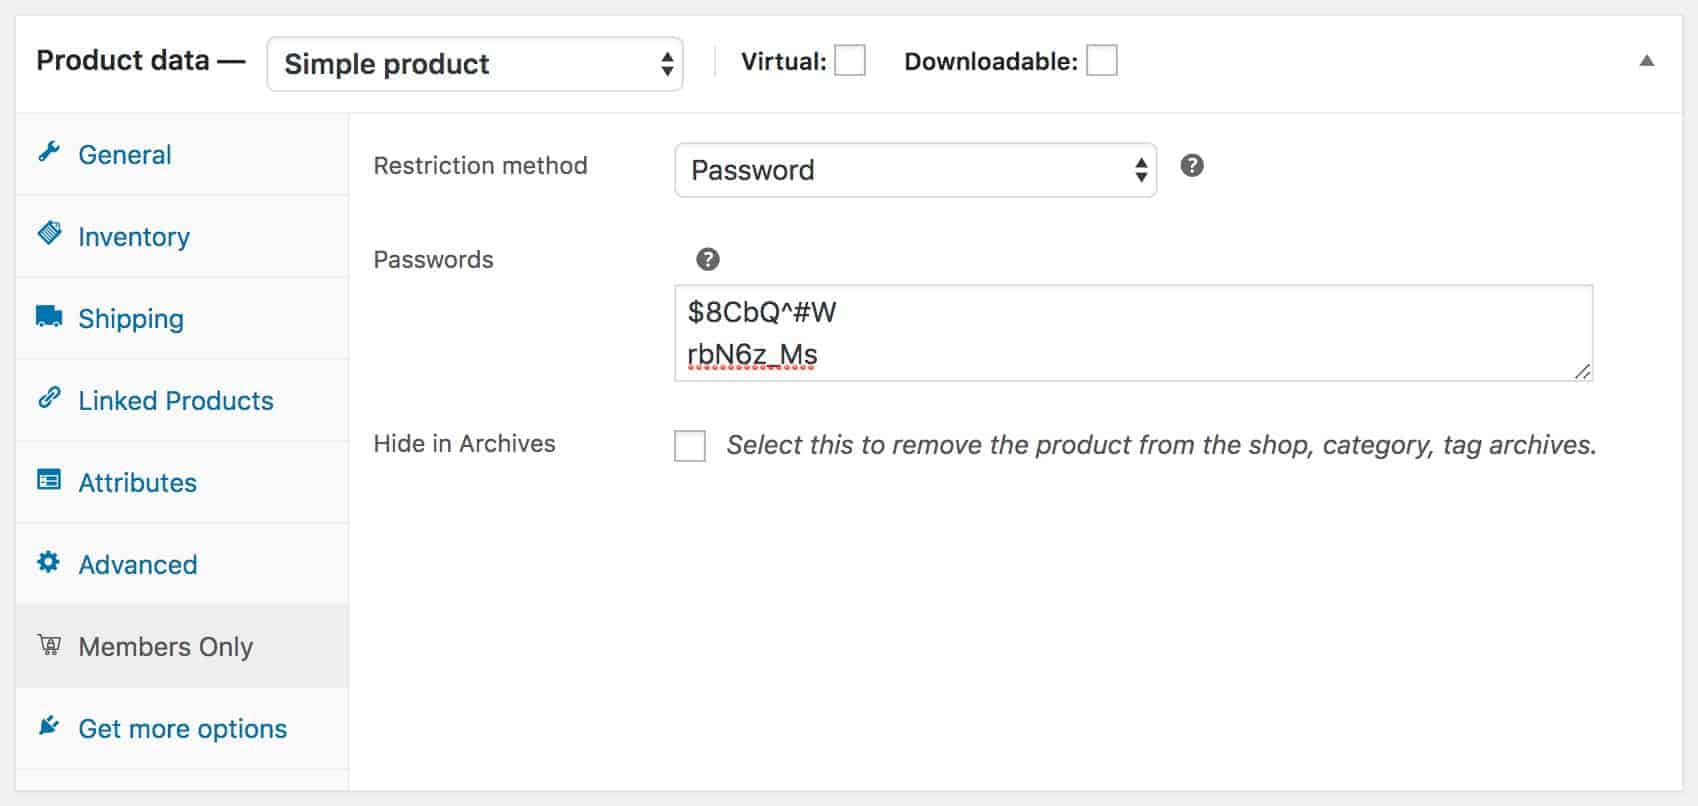
Password
The third option here is to require a password to access the product. As with the global settings, you can set multiple passwords.
What happens when an unauthorised user tries to view a private product?
Just the same as with the global settings, if a user tries to view a private product, they’ll get redirected to a page of your choosing.
Creating WooCommerce private categories
Although the easiest way to create private categories is from the Members Only settings, you can also set different privacy rules for different categories.
This is important if you want to have different privacy levels in your store.
To update a category’s privacy settings, edit the category and select the option to ‘Override Global Restrictions’.

You can then choose whether to restrict the category by password or user role.
Find out more about creating private categories in WooCommerce here.
WooCommerce private store plugin
Hopefully this article has been useful for you in creating your first private WooCommerce store. All you need is 5 minutes and the WooCommerce Members Only plugin.