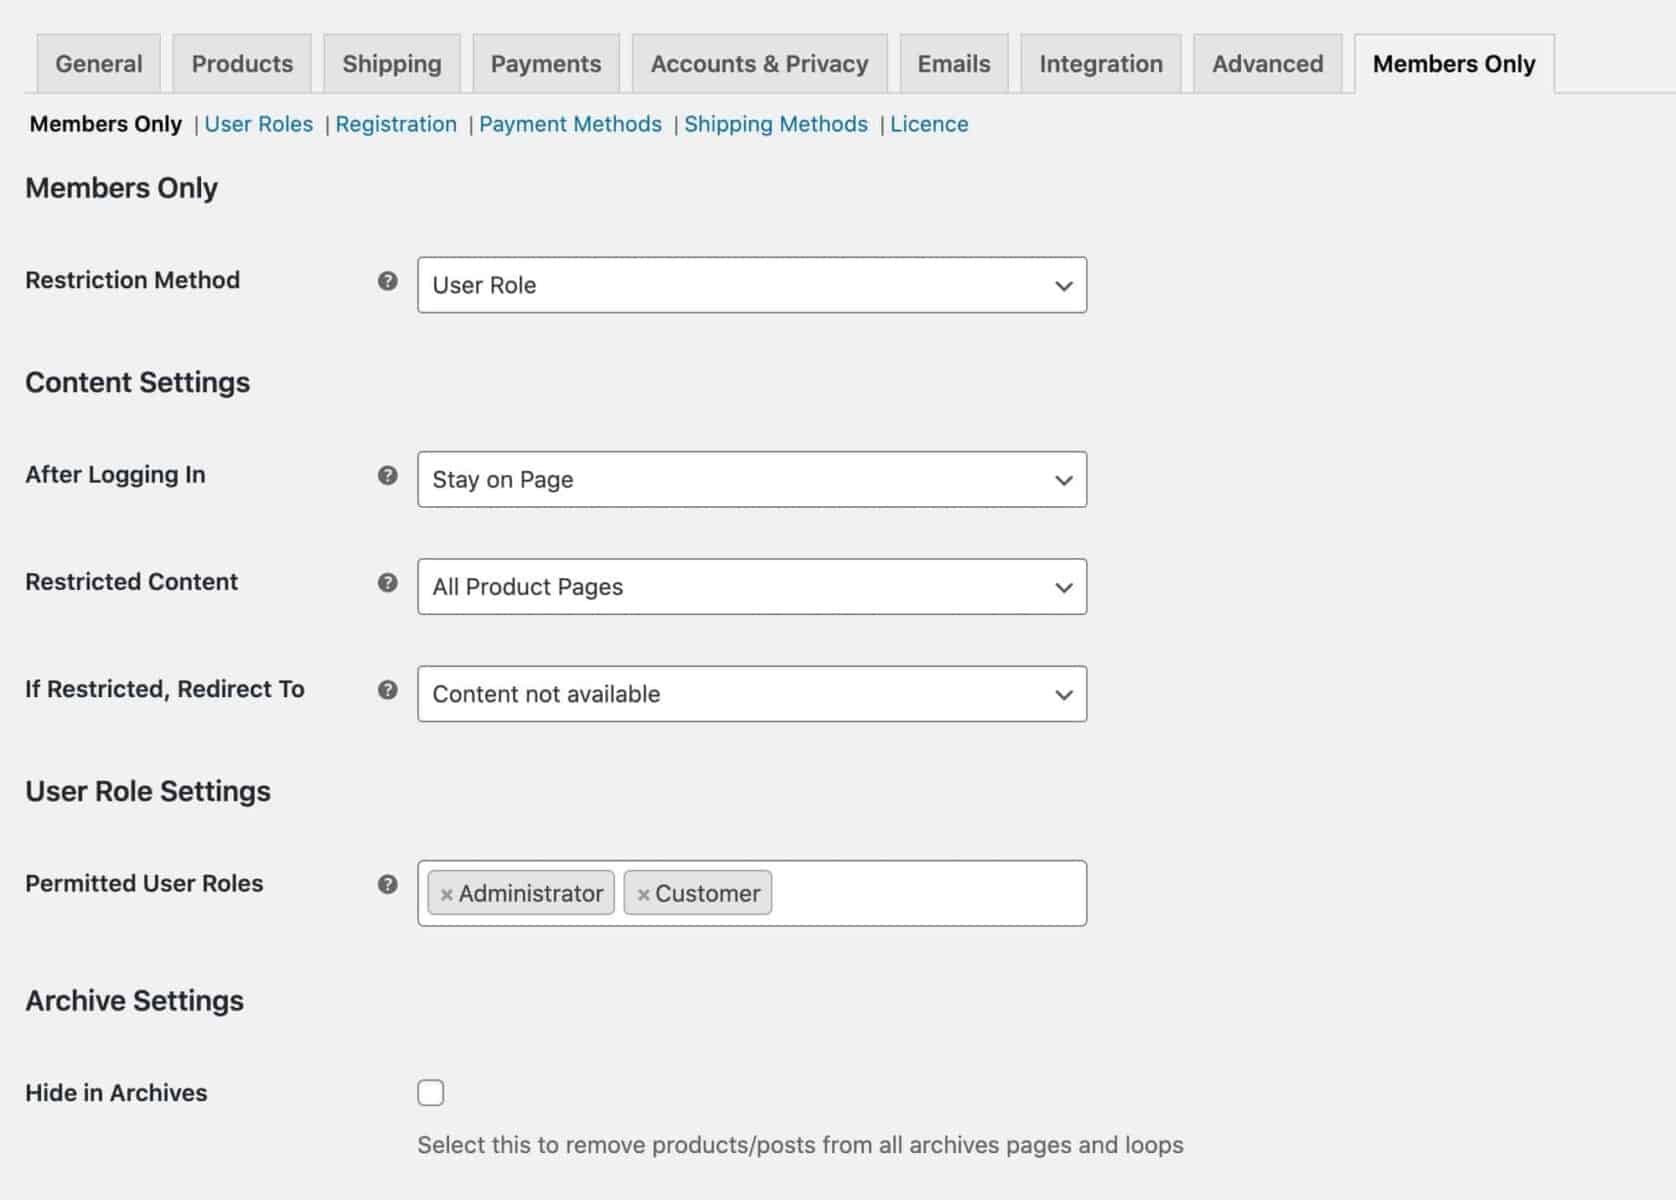
WooCommerce Members Only - Membership Plugin
Protect your content and sell members-only products
This WooCommerce membership plugin provides complete control over your site: decide who can access it and what they can see

The ultimate WooCommerce memberships plugin: protect any type of content and create a private store
WooCommerce membership plugin
- Restrict access to any kind of content
- Create private WooCommerce products or stores
- Restrict access through user role, password, login status, individual users
- Create multiple membership levels
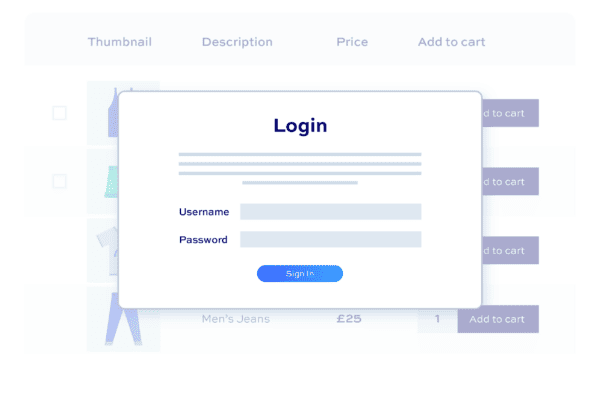
Create a WooCommerce membership site
- Control which content users can see
- Protect posts, categories, products, product categories, pages, custom post types, and taxonomies
- Choose how to restrict access
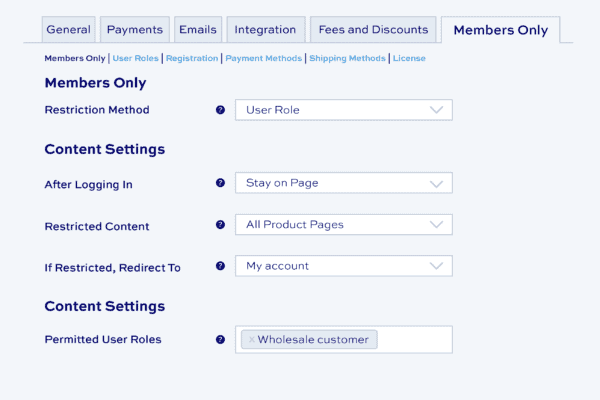
Sell members-only products
- Create different membership tiers
- Allow different user roles different levels of access
- Show or hide product prices to members
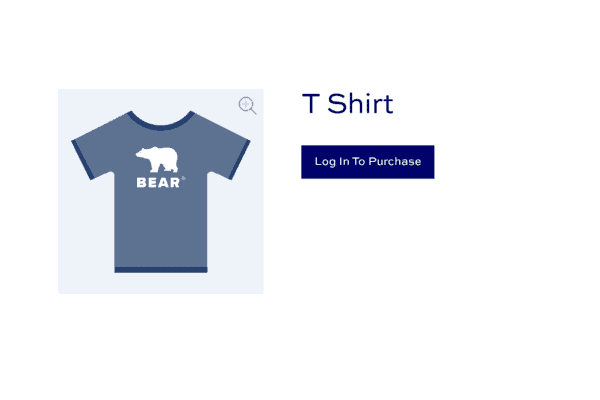
What customers say about our WooCommerce Members Only plugin
We are more than satisfied with the WooCommerce Members Only because it not only helped us solving all the issues we were having but also gave us some more functionality, like restricting menu items and widgets, which made our store even more precise to our customer needs. Plus the support is A+: fast and attentive to all our needs.

I've been using WooCommerce Members Only plugin to setup presale access for people who previously bought our limited edition books. The difficulty we faced was that we couldn't create private access to a specific user role. This plugin enabled us to assign multiple roles to users and thus enable presale access to them when we are about to launch a new product.

WooCommerce Members Only plugin features
Control access to content with the ultimate WooCommerce memberships plugin

Sell or assign memberships manually
Assign membership manually or by purchasing a product
Choose how to protect your content
Restrict access through user role, password protect your content, or by login status
Create multiple membership plans
Each plan can restrict access to different content for different users
Free or paid memberships
Sell memberships or assign them manually. Sell different memberships for different content
Control access
Allow access to content based on user registration (with optional admin approval feature if required), manual assignment, or through purchasing a product
Build a complete membership platform
Perfect for building communities, member directories, online learning platforms, purchasing clubs and members only stores, wholesale and B2B stores
Create members discounts
Members Only integrates with Dynamic Pricing and Discount Rules to create exclusive member discounts
WooCommerce Subscriptions
Members Only integrates with WooCommerce Subscriptions to enable recurring payments and instalment plans
Sell memberships
Create a membership plan then allocate a product that need to be purchased in order to obtain the membership plan. Products can be simple or variations
Sell different membership tiers
Create membership plans for Gold, Silver, Bronze, etc. Allow users to purchase membership and upgrade if they wish
Assign memberships manually
Apply membership roles to users individually or in bulk via the WordPress dashboard
Moderate user approval
Allow any user to register just by signing up - but enable manual admin approval before they can access any content. So users can register on the site but can't access content until they're approved
User role self-selection
Allow users to choose their membership level when registering - and optionally required certain roles to be manually approved. E.g., anyone can sign up for a 'Basic' membership, but 'Pro' users need to be approved
Allow multiple memberships
Customers can belong to multiple membership plans, allowing you to fine-tune what content each user can access
Membership plan duration
Membership plan duration by fixed period, until set date, or unlimited period (lifetime memberships). Send a reminder when their membership is nearly up
Protect products and categories
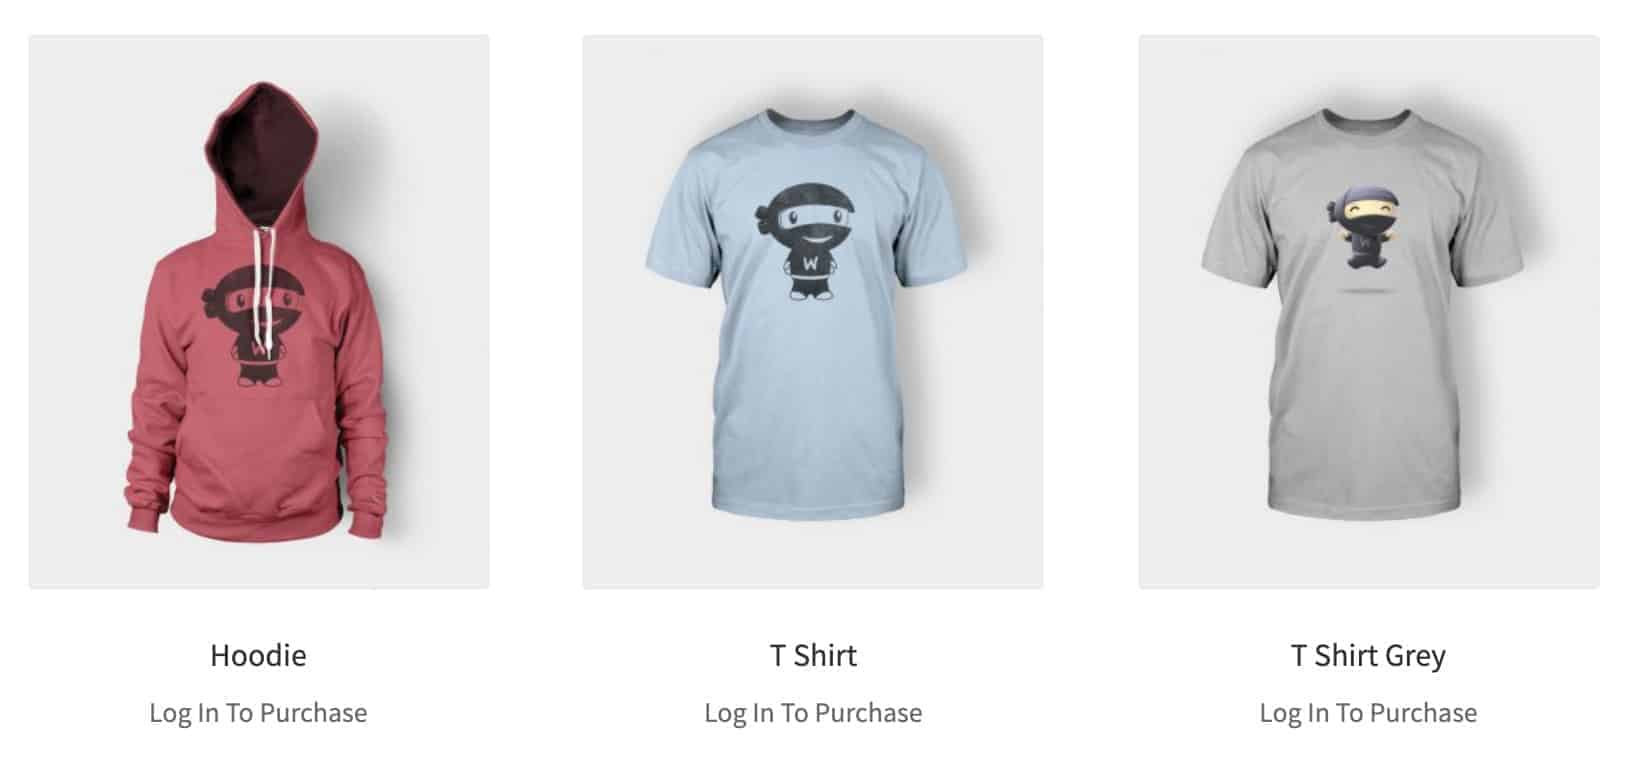
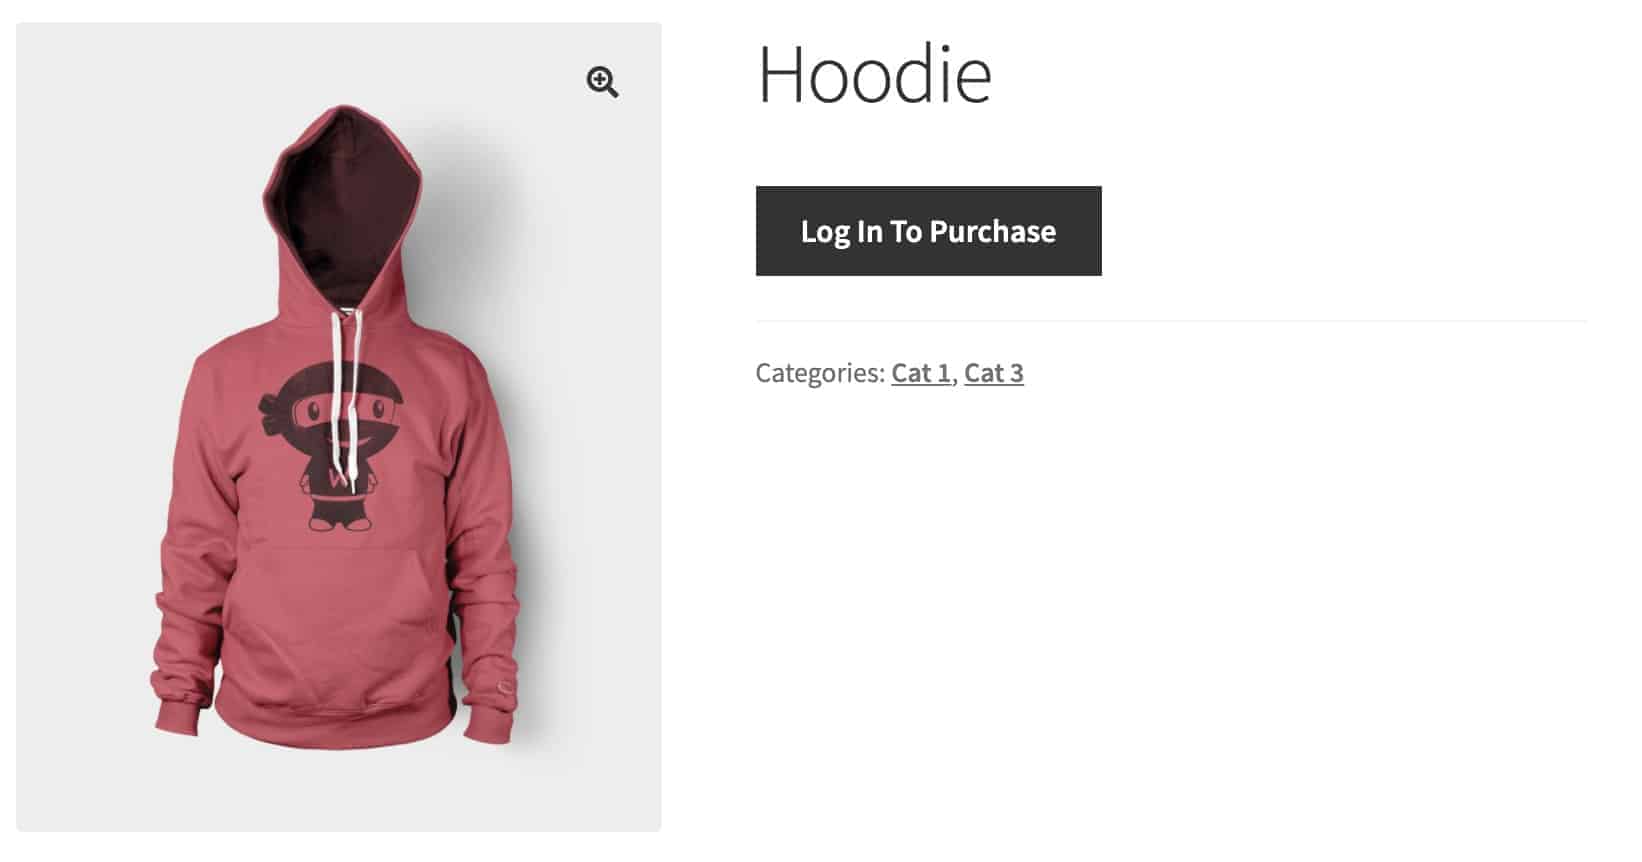
Hide WooCommerce products and categories from unauthorized users. Allow users to view products - but not purchase them
Restrict all content types
Restrict access to any content type, including WooCommerce products and categories, posts and post categories, pages, custom post types, custom taxonomies and terms. Use the plugin to protect all kinds of content - courses, tutorials, premium posts, private forums and message boards
Hide your entire site
Choose to restrict access to every page on your site except your homepage and log-in & registration page
Dedicated landing pages
Send non-members to different landing pages depending on what restricted content they try to access, allowing you to create dedicated landing pages for different membership levels
Authentication options
Authenticate users by user role, password, or log-in status. Set different rules for different users or user roles; or set different passwords for different access
Hide product prices
Display restricted products - but hide prices until users log in. Or hide the products altogether
Alternate add to cart text
Replace the standard add to cart text with your own message - then redirect the user to custom landing pages on click
Private products and stores
The perfect membership plugin to create private WooCommerce products and stores
Integrates with Dynamic Pricing and Discount Rules plugin
Members Only is designed to work with WooCommerce Dynamic Pricing and Discount Rules. Use it to create membership discounts
Multiple discount rule types
Reward members with discounts through bulk pricing, tiered pricing. fixed or percentage discounts, discounts by value, and 'Buy One Get One' offers
Create multiple pricing rules
Create as many pricing rules as you like and assign them to different memberships. Apply discounts to specific products or product categories or to all products
Set specific prices for membership roles
Assign exact prices per membership role for products and variations
Discount by quantity or value
Apply discounts according to the number of items (quantity-based) or the value of items (discounts on spend)

Compatible with Woocommerce Subscriptions
Use the WooCommerce Subscriptions plugin for recurring payments

Shipping and payment methods
Reward members with conditional shipping and payment methods
Custom user registration fields
Add custom user fields to the registration form, including checkboxes, text, select and upload fields
User approval
Choose to allow registrations but require manual approval - for some or all roles
Self-select role at sign-up
Allow users to select the type of membership they're registering for (and optionally require manual approval)
Display fields in custom locations
Choose to add custom fields to the registration form, checkout page, account page, and admin screens
Editable custom user fields
Allow users to edit custom field values from their account page
Conditional user fields
Optionally show or hide user fields based on the value of other fields
Custom redirects
Set where to redirect users to after they login or register
Create subscription products
Require users to purchase a subscription product to qualify for a membership level. If the subscription expires, the user will lose access to the content
Recurring payments or installment plans
WooCommerce Subscriptions allows you to create payment plans for indefinite or fixed length - e.g. pay $100 a month for three months
Free trials
Enable free trials using WooCommerce Subscriptions
Re-assign users with lapsed membership levels
Downgrade users to a different membership level when their subscription expires
Conditional shipping methods
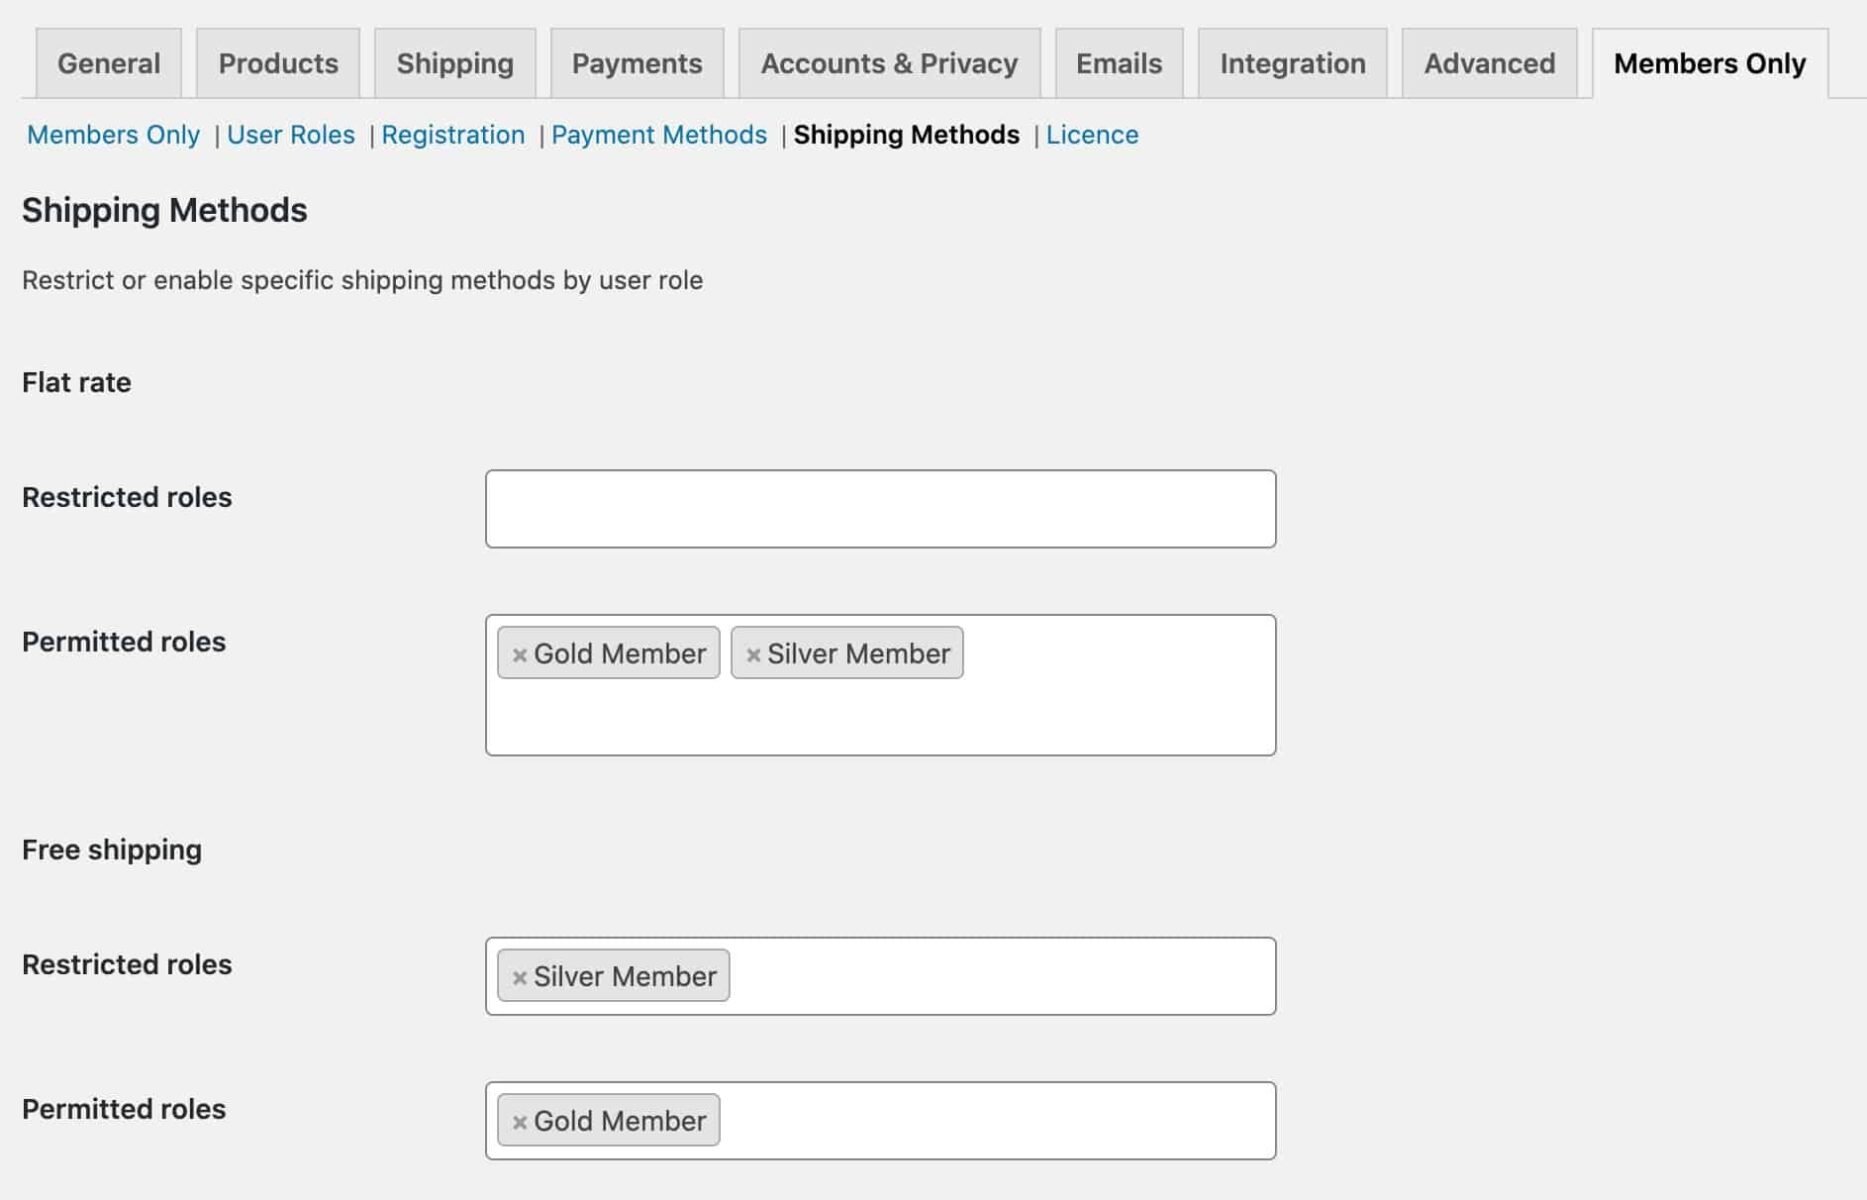
Enable certain shipping methods for different membership levels - permit or restrict shipping methods by user role
Conditional payment methods
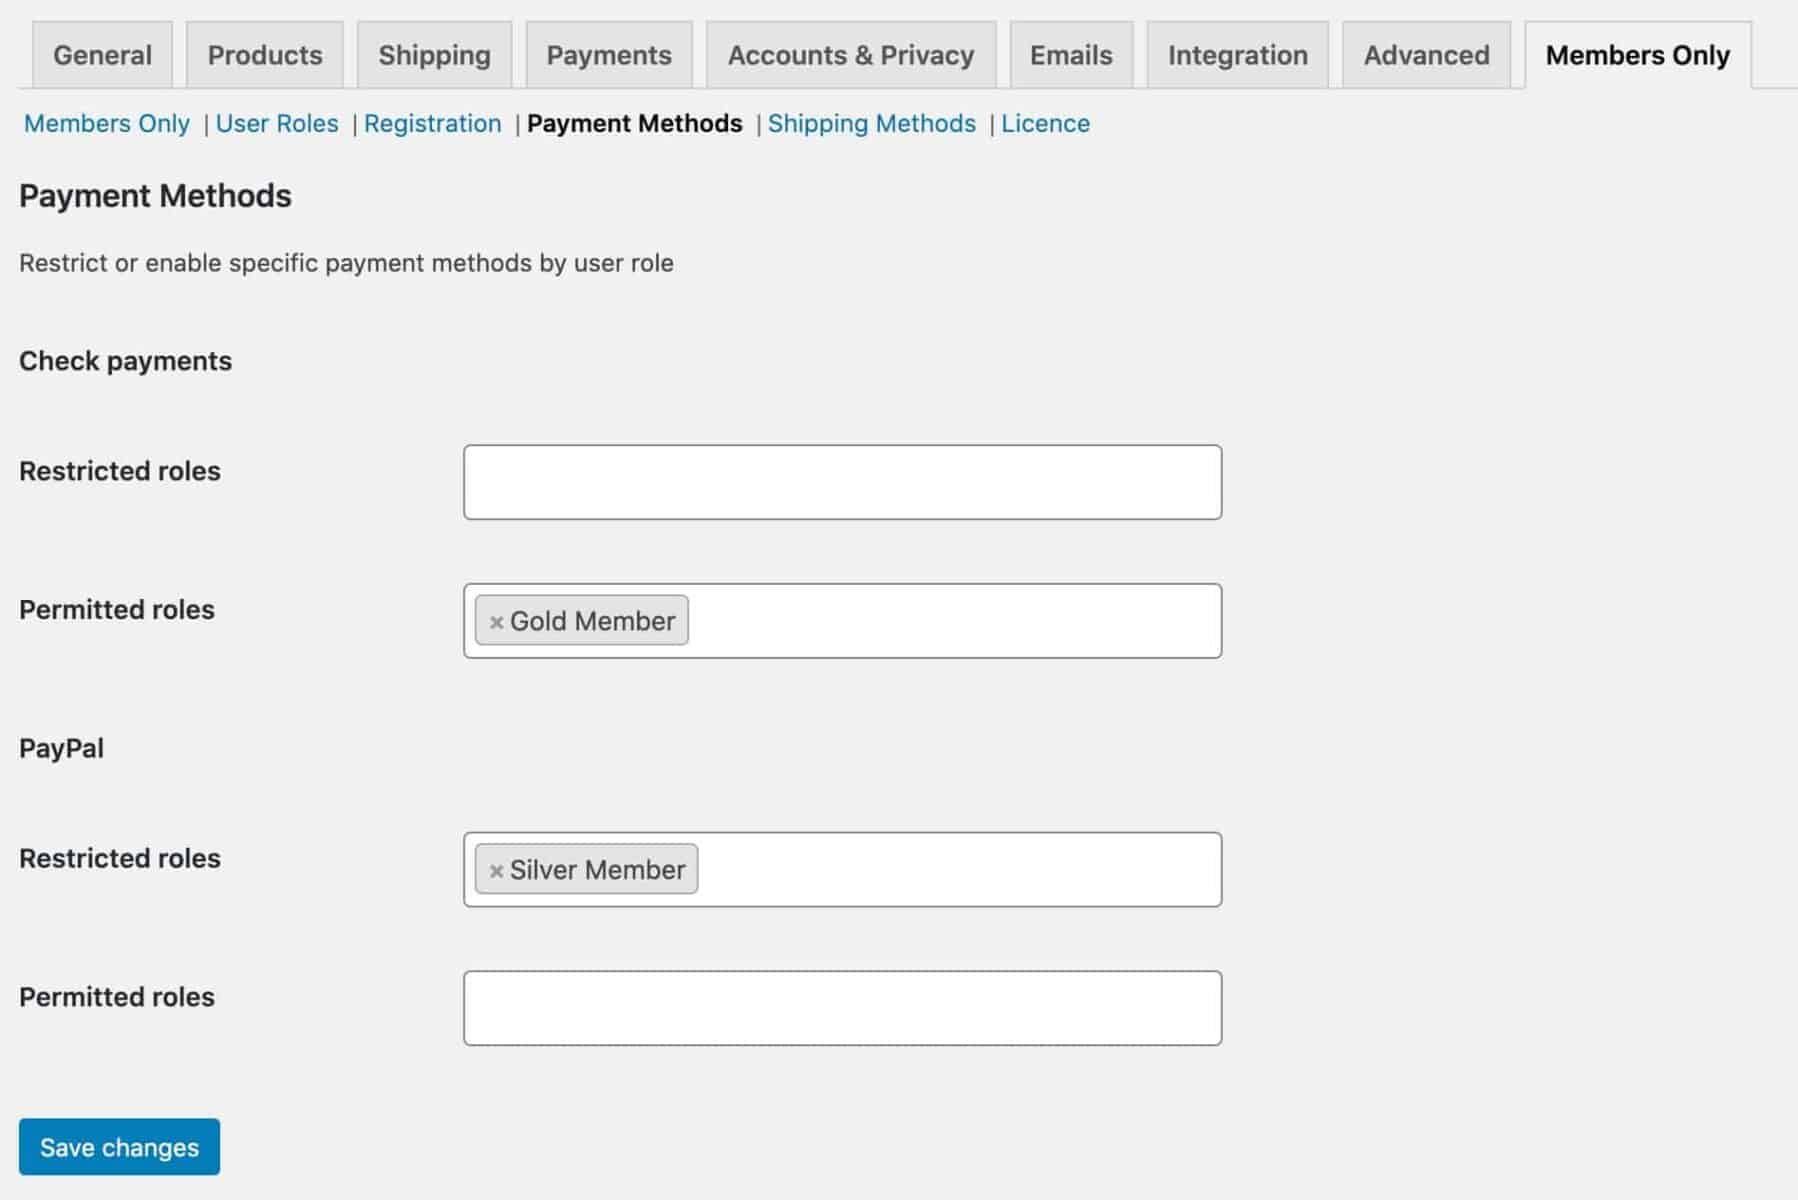
Enable certain payment methods for different membership levels - permit or restrict payment gateways by user role
Built on WooCommerce
Members Only is compatible with all WooCommerce payment gateways - making it an extremely flexible way to charge for content
Dynamic Pricing and Discount Rules
Members Only is compatible with our Dynamic Pricing and Discount Rules - allowing you to set different prices for different membership levels
WooCommerce Subscriptions
Use WooCommerce Subscriptions to create recurring revenue on your membership products
WooCommerce Product Add-Ons Ultimate
Product Add-Ons Ultimate is the leading plugin for WooCommerce add-on fields and options
Pricing
All purchases are covered by a 14 day money back guarantee. Prices are in US Dollars.
Yearly licences renew annually - cancel anytime
Lifetime licences are a one-time payment
Basic
$69.00 + VAT *
Use on a single siteUse this plugin on one production site
Renews annuallyThis plugin will automatically renew every year. If you cancel it, you can continue to use the plugin but will not receive support or updates
14 day money back guaranteeIf the plugin isn't what you want, just drop us a line within 14 days for a full refund
Pro
$99.00 + VAT *
Use on unlimited sitesUse this plugin on as many sites as you like
Renews annuallyThis plugin will automatically renew every year. If you cancel it, you can continue to use the plugin but will not receive support or updates
14 day money back guaranteeIf the plugin isn't what you want, just drop us a line within 14 days for a full refund
Basic
$189.00 + VAT *
Use on a single siteUse this plugin on one production site
One-time paymentThis is a single one-time charge. You'll recieve support and updates for the lifetime of the product
14 day money back guaranteeIf the plugin isn't what you want, just drop us a line within 14 days for a full refund
Pro
$279.00 + VAT *
Use on unlimited sitesUse this plugin on as many sites as you like
One-time paymentThis is a single one-time charge. You'll recieve support and updates for the lifetime of the product
14 day money back guaranteeIf the plugin isn't what you want, just drop us a line within 14 days for a full refund
A full refund if you're not happy
I built this plugin myself and my team and I are available to support you personally. We want you to be 100% satisfied with your purchase so if, for any reason, this plugin doesn't meet your expectations over the next 14 days, let us know and we'll give you a full refund.
Your customer support team is absolutely superb. I have worked with Collins and Clint, and they have been helpful, patient, and incredibly easy to work with.

Why buy the WooCommerce Members Only plugin?
Running an ecommerce store without exclusivity can make it challenging to retain loyal customers and differentiate from competitors. This lack of exclusivity often leads to lower customer engagement and reduced repeat sales, causing a stagnation in growth. By purchasing the WooCommerce Members Only plugin, you can create a sense of exclusivity and community, fostering customer loyalty and increasing repeat sales, thereby driving sustained growth for your store.
FAQs
Changelog for WooCommerce Members Only
= 2.0.14, 25 June 2025 =
* Fixed: Add to Cart replacement button on the product page does not redirect to the Landing Page
= 2.0.13, 18 June 2025 =
* Fixed: product-level Restriction method 'Password' does not redirect to password form page if no Plans are active
= 2.0.12, 14 May 2025 =
* Fixed: login link sometimes does not redirect to the My Account page
= 2.0.11, 6 May 2025 =
* Updated: wcmo_ignore_disabled_category_rules filter
= 2.0.10, 1 May 2025 =
* Added: wcmo_update_done and wcmo_ignore_disabled_category_rules filters
= 2.0.9, 15 April 2025 =
* Fixed: plan settings not saving
= 2.0.8, 14 April 2025 =
* Fixed: payment and shipping settings not saving correctly
* Fixed: allow non-Western characters as role names
* Updated: back-end performance improvements
= 2.0.7, 20 March 2025 =
* Fixed: Uncaught TypeError when using Members Only 2.0+ on PHP 8.1
* Fixed: settings in the backend using textarea not getting saved in multiple lines
* Fixed: Exclude from Menu setting removing menu items even for permitted users
= 2.0.6, 18 March 2025 =
* Fixed: registration fields not being included in admin notification email
= 2.0.5, 13 March 2025 =
* Fixed: custom labels for pre-existing fields are not displayed on the User Fields page in the backend
= 2.0.4, 10 March 2025 =
* Added: setting for front page visibility
* Fixed: value of custom user field of type select does not appear in the backend user profile page
= 2.0.3, 7 March 2025 =
* Fixed: incorrect function name
= 2.0.2, 7 March 2025 =
* Added: wcmo_disable_product_data_tab filter
* Fixed: category item can sometimes show in catalog if no plan ID specified
* Updated: set default Landing page to My account page
= 2.0.1, 5 March 2025 =
* Fixed: error in checkout page
* Fixed: shipping and payment methods not saving
* Updated: allow HTML in user field labels
= 2.0.0, 3 March 2025 =
* Added: multiple restriction plans
* Added: allow access by user
* Added: restrict access to pages, post types and taxonomies
* Added: select field type for registration pages
* Added: repeater option for custom user fields
* Added: conditions for custom user fields
* Added: options to display user fields in multiple locations
* Added: wcmo_allow_external_approval filter
* Fixed: issue with subscription roles not saving for variations
* Updated: redesigned custom user fields UI
* Updated: renamed 'Registration' menu item to 'User Fields'
* Updated: renamed Registration submenu to User Fields
* Updated: user role creation and deletion
= 1.10.22, 8 January 2025 =
* Fixed: PHP warning during checkout if there are no purchased products that assign roles after purchase
= 1.10.21, 2 December 2024 =
* Fixed: Exclude from Menu not working when using Navigation Block
= 1.10.20, 5 November 2024 =
* Added: wcmo_remove_permitted_product_ids filter
* Added: wcmo_always_show_user_products filter
= 1.10.19, 23 October 2024 =
* Added: wcmo_redirect_referring_page filter
= 1.10.18, 23 September 2024 =
* Fixed: role expiration date not getting saved as timestamp, which causes a PHP error on the Edit Profile page
= 1.10.17, 2 July 2024 =
* Added: wcmo_allow_external_approval filter
* Updated: role expiry dates in user profile now updateable
* Updated: WCMO_Updater class for PHP 8.2
= 1.10.16, 15 May 2024 =
* Fixed: some Members Only settings don't work on product pages that use WooCommerce Blocks
= 1.10.15, 4 March 2024 =
* Fixed: PHP warnings when editing the global header in Divi
* Fixed: Billing State and Shipping State fields in the registration form do not become dropdown fields if selling or shipping location is limited to United States
= 1.10.14, 25 September 2023 =
* Added: wcmo_disable_product_user_select filter
* Added: wcmo_assign_roles filter
= 1.10.13, 29 August 2023 =
* Updated: compatibility with WooCommerce High-Performance Order Storage
= 1.10.12, 29 June 2023 =
* Fixed: product categories not getting excluded when using Exclude from Menu setting
= 1.10.11, 24 April 2023 =
* Fixed: add to cart button not hidden for variable products on Astra theme
* Fixed: product count for each category does not consider restricted products
= 1.10.10, 28 February 2023 =
* Fixed: User IDs field in the Edit Product page is not hidden if Restriction method is not By User
* Fixed: pending user role causes fatal error in PHP 8
* Updated: compatibility with Product Table Ultimate
* Updated: prevent creating a new registration field with blank label
= 1.10.9, 4 January 2023 =
* Added: wcmo_override_is_restricted_category_by_id filter
* Fixed: PHP warnings when authenticating users
* Fixed: Fatal error when saving a page with products shortcode
= 1.10.8, 6 December 2022 =
* Added: wcmo_filter_category_local_rules filter
* Added: wcmo_override_is_permitted_category_by_id filter
* Added: wcmo_disable_new_registration_email filter
= 1.10.7, 5 October 2022 =
* Added: wcmo_product_restricted_user_ids filter
* Added: wcmo_force_hide_restricted_categories filter
* Fixed: removed wcmo_is_menu_item_restricted filter
* Fixed: Fatal error when an order cannot be retrieved in wcmo_assign_roles_after_purchase function
* Fixed: PHP warnings
* Updated: choose User IDs via multiple select dropdown instead of text field
= 1.10.6, 17 May 2022 =
* Fixed: parse error in functions-products.php
= 1.10.5, 10 April 2022 =
* Updated: add redirect button to archive page if specified
= 1.10.4, 5 April 2022 =
* Updated: error suppression in wcmo_hide_restricted_categories
= 1.10.3, 5 April 2022 =
* Added: wcmo_product_restriction_method_posts_per_page and wcmo_hide_from_user_roles_posts_per_page filters
* Added: delete user-specific transients when user profile is updated
* Fixed: some transients do not regenerate after they expire
* Fixed: permit across multiple categories setting not displaying correct products
* Fixed: redirect issue with password-protected subcategories
* Fixed: redirect issue on some paths with query strings
* Fixed: when adding a new user, sometimes roles do not get saved
= 1.10.2, 2 December 2021 =
* Added: option to ensure that products in multiple categories with different rules are accessed correctly
* Fixed: user can now access products with different locally set passwords
* Fixed: added options param to custom form fields
* Fixed: redirect from log-in incorrectly directing to referring page
* Updated: switched wcmo_product_passwords from transient to option
= 1.10.1, 26 July 2021 =
* Added: wcmo_locally_restricted_categories transient
* Fixed: ensure transient expiry doesn't affect user ID restrictions
= 1.10.0, 23 June 2021 =
* Added: support for role assignment fields in variable products
* Added: GUI to add registration fields
* Added: upload fields to registrations
* Added: description in registration fields
* Added: option to add registration fields to admin notification emails
* Added: save custom registration fields in user profiles
* Added: option to set reminder date
* Added: reminder email for expiring memberships
* Fixed: ensure correct products returned in [products] shortcode
= 1.9.18, 5 April 2021 =
= Fixed: parse errors in functions-products.php
= 1.9.17, 25 March 2021 =
* Added: wcmo_ignore_hidden_roles_non_logged_in filter
* Added: wcmo_ignore_shipping_for_non_logged_in filter
* Added: wcmo_ignore_payments_for_non_logged_in filter
* Added: wcmo_ignore_restricted_payments_for_non_logged_in filter
* Fixed: posts with multiple categories not restricted correctly
* Fixed: hidden user roles not restricting individual products correctly
* Updated: Billing and Shipping State fields in registration form
* Updated: removed wcmo_admin_notices
= 1.9.16, 16 November 2020 =
* Fixed: certain products still purchasable when method set to all
* Updated: allow users to access categories pages when wcmo_allow_view_products is set
= 1.9.15, 6 November 2020 =
* Fixed: prevent unrestricted products from redirecting to log-in page
= 1.9.14, 3 November 2020 =
* Added: wcmo_get_transient_expiration
* Added: wcmo_products_restricted_to_current_user_archive transients
* Added: wcmo_get_users_expiration_dates shortcode
* Fixed: parse error in functions-registration.php
* Fixed: correctly display custom user fields on profile page
* Fixed: widgets not hidden for restricted users
* Fixed: correctly update capabilities
* Fixed: user-role restriction on entire site not setting correctly
* Updated: licence key notifications
= 1.9.13, 6 October 2020 =
* Added: display custom registration fields in user profile
* Added: select field option for new registration fields
= 1.9.12, 22 September 2020 =
* Added: wcmo_user_needs_approval filter
* Added: further registration fields and priority option
= 1.9.11, 19 September 2020 =
* Added: extra registration fields
= 1.9.10, 18 September 2020 =
* Added: hide product price in widgets
* Fixed: remove add to cart button from restricted variable products
* Fixed: parse error in functions-registration.php
* Updated: performance improvement when entire site is restricted
= 1.9.9, 29 July 2020 =
* Added: referring page parameter to wcmo_replacement_add_to_cart_button
= 1.9.8, 23 July 2020 =
* Fixed: respect Access Product Pages setting
= 1.9.7, 14 July 2020 =
* Fixed: products restricted to user IDs displaying in archive pages
= 1.9.6, 17 June 2020 =
* Added: Access Product Pages and Redirect from Add to Cart Button settings
* Added: wcmo_after_assign_roles_after_purchase action
* Added: wcmo_after_update_users_role action
* Fixed: capabilities not displaying on Roles screen
* Updated: check for 'Pending' role in wcmo_email_additional_content_customer_new_account
= 1.9.5, 14 May 2020 =
* Added: wcmo_registration_form_role_label to change label for 'Role' field on registration form
* Added: automatically create 'pending' role if pending users barred from logging in
* Added: notice to pending users when they register
= 1.9.4, 23 April 2020 =
* Added: hide prices option
* Fixed: error message when user logs in without a role
* Fixed: empty registration fields not saving correctly
* Updated: prevent non-admins from editing role capabilities
* Updated: prevent the administrator role from being an option in the registration form
* Updated: translation files
= 1.9.3, 14 April 2020 =
* Added: wcmo_assign_roles_order_status option
* Fixed: payment and shipping methods not saving empty values
* Updated: prevent administrator role being set as new user role
= 1.9.2, 1 April 2020 =
* Update: check product is_object in wcmo_update_excluded_products_transient
= 1.9.1, 18 March 2020 =
* Fixed: changed is_numeric to is_object in wcmo_update_excluded_products_transient
* Fixed: shipping and payment settings not saving empty values
* Updated: retain wcmo_referrer param in URL when user enters incorrect password
* Updated: check WooCommerce is active
= 1.9.0, 3 March 2020 =
* Added: registration fields
* Added: allow user approval for specific user roles
* Added: wcmo_after_expired_user_remove_role
* Added: wcmo_new_registration_email_recipient filter
* Fixed: correctly set multiple roles for approved users
* Fixed: correctly remove 'Pending' role from approved users
= 1.8.5, 20 February 2020 =
* Fixed: redirecting to last product in query instead of product category
= 1.8.4, 14 February 2020 =
* Fixed: redirecting to last product in query instead of shop page
= 1.8.3, 12 February 2020 =
* Fixed: products restricted by user ID not displaying correctly in archives for logged out users
= 1.8.2, 10 February 2020 =
* Fixed: products restricted by user ID not displaying in archives
= 1.8.1, 27 January 2020 =
* Added: wcmo_role_expiration_date filter
* Added: Role based shipping methods
= 1.8.0, 25 January 2020 =
* Added: Expiration dates for membership roles
* Added: Role based payment methods
* Fixed: wcmo_update_excluded_products_transient queries incorrectly looking for product object
= 1.7.3, 24 January 2020 =
* Fixed: parse error in functions-admin-products.php when saving products
* Updated: removed fields parameter from wc_get_products in wcmo_update_product_passwords_transient
= 1.7.2, 20 January 2020 =
* Added: Italian translation
* Fixed: incorrect parameter in WP_Query
= 1.7.1, 9 January 2020 =
* Added: email user on approval or rejection
* Fixed: local passwords not working for non-logged-in users
* Fixed: issue with WooCommerce shortcodes displaying incorrect products
= 1.7.0, 12 December 2019 =
* Added: initial support for WooCommerce subscriptions
* Added: wcmo_remove_existing_roles filter to replace previous user roles
* Added: multiple roles support
* Added: option to prevent pending and rejected users from logging in
* Added: option to prevent automatic log in
* Added: set different default roles
= 1.6.3, 26 November 2019 =
* Added: approve / reject new user registrations
= 1.6.2, 20 November 2019 =
* Added: conditionally check menu items for user roles
* Added: redirect to referring page after logging in
* Fixed: excluded menu items respecting user role
= 1.6.1, 19 November 2019 =
* Fixed: parse error in products shortcode
= 1.6.0, 16 November 2019 =
* Added: restrict posts
* Added: hide products by user role
* Updated: set default method to no restriction
* Updated: assign user role on woocommerce_order_status_processing
= 1.5.0, 31 October 2019 =
* Added: restrict products by user roles
* Fixed: correctly remove restricted products from shortcode
* Fixed: correctly remove restricted products from WP_Query
= 1.4.2, 8 October 2019 =
* Updated: product tab ID for compatibility with Add-Ons Ultimate
* Updated: renamed wcmo_excluded_products transient to wcmo_products_restricted_by_user
= 1.4.1, 8 September 2019 =
* Fixed: prevent redirection from admin
* Fixed: correctly validate password
= 1.4.0, 16 August 2019 =
* Added: automatically assign roles on purchasing products
= 1.3.5, 13 August 2019 =
* Added: $password parameter to wcmo_redirect_url filter
* Fixed: set wcmo_excluded_products transient using WP_Query
* Updated: set autocomplete to off on password field
= 1.3.4, 28 June 2019 =
* Fixed: correctly redirect after logging in
= 1.3.3, 28 June 2019 =
* Fixed: user roles not correctly blocked from content
= 1.3.2, 21 June 2019 =
* Fixed: timeout error
= 1.3.1, 6 June 2019 =
* Fixed: correctly exclude authorised products from restrictions
= 1.3.0, 6 June 2019 =
* Added: checkbox to opt into hiding widgets
* Added: alternative label for add to cart button on restricted products
* Added: product restriction method column in products list
* Fixed: correctly check for restricted products on All Product Pages
* Fixed: correctly restrict locally protected products from archive pages
* Fixed: too many redirects when trying to access log-in page
* Updated: restructured settings page into sections
= 1.2.0, 1 April 2019 =
* Added: Members Only product panel
* Added: restrict product by user ID
* Fixed: incorrectly named password session variable
= 1.1.4, 28 March 2019 =
* Fixed: Updater error
= 1.1.3, 27 March 2019 =
* Fixed: JS error in admin
= 1.1.2, 26 March 2019 =
* Fixed: too many redirects issue
= 1.1.1, 26 March 2019 =
* Fixed: redirect not working correctly for some blocked content
= 1.1.0, 6 March 2019 =
* Added: individual category settings
* Updated: use term_id instead of slug for protected categories
= 1.0.2, 21 February 2019 =
* Added: hide restricted products in archives
= 1.0.1, 15 February 2019 =
* Added: pot file
* Added: licensing
* Updated: changed default restriction method to log-in-status
= 1.0.0, 11 December 2018 =
* Initial commit
Pre-Sales and Licensing
Will this plugin work with my theme?
All my plugins are independent of the theme being used so there shouldn't be any problems. If you do run into any issues, just let us know and we will take a look.
Do you offer refunds?
Yes, there’s a 14 day money back guarantee. The purpose of this guarantee is to give you plenty of time to assess the plugin to see if it will meet your needs.
During the 14 days, if you’ve got any questions about the plugin and what you are hoping to achieve with it, just raise a support ticket and we’ll get back to you.
You can find out how to register your refund request here.
Is there a free trial?
We don’t offer free trials or backend demos but all products are backed by a 14 money back guarantee so if the plugin isn’t what you wanted, we will issue you with a refund.
This allows you to spend time testing the plugin on your own environment, with your own theme and with your own plugins. It’s the best way to help you be sure that the plugin is what you want.
You can also upgrade your licence at any time – so, if you wish, you can purchase a Yearly licence initially then upgrade to the Lifetime licence within the first year and just pay the difference.
If you have any questions during your 14 day refund period, you can raise a support ticket and we will get straight back to you.
How long is the licence valid for?
Yearly licences are valid for a year. During that time you are entitled to receive free updates and support. After 12 months, yearly licences will automatically renew. You can cancel at any time.
Lifetime licences are a single, one-off payment. Lifetime licences do not expire and you are entitled to receive all future updates for the plugin.
You can purchase a Yearly licence then upgrade to Lifetime if you wish. Upgrade within the first year to just pay the difference.
Can I upgrade my licence and just pay the difference?
Yes, you can upgrade your licence any time in the first year and just pay the difference. So if you want to upgrade from Basic to Pro or if you want to upgrade from Yearly to Lifetime, you can do so and only pay the difference in price.
Also, if you wish, you upgrade from one product to a bundle that contains that product and also only pay the difference. So you can buy one or more products then upgrade to the All Access Bundle and only pay the difference in price.
What’s the difference between Basic and Pro licences?
The Basic licence entitles you to updates and support for one site; the Pro licence entitles you to updates and support for unlimited sites.
You can try out the Basic licence first then upgrade to Pro at any time. Here’s how to upgrade your licence.
Is the plugin translatable?
Yes, all our plugins are fully translatable and many come with translations in various languages. If you wish to contribute your own translations, we can add those to the core plugin to ensure they don't get overwritten.
The plugins are also compatible with WPML and other popular multilingual plugins like LocoTranslate.
Features
What methods can I use to protect content?
With Members Only, you can choose how to protect your content in a number of ways. You can restrict access by password, user role, or logged-in status. You can even restrict access to individual products and posts according to specific users.
Only the users that you have chosen can access your content.
Password options
- Set one or more global passwords
- Create different passwords for each product or post
- Create different passwords for each product or post category
User role options
- Specify one or more user roles at a global level
- Allow different user roles to access different products or posts
- Allow different user roles to access different product and post categories
- Restrict or enable payment gateways by user role
- Restrict or enable shipping methods by user role
- Set expirations for memberships
Custom registration options
- Allow users to select their role at registration
- Manually approve users after registration, if required
- Prevent pending or rejected users from logging in
- Set different default roles for new users
- Add custom fields to registration form
Other options
- Restrict access to users who are logged in
- Create user-specific products by restricting access to specified products to specific user IDs
User role editor
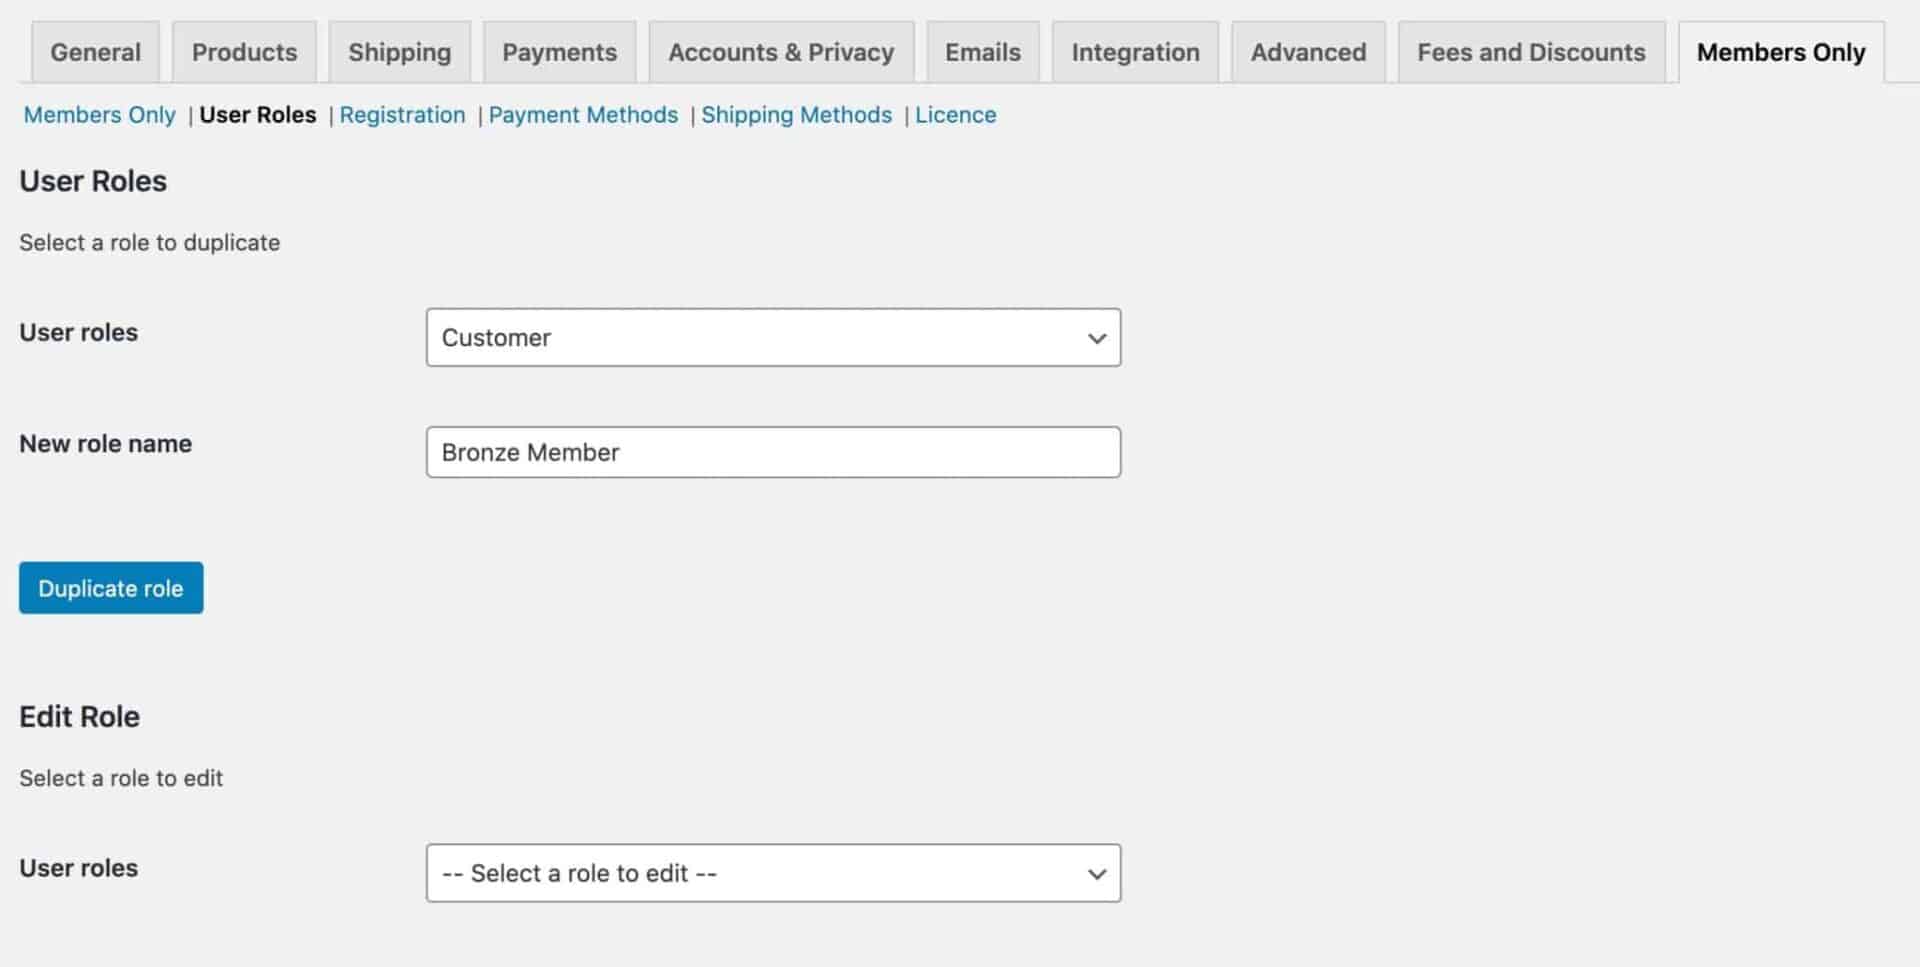
If you're protecting your content according to user roles, you need a simple way to create and manage user roles. The built-in user role editor lets you:
- Create new user roles
- Duplicate existing roles
- Edit role capabilities
What are the benefits of using this plugin?
Exclusive Offerings: Create a members-only area with premium products, discounts, or early access to new arrivals, boosting customer loyalty and engagement.
Content Control: Tailor your website experience by restricting specific pages, categories, or the entire site to members, allowing for a more targeted approach.
Increased Revenue: Offer membership tiers with varying access levels and benefits, creating additional revenue streams.
Enhanced Security: Restrict access to sensitive content or age-restricted products, ensuring compliance with regulations.
What are the different types of restrictions I can set up?
With the plugin you will have complete control of what the user sees. You can choose to:
- restrict all the content on your site
- restrict certain categories
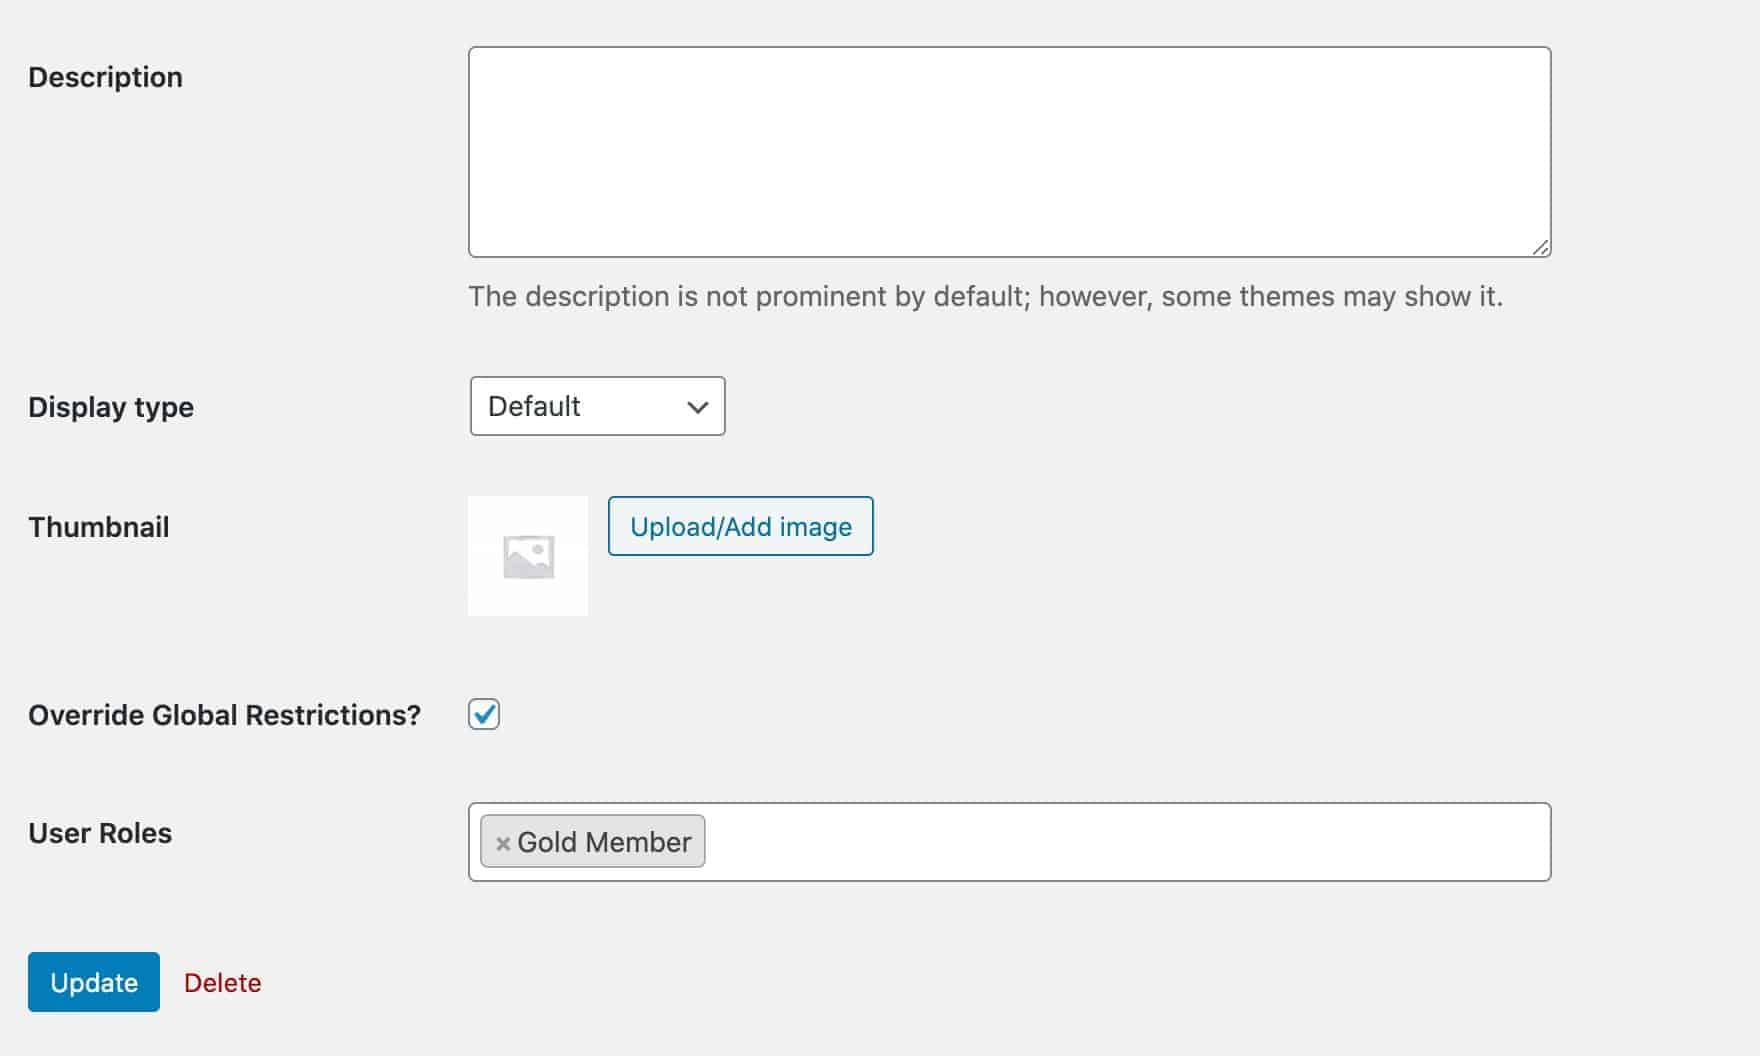
- apply different rules to different categories
- restrict individual products
- restrict products by user ID
- restrict different products to different users
- hide product prices
- show product prices but prevent certain users from purchasing the products
How easy is it to set up member restrictions?
The plugin is designed for ease of use. You can define member access rules within a user-friendly interface. Simply choose the content (products, categories, pages, etc.) you want to restrict and assign access permissions to specific user roles (e.g., Member, Premium Member).
Can I offer different membership tiers with varying access levels?
Absolutely! The plugin allows you to create multiple membership tiers, each with its own set of access privileges. This lets you cater to different customer needs and create a tiered pricing structure for your memberships. For example, a "Basic Member" might have access to exclusive discounts, while a "Premium Member" might enjoy early access to new products, free shipping, and additional content.
How do members access restricted content?
Once you've set up member restrictions, the plugin seamlessly integrates with your WooCommerce store. Members will need to log in to their accounts to access restricted areas. The plugin typically displays a login prompt when a user tries to access restricted content, allowing them to log in or create an account to proceed.
Can I customize the registration form?
Yes, you can add custom fields to the registration form.
Can I review users’ registrations?
Yes, you can choose whether to automatically approve registrations or manually approve them. You can also automatically approve some registrations - e.g. all registrations for retail customers - but manually review other registrations - e.g. for wholesale customers.
What happens to a user’s access if their membership expires?
The plugin offers flexibility in managing expired memberships. You can choose to automatically revoke access to restricted content when a membership expires. Alternatively, you can set up a grace period where users have limited access or see prompts to renew their memberships. You can configure these settings within the plugin's user-friendly interface.
Our products are featured on

Screenshots
See how the plugin looks on the back and front ends. Click the images to enlarge them.
 Display products without allowing them to be purchased
 Require users to log in to purchase products
 Edit and create user roles
 Override rules per category
 Restrict or enable shipping methods by user role
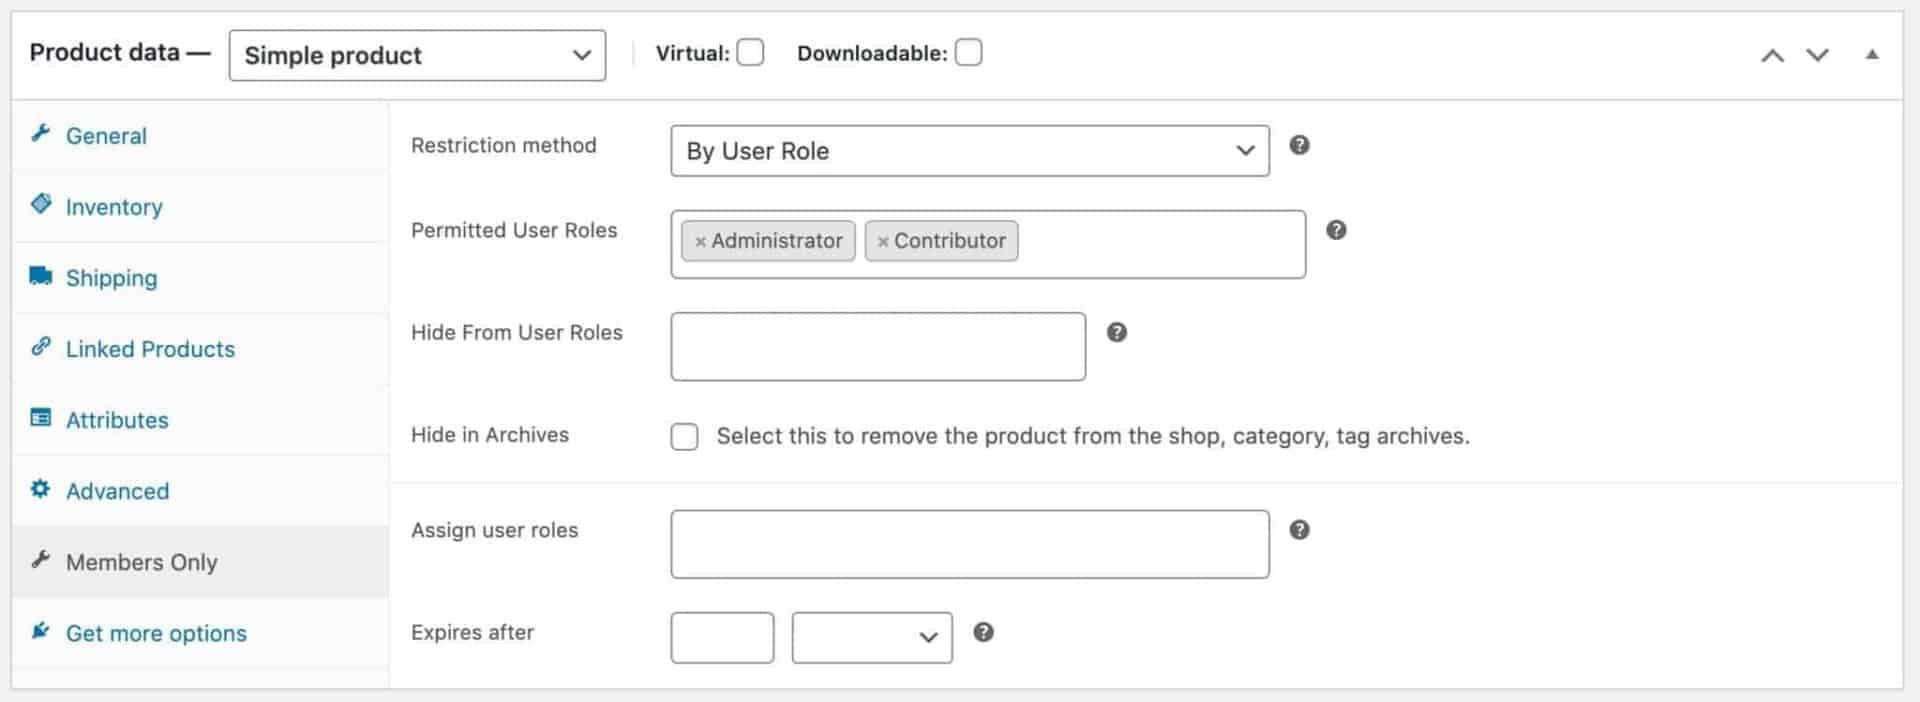
 Set restriction roles per product
 Restrict or enable payment methods by user role
 Allow users to select user role on registration
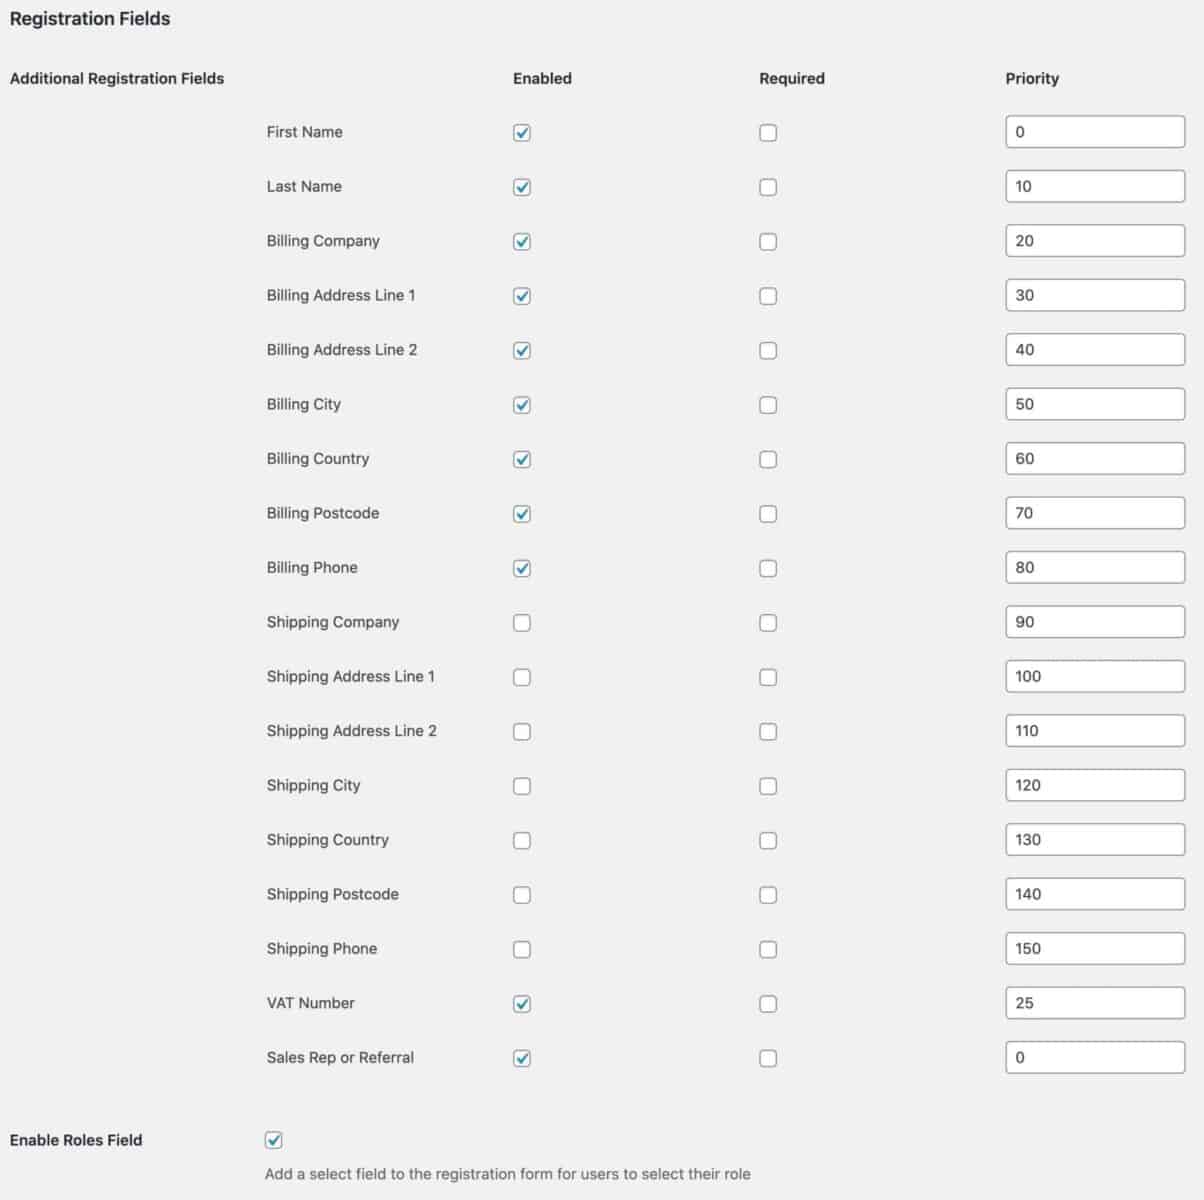
 Add extra fields to registration form
 Restrict your content


