How to create custom signs and banners in WooCommerce

You want to create a custom signs product in WooCommerce. Users will be able to create personalised signs and banners by entering custom text, uploading images, selecting size and material, and any other options they need. This tutorial will show you step by step how to set up your custom signs product in WooCommerce.
Creating custom signs and banners in WooCommerce
We’ll look at making a custom vinyl banner in this tutorial. And the methods that we use should cover pretty well all your custom signage product requirements.
Other typical applications include:
- Vinyl or fabric banners
- Aluminium signs
- Feather flags
- Vinyl lettering
- Foam boards
- Retractable or pole banners
- Window decals or frosted lettering
- Custom flags
- Vehicle or boat lettering and decals
- Pop up displays
In fact, just about any application you can think of.
All aspects of the product will be customisable by your clients to whatever parameters you set. So if you only offer certain materials or set sizes, you can specify these.
Related Tutorial
You might also be interested in the following tutorial: WooCommerce print shop – the complete guide to accepting print orders online
Example Product: Make a custom banner in WooCommerce
Let’s look at our example product, a custom vinyl banner.

You can see this product in action here.
Custom sign specifications
The customer is going to be able to set a number of different options and we’ll calculate the price based on their selections.
Options will include:
- Size
- Material thickness
- Number of printed sides
- Hem type
- Grommet frequency
- Pole pockets
- Select some accessories
And of course they’ll be able to upload their artwork.
Step 1: Install and activate Add-Ons Ultimate
In order to allow the user to enter all their personalised information for their custom banner, we’ll need to use the WooCommerce Product Add-Ons Ultimate plugin. This allows us to insert add-on fields on WooCommerce products.

Step 2: Create your product
Once you’ve got Add-Ons Ultimate installed, you’ll need to create your custom sign product in WooCommerce.
Related Tutorial
This tutorial has guidance on adding a new product: The complete guide on how to create a new product in WooCommerce.
Step 3: Add your extra fields
Okay, now let’s look at adding extra fields for the user to customise their banner. We’re going to let them enter the width and length of the banner and choose from several other options.
Create a number field
After you’ve added your new product, you can add your first field:
- Go to the Product Data section and click on the Product Add-Ons tab
- Click Add Group and enter a title for your group. In our example, we’ll call the first group ‘Size’
- Click Add Field and enter a title for your first field. In the example, we’ll call our first field ‘Width’
- Choose ‘Number’ for the Field Type. This means that the field will be displayed as a number input on the front end – so users can only enter a number

You’ll notice a couple of other parameters highlighted in the screenshot above. It’s likely that you can only produce your custom signs within certain size limits. So you can add a minimum and maximum value for the number field. In our example, users can only enter a width between 500 and 4000 mm – but you can choose whatever values you like here.
Repeat this step to create a ‘Length’ field.
Create a radio group
In the demo product, there’s also an option for the user to select the thickness of the material used for their banner. Instead of a number field, we’ll use a ‘Radio Group’ so that we can limit the user’s choice to certain options.
The set up is similar:
- Click ‘Add Field’
- Enter the field title, in this case ‘Thickness’
- Choose ‘Radio Group’ as the field type
- Click ‘Add Option’ and type in your first option
- Repeat for each option
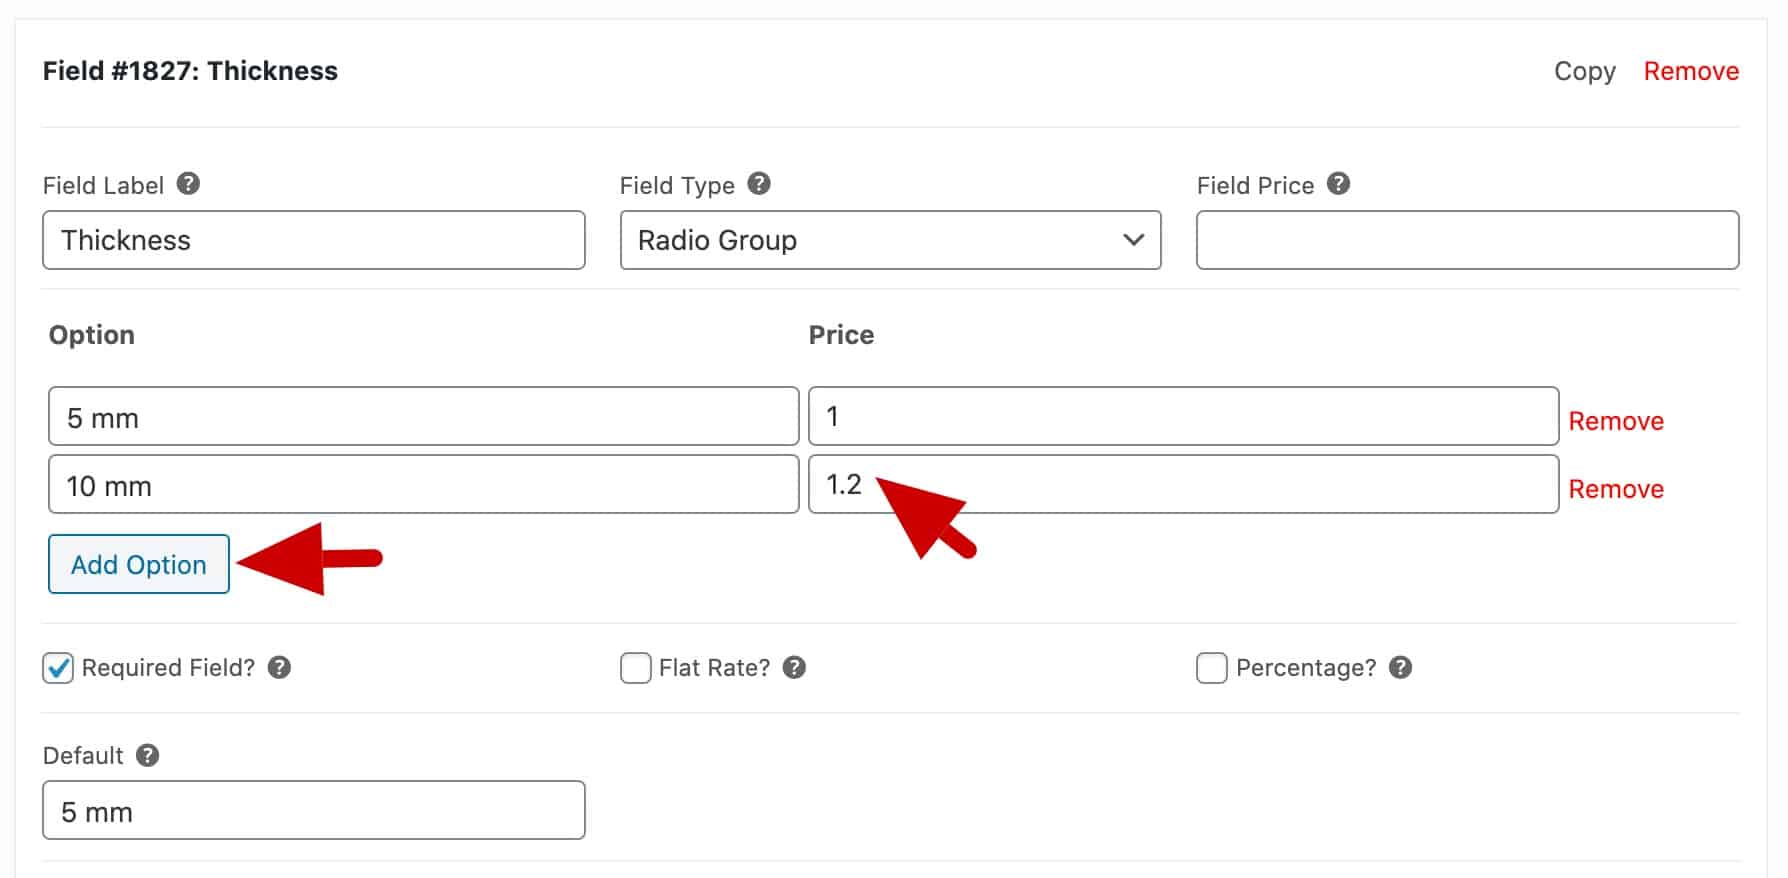
You can also see in the screenshot above that I’ve entered a value in the ‘Price’ column for each option. Usually, this would just add that value to the overall product price when the user selects that option.
But in this case we’re going to use these values as factors when we come to calculate the product price. We’ll look at that later.
Setting required fields and defaults
Notice that in all the fields we’ve created so far, the setting for ‘Required Field’ has been checked. This is to ensure that the user enters a value in these fields – otherwise they can’t add the product to their cart.
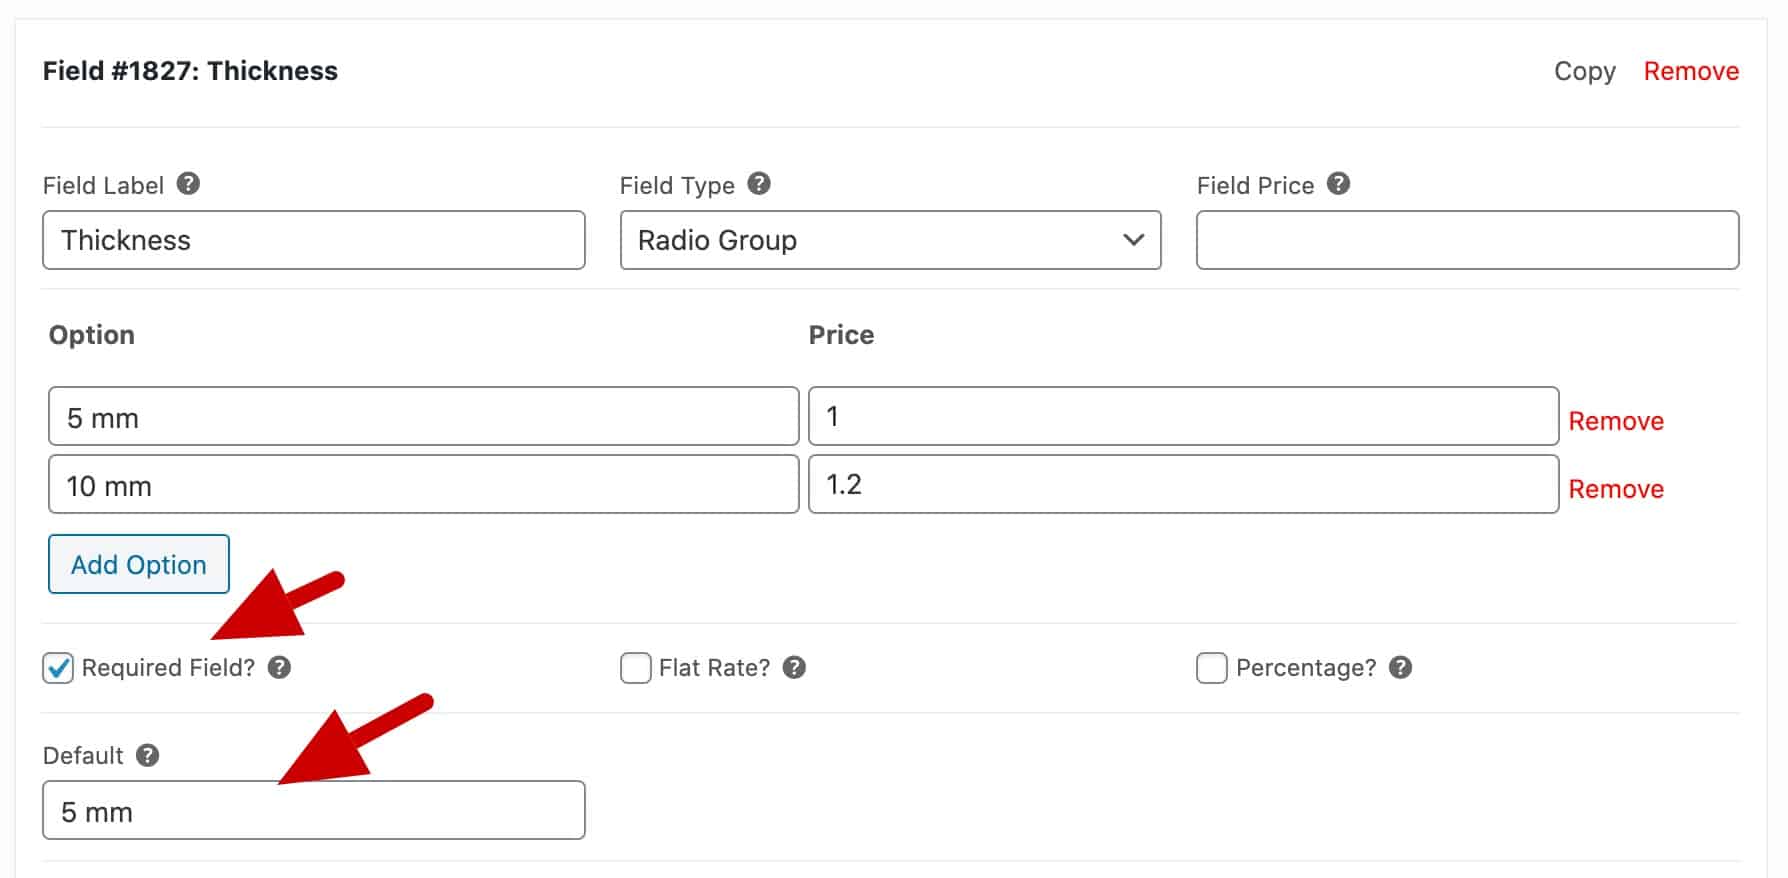
You can also enter a value in the ‘Default’ field. This will ensure that this value will be the default when the user first accesses the product page.
Step 4: Uploading artwork
It’s likely that you’ll want to allow your users to upload their own artwork. Let’s create a new group for fields specifically relating to artwork:
- Click ‘Add Group’ to create the new group
- Call it ‘Print’ or ‘Artwork’ or similar
- If you want to allow different print options, create a new radio group field. In the demo, we’ve got a radio group that allows users to select one or two sided printing. This is called ‘Printed Sides’
- Create one or more fields with the ‘Upload’ field type

Creating conditional fields
In our demo product, we’re allowing the user to choose between one or two sided printing. If they choose two-sided printing, then they will see an additional upload field for artwork for the back of the banner.
To create a conditional field:
- Create a new ‘Upload’ field, just as you did above
- Click ‘Add Condition’
- Choose to ‘Show this field if’ and ‘All rules match’
- Then select the radio button group you created above
- Choose ‘Is’ and select ‘Two Side’
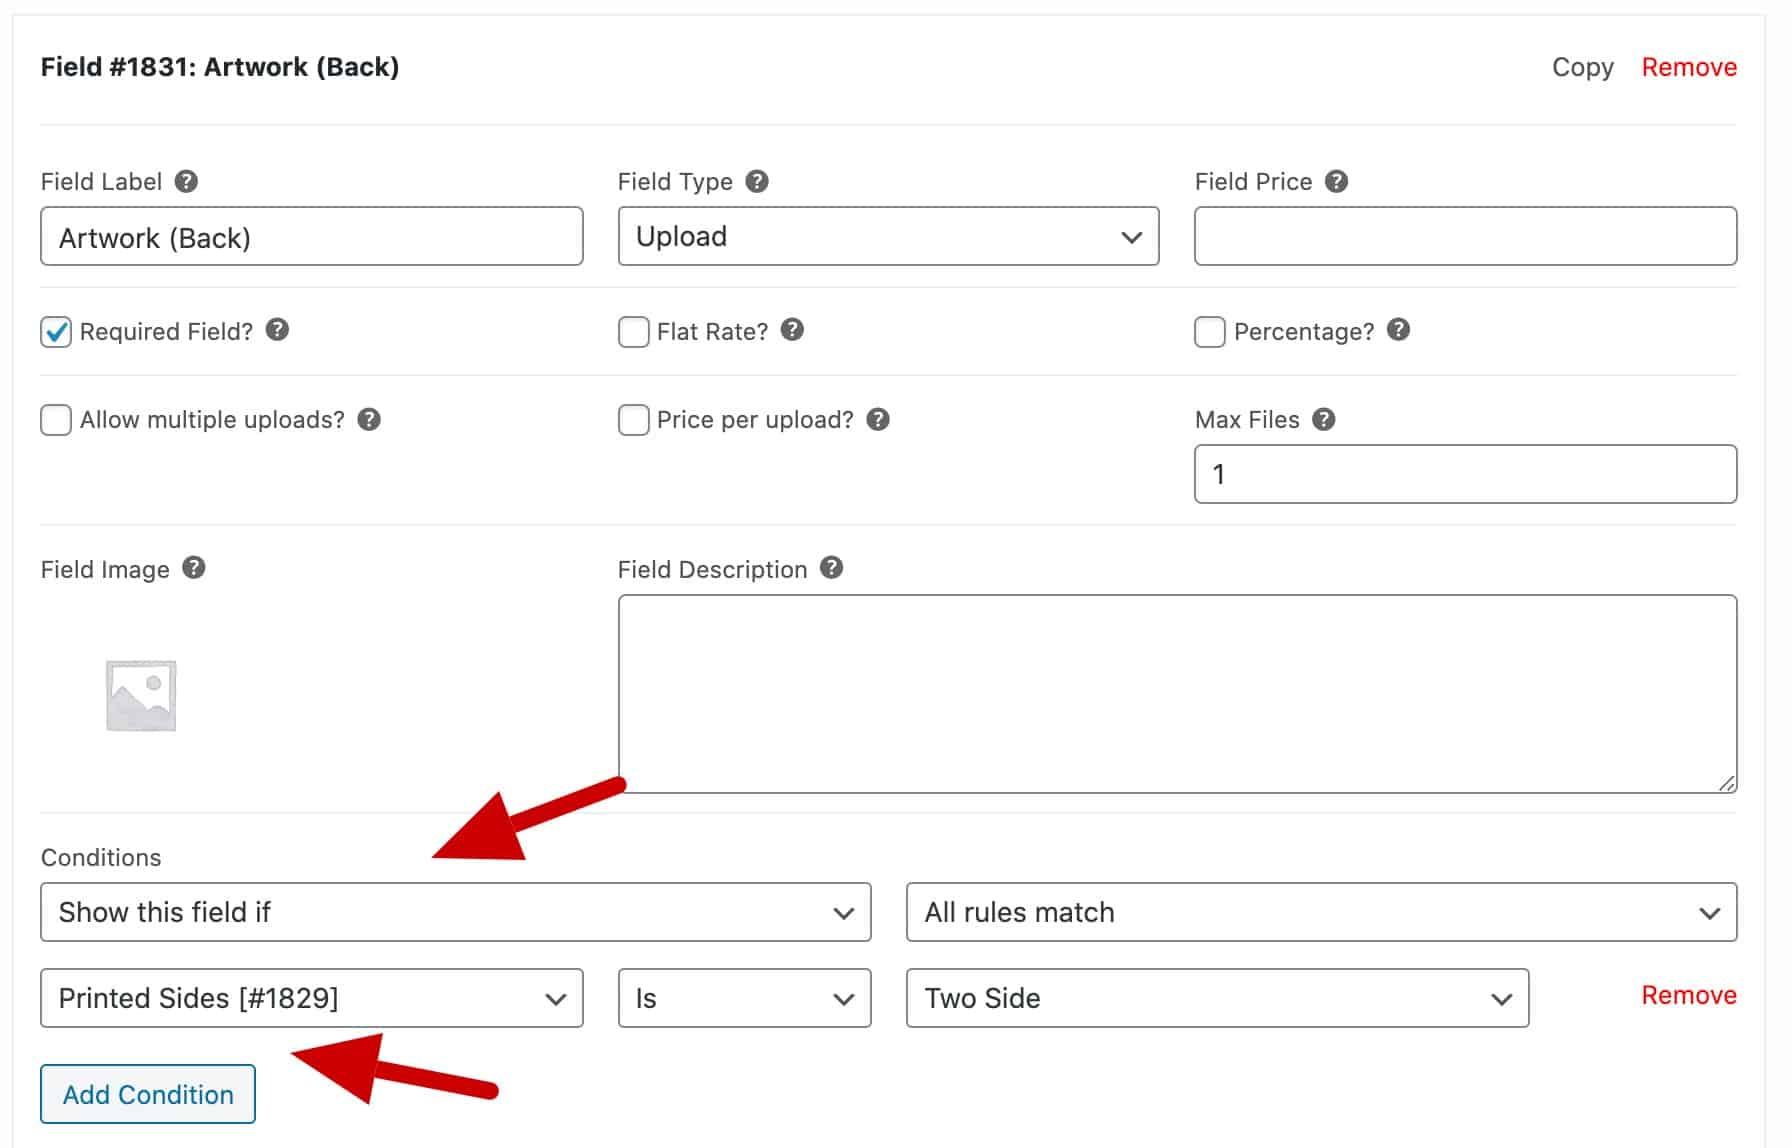
This means that this field will only be displayed if the user selects ‘Two Side’ in the ‘Printed Sides’ field.
Related Tutorial
For more information on conditions, take a look at this article: WooCommerce conditional product add-ons and options
Repeat for the remaining fields
You can now add any further fields that you like. In our demo product, we created radio group fields for ‘Hem’, ‘Grommets’, and ‘Pole Pockets’.
Adding accessories to your custom banner product
One surefire way to increase the value of your sales is to offer the user additional products to buy.

In our demo, we’re going to offer the user the chance to buy some ropes or bungees.
Add accessories as products
We’re going to offer other products as accessories. To do this:
- Create your new products in the standard way
- In the custom banner product, add a new field. This will have the field type ‘Products’
- In the ‘Child Products’ field, enter the name of the products that you’re offering as accessories.
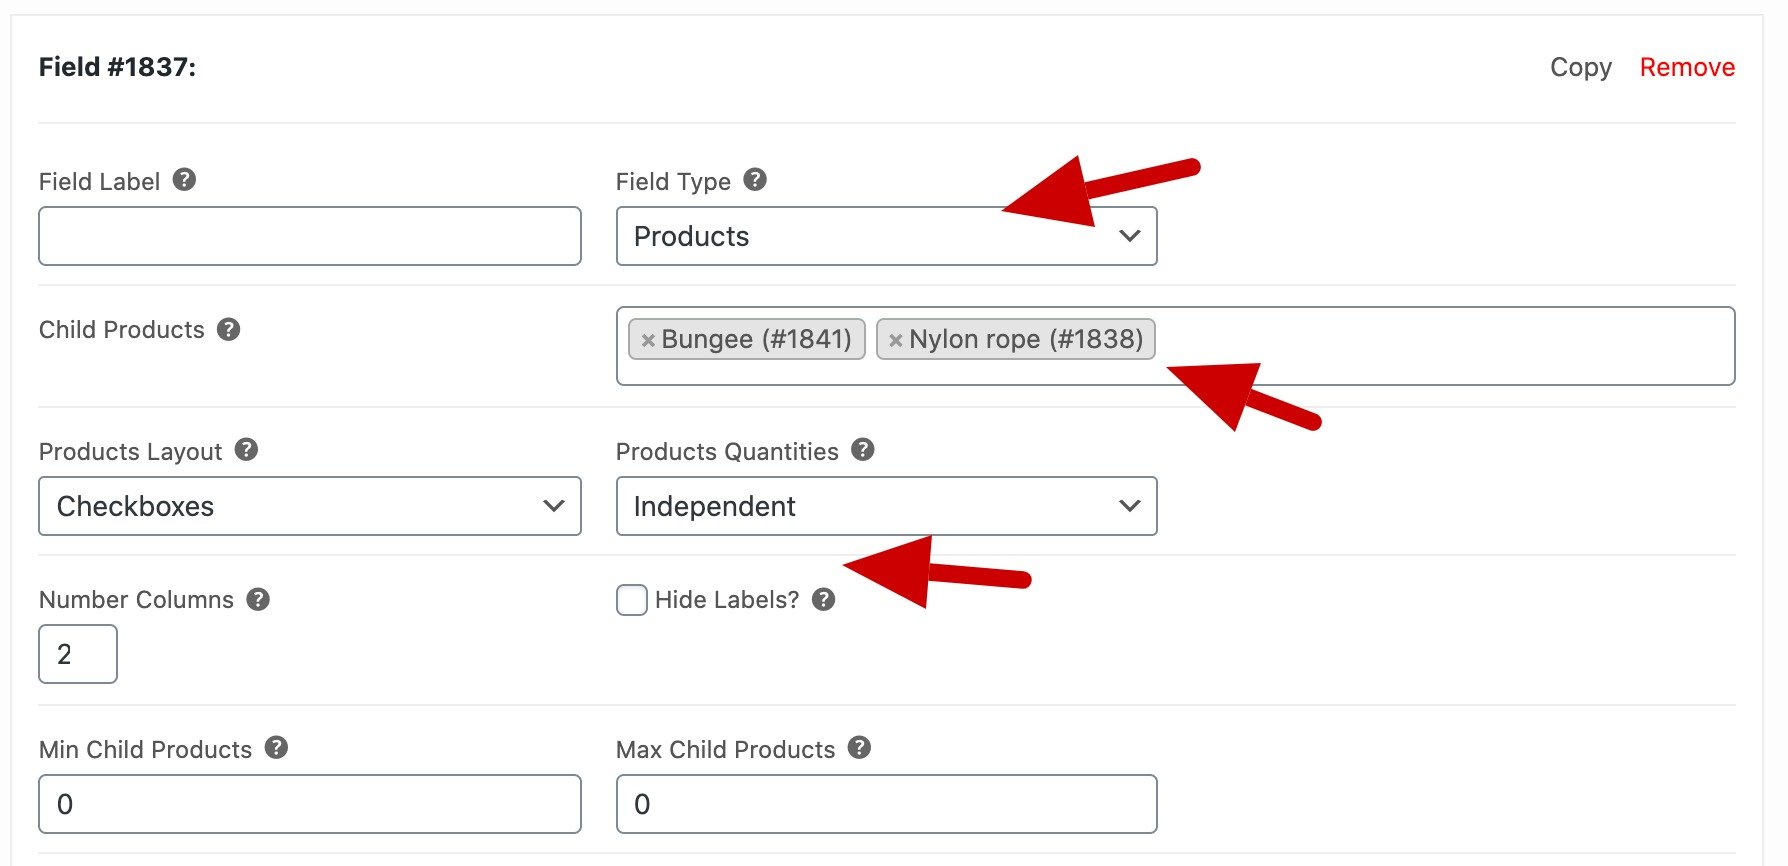
Note that we set ‘Products Layout’ to ‘Checkboxes’. This means that the user can select multiple options from this field.
We also set ‘Products Quantities’ to ‘Independent’. This means that the user can enter the quantity for each accessory product.
Calculating the product price
Custom signs and banners are usually priced based on multiple factors. It’s not necessarily a fixed price.
In our demo product, the price is calculated by multiplying the width and length to work out the area. This is then divided by a factor to create a cost per square metre / foot.
We then multiply the square metre cost by factors based on the choices the user made in the radio group fields. So if they chose the ’10mm’ option in the ‘Thickness’ radio group that we created above, the price will be multiplied by a factor of 1.2.
Creating a calculation field
To create your calculation field to work out the product price:
- Click ‘Add Field’ to create a new field
- Choose ‘Calculation’ as the field type
- Enter your formula
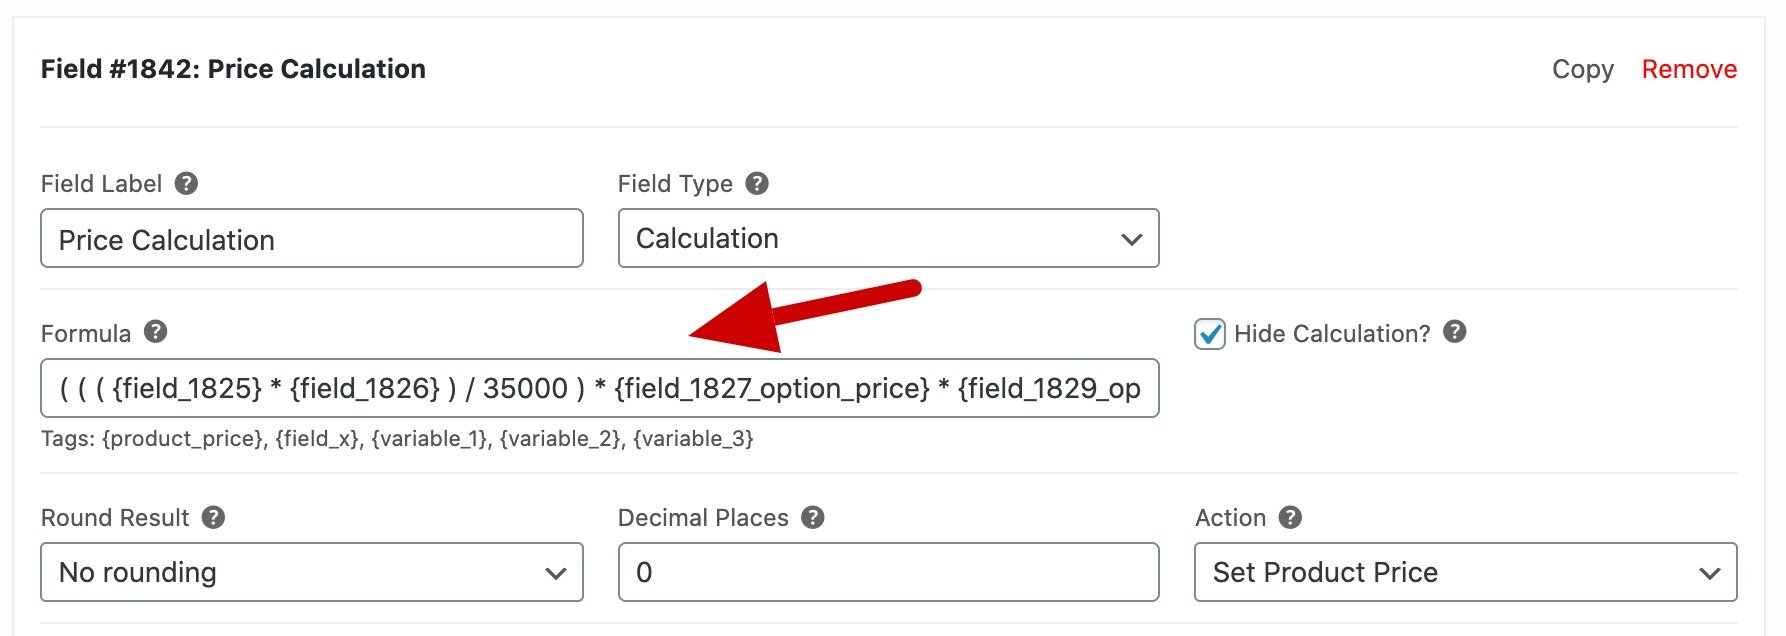
The formula might look complex but it can be broken down simply. In our demo product, the formula is:
( ( ( {field_1825} * {field_1826} ) / 35000 ) * {field_1827_option_price} * {field_1829_option_price} * {field_1833_option_price} * {field_1833_option_price} * {field_1834_option_price} * {field_1835_option_price} ) + {field_1837_field_price}
What does this all mean? Here’s a quick breakdown:
- The calculation field uses tags, e.g. {field_1825}
- A tag like
{field_1825}just gets the value from the field with the ID 1825. In this case, that’s our width field - So the section
( ( {field_1825} * {field_1826} ) / 35000 )is where we calculate the area then divide by a factor for our cost per square metre - A tag like
{field_1834_option_price}gets the value of an option from a radio group or select field. In this case it’s the value of the option that the user chose in the ‘Thickness’ field - Finally, a tag like
{field_1837_field_price}gets the price of a field. Here, we’re getting the price of any accessories that the user has chosen
Check out the demo product and watch how the price at the bottom of the page next to the add to cart button changes as you update different fields.
Finally, you need to set a couple of parameters in the calculation field:
- Check the ‘Hide Calculation’ field. This will hide the field on the front end
- Set the ‘Action’ field to ‘Set Product Price’. This will override any other prices on the page and set the product price with the result of the calculation

Related Tutorial
There’s an in-depth article on calculations here: WooCommerce measurement price calculator: calculate price by formula
Recap – creating a custom sign and banner in WooCommerce
So that’s how to create a custom sign in WooCommerce. In this article we looked at:
- How to make a custom vinyl banner
- Allowing users to personalise the product by selecting size, material and other options
- Providing upsell products to the user
- Calculating the final product price using a formula based on the user’s selections
Don’t forget – all you need is the WooCommerce Product Add-Ons Ultimate plugin.