WooCommerce Request a Quote is easy to set up. For the settings, go to WooCommerce > Settings > Request a Quote.
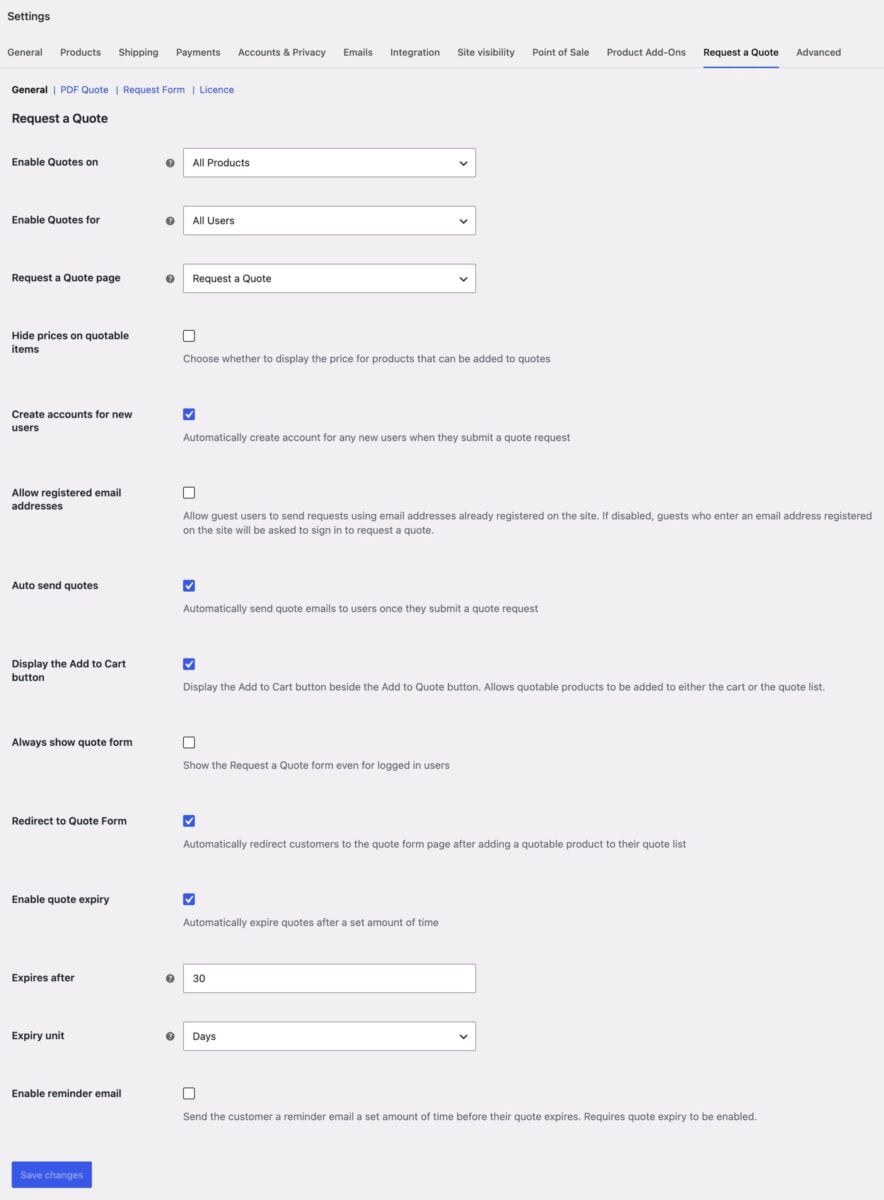
General settings
Let’s take a look at each setting on the General tab.
Enable Quotes on
Define which products will have an ‘Add to Quote’ button. Choose from:
- All Products: choose this option to enable the ‘Add to Quote’ button on every product
- Specific Products: choose this option to enable the ‘Add to Quote’ button on only some products. You can choose which products by editing the product and checking the ‘Enable Request a Quote’ option
- Specific Categories: you can specify all the products in certain categories
- Specific Tags: specify all the products in certain tags
Enable Quotes for
Use this setting to decide which users will be able to request a quote. The options are:
- All Users: every user will be able to request a quote
- Logged-In Users: only users who are logged in will be able to request quotes
- Logged-Out Users: only users who are not logged in can request quotes
- Specific User Roles: only users with specific user roles will be able to request quotes
Request a Quote Page
Define which page contains the [pr_raq_form] shortcode. This page is automatically created and the shortcode inserted when you install the plugin, so you generally won’t need to do anything with this setting.
Hide prices on quotable items
Check this option if you would like to remove prices from products that users can request quotes for.
Create accounts for new users
Check this option if you’d like to automatically create an account for any new user that submits a quote request.
Allow registered email addresses
By default, if a guest customer enters an email address that is already registered on the site, they are prompted to sign in before they can submit a quote request. Enable this setting to allow guests to submit quote requests using a registered email address without signing in.
Link registered email addresses
When enabled, quote requests submitted by a guest using a registered email address will be associated with that customer’s account. Requires Allow registered email addresses to be enabled.
Auto send quotes
When enabled, the plugin automatically sends a quote email to the customer as soon as they submit a quote request form. When disabled, quote requests are saved as pending orders and you send the quote manually from WooCommerce > Orders.
Display the Add to Cart button
When enabled, an Add to Cart button is displayed alongside the Add to Quote button, allowing customers to either add a quotable product to their cart or to their quote list. When disabled, only the Add to Quote button appears on quotable products.
Always show quote form
By default, the quote form on the Request a Quote page is hidden for logged-in users who have already submitted a request. Enable this setting to always display the form, regardless of whether the customer is logged in.
Redirect to Quote Form
When enabled, customers are automatically redirected to the Request a Quote page immediately after adding a quotable product to their quote list. This works on product pages, shop/archive pages, and with AJAX add-to-cart enabled. When disabled, customers remain on the current page and see the standard “Added to quote” message with a link to view their quote.
Quote expiry
You can set quotes to automatically expire after a set amount of time, after which the customer’s checkout link stops working and the order status changes to Quote expired.
- Enable quote expiry – turns the feature on. Off by default.
- Expires after – a number field for how long a quote stays valid, counted from when it’s created.
- Expiry unit – Days, Weeks, or Months.
For example, setting this to 14 Days means a quote created today will expire in two weeks.
Once a quote expires, its status changes to Quote expired and the customer’s “Checkout now” link in the quote email no longer works. If you need to give a customer more time, open the order and edit the Quote expires date (see “Order screen additions” below) – extending it into the future automatically reopens the quote and reactivates the checkout link.
Quote reminder email
If quote expiry is enabled, you can also send the customer an automatic reminder email before their quote expires, prompting them to complete checkout.
- Enable reminder email – turns the feature on. Requires Enable quote expiry to also be turned on.
- Send reminder – a number field for how long before the expiry date to send the reminder.
- Reminder unit – Days, Weeks, or Months.
For example, with Expires after set to 14 Days and Send reminder set to 3 Days, the reminder goes out 3 days before the 14-day expiry date. The reminder is only sent once per quote, and only for quotes that have already been sent to the customer.
You can customise the reminder email’s subject line and content under WooCommerce > Settings > Emails > Quote Reminder, the same as any other WooCommerce email.
Integration
This tab only appears if you also have Dynamic Pricing and Discount Rules installed and active. If you don’t have that plugin, you won’t see this tab.
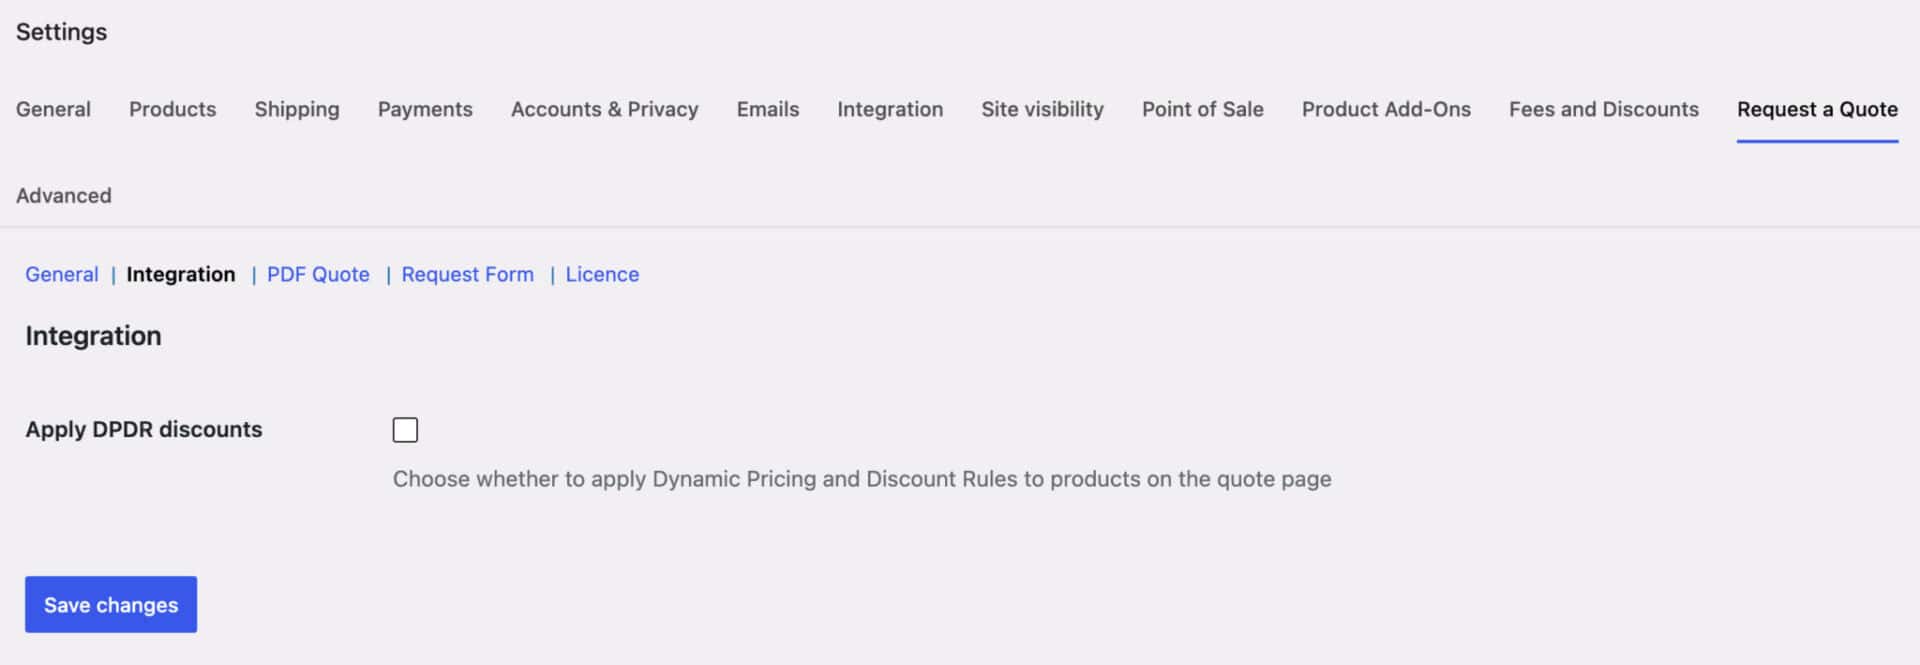
Apply DPDR discounts
Choose whether to apply your Dynamic Pricing and Discount Rules to products on the Request a Quote form. Off by default.
When enabled, any pricing rules you’ve set up in Dynamic Pricing and Discount Rules – bulk discounts, role-based pricing, and so on – are calculated on quotable products the same way they would be in the regular cart, so the totals your customer sees on their quote reflect those discounts.
PDF Quote
Settings for attaching a PDF version of the quote to the customer email.
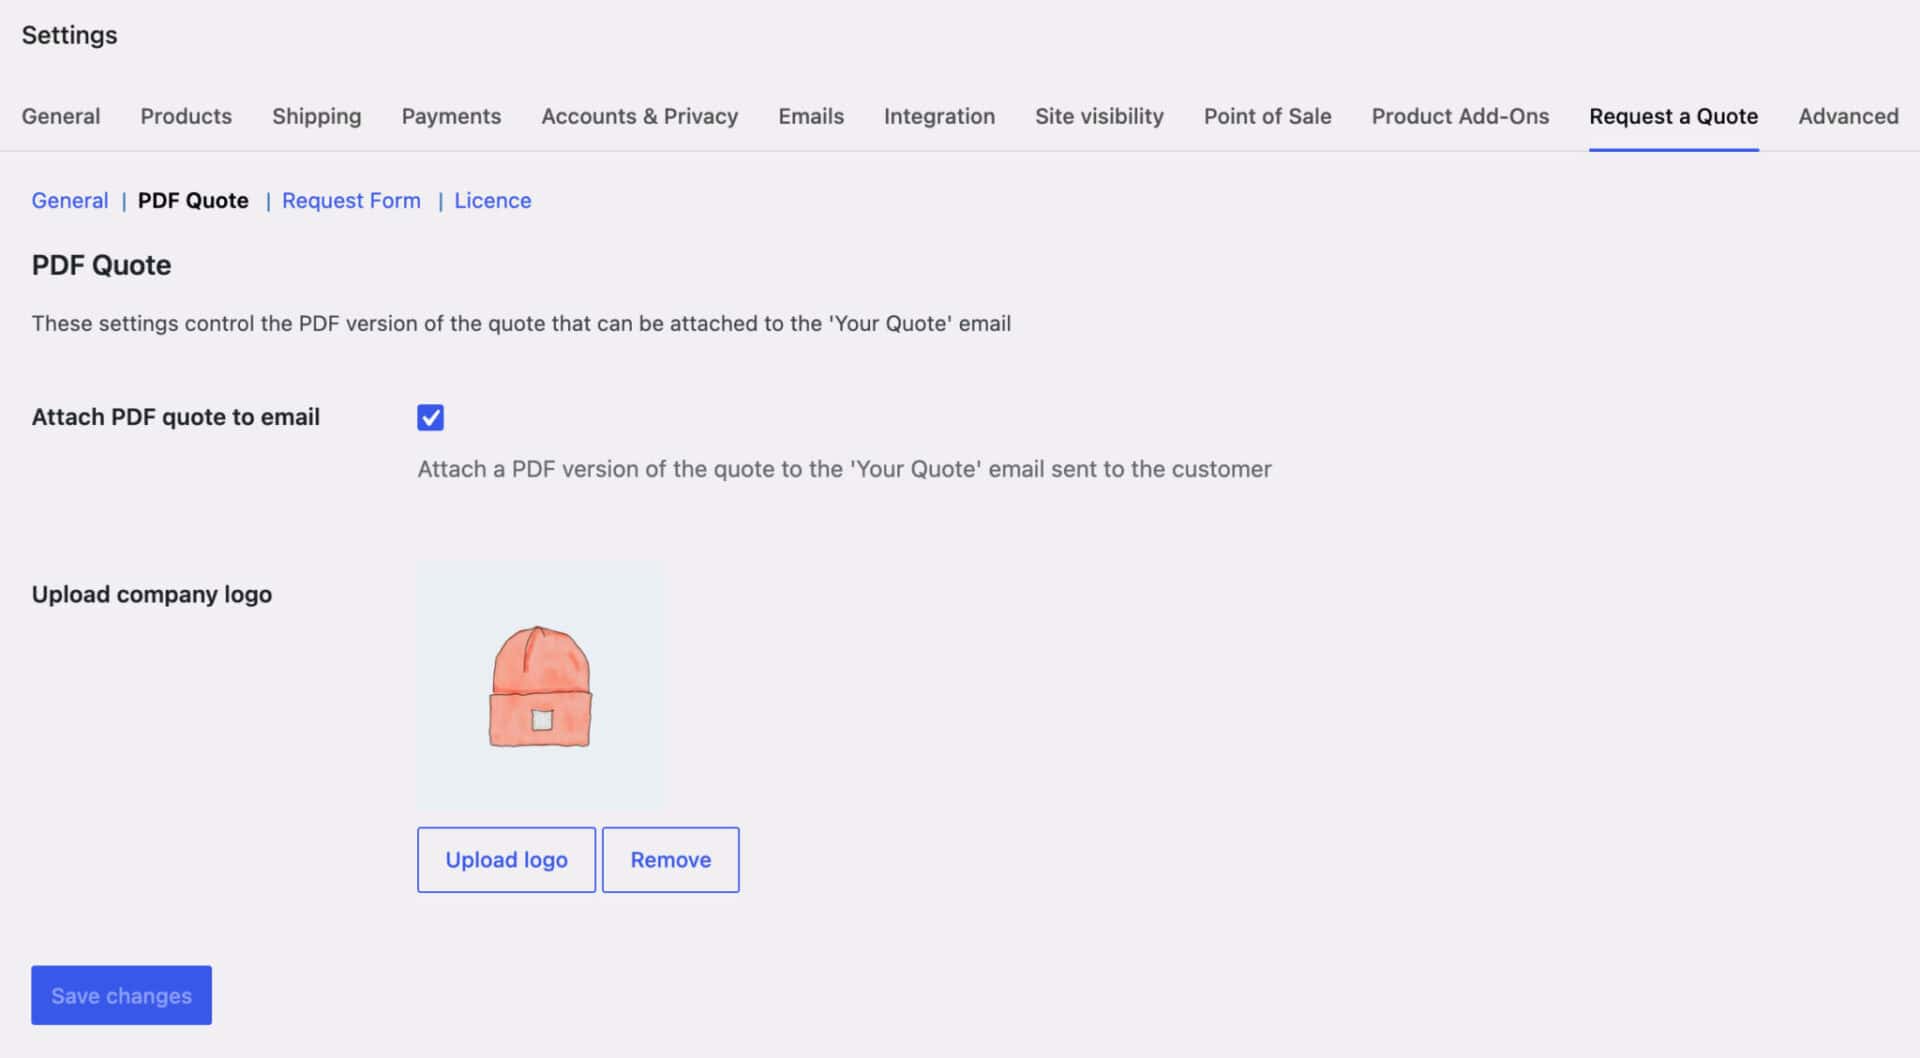
Attach PDF quote to email
Turn this on to automatically attach a PDF version of the quote to the “Your Quote” email sent to the customer. Off by default.
The PDF includes:
- Your company logo (if uploaded – see below) and store address, side by side at the top
- A “Prepared for” section with the customer’s name and billing address
- The full quote – line items, quantities, and totals
- A footer inviting the customer to get in touch, showing your store’s email address (the one set under WooCommerce > Settings > Emails)
Upload company logo
Upload an image to appear at the top of the PDF quote, next to your store address. Click Upload logo, choose or upload an image from your Media Library, then save your changes. Use Remove to clear the logo.
Request Form
Use the settings here to customize and drag and drop the fields on your Request a Quote form – no code required.
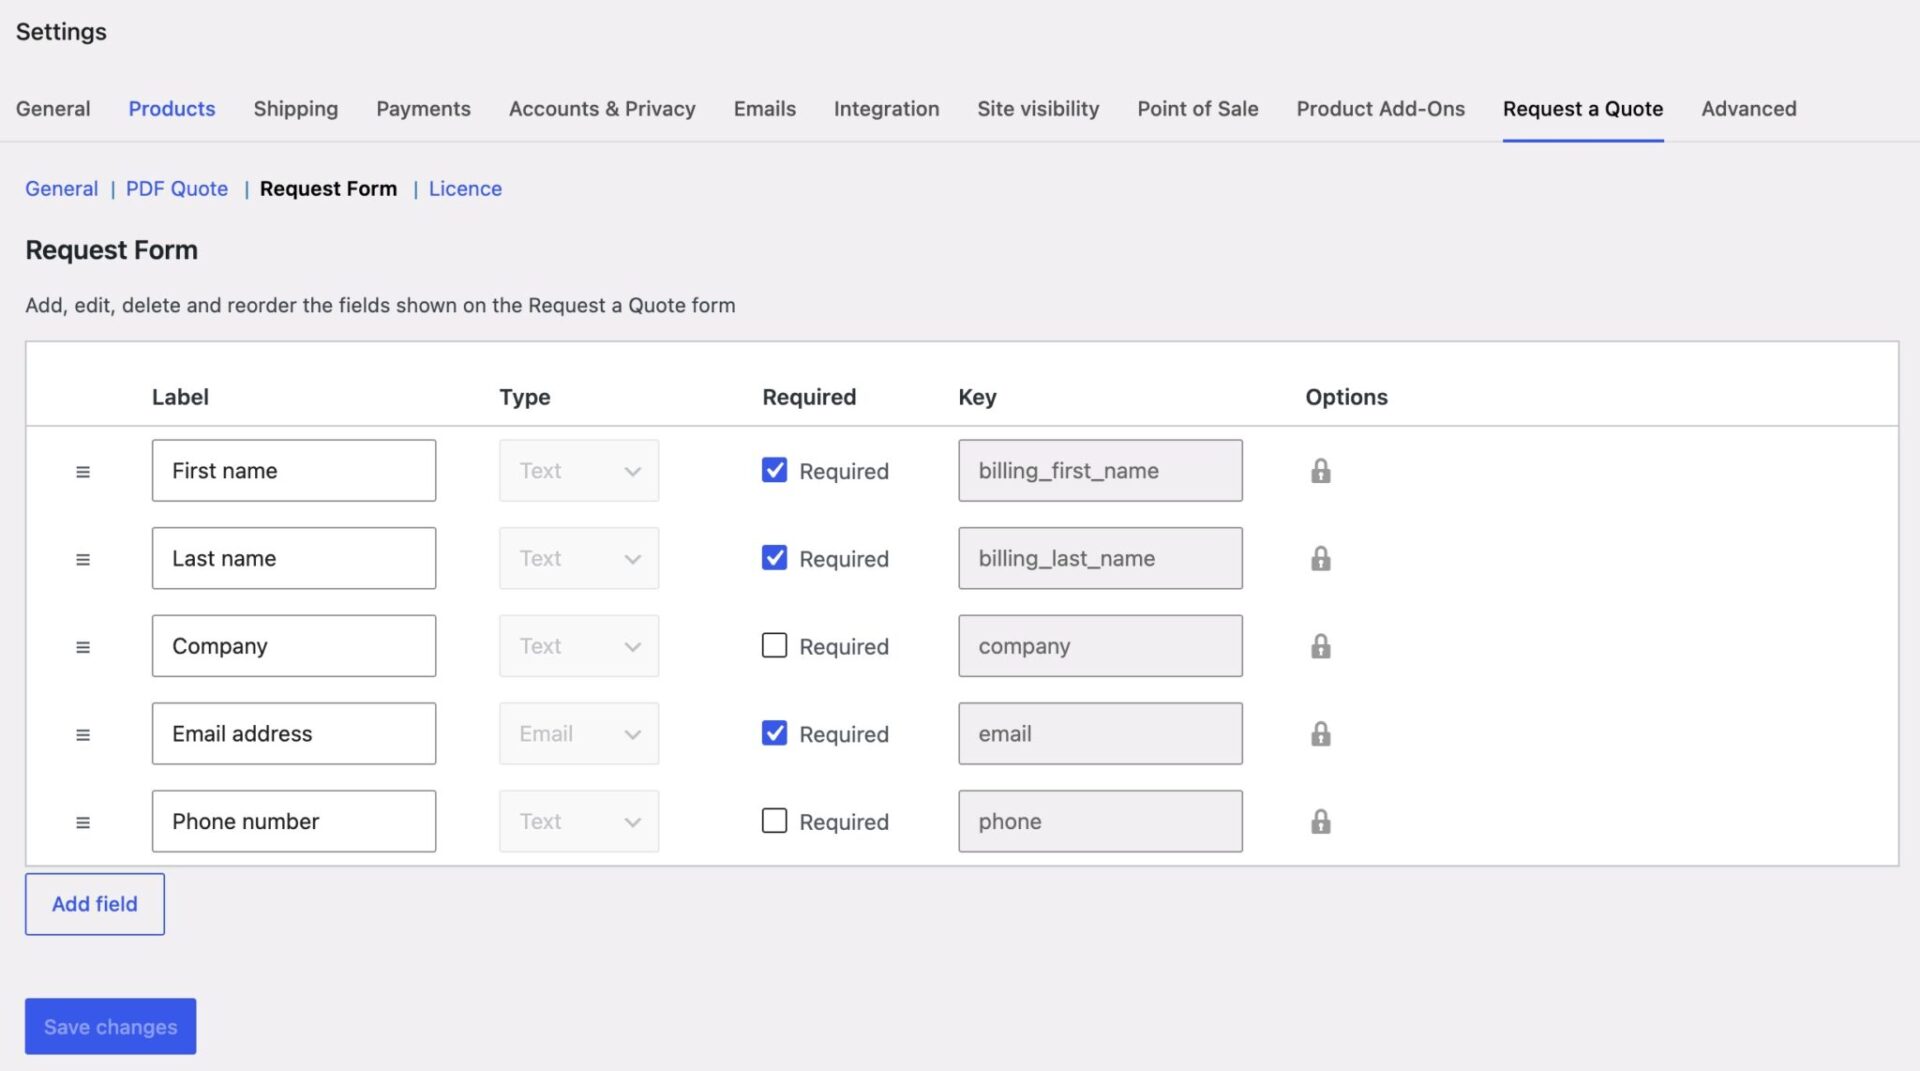
Each row in the table represents one field on the form. You can:
- Reorder fields – drag a row using the handle on the left to change the order fields appear on the form.
- Edit a field – change its label, whether it’s required, and (for new fields) its type and key directly in the table.
- Add a field – click Add field to add a new row, then fill in its label and choose a type.
- Delete a field – click Delete on any field you added yourself.
Field types available: Text, Textarea, Email, Checkbox, and Select. Select fields let you define a list of options – click Add option to add each choice (a label the customer sees, and a value stored against the order).
Built-in fields: First name, Last name, Company, Email address, and Phone number are core fields the plugin needs to build the customer’s billing details on the order. You can still edit their label and whether they’re required, and drag them into any order you like, but they can’t be deleted or have their underlying field key changed – you’ll see a lock icon instead of a Delete button on these rows.
The Message field, and any field you add yourself, can be freely edited, reordered, or deleted.
Field key: each field has a Key, used internally to store the submitted value. New fields get a key generated automatically from the label, but you can edit it – useful if you want a custom field to map to a specific WooCommerce field name.
Any field that doesn’t correspond to a standard WooCommerce order field (for example, a custom “Preferred delivery date” field) is saved as a custom field on the order, and shown in a Quote Custom Fields box on the order screen.