Setting up options for select fields in WooCommerce Product Add-Ons Ultimate is easy enough – but if you have a lot of fields with a lot of options, it can be laborious, particularly if you need to update options regularly.
One solution is to list all your field options in a CSV file and just upload that to your site. The plugin can read the options from the file and automatically populate the select fields – so you don’t need to add any options manually. And when you need to change some of the options, just edit the CSV file and re-import it. All your options will update automatically.
Note that you need the Pro version of Add-Ons Ultimate for this, plus the Advanced Calculations extension.
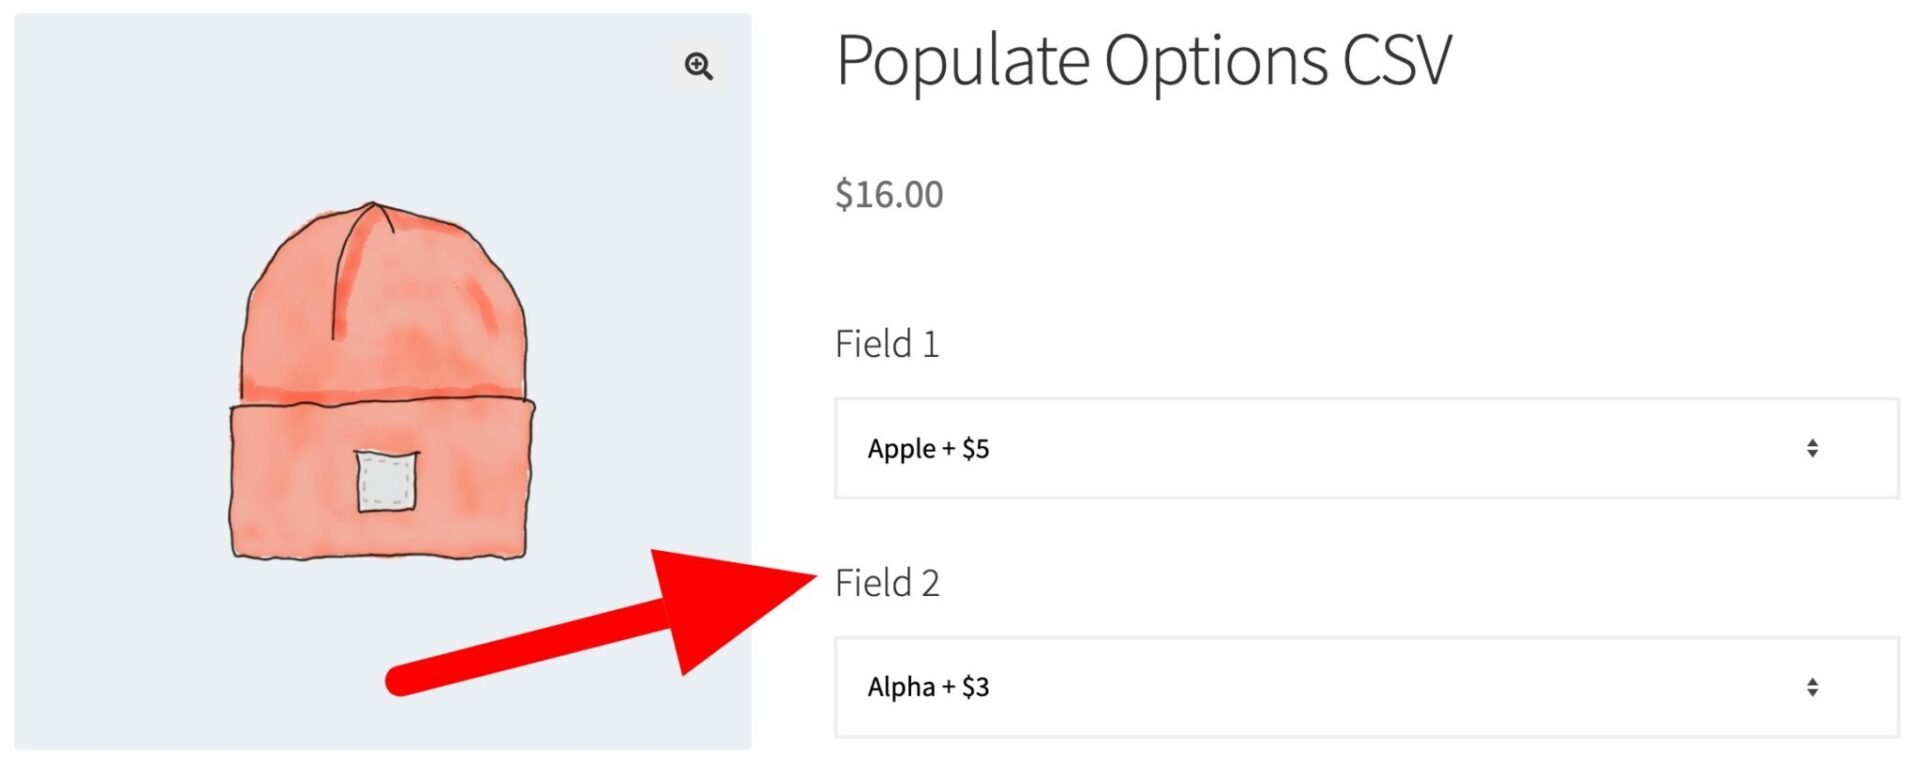
Populate select field options with imported CSV file
Here’s how to do it:
Step #1: Create your select fields
The first step is to create your select fields in Add-Ons Ultimate. You don’t need to add any options – just make a note of the field ID. You can do this for as many fields as you like, product-level or global.
Step #2: Create and import your CSV file
Check out this article for correctly formatting and importing your CSV file using Advanced Calculations.
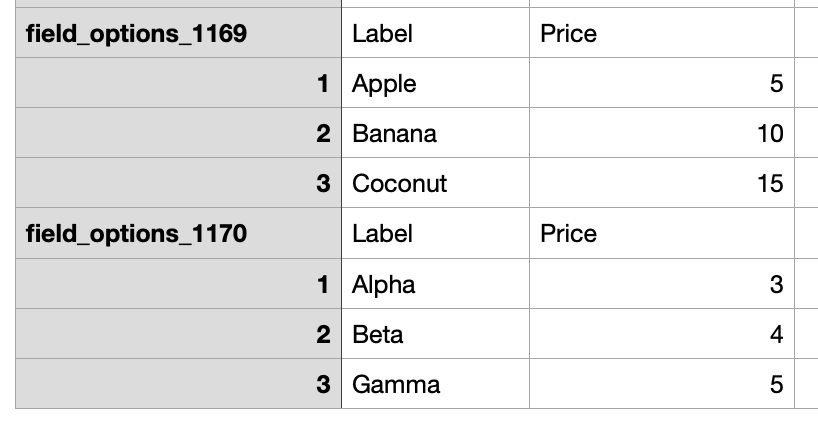
For each field, you’ll need a separate table. Take a look at the screenshot below as an example. Each table should contain the following:
- In the top left cell, enter ‘field_’ plus your field ID, e.g. ‘field_1169’, ‘field_1170’, etc
- Create two columns and label the first one ‘Label’ and the second ‘Price’
- Enter the text for each option in the ‘Label’ column and the price (if applicable) in the ‘Price’ column
- Repeat for each field
- Export the file as a CSV and upload it to Product Add-Ons > Calculations
Step #3: Add a code snippet
Finally, add the following code snippet. You don’t need to edit it. Here’s how to add a code snippet.
| <?php | |
| /** | |
| * Populate select field options from CSV | |
| */ | |
| function demo_populate_options_from_csv() { ?> | |
| <script> | |
| ( function( $ ) { | |
| var populate_options = { | |
| init: function() { | |
| if( pewc_look_up_tables ) { | |
| $( '.pewc-item-select' ).each( function( i, v ) { | |
| field_id = $( this ).attr( 'data-field-id' ); | |
| if( pewc_look_up_tables['field_' + field_id] ) { | |
| table = pewc_look_up_tables['field_' + field_id]; | |
| values = table['Label']; | |
| prices = table['Price']; | |
| console.log( values ); | |
| $( '.pewc-field-' + field_id + ' select' ).find( 'option' ).remove(); // Optional: will remove any existing values | |
| for( k in values ) { | |
| if( values[k] != '' ) { | |
| price = ''; | |
| price_label = ''; | |
| if( prices[k] != '' ) { | |
| price = prices[k]; | |
| price_label = values[k] + ' ' + pewc_vars.separator + ' ' + pewc_vars.currency_symbol + prices[k]; | |
| } | |
| $( "<option></option>", { value: values[k], text: price_label } ).appendTo( '.pewc-field-' + field_id + ' select' ).attr( 'data-option-cost', price ); | |
| } | |
| } | |
| } | |
| }); | |
| } | |
| } | |
| } | |
| populate_options.init(); | |
| })( jQuery ); | |
| </script> | |
| <?php | |
| } | |
| add_action( 'wp_footer', 'demo_populate_options_from_csv', 9999 ); |
That’s it. Now your options will be dynamically populated using the values in the CSV file.