WooCommerce Product Add-Ons Ultimate is incredibly flexible in what it can do. This example combines the Pro version of Add-Ons Ultimate with the Advanced Calculations extension to allow you to import options for select fields with a CSV file. This means you easily manage 100s of options without needing to laboriously update field settings.
This example is for car manufacturers and models – but you can apply it to any product type you wish. We’ll have two select fields – one where the user can select their car manufacturer, e.g. BMW, Ford, etc – then a second field where the models are automatically updated. The data for the models is pulled from a CSV file.
When the user selects a different manufacturer, the options in the ‘Model’ field will automatically update. You don’t need multiple fields for models for each manufacturer or loads of conditions. All the options are updated dynamically on the front end using values pulled from a CSV file. You can see a working demo product here.

Dynamically update options on the front end
Here’s how to achieve this:
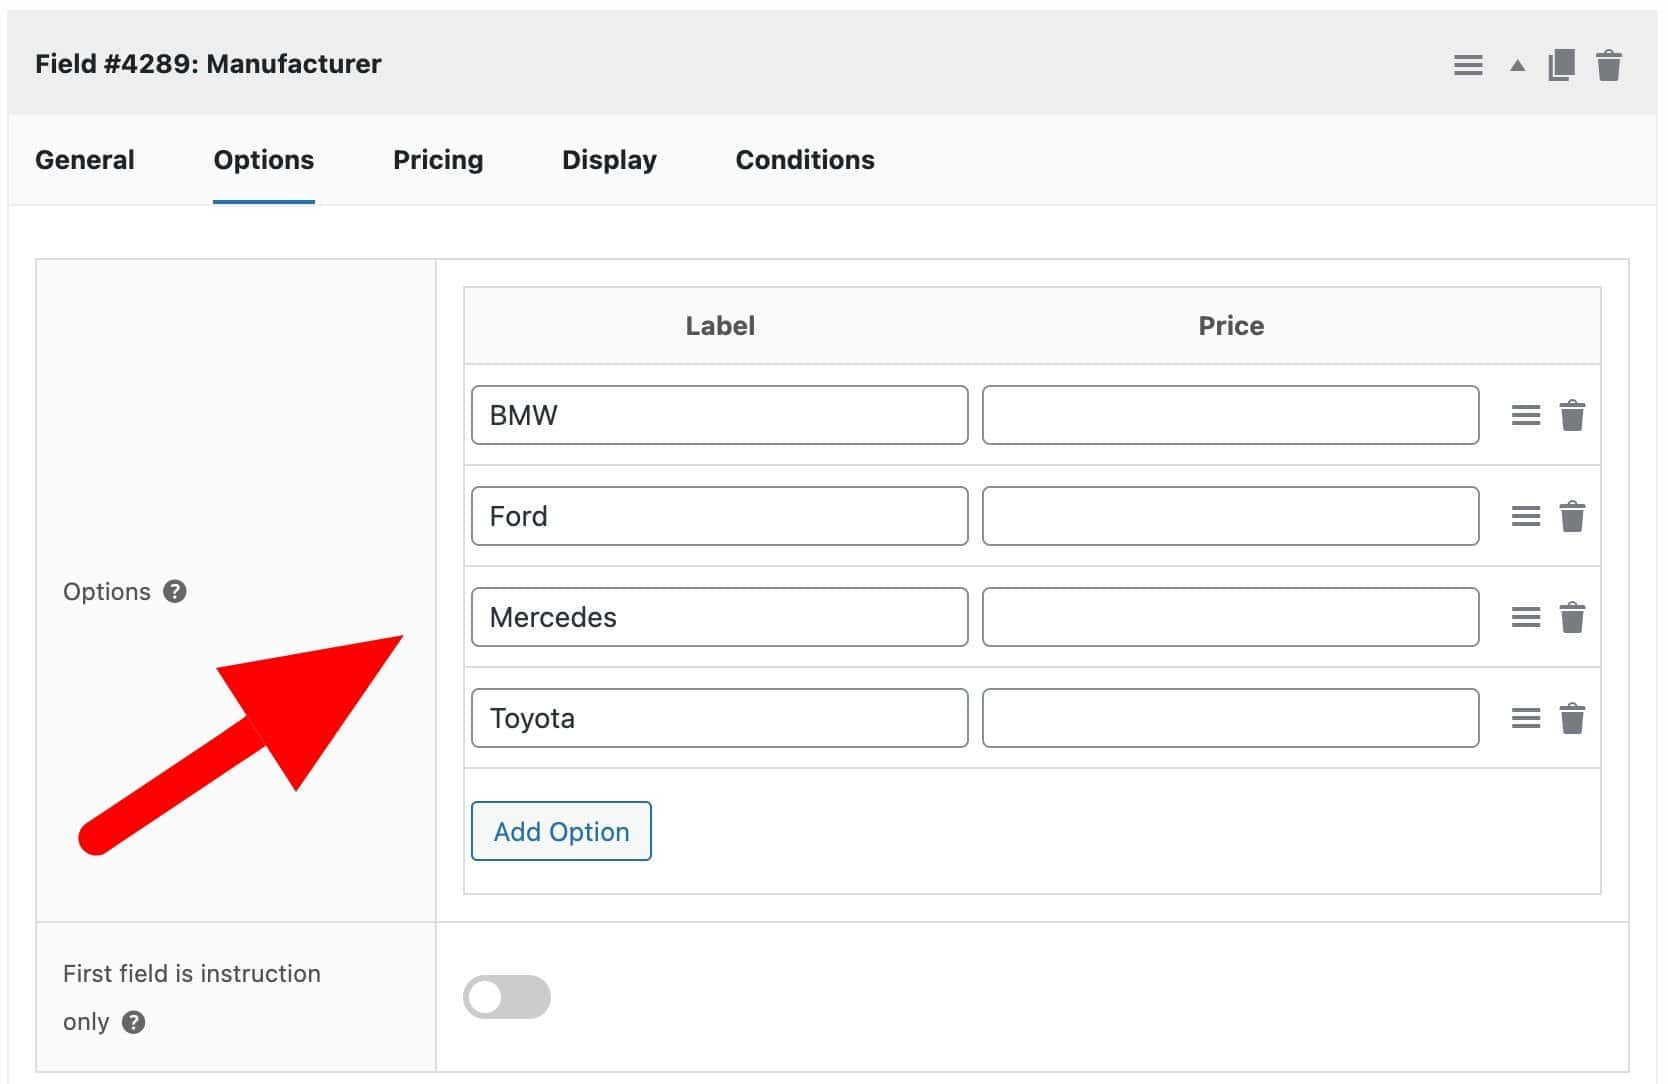
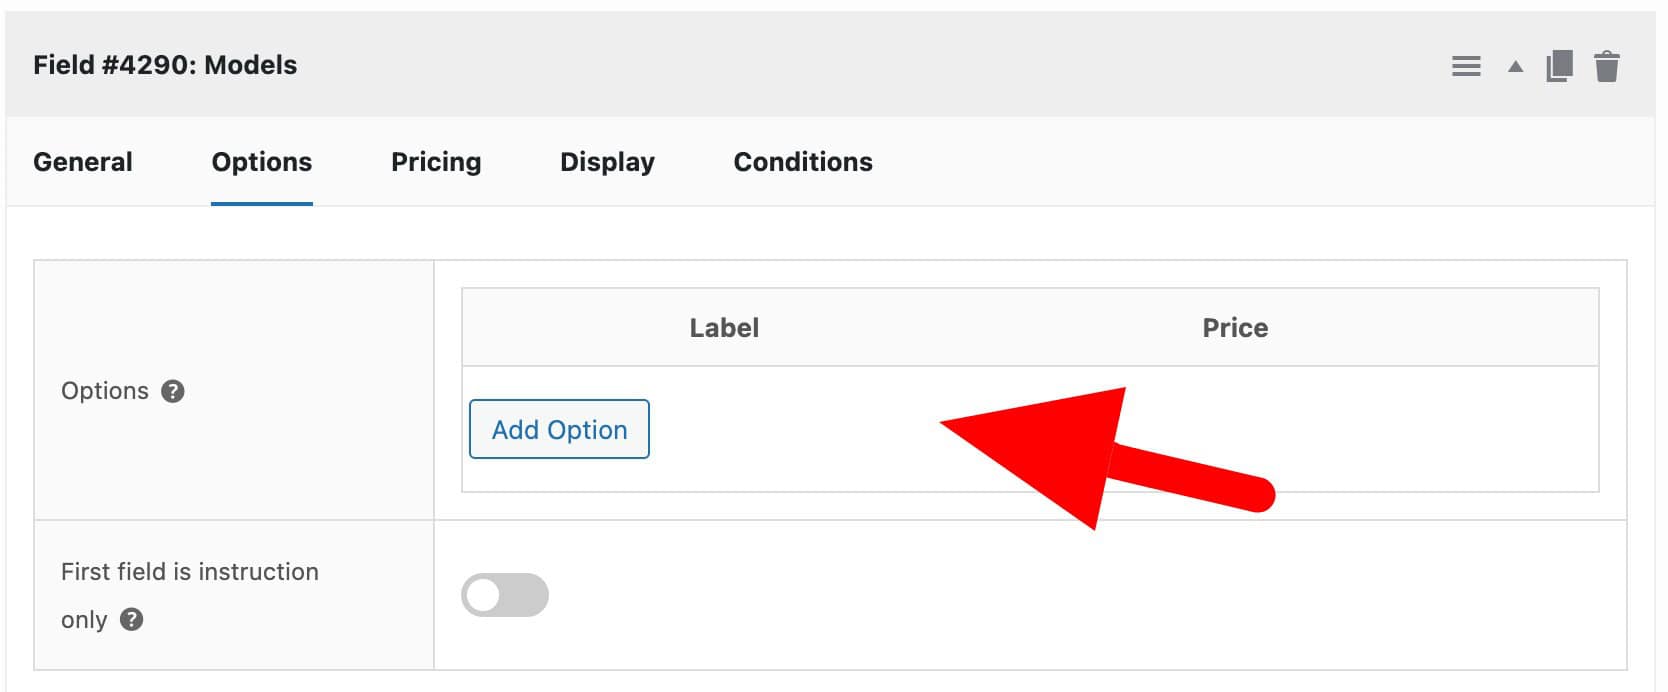
Step #1: Create select fields
The first step is to create your select fields and to populate the options for the first field (‘Manufacturer’). You can leave the options for the second field (‘Model’) empty.
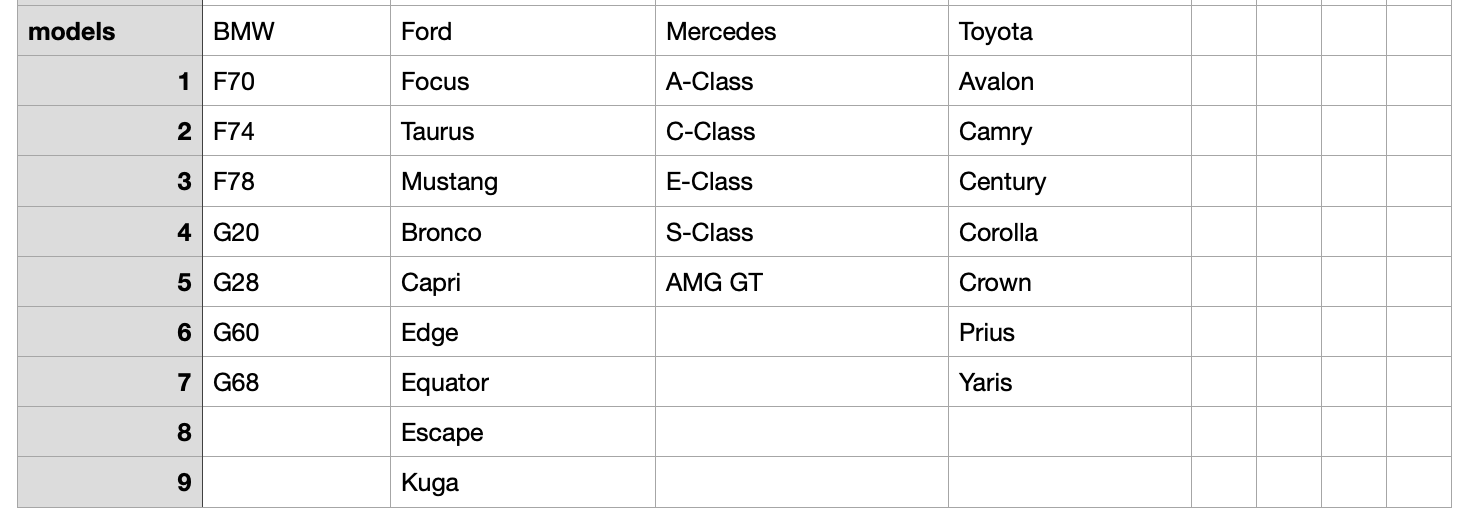
Step #2: Create and upload a CSV file
Next, you need to create your CSV file with the options for the second field. There is guidance on creating a CSV file here. Note that for this, you’ll need the Advanced Calculations plugin.
For your file:
- Add the name of your field in the top left, e.g. ‘models’
- Enter the options from your first field along the top row – in this case, that’s each manufacturer. The text should exactly match the options – so case, spelling etc is important
- Under each heading, list the options for the second field – so, in our example we list all the BMW models under the BMW heading
- Upload your file to Product Add-Ons > Calculations
Step #3: Add a code snippet
Finally, you just need to add a code snippet to your site (here’s how). You’ll need to update three values:
- The ID of the first field
- The ID of the second field
- The name of the table (e.g. ‘models’)
You can make these adjustments at the top of the code snippet – each part is clearly marked.
| <?php | |
| function demo_do_get_first_select_field_id() { | |
| return 1163; // This is the ID of the first field, e.g. 'Manufacturer' | |
| } | |
| function demo_do_get_second_select_field_id() { | |
| return 1164; // This is the ID of the second field, e.g. 'Model' | |
| } | |
| function demo_do_get_table_name() { | |
| return 'models'; // This is the name of the look up table in your CSV file, e.g. 'models' | |
| } | |
| function demo_do_option_tables() { ?> | |
| <script> | |
| ( function( $ ) { | |
| var dynamic_options = { | |
| init: function() { | |
| $( 'body' ).on( 'change','.pewc-field-<?php echo demo_do_get_first_select_field_id(); ?> select', this.update_options ); | |
| $( '.pewc-field-<?php echo demo_do_get_first_select_field_id(); ?> select' ).trigger( 'change' ); // Update options on page load | |
| }, | |
| update_options: function() { | |
| var options = pewc_look_up_tables['<?php echo demo_do_get_table_name(); ?>']; | |
| var field_id = <?php echo demo_do_get_first_select_field_id(); ?>; | |
| var target_field_id = <?php echo demo_do_get_second_select_field_id(); ?>; | |
| // Get options from first colimn | |
| var column = $( '.pewc-field-' + field_id + ' select' ).val(); | |
| var values = options[column]; | |
| $( '.pewc-field-' + target_field_id + ' select' ).find( 'option' ).remove(); | |
| for( k in values ) { | |
| if( values[k] != '' ) { | |
| $( "<option></option>", { value: values[k], text: values[k] } ).appendTo( '.pewc-field-' + target_field_id + ' select' ).attr( 'data-option-cost', 0 ); | |
| } | |
| } | |
| } | |
| } | |
| dynamic_options.init(); | |
| })( jQuery ); | |
| </script> | |
| <?php | |
| } | |
| add_action( 'wp_footer', 'demo_do_option_tables' ); |
That’s it. Now your options will update dynamically when the user changes their selection in the first field.