How to create a school uniform shop in WooCommerce

WooCommerce is the ideal platform to create a school shop selling uniforms, kit, stationery and other equipment. In this article, we’ll look at how to set up a private shop that is restricted to certain customers, e.g. parents or staff. We’ll also look at options to allow users to customise products.

Creating a WooCommerce uniform shop
This tutorial will cover the following items:
- How to create a WooCommerce shop to sell school uniforms and related products
- How to restrict access to the shop so that only parents and other authorised users can purchase products. You’ll be able to define whether to restrict all products or just some.
- Personalising products, e.g. allowing customers to add initials to a school bag
- Providing discounts on purchases, e.g. for staff members
- Options for displaying products to allow customers to order multiple items easily
In addition, there’s a fully functioning demo website that you can view to see exactly how each aspect of the tutorial will work in real life.
Of course, although the tutorial is based around a school shop, this applies equally well to colleges, universities, and any other kind of educational establishment.
Let’s get started.
Step #1: Create your store
In the first place, you’ll want to add your school uniform products to WooCommerce. In our demo site, we’re going to add products to the following categories:
- School uniform
- Stationery and books
I’m assuming that you already know how to set up your store and add products. However, you can take a look at this tutorial if you need more information on how to add products to WooCommerce.
You can view the demo site here.
Step #2: Restrict your products to parents
A key aspect of our WooCommerce school shop is that only parents should be able to purchase its products. This is simple to set up but requires an additional plugin – the WooCommerce Members Only plugin.

WooCommerce Members Only will provide the extra functionality you need, including:
- Hide your products from users who don’t have your permission to make purchases
- Create new user roles for parents, staff, etc
- Allow you to review and approve new user registrations
First of all, we’re going to look at how to restrict your school shop so that only parents and staff can make purchases. There are several ways to do this. In our demo, we are going to restrict access according to our customers’ user roles but will look at the other options as well.
Restricting your school shop to specific user roles
User roles are a key feature of WordPress and WooCommerce. We’ll look at how to create user roles that are specific to our requirements then how to use them to restrict access to products.
We’re going to use roles to specify different levels of access to our site for the following types of user:
- Parents
- Staff
For more detailed information on WooCommerce user roles, see this article.
Set up Members Only
The first thing we need to do is install and activate the WooCommerce Members Only plugin. There’s a step by step guide here.
Create our new roles
With Members Only activated, it’s a simple step to create our new user roles:
- Go to WooCommerce > Settings > Members Only > User Roles
- In the ‘User roles’ field, select ‘Customer’. This is the default customer user role in WooCommerce and we’re going to duplicate it for our ‘Parent’ user role
- Type the name of your new user role, e.g. ‘Parent’, in the ‘New role name’ field
- Click ‘Duplicate role’
Your new role will be created. You can repeat these steps for any further user roles, e.g. ‘Staff’.

That’s it. We’ve now got our user roles set up. Of course, you can modify this step to create different user roles if you wish.
Hide the products in our school shop
The next step in creating our WooCommerce school uniform shop is to hide the products from unauthorised users. In our example, we’re going to make specific categories of products available only to users with the user roles we just created.
To restrict products to certain roles:
- Go to WooCommerce > Settings > Members Only
- In the ‘Restriction Method’ field, select ‘User Role’
- In the ‘Restricted Content’ field, select ‘Specified Categories’
- Enter your restricted product categories in the ‘Restricted Categories’ field. These are the product categories that you wish to hide from other users. In our example, I’ve entered Accessories and Uniform
- Under ‘Permitted User Roles’, enter the user roles that are allowed to view the products in the restricted categories above. In our example, I’ve entered ‘Parent’ and ‘Staff’. Note that you might want to enter ‘Administrator’ as well so that you can view the site in the same way as a customer

You can save the settings page now and your products will be hidden from users who are not parents or staff. If an unauthorised user tries to view products, they’ll see a message like this.

Let’s take a quick look at some of the other options here.
Restricting access by password or logged-in status
On our demo site, we’ve specified user role as the method to access content. However, you could use a couple of different methods:
- Restrict access by password: if you don’t want to ask users to create accounts on your site, you could just require a password. There’s some more information on password protecting products in WooCommerce here
- Restrict access by logged-in status: if you don’t need different user roles on your site, you could restrict access just by logged-in status. So only users who were logged in would be able to view the products
Hiding products and hiding prices
There are some more options around exactly how you restrict access. For instance, you could choose to hide products altogether from unauthorised users. To do this, choose ‘Hide In Archives’:

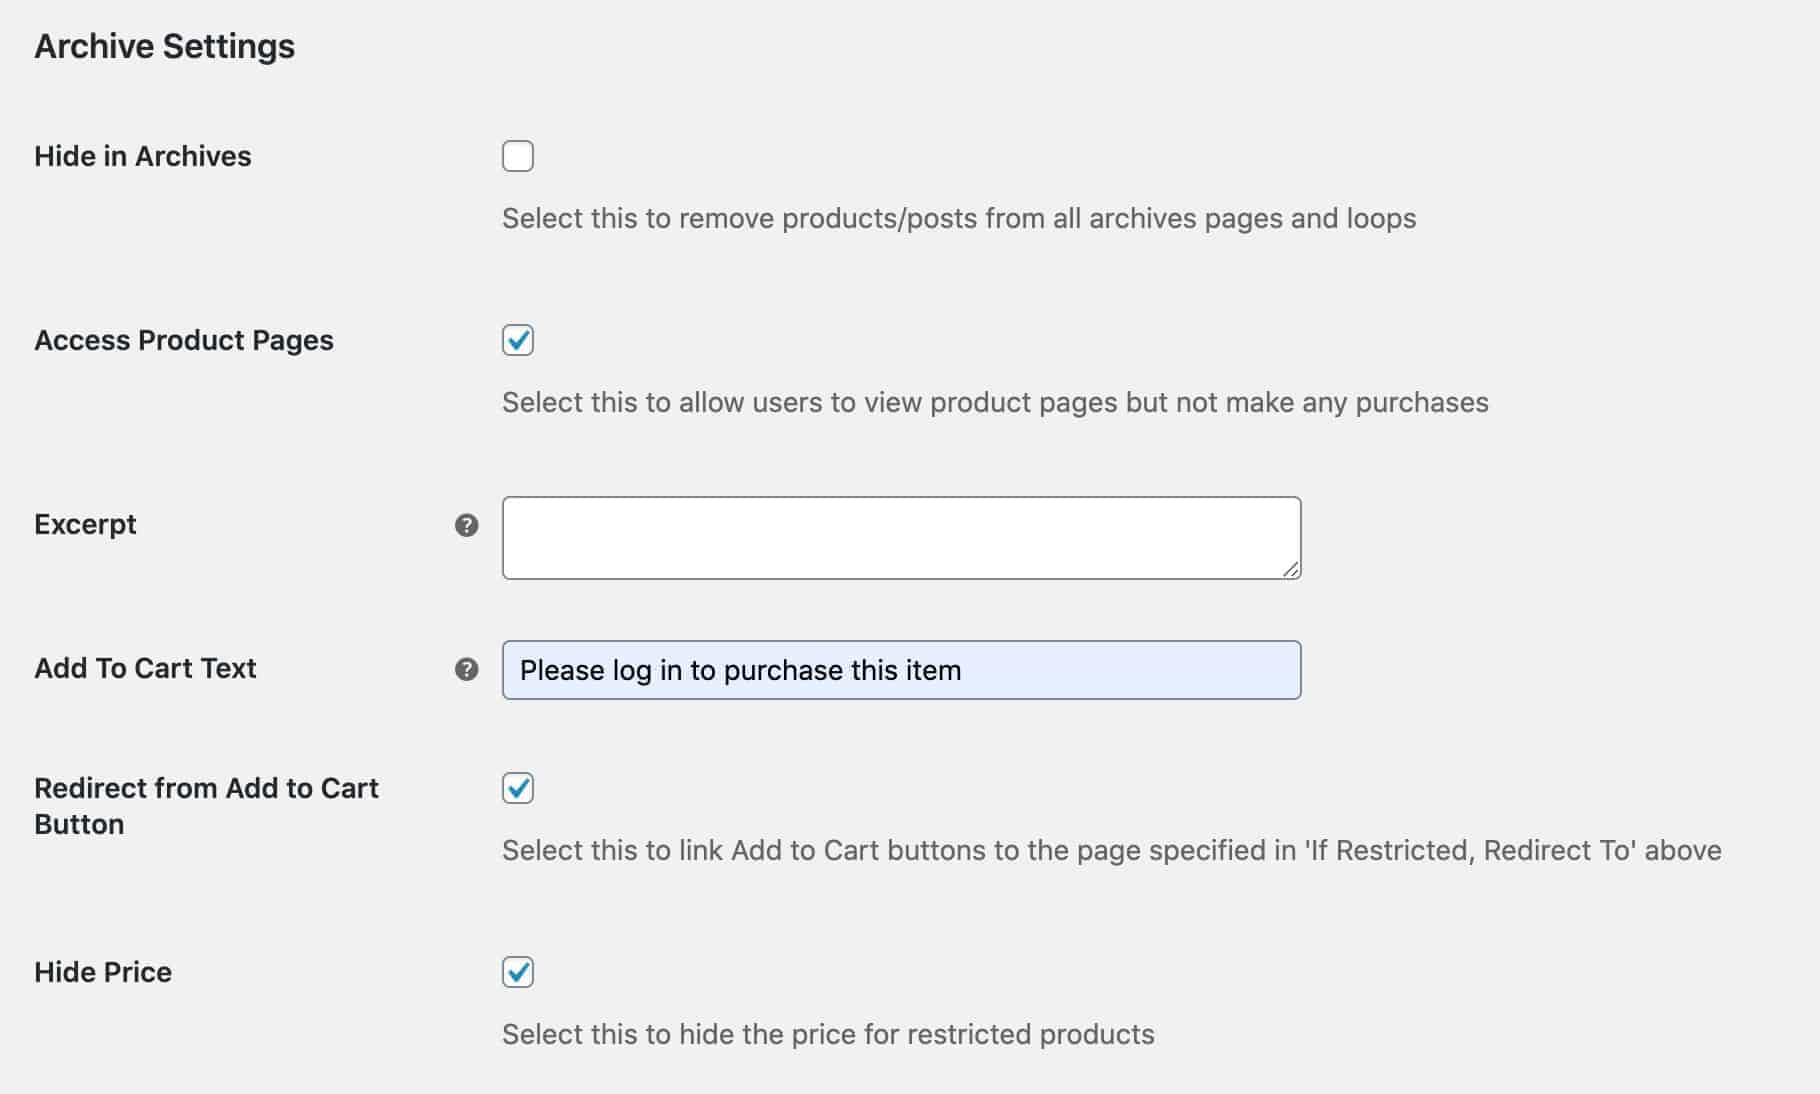
Alternatively, you could keep the products on display but limit access and hide prices.
In the settings below, the ‘Hide in Archives’ option has been deselected meaning that restricted products will be visible, but not purchasable.
Furthermore, the ‘Access Product Pages’ option has been enabled which will allow non-authorised users to view restricted products’ pages. But I’ve also changed the text that will appear on the add to cart button, enabled the option to hide product prices, and chosen to redirect the users to a log-in page if they click the add to cart button.
At this point, our WooCommerce school uniform shop is ready to go. However, let’s look at a few more options and extras that we might want to add in.
Step #3: Approving new customer registrations
WooCommerce Members Only gives you the ability to require new registrations to be reviewed and approved. This means that you can stop new users signing up on the site without your approval.
To enable approvals on registrations:
- Go to WooCommerce > Settings > Members Only > Registration
- Select the ‘Enable User Approval’ field
You can also set the following options:
- Prevent Pending Users: this will stop any users who have registered by not yet been approved from logging in
- Prevent Rejected Users: this will prevent any users that you’ve rejected from logging in
- Default User Roles: if you like, you can ensure that new users will be assigned to a specific user role when they are approved. Normally, it’s the Customer user role
- Prevent Auto Log-in: select this to stop WooCommerce from trying to automatically log newly registered users in

Now, when a new user registers on your site, you’ll get an email with a link to review their registration. You can either approve or reject them and they won’t be able to place any orders until approved.
You can find out more about user approval in WooCommerce here.
Allowing new users to choose their roles
Additionally, you can allow users to select their user role when they register. From the same settings page:
- Select the ‘Enable Roles Field’ option
- Choose which roles the new user can select from
- You can also specify separately which roles need approval
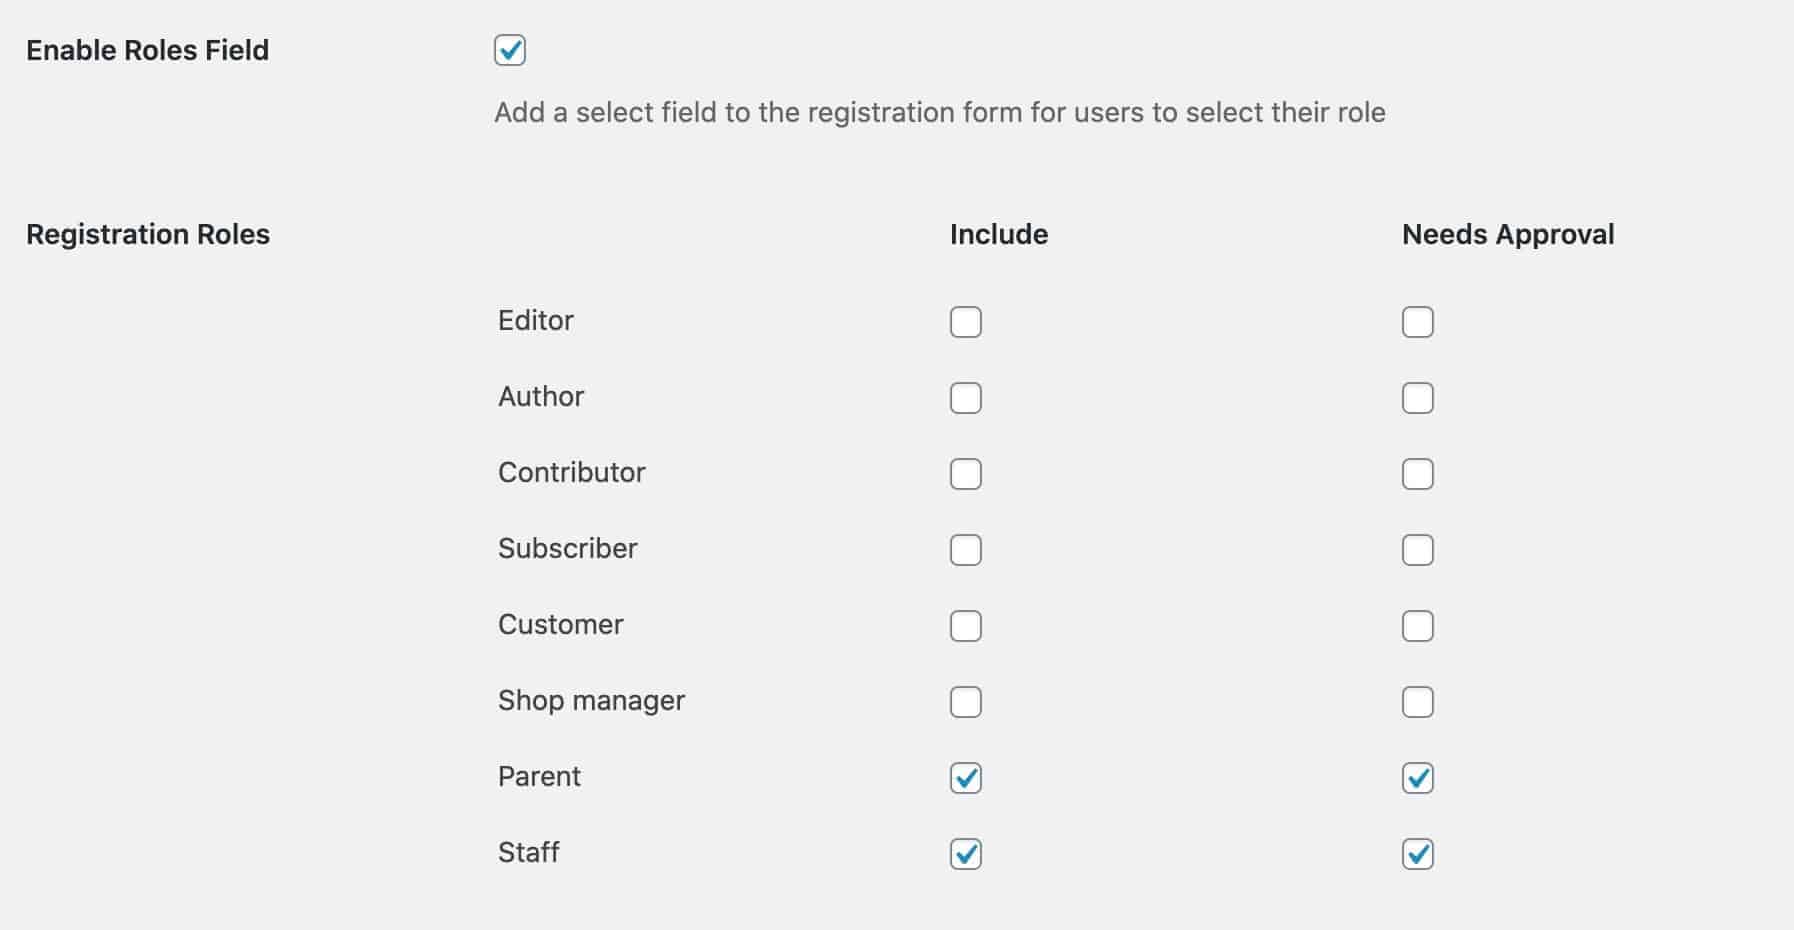
This adds a new field to the registration form that allows the user to pick their role.

Bonus Step: Allow customers to personalise your products
So in the three steps above, we’ve seen an easy way to create your school shop in WooCommerce. Let’s look at a couple of ways to augment it.
Many schools will offer or require their students to have personalised items. Let’s look at something simple like adding a student’s initials to a sports jersey.

For this step, we’ll need to use another plugin: WooCommerce Product Add-Ons Ultimate.

Personalising products in your school shop
Add-Ons Ultimate lets your customers personalise your products. In this example, we’ll just add a simple text field to our Sports Top product for customers to enter the student’s initials.
After you’ve installed and activated Add-Ons Ultimate:
- Edit the product that you’d like to be customisable
- In the ‘Product Data’ section, click the ‘Product Add-Ons’ tab
- Click ‘Add Group’ then ‘Add Field’
- Enter the field label, e.g. ‘Add Your Initials’
- Set the field type to ‘Text’

You might also notice that we’ve assigned a price to the text field and selected the option for ‘Price Per Character’. This means that we can charge for each character entered in the field.
This is just a simple example of how you can add extra options to your products using Add-Ons Ultimate. For more information, take a look at the product page.
WooCommerce school shop – recap
We’ve looked at how to create a school shop in WooCommerce where the products are protected from view. Only parents and staff can access them.
To do this, we used the WooCommerce Members Only plugin.