Set up and display WooCommerce related products (step-by-step)

Do you want to encourage your customers to increase their average order value? Displaying related products in your WooCommerce store is an excellent way to do that.
By default, WooCommerce lets you display three kinds of related products on single product pages. The first is related products that WooCommerce selects randomly based on categories or tags you include.
The second is product upsells that can be used to showcase more expensive substitutes for products your customers are currently viewing. The third and last kind is product cross-sells which let you showcase complementary products when customers add specific products to their cart. For instance, if a shopper adds a laptop to their cart, you can show them a charger or laptop bag on the cart page.
In this article, we’ll talk about the benefits of showing related products, how to display them in WooCommerce, and why a plugin can help you optimize the way you display related products in your store.
What are the benefits of showing related products in WooCommerce?
If possible, you should include related products, up-sells, and cross-sells to your store. They each serve different purposes and utilising all of them is a good strategy to encourage customers to make a purchase, increase their average order value, and increase the number of items in their cart.
Let’s look at all three of them in a little more depth.
Encourage customers to buy more
Displaying related products in WooCommerce is a great way to encourage shoppers on your online store to add something to their cart. For instance, if a customer is viewing a t-shirt product they’re not really interested in, you can display another t-shirt that’s in a similar price range that might be more appealing to them. As a result, this increases the chances of making a sale.
Upsells, on the other hand, are directed towards encouraging customers to add a more expensive product to their cart rather than the product they’re currently viewing. For example, if a shopper is viewing an entry-level laptop, you can display the higher-priced, better laptop you sell as an upsell. This is a great way to increase their average order value.
On the other hand, cross-sells are designed to encourage customers to add more products to their cart in addition to the ones they’re already interested in. For instance, you can display tennis balls on the tennis racket product page as cross-sells. Similarly, you can display a small jewelry armoire as a cross-sell product for any jewelry products you sell on your online store.
Increase the average order value
Generally speaking, it’s much easier to get customers who already are on your online store to increase their order value than attract new customers. With this in mind, showcasing related products on your WooCommerce site is a very smart way to increase revenue for your business.
A large part of why this works is down to the fact that this is a very clean, non-intrusive way of advertising products to customers. This means you’re likely to get more conversions as opposed to more aggressive marketing tactics such as sending email campaigns to people on your mailing list.
Get customers to buy the focal product
Additionally, according to a 2020 study about complements and substitutes in product recommendations, showing product upsells can actually encourage customers to buy the focal product or the product they are currently viewing. For example, let’s say your customer is looking at an iPhone 11 and you’re recommending an iPhone 13, which is more expensive. This might convince your viewer that the iPhone 11 is the better deal, and they will proceed with that purchase.
How to show related products in WooCommerce (default settings)
Here, we’ll go over how you can use the default WooCommerce settings to display related products on your WooCommerce site. You may find that this method is enough for your needs, but many WooCommerce store owners will find that they want more functionality. We’ll also show you how to use a WooCommerce plugin that lets you fully customise how related products are displayed in your store, so stay tuned!
Step #1: Create a WooCommerce product
To get started, navigate to Products → Add New from the default WordPress admin panel.
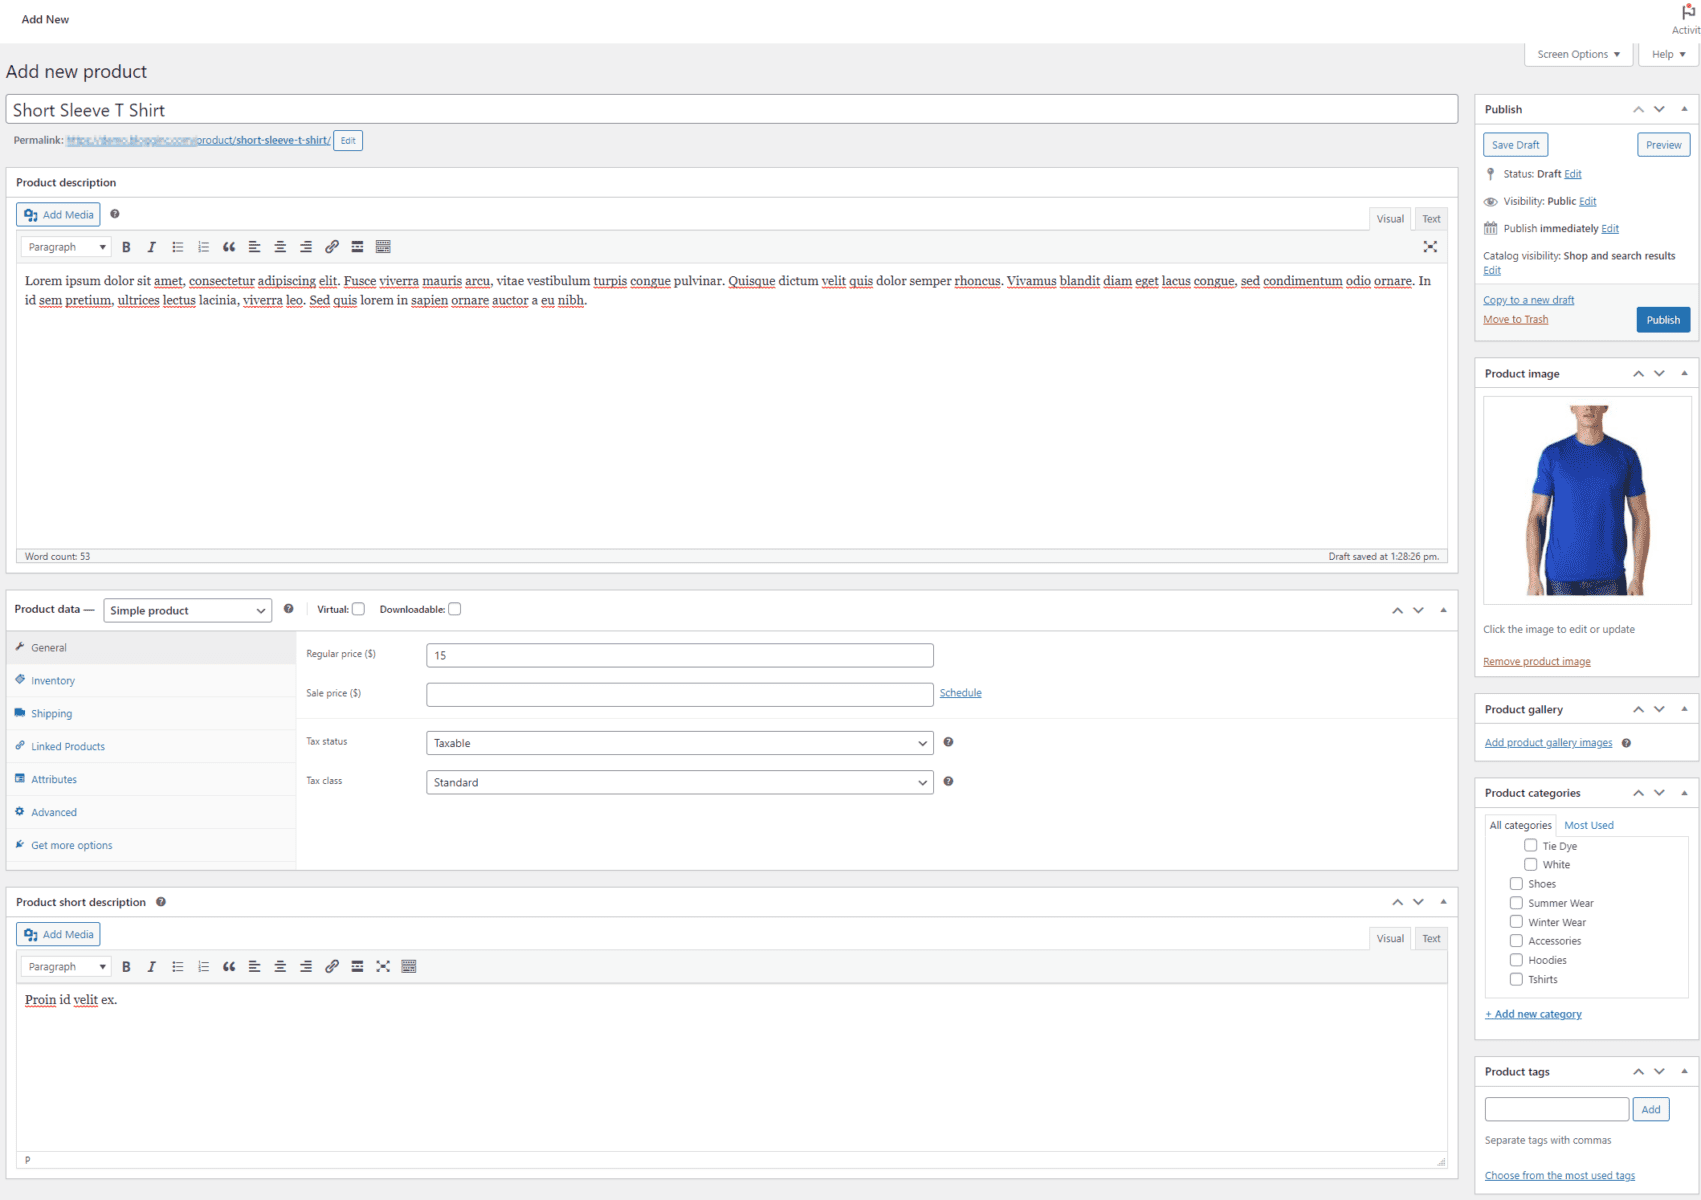
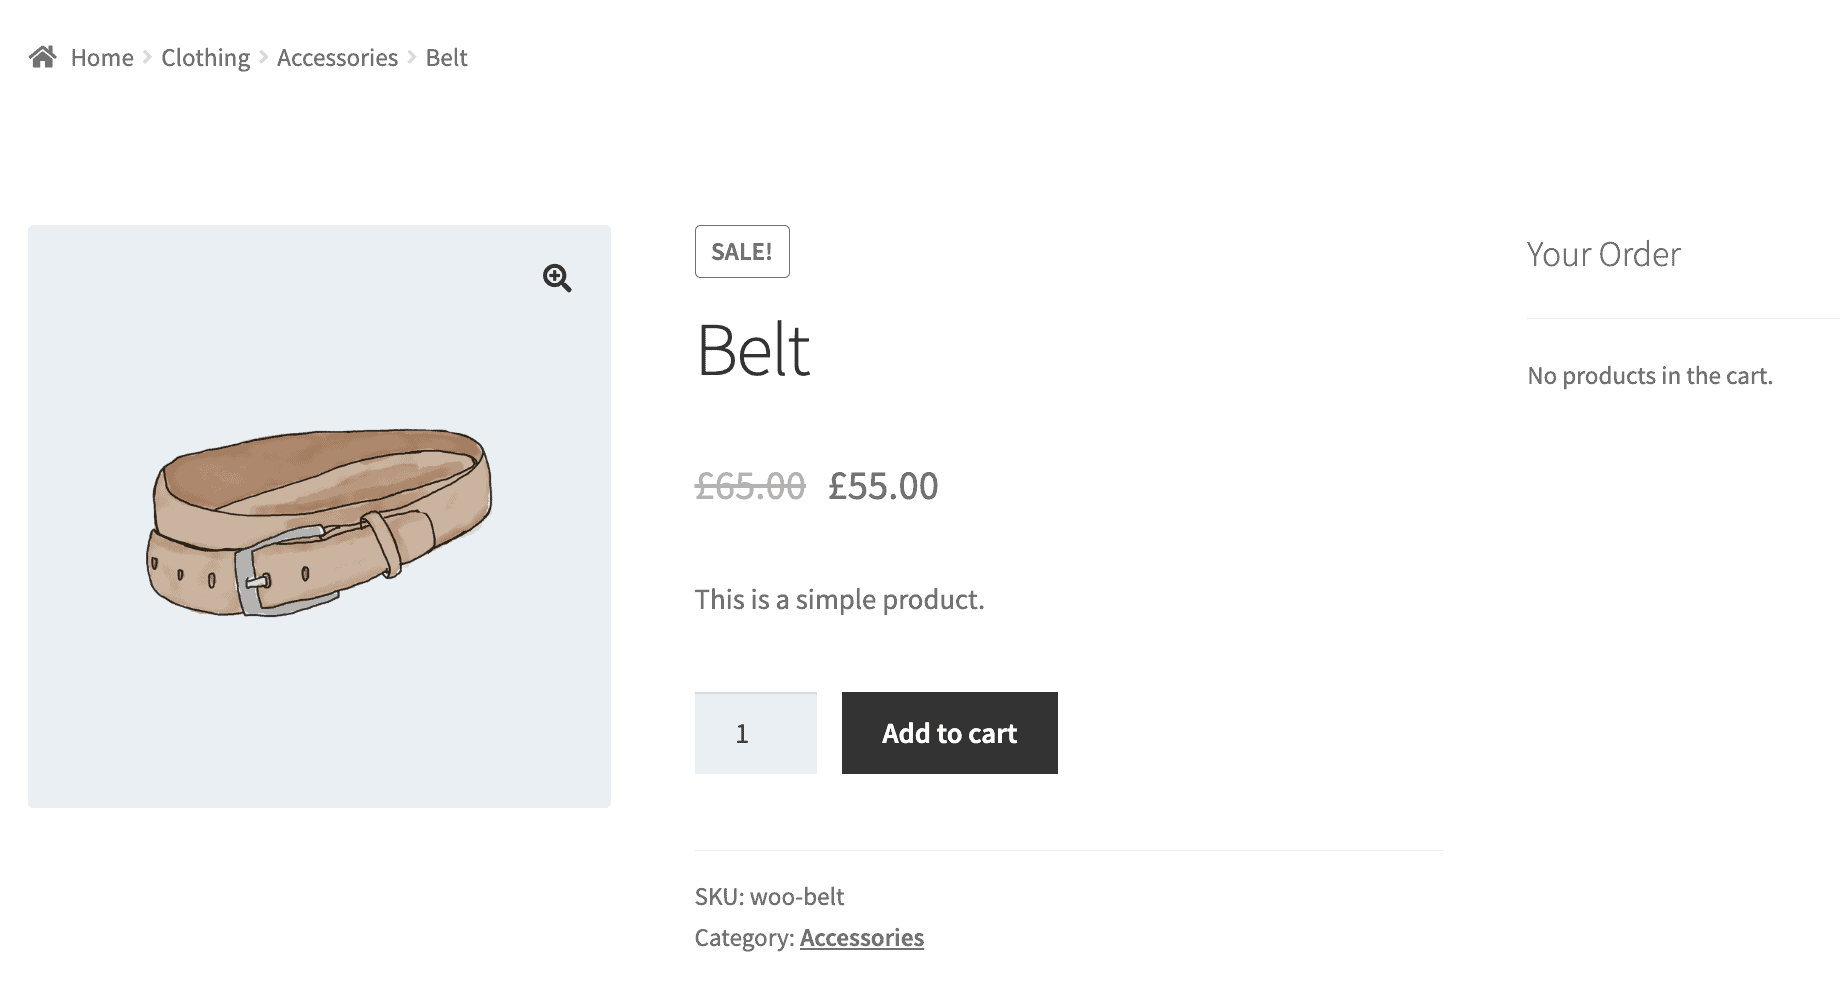
Set basic product details such as the title, description, price, and product image.
Step #2: Showcase related products
WooCommerce, by default, selects products randomly that have the same tags or products within the same category to be displayed as “related products” on the single product page. For this reason, it’s a good idea to add your product to a category that has other similar or related products in it.
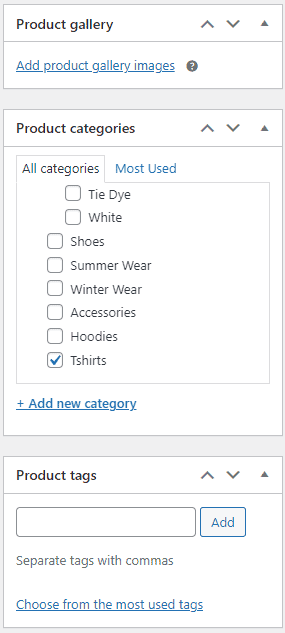
For instance, if it’s an apparel product, you can add it to the “Clothing” category on your WooCommerce site.
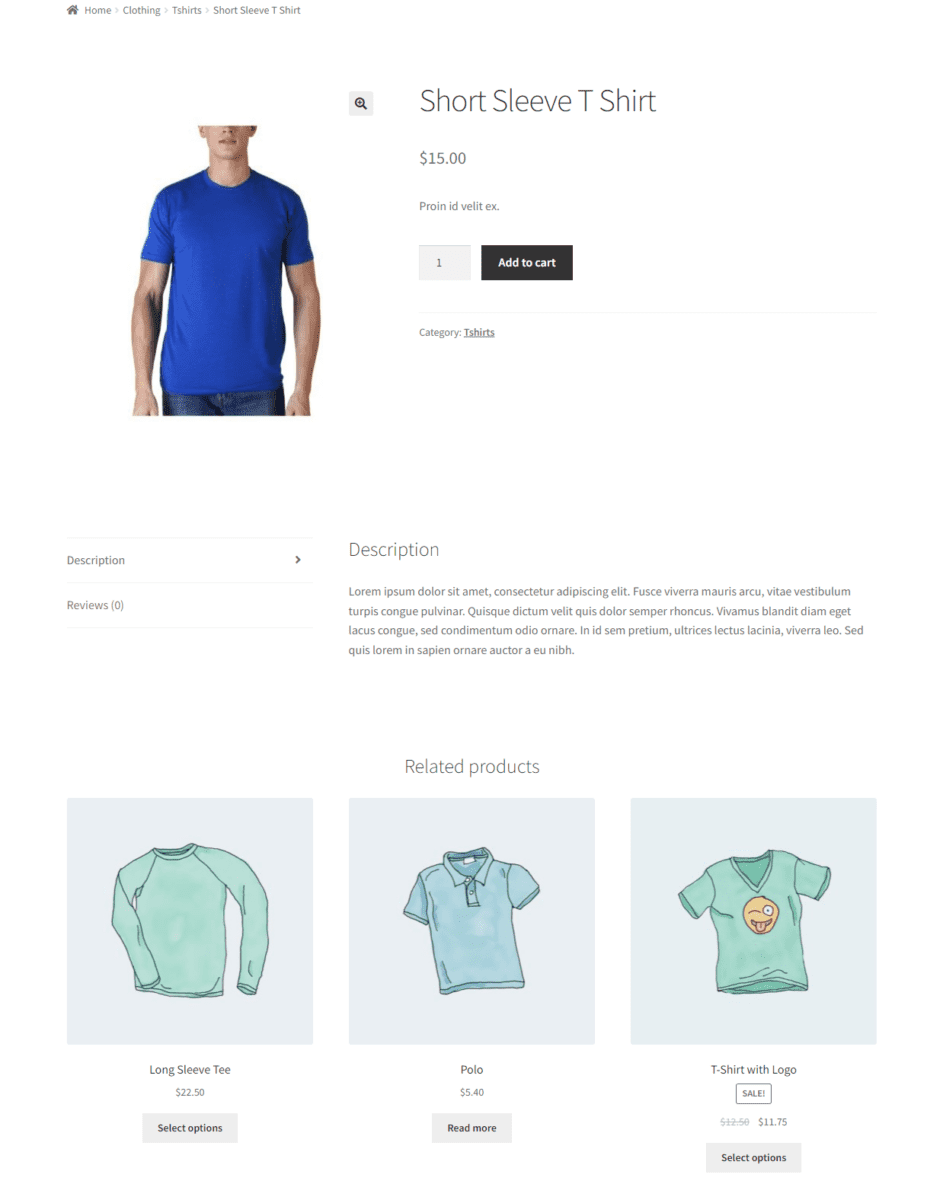
When your shoppers land on the product page, they can see randomly selected related products from the same category at the bottom of their screen.
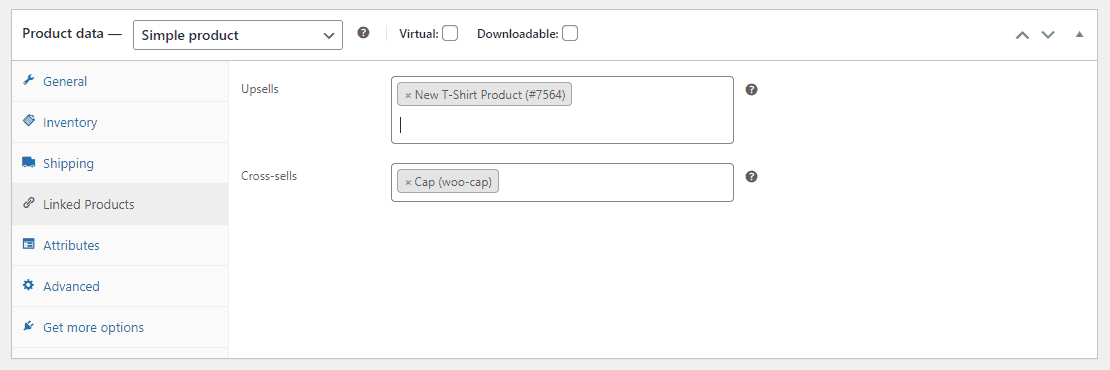
Step #3: Setup up-sells
WooCommerce also lets you set up specific products to be displayed as upsells on the single product page. Using the product edit screen, click on the Linked Products tab under the Product data meta box.
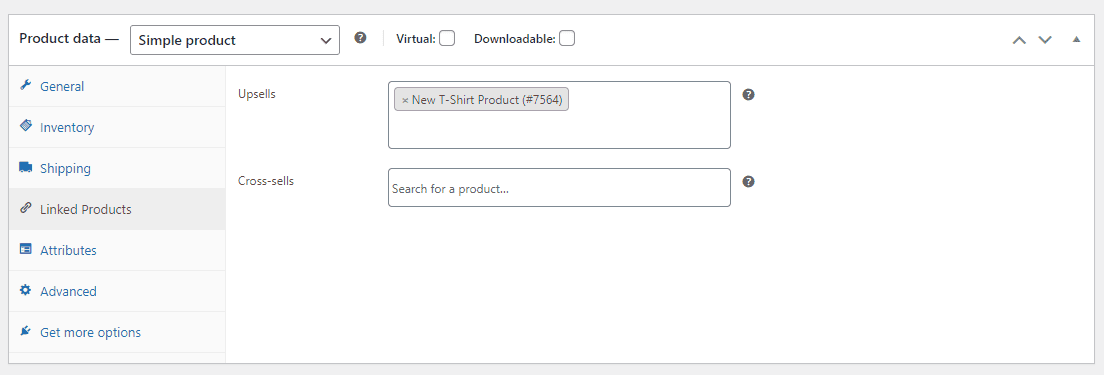
Select the products you want to display as upsells for the specific product you’re editing. For instance, you can display a better, more expensive product as the upsell on the product page so customers can buy the best product your online store offers.
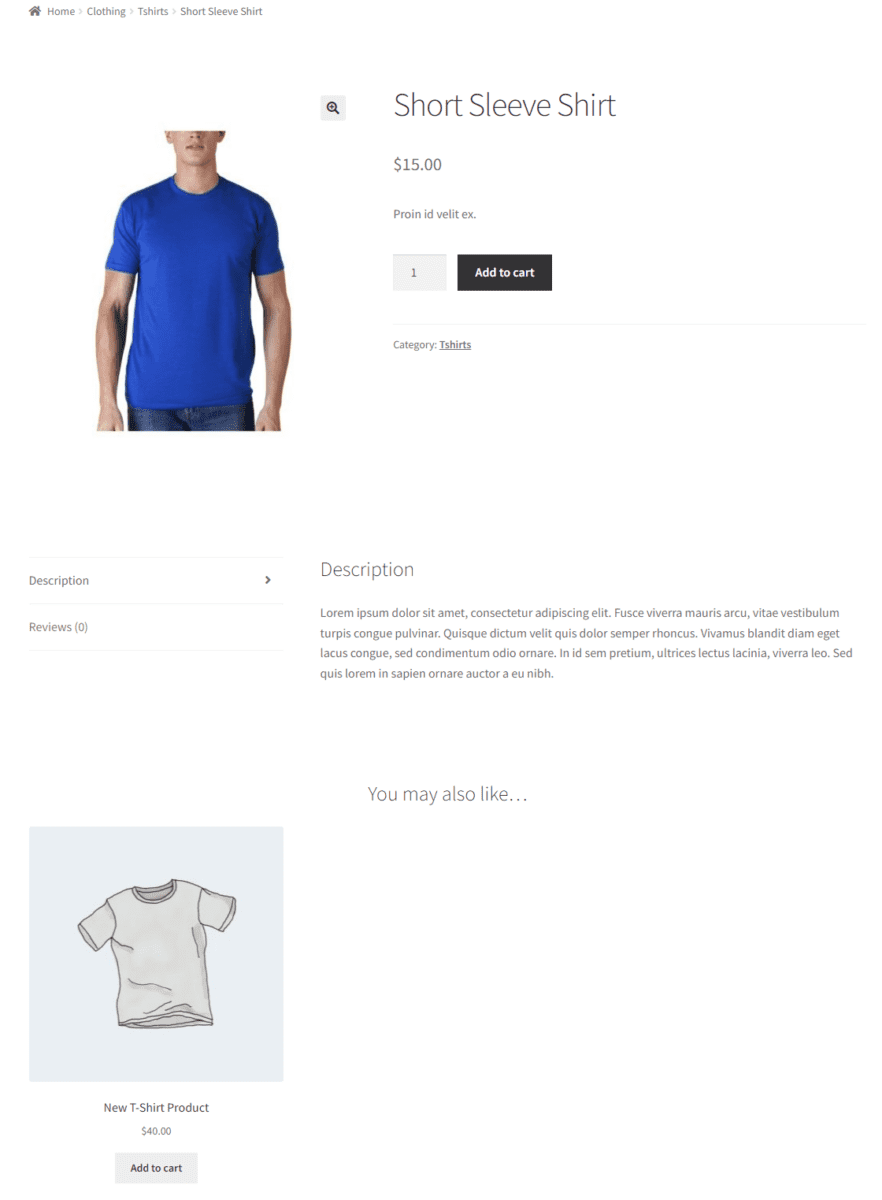
The specified upsell products will be showcased to customers right below the product in a “You May Also Like” section.
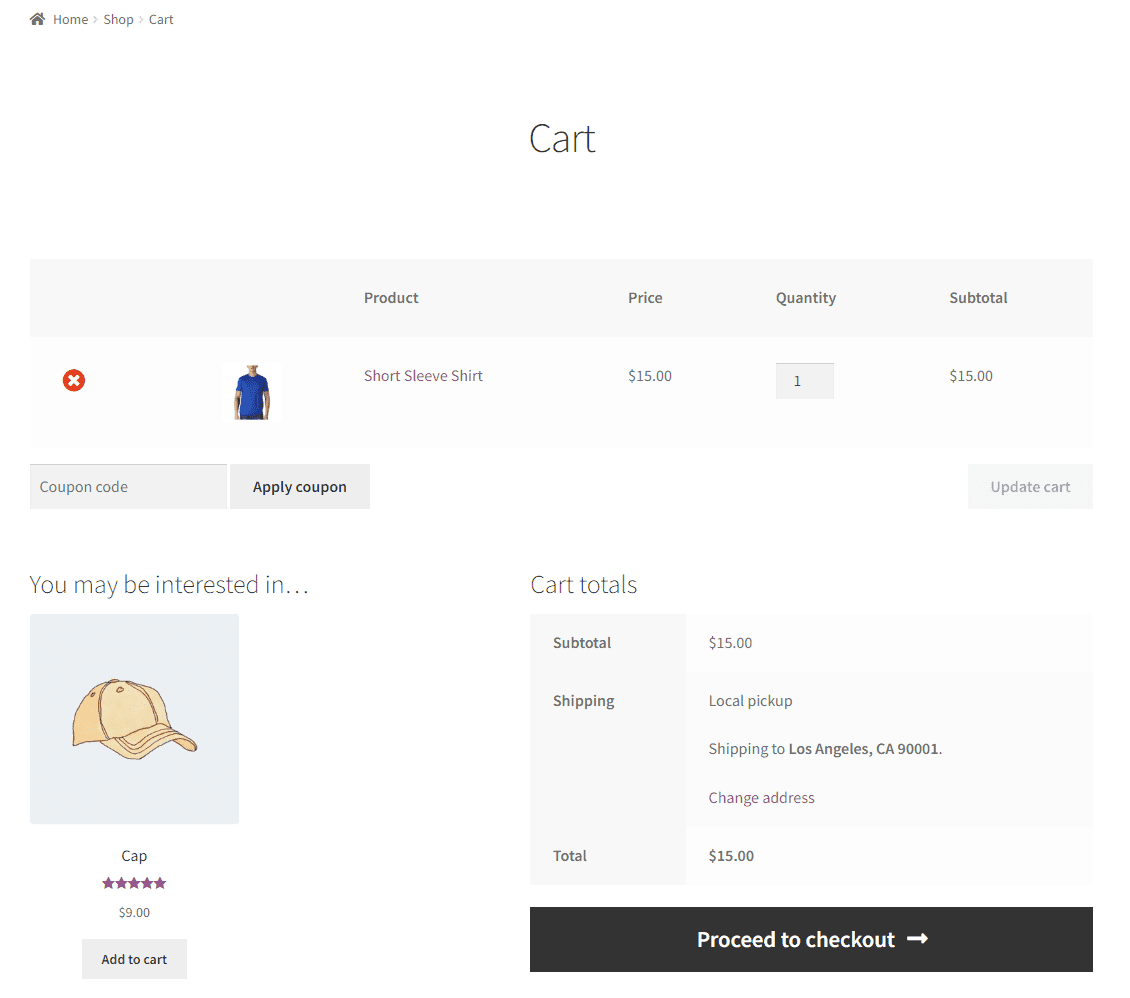
Step #4: Display cross-sells
Similarly, you can also display cross-sells on the cart page when customers add specific products to their shopping cart.
Once you specify products that complement the current product you’re editing, the cross-sell products are automatically displayed on the cart page of your online store.
How to show related products in WooCommerce using a plugin
While setting up related products using the default WooCommerce functionality works OK, we can see that there are two major limitations:
- While you can choose which up-sells and cross-sells you want to display for a particular product, you can’t choose which related products to display. Since WooCommerce randomly selects related products based on categories and tags, then customers might see related products that aren’t actually a good fit for the items they are viewing.
- You have limited layout options, and can’t really change how your related products appear on product pages
WooCommerce Order Bump is a WooCommerce is a plugin that solves both of these issues by giving you full control over choosing what related products to show, and how they’re displayed to your customers.
What is WooCommerce Order Bump?
The WooCommerce Order Bump plugin is the ultimate solution for showcasing related products on WooCommerce sites.
Increase sales and maximize revenue with the WooCommerce Order Bump plugin
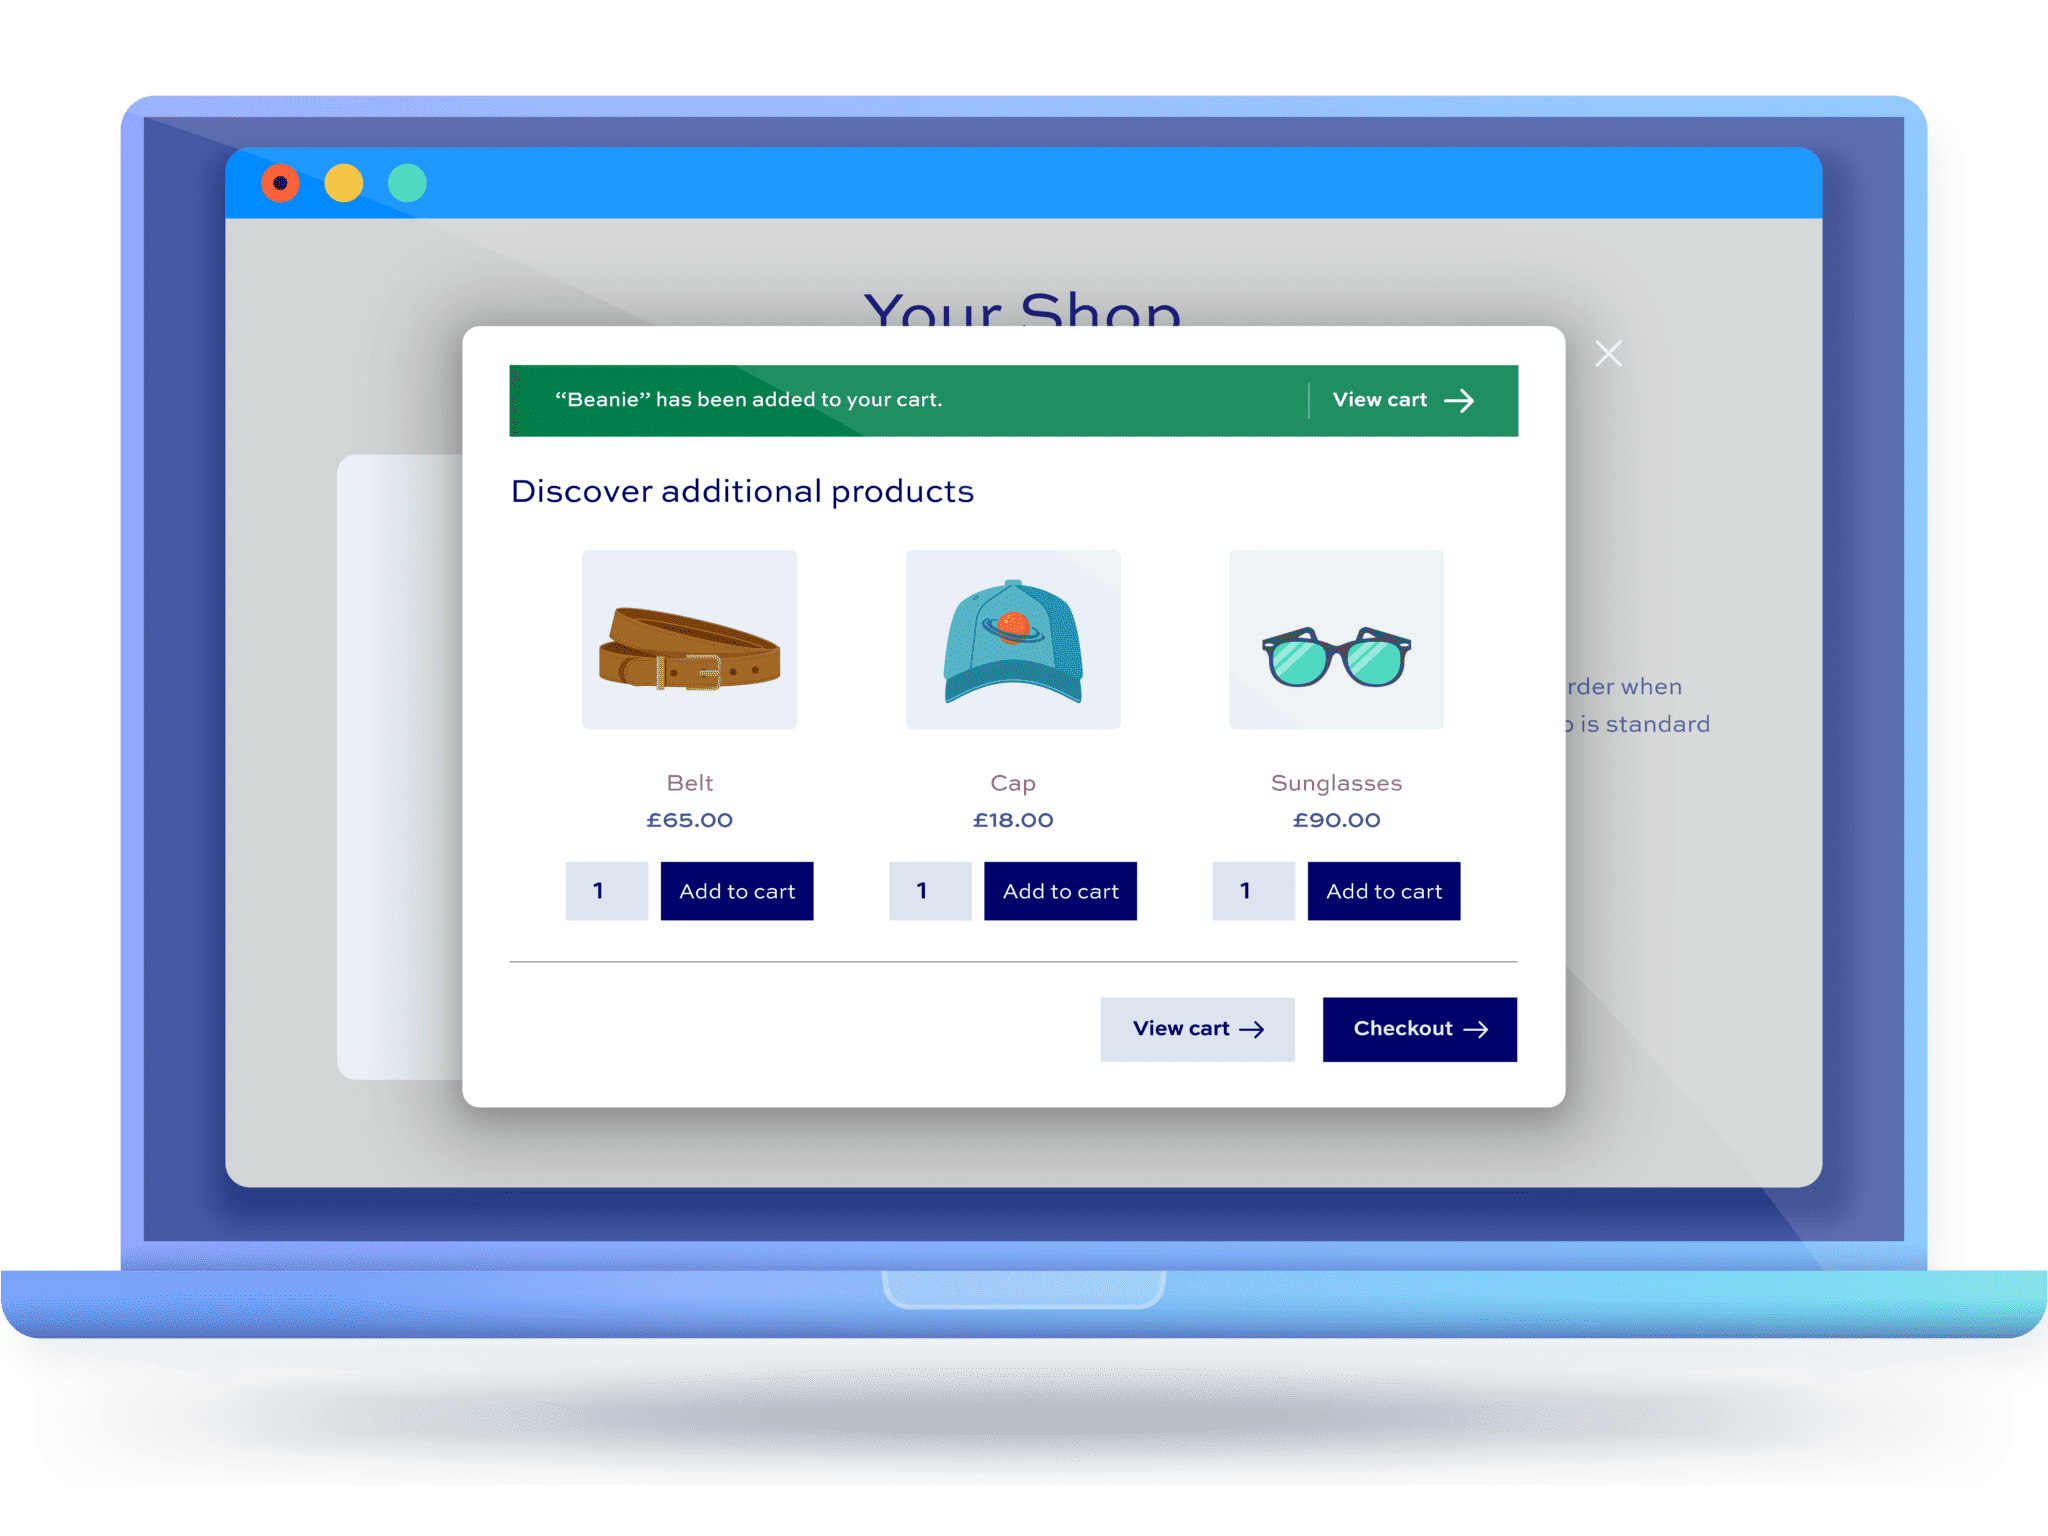
The robust plugin is designed to let you display a modal pop-up with related products, upsells, and cross-sells. This makes it very easy to showcase an order bump anywhere on your online store. You can choose to display the pop-up on the product page after the user adds a product to their cart, the cart page, and the checkout page.
WooCommerce Order Bump gives you full control over which product pages the modal popup should appear on. You have the option to choose between All Products, Selected Attributes, Selected Categories, or Selected Products. In addition to this, you can also exclude the pop-up for specific products.
You can create as many modal popups as you like, and you can customise the content and appearance of each of them. Here are the main ways you can do this:
- Change the header content: This is highly useful as you can write headers that reflect the type of product you’re promoting, such as ‘Other T-shirts you might like’. If you’re running a sale and are showing discounted items as related items, you can also update your header to reflect your campaign. It’s easy to try out different headers to see which ones perform the best!
- Select the exact products you want to display: For example, if a customer is viewing a blazer, you can either show him alternative blazers or other pieces of a complete suit. The choice is yours!
- Change the layout: Choose between a product layout or checkout layout for your popup.
On top of all this, you can also display the quantity field, cart button, and checkbox button on the modal popup to streamline the shopping process on your WooCommerce site.
Additionally, you can even offer discounts on related products to encourage people to add them to their shopping cart and increase the chances of making more sales on your online store.
How to set up related products with WooCommerce Order Bump
Step #1: Install and activate the WooCommerce Order Bump Plugin
To get started, get the WooCommerce Order Bump Plugin and install it on your WooCommerce site. Navigate to Plugins → Add New and upload the plugins .ZIP file to your WooCommerce site.
Once it’s done, click on the Install Now button and activate the plugin as well. With the WooCommerce Order Bump plugin installed and activated on your site, it’s time to activate its license.
To do this, navigate to WooCommerce → Settings → Order Bump and click on the Licence link from the top.
Enter the license key given to you at the time of purchase and click on the Save changes button to continue.
Step #2: Add a new order bump
Now, all that’s left to do is create a new order bump for displaying related products anywhere on your WooCommerce site. Start by navigating to WooCommerce → Order Bumps and clicking on the Add New button.
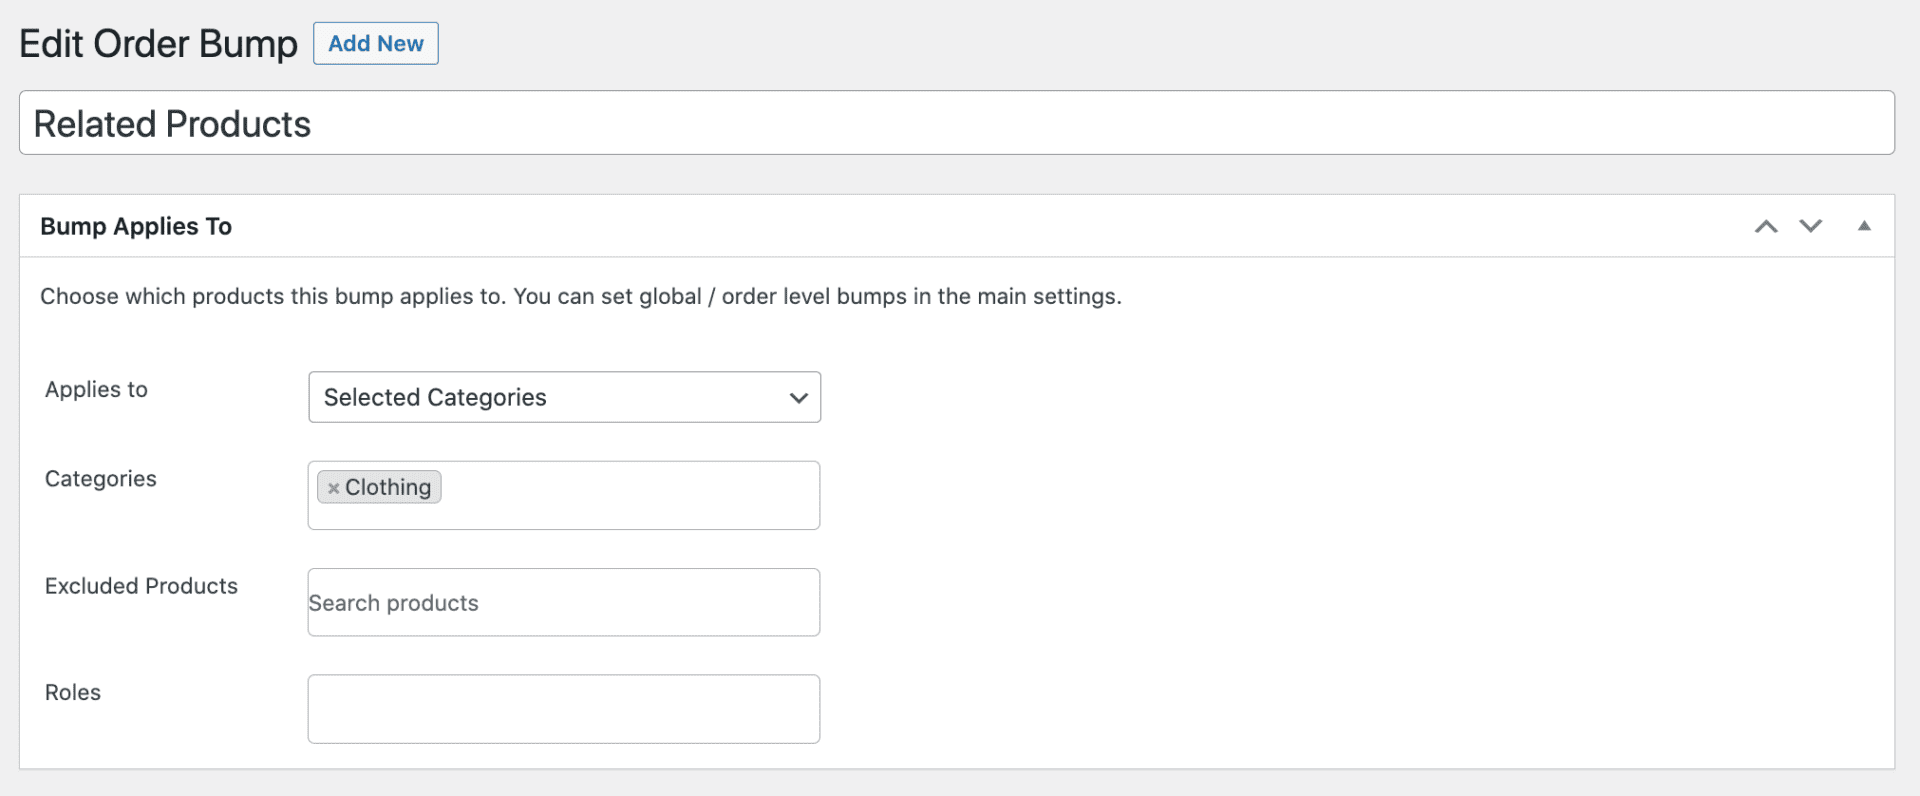
After entering a relevant title, select the products, categories, and attributes that you want to showcase related products for or enable related products for all products on your WooCommerce site.
For example, if you want to showcase related products for products in the Clothing category only, select the Selected Categories option from the Applies to dropdown menu and specify the WooCommerce category below. In addition to this, you can also specify products to be excluded from the related products order bump display.
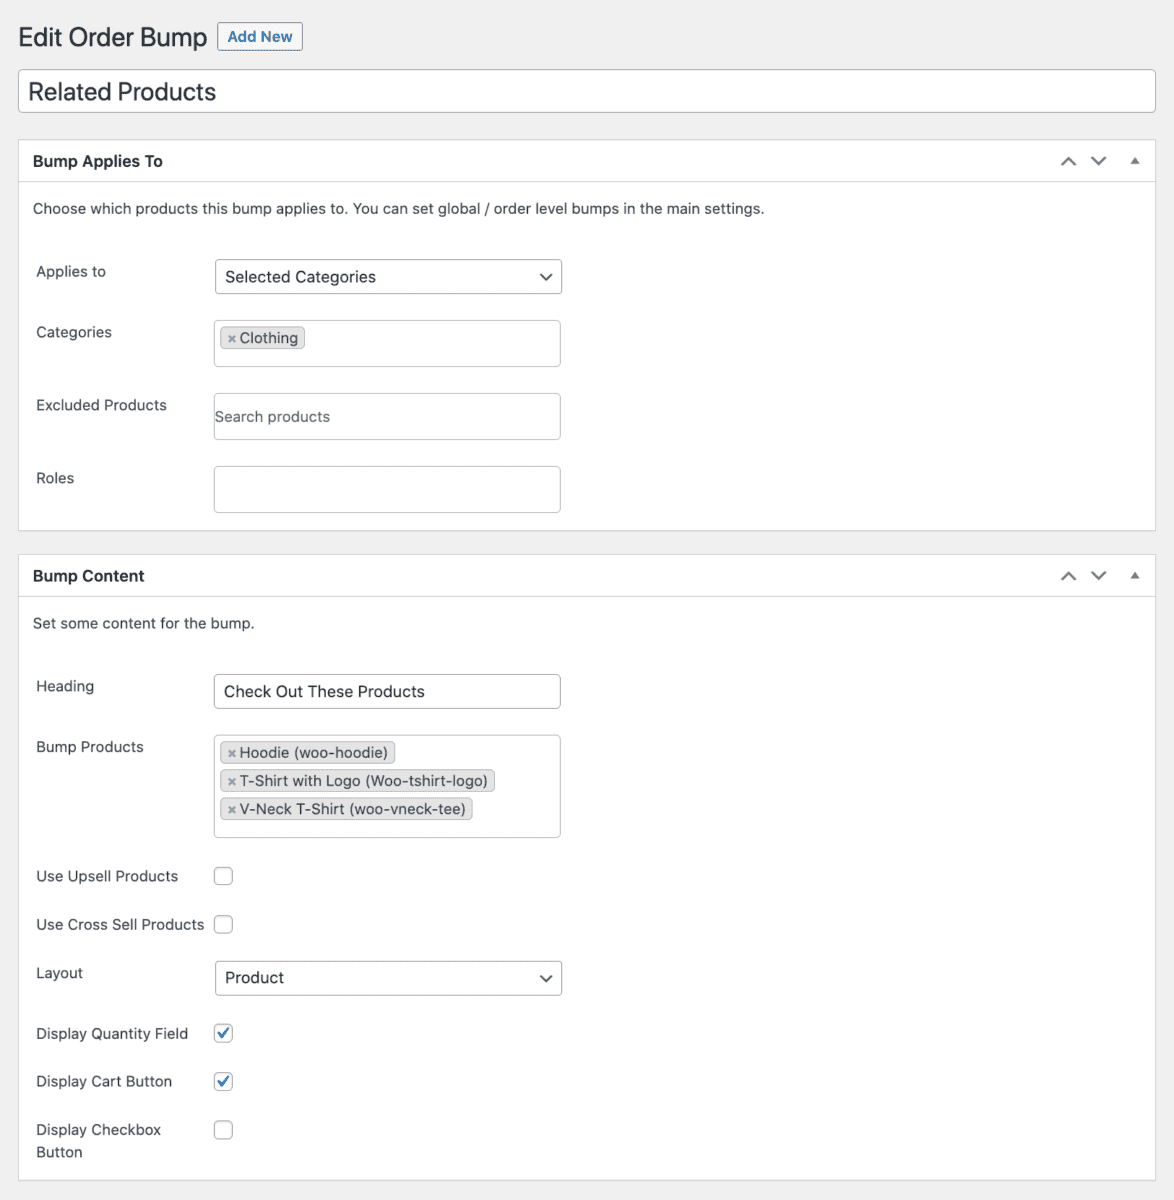
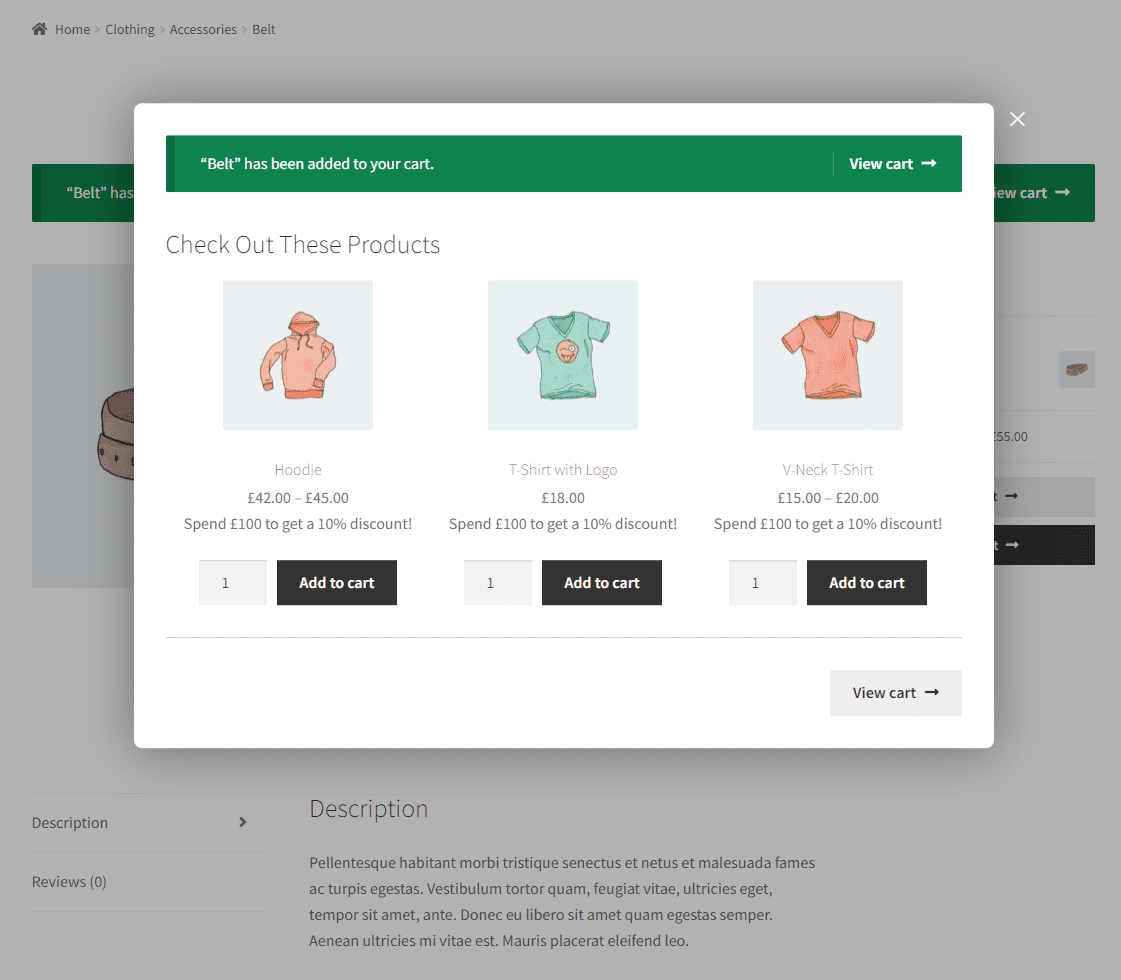
Next, let’s move on to setting the Bump Content meta box. The Heading field will let you showcase a custom message to your shoppers. For instance, “Check out these products” or simply “Related products”.
You can also choose to display the upsell or cross-sell products to be displayed in the order bump, as well. The best part is that the WooCommerce Order Bump plugin also lets your shopper directly add the related products to their shopping cart and lets them select their desired quantity. To do this, just enable the Display Quantity Field and Display Cart Button checkboxes.
Make sure to click on the Publish button to continue.
Step #3: Preview
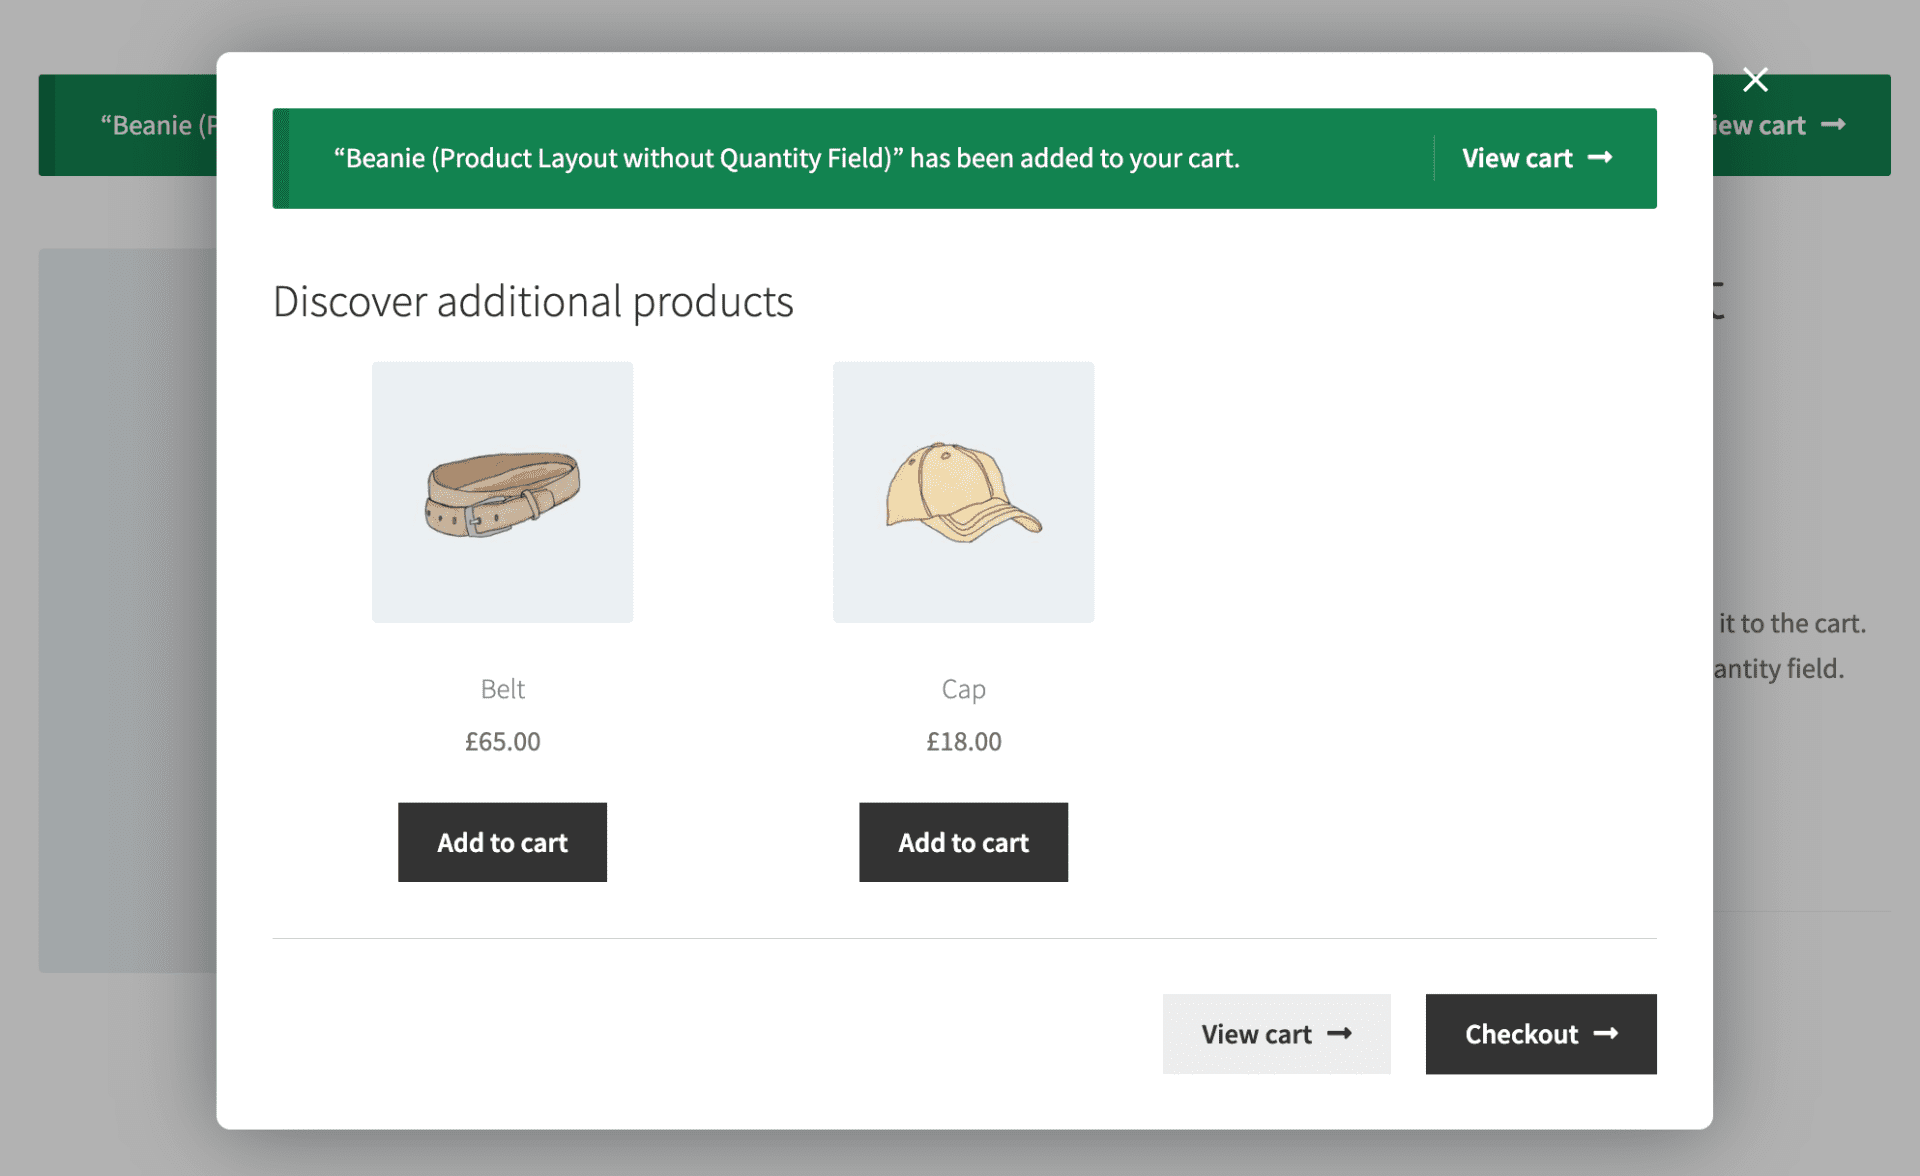
Now when shoppers add any of the specified products to their cart, they’ll see an “Order Bump” that pops up as soon as the product is added to the shopping cart.
This way your customers can quickly add related products to their cart and continue browsing your online store afterward.
Improve the way you show related products with WooCommerce Order Bump
As we’ve seen in this article, default WooCommerce doesn’t quite cut it when it comes to displaying related products in your store. Related products are randomly selected, and you don’t have any way to change the appearance of your Related Products section.
If you want to fix this, you’ll need a related products plugin that will add more functionality to your online store. We recommend using the WooCommerce Order Bump plugin as it offers an all-in-one solution for showcasing related products in WooCommerce.
The WooCommerce Order Bump plugin essentially lets you display a modal pop-up with your choice of related products either for all products, specific categories, attributes, or for specific products only. This way, you can showcase relevant related products to shoppers and increase the likelihood of them adding more products to their carts.
WooCommerce Order Bump gives you full control over how your related products’ modal popup looks and feels on the front-end of your WooCommerce site. You can change the header content, select the exact products you want to display, and choose your preferred layout style. Additionally, you can even showcase a quantity field, cart button, and checkbox button to further enhance the shopping experience and make it easier for your shoppers to add more products to their carts. As a result, it can help you increase the average order value of your online store and generate more revenue for your business.
Increase sales and maximize revenue with the WooCommerce Order Bump plugin
Are you looking to improve the way you showcase related products on your eCommerce store? Get WooCommerce Order Bump today!