WooCommerce product personalization: the easy way

Product personalization is an attractive selling point in eCommerce. Whether you sell apparel, gift hampers, tech products, decor items, or anything else, you may want to let customers add extra options to customize their products before checking out in your WooCommerce store.
This article is your 5-minute guide that shows you how to do just that! It all starts with the WooCommerce Product Add-Ons Ultimate, which we introduce to you below. We’ll then show you how to set up a personalized product using the plugin using add-on fields and conditional logic, discuss the full advantages of enabling product personalization in your store, and talk about overcoming the core challenges involved.
WooCommerce Product Add-Ons Ultimate
To get started with your WooCommerce product personalization, you’ll need the Product Add-Ons Ultimate plugin.

Using the Add-Ons Ultimate plugin, you’ll be able to easily add extra fields to your products. Let’s take a quick walkthrough using an example scenario.
WooCommerce Product Personalization in 8 Steps
In our example, we’re going to pretend that we would like to allow our customers to personalize a greetinggreetings card online. We’re going to allow them to personalize the product in the following ways:
- Add a pre-defined message to the front of the card
- Use conditional logic to optionally add a custom message
- Upload a custom image for the front of the card
- Write a personal message inside the card
It’s a pretty simple example and I’m sure you can think of lots of ways to improve it. But it’s fine as a way of walking through some of the plugin’s capabilities.
(If you’d like to find out more about adding WooCommerce gift wrapping and messages, take a look at this article.)
Step 1: Download and install the plugin
I’m assuming that you’ve got your WooCommerce store already up and running. All you need for product personalization is to install the Add-Ons Ultimate plugin:
- When you purchase the plugin, you’ll receive an email with a link. Download the zip file from the link
- In your WordPress dashboard, go to Plugins > Add New > Upload Plugin
- Browse to your zip file
- Click ‘Install Plugin’ then ‘Activate’
Now your plugin will be installed and activated.
Step 2: Create a product to be personalized
Create a new product that you’re going to allow your customers to personalize. So, in our example, we’re going to create a product called ‘Personalized Greetings Card’ (more imaginative names are available).
Step 3: Add some extra fields to your product
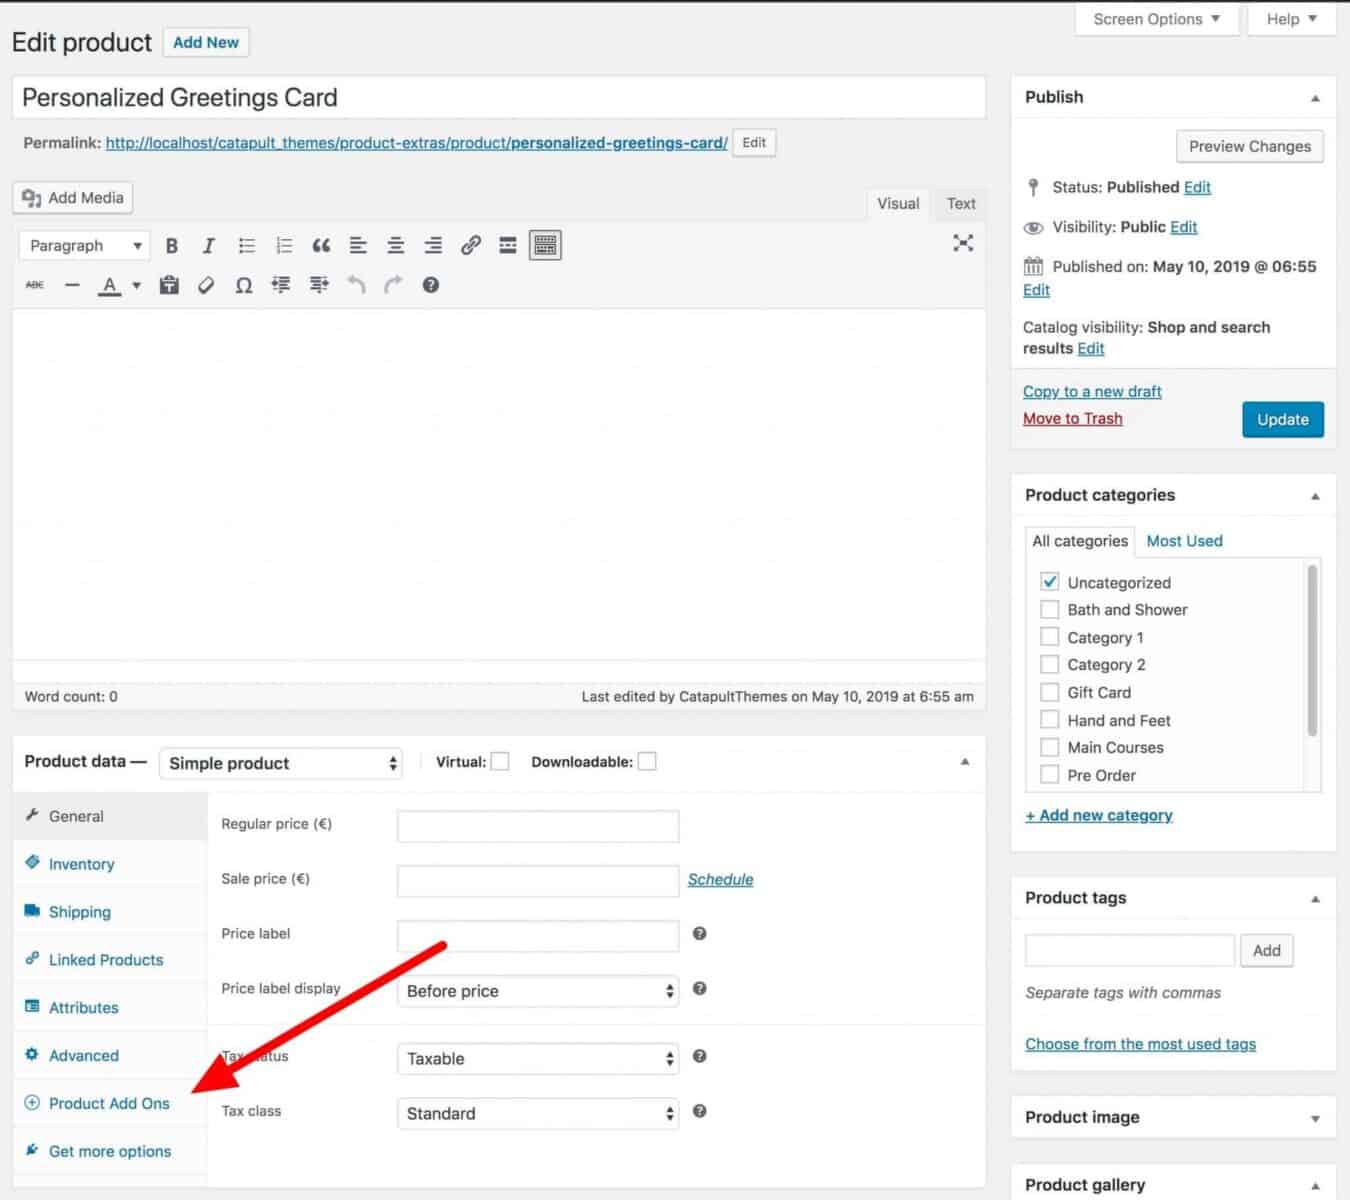
- Click the ‘Product Add Ons’ tab in the ‘Product data’ section
- Click ‘Add Group’ to create a group for your personalizable field
- Finally, click ‘Add Field’ to create your first personalizable field
You’ll see something like the screen above.
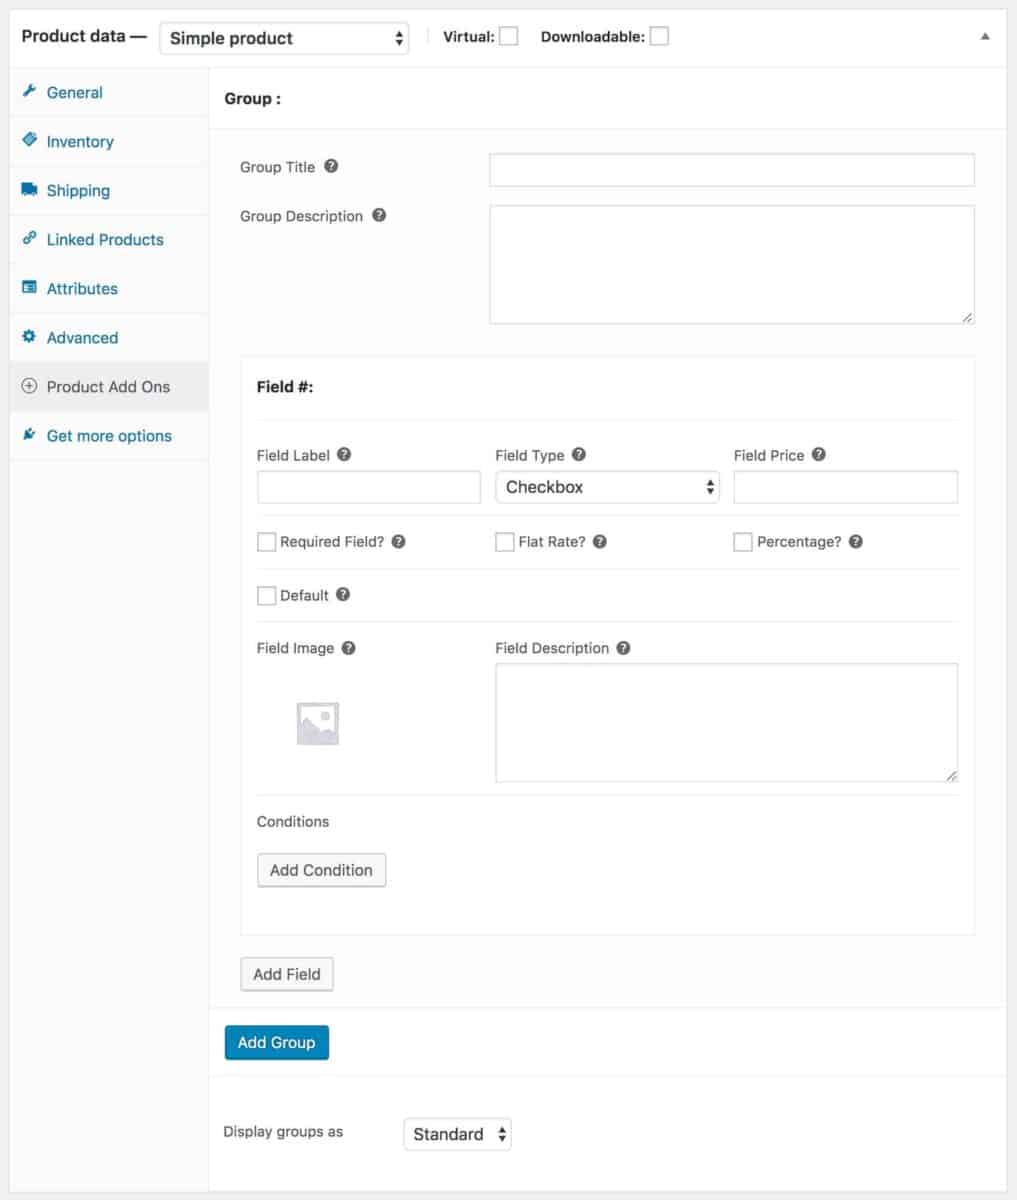
Step 4: Define your groups and fields
Product Add-Ons Ultimate allows you to create additional fields and organize them into groups. We’re going to create a group for options for personalizing the front of the card and a group for options for personalizing inside the card.
- Enter some text in the ‘Group Title’ and ‘Group Description’ fields – these are optional
- In the ‘Field Type’ dropdown, select ‘Select’
- Add a custom phrase or slogan as options
- You can also enter some text in the ‘Field Label’ and ‘Field Description’ fields to help the customer know what the field is for
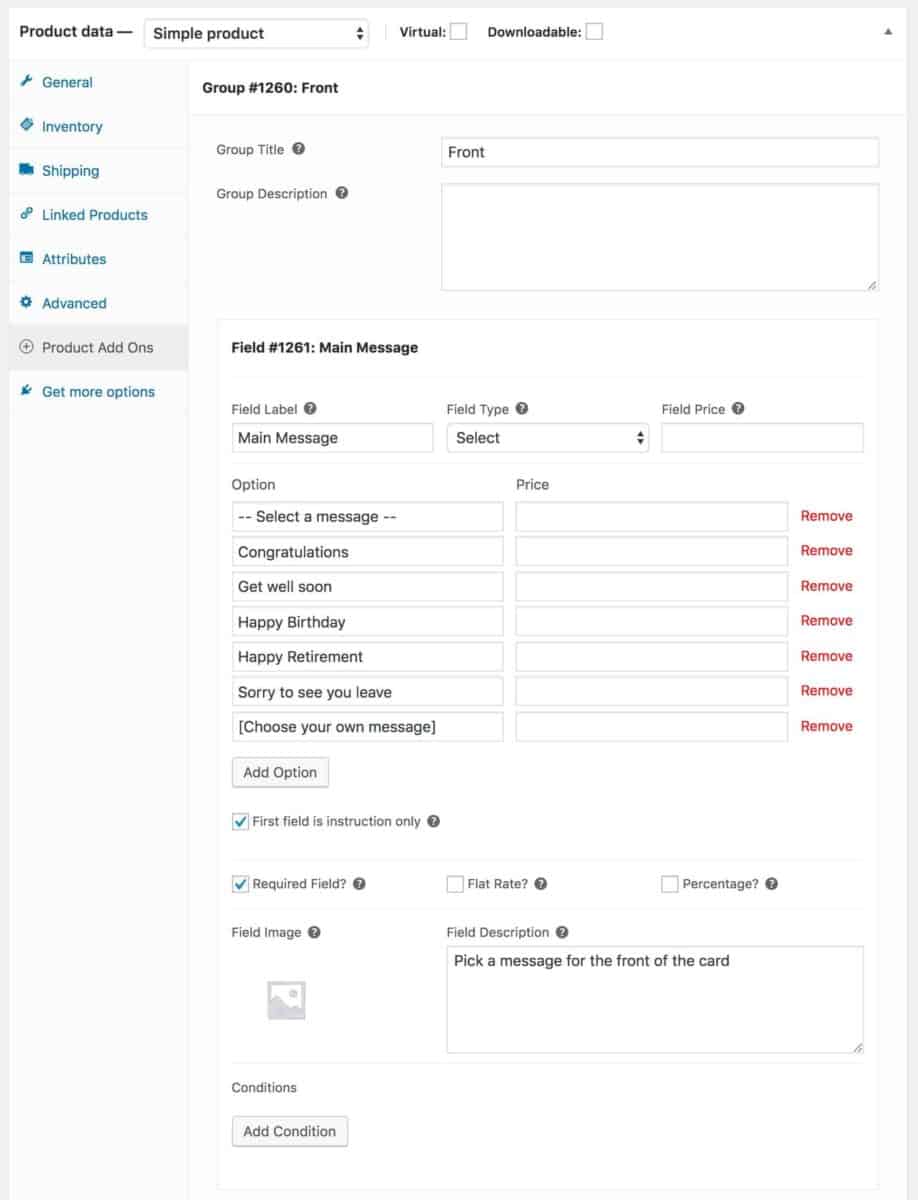
Note that I’ve also selected a couple of further options:
- ‘First field is instruction only’: I’ve checked this option because I’ve added an instruction (‘– Select a message –‘) to the user as the first option. By checking this field, I can ensure that one of the options below will have to be selected.
- ‘Required Field’: by checking this option, I am ensuring that the customer will need to choose a value from this field (and not the first option, which is an instruction).
Step 5: Use conditional logic
A really important feature of any personalized product is the ability to show or hide fields based on certain conditions.
Product Add-Ons Ultimate allows you to use conditional logic:
- Create a new field and choose ‘Text’ as the ‘Field Type’
- Add a field label and description as required
- To apply some conditional logic to this product, click the ‘Add Condition’ button
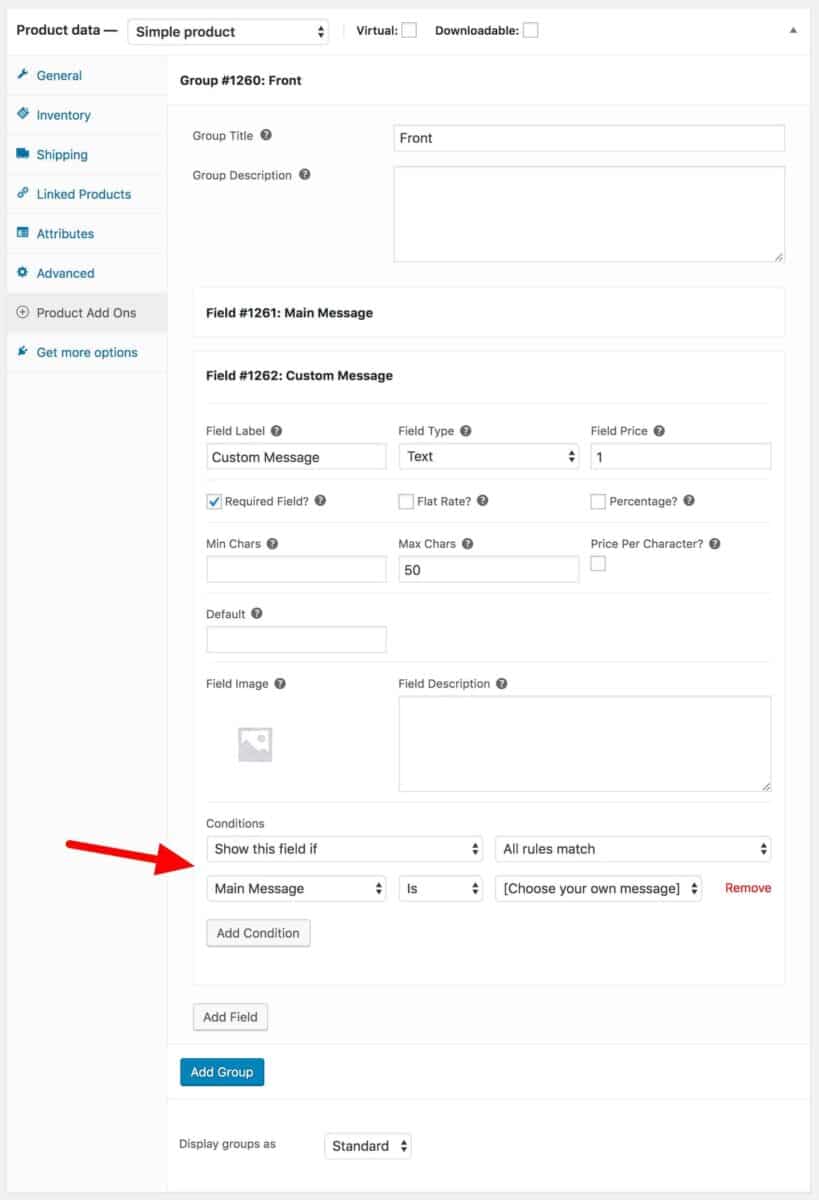
When you click ‘Add Condition’ you get some new options:
- Choose whether to hide or show the field
- Choose whether all conditions need to be met, or just one
- Then add the conditions – choose the field (in this case, the ‘Main Message’ field) and the value that it needs to meet the condition (in this case, if the user has selected the ‘[Choose your own message]’ option
Now, this field will only be displayed on the front end if the user selects [Choose your own message] from the select field.
Text field options
Note some other options in the text field above:
- ‘Field Price’: I’ve decided that we’re going to charge the customer extra if they want to personalize the card with a custom message
- ‘Max Chars’: we also don’t want the customer writing an essay so I’ve set the maximum number of characters to 50 for the custom message
Additionally, with the conditional logic feature, you can set up dynamic pricing adjustments. As customers customize their greeting cards, the price will automatically update to reflect their choices. This ‘Calculate Price‘ function ensures transparency and helps customers make informed decisions.
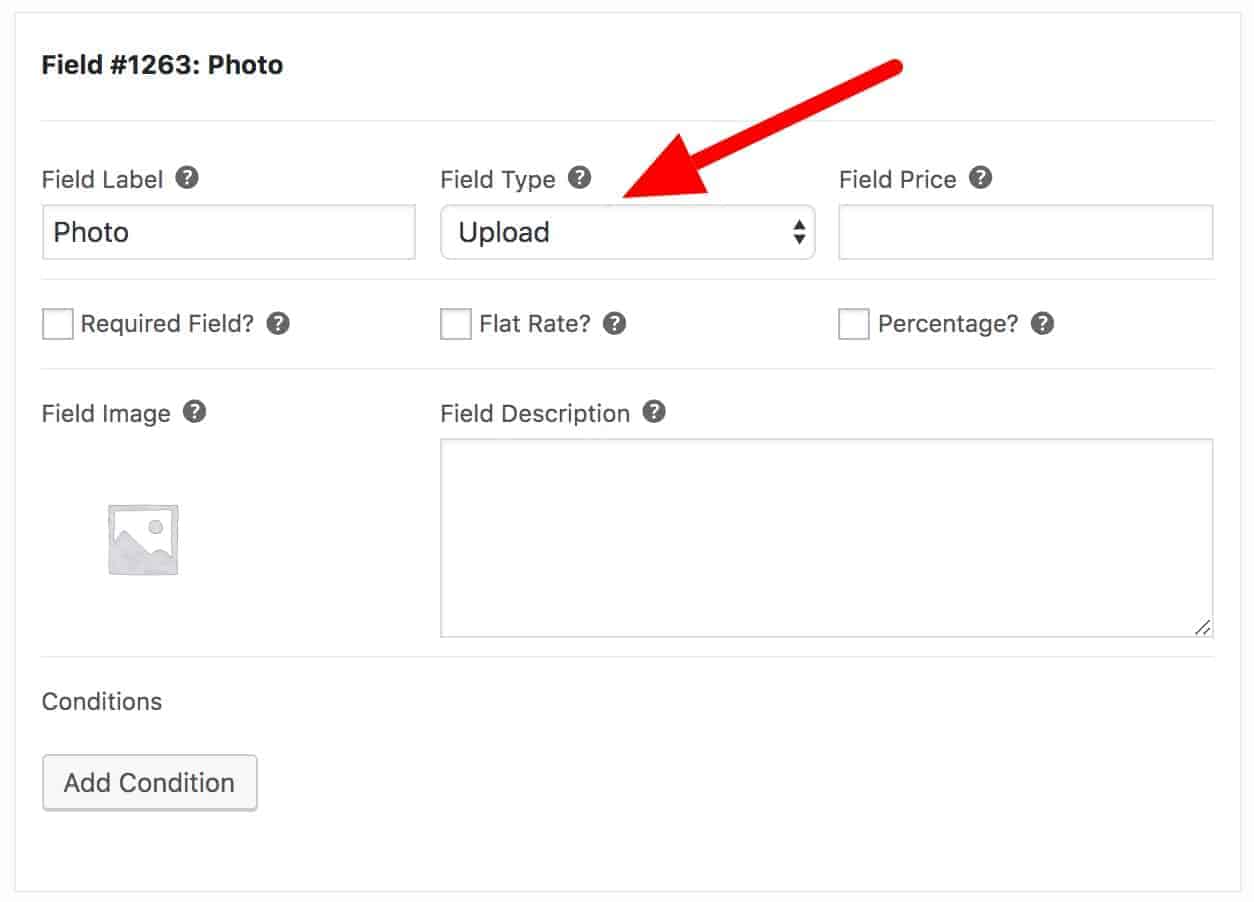
Step 6: Add an image upload field
Let’s finish off the fields for the front of the card with an image upload field. Image uploads are a very popular method of WooCommerce product personalization.
- Add a new field and select ‘Upload’ as the field type
- That’s it (Product Add-Ons Ultimate makes it easy to add upload fields to WooCommerce)
Step 7: Add another group for inside the card
Just to finish off all the personalization options, we’ll add another group for extra fields for the inside of the card. Separating fields into groups helps the customer.
- Click ‘Add Group’
- Click ‘Add Field’
- Enter your field options. In this case, we’ll use a textarea field to allow the user to write a more substantial message
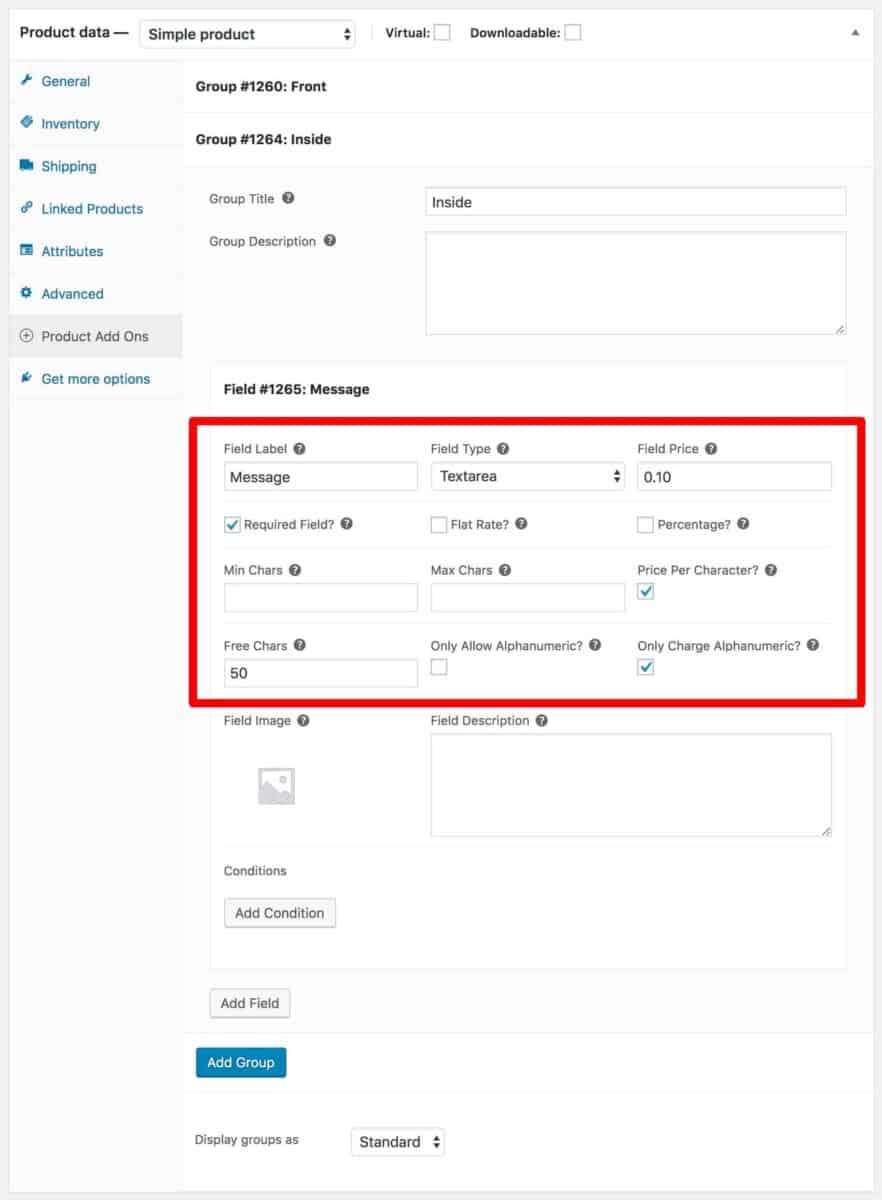
Note some more options that I’ve used in this field:
- ‘Price Per Character’: maybe you want to charge your customer per character for their message. Checking this option means that the value in the ‘Field Price’ field will be multiplied by the number of characters that the customer enters.
- ‘Free Chars’: we’re kind people so we’re not going to charge our customers for every single letter they write. Instead, we’ll give them 50 characters for free and only charge them when they go over.
- ‘Only Charge Alphanumeric’: and we’re reasonable too – so we won’t charge for spaces, only for alphanumeric characters
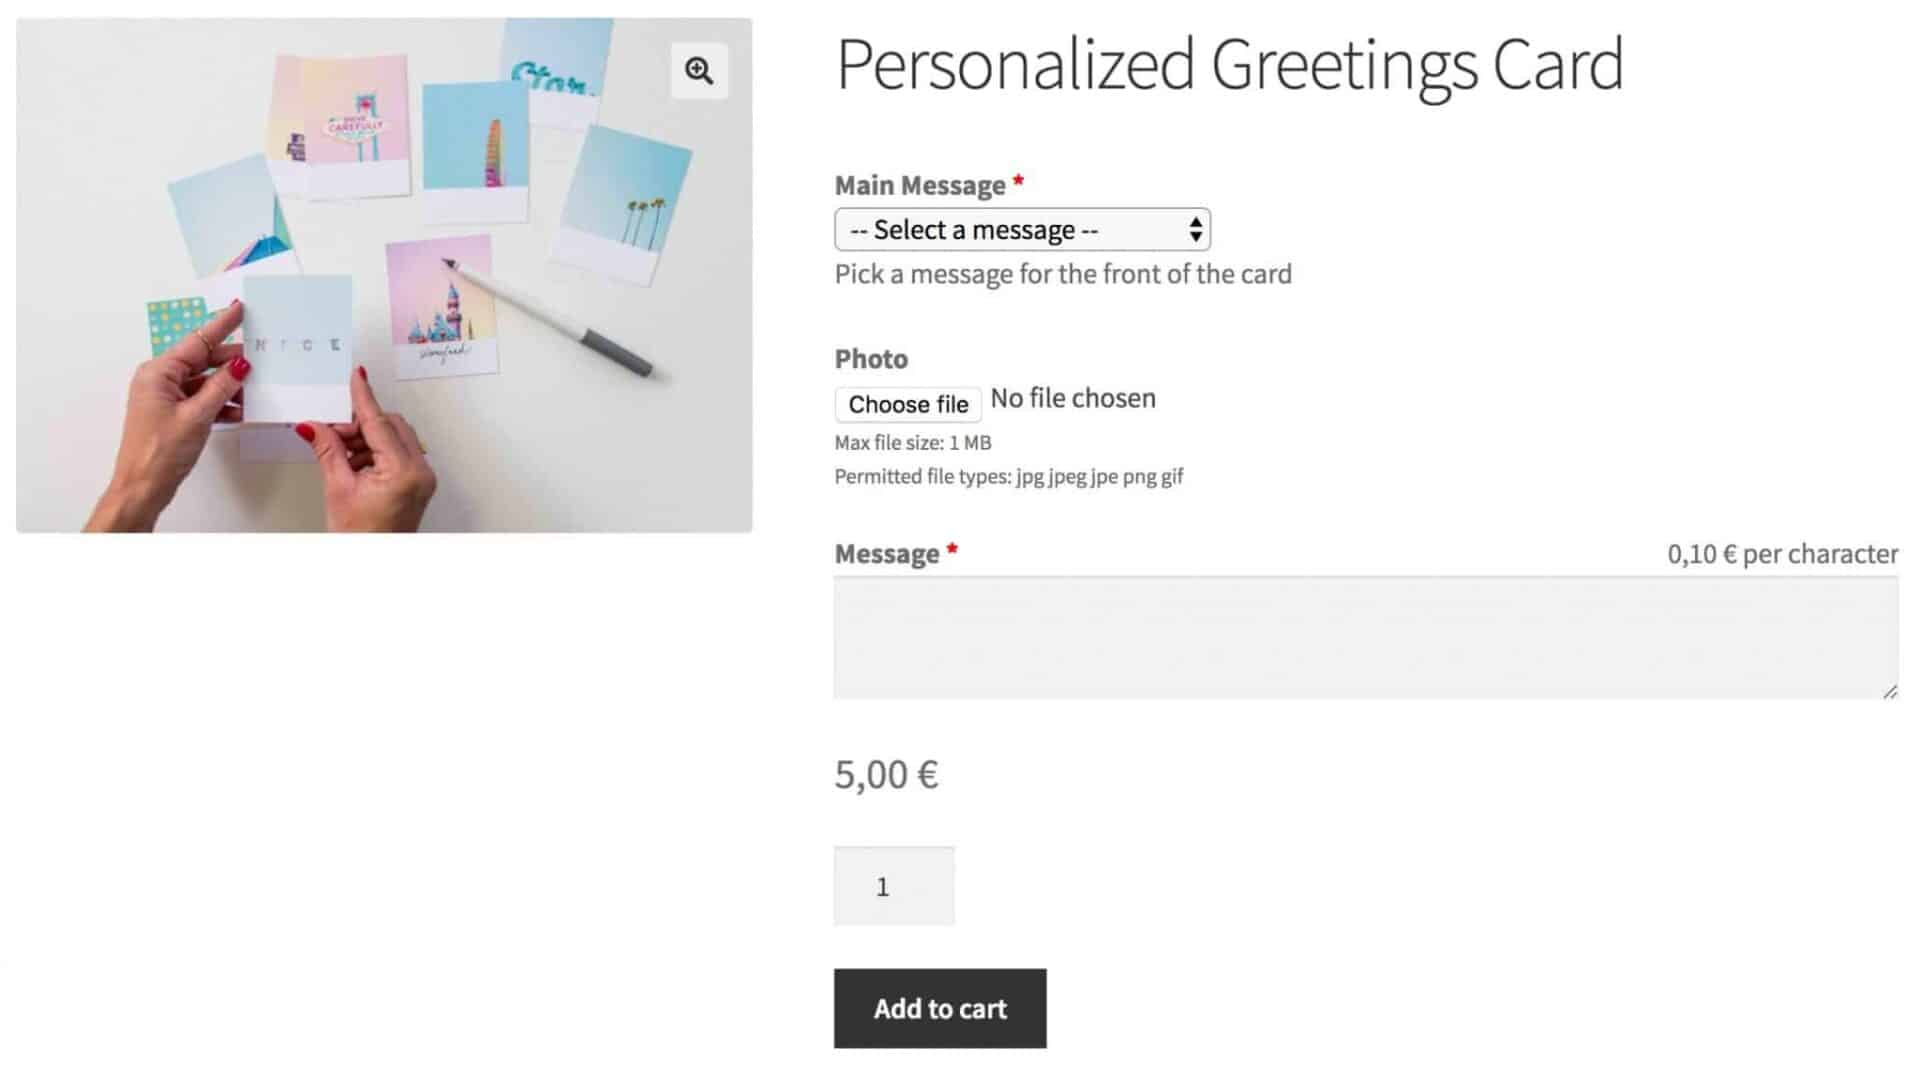
Step 8: Sit back and admire your work
We’ve finished all our personalization options so we just need to save or publish the product and take a look at it on the front end.
This is what the product will look like in the Storefront theme. You can use any theme you like, and style it with CSS if you wish.
I think that should take less than 5 minutes to create: you just need Product Add-Ons Ultimate, your ideal product personalization plugin:
Advantages of personalizing WooCommerce products
If you’ve read this far, you probably already have a good idea of the benefits of letting your customers personalize your products.
In essence, I think the top three advantages are:
- Increase sales conversions
- Build customer loyalty
- Enrich your products
If you’d like some more ideas on the benefits, check out this article:
Both have sections on reasons to personalize products.
Addressing common challenges in implementing WooCommerce product personalization
The implementation of WooCommerce product personalization presents several key challenges that impact user experience and operational efficiency. A primary concern is the organization of add-ons to prevent overwhelming users during the customization process. A solution like the WooCommerce Product Add-Ons Ultimate plugin addresses this by offering conditional logic functionality, enabling fields to dynamically appear based on previous selections. Additionally, the plugin facilitates a structured approach by allowing information to be categorized into tabs, groups, or accordions, guiding users through a step-by-step customization journey.
Another significant challenge revolves around maintaining cost-effectiveness in operations. The plugin assists in overcoming this challenge by enabling businesses to assign prices to various add-ons. For instance, if a business offers custom designs on clothing, the plugin allows for upcharges based on the number of letters or complexity of the design. This feature ensures that businesses can cover the costs associated with personalized additions while providing transparency to customers.
The only WooCommerce personalized plugin you’ll ever need
Don’t forget – buy Product Add-Ons Ultimate now…
Hey Gareth
Thanks for a great tutorial on custom giftcards.
I intend to add custom posters to my shop and would very likely be using “Product Add-Ons Ultimate” as part og the setup.
But the biggest challenge is how to actually generate the PDF’s (or what ever format the offset guy will print the poster from) when the customers have finished their design. Do you know of any plug-ins, API’s or services that can do that
My webshop is not live yet, so i can not provide a link to it 🙂
Thanks in advance
Hi Jeppe
Unfortunately I don’t know of any plugins that will help you with this. If you find something, please let me know as it would interesting to add it to this post.
Thanks
Gareth
can this be connected with DOKAN plugin
Hi
Yes, the plugin will work with Dokan but your vendors will not be able to configure add-on fields from the front end. This will need to be done from the admin.
Thanks.
Hi,
I’m looking for an all in one plugin for my “Personalised gifts” website. The easy part is getting a plugin for the sublimation services, but I will also need a plugin for the laser engraving and laser cutting services. I want my customers have the opportunity to have the same options as sublimation, but in a laser engraving format.
Hi Kim
Could you give some more details about what options you would like to have on the product page?
Thanks.
Hi 🙂
Can I attach a video file and send it with a personal greeting?
Hi
Yes, you can allow users to upload video files and enter a custom text message.
Thanks.
Amazing, thank you for your quick reply. Any chance to test this before buying the plugin? Also – can the process be translated to other language using TranslatePress?
Hi
Yes, the plugin is fully translatable. We don’t have a demo version but we do have a 14 day money back guarantee. I’d be happy to refund you if the plugin doesn’t meet your expectations in any way.
Thanks.
Can we design our custom fields according to our own requirement – For example making border outside of the field and style it ?
Hi
Yes, you can update some styles directly through the Customizer or apply your own CSS for more advanced design options.
Thanks.