How to add engraving options to WooCommerce products [+ video]

If you would like to add engraving options to your products in WooCommerce, you will probably want to add a field for the user to enter some text. You might also want to add other options like checkboxes or even a file uploader.
By default, WooCommerce doesn’t give you these features so you’ll need a plugin.
WooCommerce engraving plugin
WooCommerce Product Add-Ons Ultimate is designed for personalizing products with engraving options. It’s used on thousands of websites and is compatible with any WordPress theme.

WooCommerce Product Add-Ons Ultimate
The perfect plugin for engraving products in WooCommerce
With WooCommerce Product Add-Ons Ultimate, you can:
- Add one or more text fields to your products for users to enter the text they want to be engraved
- Specify the minimum or maximum number of characters to be engraved
- Set a cost for the engraving – or even specify a cost per letter if you like
- Charge a setup fee
- Include other options like color, style, material, etc
It’s also got more advanced features, should you need them, including:
- Conditional logic if you only need to display certain options in certain circumstances
- Add options globally so you can add custom fields to multiple products from one place
In this article we’ll look at very clear and simple steps to add an engraving option to your WooCommerce products, some different ways to charge for it, and some further parameters like setting the number of characters allowed.

We’ll also look at how you can provide a live preview of the engraving on the main product image.
It will take you only a few minutes to get your engraving product up and running.
How to add an engraving product to WooCommerce – video
This video includes exactly the same steps as this tutorial:
Examples of engraved products
In this example, we’ll look at adding an engraving option to a ring – but you can apply the same techniques to any product that can be engraved:
- Jewelry: it’s not just wedding bands that can be engraved. Jewelry is one of the most popular product types to get engraved, especially as a gift
- Pens: engraved pens are an ideal gift or presentation
- Plaques and awards: add custom engraving with the winner’s name and achievement to awards, cups, medals and so on
- Trophies: like plaques, these will often need to have the recipient’s details etched or engraved
- Glasses and tumblers: glass can be laser engraved with a personalized message
- Watches: watches and clocks are another popular gift item to get engraved with a personal message
- Pet tags or key rings: these both might need the owner’s details etched or stamped
How to create an engraved product in WooCommerce
In our example product, the user can choose the material for their ring and enter their text to be engraved. At the end of this tutorial, we’ll also look at how the user can preview their text live on the main image.
You can also check out the working demo product here.
In this example, we’ve used the Storefront theme but you can use any WordPress theme you like.
Step 1: Install Product Add-Ons Ultimate
Once you’ve downloaded WooCommerce Product Add-Ons Ultimate, you can add it to your WordPress site just like any other plugin. Simply go to Plugins > Add New then select the option to ‘Upload Plugin’. Browse to the downloaded zip file on your computer and upload it.
Once it’s uploaded, just click ‘Activate’ and you are ready to start adding options to your product.
Step 2: Create the engraving product
If you haven’t already created your engraving product, you can add a new product now. Give it a title and price, upload an image, and add any other details you need.
Step 3: Create an option to select the metal type
If you’d like to allow your user to choose the metal type or color:
- Select the ‘Product Add-Ons’ tab in the ‘Product data’ section
- Click ‘Add Group’ then ‘Add Field’
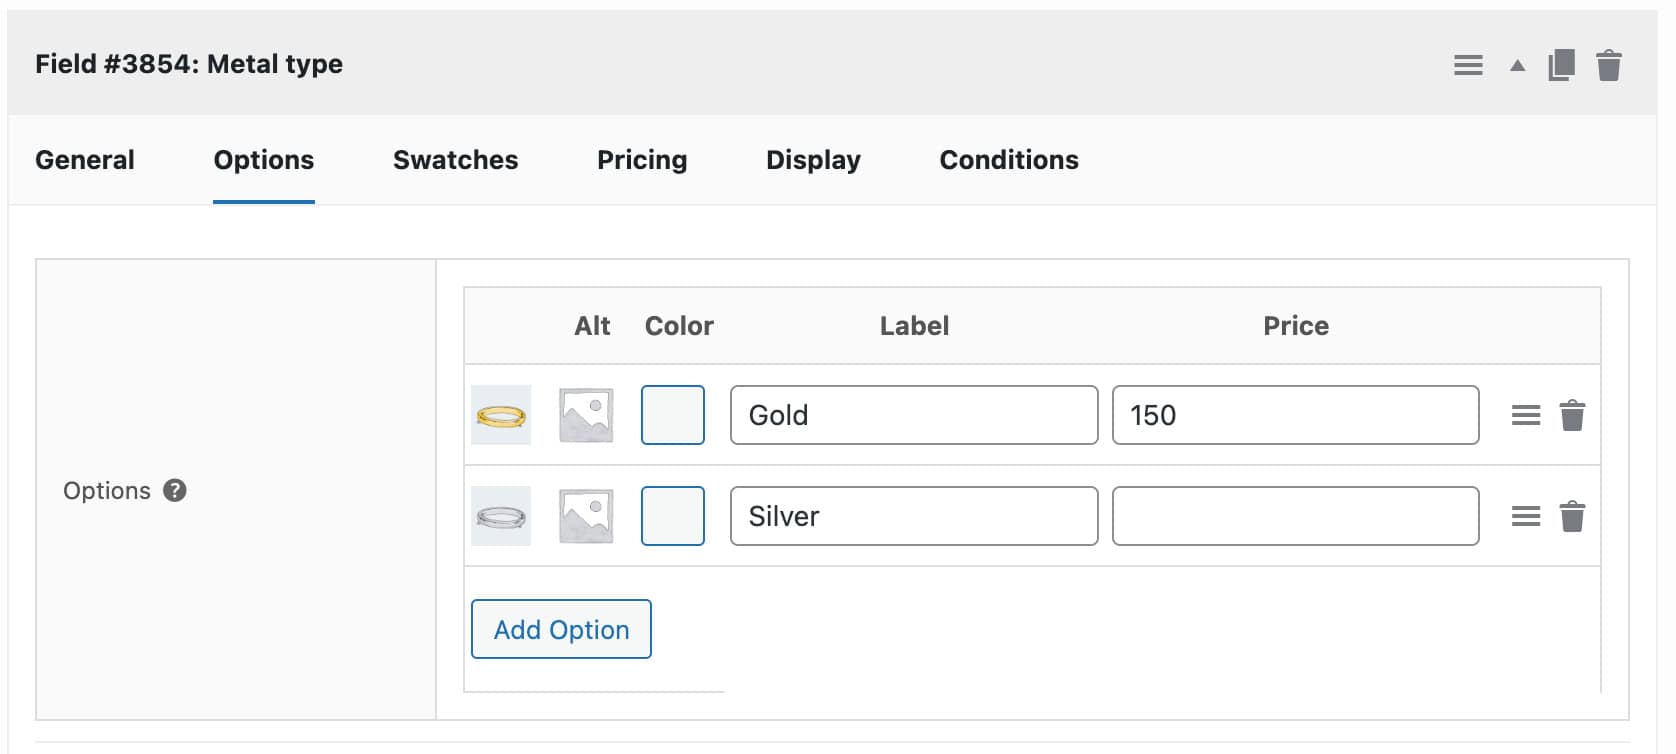
- Select ‘Swatch’ as the field type and enter a label for your field, e.g. ‘Metal type’
- Click the ‘Options’ tab
- Click ‘Add Option’ for each metal type
- Upload an image and enter a label for each type
- If you want to charge extra for some options, enter the additional cost per option
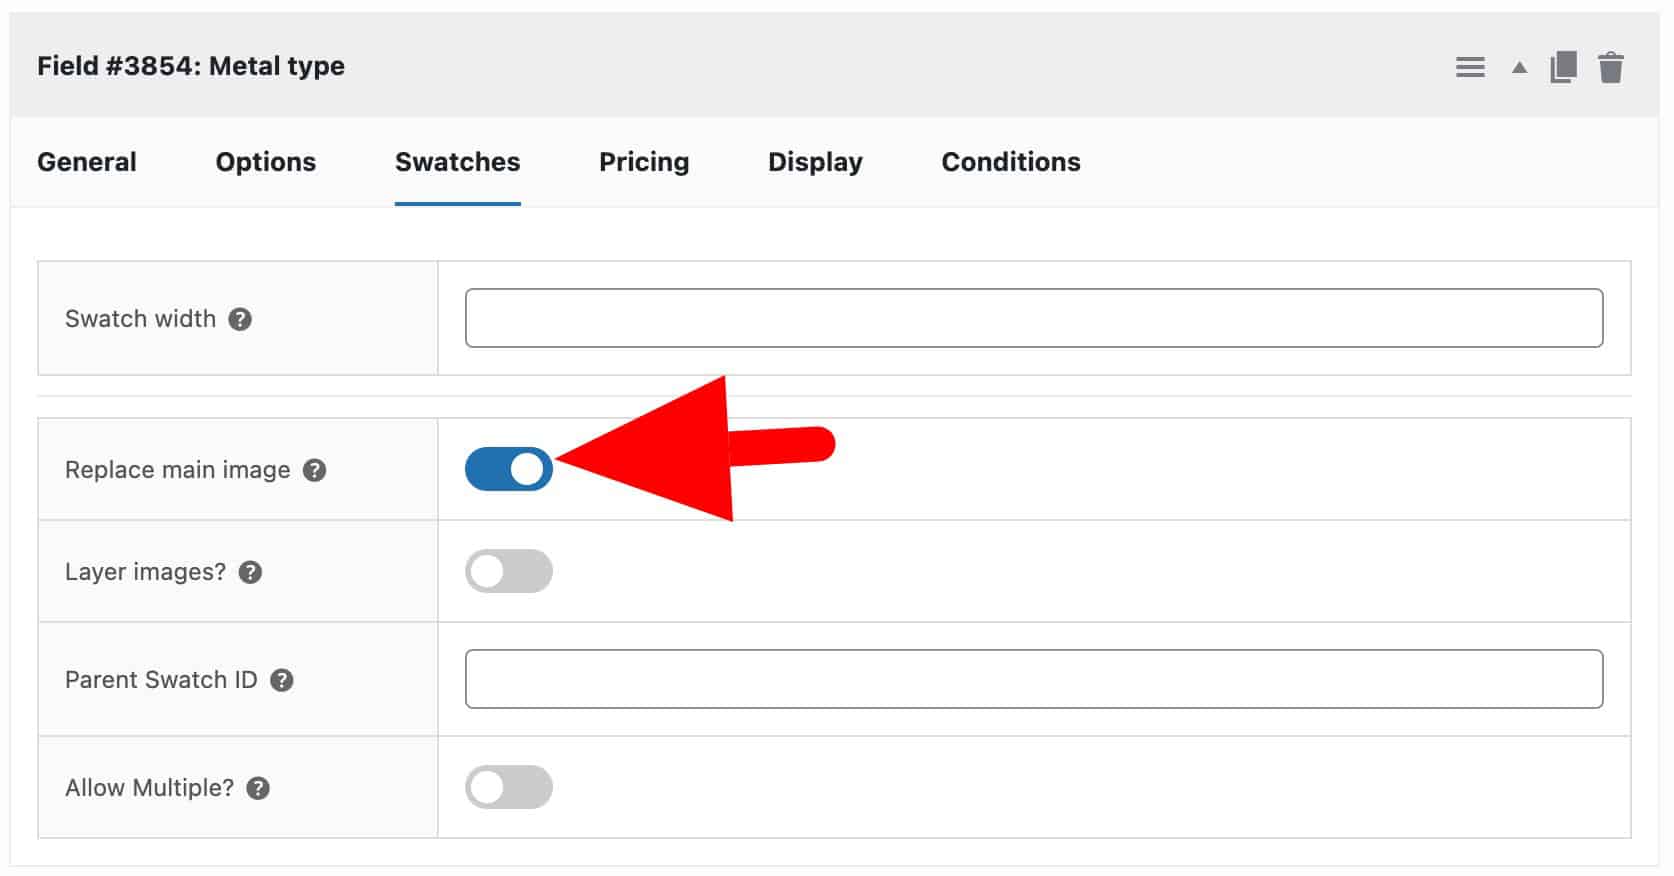
If you would like the main product image to update when the user selects new metal type, just select the ‘Replace main image’ option on the ‘Swatches’ tab.
If you prefer, you could just use a ‘Select’ field here, which would just display the metal types as text rather than images. Or you could even use variations. Either is fine.
Step 4: Create a custom text field
To add an option for the user’s custom text to be engraved:
- Select the ‘Product Add-Ons’ tab in the ‘Product data’ section
- Click ‘Add Group’ then ‘Add Field’
- Select ‘Text’ as the field type
- Add a field name and other other details
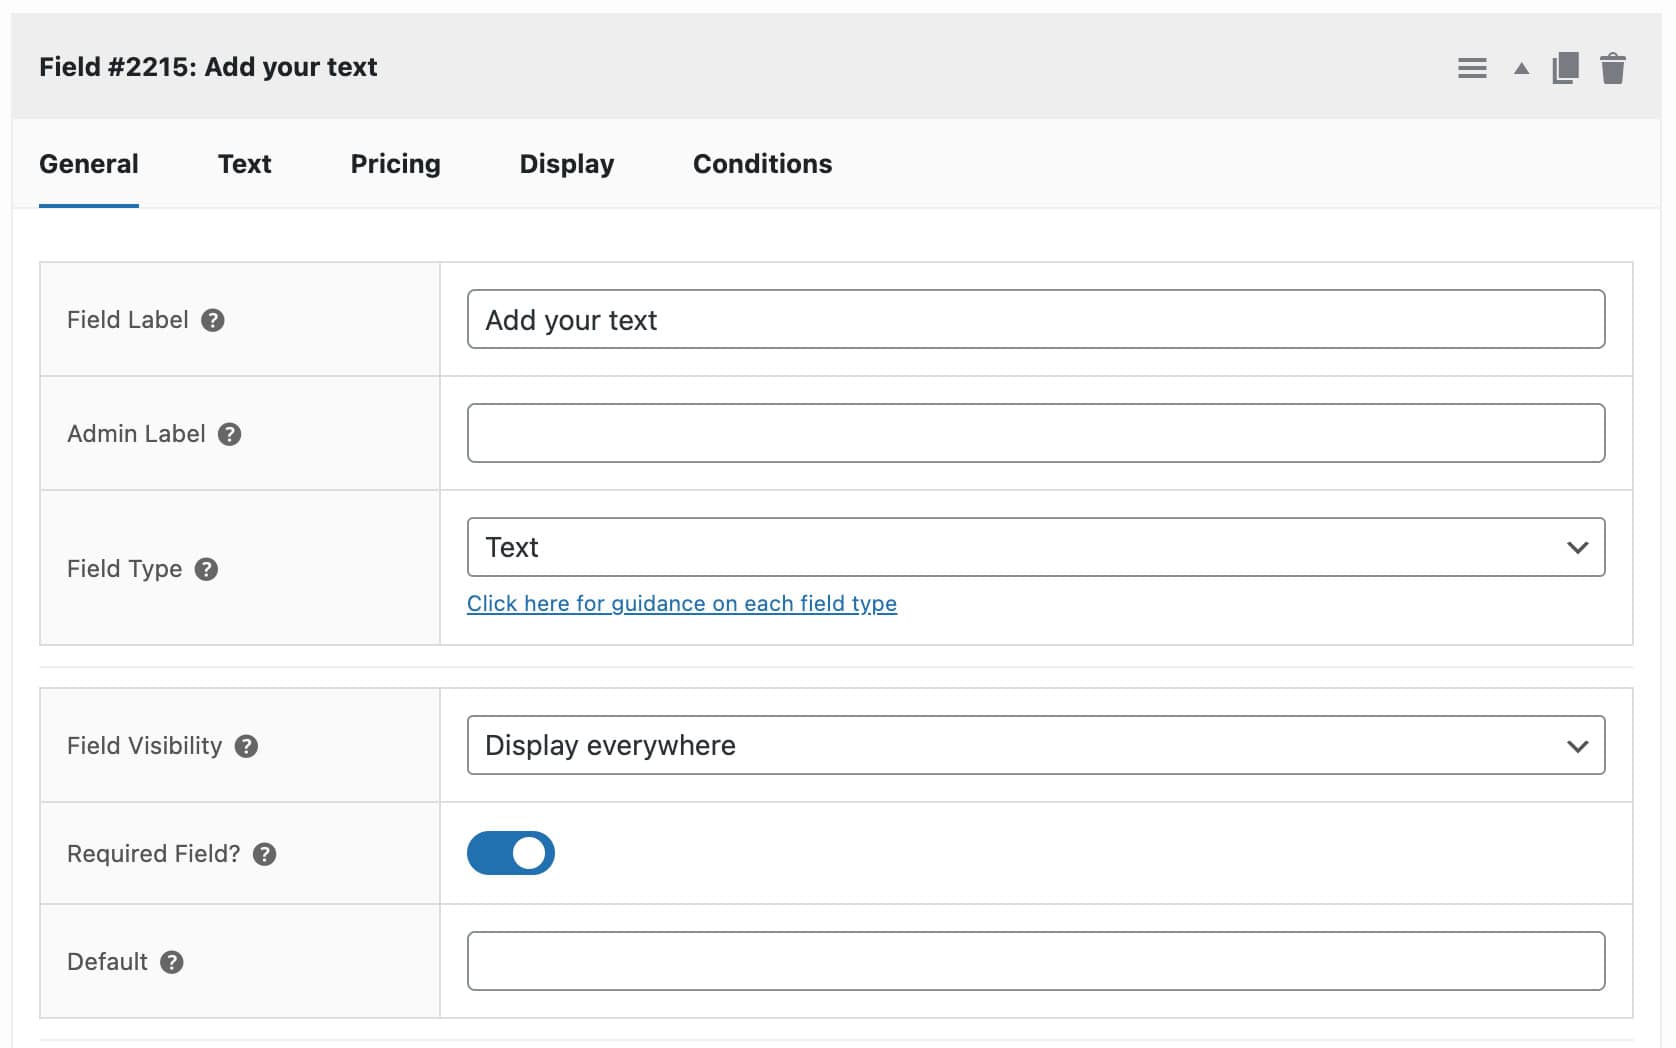
You can add as many text fields as you like.
Step 5: Pricing options for the engraved text
Product Add-Ons Ultimate gives you great flexibility on how you can set prices for text fields.
Add a single price for the engraving
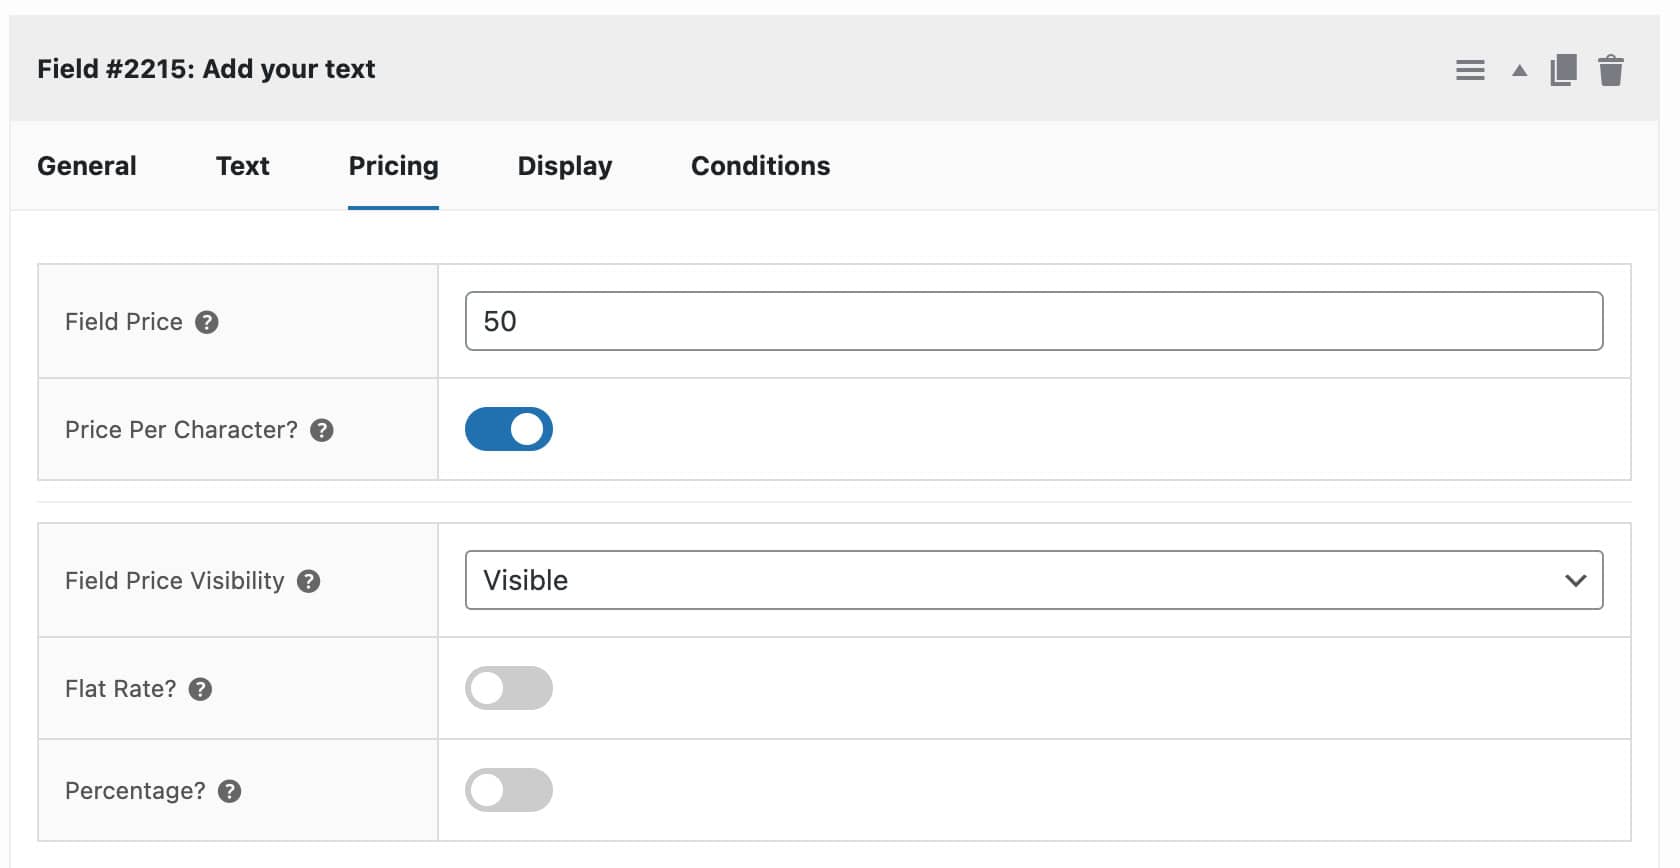
To add a cost for the engraving, just enter the value in the ‘Field Price’ field on the ‘Pricing’ tab. This will be displayed on the front end. When the user enters some text into the field, the extra cost will be added to the product price.
Charge a price per character
If you prefer, you can charge per character.
To do this, just enable the ‘Price Per Character’ checkbox. When this is selected, the value entered in the ‘Field Price’ field will be multiplied by the number of characters the customer enters.
Allow some free characters
If you’d like to allow your customers a certain number of free characters before you start charging them, just enter the number in the ‘Free Chars’ field.
Charge a fixed fee
You may wish to charge a single fixed fee for the engraving rather than a cost per item ordered. Perhaps your engraving costs are a one-off, irrespective of the number of products ordered.
If this is the case, just check the ‘Flat Rate’ option. Whatever quantity the customer orders, the engraving cost will only be charged once.
This is useful if you need to charge a single, one-off set-up fee.
Charge a percentage of the product price
Yet another cost option for your engraving product is to charge as a percentage of the product price. Just check the ‘Percentage’ option.
Step 6: Optional extra parameters for the text field
With engraved products, it’s likely that you might need to specify some additional parameters for the text. For instance, there is likely to be a limit on the number of characters that can be engraved or you might only want to allow certain characters.
Only allow alphanumeric characters
If you only want to accept alphanumeric characters, you can check the ‘Only Allow Alphanumeric’ option. Customers will only be able to type digits and upper and lower case letters into the text field.
Only charge for alphanumeric characters
Or, perhaps you only want to charge for alphanumeric characters. Checking this option means that customers won’t get charged for entering spaces in their engraving text.
Define a minimum or maximum number of characters
Space might be limited so perhaps you want to define the minimum or maximum number of characters that the user can enter. Just enter the values in the ‘Min Chars’ and ‘Max Chars’ fields.
Show a character counter
Enable the ‘Show Counter’ option to display a count of the number of characters entered in the field.
Make the engraving field required
We discussed whether the engraving field was a compulsory field. If you want to make it required, so that the customer must enter a value before adding it to their cart, just check the ‘Required’ option.
Set a default value in the engraving text field
It might be that you want to set a default value in the text field. Just enter the default value in the ‘Default’ field.
Adding a live preview for the engraving text
So far, we’ve looked at how to create an engraving product where the user can enter text and select various other options.

Now, let’s look at how to display the user’s text on the main product image. For this, we’ll need an additional plugin: Text Preview for Add-Ons Ultimate.
Step 1: Change field type to ‘Text Preview’
Once the new plugin is installed and activated, edit your engraving product and change the field type of your text field to ‘Text Preview’. Click back to the ‘Text’ tab and you’ll see some additional options.

Step 2: Position the preview field
Using the ‘Text center (X)’ and ‘Text center (Y)’ fields, you can define the position of your text preview field. By default, the field will be set to the center of the main product image but you can adjust this to place the field anywhere you like on the image.
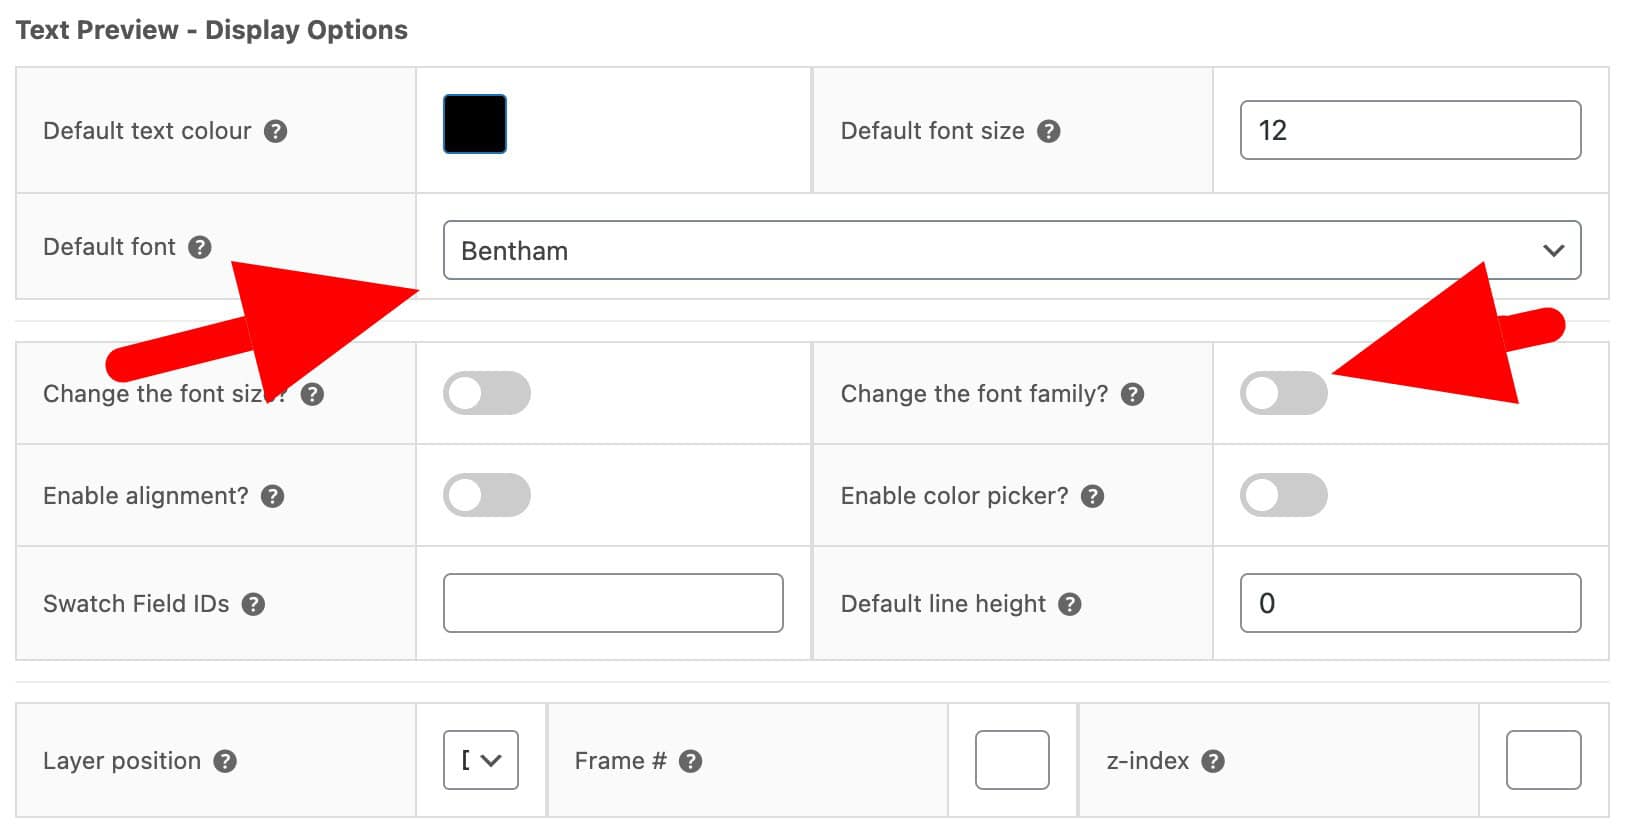
Step 3: Set font options
The Text Preview plugin automatically provides you with all Google Fonts and it also allows you to upload your own custom fonts if you wish.
If you’d like to restrict the user to only a few fonts, you can go to WooCommerce > Settings > Product Add-Ons > Text Preview and enter the fonts in the ‘Choose Google Fonts’ setting.
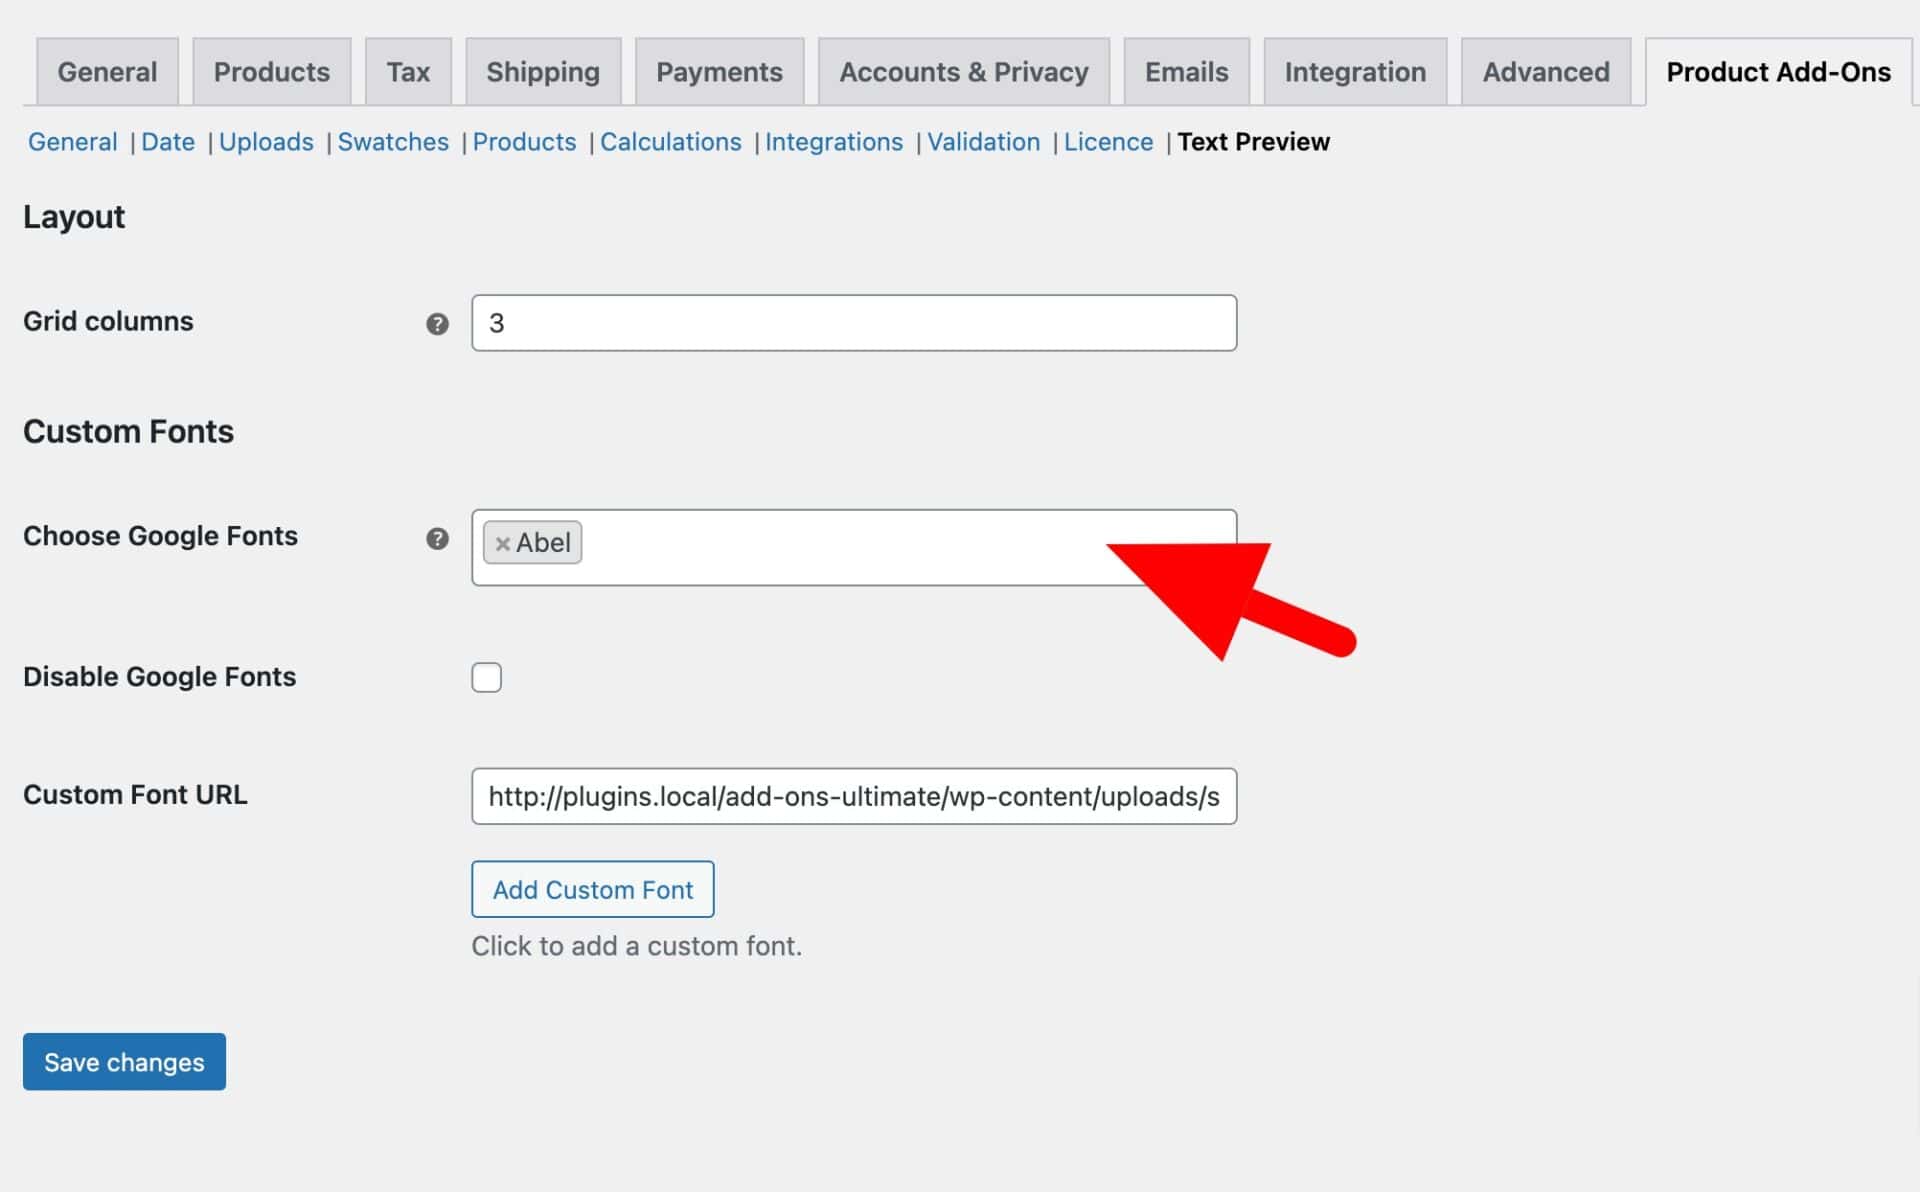
If you only want to allow the user to use one font, then select it in the ‘Default font’ setting and ensure that ‘Customers can change the font family’ is not selected.
Step 3: Set text options
If you would like to allow the user to select the text color, select the ‘Enable color picker’ option. If you would like them to be able to change the font size, select the ‘Customers can change the font size’ option.
Engraving product with live preview
Here’s a demo product of the text preview in action. Enter some text in the text field and you will see it automatically displayed on the main product image.
Creating custom engraving products in WooCommerce – recap
Adding custom engraving is crucial for some products and businesses. With WooCommerce Product Add-Ons Ultimate you can easily let your users enter their custom text and options.
WooCommerce Product Add-Ons Ultimate
The perfect plugin for engraving products in WooCommerce
And with Text Preview, you can extend Add-Ons Ultimate to let the user preview how their custom text will look engraved on the product itself.
Bonjour
en tant que plugin pour woocommerce , je suppose qu’il est compatible avec divi?
thanks
Oui, le plugin est compatible avec Divi.
Gareth
Bonjour,
Comment faire pour que le client voit un aperçu de sont produit final.
Exemple : il tape un nom sur la ligne qu’il doit graver et que sa s’affichent sur la photo du produit.
Bonjour Serif
Il n’y a pas un aperçu du produit.
Hello,
Is it possible to add upload button with custom engraving functionality?
For example,
I would like to offer to my customers custom engraving feature with possibility to add their font of choice.
Thanks.
Hi
Yes, you can add an option for the user to select their font of choice. If you want to allow users to preview their lettering in the choice of font then you can use https://pluginrepublic.com/wordpress-plugins/text-preview-plugin/.
Thanks.
Bonjour,
En plus de pouvoir choisir la police d’une ligne, est-il possible à l’utilisateur d’éditer plusieurs lignes sur un produit, et de choisir son alignement ?
Par exemple :
Dans la fabrication d’un cachet d’entreprise/tampon, je souhaiterai que l’utilisateur puisse personnaliser son texte.
PS : J’utilise Flatsome et Avada (theme wordpress)
Merci d’avance.
Bonjour
Oui, c’est possible à utiliser plusieurs champs sur un produit, un champ par ligne. C’est possible a positionier chaque ligne/champ.
Merci.