WooCommerce online opticians: accept prescriptions for glasses

If you’re an optician or optometrist, you might consider letting customers place orders for prescription glasses online. For this, you’ll need to create a WooCommerce prescription glasses product.
This way, customers can enter the details of their prescription (or upload their prescription), personalise their glasses, and place their order. And, in this tutorial, we’ll explain how you can set up your WooCommerce online optician store using the WooCommerce Add-Ons Ultimate product.
WooCommerce Product Add-Ons Ultimate
Personalize products with extra custom fields and options
How to create a WooCommerce online optician store using WooCommerce Add-Ons Ultimate
The WooCommerce Add-Ons Ultimate plugin lets you create a glasses prescription product that customers can customise before placing their order. This way they can enter their prescription details and personalise their glasses directly on the single product page.
Step #1: Create a WooCommerce product for prescription glasses
The first thing you need to do is create a new WooCommerce product for the prescription glasses. You might call it something like Prescription Glasses. The total price of the glasses depends on the customer’s prescription. For this reason, we’ll enter the product’s base price and hide the price label from the single product page.
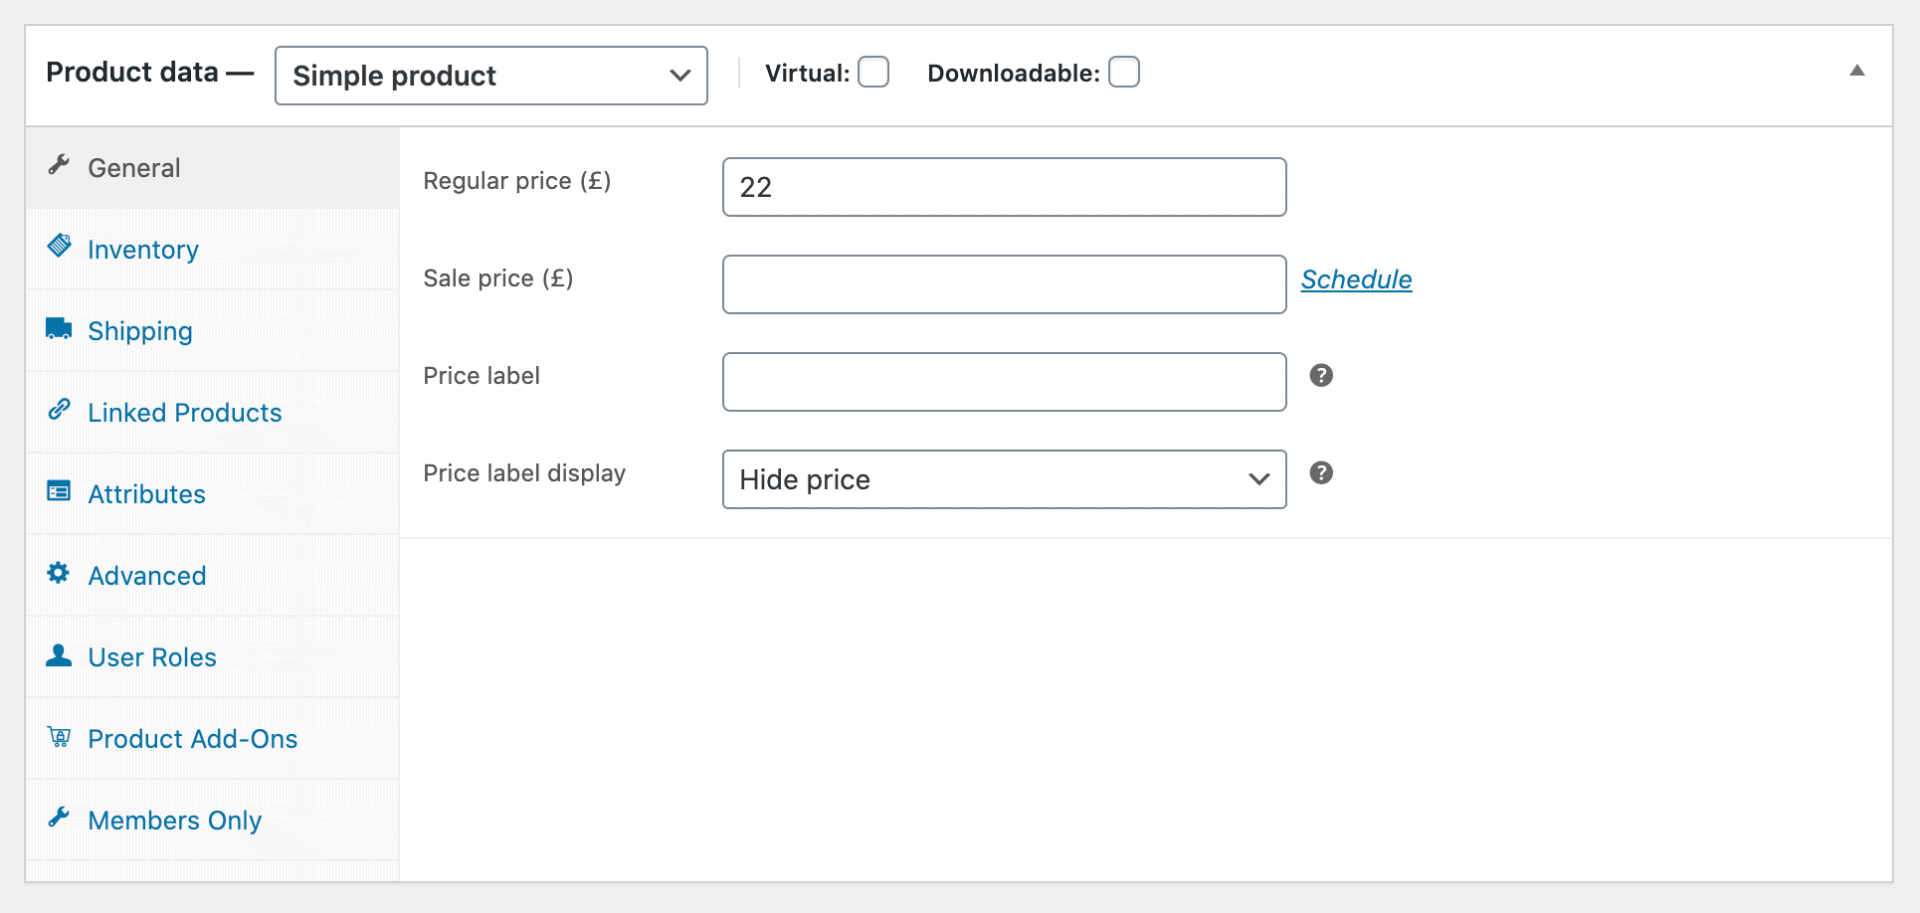
The WooCommerce Product Add-Ons Ultimate plugin will automatically calculate and display the product’s price above the ‘Add to Cart’ button.
Step #2: Create fields for entering WooCommerce glasses prescriptions
Next, we’ll create add-on fields for the WooCommerce prescription glasses product so customers can enter their prescription and personalise their glasses.
Purpose of glasses
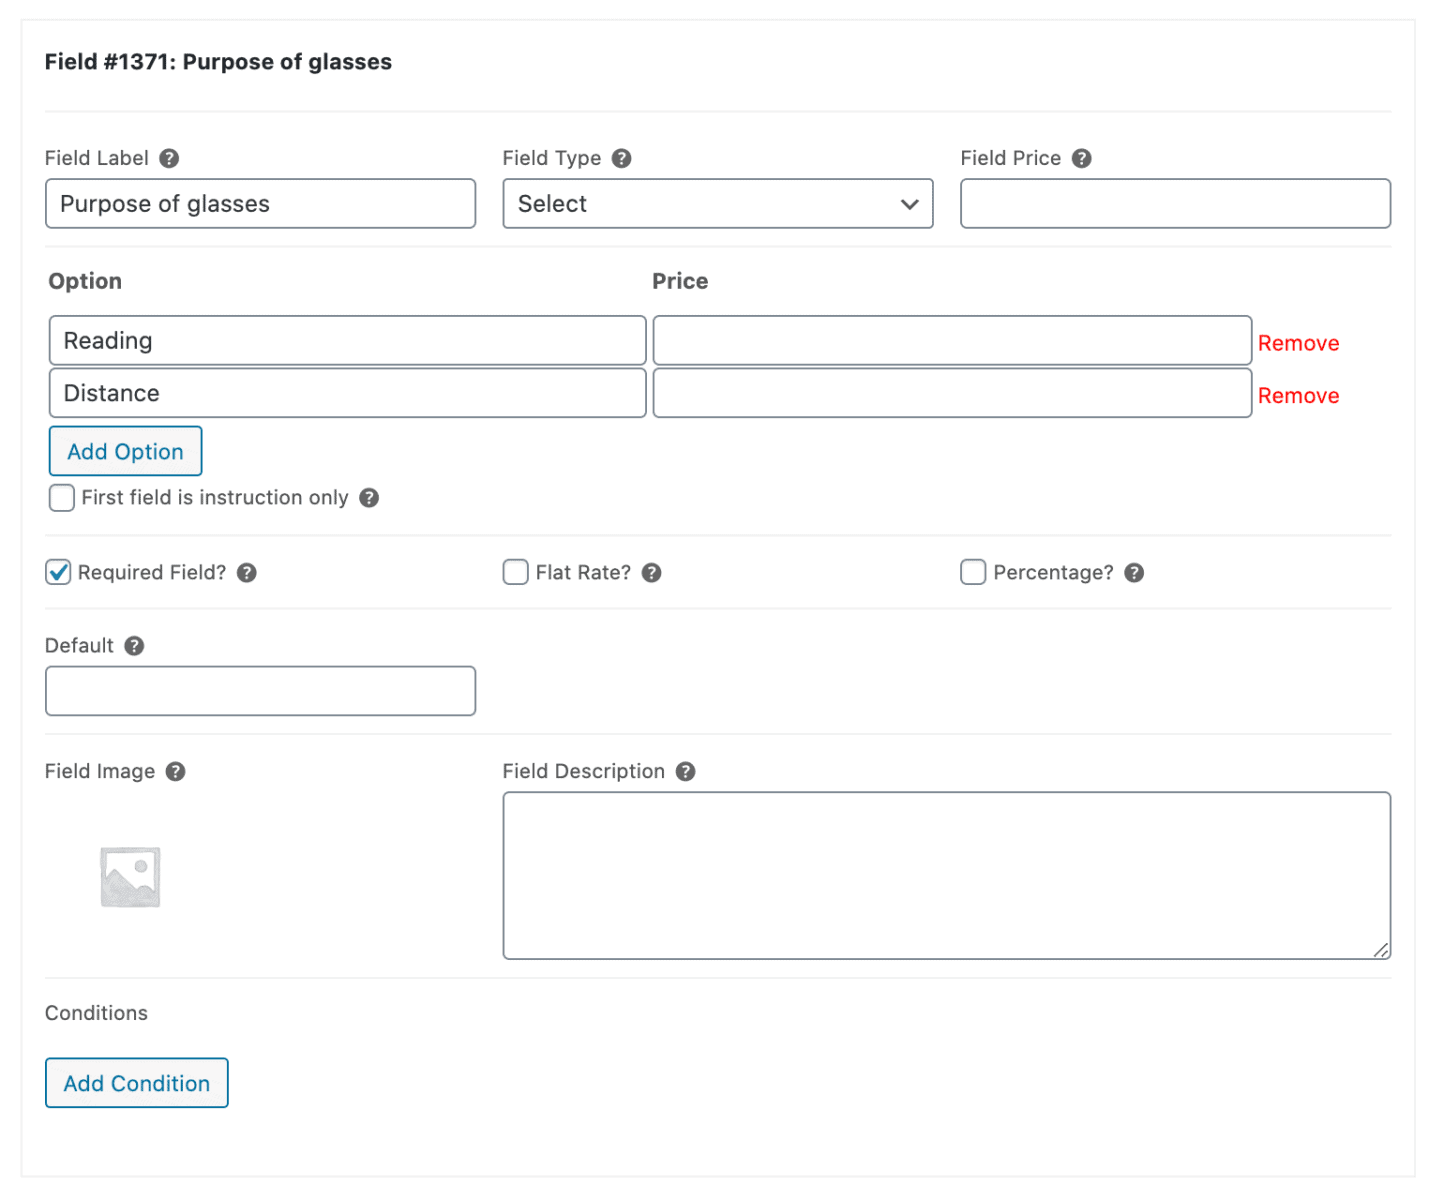
- Click the ‘Add Group’ button and then the ‘Add Field’ button
- Give the field a title and set the ‘Field Type’ to ‘Select’ using the dropdown
- Click the ‘Add Option’ button and add ‘Reading’ and ‘Distance’ as options
- Tick the checkbox next to the ‘Required Field?’ option
Sphere, Cylinder, and Axis
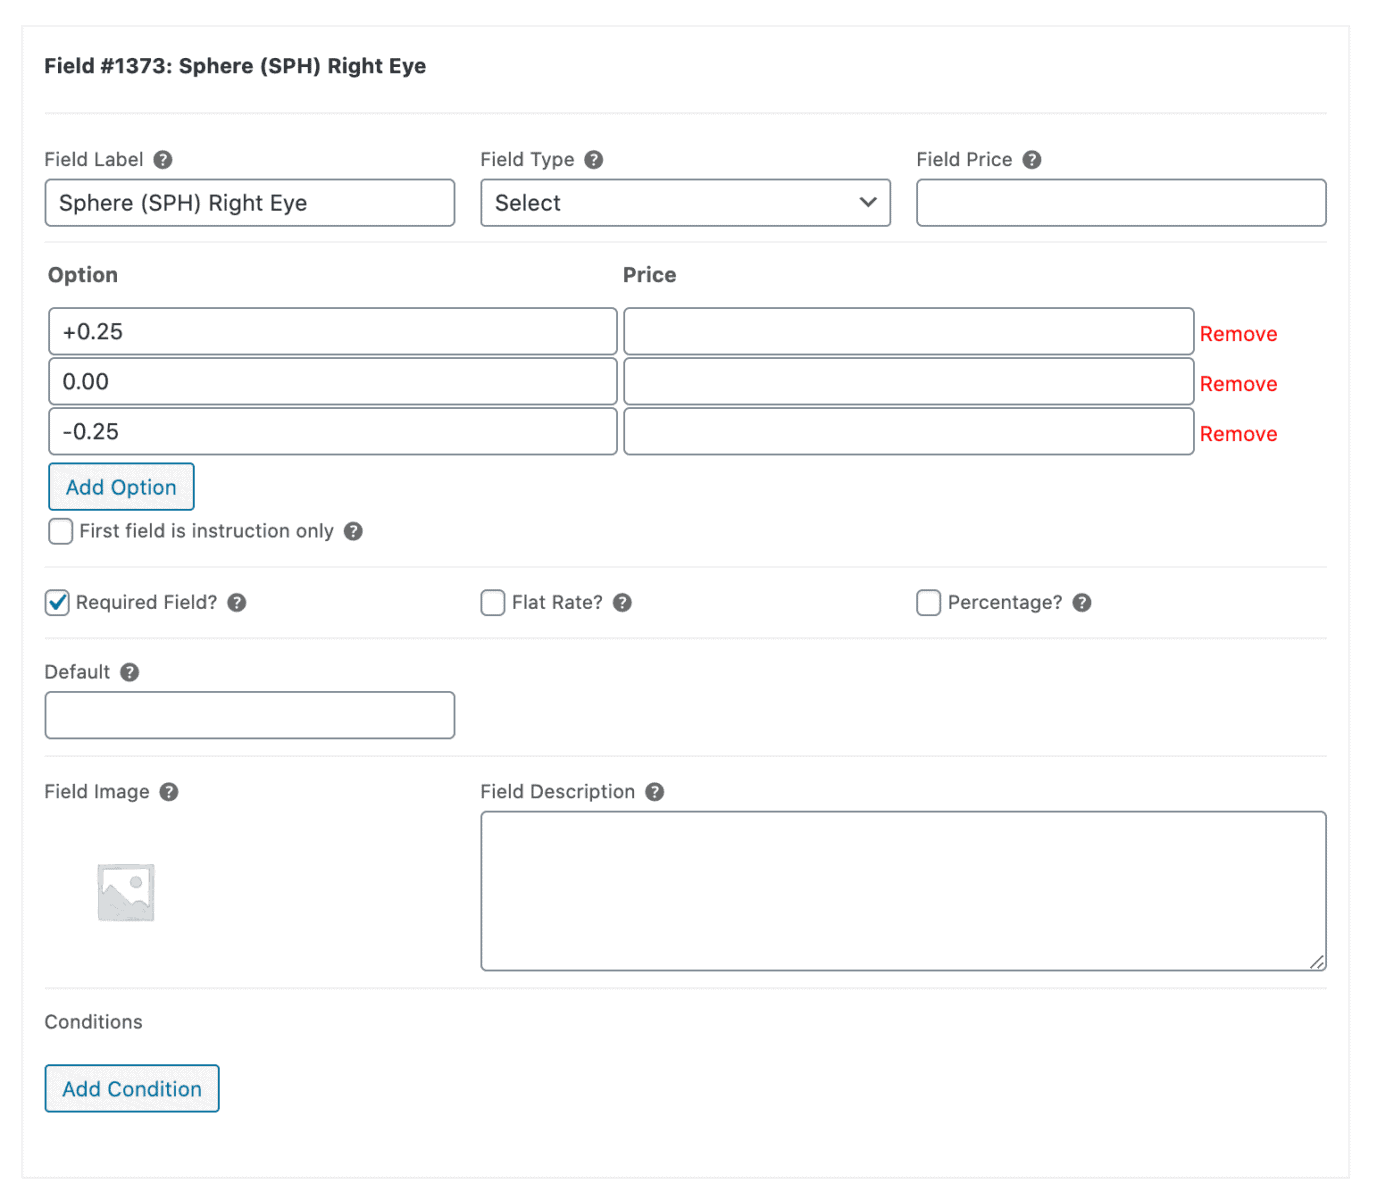
- Click the ‘Add Group’ button and then the ‘Add Field’ button
- Give the field a title and set the ‘Field Type’ to ‘Select’ using the dropdown
- Click the ‘Add Option’ button and enter the different values as options
- Tick the checkbox next to the ‘Required Field?’ option
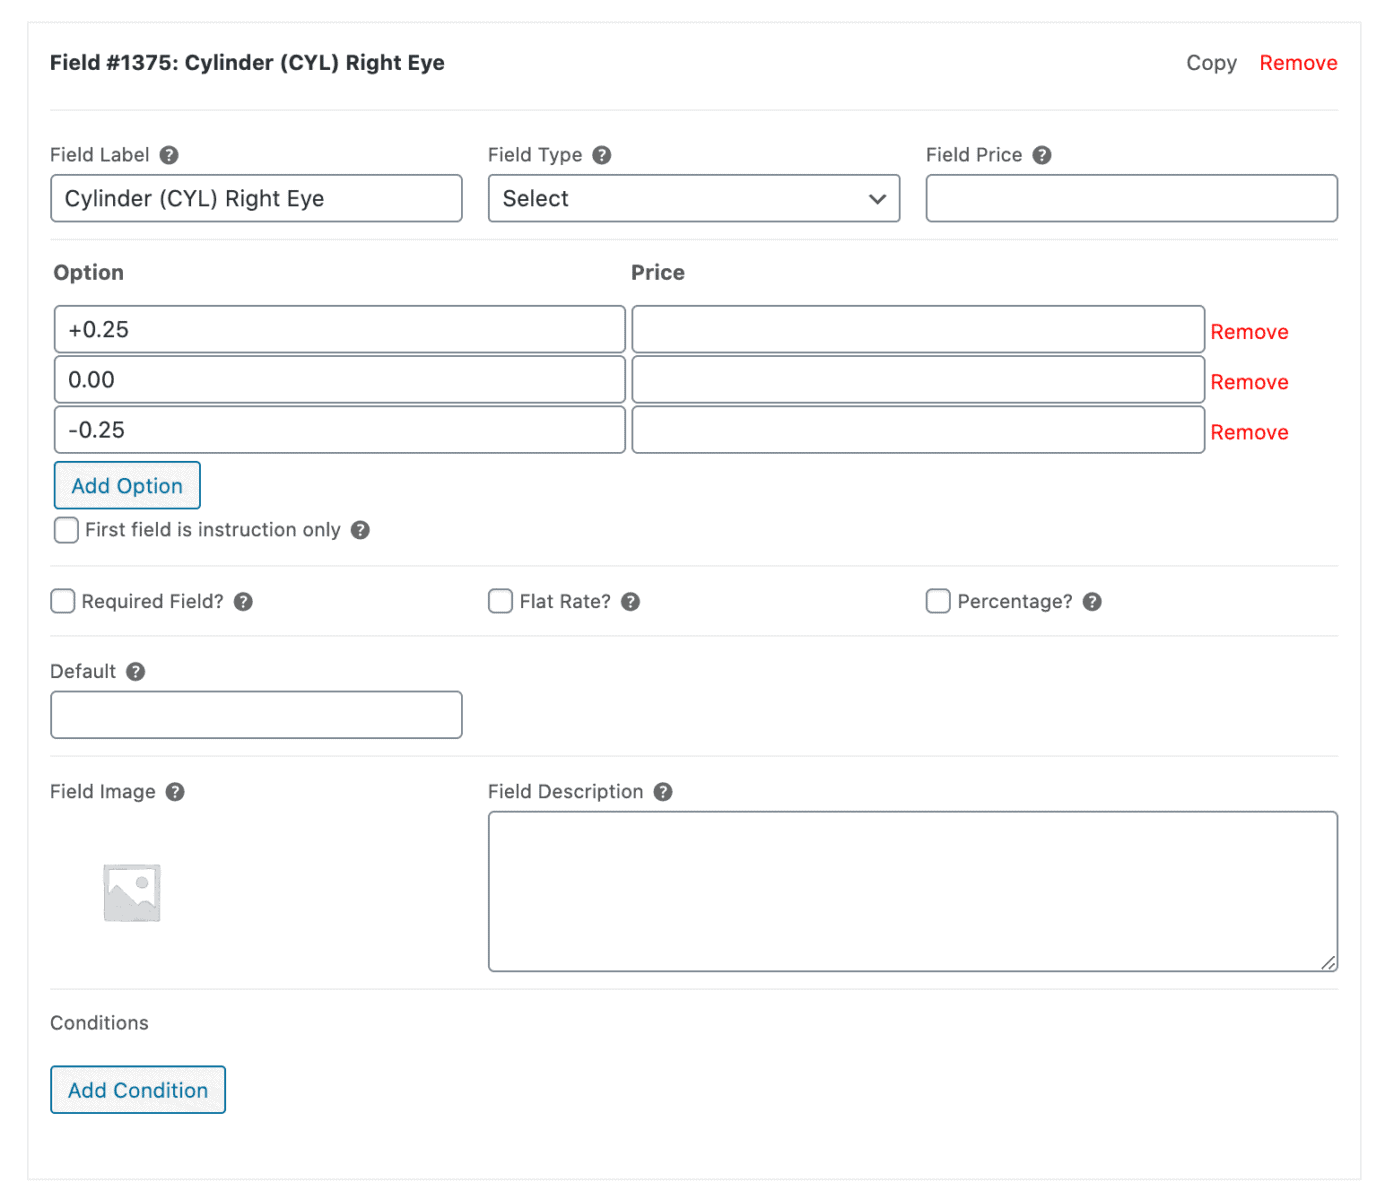
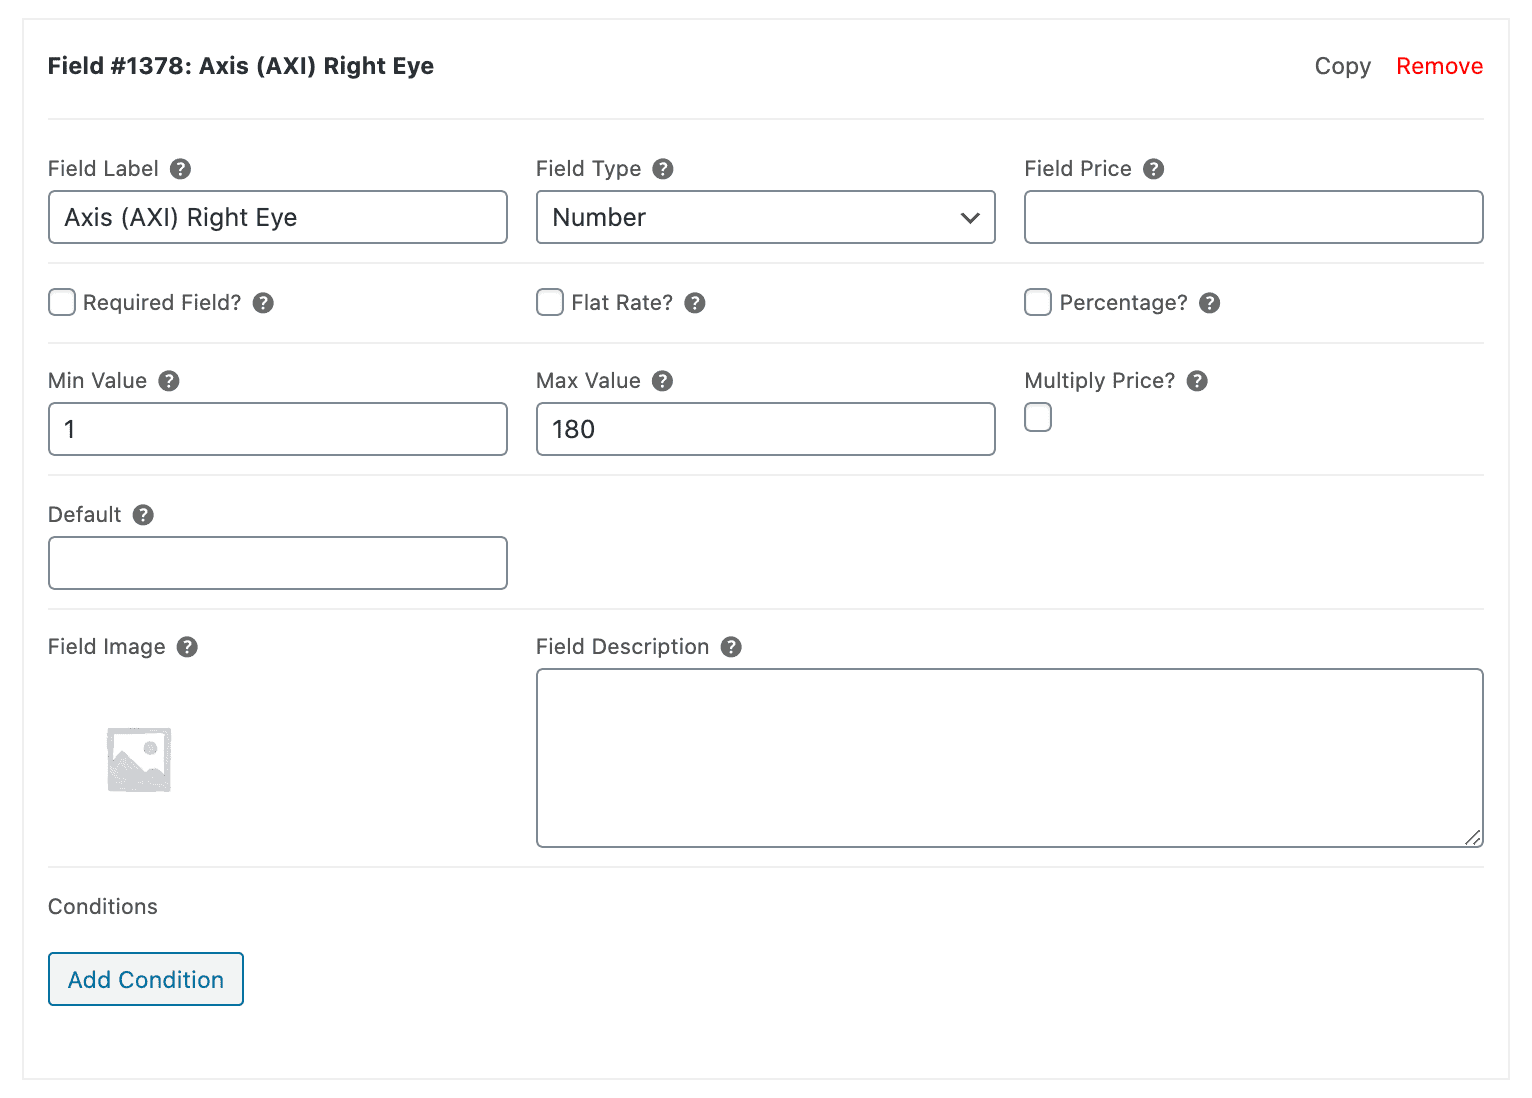
Repeat these steps to create fields for entering the Cylinder (CYL) and Axis (AXI) values for the right eye and the left eye.
Pupillary distance
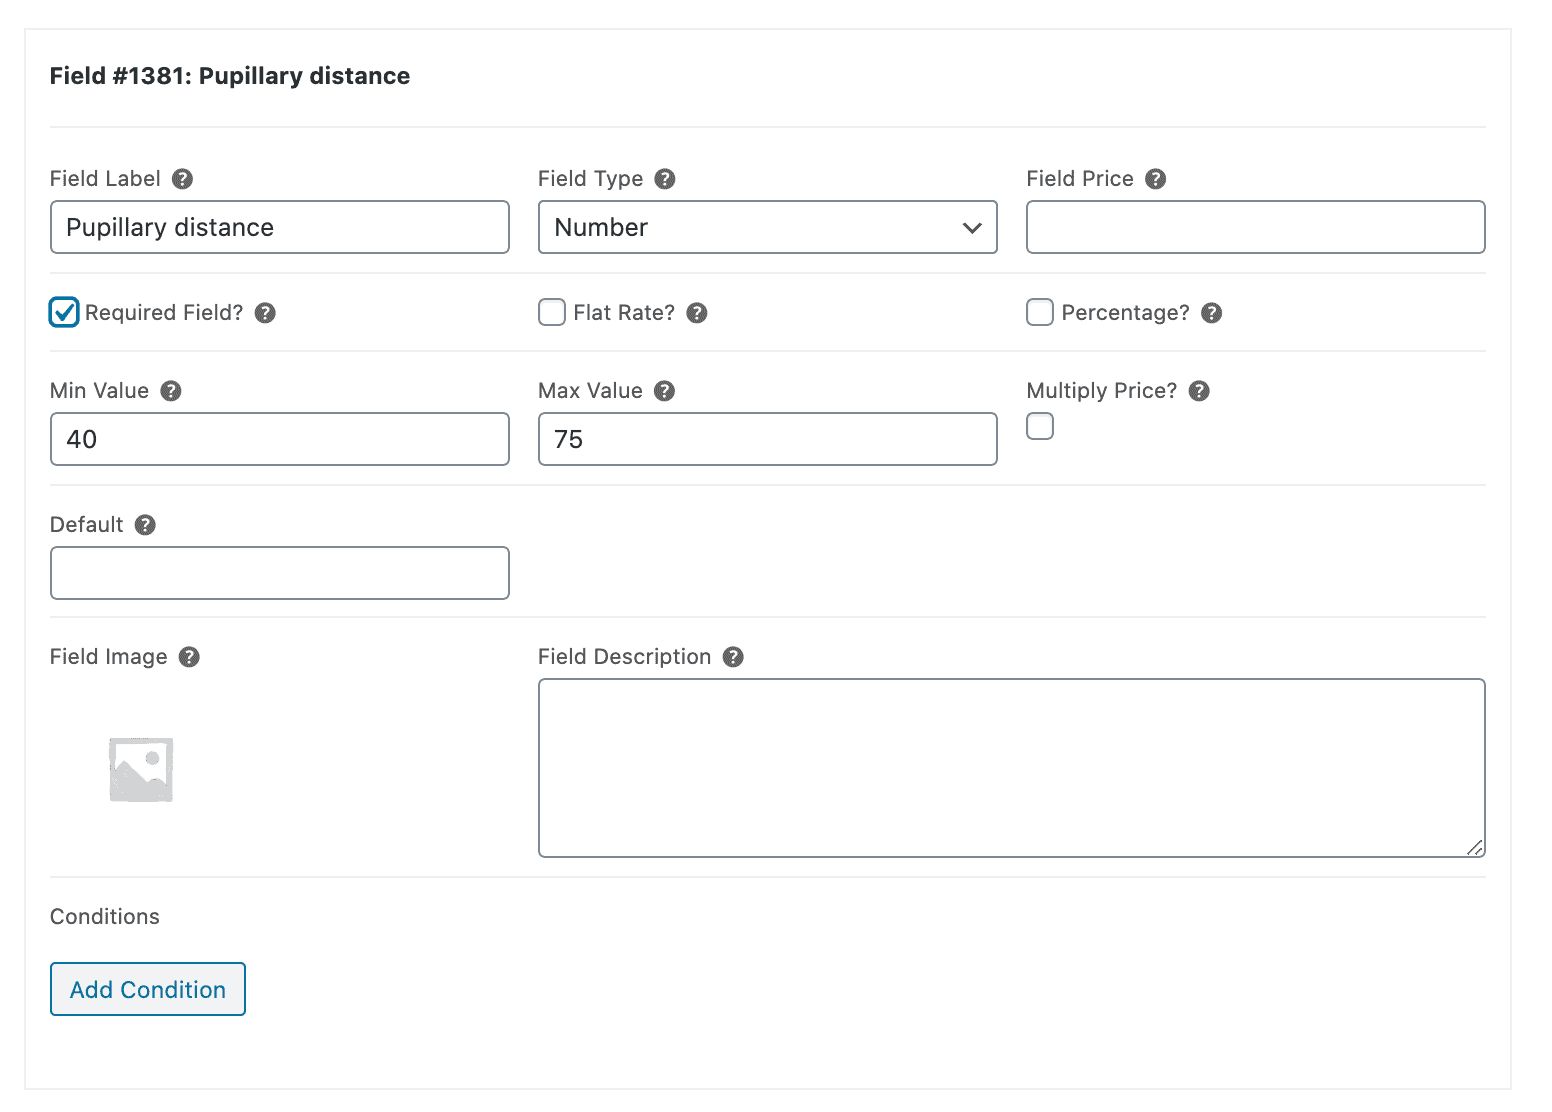
- Click the ‘Add Group’ button and then the ‘Add Field’ button
- Give the field a title and set the ‘Field Type’ to ‘Number’ using the dropdown
- Enter a ‘Min Value’ and ‘Max Value’
- Tick the checkbox next to the ‘Required Field?’ option
Prescription test date
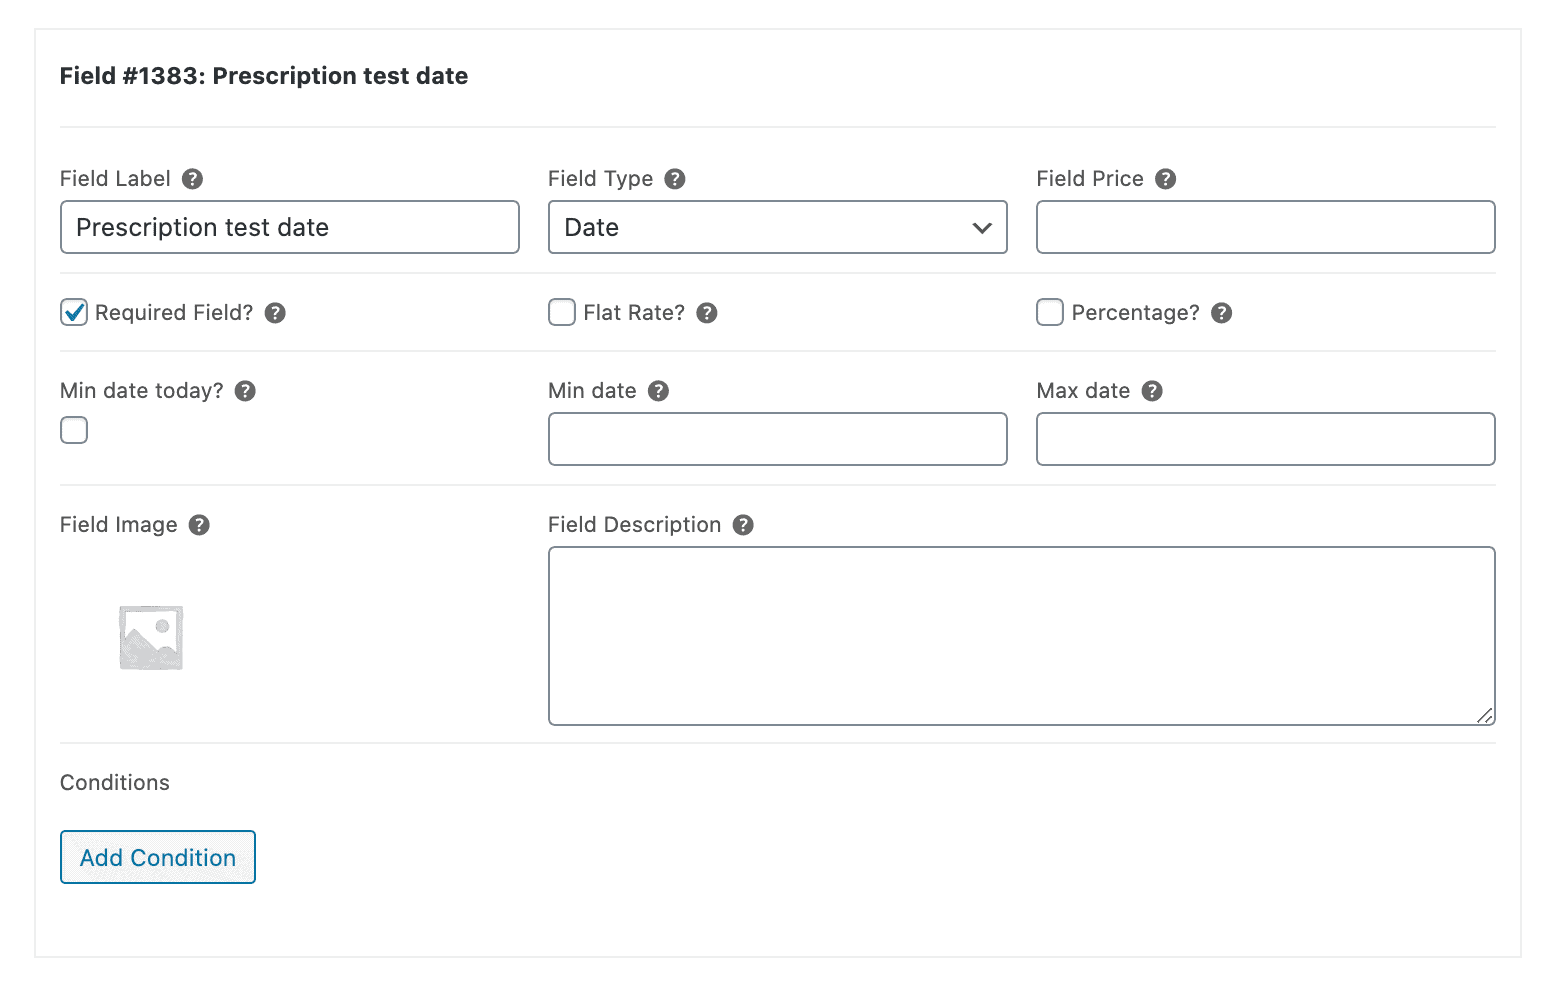
- Click the ‘Add Group’ button and then the ‘Add Field’ button
- Give the field a title and set the ‘Field Type’ to ‘Date’ using the dropdown
- Tick the checkbox next to the ‘Required Field?’ option
Upload prescription
Optionally, you can give customers the option to upload their prescription instead of entering their prescription details. Here’s how:
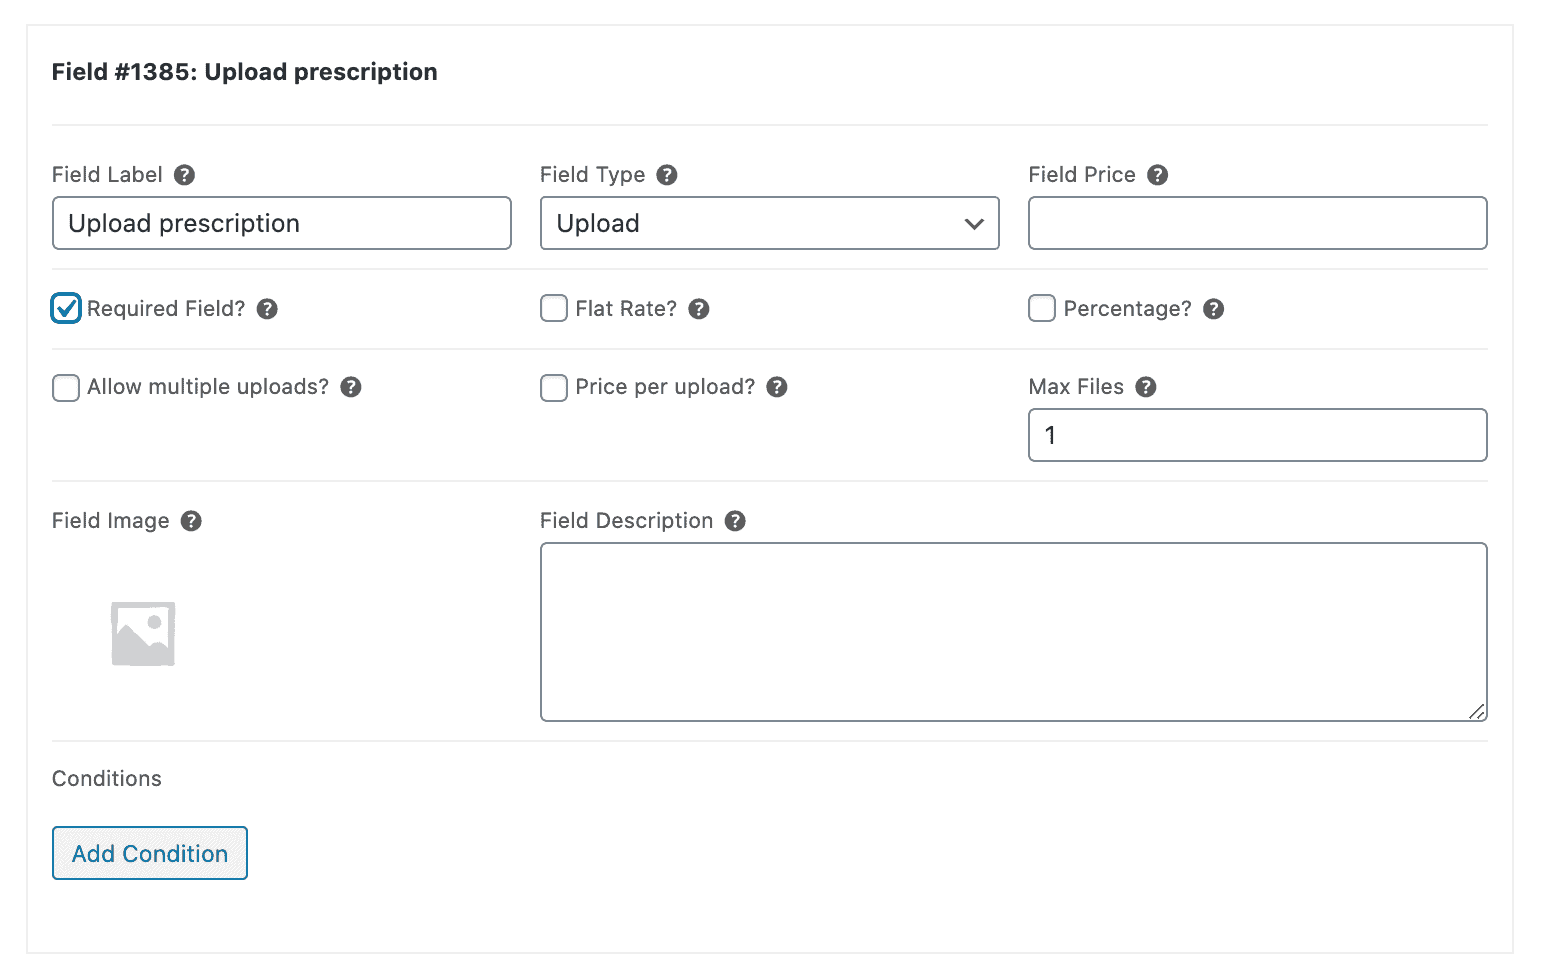
- Click the ‘Add Group’ button and then the ‘Add Field’ button
- Give the field a title and set the ‘Field Type’ to ‘Upload’ using the dropdown
- Make sure ‘Max Files’ is set to 1
- Tick the checkbox next to the ‘Required Field?’ option
Step #3: Personalise your glasses
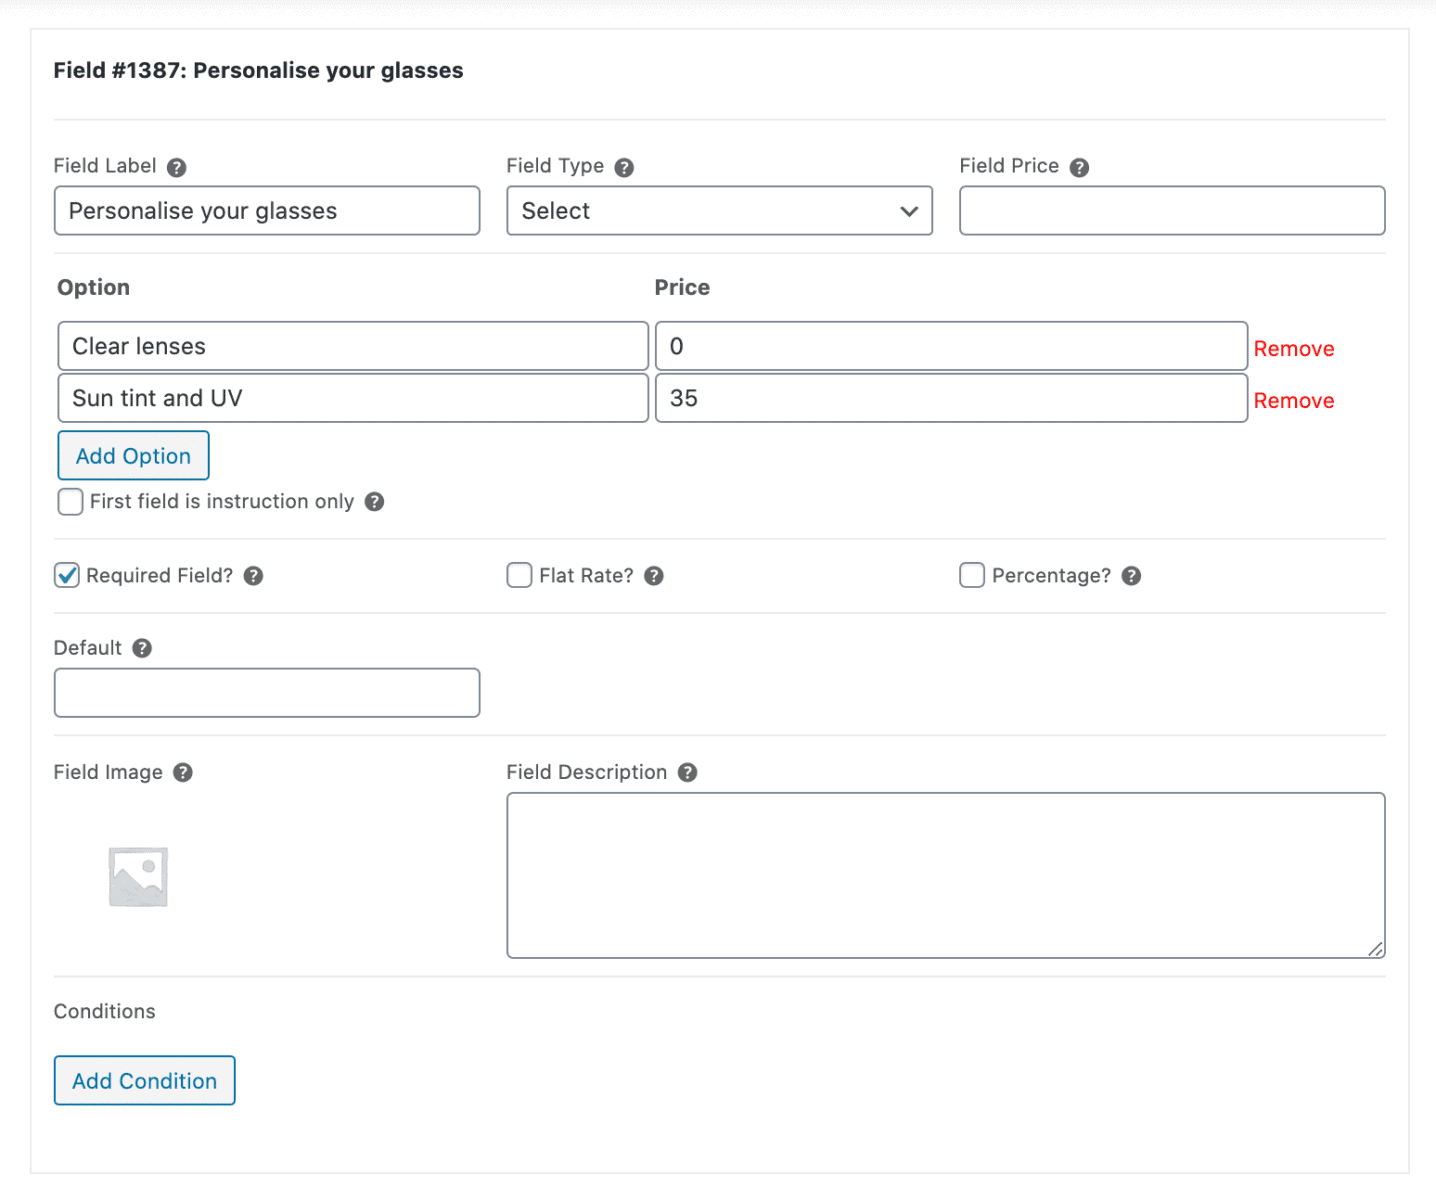
- Click the ‘Add Group’ button and then the ‘Add Field’ button
- Give the field a title and set the ‘Field Type’ to ‘Select’ using the dropdown
- Click the ‘Add Option’ button and add the different personalizations you’d like to offer as options e.g. ‘Clear lenses’ and ‘Sun tint and UV’
- Tick the checkbox next to the ‘Required Field?’ option
Step #4: View the finished product
Your WooCommerce prescription glasses product will look something like this on the front-end:
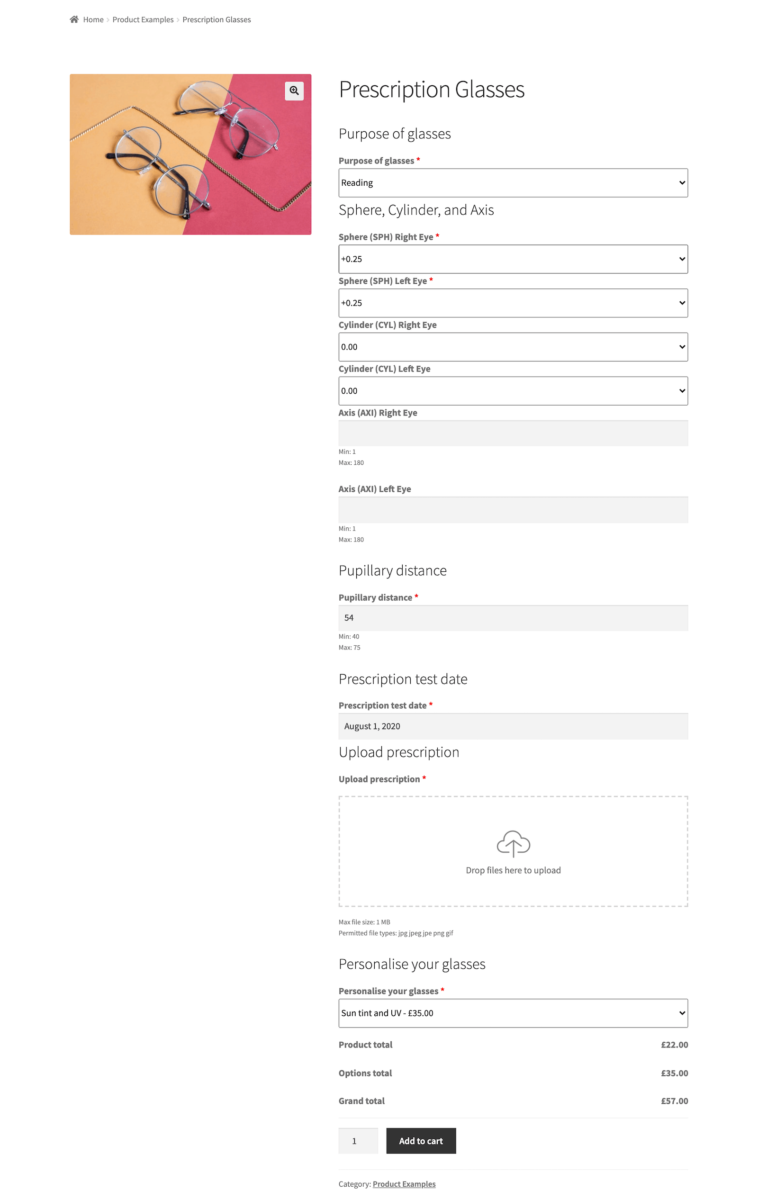
Customers can either enter their prescription details or upload their prescription using the file upload option. Once that’s done, they can personalise their glasses and place their order.
Set up your WooCommerce online opticians store today
As a WooCommerce online optician, you might consider setting up a prescription glasses product to sell custom glasses through your store.
The easiest way to do this is by using the WooCommerce Add-Ons Ultimate plugin. It lets you create add-on fields for entering prescription details or the entire prescription. You can also use it to let customers personalise their glasses before placing their order.
Also be sure to check out our tutorials on mix and match products, custom face masks, and mattress configurator product for inspiration.
Ready to start selling prescription glasses? Get WooCommerce Add-Ons Ultimate today!
WooCommerce Product Add-Ons Ultimate
Personalize products with extra custom fields and options
Are all features used in this tutorial available in the basic version of the plugin?
Hi
Yes, this tutorial only uses features from the Basic version of the plugin.
Thanks.
Hi,
Just to confirm, if I use your Basic version, I will be able to do contact lens and spectacle scripts online.
Hi
The fields used in this tutorial are all available in the Basic version.
Thanks.
Hello,
Is there anyway to get online demo to test ?
Thank you
Hi
We don’t offer free trials or backend demos but all products are backed by a 14 money back guarantee so if the plugin isn’t what you wanted, we will issue you with a refund. This allows you to spend time testing the plugin on your own environment, with your own theme and with your own plugins. It’s the best way to help you be sure that the plugin is what you want.
You can also upgrade your licence at any time – so you can purchase a Yearly licence initially then upgrade to the Lifetime licence within the first year and just pay the difference. If you have any questions during your 14 day refund period, you can raise a support ticket and we will get straight back to you.
There’s also a video here to give you an idea of the admin: https://www.youtube.com/watch?v=HwwK8co8JRM.
Thanks.
Hi,
I’m interested in this plugin to allow clients to buy glasses with prescription.
If i buy the basic for 1 year, and decide later to get the PRO, can i just pay the remaining to make it pro?
Thanks for your help
Hi Claudia
Yes, you can upgrade and just pay the difference within the first year: https://pluginrepublic.com/documentation/how-to-upgrade-your-licence/
Thanks.
I have a client interested in this plugin. There is a special request though. Are you able t or refer me to a plugin that allows the patient to view the spectacles on their face using the camera of their device.
Hi, I need to know, if it is possible to show the variations for left eye and right eye next to each other? If a client wants to buy contact lenses (or glasses) for both eyes, he needs to activate the variations by selecting a checkbox (Right Eye). To understand what I mean, you can check for example this site: https://www.misterspex.ch/p/cl/16862
Please net me know cause I urgently need this function.
Elton
Hi Elton
Yes, you can display the left and right eye options next to each other. You can also display options conditionally – so the left or right eye options could be activated when the user selects a checkbox.
Thanks.