How to create a WooCommerce gift box product
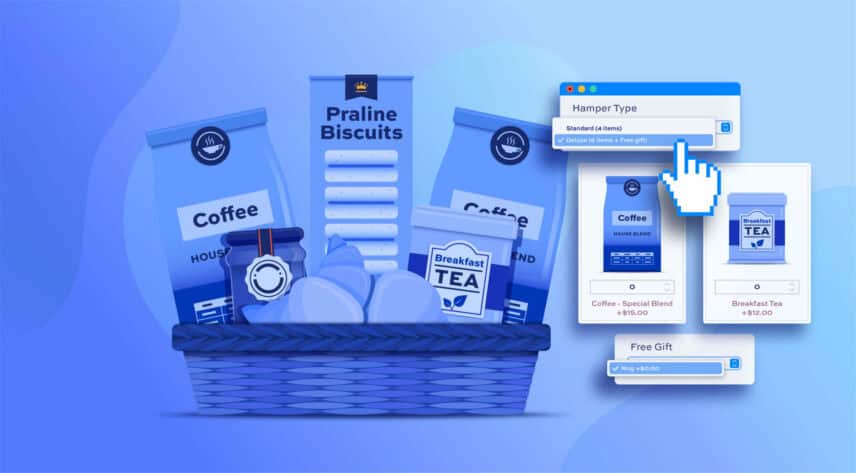
In this short tutorial, we’ll look at creating a gift box or gift hamper product in WooCommerce using composite products. Typically, a gift box is a single product assembled from other products. The user can pick and choose which products they want to go into their gift box.
WooCommerce doesn’t allow you to do this so you’ll need an additional plugin: WooCommerce Product Add-Ons Ultimate. The Pro version is required for this tutorial.
Create a WooCommerce gift box product
Our example will be a breakfast hamper. The user can choose different sizes of hamper and this will determine how many items they pick to include in the hamper.
We’ll also include the option to give the customer a free gift if they pick the larger hamper.
Step 1: Install WooCommerce Product Add-Ons Ultimate
Follow the step above to install and activate Add-Ons Ultimate. Don’t forget: you’ll need the Pro version.
WooCommerce Product Add-Ons Ultimate
Personalize products with extra custom fields and options
Step 2: Create each gift item as a product
In this example, customers are going to be able to choose a certain number of items to fill their food hamper / gift box. Depending on the size of hamper they choose, they’re going to be able to add different teas and coffees.
Then, if they select the ‘Deluxe’ hamper, they get a free mug.
In the demo product, we’ve created several coffee, tea and mug products as individual standalone products. You can do the same for your own hamper items.
Step 3: Create the hamper product
With all your items added, you can create the main product. The hamper is just a composite product made up of different components – in this case, teas and coffees.
Step 4: Set gift items as add-on fields in the hamper / gift box
We’re going to create some add-on fields for our hamper product:
- A select field for the user to select the size of hamper or gift box
- Two products fields where we’ll enter the component products. Only one of these fields will be displayed at any one time, depending on the value of the select field
- Another products field for the free mug. This will only be displayed if the customer chooses the deluxe option in the select field
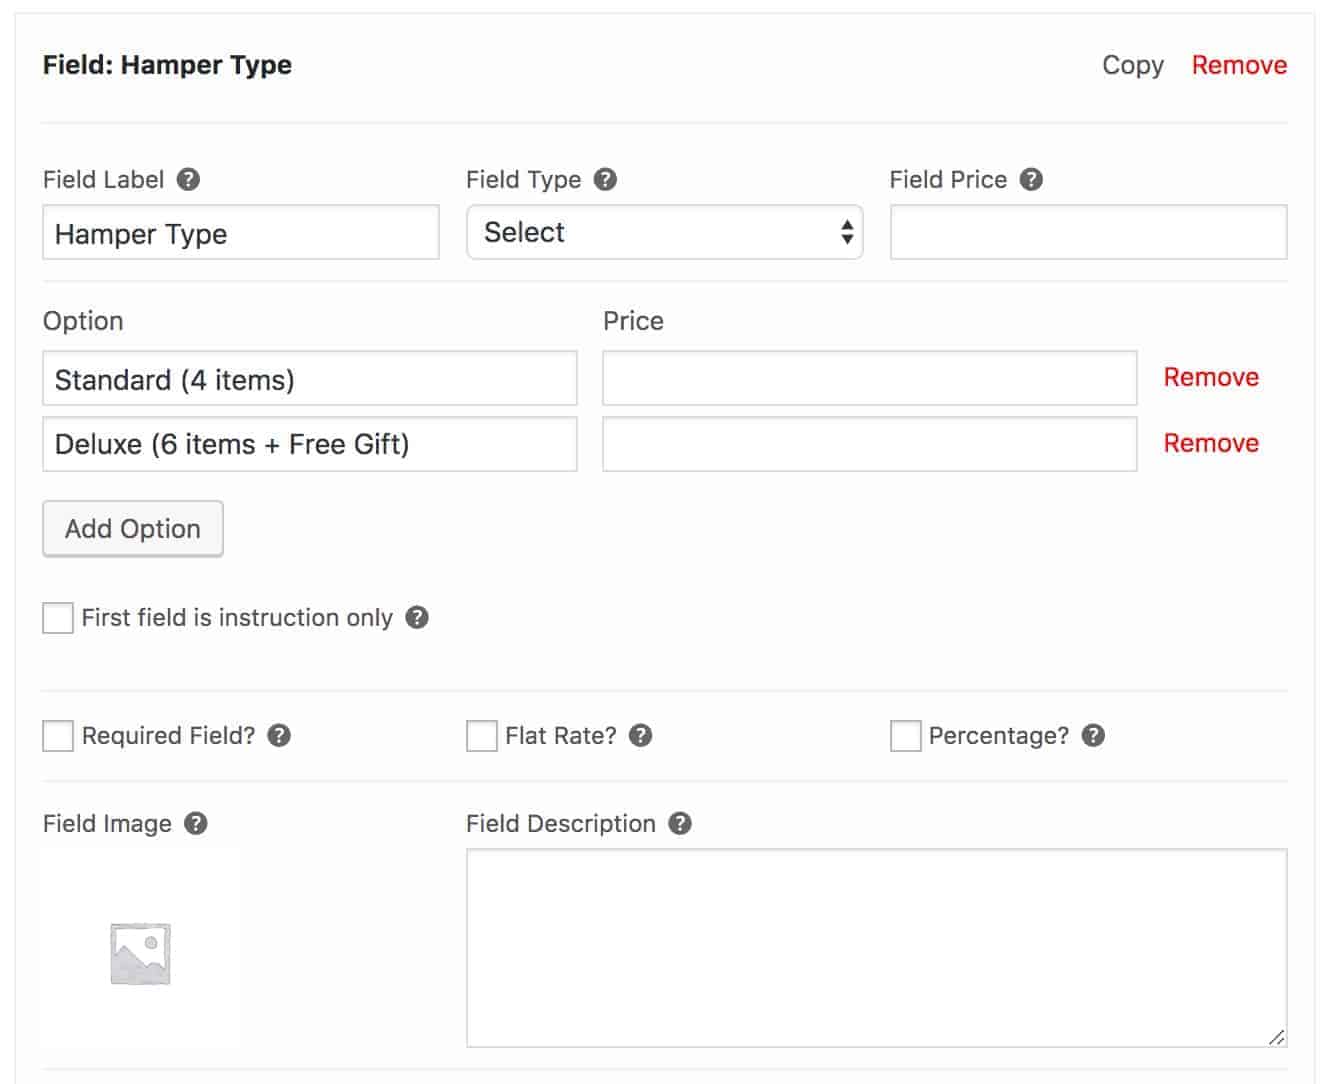
Create a select field
In your gift box / hamper product, click on the ‘Product Add-Ons’ tab:
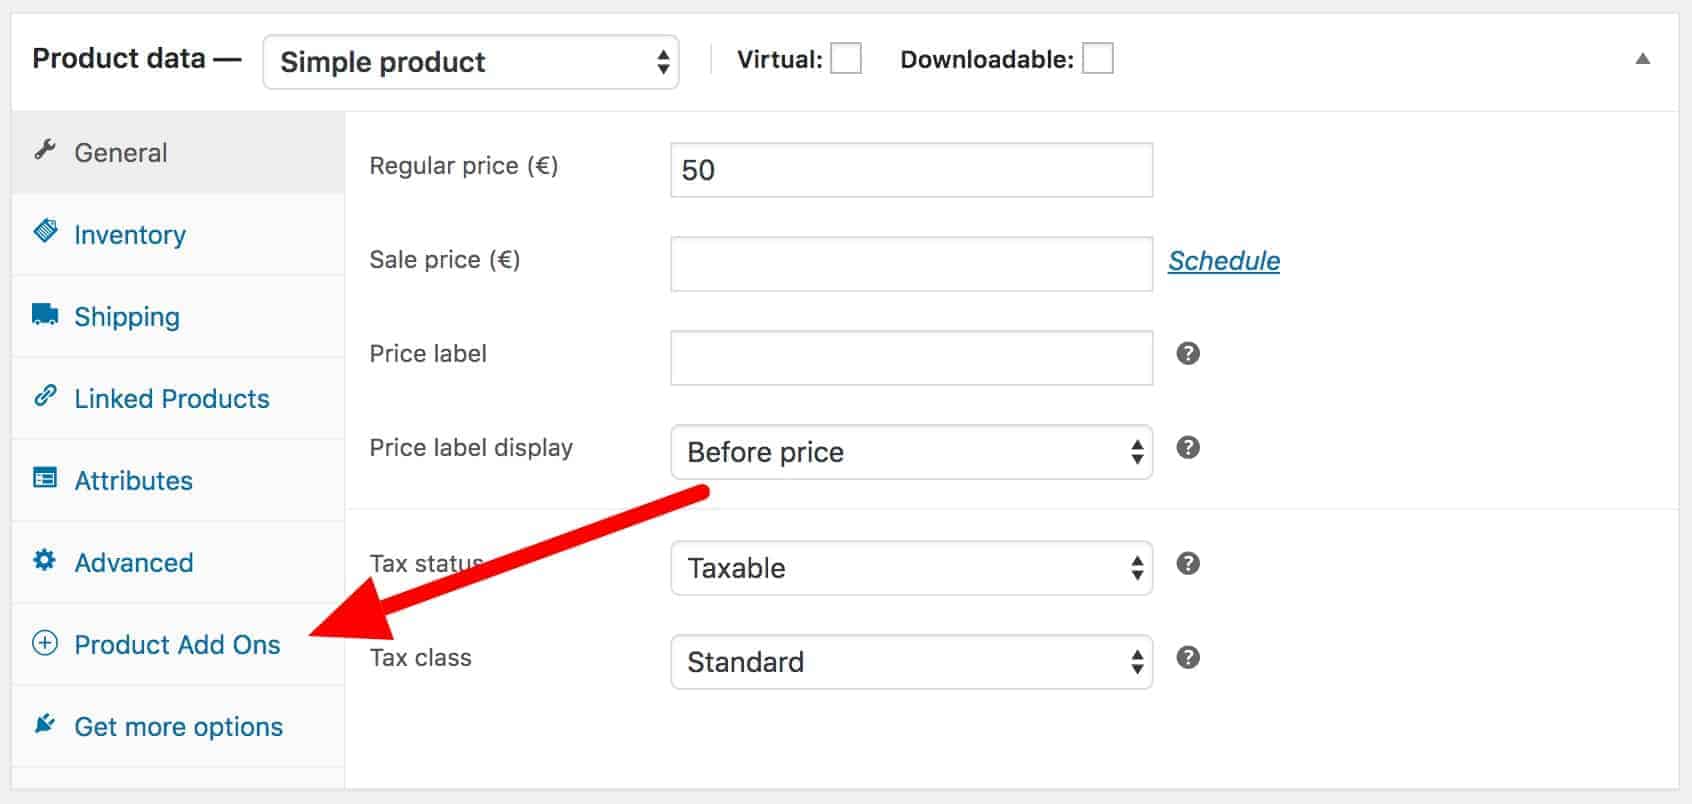
- Click ‘Add Group’
- Click ‘Add Field’
- Select ‘Select’ as the field type
- Click ‘Add Option’ to start adding options
Your field might look something like this:
Create product fields for the component products
- Add another field and select ‘Products’ as the field type.
- Enter all your gift items into the ‘Child Products’ field.
- Set the ‘Products Layout’ to ‘Checkboxes’ and the ‘Products Quantities’ to ‘Independent’ (this means that the customer can set their own quantities for each child product)
- Set the ‘Minimum Child Products’ and ‘Max Child Products’ to the same value – in this case, 4. This will ensure that the customer will have to select 4 items from this field if they want to buy the hamper
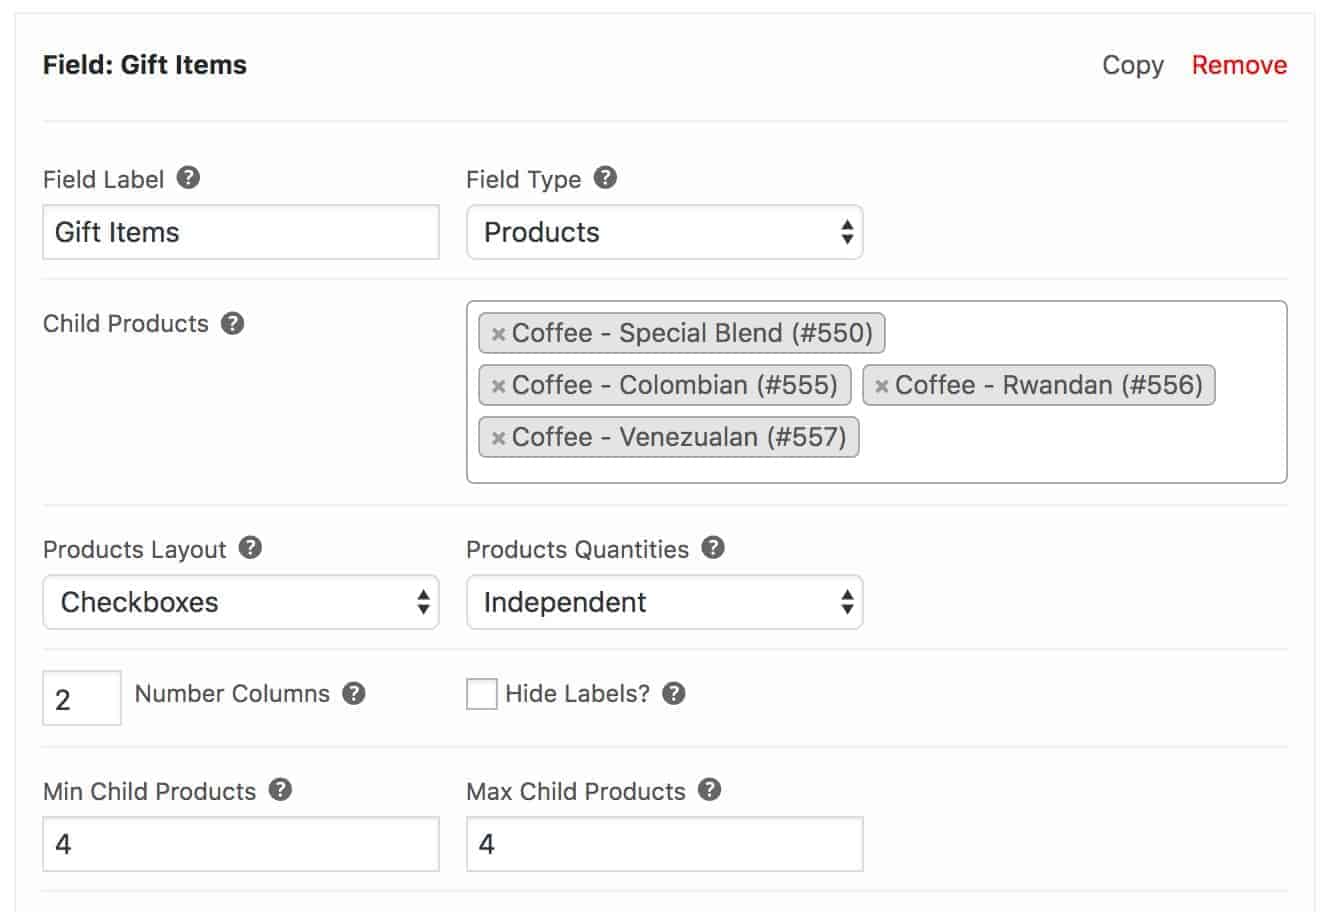
Now, duplicate this field and update the minimum and maximum child products to 6 (or whatever you’re using in your product). We’re going to use these duplicate fields in our conditional logic.
Note also that the ‘Products Layout’ is set to ‘Checkboxes’. This will mean that users can pick different component products as if they were checkboxes – so they can pick more than one, or deselect a previously selected one if they wish.
Also, the ‘Product Quantities’ field is set to ‘Independent’. This means that the customer can choose how many of each component they want: e.g. I’ll have one Colombian blend coffee and two Earl Grey teas.
Step 5: Assign some conditional logic
In your first products field, click ‘Add Condition’.
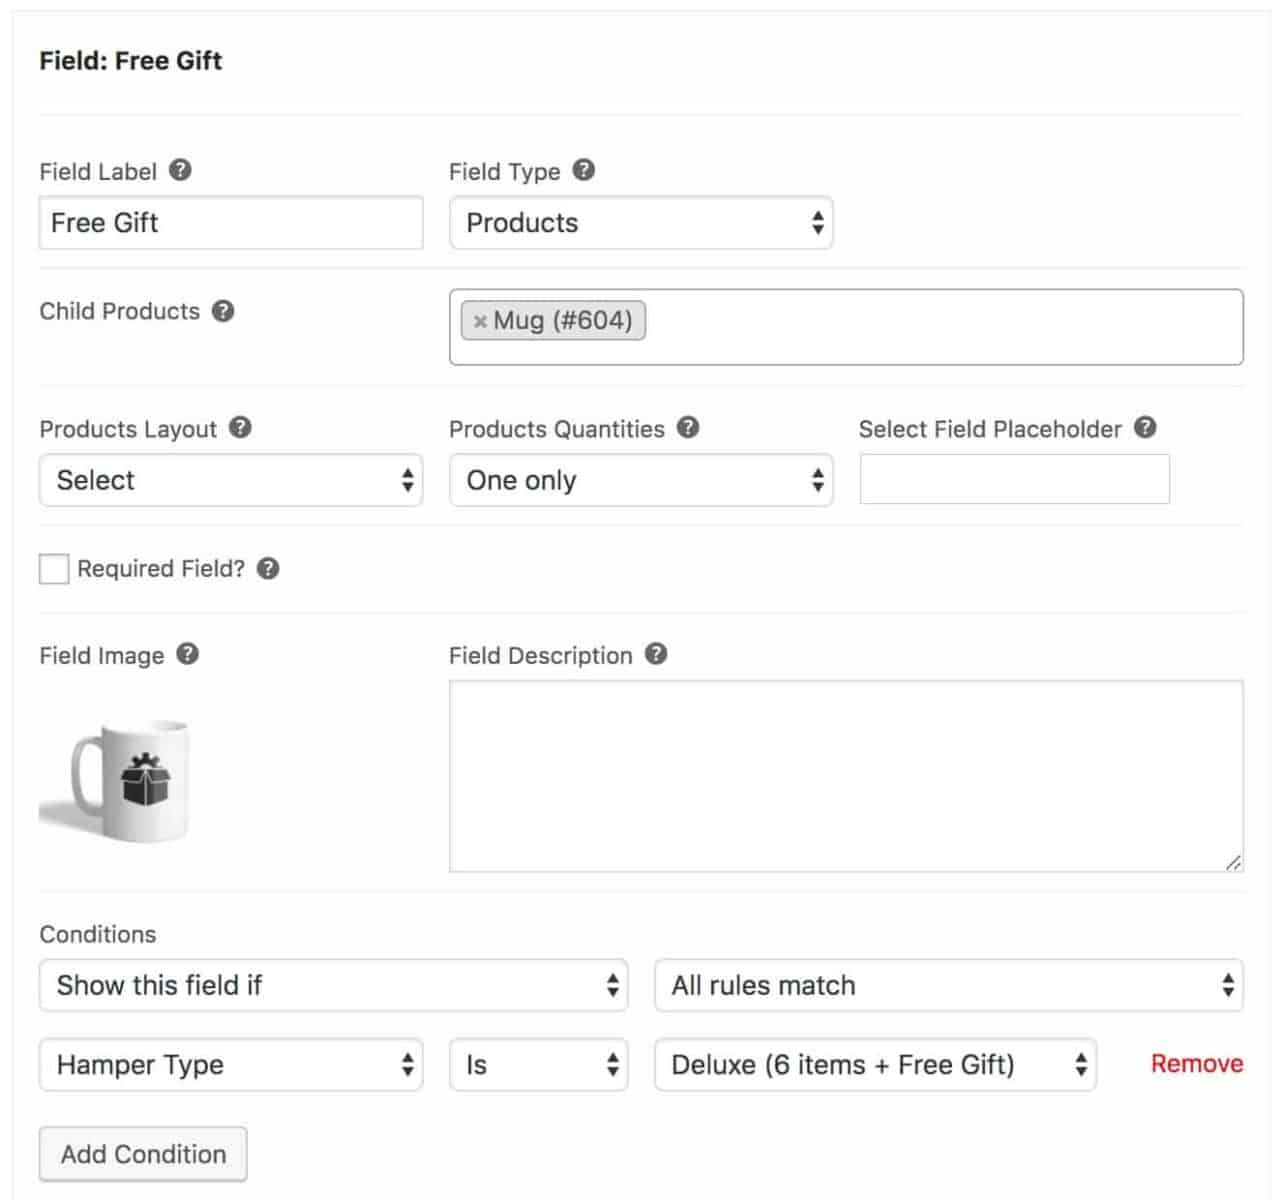
Set the parameters to ‘Show this field if’ ‘All rules match’. Then choose your select field in the first column and the first value in the last column:

Now, your first products field will only be displayed when the user picks the first hamper type.
Repeat this for the duplicate products field, but change the condition so that it will only be displayed if the user selects the second option:

So this field will only be displayed if the user selects the other option from the select field. In this way, only one products field will ever be displayed at one time.
Add a field for a free gift
We can add a free gift to our hamper by adding another ‘Product’ field and adding a single product to it. We choose a select field as the layout and ‘One only’ as the quantity option. In this way, it will automatically get added to the cart when the user clicks ‘Add to cart’.
The condition is the same as the field above.
The finished gift hamper product
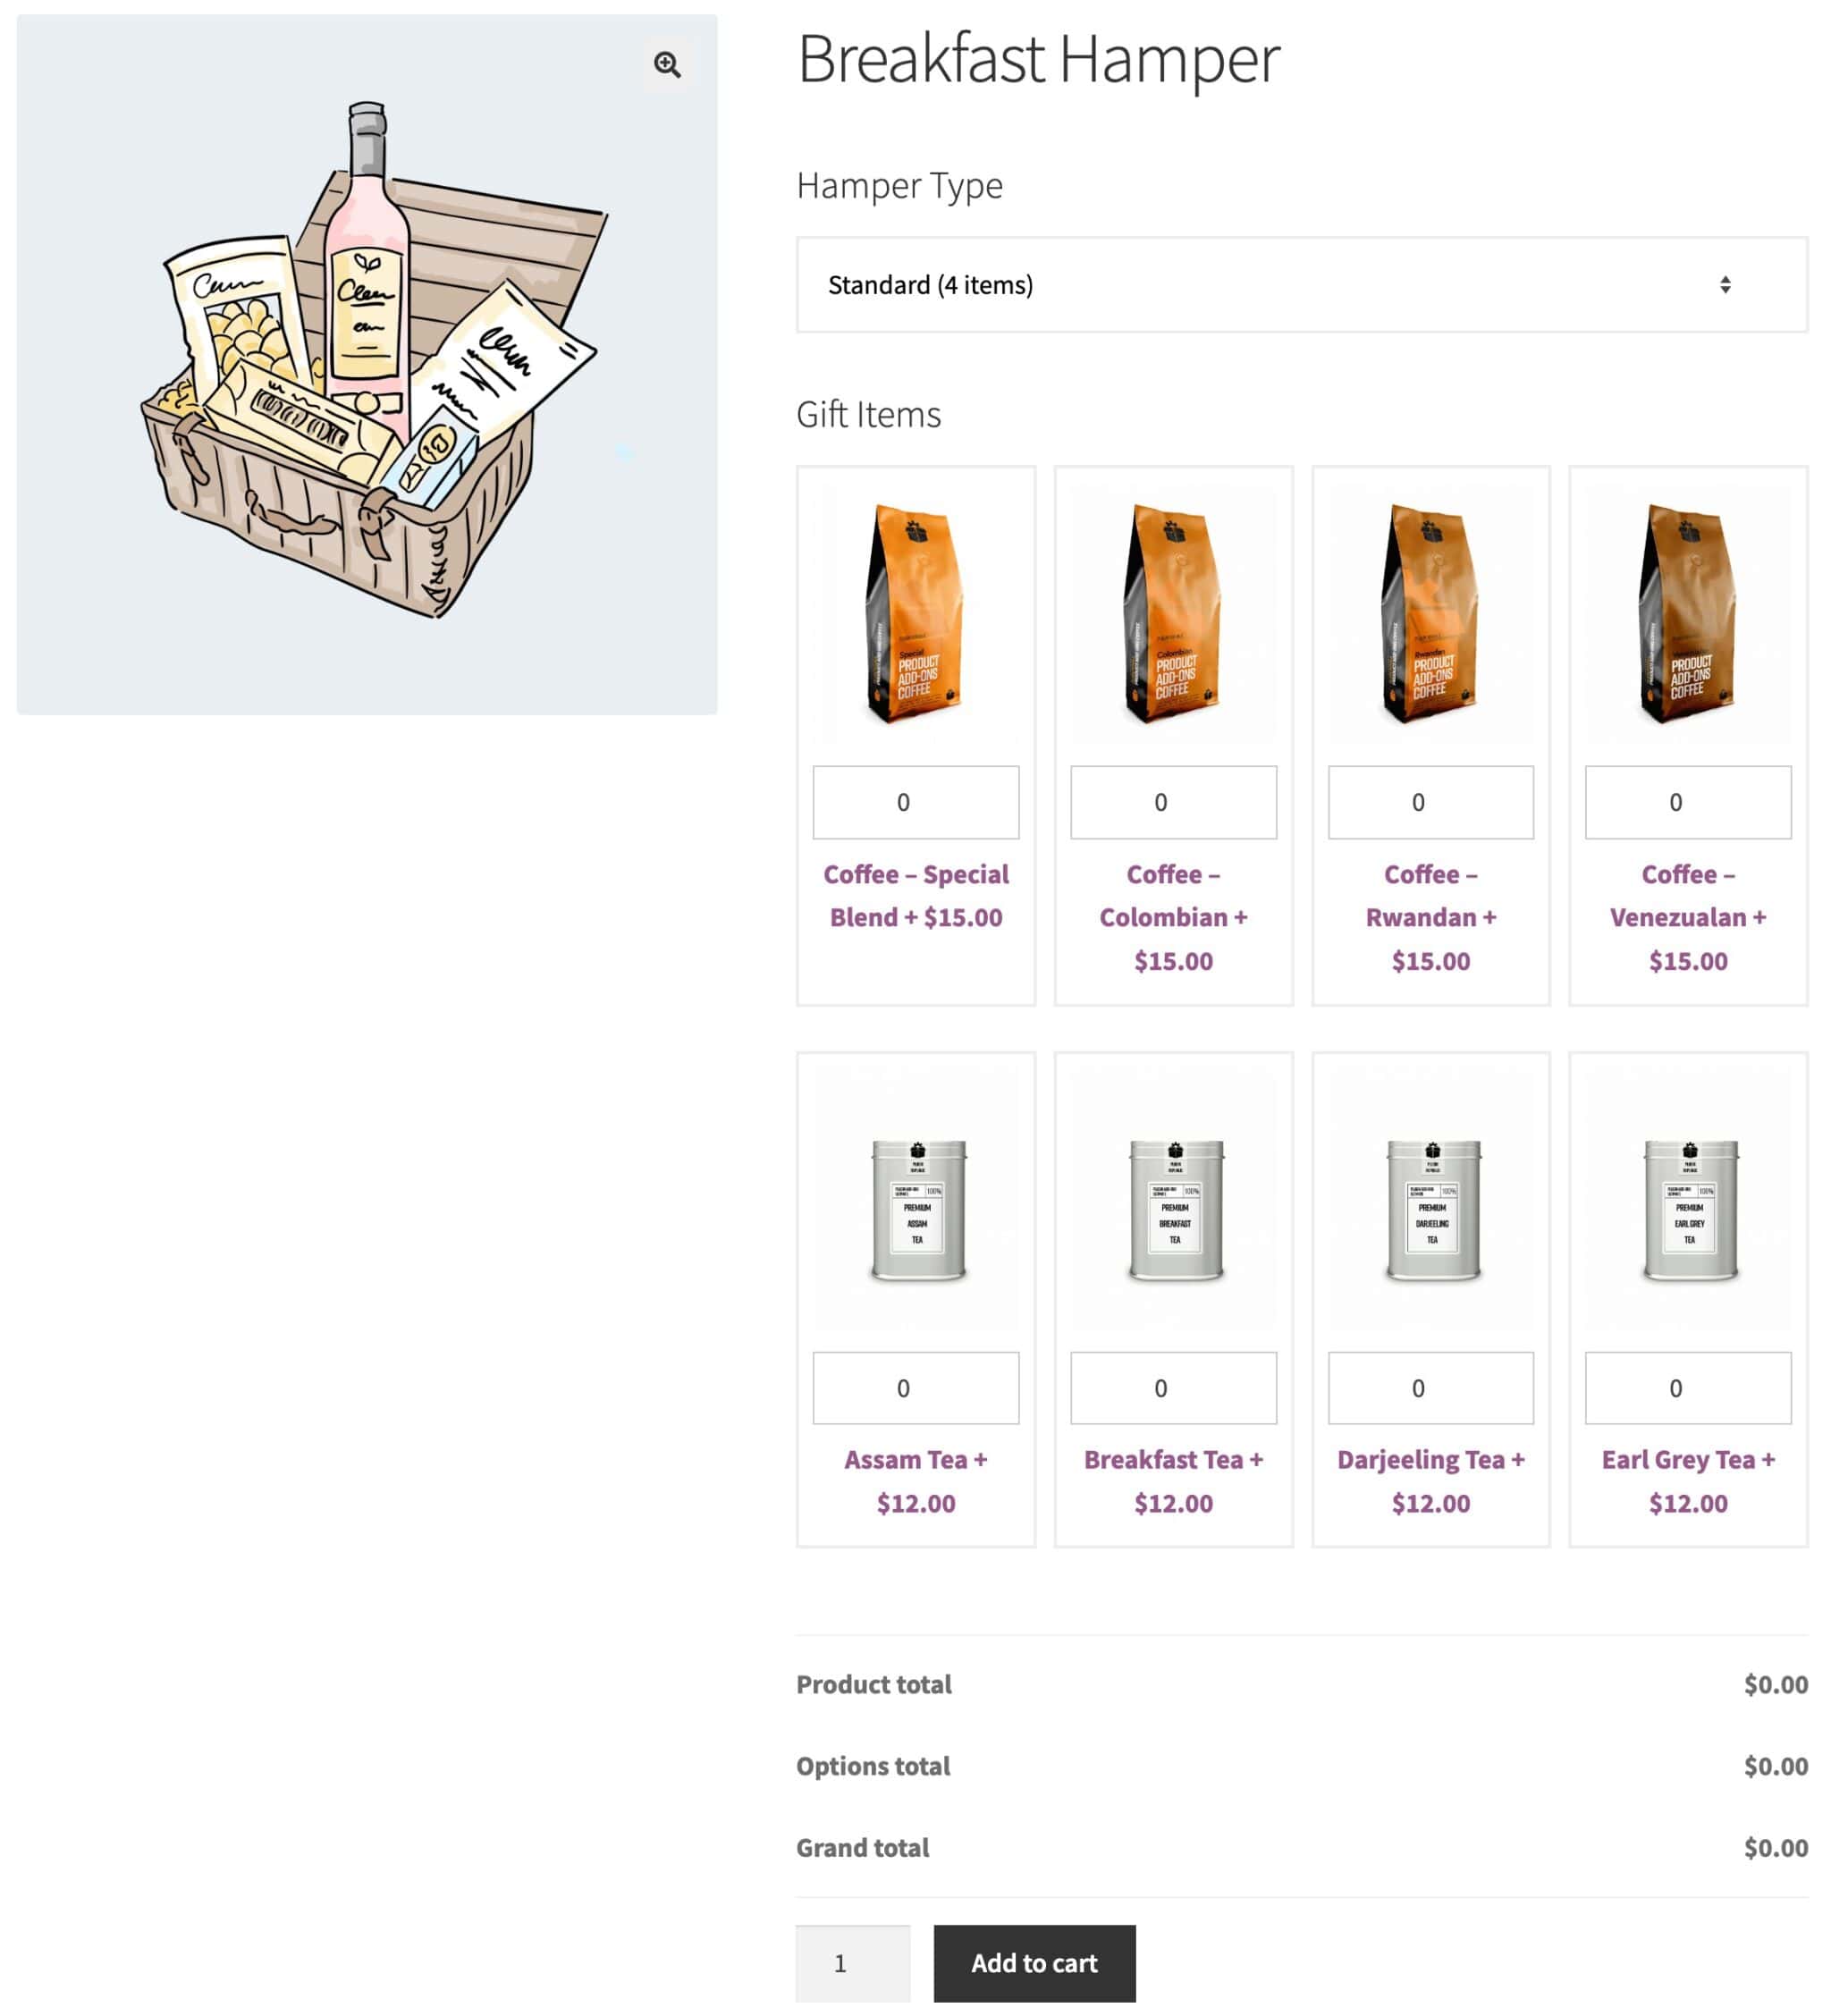
Your completed gift box / hamper product should look something like this.

You can view a working example of this gift box product here.
Creating a WooCommerce gift box product – recap
It’s pretty simple to create a gift box product in WooCommerce. You just need the Pro version of the Product Add-Ons Ultimate plugin.
