How to sell shoes online with WooCommerce
In this article, we’ll cover how to sell shoes online step-by-step, including building your product catalog, creating a shipping process, defining your brand, and pricing your products competitively.
We’ll also look at some of the most useful WooCommerce plugins and extensions that you can install on your website to ensure that you maximize revenue and profits – all while keeping your site easy to navigate and your customers motivated to buy.

Why selling your shoes via your own store is the best option
There’s no doubt about it; the online shoe market is booming. In 2024, a whopping 27.5% of total retail sales of shoes in Great Britain were made online. There’s never been a better time to set up your online store and get a piece of the action.
Selling shoes through your own online store offers several advantages over social media or third-party platforms.
For starters, you are in complete control over your branding and marketing, meaning that you can really hone in on your USPs and build strong relationships with your customer base, fostering loyalty and repeat business.
Secondly, the fees and restrictions imposed by third-party sites are avoided, meaning that your profit margins are larger. You decide on your pricing, and enable greater flexibility in any discounts, sales and promotions.
Finally, owning your own platform enables you to gather valuable customer data, empowering you to refine marketing strategies and tailor offerings to specific preferences.
Selling shoes online – your step-by-step guide
Step 1: Defining your brand and niche
Whether you already have a physical shoe store or are starting from the ground up, your branding is going to be what sets you apart from your competitors.

Defining your niche will also ensure that you bring something fresh and exciting to the marketplace.
Set some time aside to clarify your USPs and grasp how you can work these into different areas of your online set-up and marketing strategy going forward.
Before launching, study your competitors and see what’s trending. For example, if you’re selling sneakers, look at what’s hot on StockX or GOAT. If you want to sell handmade leather boots, check Etsy for demand and pricing trends. Use tools such as Google Trends, Keyword Planner and Answer the Public to see what potential customers are actively searching for.
Step 2: Building your product catalog
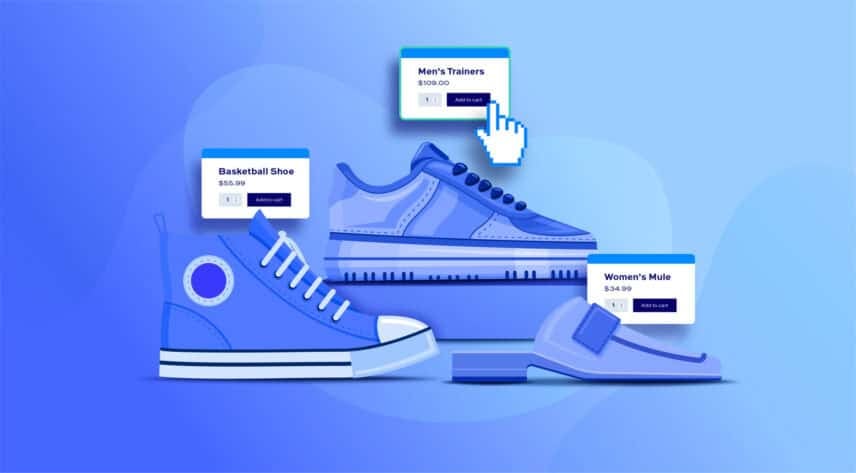
How you present your product offering online can be the deciding factor when it comes to success.
That’s why it’s so important to invest time and energy into creating a digital storefront that showcases your products in the best light.
This means taking professional images, curating detailed SEO-optimised descriptions, and leaving time to carefully consider your copy and menu structure to provide the best browsing experience for your customers.
Quality images
A successful online shoe store will include high-quality, creative product images.
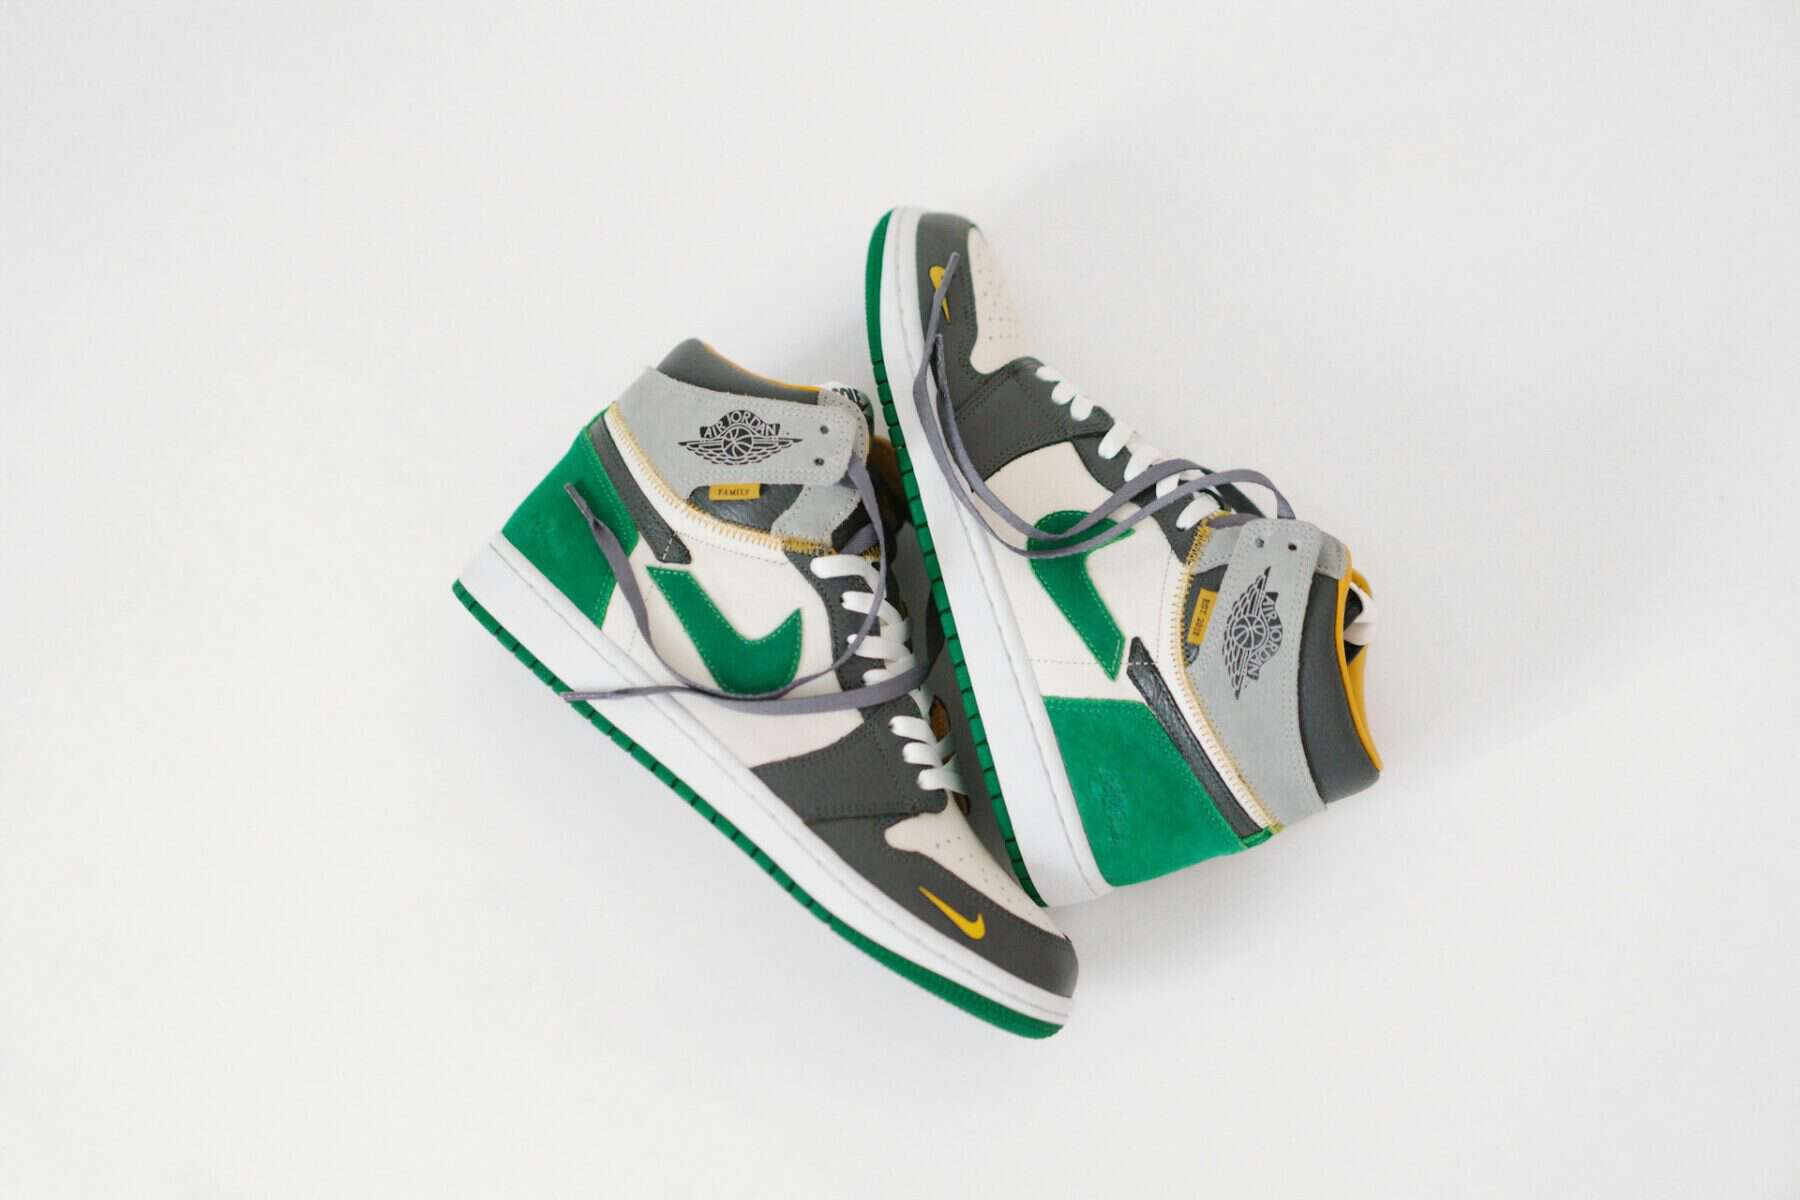
For product photography, ensure your shoes are clean and well-prepared before the shoot. Set up a scene with appropriate lighting. Soft, diffused light works best to highlight the shoe’s features without harsh shadows.
A professional camera is essential, as is knowledge of how to adjust settings to capture sharp, detailed images.
Photograph the shoes from different angles so the customer can get a complete view.
Incorporating props can add context and creative flair. If you do choose to use props, make sure they complement rather than distract from the product.
Post-shoot, you’ll need to be able to edit your images to enhance clarity and color accuracy.
If you’re looking for a more detailed guide on how to take great product photographs, with step-by-step instructions, Shopify’s article on shoe photography is a great starting point.
For a visual demonstration on photographing shoes for ecommerce, you also might find this video helpful:
How to photograph shoes for ecommerce – full affordable setup
WooCommerce product images
In WooCommerce, you can upload multiple high-resolution images for each product, so customers can view the shoes from various angles.
The platform also supports zoom and lightbox features, which means that shoppers are able to examine details closely.
Combining high-quality photography with well-crafted descriptions creates an engaging and informative shopping experience that encourages purchases.
Detailed product descriptions
When crafting product descriptions, start with a strong value statement highlighting the shoe’s key benefits.
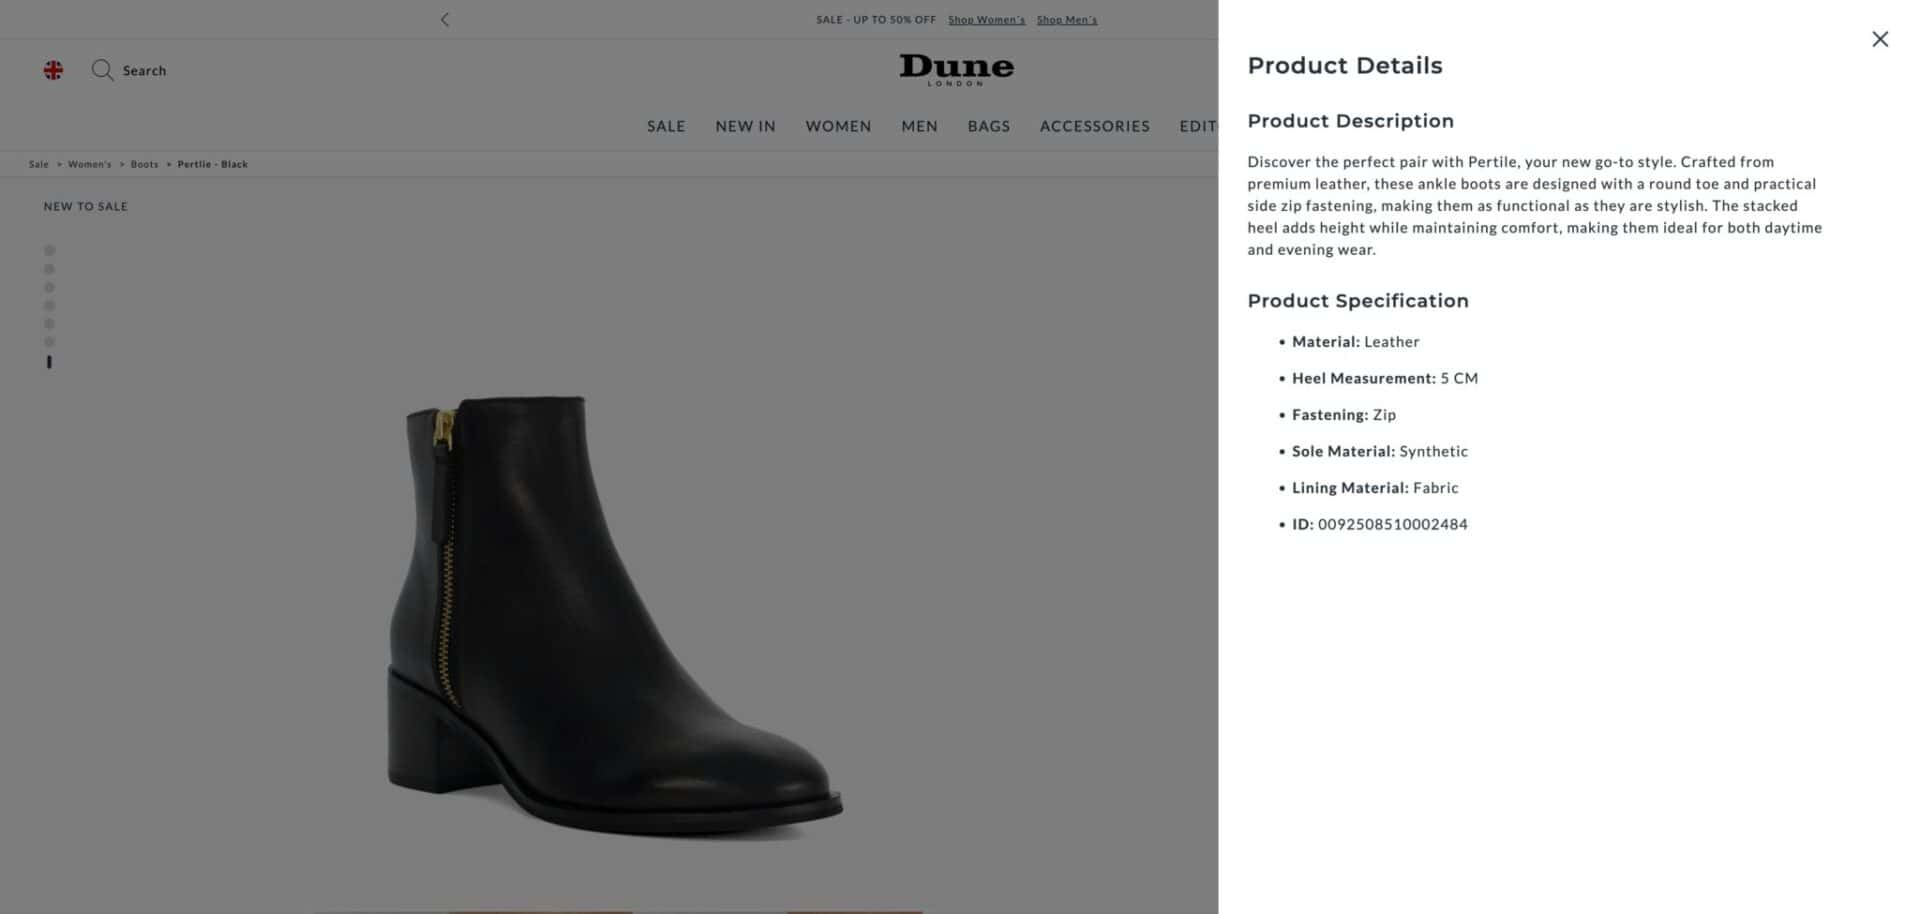
Ideally, product descriptions should be short and sweet. However, be mindful to include all the most important information while also focusing on what sets the product apart. Some details to include are:
- Material details (e.g. leather, canvas, recycled materials).
- Sizing and fit (e.g. runs true to size or order one size up).
- Care instructions (e.g. how to clean or maintain).
- Ideal usage (e.g., formal occasions, casual outings, or sports).
Incorporating relevant keywords can help naturally improve search engine visibility, which means your customers can find your products more easily. Organize information using headings and bullet points for readability.
WooCommerce allows you to add detailed descriptions and specifications for each product, enhancing the shopping experience.
For more tips on writing effective product descriptions, see WooCommerce’s guide.
Custom options
One of the best ways to stand out in the competitive online shoe market is by offering customization options.
Shoppers love the ability to personalize their purchases, making their footwear truly one-of-a-kind.
With plugins like WooCommerce Product Add-Ons Ultimate, you can give customers the freedom to tailor their shoes to their unique preferences.
Consider offering:
- Monogramming: Allow customers to add initials, names, or even small custom messages to their shoes for a personal touch.
- Unique color combinations: Give buyers the ability to mix and match colors for different parts of the shoe, such as the sole, laces, and upper.
- Material selection: Let customers choose from a variety of materials, such as leather, suede, or eco-friendly alternatives.
- Engravings or embellishments: Offer decorative elements like metallic accents, rhinestones, or embroidery for a luxury feel.
Incorporating these personalization features can enhance customer engagement, increase perceived value, and separate your online shoe store from mass-market retailers.
Customization boosts sales and fosters brand loyalty, as customers are more likely to return for future purchases.
Organized categories
A well-structured online store makes it easy for customers to find exactly what they need, improving their shopping experience and increasing conversions.
WooCommerce allows you to organize shoes into intuitive categories, you can streamline navigation and guide customers toward their ideal pair.
Here are a few effective ways to categorize your footwear:
- By style: Organize shoes into broad style categories to enable browsers to find what they are looking for with ease.
- By purpose: Shoppers often search for shoes based on their intended use, such as hiking, running, casual wear and so on.
- By size and fit: Help customers quickly find shoes that fit them by offering size-based filters (US, UK, EU sizing), width options (narrow, standard, wide) and adjustable fit styles (stretchable, elastic, Velcro).
- By brand: If you sell multiple brands, create dedicated brand categories to help brand-loyal shoppers find their favorites easily.
- By price range: Organizing shoes by budget (e.g., “Under $50,” “$50-$100,” “Luxury Collection”) allows customers to browse based on their spending preferences.
- By special features: Highlight unique characteristics such as eco-friendly materials, waterproof designs and limited-edition collections.
Additionally, implementing filters and search functions within these categories ensures customers can refine their search effortlessly.
A well-organized shoe store improves user experience by facilitating customers to browse, leading to increased sales and customer satisfaction.
Step 3: Packaging, presentation and pricing
Providing an optimum customer experience is crucial. Doing so will help to foster customer loyalty, increase word-of-mouth recommendations and encourage satisfied customers to leave positive online reviews.
Make sure that your customers receive their shoes in perfect condition. Also, invest in secure, visually appealing packaging and add a personalized touch like a handwritten thank you note to really impress.
Some additional customer experience tips include:
- Eco-friendly packaging: Use recyclable or biodegradable materials to appeal to environmentally conscious buyers.
- Secure shipping: Protect shoes with cushioning to prevent damage during transit. Include proper labeling to minimize mishandling.
- Unboxing experience: Add branded tissue paper, thank-you notes, or small freebies like shoe care samples to enhance the customer experience.
- Pricing strategy: Calculate costs, including production, packaging, shipping, and profit margins and research competitor pricing to position your products effectively and ensure that customers feel they are getting good value for money.
How to set up your WooCommerce store to sell shoes online
Where can you sell shoes online?
As we touched upon above, there are various platforms you can use to sell your shoes online. Before diving into WooCommerce, let’s consider the different options you have and their pros and cons.
Online marketplaces
These platforms let you list and sell shoes without building an entire website.
- Amazon & eBay: Huge customer base, but high competition and selling fees.
- Etsy: Ideal for handmade or vintage shoes, but a niche audience.
- Depop & Poshmark: Best for trendy or second-hand shoes, and a pleasant social shopping experience.
- StockX & GOAT: Specialized in sneaker resales, but has a strict authentication process.
Pros:
- Quick setup, no need for web development.
- Access to an existing audience.
Cons:
- High seller fees and commissions.
- Limited branding and customer relationship control.
- With some platforms, you may not own your own content. Read the terms and conditions carefully.
Standalone ecommerce platforms
These platforms allow you to build your own branded store.
- Shopify: User-friendly with built-in ecommerce features but requires monthly fees and additional transaction costs.
- BigCommerce: Scalable, but can be expensive for small businesses.
- Squarespace & Wix: Good for design flexibility but not as feature-rich for ecommerce.
Pros:
- Full control over branding and customer experience.
- Easier integrations with marketing tools.
Cons:
- Monthly fees can add up.
- Some limitations in customizability and scalability.
- With some platforms, you may not own your own content. Read the terms and conditions carefully.
Why choose WooCommerce to sell your shoes online?
WooCommerce is a free, open-source WordPress plugin that transforms your site into a fully functional online store. Here’s why WooCommerce is the best platform to set up your online shoe store:
- Cost-effective: WooCommerce is free, which makes it an appealing option for those just setting up their businesses and wanting to keep outgoings to a minimum. While you may need to pay for hosting, a domain, and premium plugins to ensure your store runs effectively, there are some free themes available to help get you started.
- Highly customizable: There are thousands of WooCommerce themes and plugins to choose from that can help to make your store look and function exactly as you wish. Whether you need advanced product filters, customer reviews, or automated marketing tools, WooCommerce offers flexibility to tailor your store to your brand’s needs.
- SEO-friendly: With WooCommerce, optimizing your store to attract more traffic from search engines is easy. By using SEO plugins like Yoast SEO to improve product descriptions, meta tags, and image optimization, you can optimize your site and improve its visibility without extensive SEO knowledge. .
- Scalable: You might start small, but you have big plans for the future! WooCommerce supports unlimited products, so you don’t need to be concerned about outgrowing your ecommerce platform. Integrating advanced features such as multi-channel selling, automated email marketing, and analytics tools allows you to scale your business effortlessly as you go from strength to strength.
- Multiple payment options: WooCommerce integrates seamlessly with popular payment gateways like PayPal, Stripe, and Square. This ensures a smooth checkout process for customers, increasing conversions and reducing cart abandonment.
- Community support and resources: WooCommerce has a vast community of developers, store owners, and support forums where you can find help and guidance. The WooCommerce documentation and tutorials make it easy to troubleshoot and optimize your store.
Interested in using WooCommerce to sell shoes online? Use our guide below to get set up.
Step 1: Choose a hosting provider and install WordPress
A hosting provider is a company that stores your website’s files and makes them accessible on the internet.
Think of it like renting space on a powerful computer (a server) that keeps your website online and available to visitors 24/7.
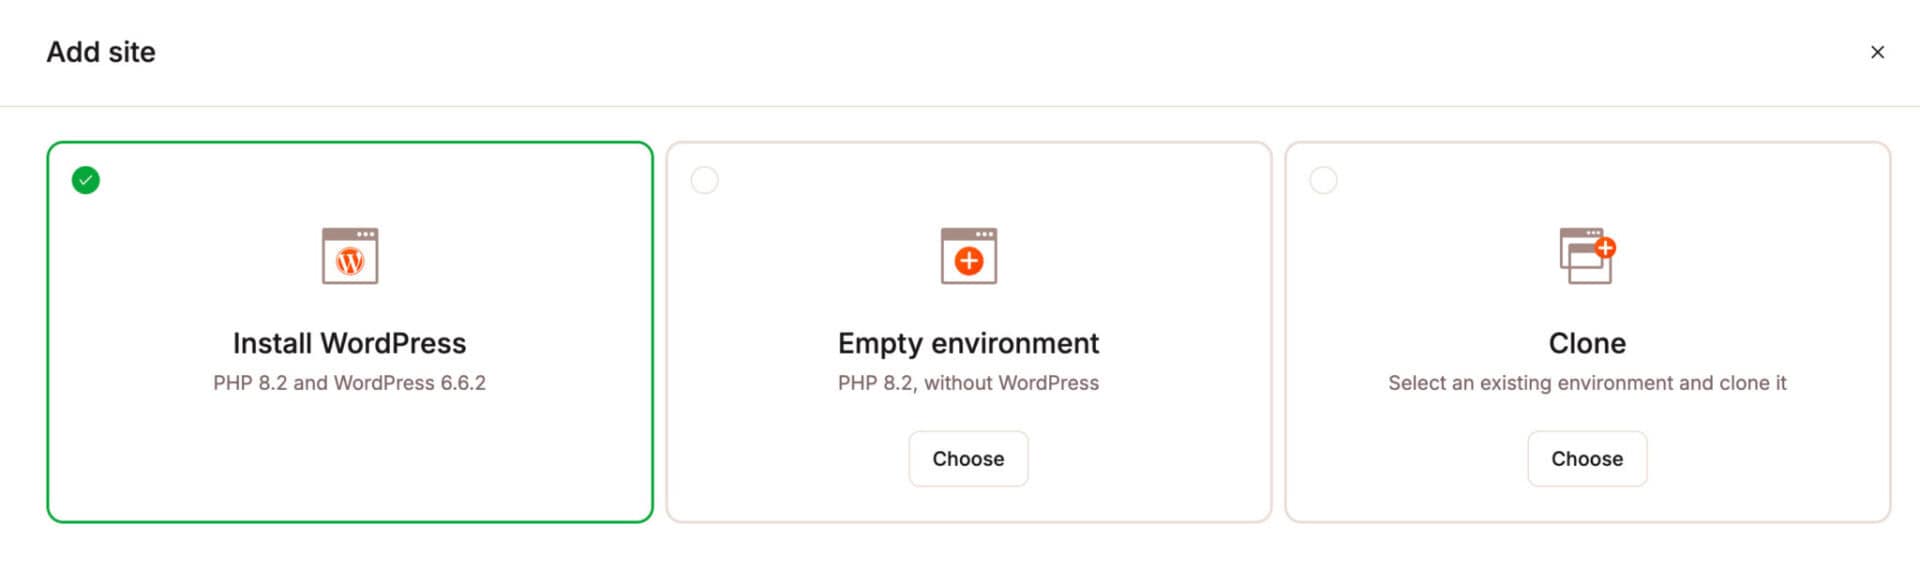
Select a reliable hosting provider such as Kinsta or Pressable. These hosts offer an extremely easy process to get started, installing WordPress and WooCommerce for you in a matter of seconds. They also have extremely good support in case you have any questions.
Step 2: Add shoes to your store
Once you’ve been through the installation process, you can start to add your products.
Create product listings
- Navigate to Products → Add New in WooCommerce.
- Add product names, descriptions, categories, tags, and images.
- Choose product types:
- Simple products: A single pair of shoes.
- Variable products: Shoes with different sizes, colors, or materials.
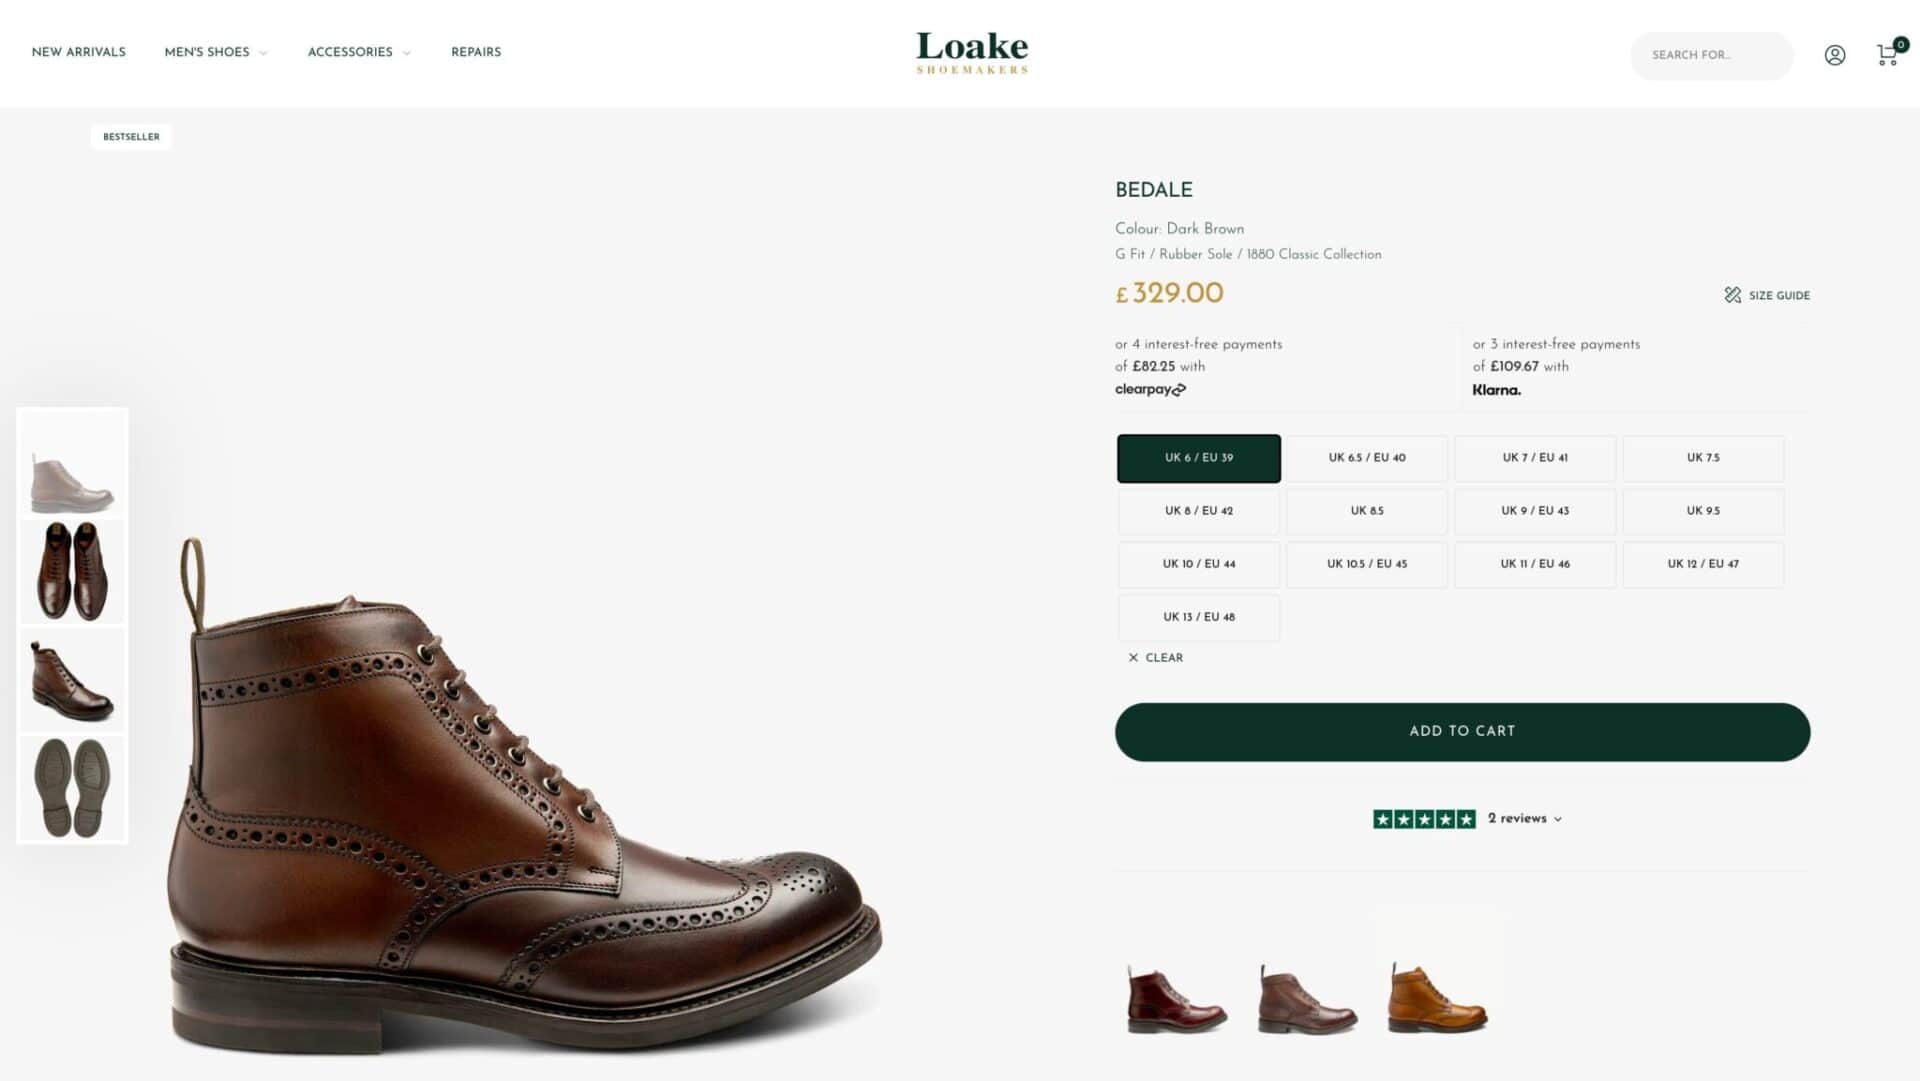
Enhance product pages with galleries & options
- High-quality images: Show shoes from multiple angles with zoom-in features.
- Product variations: Let customers select size, width, color, material, and sole type.
- Size guides: Create a dedicated size guide page and link to it.
- Customer reviews & ratings: Enable reviews to build trust.
For additional customization, explore the WooCommerce Product Add-Ons plugin.
Step 4: Customize your store’s appearance
Choose a WooCommerce-compatible theme. You can customize:
- Homepage layout
- Brand colors and fonts
- Navigation and product filtering
Step 5: Configure payment gateways
Enable multiple payment methods like PayPal, Stripe, and Square to offer flexibility. WooCommerce does not charge extra transaction fees.
Read more about WooCommerce payment gateways.
Step 6: Set up shipping options
Define shipping zones (local, domestic, international) and methods:
- Flat rate shipping
- Free shipping on orders over a certain amount
- Local pickup
For advanced shipping, use the WooCommerce Table Rate Shipping plugin.
Step 7: Install useful plugins for selling shoes
To enhance your online shoe store, integrating specific plugins can significantly improve functionality and customer experience. Some of the best plugins include:
- WooCommerce Product Add-Ons Ultimate: Allows customers to personalize products by adding extra options, such as custom engravings or preferred shoe materials.
- WooCommerce Variation Swatches: Enhances the presentation of product variations by displaying color and image swatches instead of standard dropdowns. This is particularly useful for showcasing different shoe colors and styles.
- WooCommerce Dynamic Pricing and Discount Rules: Enables store owners to implement flexible pricing strategies, such as bulk purchase discounts or special offers, which incentivizes customers and boosts sales.
- WooCommerce Wishlists Ultimate: Enables customers to save their favorite products for future purchases, enhancing user engagement and encouraging return visits.
Step 8: Test your store
Before launching your WooCommerce-powered shoe store, it’s crucial to test every aspect to ensure a smooth shopping experience for your customers.
Here’s a step-by-step testing checklist:
- Place test orders:
- Use WooCommerce’s built-in testing features or a plugin like WooCommerce Stripe Payment Gateway to simulate transactions.
- Check different payment methods (PayPal, credit/debit cards, Apple Pay, Google Pay, etc.) to verify that payments process correctly.
- Try placing an order as a guest and as a registered user.
- Test order cancellations, refunds, and returns to ensure smooth processing.
- Check payment gateways:
- Ensure that transactions go through securely and that order confirmations are sent automatically.
- Verify that currency settings and tax calculations are accurate.
- Test international payments if you’re selling globally.
- Ensure key pages work correctly:
- Review pages like Shop, Cart, Checkout, and My Account for smooth navigation.
- Check that product filters and sorting options function properly.
- Ensure customers receive order confirmation emails and shipping updates.
- Test the mobile experience, as many customers shop via smartphones.
- Check for speed & performance issues:
- Use tools like Google PageSpeed Insights or GTmetrix to evaluate site speed.
- Optimize image file sizes and enable caching to improve load times.
- Ensure your hosting plan can handle traffic spikes.
Step 9: Launch your online shoe store
Once you’re confident that your store is fully functional, it’s time to launch! Follow these marketing strategies to create a buzz and drive traffic:
- Promote on social media:
- Share high-quality images and videos of your products on Instagram, Facebook, Pinterest, and TikTok.
- Use relevant hashtags such as #ShoesOfInstagram, #SneakerAddict, and #ShoeTrends2024 to attract customers.
- Engage with potential customers by responding to comments and messages.
- Run email marketing campaigns:
- Leverage influencer & affiliate marketing:
- Partner with fashion bloggers, YouTubers, or Instagram influencers in the footwear niche.
- Use an affiliate program like AffiliateWP to encourage referrals.
- Utilize paid advertising:
- Run Google Ads and Facebook Ads targeting customers based on shoe preferences.
- Retarget previous website visitors with display ads.
- Offer limited-time deals & giveaways:
- Announce an exclusive launch discount or flash sale.
- Host a giveaway where users share your store for a chance to win a free pair of shoes.
Step 10: Maintain and grow your store
Launching your store is just the beginning. To ensure long-term success, you must actively maintain and grow your WooCommerce shoe business.
- Keep your inventory fresh:
- Regularly update stock levels to avoid selling unavailable products.
- Introduce new styles based on seasons, trends, and customer preferences.
- Use analytics tools like Google Analytics to track best-selling products.
- Run promotions & discounts:
- Offer seasonal sales, bundle deals, or loyalty rewards programs.
- Use plugins to create custom discount offers.
- Optimize for SEO & performance:
- Research and use relevant keywords such as “best running shoes 2024” or “affordable leather boots” in product descriptions and blog posts. There are free tools such as Google Keyword Planner that can help.
- Improve site speed and ensure mobile optimization.
- Update meta descriptions and alt text for images.
- Engage your audience with content marketing:
- Create a blog featuring shoe care tips, style guides, and industry trends.
- Utilize video marketing for shoe reviews or styling tutorials.
- Encourage customers to leave reviews and share their purchases on social media.
- Monitor & improve customer experience:
- Use chatbots or live chat support for real-time customer assistance.
- Collect feedback through surveys and adjust your offerings accordingly.
- Provide hassle-free returns and excellent post-sale support.
Additional tips to manage your online shoe store
Managing your inventory with WooCommerce
WooCommerce lets you track stock automatically and:
- Set stock status (In Stock, Out of Stock, On Backorder).
- Enable low-stock notifications.
- Track sales trends with WooCommerce Analytics.
Managing orders in WooCommerce
Managing orders efficiently in WooCommerce is essential for smooth business operations and customer satisfaction.
Let’s look at how to set up an efficient order management process, from receiving and processing orders to handling refunds and returns.
Receiving orders
Viewing orders
You can view and manage orders from the WordPress dashboard by navigating to:
WooCommerce → Orders
Here, you will see a list of all orders along with their statuses, order numbers, customer names, total amounts, and other details.
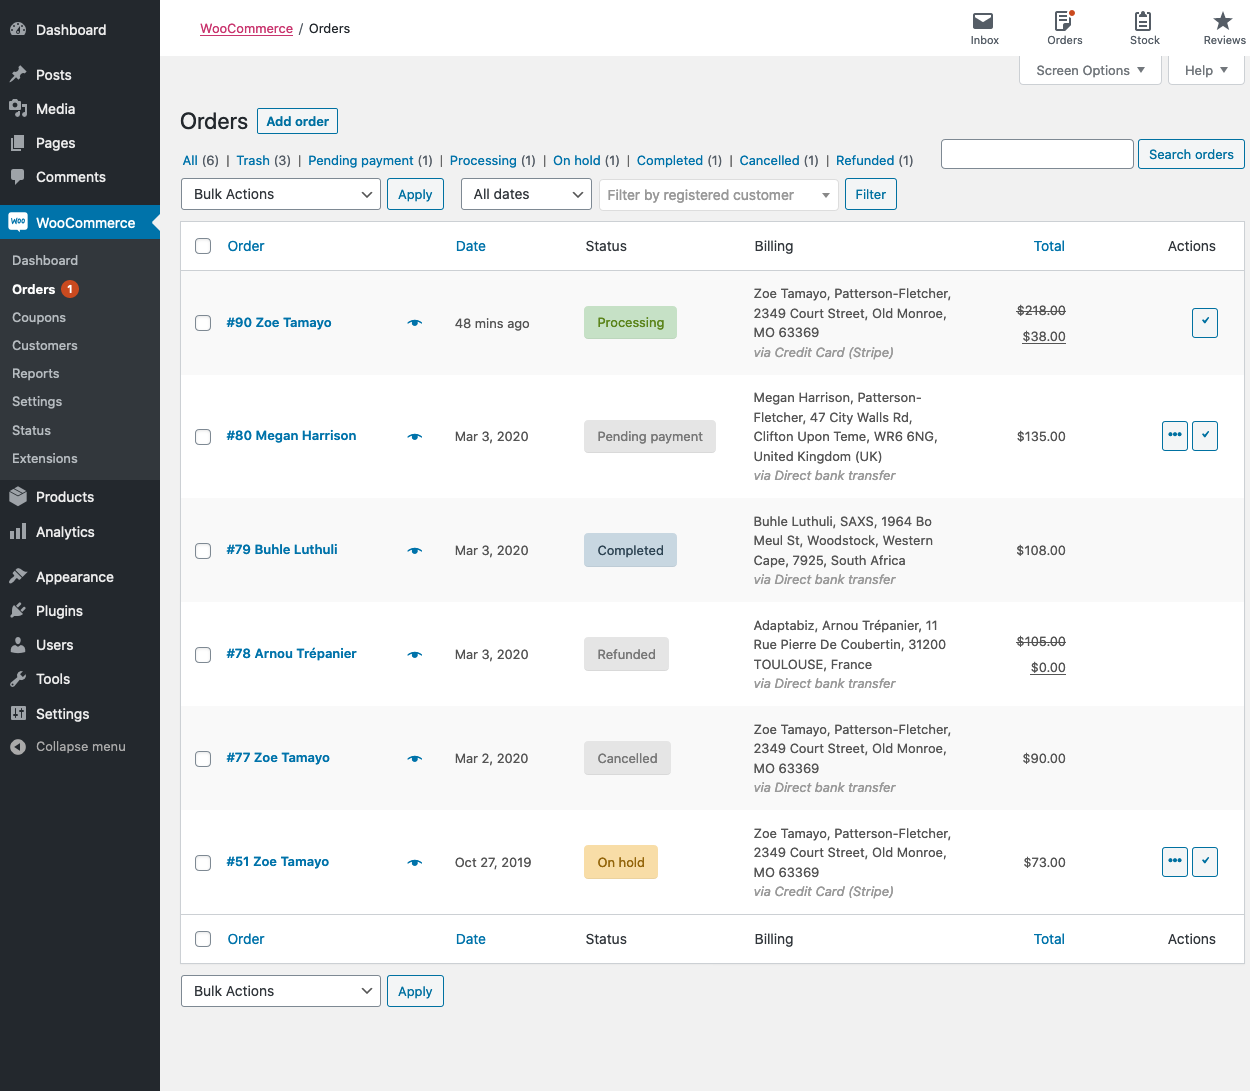
Understanding order statuses
Each order in WooCommerce is assigned a status to indicate its current stage in the fulfilment process. The default WooCommerce order statuses include:
- Pending payment: Order received but awaiting payment confirmation.
- Processing: Payment received, and the order is being prepared.
- On hold: Awaiting further action (e.g., manual review, stock verification).
- Completed: The order has been fulfilled and completed.
- Canceled: The order has been manually or automatically canceled.
- Refunded: The order amount has been refunded to the customer.
- Failed: Payment was attempted but did not go through.
To change an order’s status, click on an order, then use the Order Actions dropdown to update it as needed.
For more details on managing orders, visit: WooCommerce Orders Documentation.
Getting paid
Payment processing
Payments are processed via the payment gateway(s) you have configured. WooCommerce supports multiple payment gateways, including:
- PayPal
- Stripe
- WooCommerce Payments
- Bank Transfer (BACS)
- Cash on Delivery (COD)
To manage your payment settings, go to:
WooCommerce → Settings → Payments
Receiving funds
The transfer of funds depends on your selected payment provider.
- WooCommerce Payments: Funds are deposited into your bank account based on a set schedule (typically daily, weekly, or monthly).
- PayPal: Funds are available in your PayPal account and can be withdrawn to your bank.
- Stripe: Funds are typically transferred to your bank within 2-7 days.
For more details, check your payment provider’s terms.
Shipping orders
Printing shipping labels
WooCommerce integrates with various shipping label services to streamline the shipping process. You can print shipping labels directly using WooCommerce Shipping, which supports USPS and DHL (for US merchants). To set up WooCommerce Shipping:
- Go to WooCommerce → Extensions → WooCommerce Shipping.
- Install and activate the extension.
- Generate shipping labels from the Orders page.
More details: WooCommerce Shipping Guide
Sending tracking updates
To improve the customer experience, provide tracking information for shipped orders. You can:
- Use the WooCommerce Shipment Tracking extension to send tracking details via email.
- Manually add tracking numbers in the order notes.
- Use third-party shipping plugins like ShipStation or Advanced Shipment Tracking for WooCommerce.
More details: WooCommerce Shipment Tracking
Handling returns & refunds
Setting return policies
It’s important to establish clear return and refund policies. To configure refund settings:
- Navigate to WooCommerce → Settings → Refunds.
- Set conditions for refunds, including time limits and eligibility criteria.
- Display the return policy on your website (e.g., in the footer or FAQ section).
Processing refunds
Refunds can be processed directly through the WooCommerce dashboard:
- Go to WooCommerce → Orders.
- Click on the order to be refunded.
- Select Refund and enter the refund amount.
- Choose whether to refund manually or via the payment gateway.
- Confirm the refund.
For automatic refunds, ensure your payment gateway supports refund processing (e.g., WooCommerce Payments, PayPal, Stripe).
Read the WooCommerce Refunds Guide for more information.
Are you ready to sell shoes online?
By following these steps, you can build a thriving online shoe business using WooCommerce. With our comprehensive suite of plugins you can start strong, engage your audience, and continuously improve to build a thriving online shoe store.