Text Preview allows you to use Google Fonts by default.
Selecting which Google Fonts to display
Out of the box, the plugin will display a list of all Google Fonts for the user to pick from. If you’d like to narrow this list down and present only certain fonts to the user, go to WooCommerce > Settings > Product Add-Ons > Text Preview and choose the fonts to display in the ‘Choose Google Fonts’ setting.
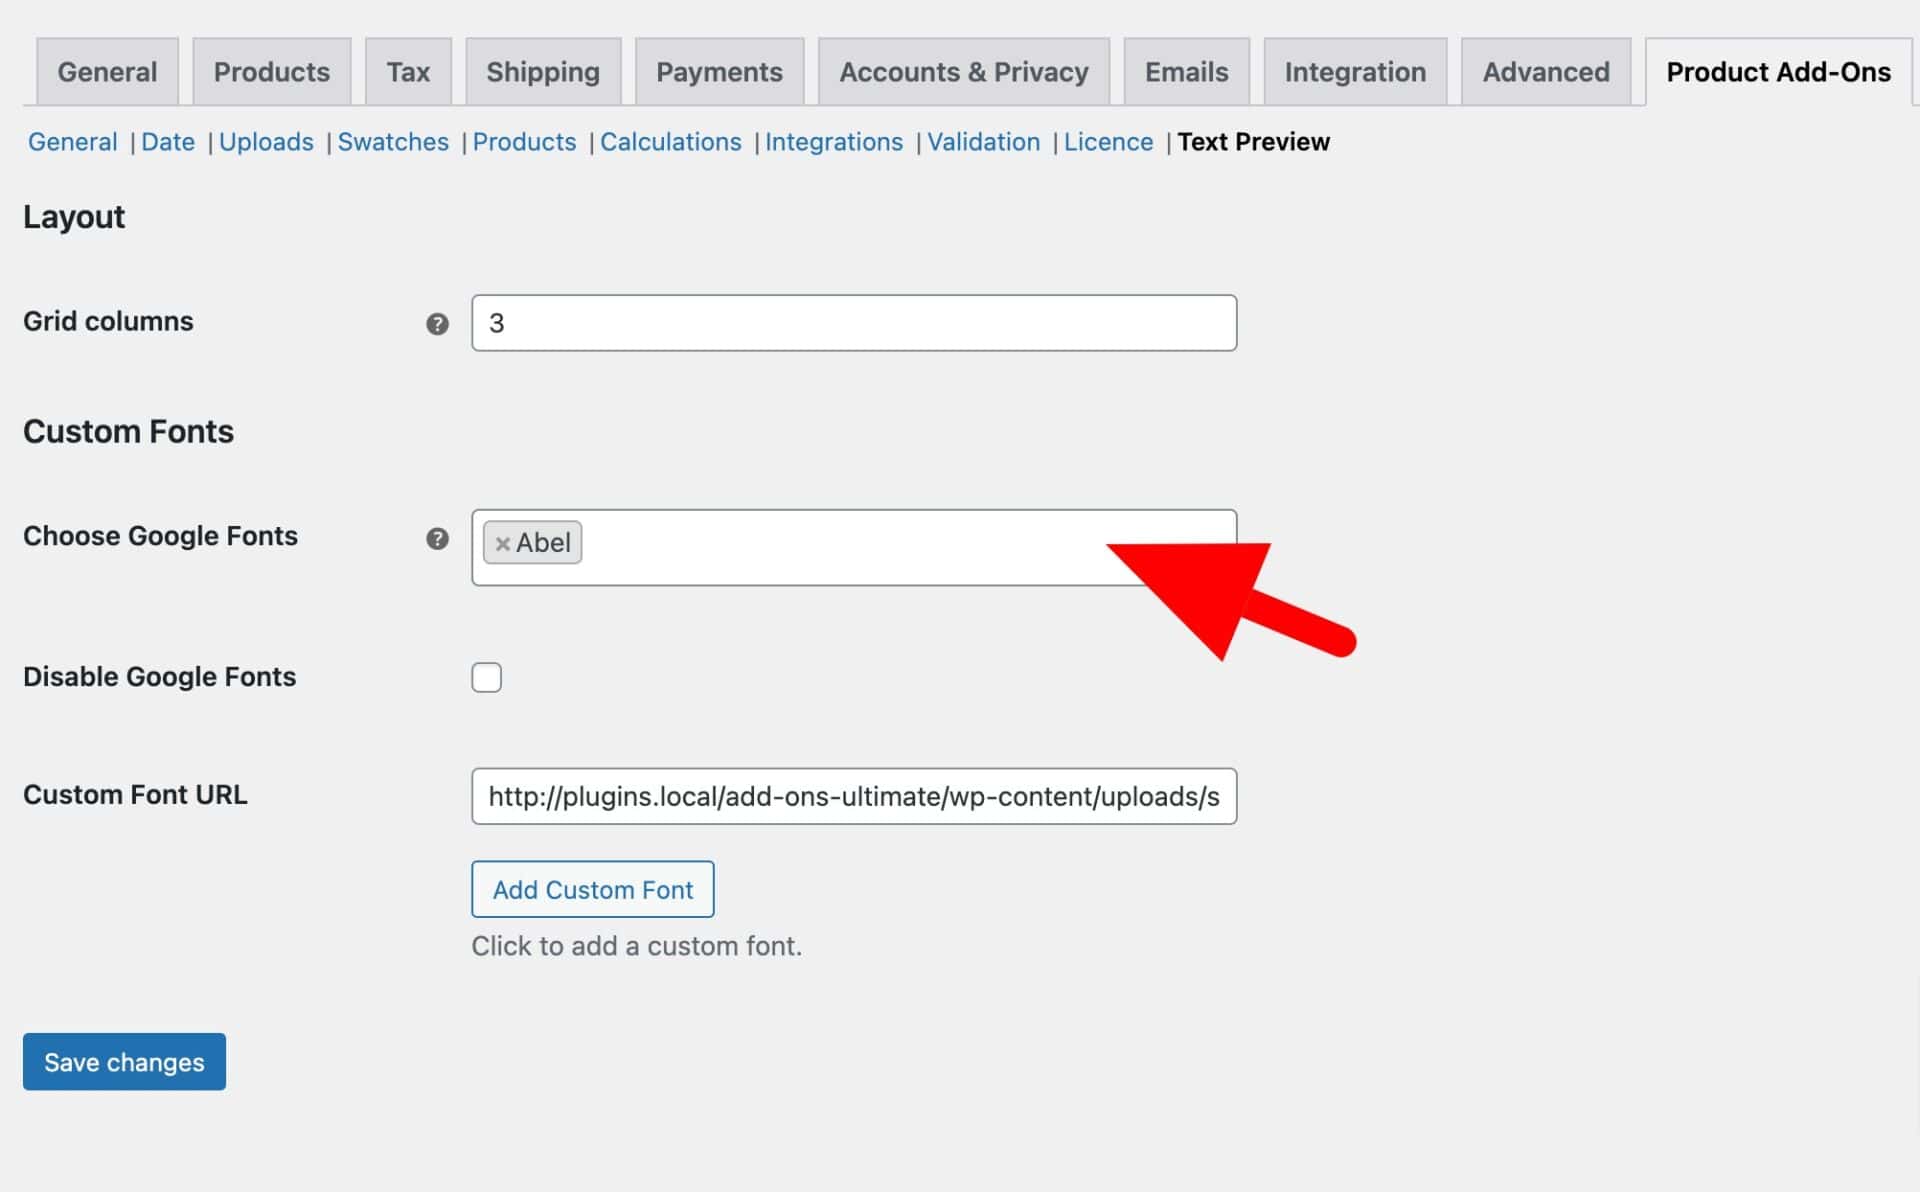
Only the fonts entered here will be displayed on the front end to the user.
Uploading your own fonts
However, if you like, you can upload your own fonts too.
To upload your own fonts, follow these steps:
1. Upload font files to your server
You can either upload your font file to a location on your server using FTP or similar. Alternatively, you can upload them to your Media Library in WordPress. However, note that you might need to install a plugin like Extra File Types to allow the file types.
When you’ve uploaded your font file, make a note of its URL.
2. Register your custom fonts
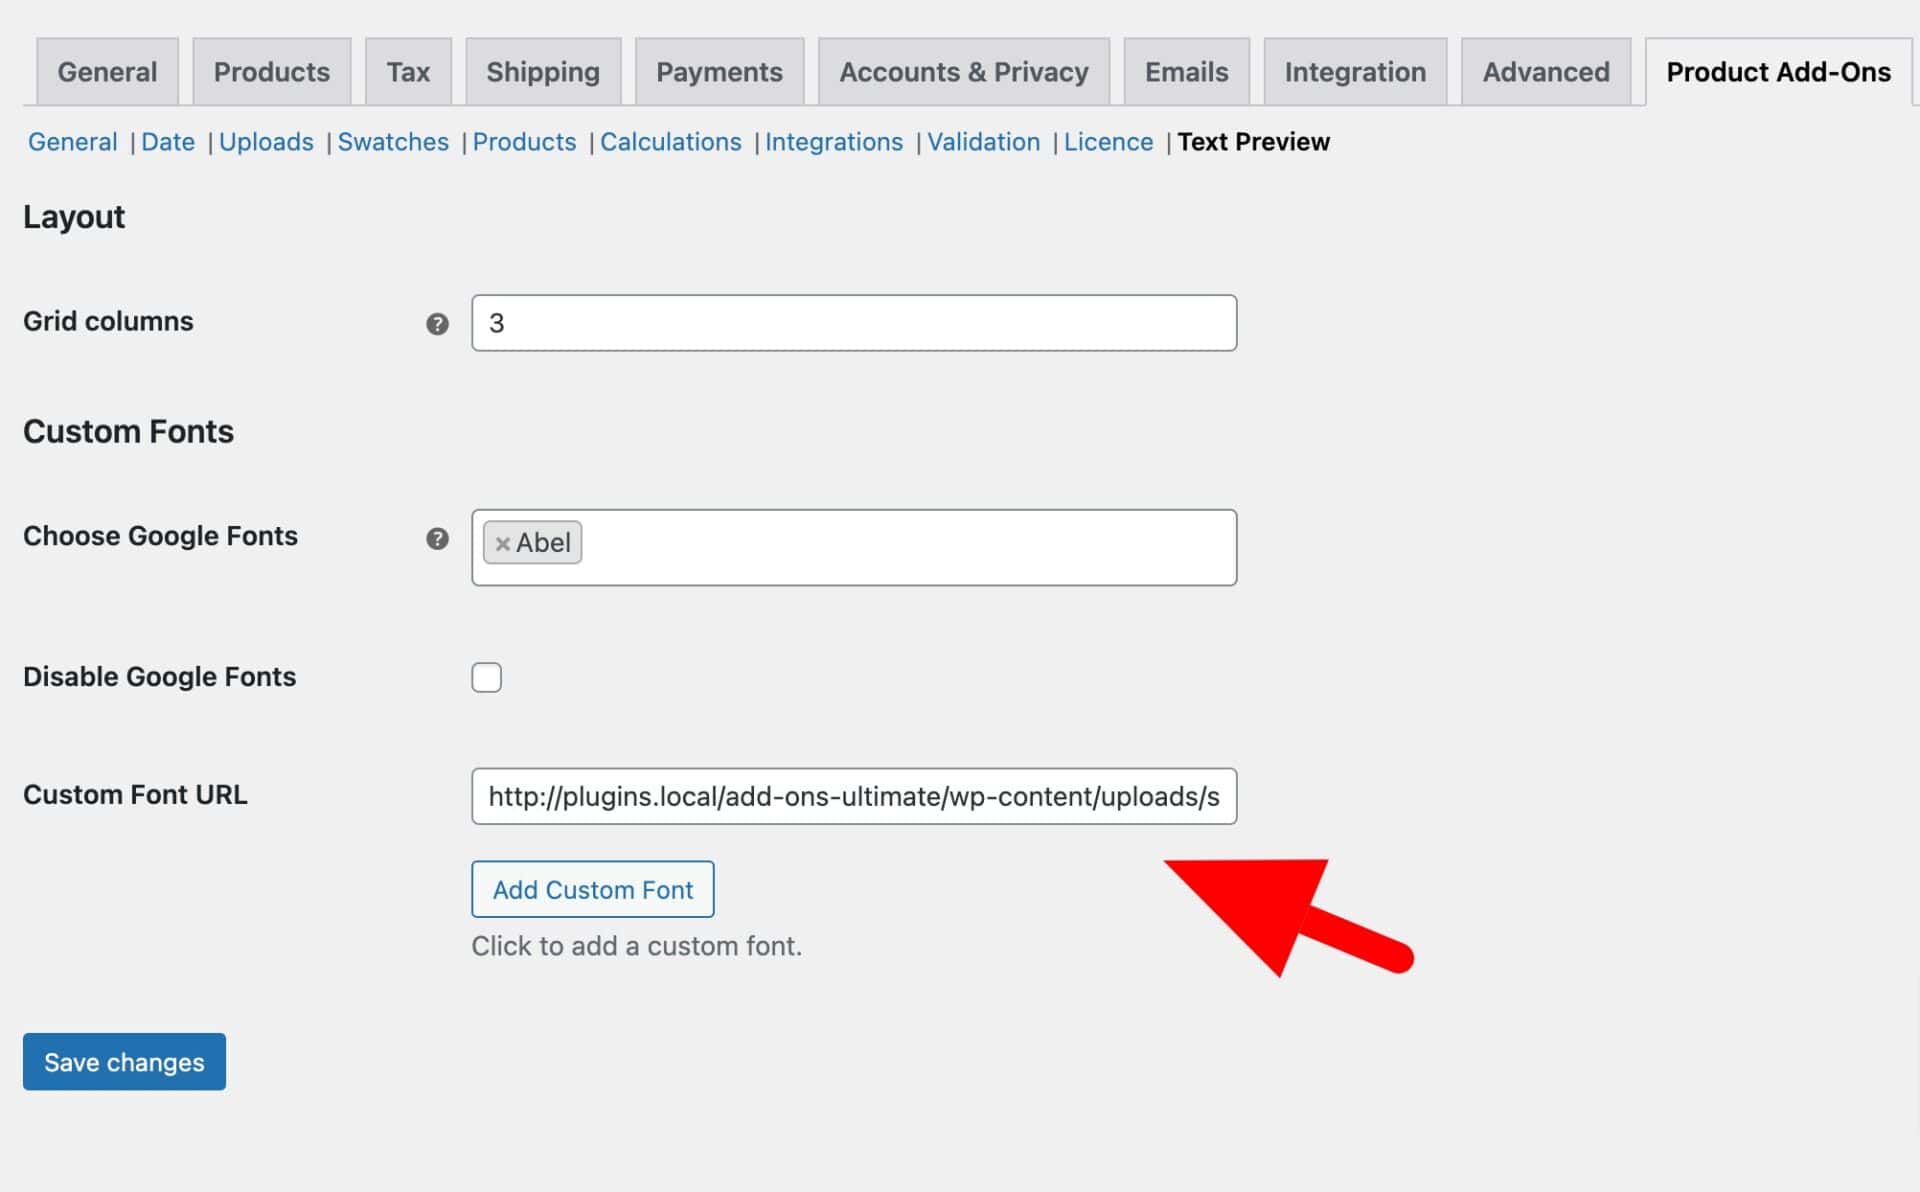
To register the font so that it’s available to the user, you’ll need to add the URL to the ‘Custom Font URL’ setting.
Go to WooCommerce > Settings > Product Add-Ons > Text Preview and enter the URL in the ‘Custom Font URL’ field. If you want to add more than one font, just click the ‘Add Custom Font’ button.
When you’ve finished adding all your custom fonts, click ‘Save changes’.
Your custom fonts will now automatically appear in the front end select field.
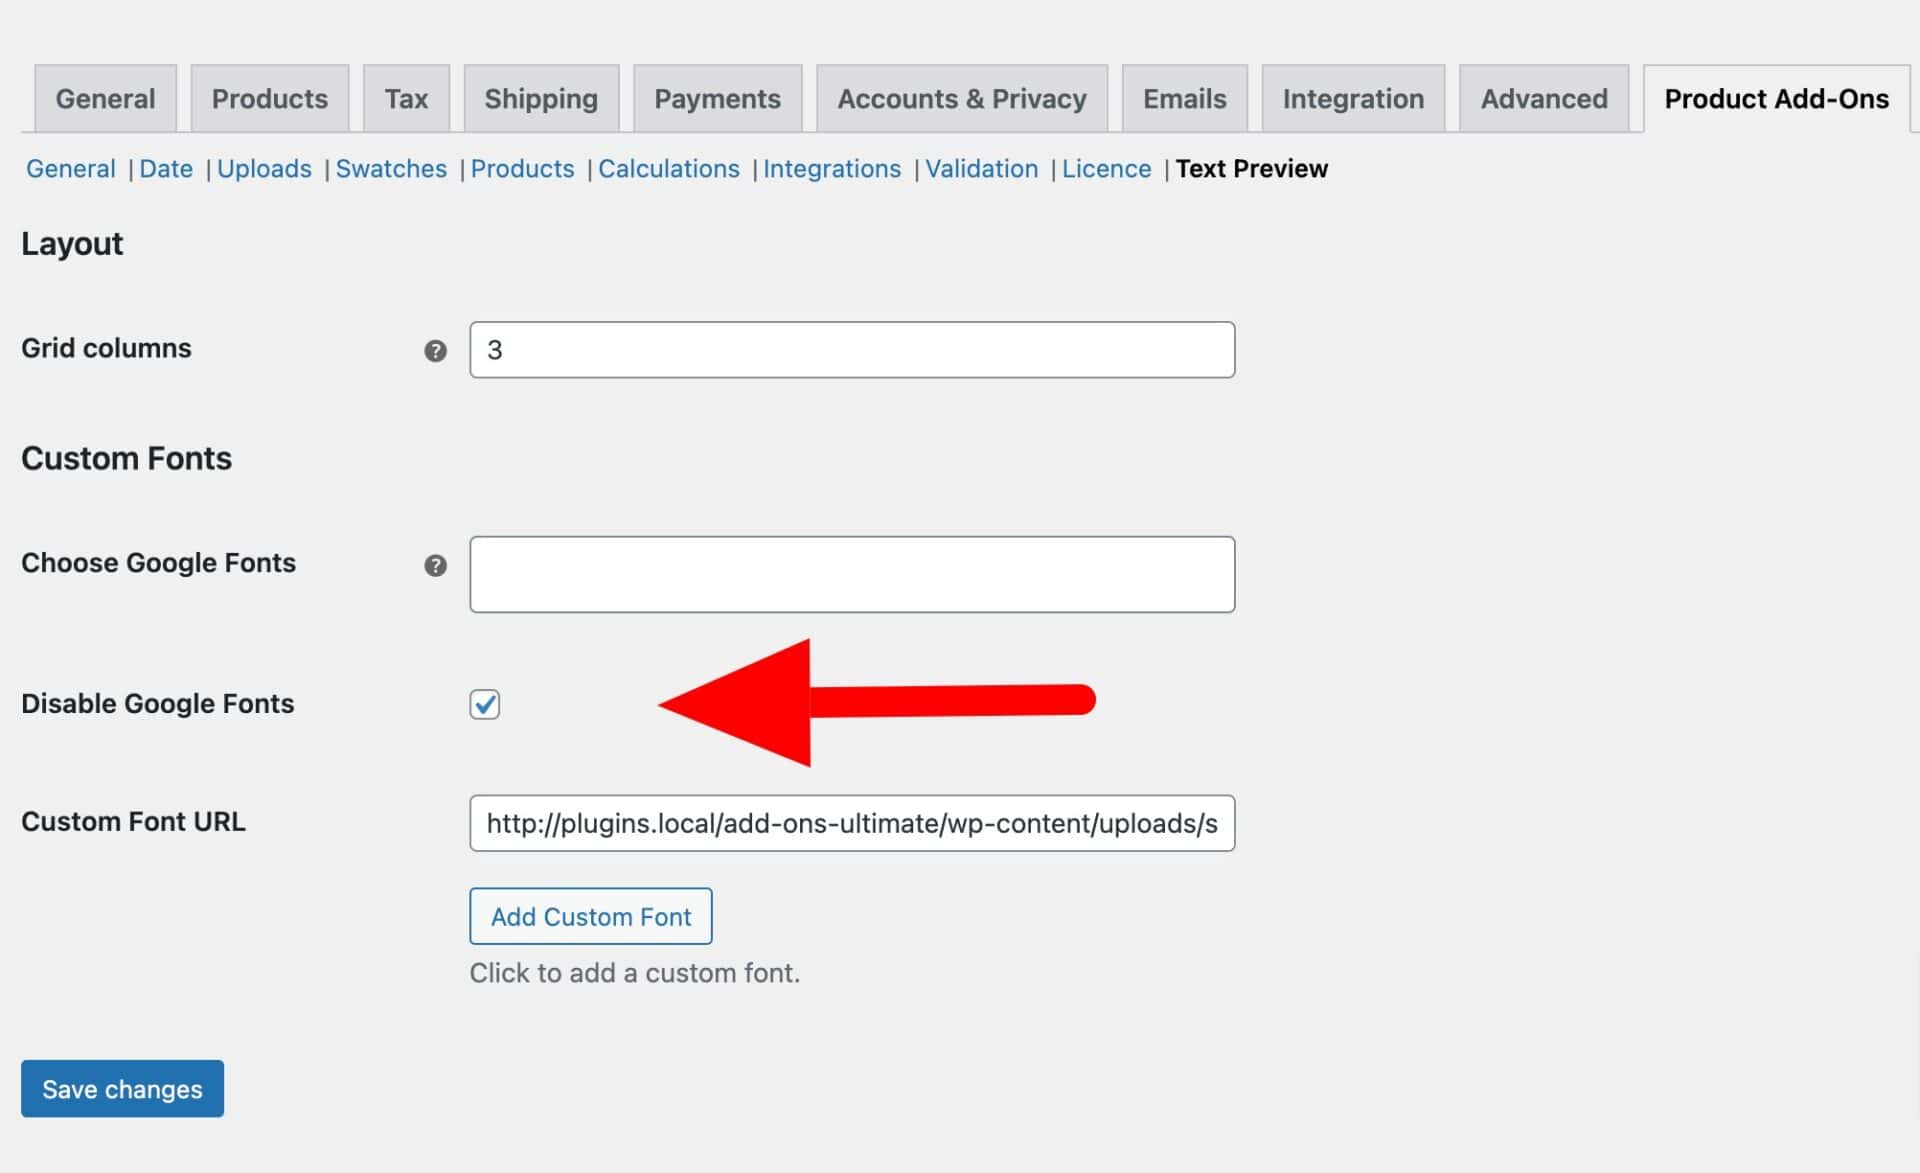
Disable Google Fonts
If you have custom fonts and some or all Google Fonts, these will all be displayed in the same list. If you would like to disable all Google Fonts and just use your custom fonts, select the ‘Disable Google Fonts’ option.
Troubleshooting custom fonts
If you’re uploading custom fonts, you might find that you see the term [object Object] in your select field. To solve this issue, you need to dequeue the standard version of Select2. You can do that with this snippet:
| <?php | |
| /** | |
| * Enqueue older version of Select2 library | |
| */ | |
| add_filter( 'apaou_dequeue_select2', '__return_true' ); |
Here’s how to add that snippet.