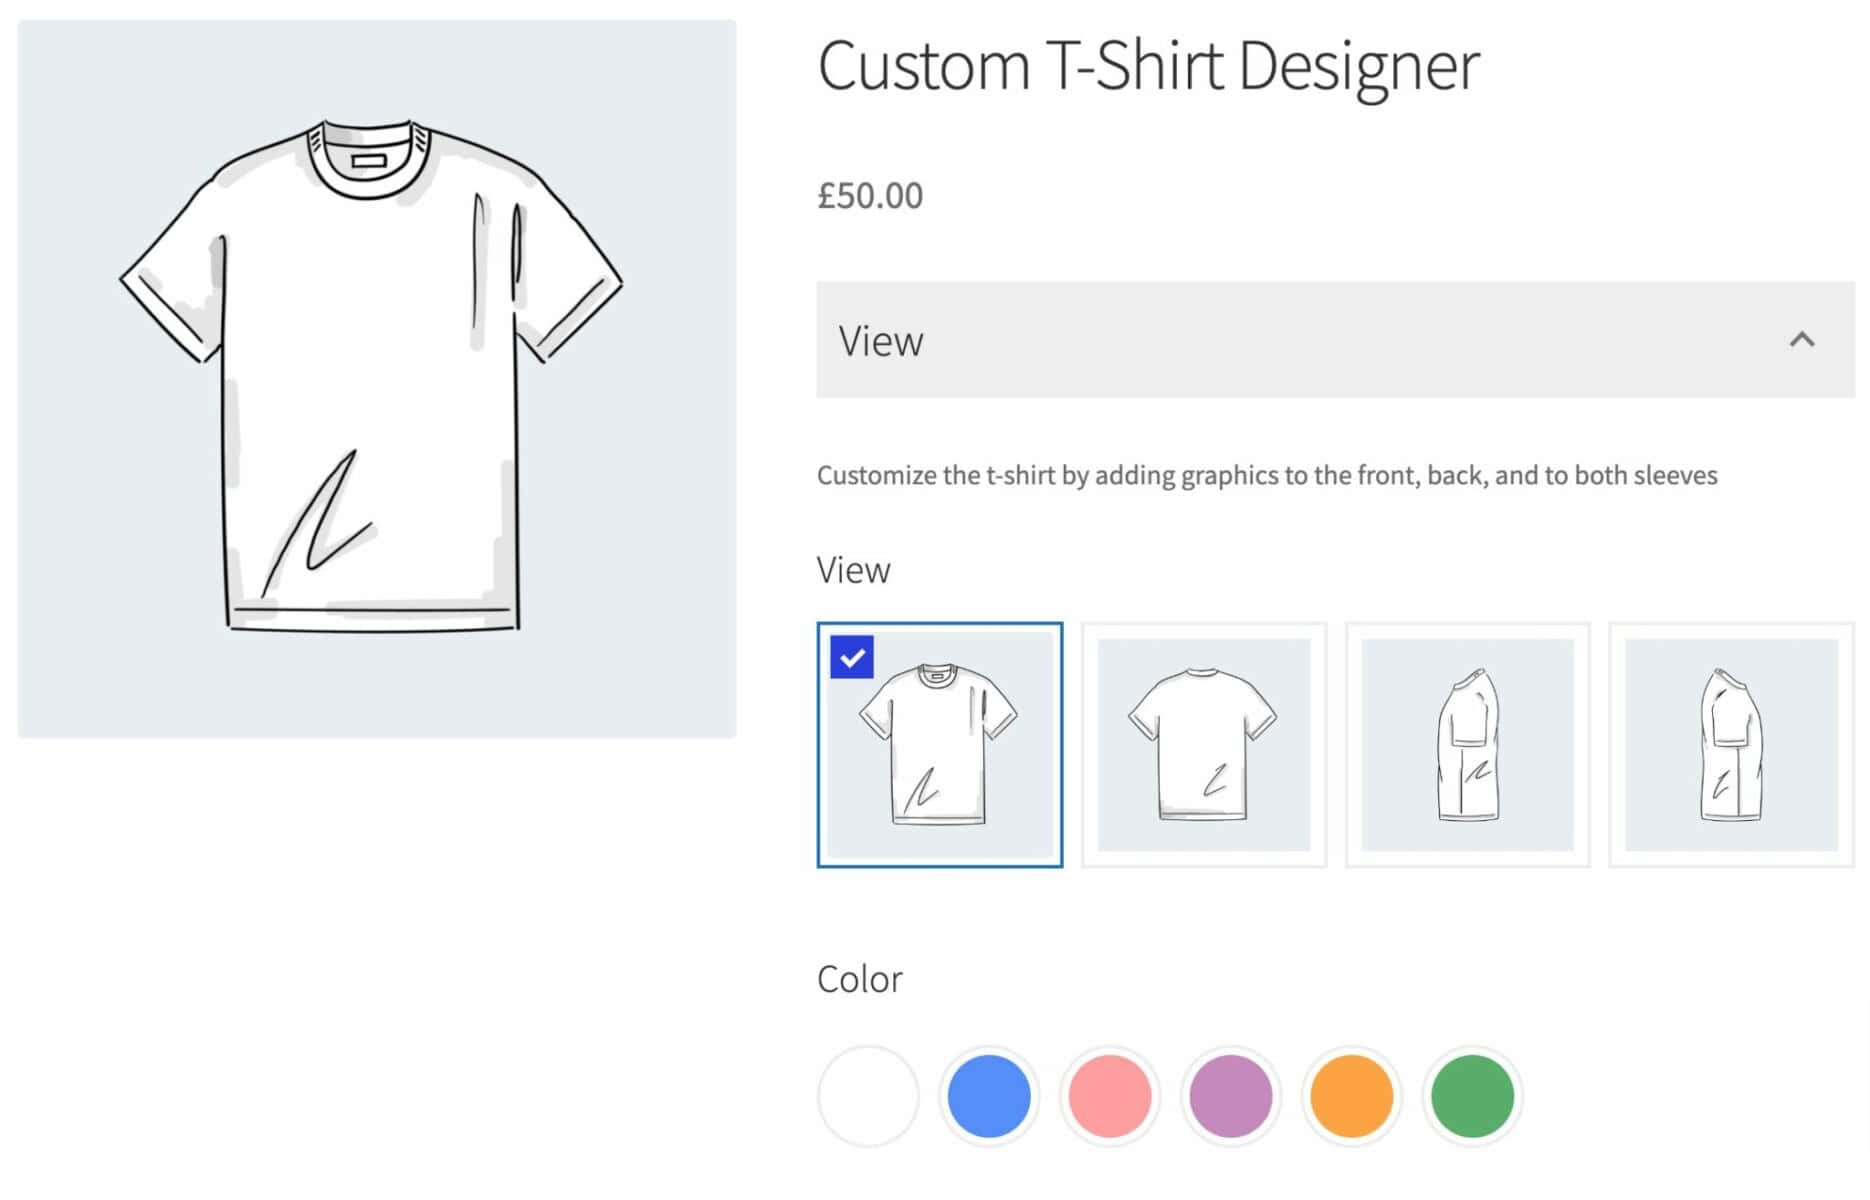
In the WooCommerce Product Add-Ons Ultimate plugin ‘swatches’ fields allow you to display images or colors as swatches on your WooCommerce product. Take a look at the screenshot below – you can see the two types of swatches: a color swatch and an image swatch. There’s a demo product here.
(Note: if you are looking to display a text swatch, please see this article).
Setting up Swatches fields
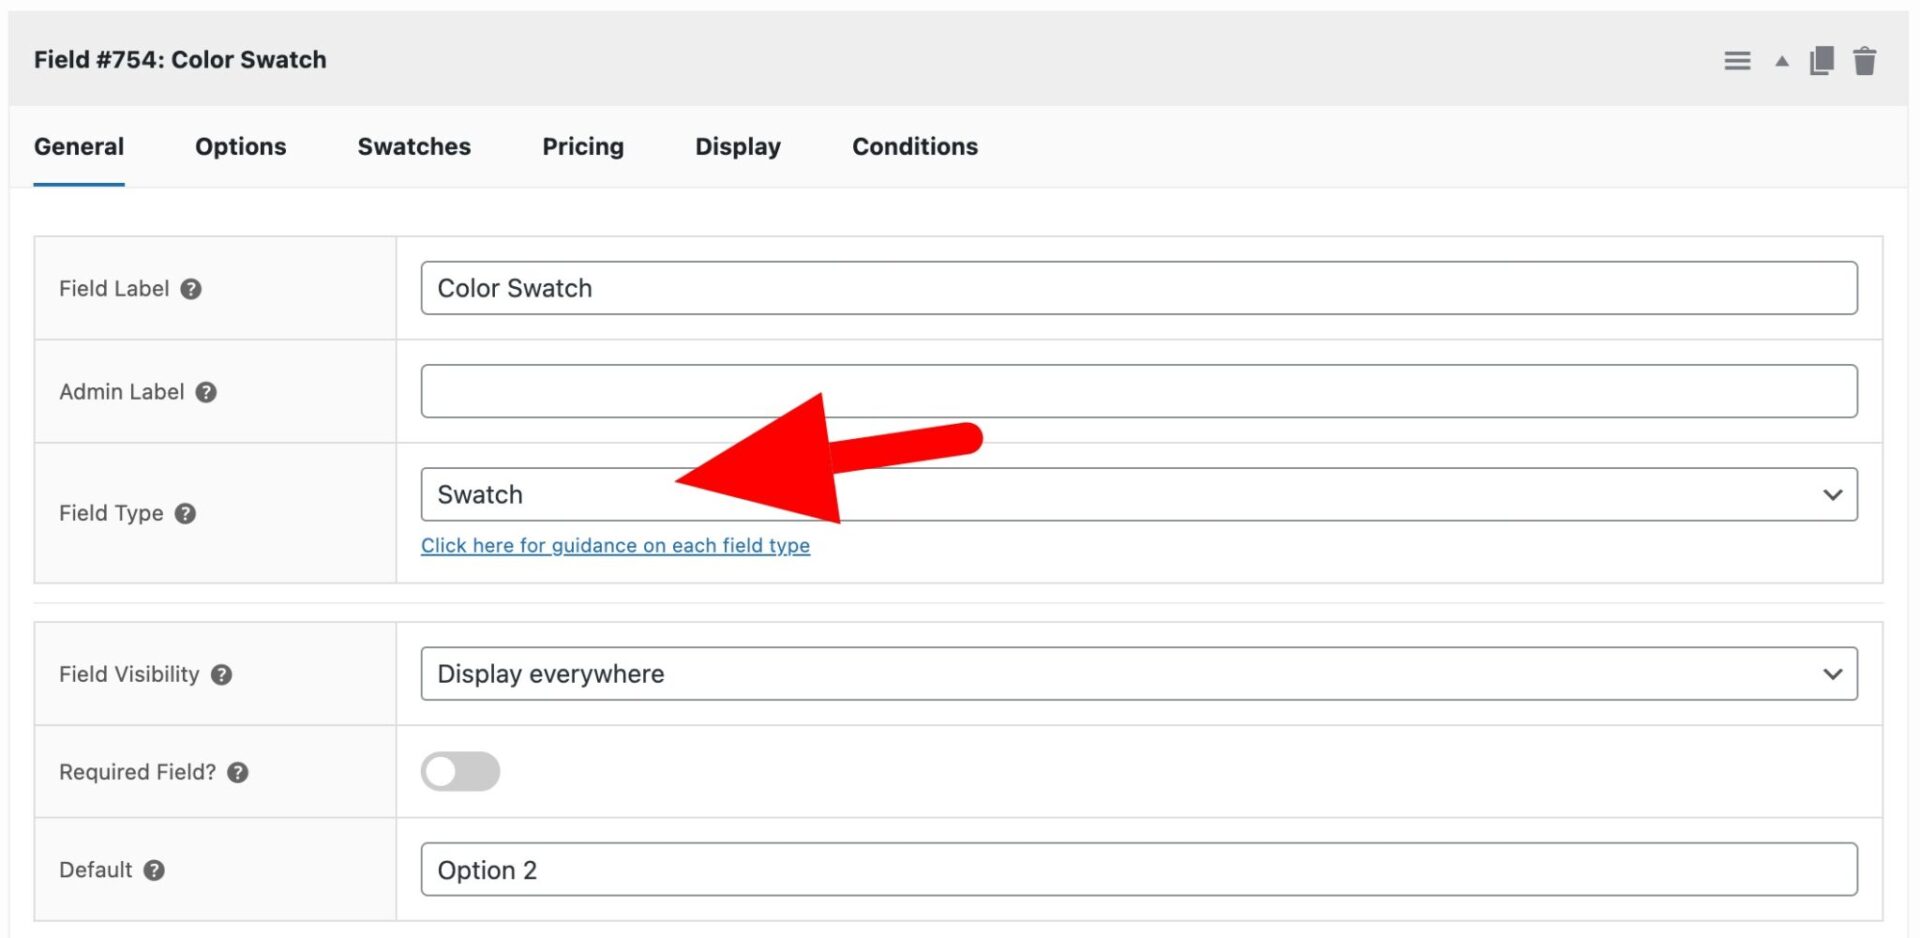
To add either an image or color swatch field, just choose ‘Swatch’ from the ‘Field Type’ dropdown list.
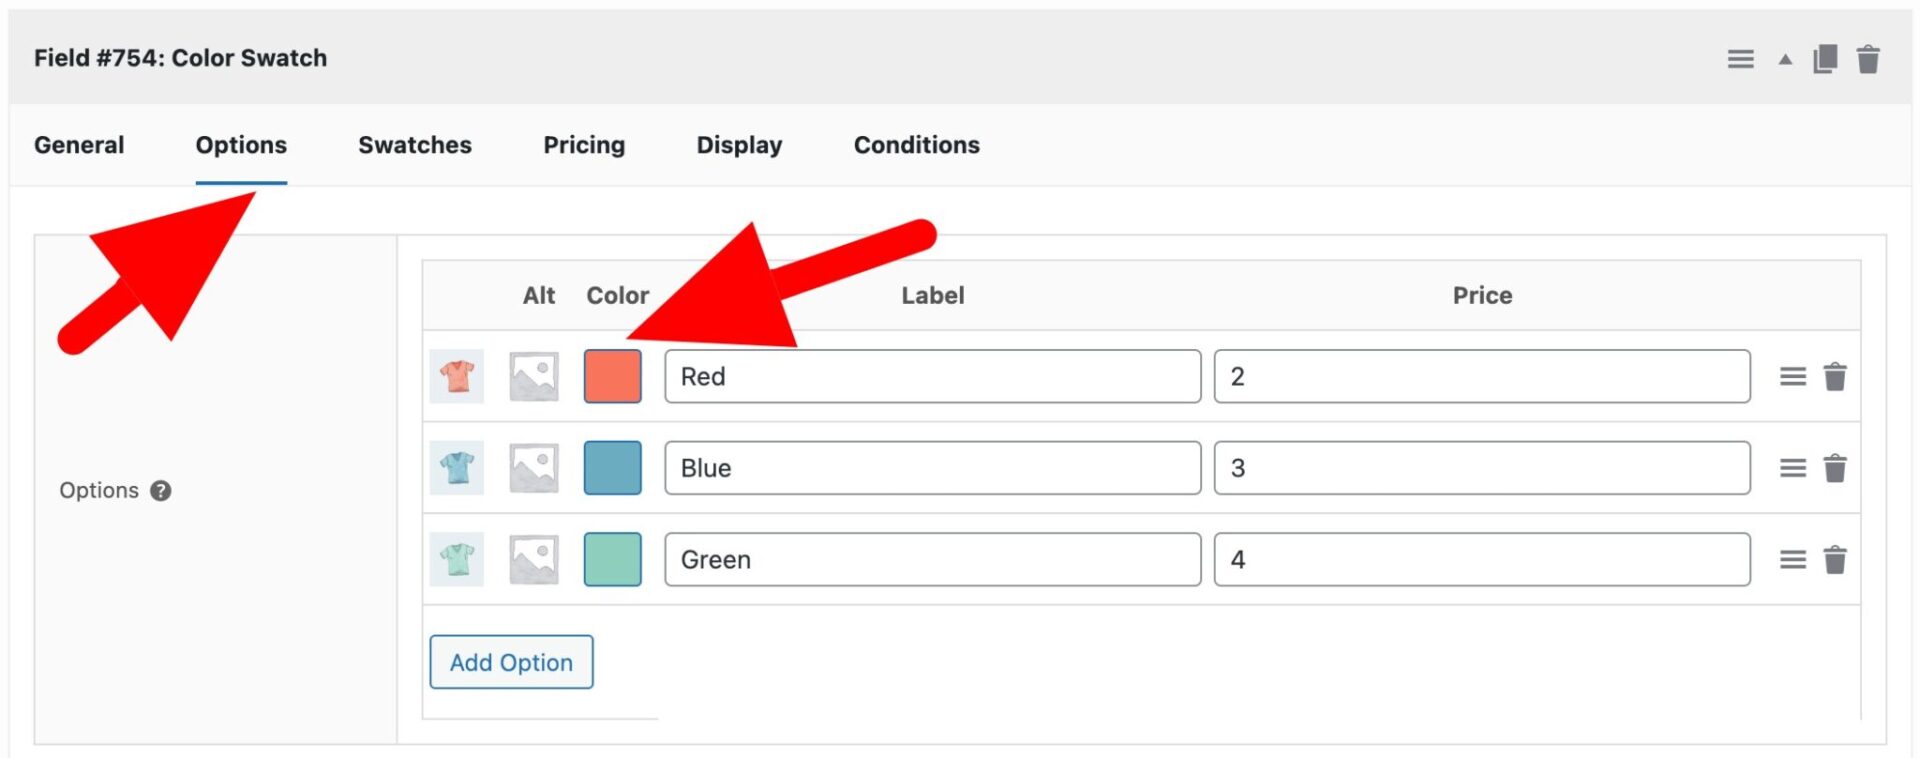
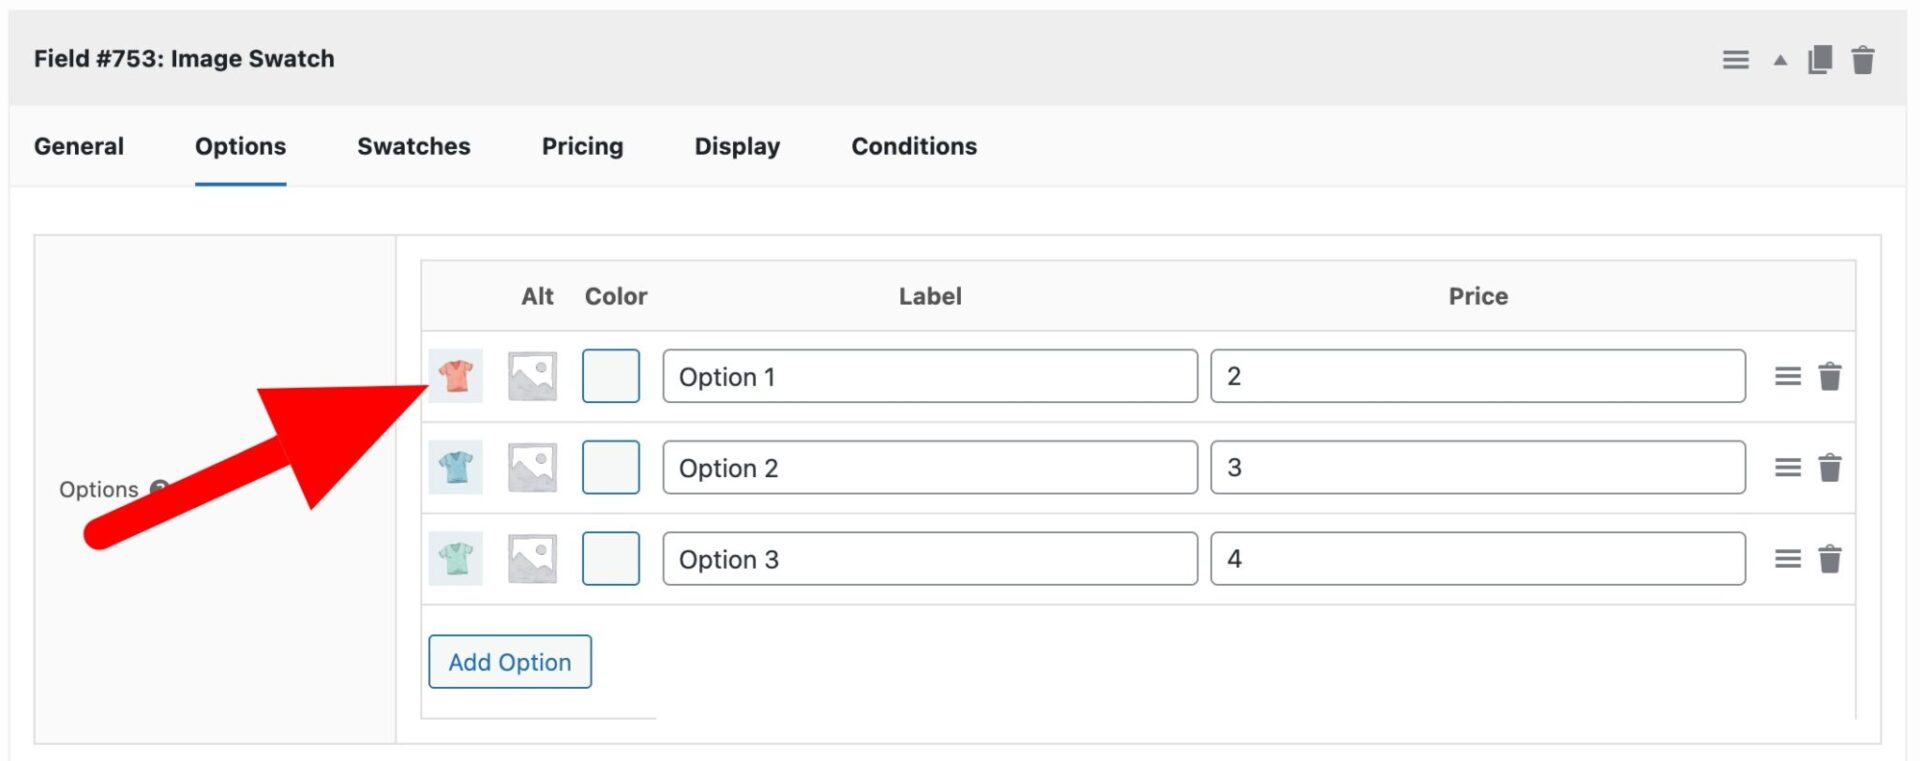
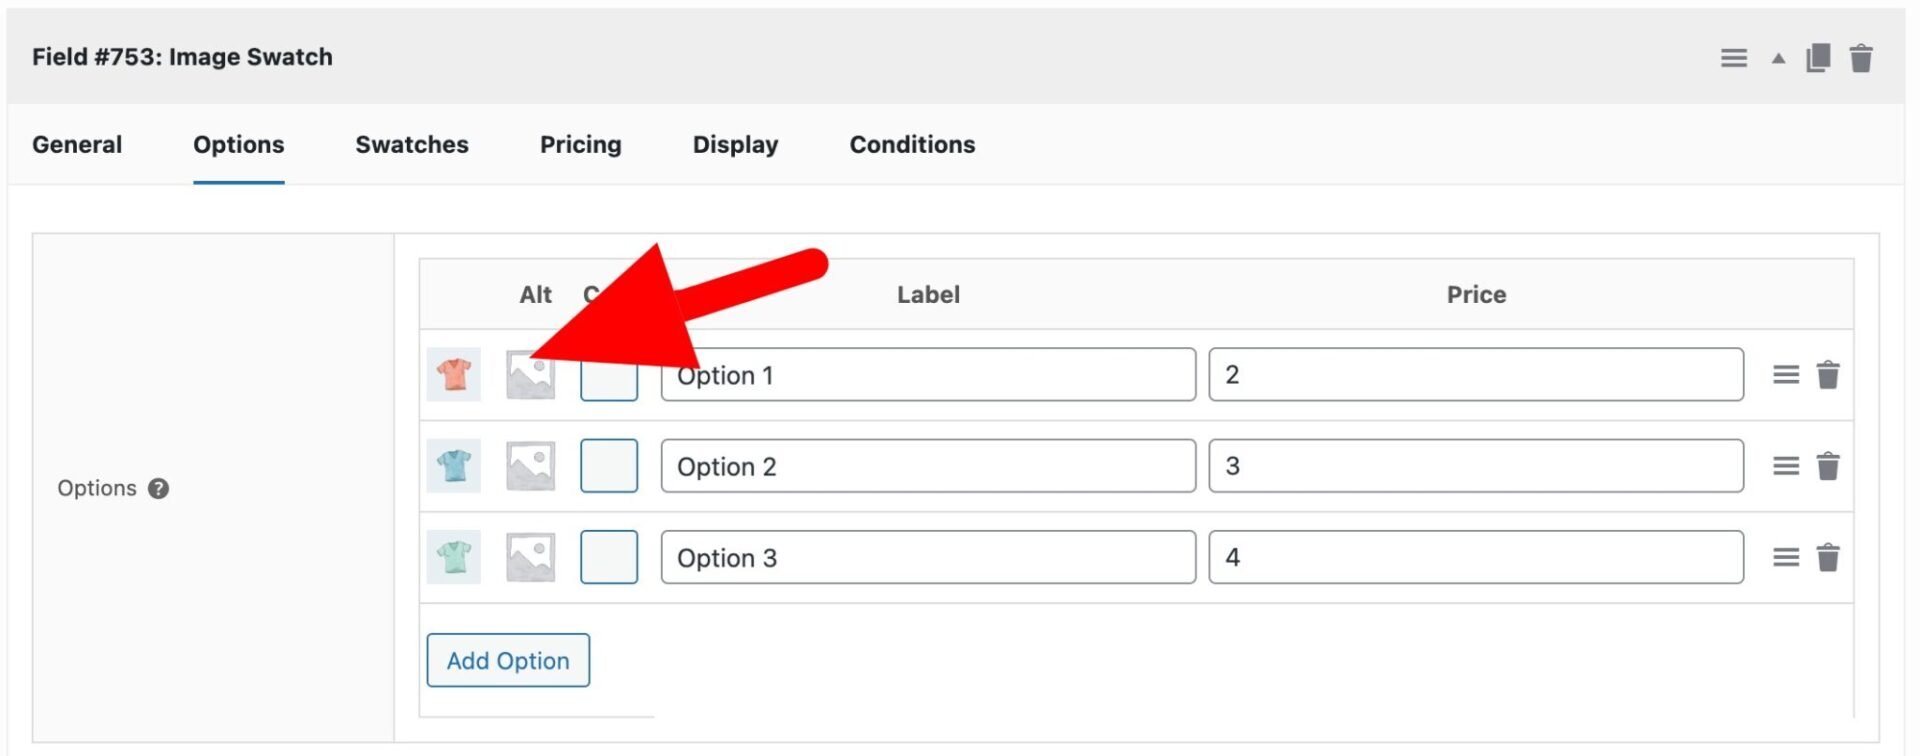
Select the ‘Options’ tab and define each swatch as an option. You can enter a label and a price (optional). The price will only be added to the product price if the user selects that option.
If you’re creating color swatches then define the color by clicking on the color picker.
If you’re creating image swatches then upload an image by clicking on the image placeholder on the left of the option.
Optionally, upload an alternative image in the ‘Alt’ column. This is the image that will be displayed as the swatch and can be used with the layered images option.
Min Number
Set the minimum number of swatches that the user should choose. This only works when ‘Allow multiple’ is enabled. Note also that the validation takes place when the user clicks ‘Add to cart’.
Max Number
Set the maximum number of swatches that the user should choose. This only works when ‘Allow multiple’ is enabled. Note also that the validation takes place when the user clicks ‘Add to cart’.
If you are specifying a minimum or maximum number of swatches, you might need to ensure that ‘Required field’ is checked in order to ensure that users select the required number of swatches.
For some further settings, click on the ‘Swatches’ tab.
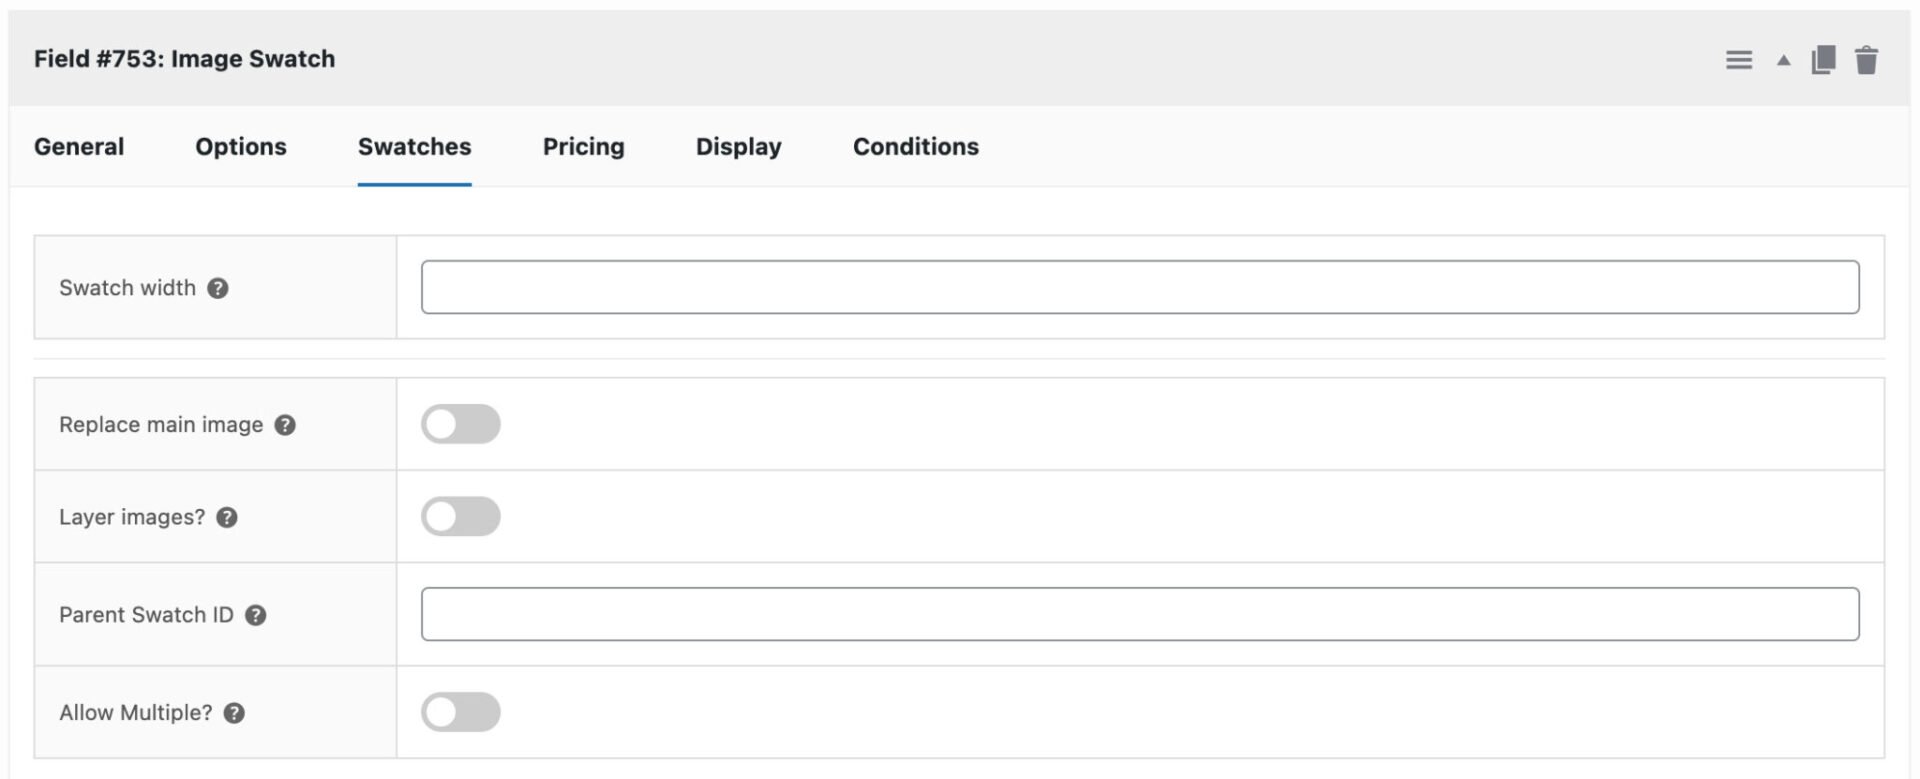
Swatch Width
Set a maximum width in pixels for each swatch. Leave blank to use the default image size.
Replace Main Image
See below.
Layer Images
See this article.
Allow Multiple
Select this option if the user can select more than one option.
Click on to the ‘Display’ tab for options on how to display the swatches.
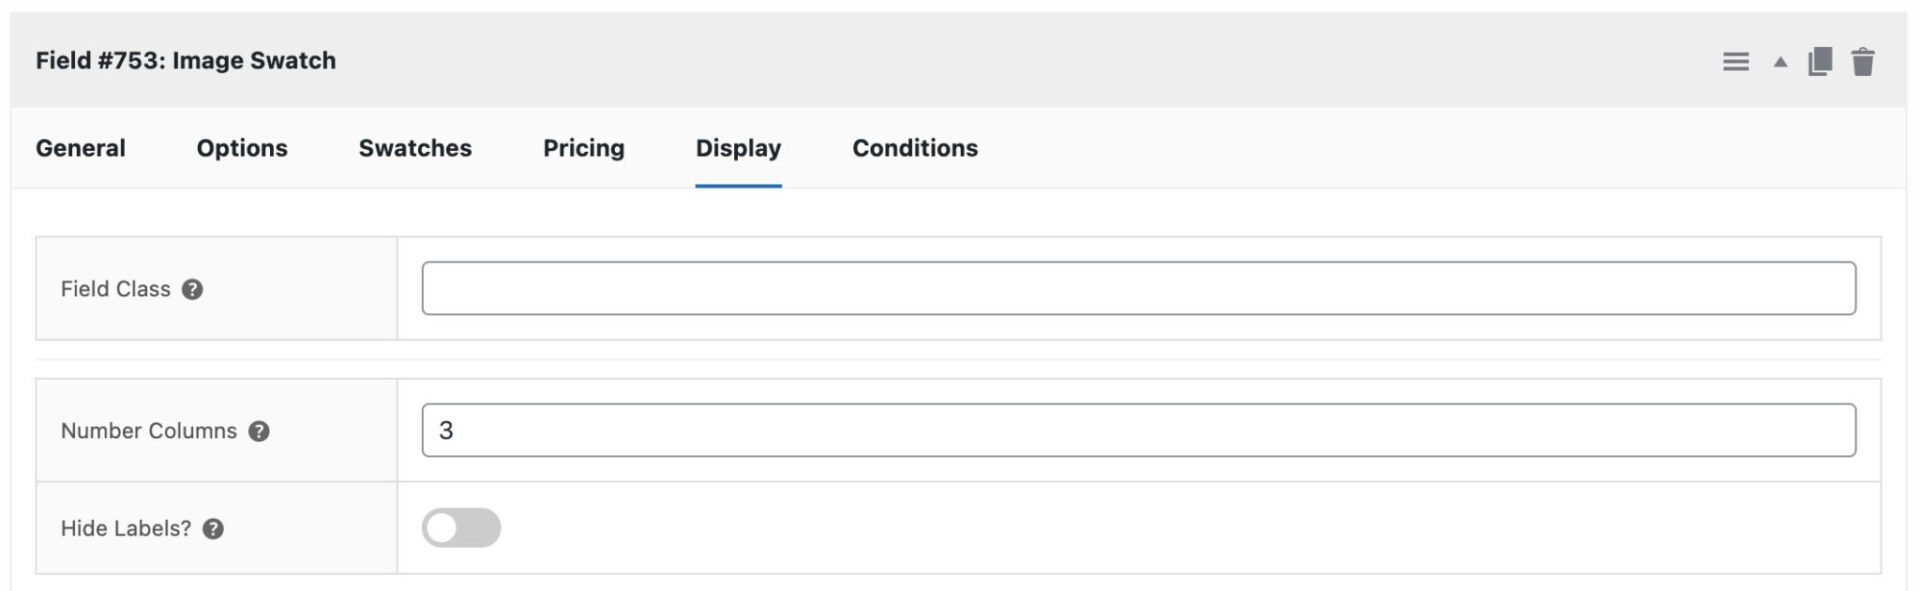
Number Columns
Choose how many columns to display the image swatches in on the front end.
Hide Labels
Select this option to hide the text labels and only display the images.
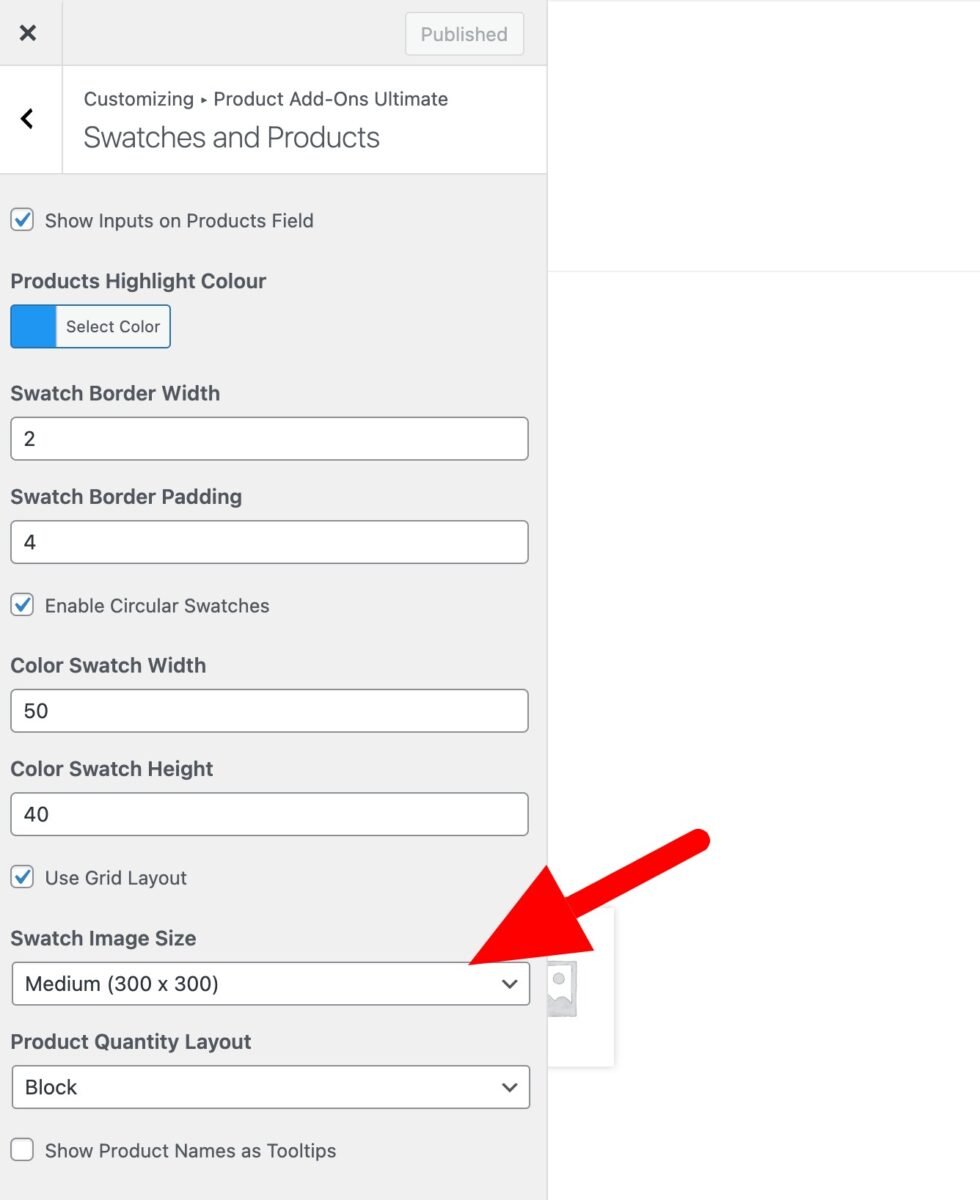
Make swatch thumbnails larger
If you would like to display swatch images at a larger size, you can adjust the ‘Number columns’ setting above. The size of the swatch will automatically adjust to fill the available space – so swatches in 1 column will be much larger than swatches in 4 colums, for example.
You can also adjust the default image size. Follow the guidance in this document on styling add-on fields to open the Customizer. Then navigate to Product Add-Ons Ultimate > Swatches and Products and change the ‘Swatch Image Size’ setting.
Replace main image with swatch image
To replace the main image with the selected image swatch, go to WooCommerce > Settings > Product Add-Ons > Swatches and check the ‘Replace main image’ setting.
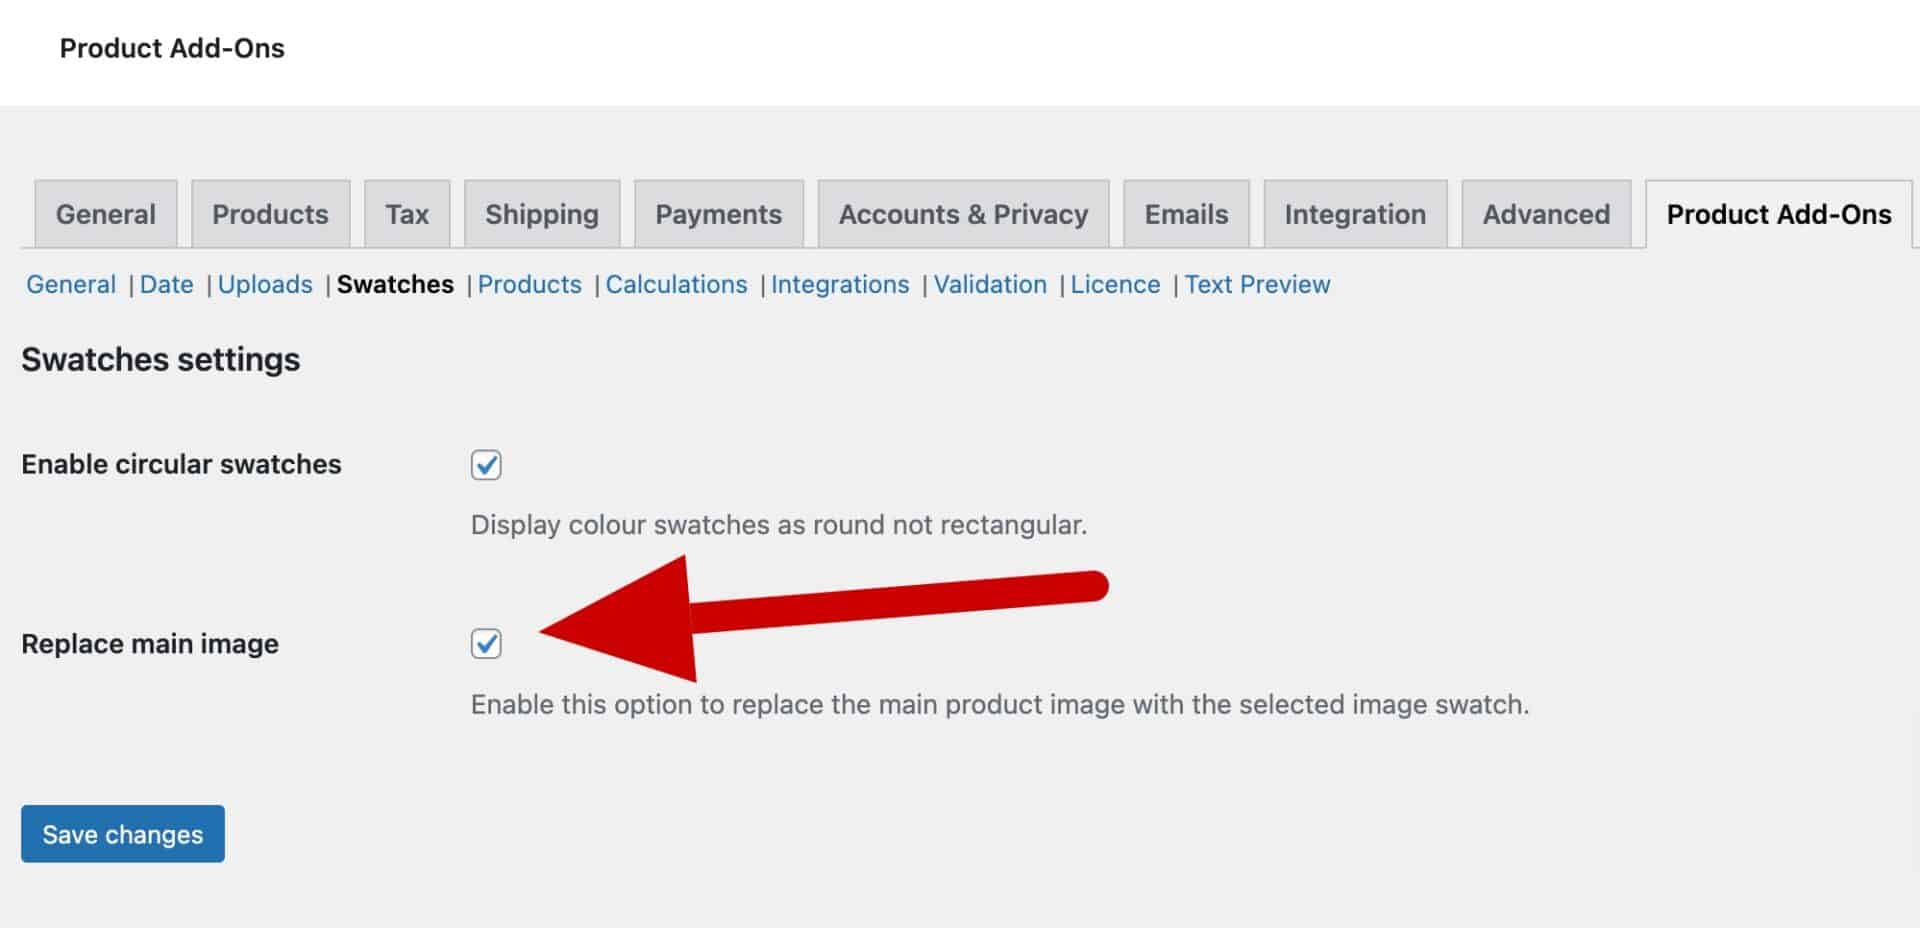
Please note that there might limited support for this feature from your theme. You can always test its functionality by switching temporarily to the Storefront theme and rechecking.
Enable circular colour swatches
By default, colour swatches will be square. If you prefer them to be circles, open the WordPress Customizer then go to Product Add-Ons Ultimate > Swatches and Products and select the ‘Enable Circular Swatches’ option.
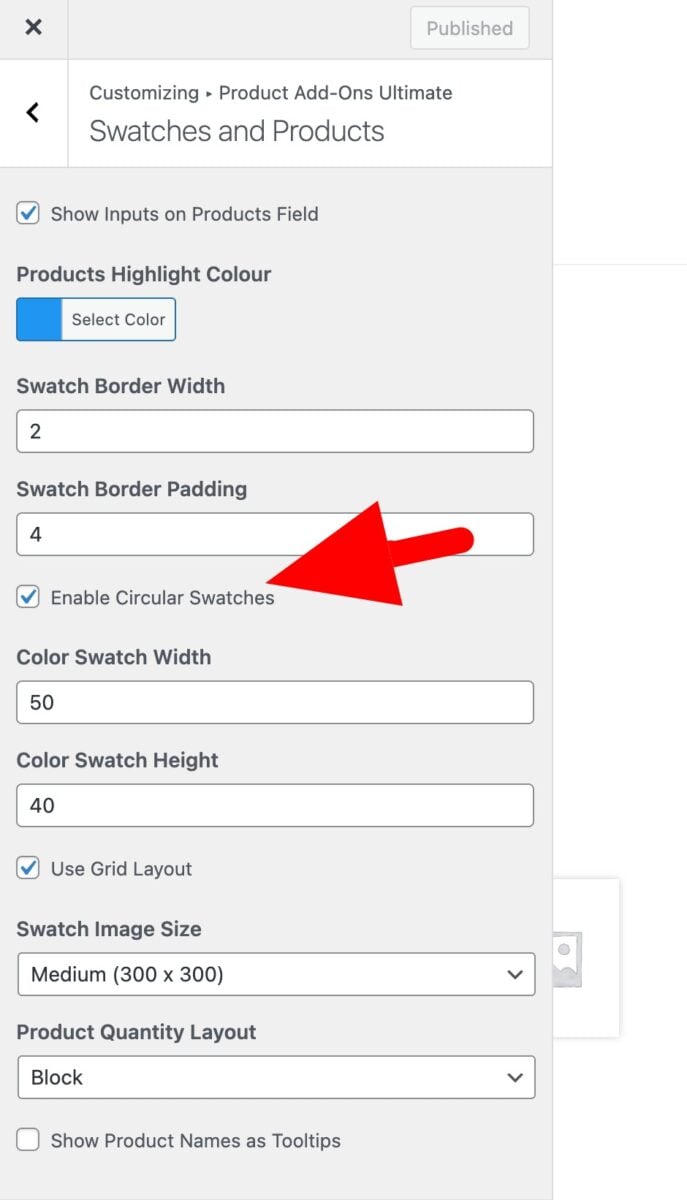
Image layers
If you’d like to use your swatches as image layers, see this article.