The Advanced Uploads extension will add extra options to your Product Add-Ons Ultimate settings. You’ll find the extra options in the general settings and in the add-on field settings.
General settings
First, go to WooCommerce > Settings > Product Add-Ons and click the ‘Uploads’ subheading. You’ll see a new section with the settings for Advanced Uploads.
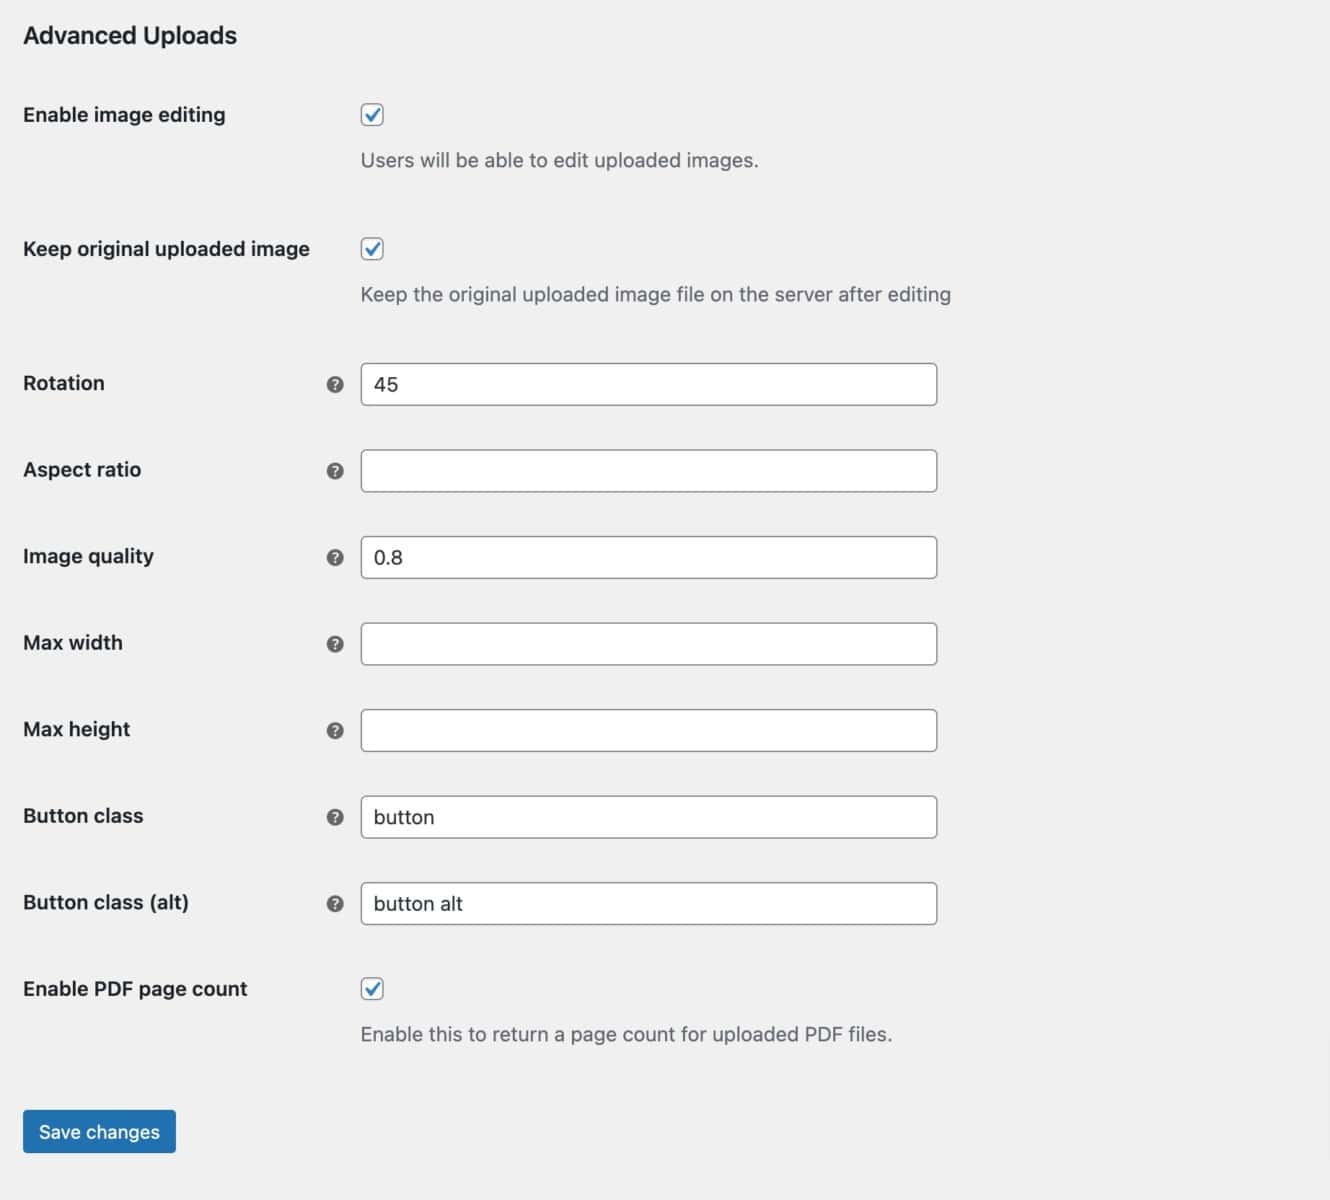
Advanced Uploads settings
Here’s a guide to the settings available in Advanced Uploads. Many of these settings can be overridden by individual upload fields.
- Enable image editing: you need to enable this for the other options to be available. When you check this option, the user will see a link to ‘Edit Image’ when they upload a new image
- Keep original uploaded image: if you’d like to receive a copy of the original file before the user performed any editing tasks, check this option
- Rotation: enter a value in this field to allow users to rotate their images after upload. The value that you enter will be the number of degrees that the image can be rotated by
- Aspect ratio: if you want to force the user to crop to a certain aspect ratio, enter a value here. You can use a value like ’16/9′ or ‘1.778’
- Image quality: you can use this setting to control the quality (and therefore also the size) of the edited image. Enter a value between 0 and 1 with 1 being the highest quality. The default value is 0.8
- Max width: enter a value here to rescale uploaded images to a maximum width. Leave the next setting, ‘Max height’, empty to ensure that images are scaled to the correct aspect
- Max height: enter a value here to rescale uploaded images to a maximum height. Leave the previous setting, ‘Max width’, empty to ensure that images are scaled to the correct aspect
- Button class: you can enter a class name here that will be applied to all buttons in the editing window
- Button class (alt): enter a class name here that will be applied to the ‘Update and Close’ button in the editing window
- Enable PDF page count: enable this to return a value for the number of pages in an uploaded PDF
Field settings
As well as the general settings above, you’ll find extra options on each upload field. The extra options are highlighted below:
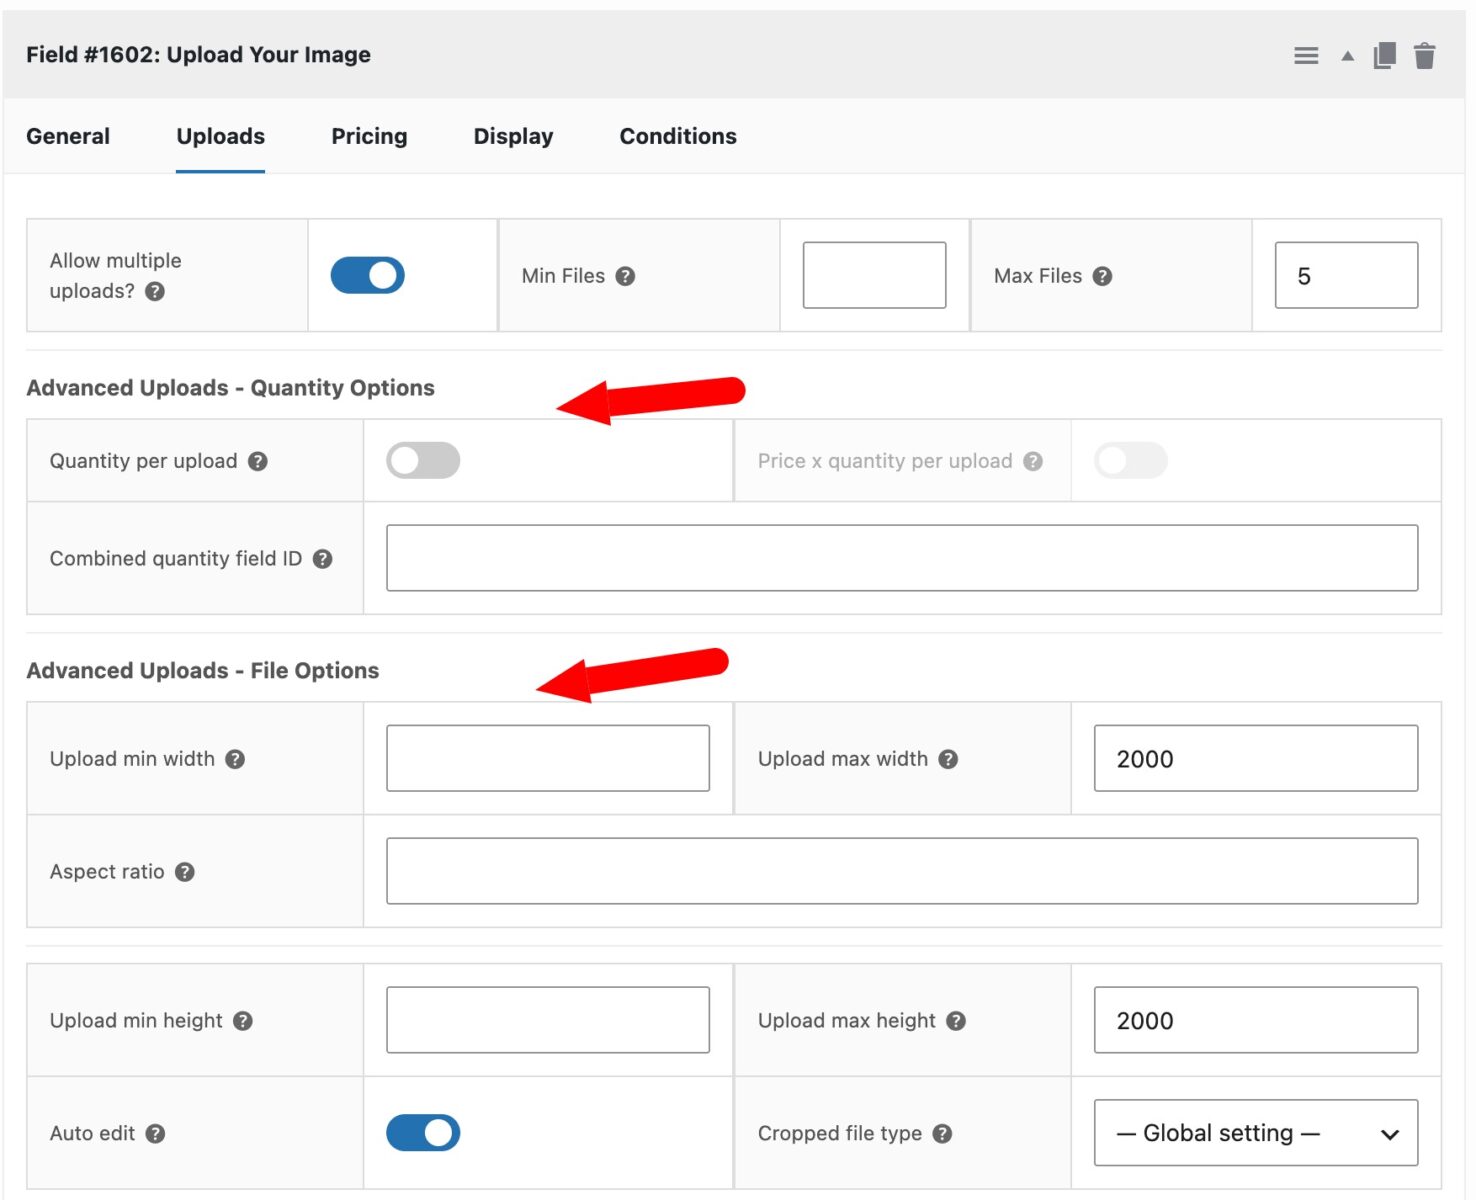
- Quantity per upload: check this field if you’d like to display a quantity field for each uploaded file
- Combined quantity field ID: enter the field ID here of a number field (set up separately) which will be used to store the combined total of all quantity fields
- Upload min width: the minimum width in pixels of any uploaded image files
- Upload min height: the minimum height in pixels of any uploaded image files
- Aspect ratio: if you want to force the user to crop to a certain aspect ratio, enter a value here. You can use a value like ’16/9′ or ‘1.778’
- Upload max width: the maximum width in pixels of any uploaded image files
- Upload max height: the maximum height in pixels of any uploaded image files
- Auto-edit: this will trigger the edit screen automatically when a user uploads a file. Note: ‘Max files’ must be set to 1