Bookings for WooCommerce can automatically create and delete Google Calendar events when bookings are made, cancelled, or removed. You can manage all your bookable products in a single calendar – or you can allocate different calendars to different products. Whatever way you choose, you can always keep your Google Calendar synced with your WooCommerce bookings.
How it works
- When a customer places an order, a calendar event is created with the booking dates, customer name, email, and phone number
- When an order is cancelled or refunded, the event is deleted
- When a booking is manually cancelled from the booking edit screen, the event is deleted
- When a booking is trashed or permanently deleted, the event is deleted
- Manual bookings created from the WP admin are also pushed to the calendar
Google Calendar set up
First, let’s take a look at how to set up your Google Calendar. This step might take a few minutes but once it’s done, you shouldn’t need to touch it again.
Step 1: Create a Google Cloud project
- Go to console.cloud.google.com and sign in with the Google account that owns the calendar you want events added to
- Click Select a project → New Project (top left of the screen), give it a name (e.g. “My Store Bookings”), click Create
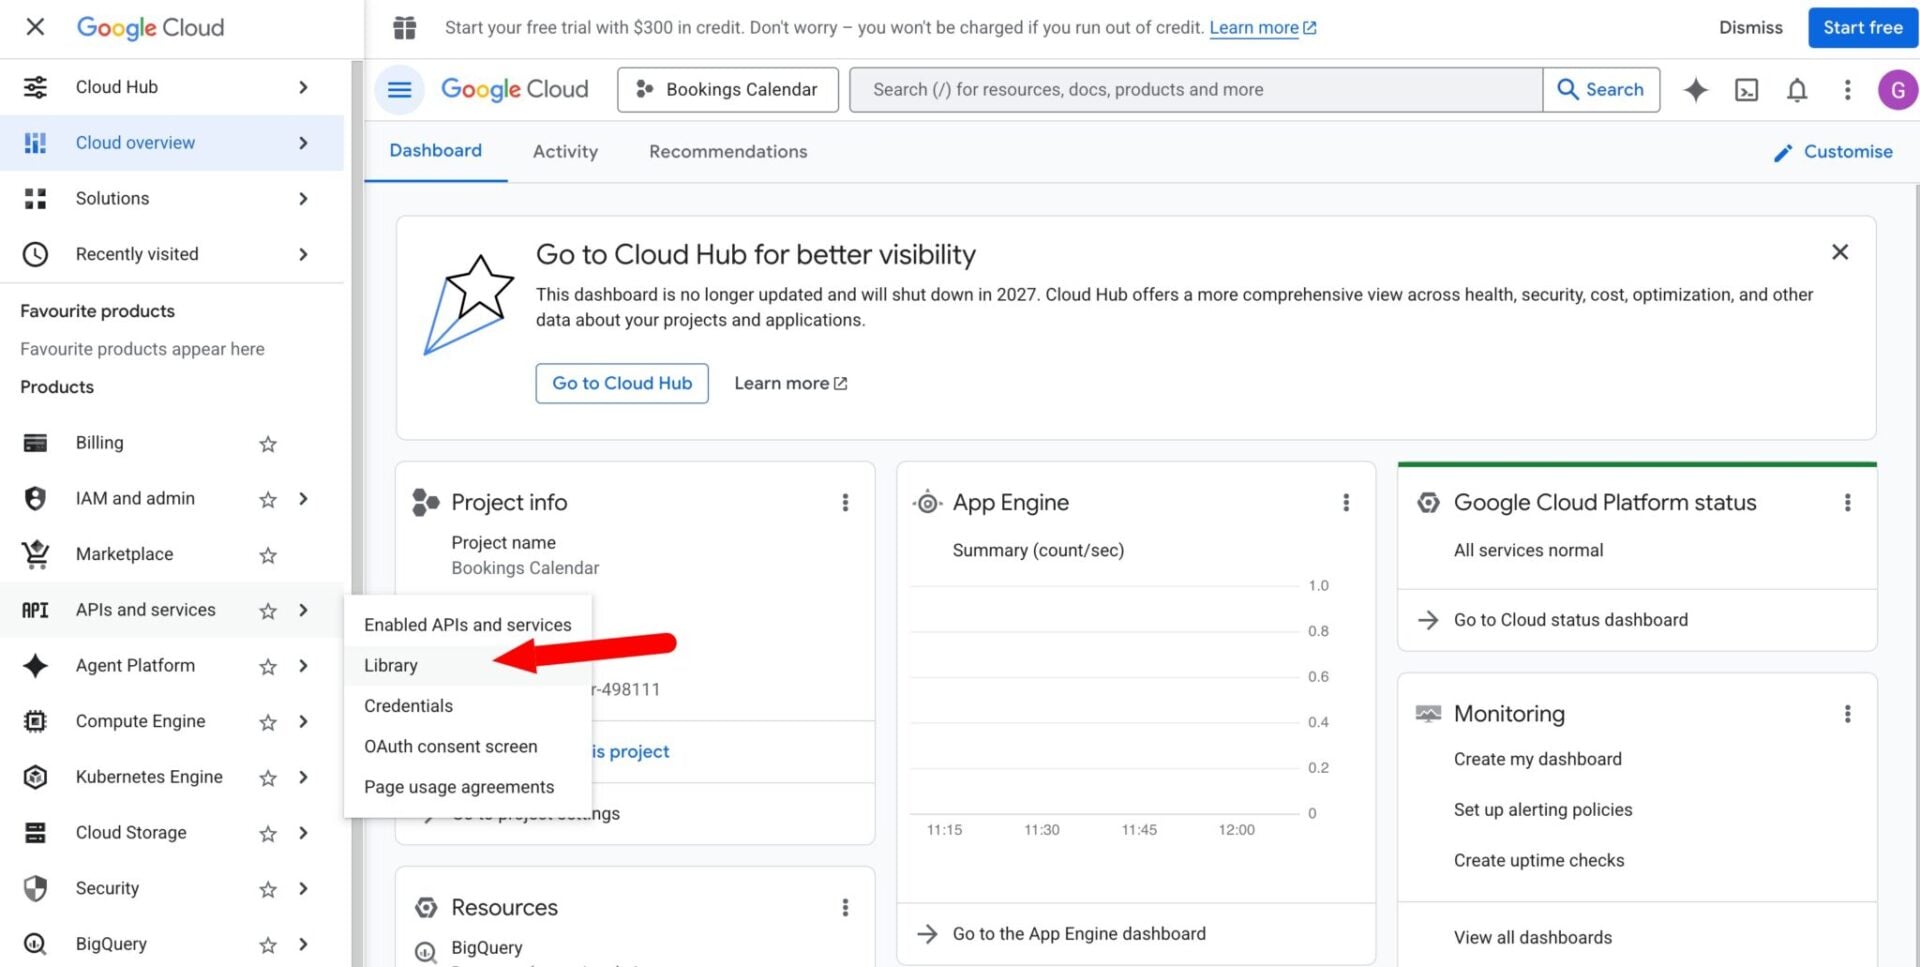
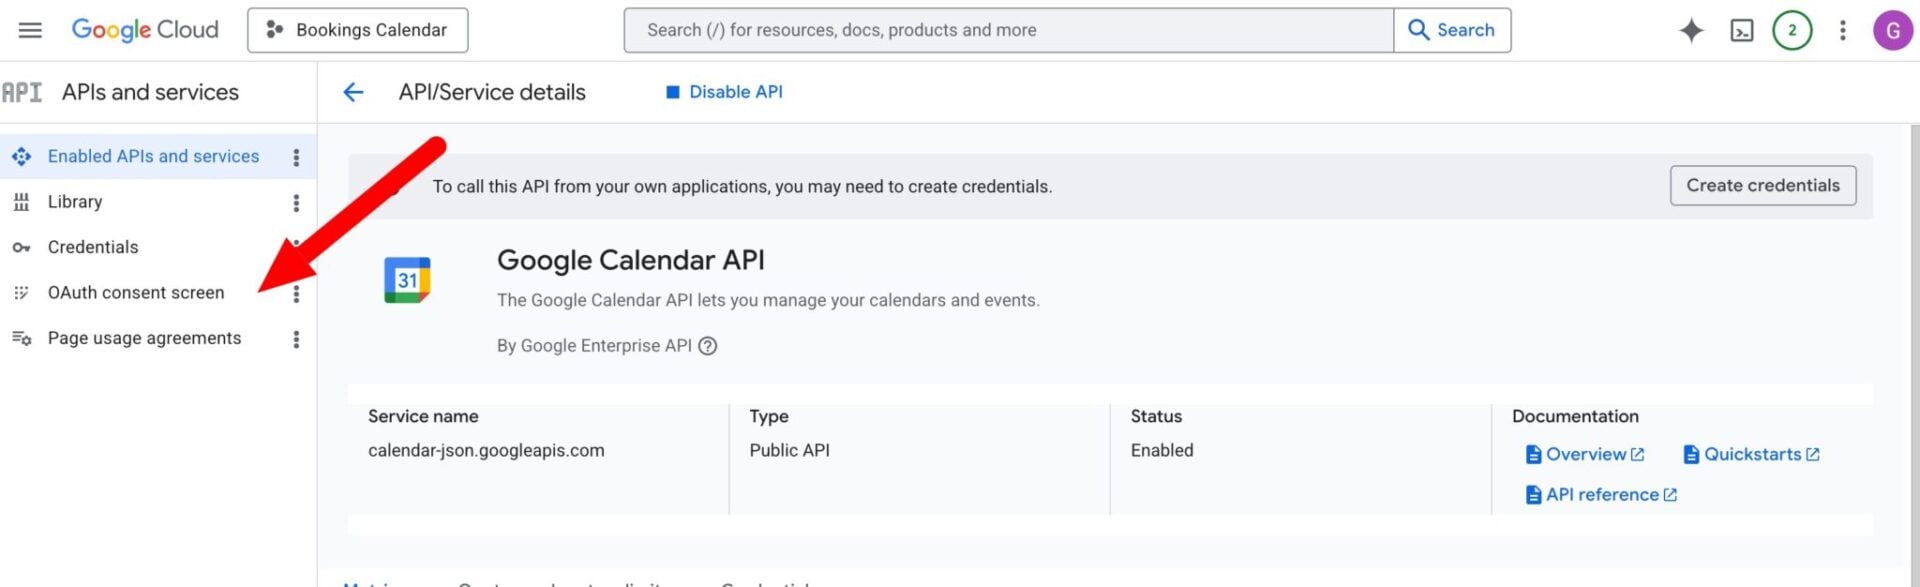
- Go to APIs & Services → Library, search for Google Calendar API, click it, then click Enable


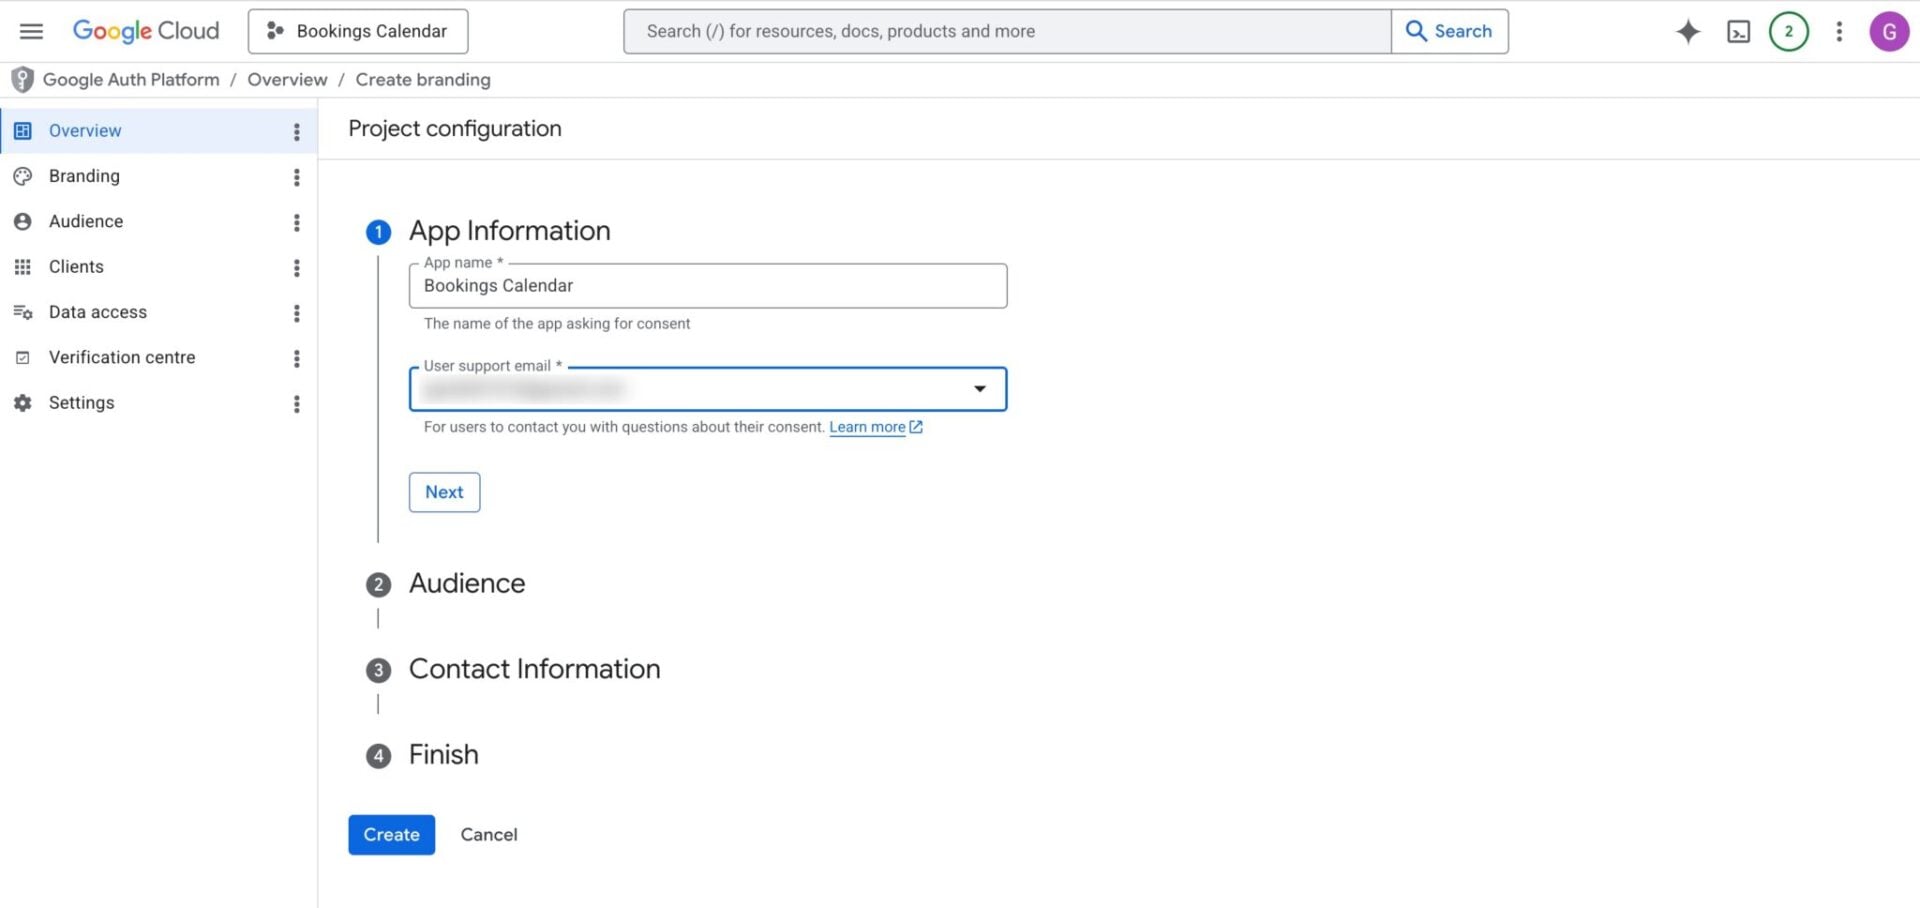
Step 2: Configure the OAuth consent screen
- Go to APIs & Services → OAuth consent screen and click Get started
- Fill in the App name, User support email, and Developer contact email
- Select External in Audience
- Click Create
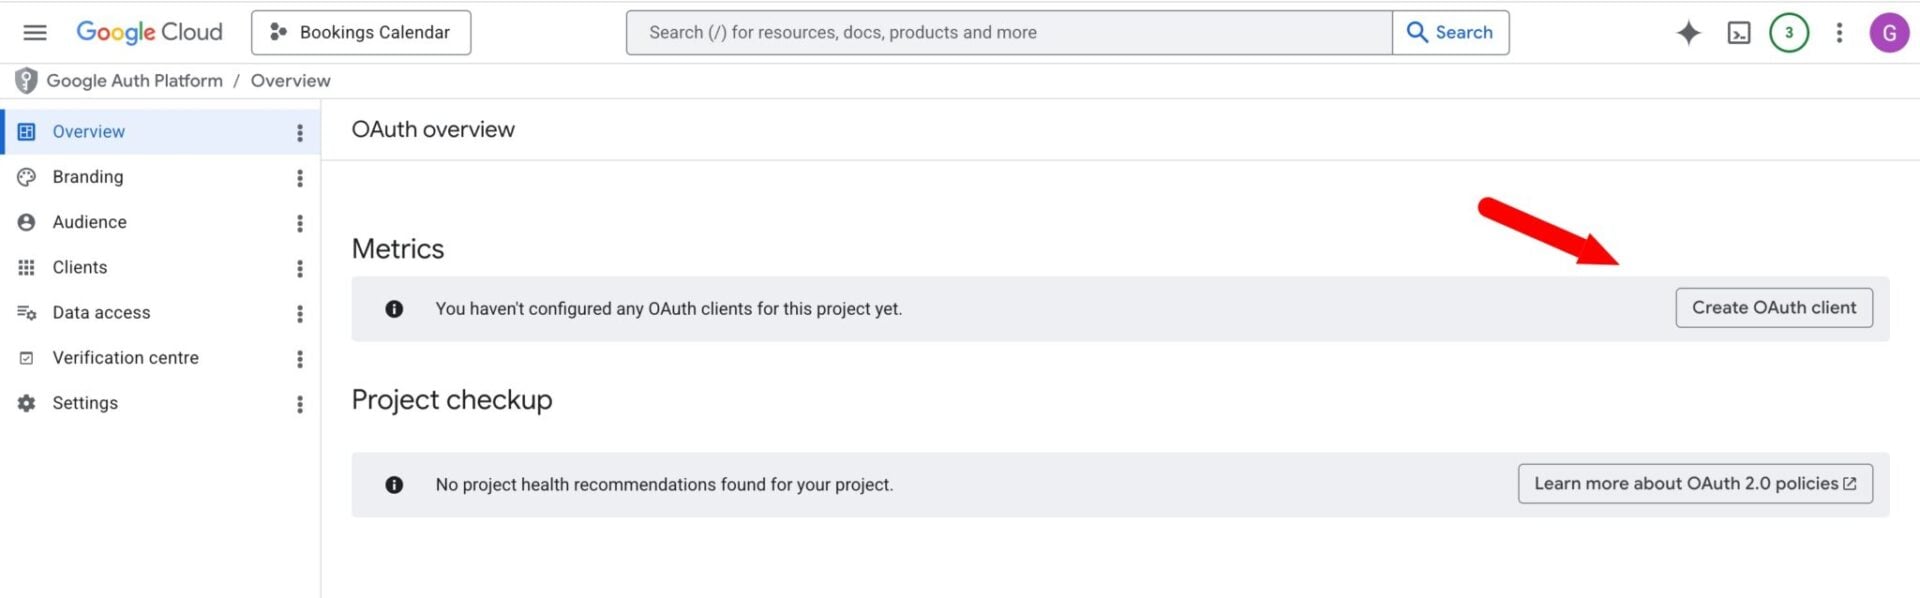
Step 3: Create OAuth credentials
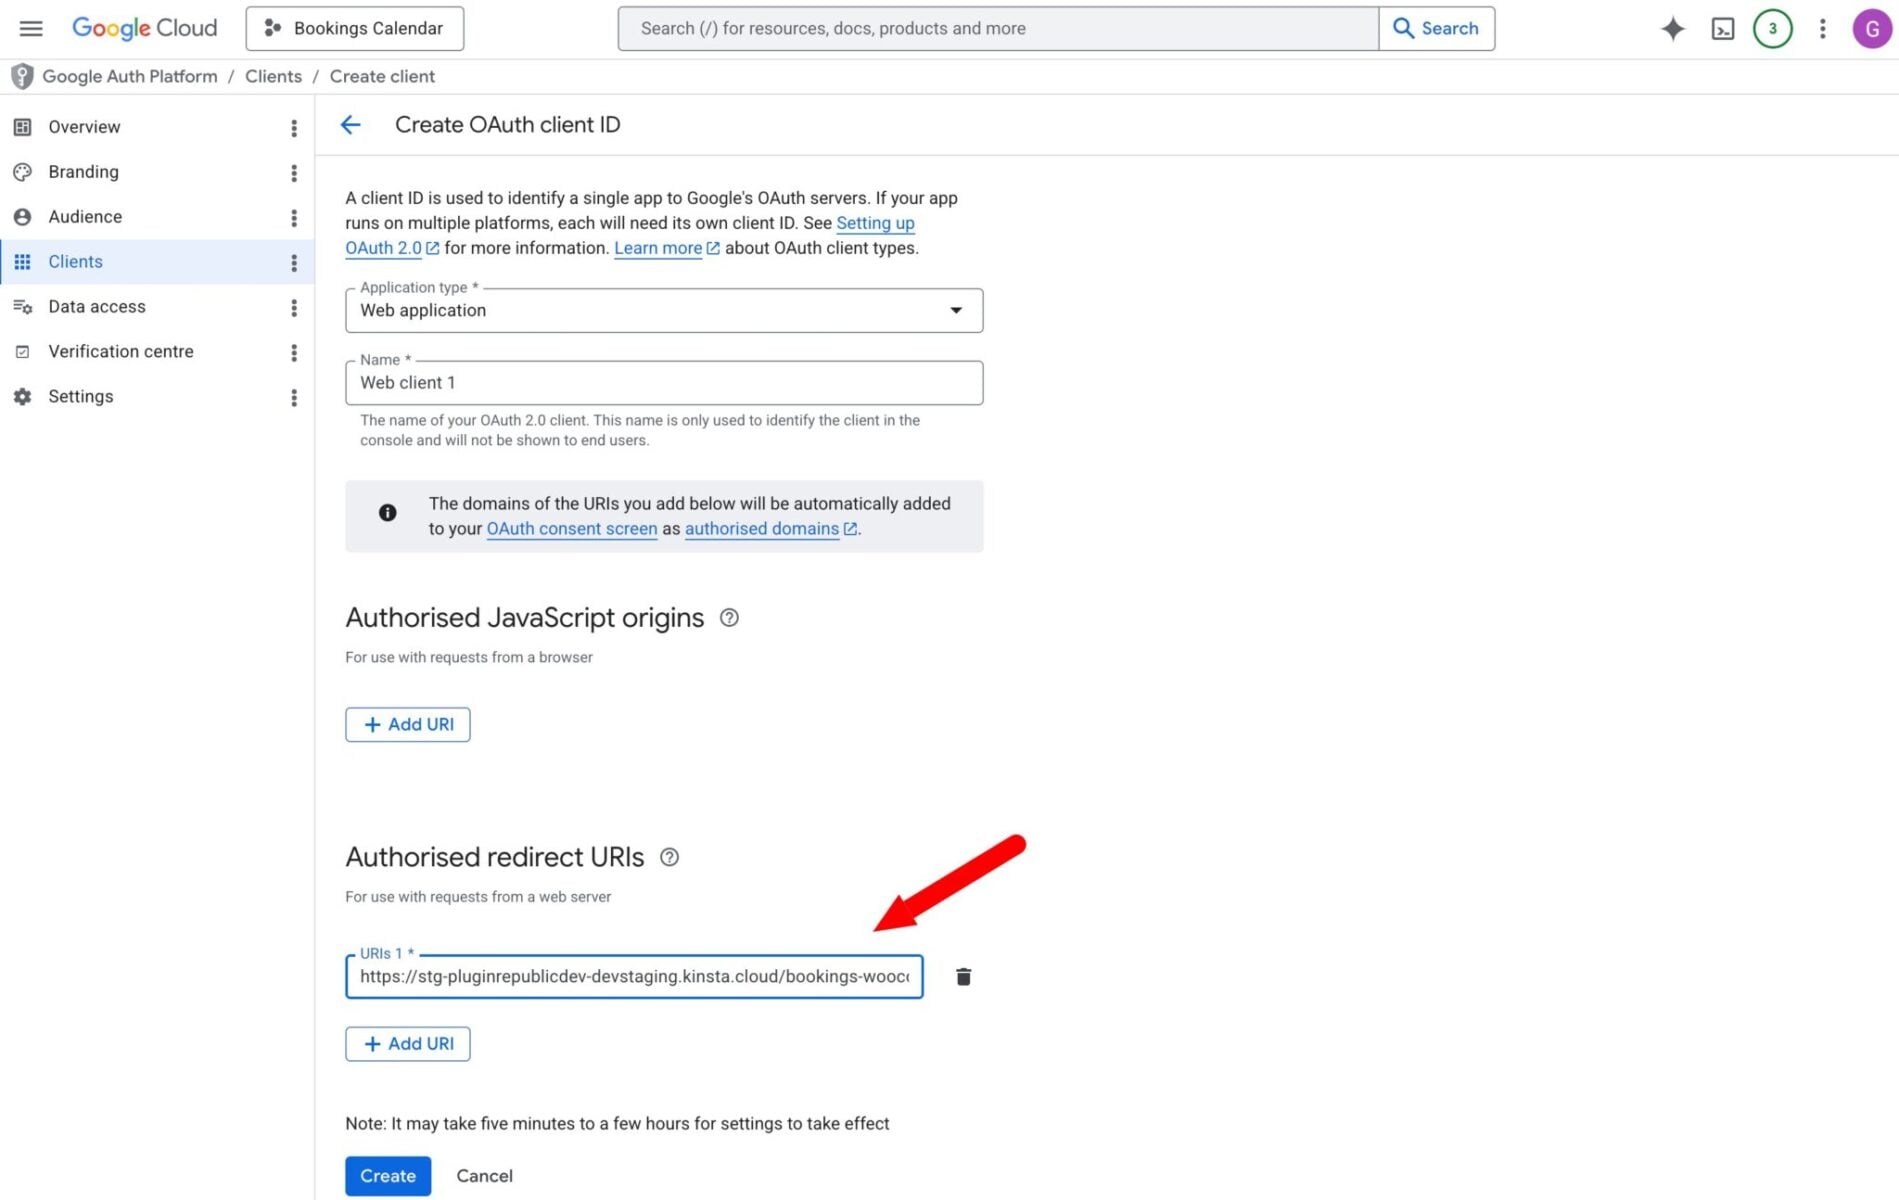
- From the previous screen, click Create OAuth client or go to APIs & Services → Credentials → Create Credentials → OAuth client ID
- Set Application type to Web application
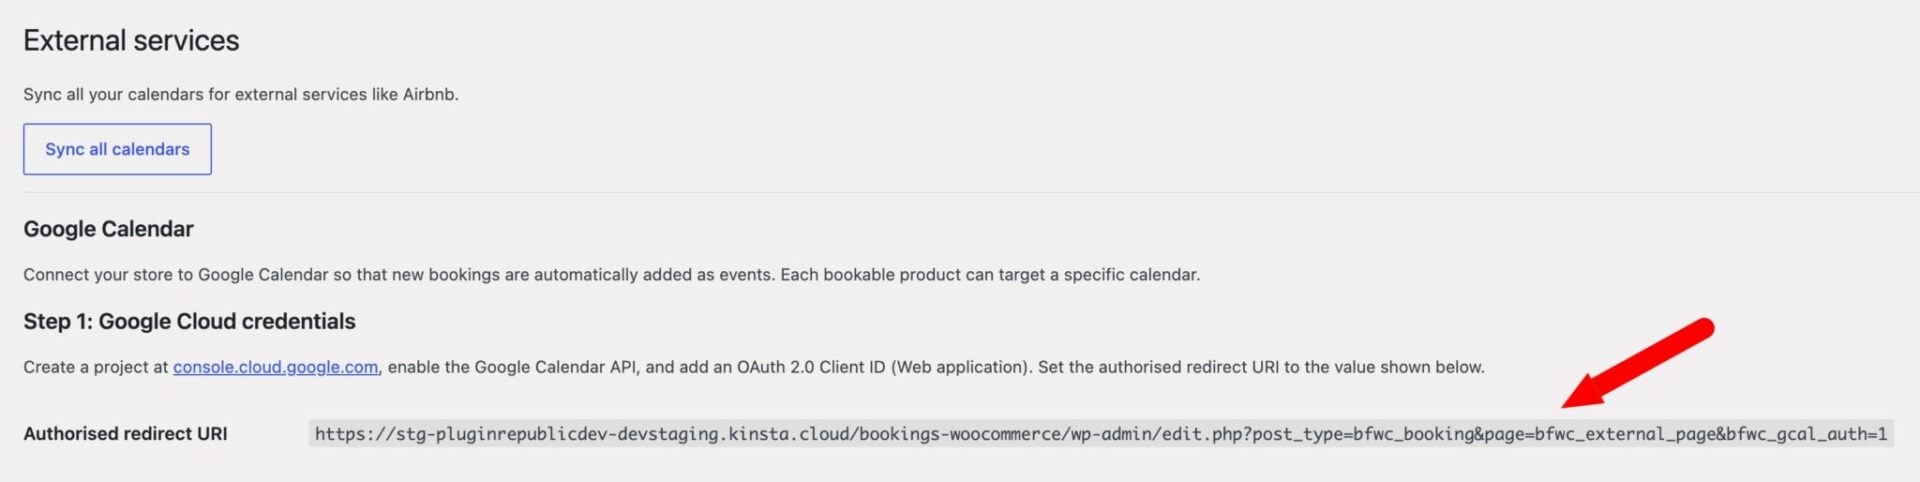
- Under Authorised redirect URIs, click Add URI and paste the redirect URI shown on the Bookings → External settings page
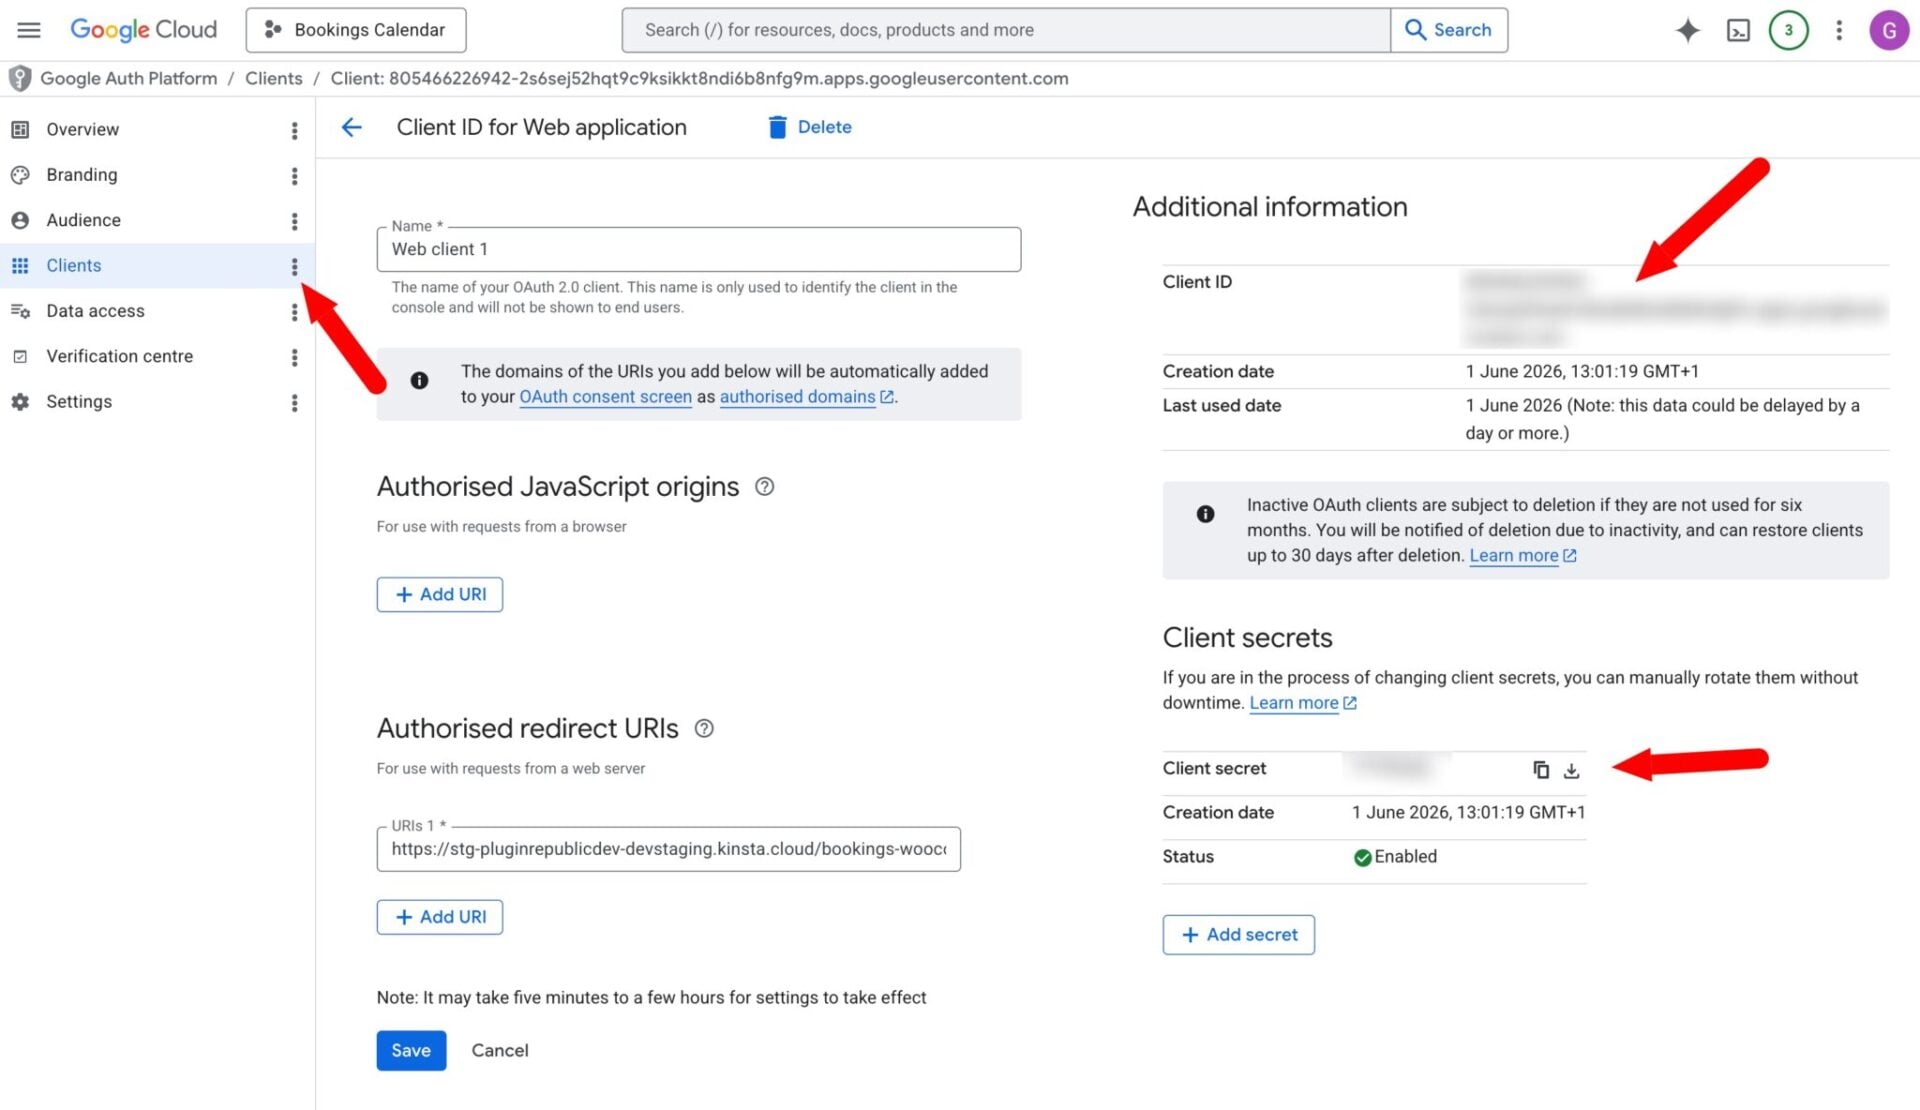
- Click Create, then copy the Client ID and Client Secret shown in the popup. You can also find these credentials on the Clients menu
Step 4: Connect in WordPress
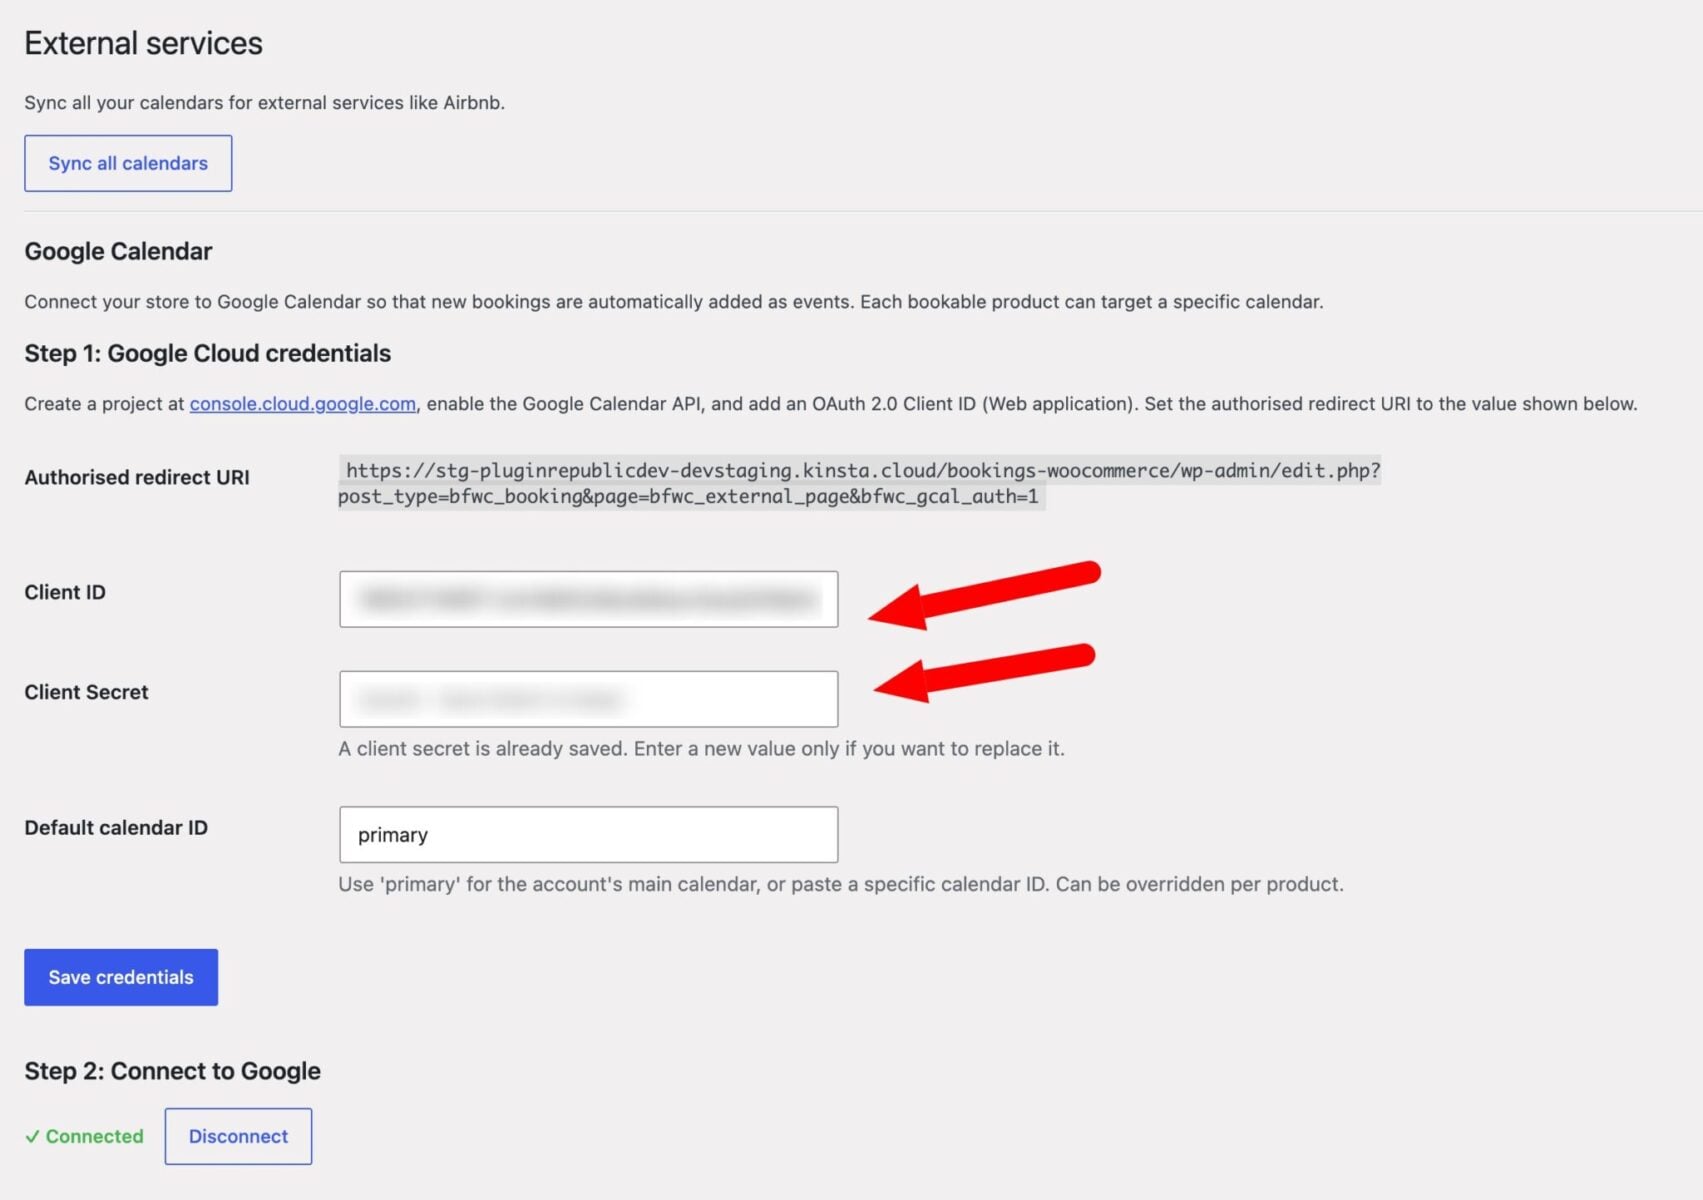
- Go to Bookings → External in your WordPress admin
- Scroll down to the Google Calendar section
- Paste your Client ID and Client Secret into the fields, set the Default calendar ID (use
primaryfor your main calendar), and click Save credentials - Click Connect to Google Calendar
- If Google shows an “unverified app” warning, click Advanced → Go to (app name) → Proceed — this is expected for apps that have not been through Google’s formal verification process
- Approve the calendar access request and click Allow
- You will be redirected back to the settings page with a “Connected” confirmation
Settings
| Setting | Description |
|---|---|
| Client ID | The OAuth 2.0 client ID from Google Cloud Console |
| Client Secret | The OAuth 2.0 client secret. Stored securely; leave blank to keep the existing value |
| Default calendar ID | The Google Calendar to write events to. Use primary for the account’s main calendar, or paste a specific calendar ID. Can be overridden per product |
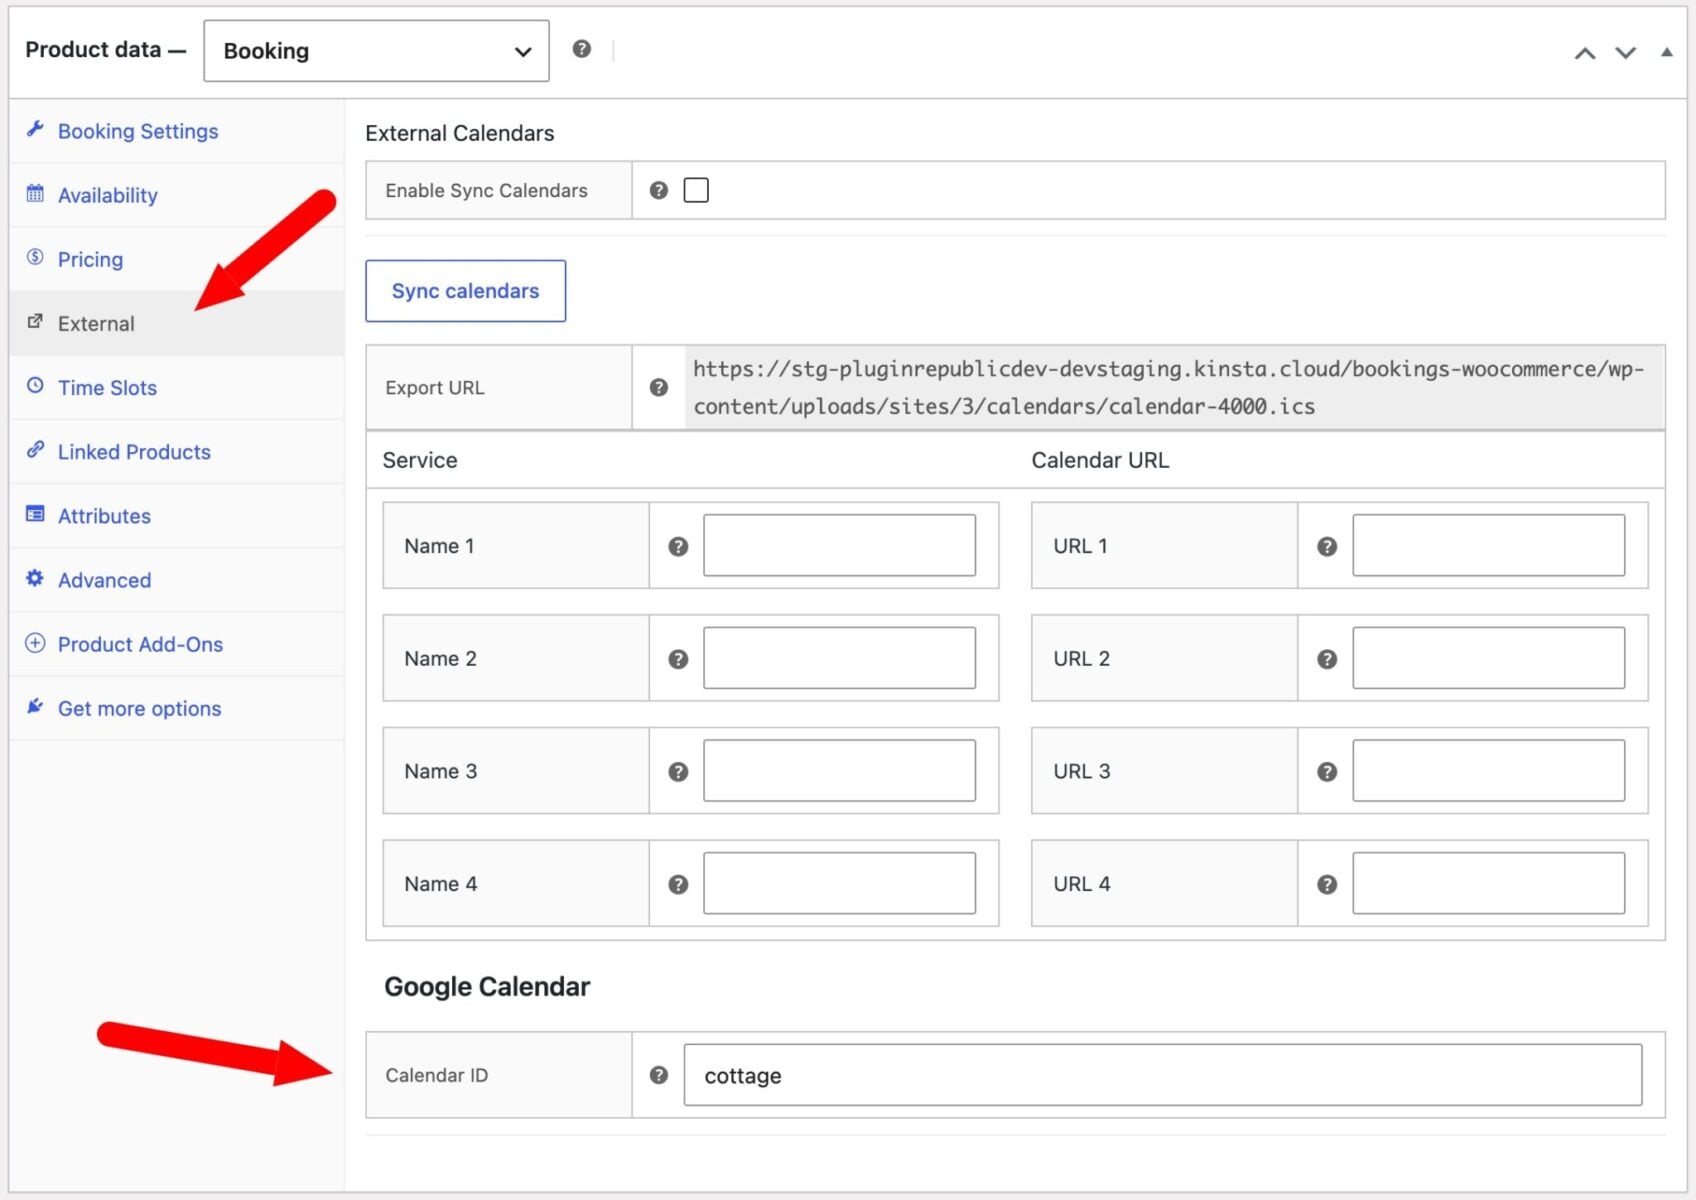
Per-product calendar
Each bookable product can send events to a different Google Calendar.
- Edit the product and go to the External tab
- Enter a Calendar ID in the Google Calendar field
- Leave it blank to use the default calendar set on the External settings page
To find a calendar ID: in Google Calendar, open the calendar’s settings and look under Integrate calendar for the Calendar ID (it looks like [email protected] for secondary calendars, or primary for the main one).
Event details
Each calendar event includes:
- Title — product name and customer name, e.g. “Studio Hire – Jane Smith”
- Date/time — all-day or multi-day for day-based bookings; timed event for slot bookings
- Description — booking ID, order ID, customer name, email, phone, and a link to the booking in the WP admin
Cancellation
Events are removed from Google Calendar automatically when:
- The associated WooCommerce order is cancelled or refunded
- The booking is manually cancelled using the Cancel booking button on the booking edit screen
- The booking post is moved to trash or permanently deleted
Notes
- Google access tokens expire after one hour. The plugin automatically refreshes them using the stored refresh token – no manual action is required
- Each store must create its own Google Cloud project and OAuth credentials. There is no shared app
- The integration requires the site to be accessible on a public domain. It cannot be set up on a local development site as Google does not accept local domains as redirect URIs
- The “unverified app” warning appears because the OAuth app has not been submitted to Google for verification. For a private store connecting its own calendar, this is expected and safe to proceed through
Two-way Google Calendar sync
The Google Calendar integration is one-way by default: new bookings are pushed to your calendar automatically. Two-way sync goes further by reflecting changes you make directly in Google Calendar back into your store.
How do you enable two-way sync?
Switch on two-way sync from your Bookings settings. To enable it:
- Go to Bookings > External in your WordPress admin
- Check ‘Allow two-way integration’ under Google Calendar
- Set a ‘Poll interval’ to control how often the plugin checks Google Calendar for changes, with options from every 5 minutes to every 2 hours
- Click ‘Save credentials’
Two-way sync is now active, and the plugin will start checking Google Calendar for changes on the schedule you set.
What does two-way sync do?
Two-way sync keeps your store and your Google Calendar in step by acting on two types of change.
Events deleted in Google Calendar. Delete a calendar event that matches a store booking, and the plugin sets that booking’s status to ‘Cancelled’ and restores the dates so they’re available to book again.
Events added in Google Calendar. Create a new event directly in Google Calendar that didn’t come from a store booking, and the plugin adds a blocked booking in the store for those dates. This stops customers booking dates that are already occupied in your calendar.
How does it work?
The plugin polls Google Calendar on a schedule using Google’s incremental sync. It only fetches events that have changed since the last check, so the process is efficient and uses minimal API quota.
The first sync establishes a baseline snapshot of your calendar, and only new changes are processed after that. Existing calendar events won’t trigger new blocked bookings when you first turn the feature on.
Run a sync manually at any time with the ‘Run sync now’ button on the External settings page. This is useful for testing, or when you need changes to appear immediately without waiting for the next scheduled poll.
What should you be aware of?
A few things are worth keeping in mind once two-way sync is running:
- Changes made in Google Calendar appear in the store within the time set by your poll interval, not instantly
- Canceling a booking via two-way sync doesn’t cancel any associated WooCommerce order, so you’ll need to handle the order separately
- Slot-based products (those using time slots rather than full-day bookings) aren’t affected by the block-dates behavior. Only standard day-based bookings are blocked
- Two-way sync needs an active Google Calendar connection. If you disconnect from Google, the sync stops until you reconnect