How to create a build-your-own computer product in WooCommerce

If you would like to allow your users to configure a build your own computer product in WooCommerce, you’ll need a plugin. WooCommerce itself doesn’t have all the required functionality, so you’ll need the Pro version of the WooCommerce Product Add-Ons Ultimate plugin.
WooCommerce Product Add-Ons Ultimate
Create a build your own computer product in WooCommerce
Create a build your own computer product in WooCommerce
Computers – especially desktops, but also laptops – can be configured so that users can choose which components to include in the final product. So, for example, the user can select which processor to include.
Building a product from multiple components in this way is sometimes referred to as a composite product. Each component is a standalone product in its own right. It may be purchased separately – or it might only be available as part of the main product.
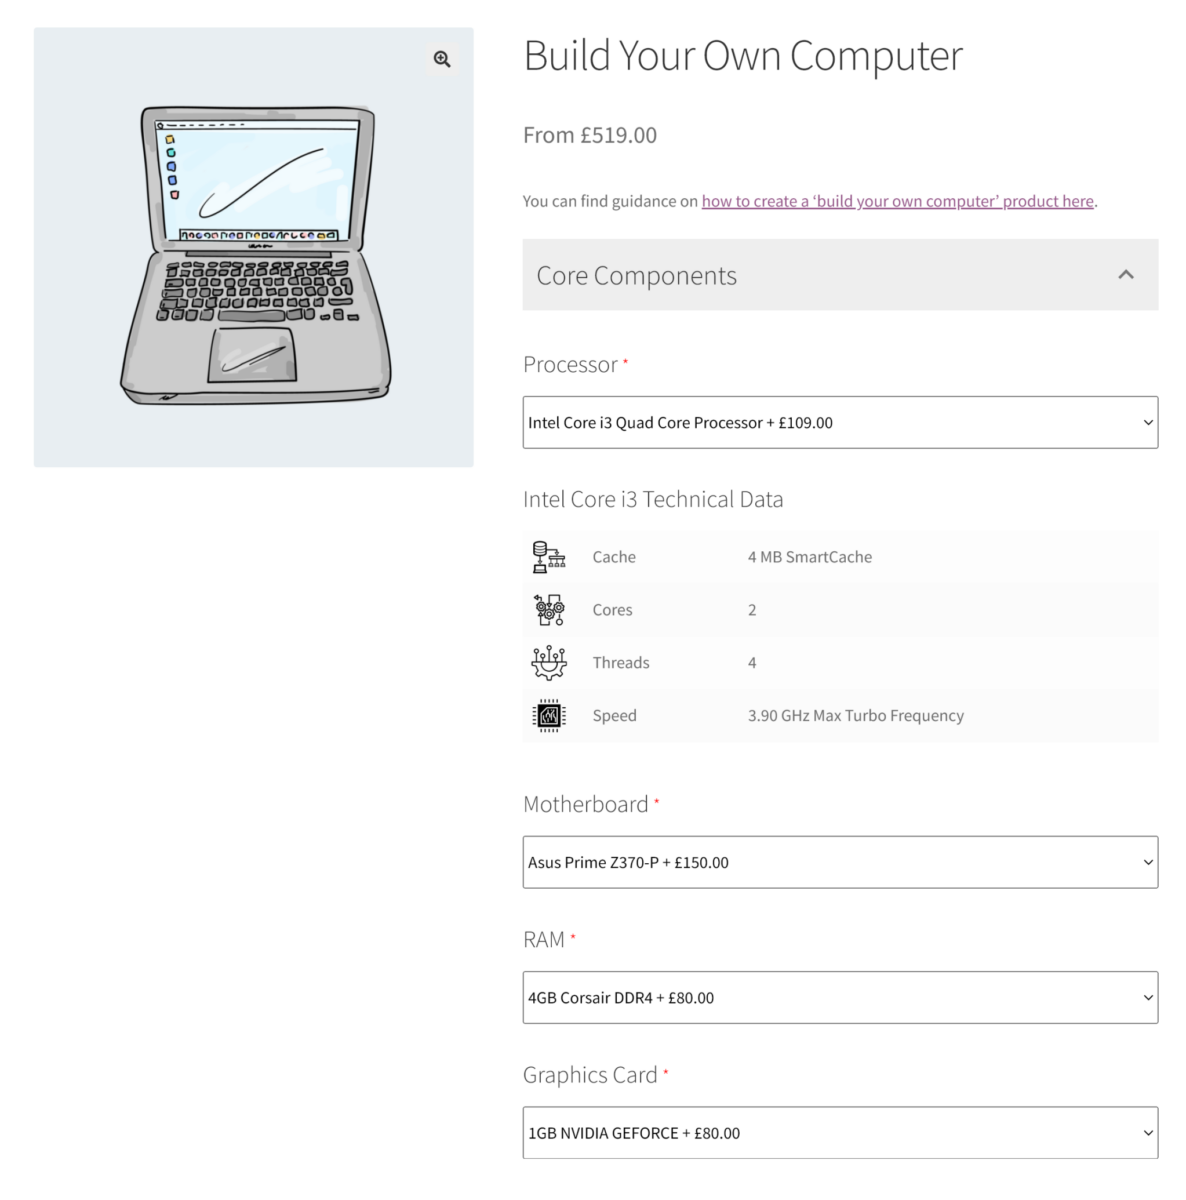
To create a build your own computer product in WooCommerce, just follow these steps:
- Install the WooCommerce Product Add-Ons Ultimate plugin
- Create your components as products
- Create your main product
- Add fields for each component
You can also refer to this working example of the composite product on the demo site.
Step 1: Install WooCommerce Product Add-Ons Ultimate
You’ll get an email when you purchase Product Add-Ons Ultimate. Download the plugin from the link contained in that email.
Upload and install the plugin by following these instructions.
Step 2: Create your child products
With the Add-Ons Ultimate plugin installed, you can start to create the products that will be used as components for your ‘build your own PC’ product.
In this example, let’s say that we’re going to allow our customers to configure the following items:
- Processor
- Motherboard
- RAM
- Graphics card
We’re also going to let them configure some peripherals, e.g.,
- Monitor
- Keyboard
You may have far more components than these, but hopefully this should be enough of an example.
So you need to create each component as a separate product. Let’s take the first component, processors, as our example. Perhaps your store specializes in Intel processors. You need to create a product for each processor that you stock, e.g.,
- Intel Core i3 Quad Core Processor
- Intel Core i5 Quad Core Processor
- Intel Core i7 Quad Core Processor
- Intel Core i9 Quad Core Processor
Create each one as a separate product.
Once you’ve set up all your processors, you’ll need to repeat for all your different product types.
Step 3: Create your main product
When you’ve created all your components, you need to create one single product that will be the main ‘Build Your Own PC’ product. This will be the composite product.
If you want to set a base price for your composite product, just enter a value in the ‘Regular price’ field. The total price of the product will be a sum of this price and the price of all the selected components.
Step 4: Add fields for each component
Finally, you need to add the components as add-on fields to your main product.
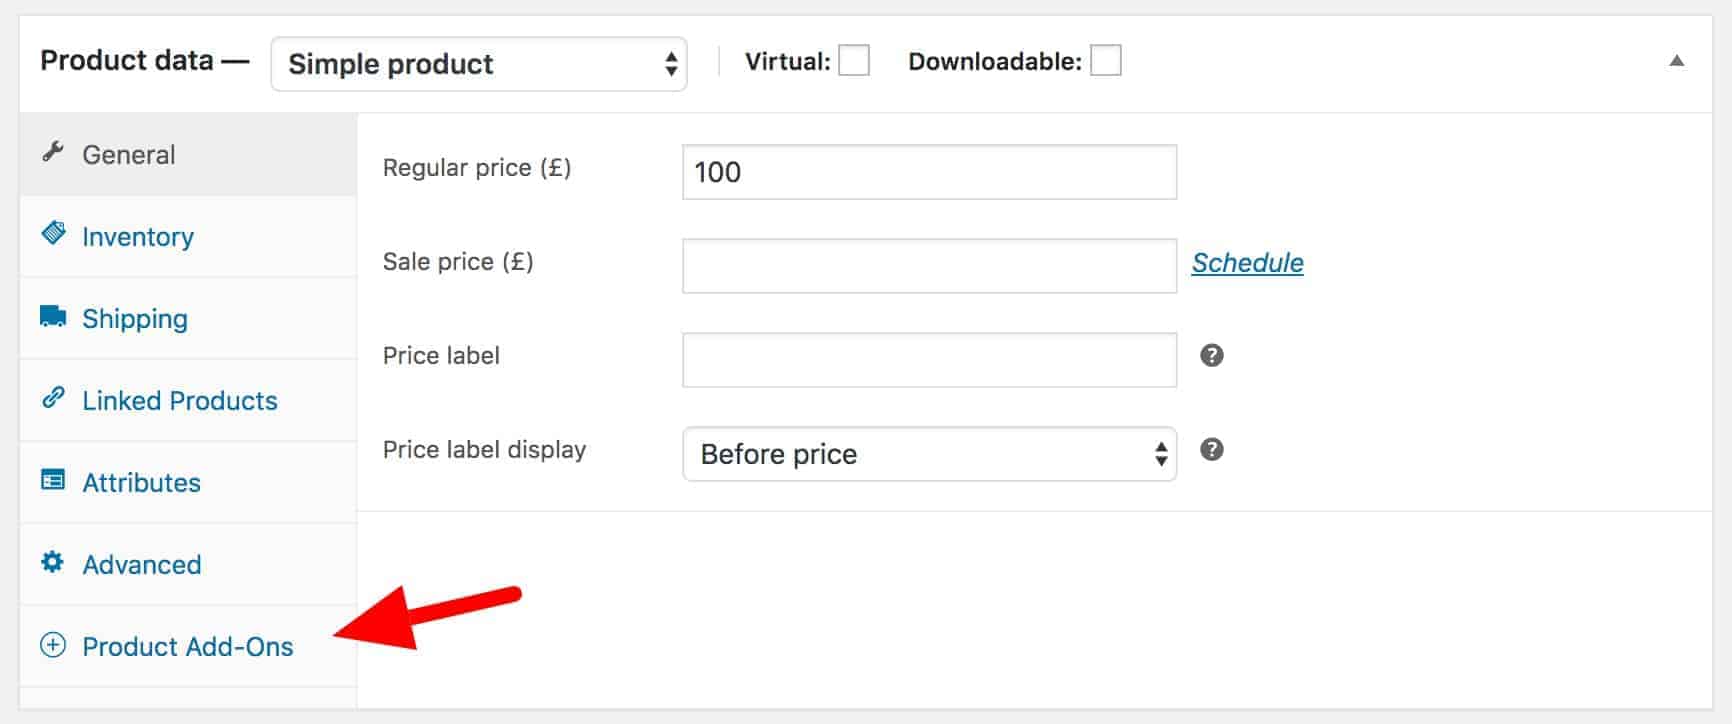
In the main product edit screen, click on the Product Add-Ons tab here:
Create component groups
From this panel, you can add your extra fields. Let’s create two groups, one for Core Components and one for Peripherals.
- Click ‘Add Group’ and enter the name of the first group, e.g. ‘Core Components’
- Click ‘Add Group’ and enter the name of the second group, e.g. ‘Peripherals’
- You can enter descriptions for each group if you wish.
Set group layout
You might like to organise groups on the page to help your user and create a more ‘step-by-step’ feel for the composite product.
To do this, you can choose either ‘Accordion’ or ‘Tab’ in the ‘Group Layout’ setting.
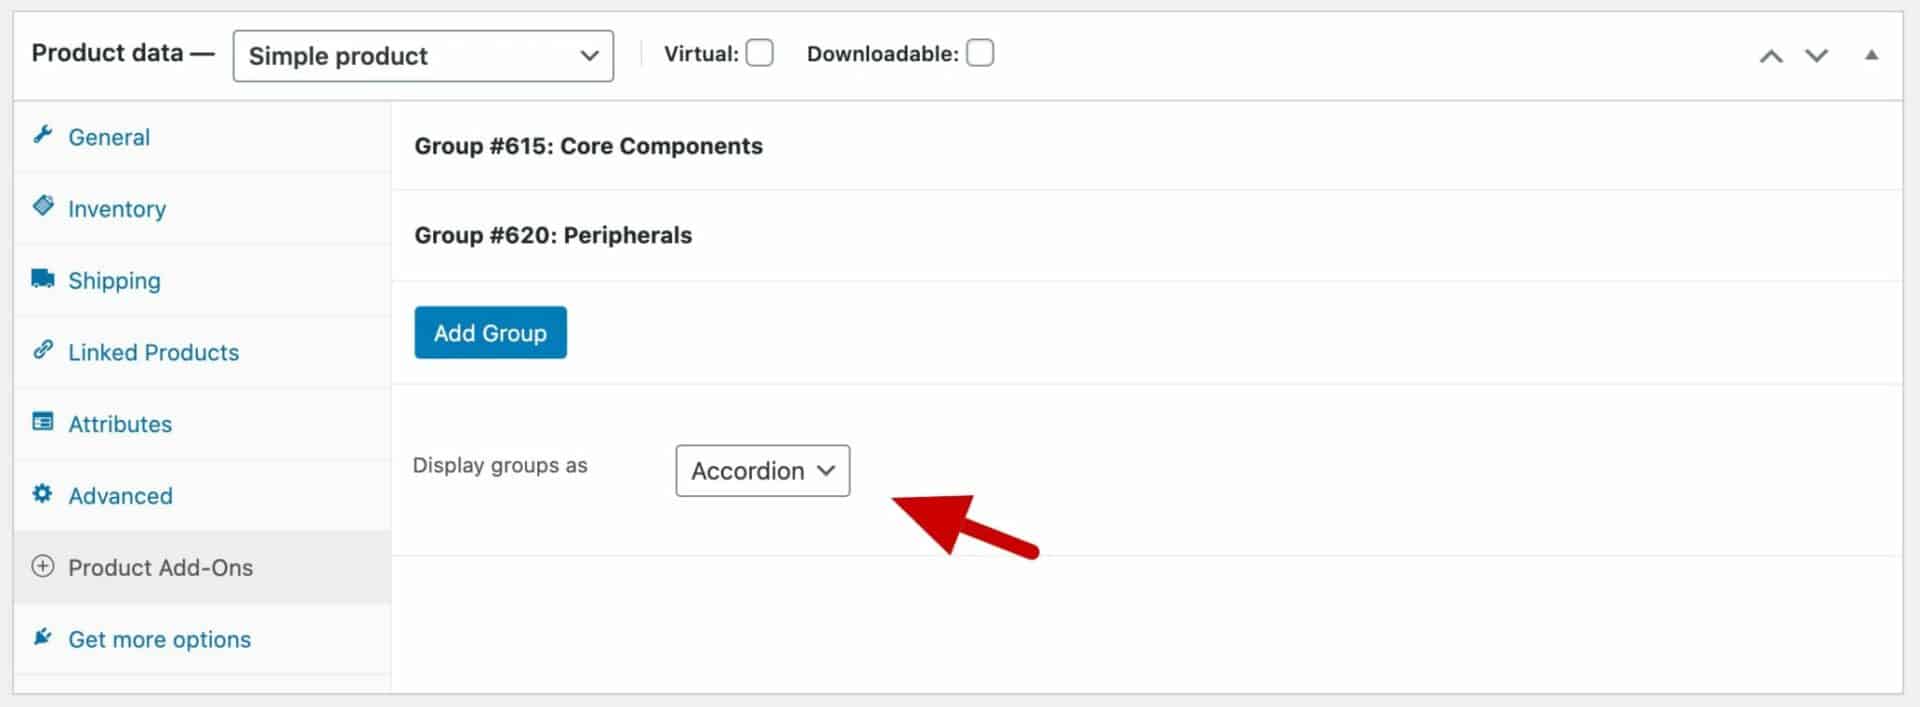
In the build your own computer demo, I’ve used the ‘Accordion’ layout so that only the fields from one group is visible at a time. The other group is collapsed and all its fields are hidden. This makes it easier for the user, especially when you have a large number of fields.
Create add-on fields for components
You’ll need to repeat the following process for each component:
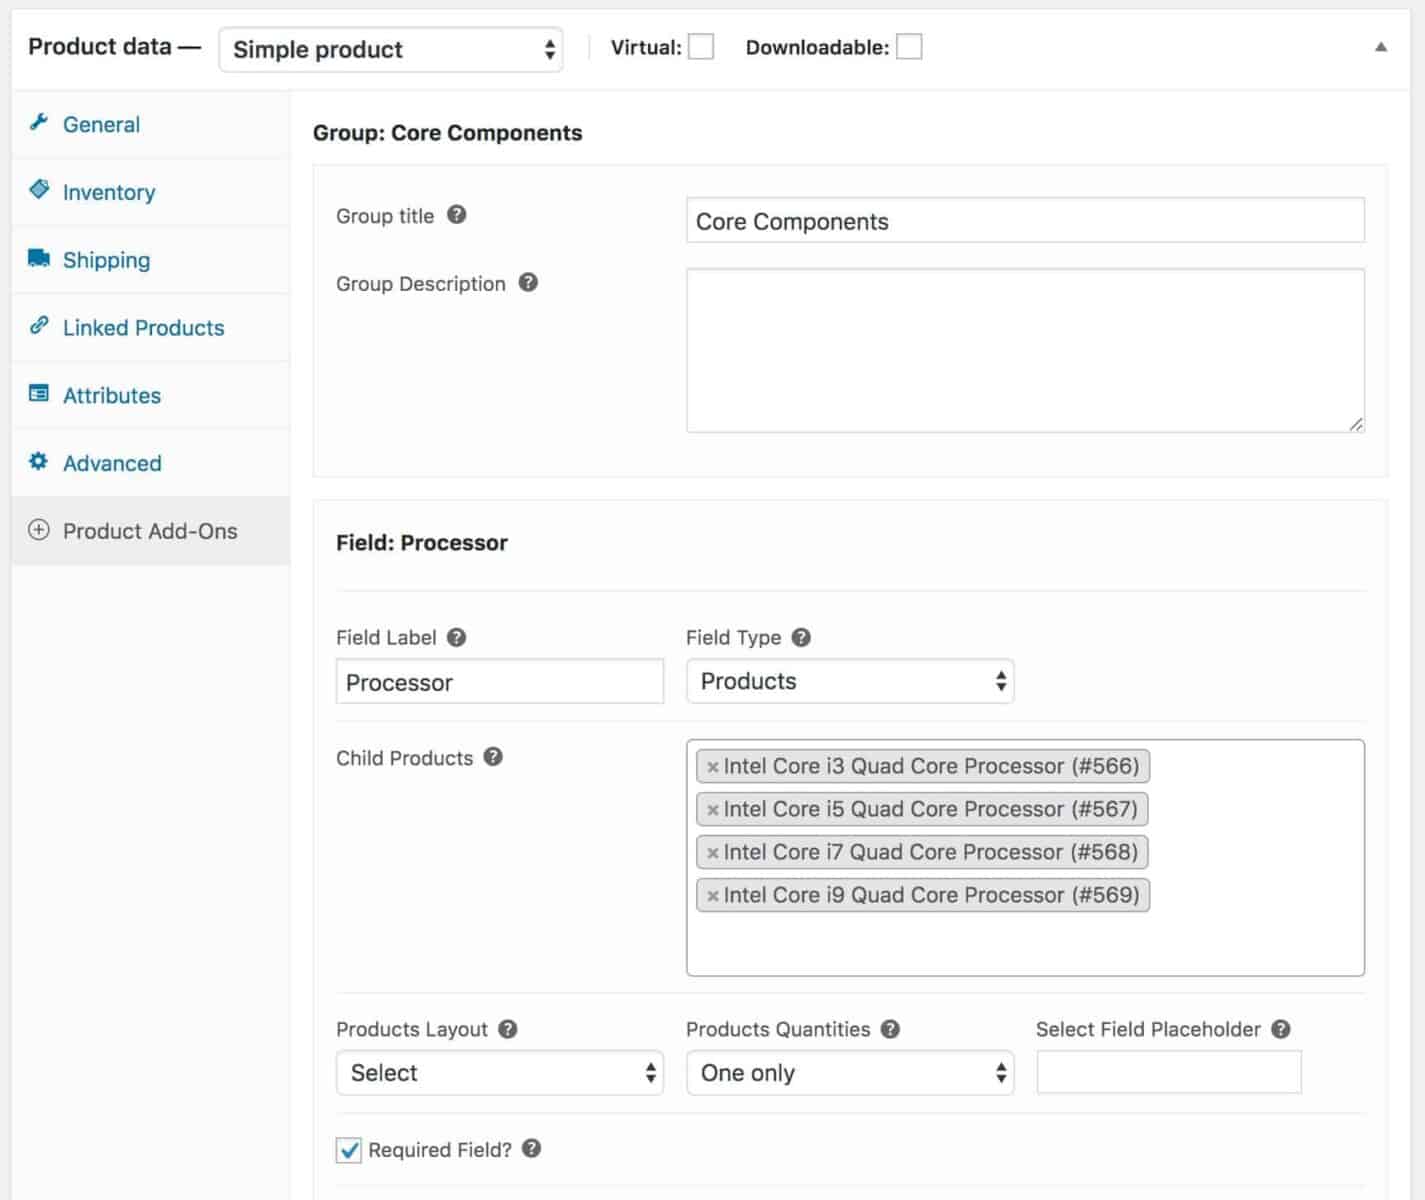
- In the first group, click ‘Add Field’
- Give the field a name, e.g. ‘Processor’
- Choose ‘Products’ as the field type
- Type the names of your processor products into the ‘Child Products’ field
- Choose the layout for your component, e.g. a select field
- Because the PC will need a processor, select the ‘Required Field’ option
The field will look something like this:
Repeat for each component, ensuring that you add the field to the correct group.
The finished build your own computer product
When you’ve added all your child products as components, you can publish your main product. It should look something like this:
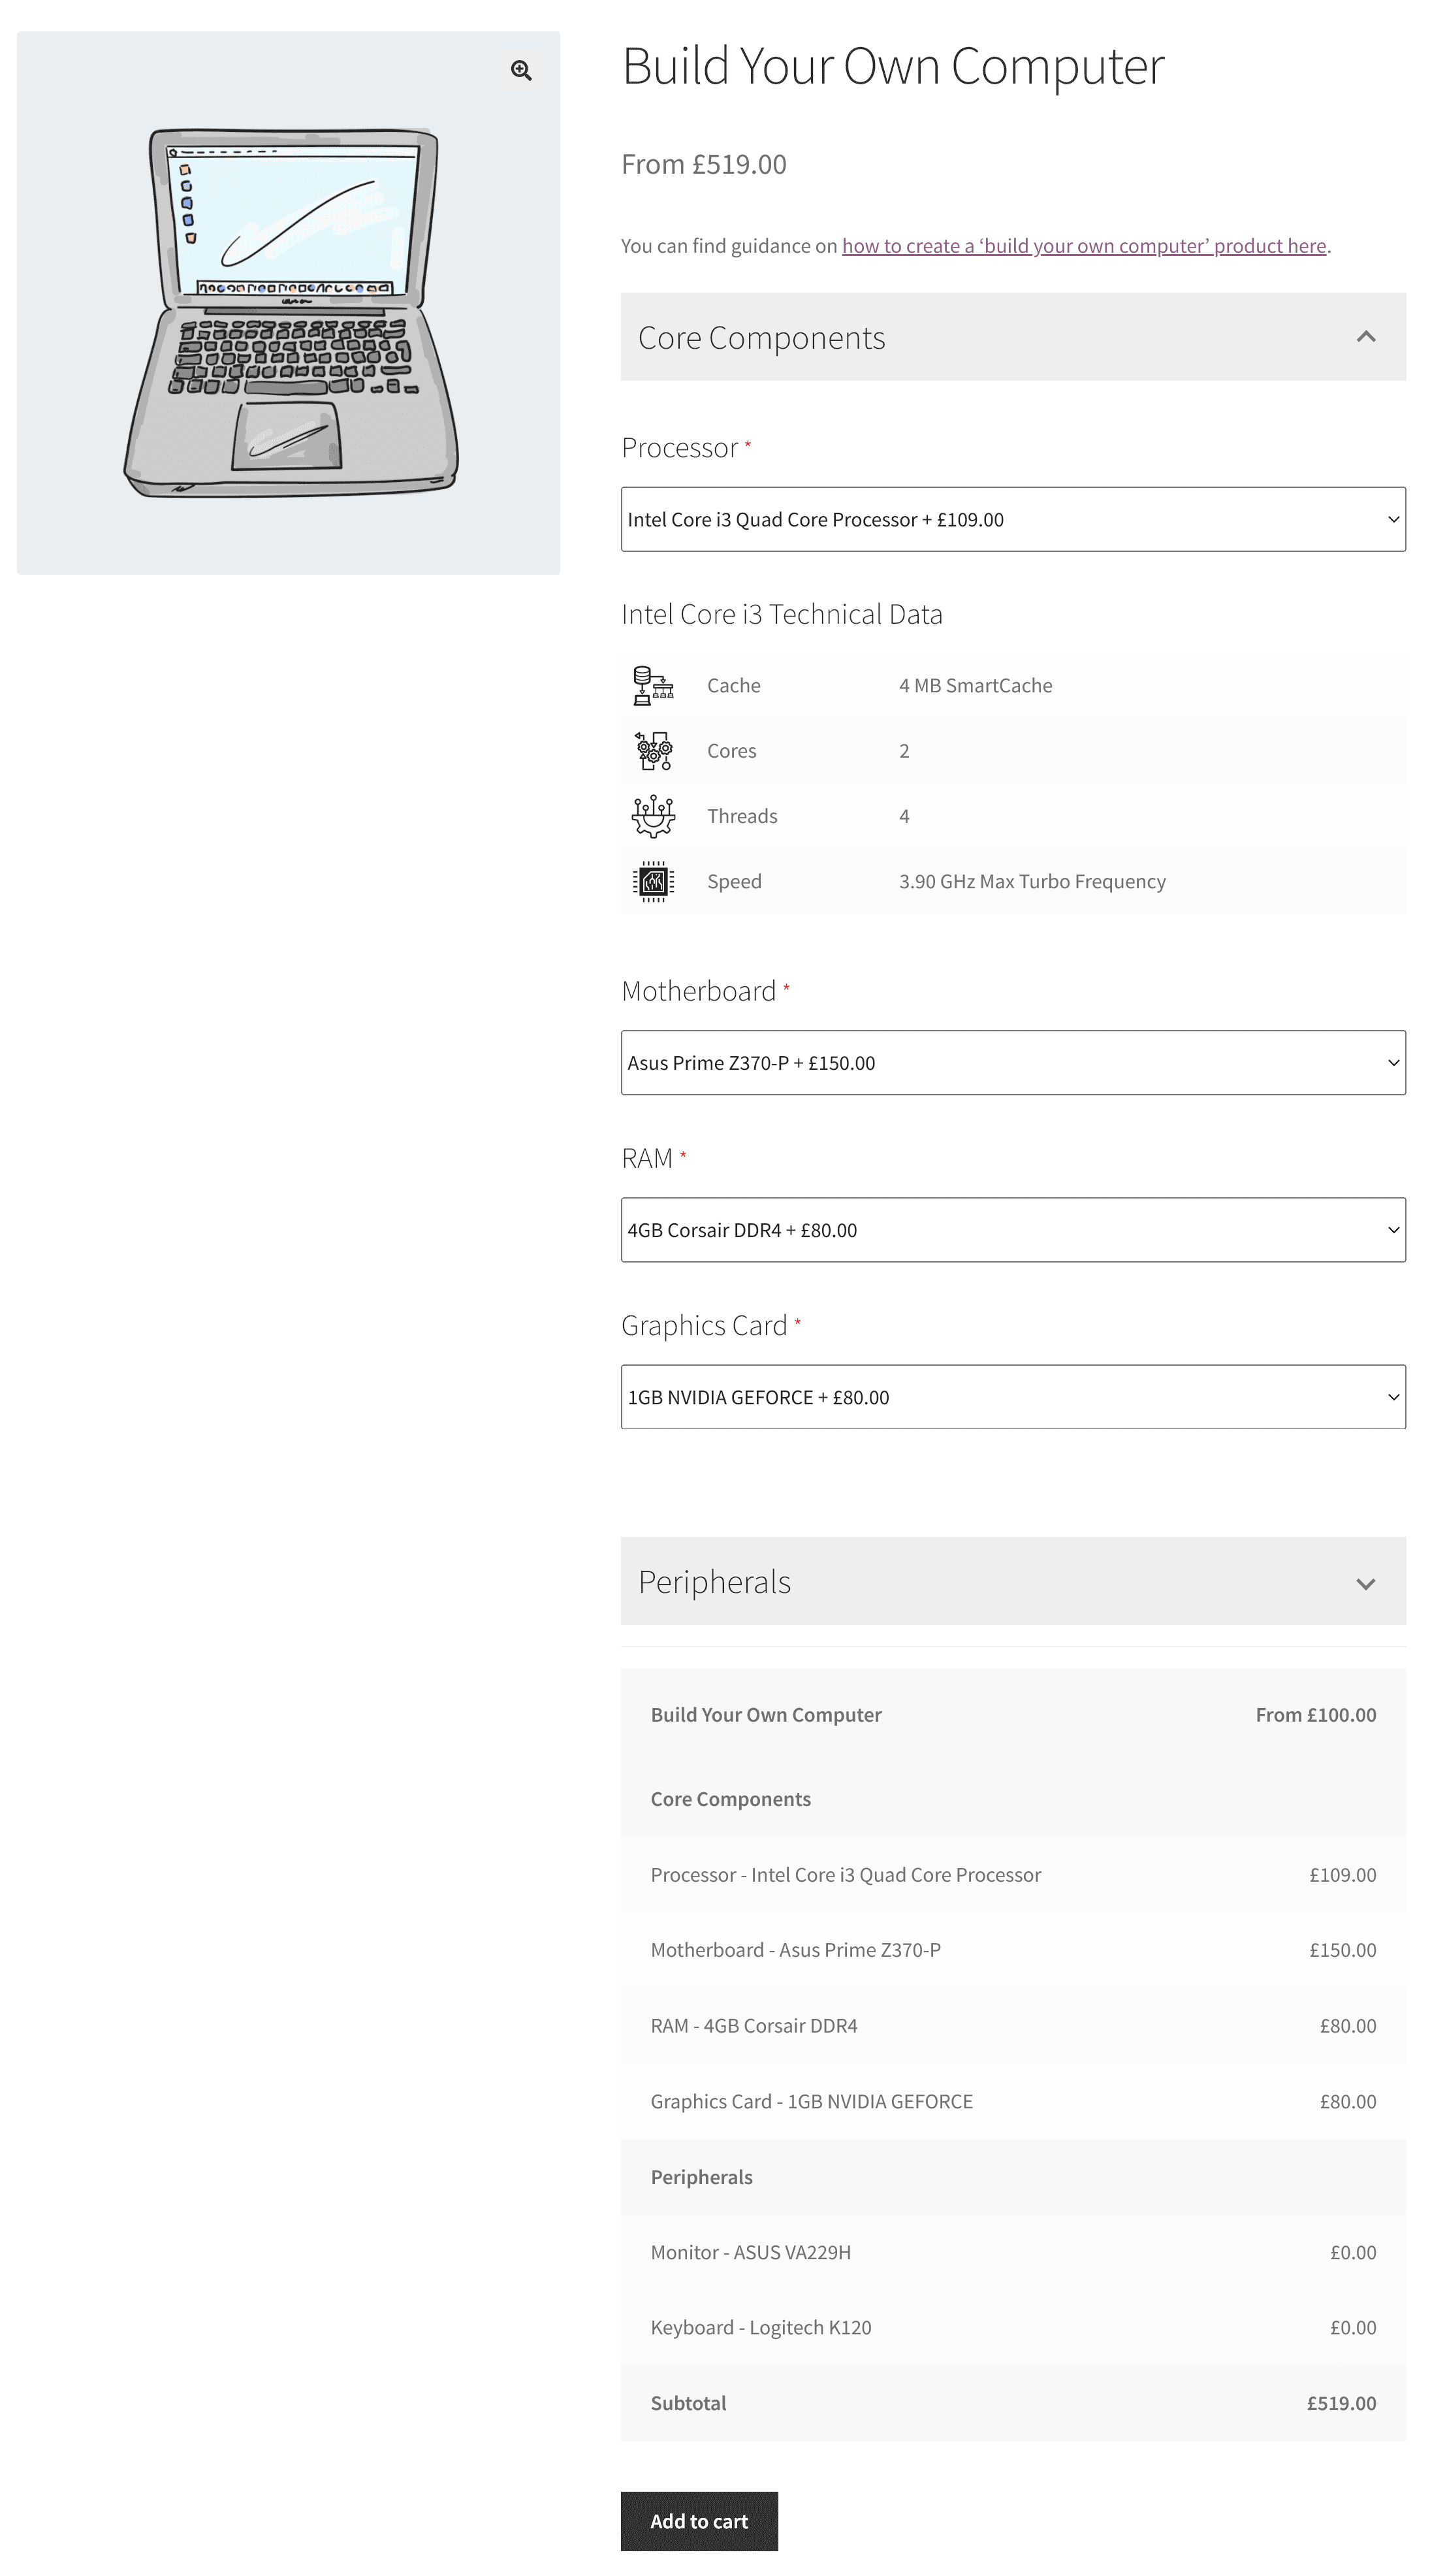
You can preview this product here.
Create a build your own computer product in WooCommerce – recap
To create a configurable computer product in WooCommerce, you’ll need the Product Add-Ons Ultimate plugin.
WooCommerce Product Add-Ons Ultimate
Create a build your own computer product in WooCommerce
