How to set up WooCommerce: your complete guide
Starting an online store can be overwhelming. You have to choose the right products or services to offer, attract and convert customers, and provide quality support. Plus, you’ll have to build and maintain a website to facilitate sales, which might mean you need to set up WooCommerce.
Fortunately, this crucial step is easier than you might expect. You don’t need a background in web development or design to create an effective e-commerce shop with WordPress. The WooCommerce plugin enables anyone to get an attractive and functional online business up and running quickly.
In this post, we’ll introduce WooCommerce and explain why it’s a strong foundation for your online store. Then we’ll walk you through how to set it up, and where to go from there. Let’s get to work!
Why You Should Use WordPress and WooCommerce to Build Your Online Store
These days, starting a website is simple. There are many tools available to help you get started – so many, in fact, that it can be difficult to choose the right ones.
When it comes to building an e-commerce store, we highly recommend using WordPress:
This Content Management System (CMS) is easy to use, intuitive, and flexible. It can be leveraged as a foundation for many types of websites, including online stores. However, it doesn’t include e-commerce-specific features out of the box, so you’ll also need a plugin.
That’s where WooCommerce comes into the picture:
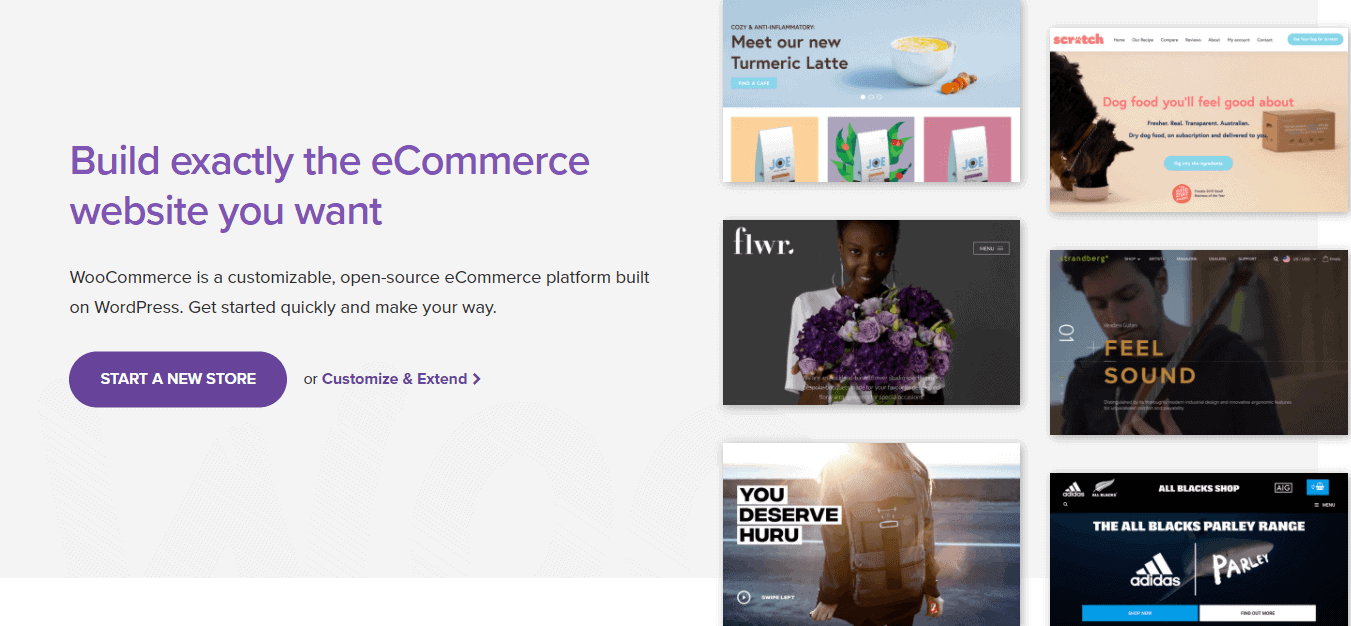
This plugin adds new functionality to WordPress – everything you’ll need to showcase your products and enable visitors to purchase them. It has plenty of features without being overwhelming, even for new users. Best of all, it’s simple to set up WooCommerce, and completely free.
How to Set Up and Configure WooCommerce (In 7 Steps)
If you’re still a little unsure about launching your e-commerce site, don’t worry. In this walkthrough, we’ll show you everything you need to know to get your WooCommerce store up and running.
Step 1: Set Up Your WordPress Website
WooCommerce isn’t a standalone solution – you’ll need to install it on a WordPress website. If you already have one, you can skip to the next step.
If not, you’ll want to set up a new WordPress site. The first task is to choose a web host. This is what makes your online store available to visitors.
You can purchase a shared hosting plan for $5 per month or less, which will give you what you need for a small online store. However, you tend to get what you pay for with web hosts. We recommend Kinsta as the industry leader in WordPress web hosting.
Next, you have multiple choices when it comes to installing WordPress. You can do so manually, which should only take a few minutes but can be a little tricky for complete beginners.
Alternatively, your web host may offer a simpler solution. Many hosts have a one-click WordPress installation feature. Check out your provider’s documentation or support for more details.
Step 2: Install WooCommerce
At this point, you should have a WordPress website up and running. If you’re brand-new to the platform, you may want to spend some time familiarising yourself with its basics before moving forward.
One of the best things about WordPress is its plugins – add-ons that give your site new features and functionality. WooCommerce is one of the most popular, and adding it to your site is simple.
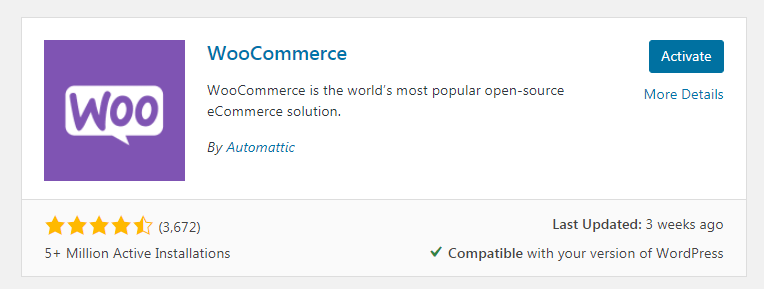
Just open up your WordPress dashboard and head to Plugins > Add New. Search for “WooCommerce” – it should be the first option that comes up:
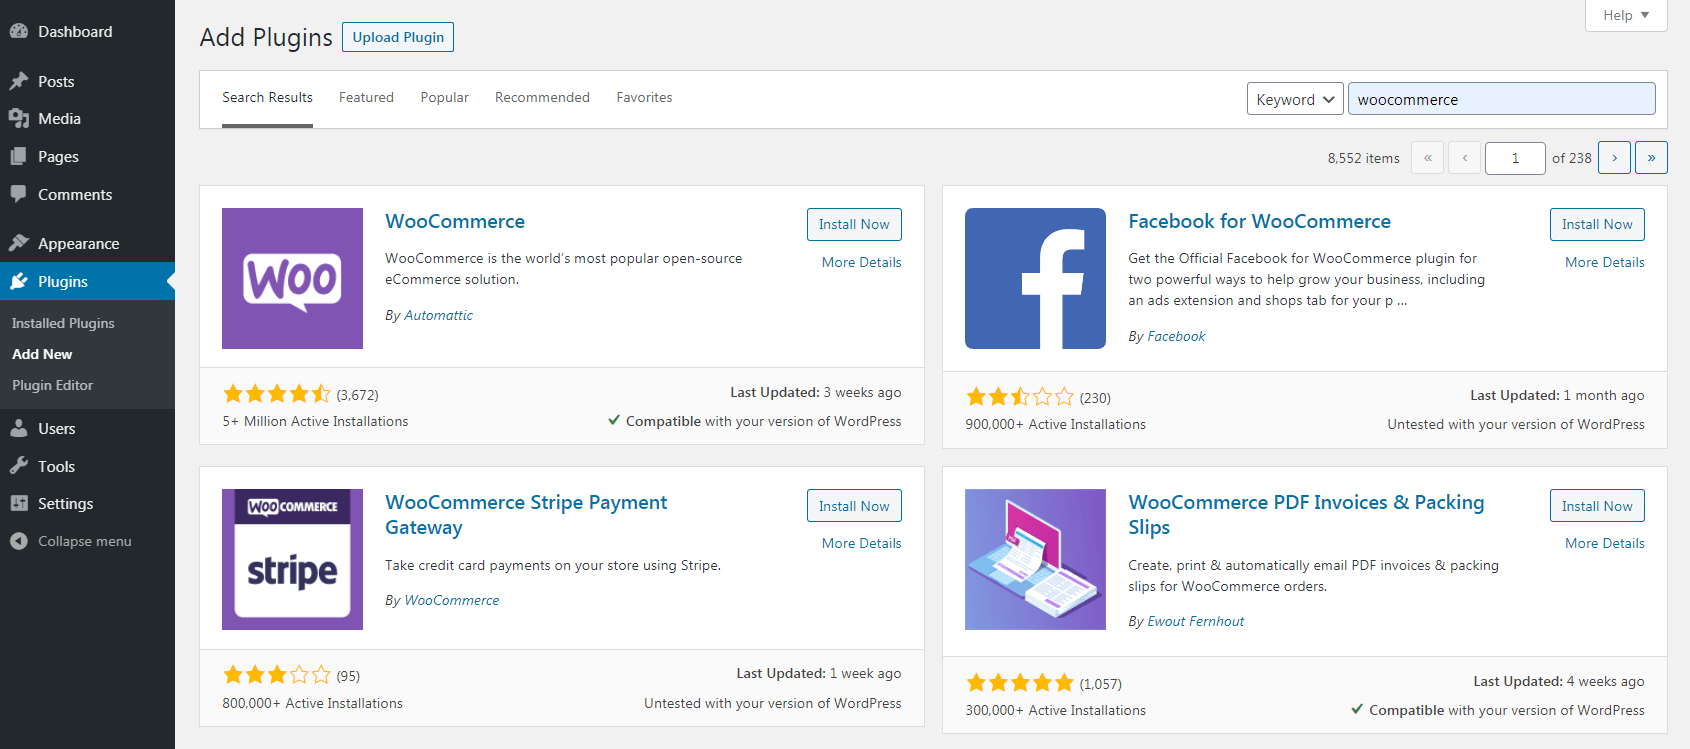
Click on Install Now, then wait a few moments. When the button text changes to read Activate, click on that as well:
With that, WooCommerce is now up and running on your website.
You should then be redirected to a setup wizard that will walk you through configuring your new online store. While this wizard is optional, it’s a good idea to take care of these crucial tasks now.
Step 3: Add Your Store Details
The first screen of the WooCommerce setup wizard looks like this:
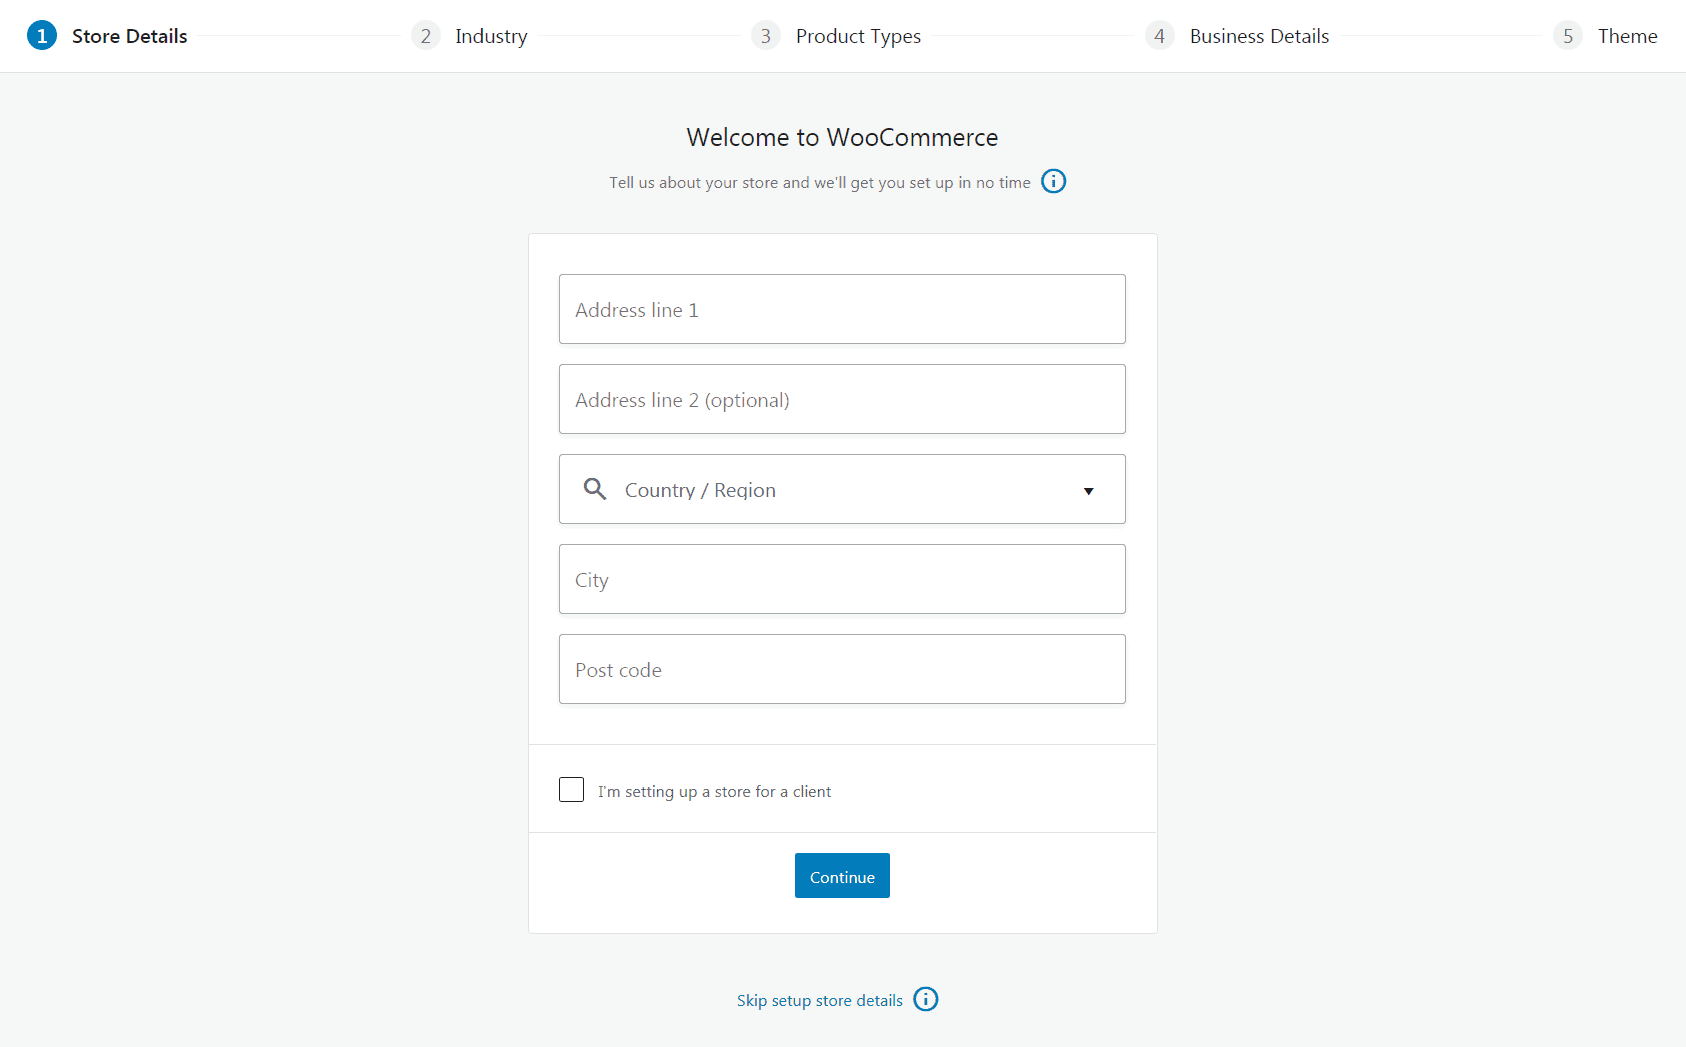
Here, you’ll input some simple information about your store. Where it’s located will be important when it comes to calculating taxes and shipping options, so make sure the details you enter here are accurate.
You’ll also see a checkbox labeled I’m setting up a store for a client. This will enable some handy options for developers. However, since you’re building a shop to sell your own items, you can safely skip it.
Step 4: Choose Your Product Types
The next screen will ask you about the categories of products you’re planning to sell:
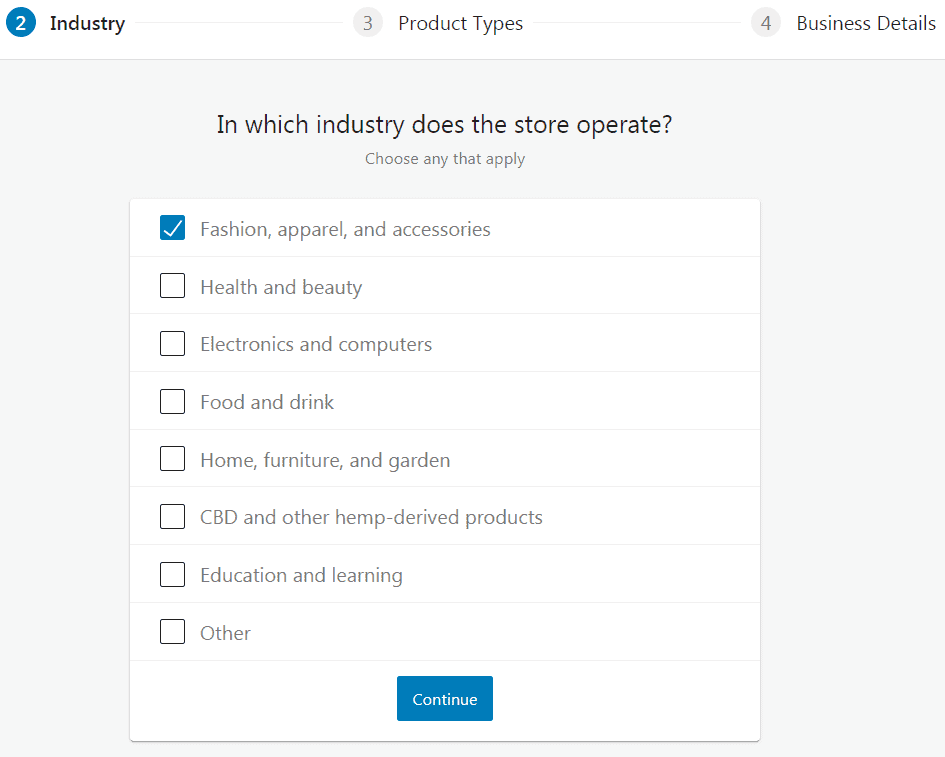
Choose the option that fits the best, or Other if none of them apply.
After that, you can include a little more detail about the types of products you’re offering:
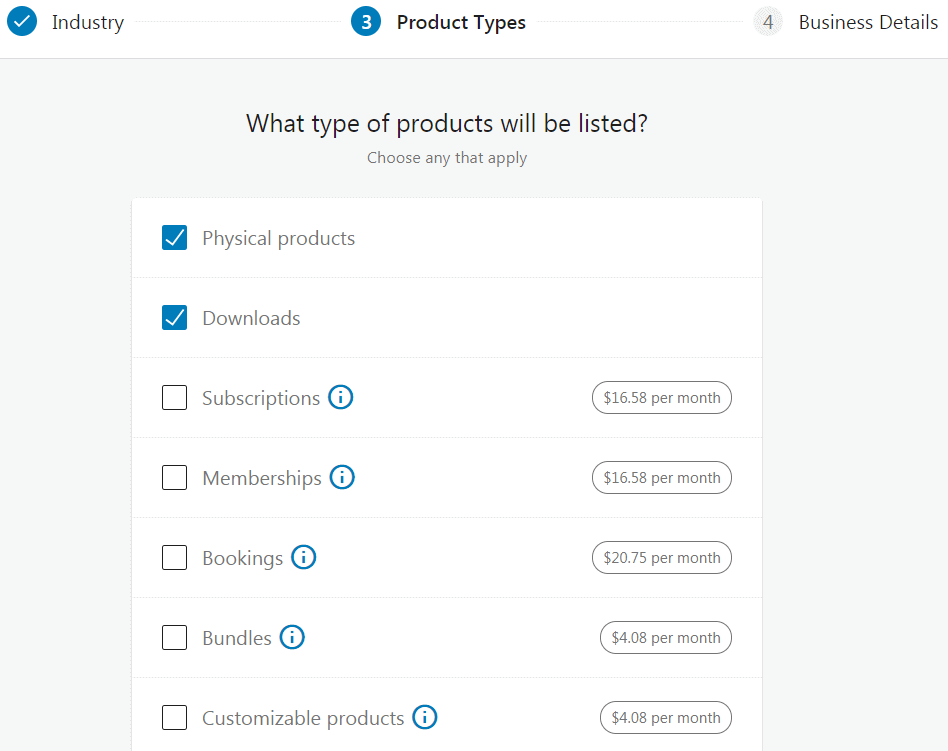
By default, WooCommerce lets you sell both physical and downloadable products. You can check one or both of these boxes depending on your needs.
Note that the remaining options have prices listed next to them. These are product types that WooCommerce doesn’t support out of the box, but that you can add to your store by purchasing one or more extensions.
So for example, if you want to offer subscriptions to a service, you could purchase the WooCommerce Subscriptions extension for $16.58 per month ($199 per year).
Keep in mind that you don’t need to set up these extensions now – you can install them later if you want to. Additionally, if you want to add new features to your store, there are other WooCommerce add-on plugins you can choose from besides the ones listed on this page.
Step 5: Add Optional Plugins
Once you’re done choosing your product types, you can continue to the next screen:
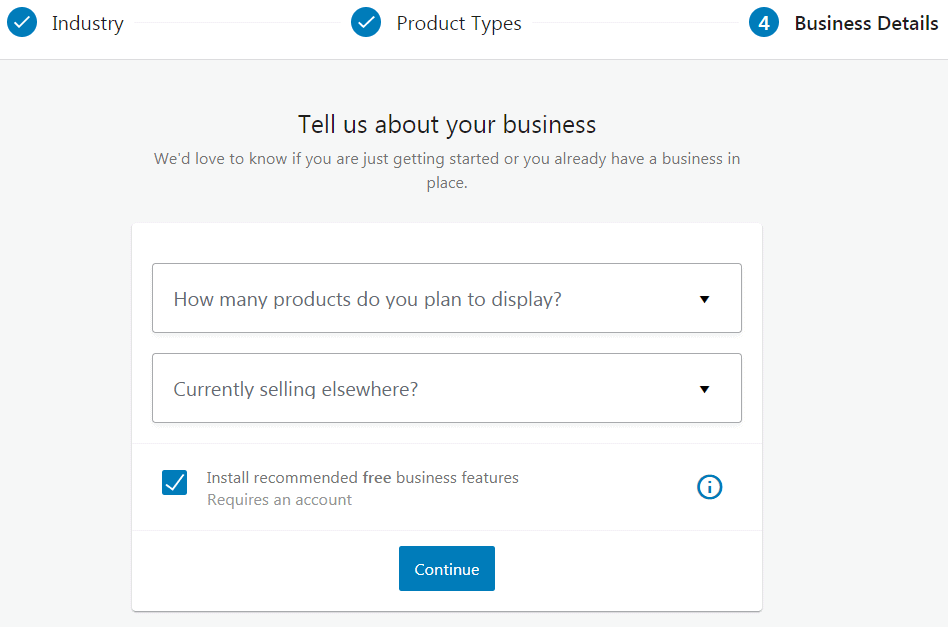
Here, you can include some information about the amount of products you intend to display in your store. Note that this won’t limit you in any way, so don’t worry if you’re not quite sure yet.
WooCommerce will also ask you about where else you’re selling (if relevant), and how much you’re making annually. This gives the plugin a sense of the current scope of your business.
Finally, you’ll see a checkbox labeled Install recommended free business features. This will add a curated selection of useful plugins and other tools to your store, including:
- Jetpack: An all-in-one solution that offers security features, performance optimisations, and more.
- WooCommerce Shipping & Tax: Lets you handle shipping and fulfillment right from your dashboard.
- WooCommerce Payments: Offers more payment options than the default WooCommerce setup.
- Facebook for WooCommerce: Helps you integrate Facebook with your WooCommerce site.
- Mailchimp for WooCommerce: Enables you to connect your store to Mailchimp (an email marketing platform).
- Google Ads: Lets you track key analytics for your store (number of visitors, views, sales, etc.).
- Creative Mail for WooCommerce: An alternative email marketing solution, powered by Constant Contact.
Some of these will require you to set up accounts before you can connect them to your store. While these are all handy solutions, it’s important to note that every store’s needs are unique, and there are lots of WooCommerce-compatible extensions and plugins to choose from.
Plus, having unused plugins can cause slow site speed. So we’d recommend skipping these installations for now, and taking your time to decide exactly which tools you require.
Step 6: Choose a Theme for Your Store
Alongside plugins, themes are one of the features that makes WordPress shine. By adding a theme to your site, you can dramatically change its appearance and layout. This lets you control the style of your online store without requiring design know-how or coding expertise on your part.
All new WordPress sites have a default theme installed – typically, this will be the Twenty Twenty-One theme. While it’s a fine option, it’s not designed for online stores specifically.
It’s a good idea to choose a theme that’s built for e-commerce, or even one designed for WooCommerce users. That will make it easier to ensure that your entire site looks consistent, especially if you have other pages alongside your shop.
The final step in the WooCommerce wizard prompts you to choose and install a theme:
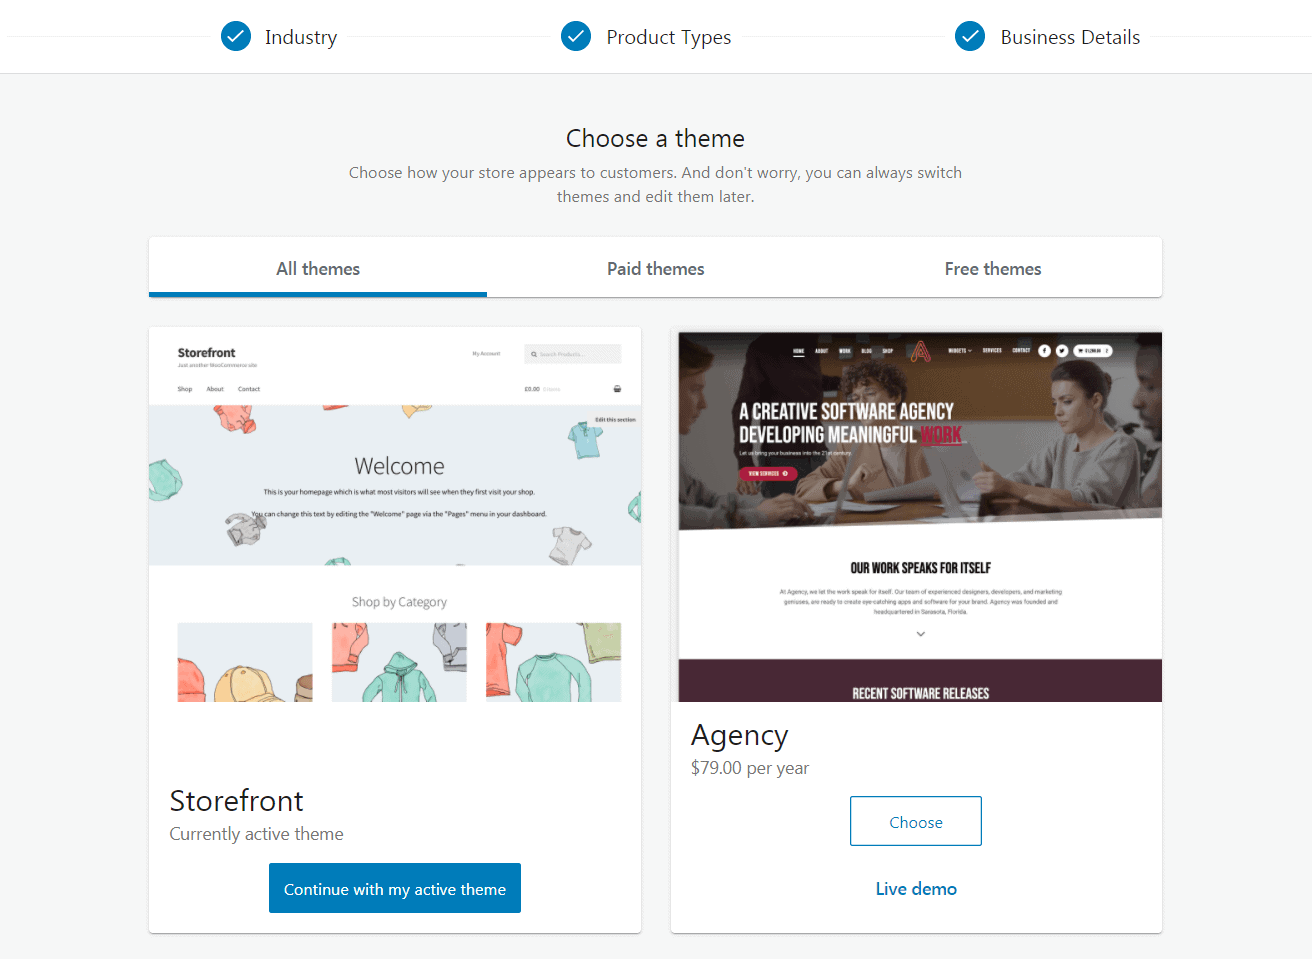
There’s a selection of free and premium options here, some with a more general focus and others designed for specific types of stores. If you want to keep things simple, you can opt for the free, official WooCommerce theme, Storefront.
Just keep in mind that, as with plugins, there are lots of theme options out there. The ones presented here are just the tip of the iceberg. If you don’t like any of them, you can find plenty of free and premium WooCommerce themes elsewhere. You can also change your theme at any time, so feel free to play around with a few options before making a final decision.
Step 7: Start Using Your WooCommerce Store
If you want to use one of the recommended themes, select Choose and it will be installed and activated for you. If not, just hit Continue.
Either way, you’ll be presented with one final option:
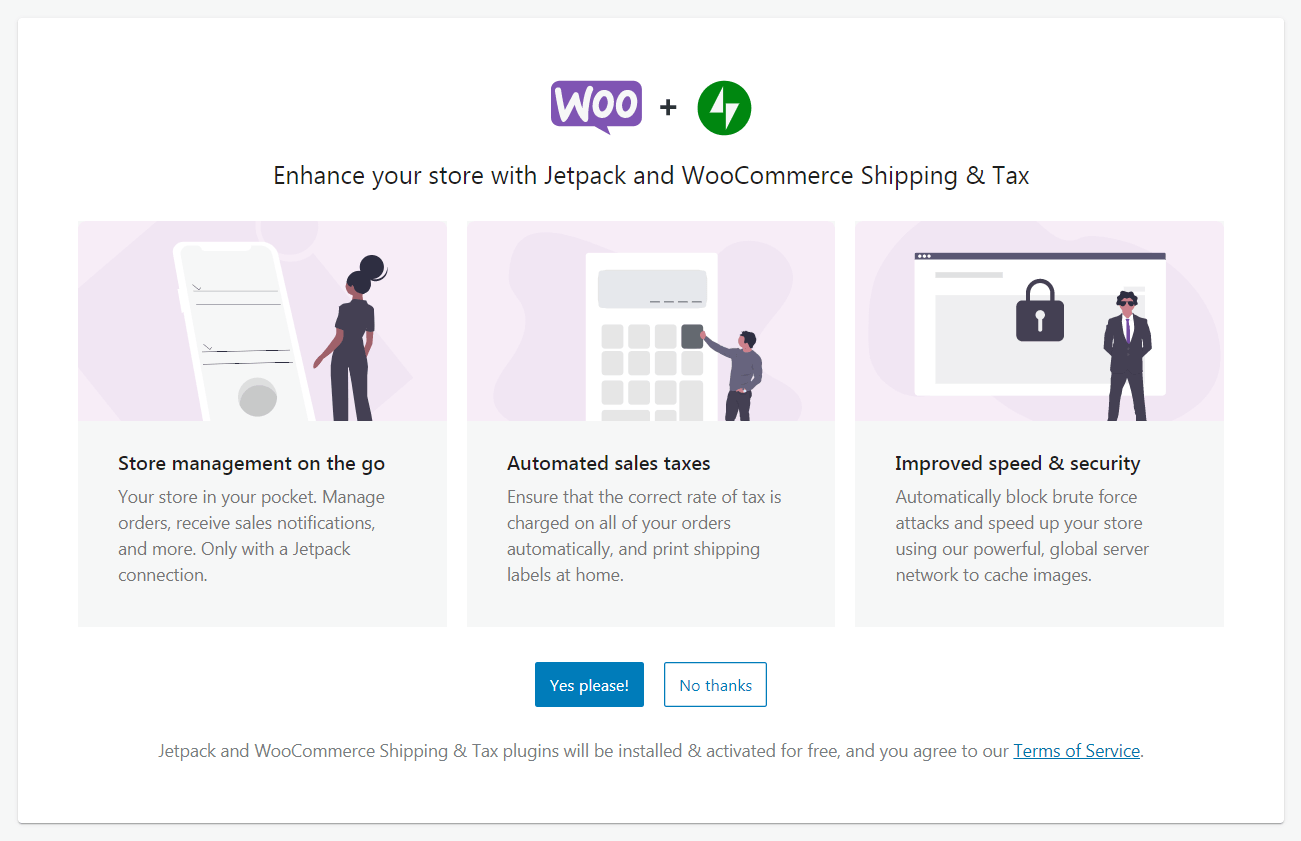
This is another chance to install the Jetpack and WooCommerce Shipping & Tax plugins on your site. Go ahead and do so if you like.
As with the rest of the wizard, these decisions aren’t final. You can always come back and install these plugins later, or uninstall them if you choose not to use them.
After that, you’ll be taken to your new WooCommerce home screen:
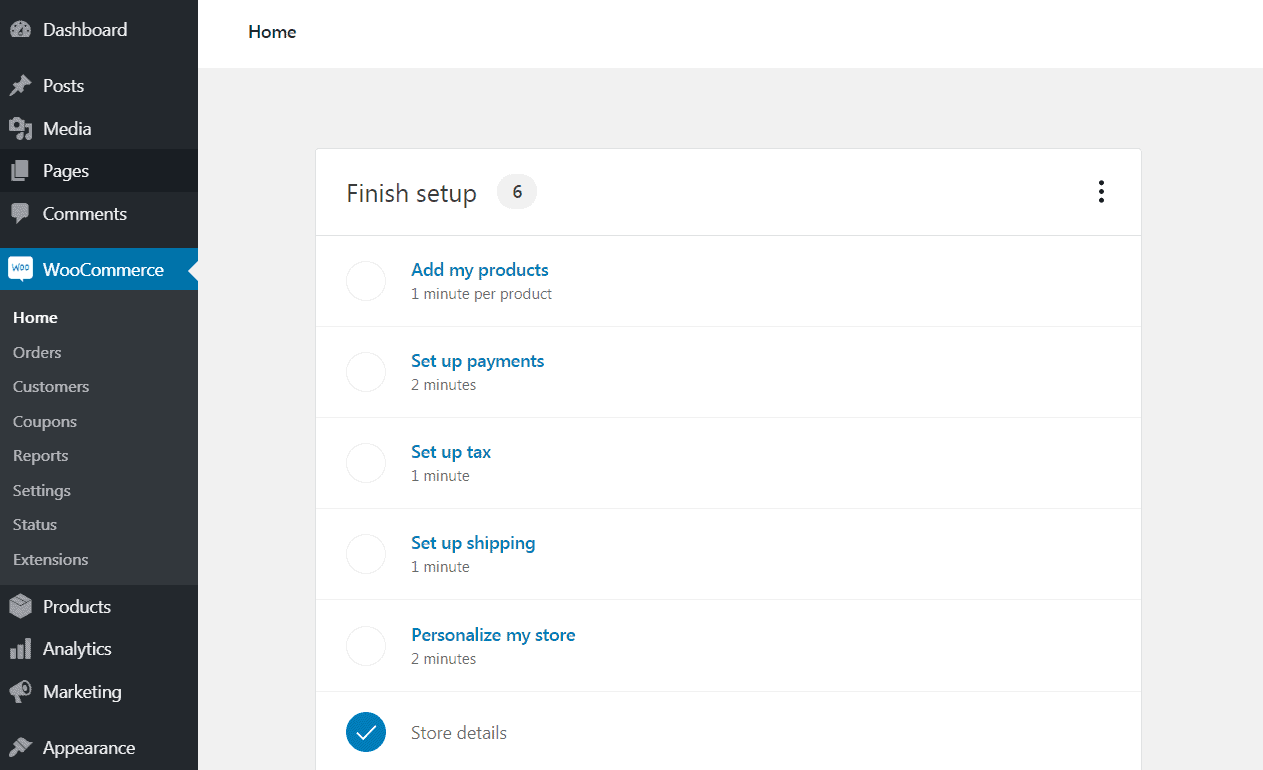
This provides you with links to some of the other key settings to configure, in order to finish your store’s setup. You can add your payment options, shipping methods, and so on.
If you chose to add any extensions or plugins to your store while following the setup wizard, there will also be prompts to install and activate them here. These tasks can be tackled now, or at any later point.
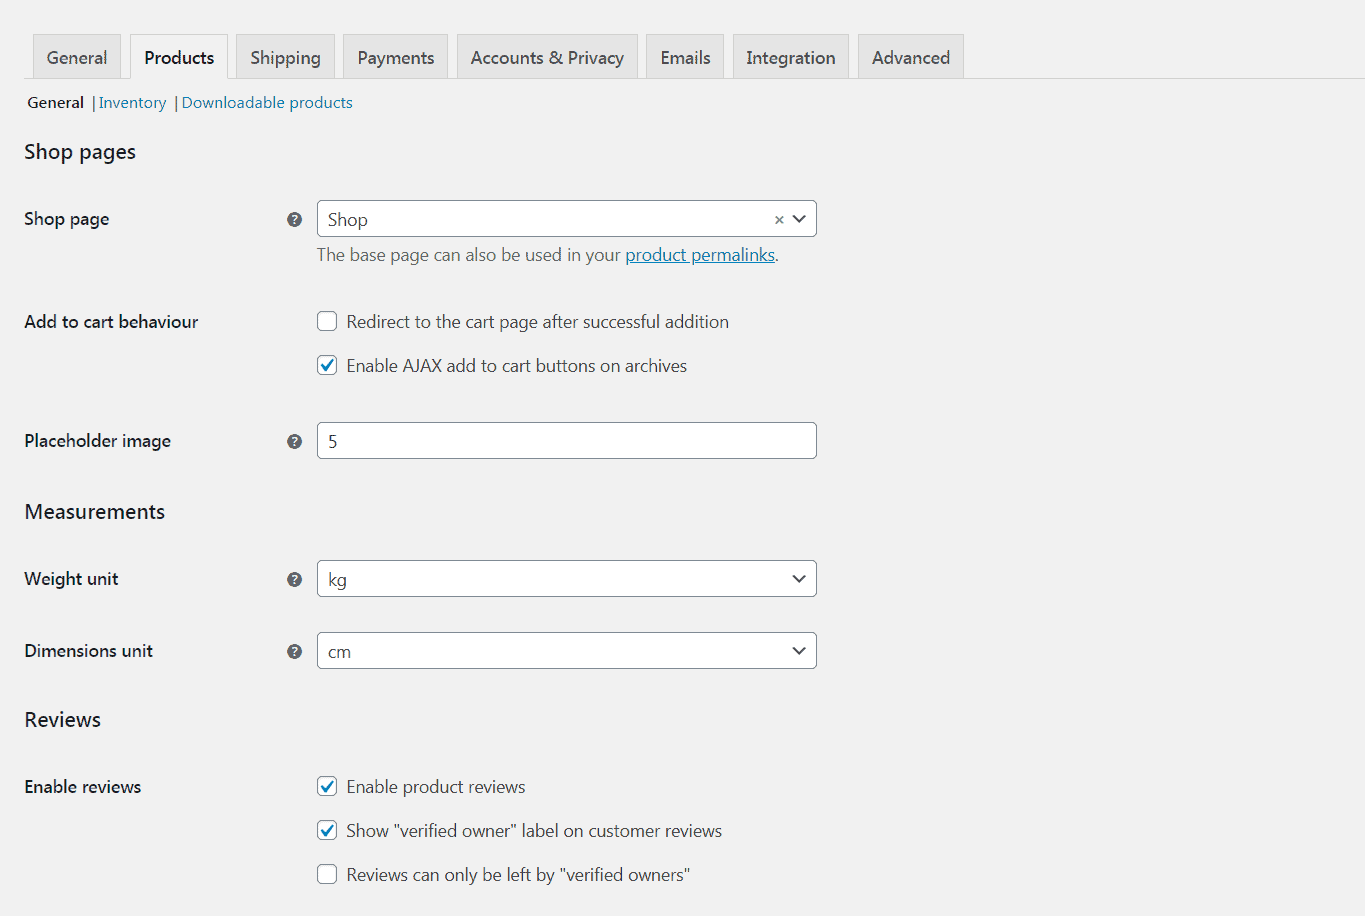
Alternatively, you can head straight to WooCommerce > Settings to see all of the available options for your online shop:
With that, you have officially set up WooCommerce!
What to Do After You Set Up WooCommerce
At this point, you may be wondering what you should do next. WooCommerce is installed and set up, but your store isn’t quite ready to go.
Here are some of the other tasks you’ll want to tackle now:
- Finish configuring your WooCommerce settings. As mentioned above, you’ll still need to enter details about your payment and shipping options, taxes, and so on. It’s a good idea to start by heading to the WooCommerce Settings page and familiarising yourself with the options there.
- Customise your theme. Most WordPress themes offer plenty of customisation options, so you can tweak exactly how your store appears. If you haven’t yet, you can start by selecting a WooCommerce theme. Then head to Appearance > Customise to start making changes.
- Add your products. Right now, your store is empty. You’ll need to add each product or service you intend to sell via the Products > Add New screen. For more details, check out our full tutorial on the subject.
- Improve your store with supporting plugins. WooCommerce adds vital e-commerce features to your website, but you may want additional options. There are certain things that you can’t easily do with WooCommerce out of the box, such as creating product tables and building a members-only store. Fortunately, there are plugins you can install to add just about any feature or functionality to your site.
It will take some time and research to outfit your store exactly the way you want. However, the more time you take to perfect it now, the easier it will be to start building a customer base and bringing in revenue.
Conclusion
E-commerce is a booming field, and there’s a lot of competition out there. If your new online store is going to succeed, you’ll need to give it the best possible shot by building it using proven solutions. WordPress, WooCommerce, and a curated selection of supporting plugins are a smart choice.
Once you have those tools in hand, building your e-commerce shop is pretty simple. After you set up your WordPress website and install WooCommerce, you’ll be able to follow the plugin’s setup wizard to handle most of the key initial steps, such as entering your store details and choosing a theme.
Do you have any questions about getting your WooCommerce shop off the ground? Let us know in the comments section below!