How to build a ‘create your own pizza/sandwich/meal’ product in WordPress

This article is a ‘use case’ for the WooCommerce Product Add Ons Ultimate plugin, showing you how to build a ‘create your own pizza’ type product in WordPress, using WooCommerce and WooCommerce Product Add Ons Ultimate. We’ll build an example product that would allow customers to configure their own pizza, specifying their choice of base, sauce, size and toppings.
Related Tutorial
Please note that there is an even better method for creating a WooCommerce pizza builder product here.

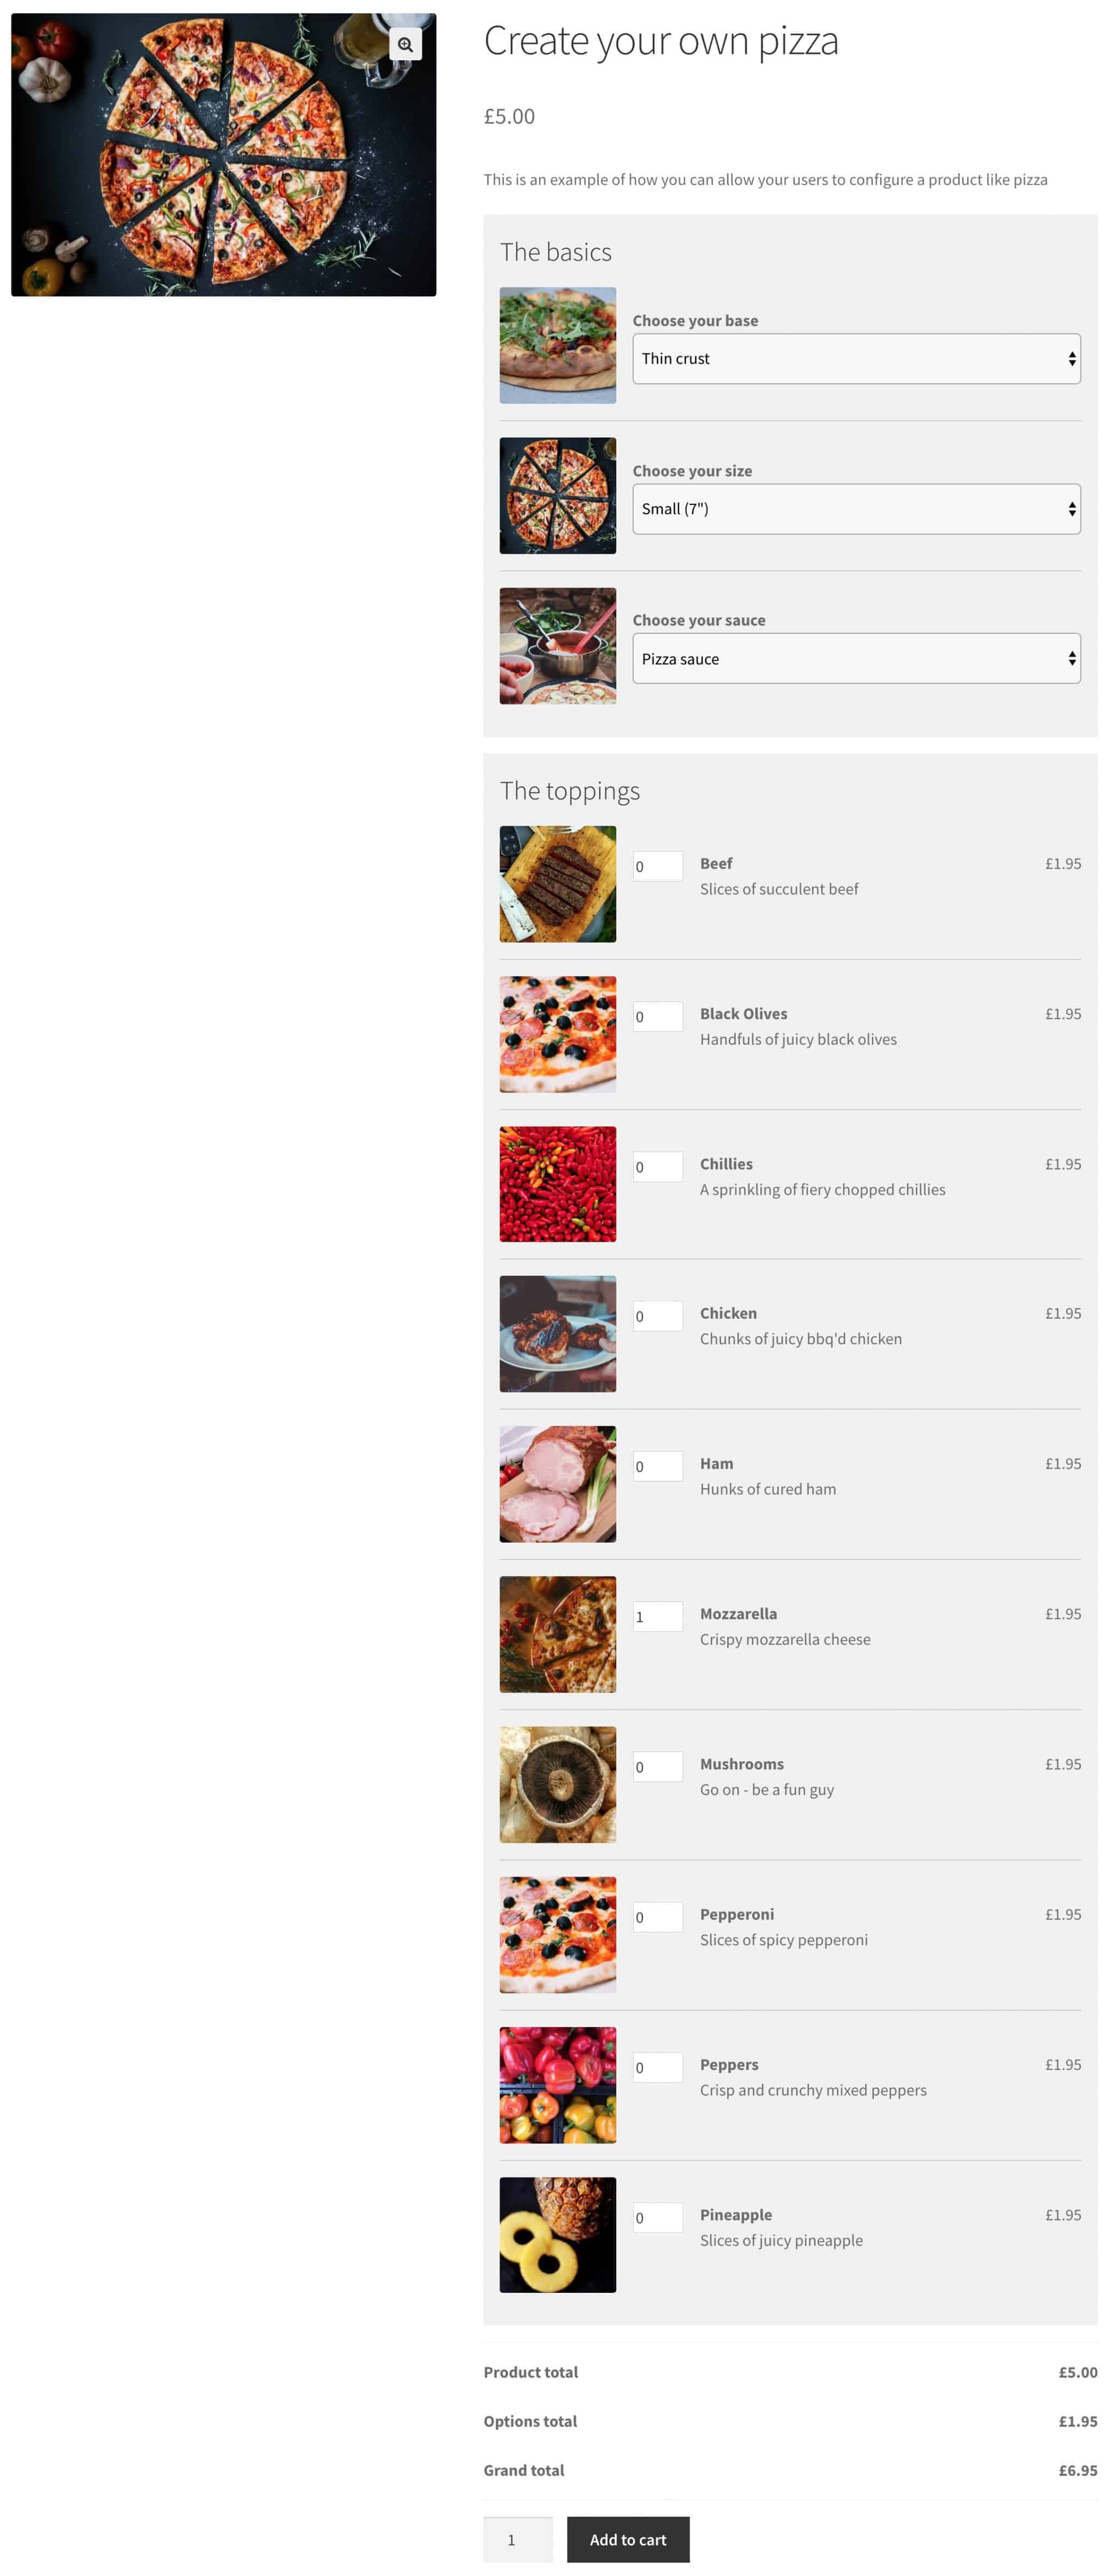
For this demo, I’ve used the Storefront theme. You can see a working example of the page here; it should look something like this:
Key features
The customer will be able to configure their own pizza. They’ll use select (dropdown) fields to specify things like size and crust and use number fields to specify their choice of toppings.
Options will have different pricing so the total price for the pizza will change depending on what the user chooses.
Each option will be accompanied by its own image to help the user.
Related Tutorial
Find out more about adding extra options to WooCommerce products here
What we’ll be using
The demo is based on the Storefront theme, which is WooCommerce’s flagship theme. But this should work for any theme so you won’t need to switch to Storefront if you don’t want.
In addition, we also using WooCommerce and the WooCommerce Product Add Ons Ultimate plugin.
These two plugins are all you need to create this configurable product.
Building your ‘create your own pizza product’
Setting up your product
To create your product in WooCommerce, you just follow the standard process for creating a WooCommerce product:
- Go to Products > Add New
- Enter your product title, e.g. ‘Create your own pizza’
- Enter a description and a short description
- Enter a base price
Setting up the options
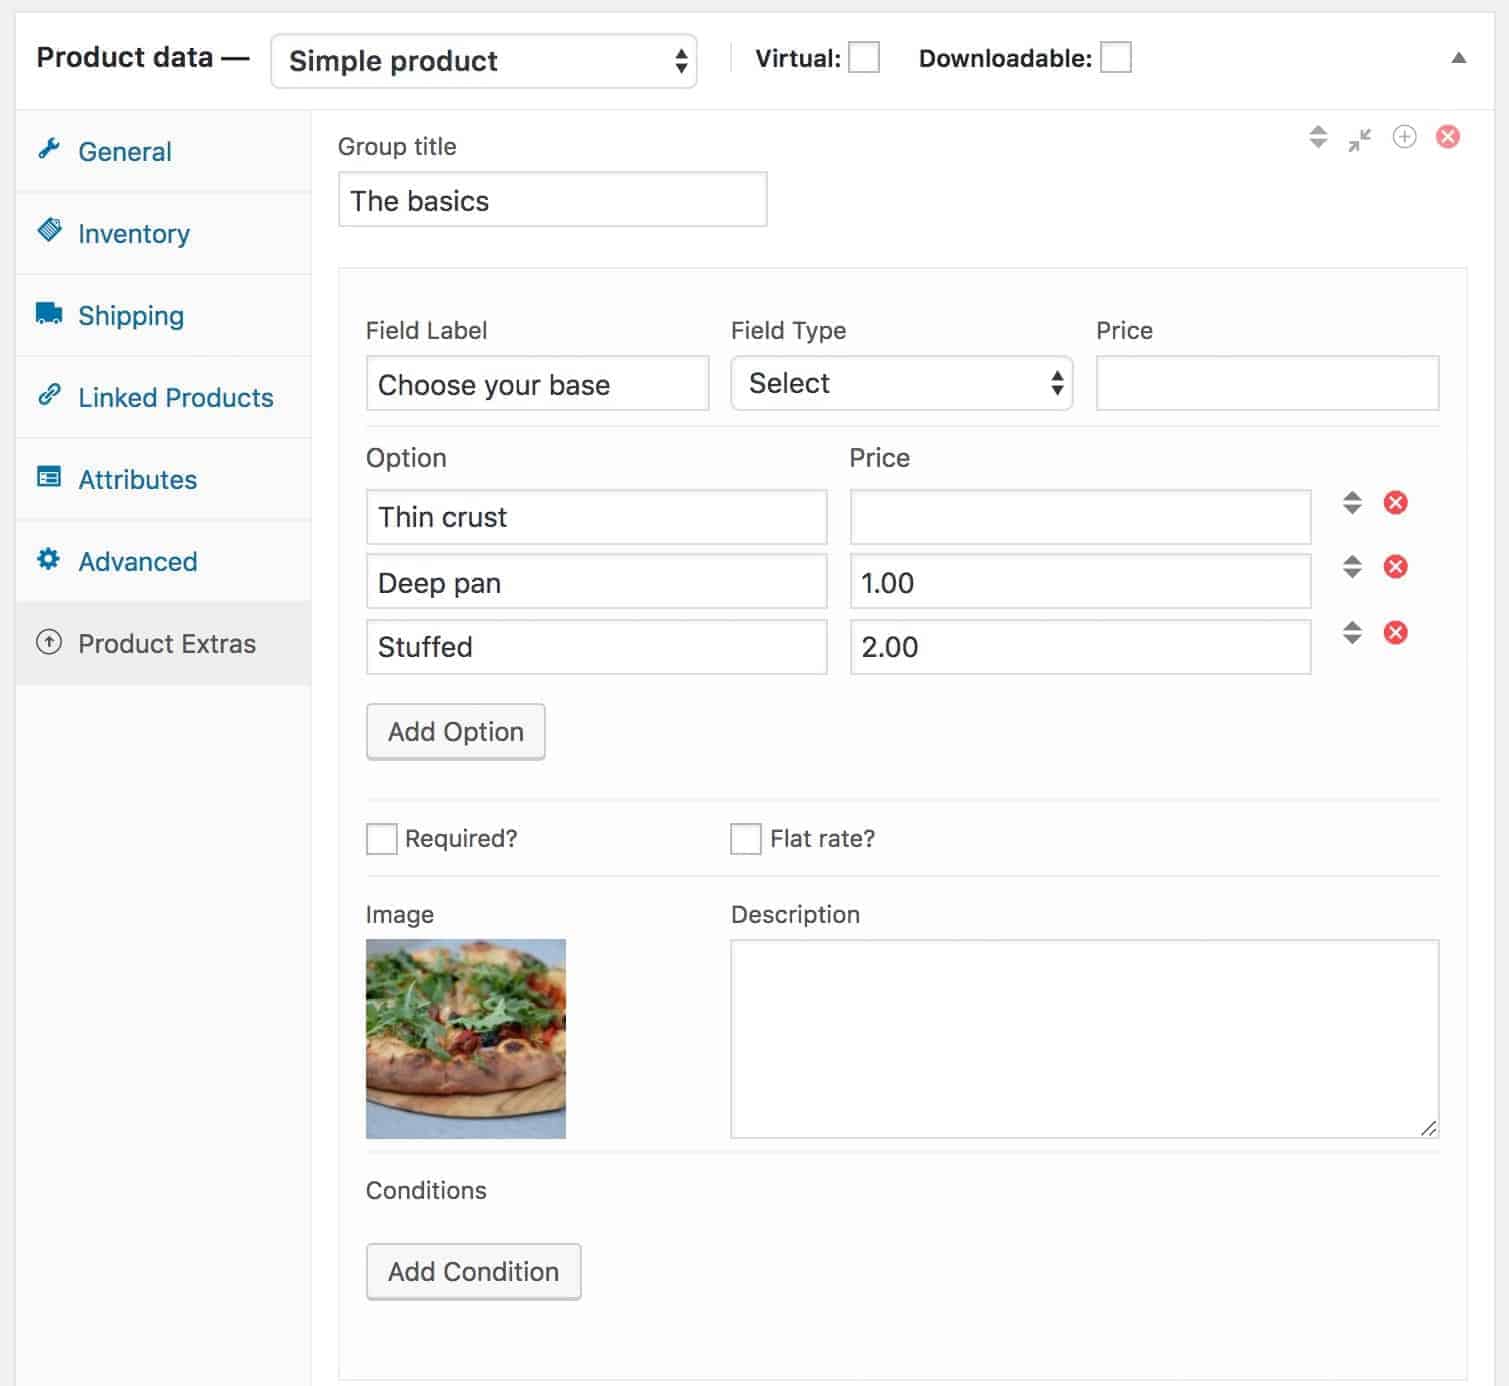
When you’ve set up the basic product, you can add the different options. In the Product Data section, click on the WooCommerce Product Add Ons Ultimate tab:

In the demo product, I’ve created two groups of fields: the first group is for the basic options like size and crust; the second group is for the toppings.
The basics
To set up the group for the basics, follow these steps:
- Click ‘Add Group’
- Enter a title, e.g. ‘The basics’
- Click ‘Add Field’
- Enter the field label, e.g. ‘Choose your base’
- Update the field type to ‘Select’
- Click ‘Add Option’ to create a new option
- Enter the first option for the crust, e.g. ‘Thin crust’, in the ‘Option’ column
- If you want to add a surcharge for this option, enter a value in the ‘Price’ column. This is the amount that will be added to the overall cost of the pizza if the user chooses this option.
- Repeat for other crust options, e.g. ‘Deep pan’, ‘Stuffed crust’, etc.
- Upload an image to accompany this field
You can repeat the steps above for the fields in the group, e.g. ‘Choose your size’, ‘Choose your sauce’.
The toppings
Now you’ve created your first group of extra options, you can follow these steps to create the group of fields for the toppings:
- Click ‘Add Group’
- Enter a title, e.g. ‘The toppings’
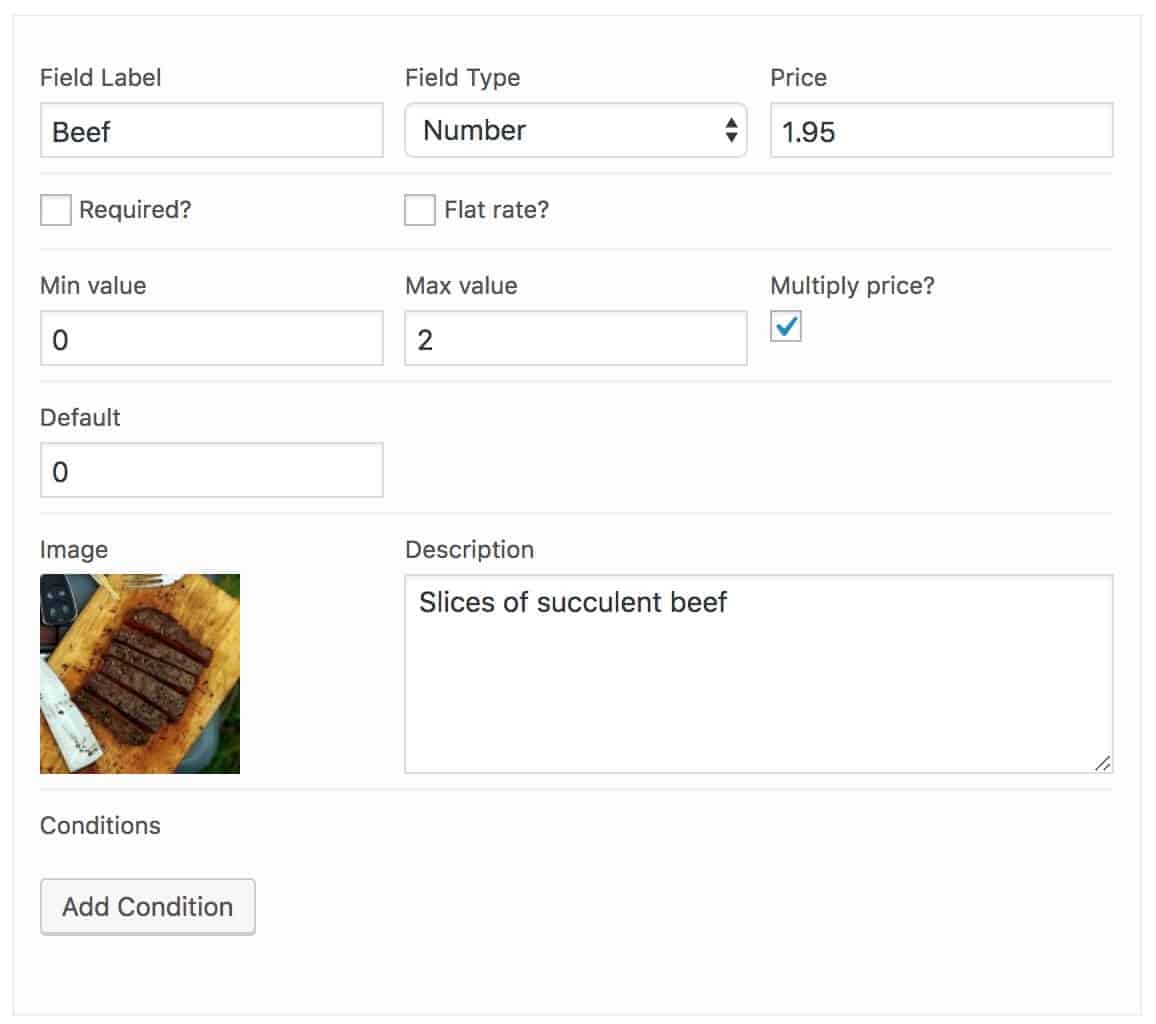
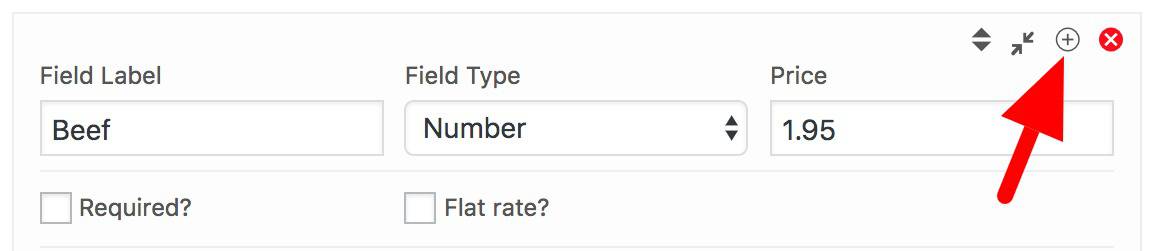
- Click ‘Add Field’
- Enter the field label, e.g. ‘Pepperoni’
- Update the field type to ‘Number’
- Enter the price for the topping in the ‘Price’ field
- Enter 0 in the ‘Min value’ field
- If you wish to limit the number of times the customer can choose to have this topping, enter a value in the ‘Max value’ field
- Check the ‘Multiply price’ field. This will ensure that the price of the add-on will be multiplied by the number the customer chooses: e.g. if the price of pepperoni on your pizza is $1.50 and the customer enters 2 in the number field (to get a double helping), then $3.00 will be added to the pizza price
- Upload an image to accompany the field
- Add a description to add a bit of detail to the option
You can repeat the steps above for each topping. The quickest way is to click the ‘Duplicate’ icon in the top right of the field to create a copy of the option then just change the details as necessary.
When you’ve added all your fields, you can publish the product.
Additional CSS
Once you’ve published the product, you can take a look at it on the front end. In the demo site, I added a small amount of CSS to give each group a background colour in order to keep the groups more obviously separate.
| .pewc-product-extra-group-wrap { | |
| padding: 1em 1em 1em; | |
| background: #f1f1f1; | |
| margin-bottom: 1em; | |
| } | |
| .pewc-product-extra-groups li { | |
| margin-bottom: 1em; | |
| border-bottom: 1px solid #ccc; | |
| } | |
| .pewc-product-extra-groups li.pewc-has-field-image { | |
| padding-bottom: 1em; | |
| } | |
| .pewc-product-extra-groups li:last-child { | |
| margin-bottom: 0; | |
| border-bottom: none; | |
| } | |
| .pewc-product-extra-groups li p.pewc-description { | |
| margin-bottom: 1em; | |
| } | |
| ul.pewc-product-extra-groups { | |
| margin-bottom: 0; | |
| } |
This adds a background colour to each group and adds a border under field.
Other food product ideas
You can use this approach for any food-based product where customers can pick their own ingredients, fillings or toppings, e.g.:
- Build your own sandwich – let customers pick their choice of bread, topping, relish, sauce and fillings
- Create your own burrito – let customers choose fillings, extras and any side orders
Final steps
Don’t forget you can check out the demo page here. And if you have any examples of products you’ve made using this method, please share them below.

WooCommerce Product Add-Ons Ultimate
Personalize products with extra custom fields and options
Do I need to purchase the pro version of this plugin to have all the options shown on this article?
Hi Julio
The image search fields used for the crust, size and sauce fields require the Pro version. However, you could replace these with radio groups or select fields if you just wanted to use the Basic version.
Thanks
Gareth