The WooCommerce Live Image Preview lets customers see their uploaded image on the main product image. Customers upload an image using a standard ‘Upload’ field, and Image Preview displays it within the main product image.
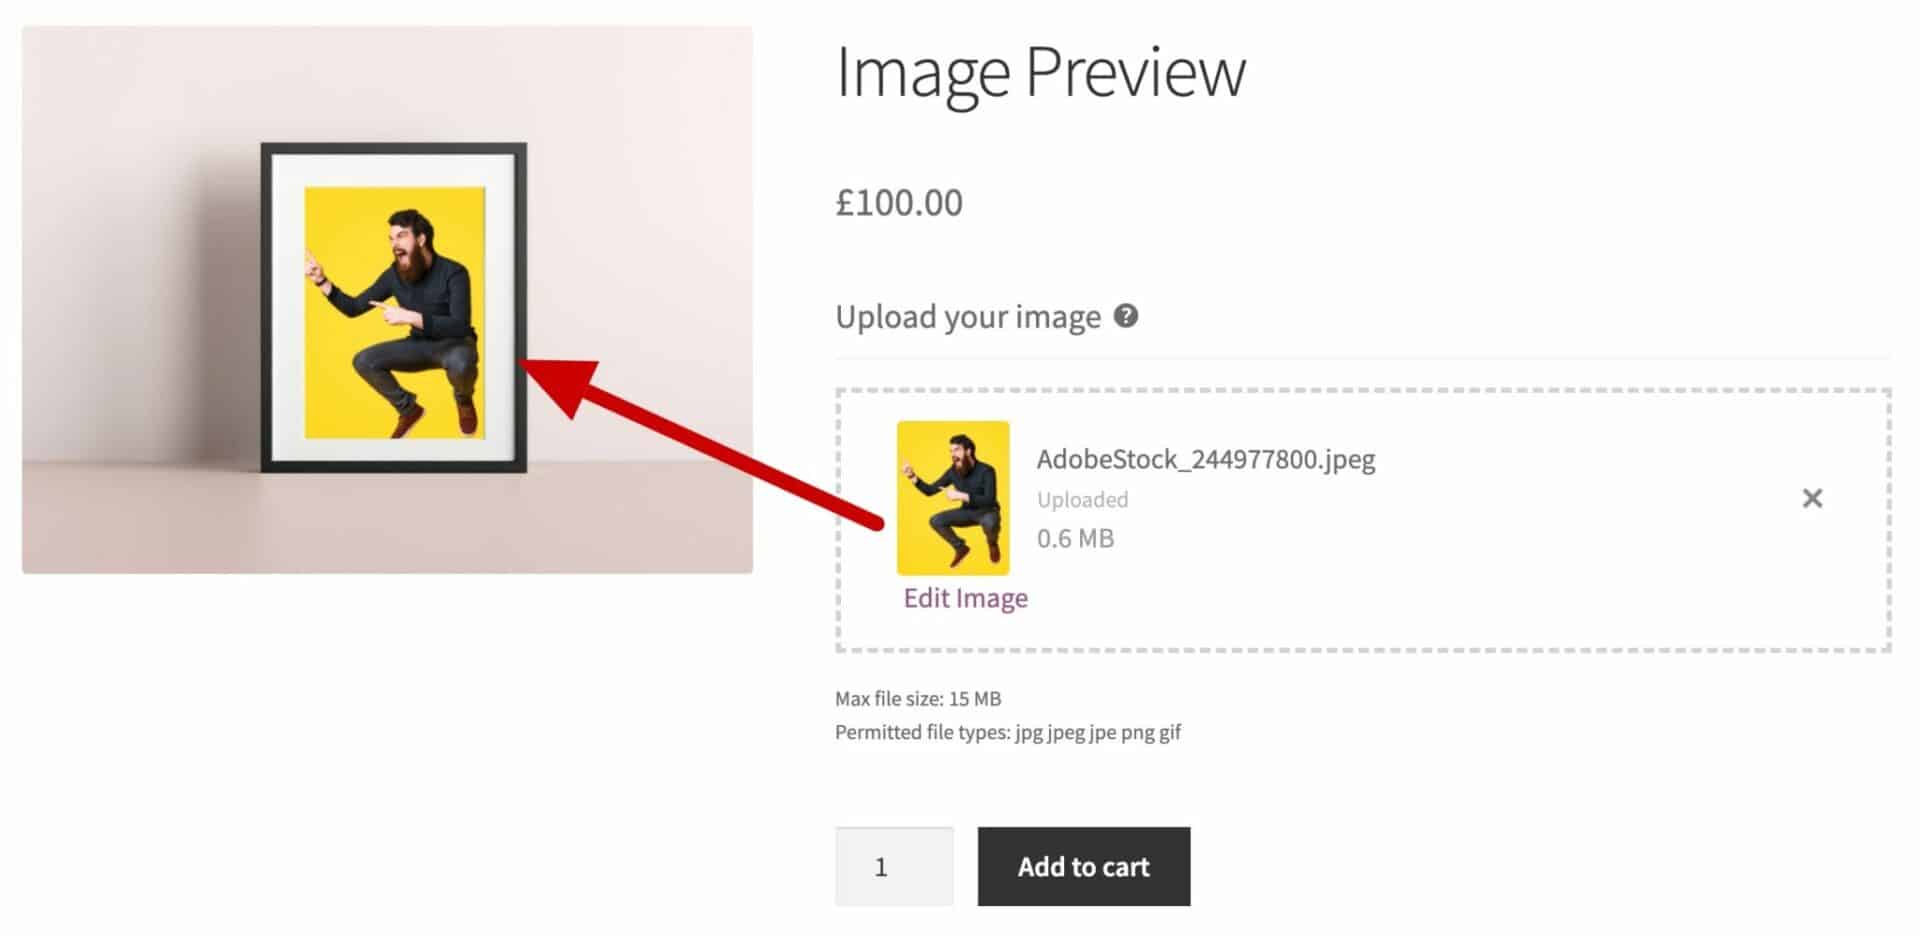
Your product image can be transparent or non-transparent – Image Preview works with either. You can place the uploaded image automatically, or let customers drag, resize, and rotate it themselves. If you like, you can also target a specific image in the product gallery, so when a customer uploads their image, the gallery updates to show the correct product image.
Products can even have multiple upload fields active on the same image, each positioned independently. You can choose to preview multiple uploads on the same image – e.g. for photo frames with multiple images – or trigger a different gallery image per upload.
And with composite images enabled, the cart, checkout, and order thumbnail shows a single flattened image instead of the product image and upload as two separate things.
What image types does Image Preview support?
Image Preview works whether or not your main product image has a transparent area. The setup you choose depends on the effect you want.
- Product image with a transparent area (saved as a PNG): use this when you want the uploaded image to sit “behind” the product image. The opaque areas of the PNG will obscure any part of the uploaded image
- Product image without a transparent area (a plain JPG or PNG): use this when you want the uploaded image to sit “above” the product image. You can define a preview area to ensure the uploaded image appears in exactly the right position
Transparency determines where the upload should sit relative to the product image, but it doesn’t otherwise limit which features you can use. The interactive drag, resize, and rotate controls, the Preview area boundary, and composite images all work the same way regardless of which type of image you’re using.
Customer controls for interactive preview
When Preview position is set to either interactive option, customers see on-image controls once their image is uploaded:
- Drag the image to reposition it.
- Use the resize handle to make the image larger or smaller.
- Use the rotate handle to rotate the image freely.
- Toggle the Fill/Fit button to switch between fitting the whole image inside its frame and scaling it to fill the frame edge-to-edge.
- Click Reset to restore the image to the admin-configured starting position, size, and rotation.
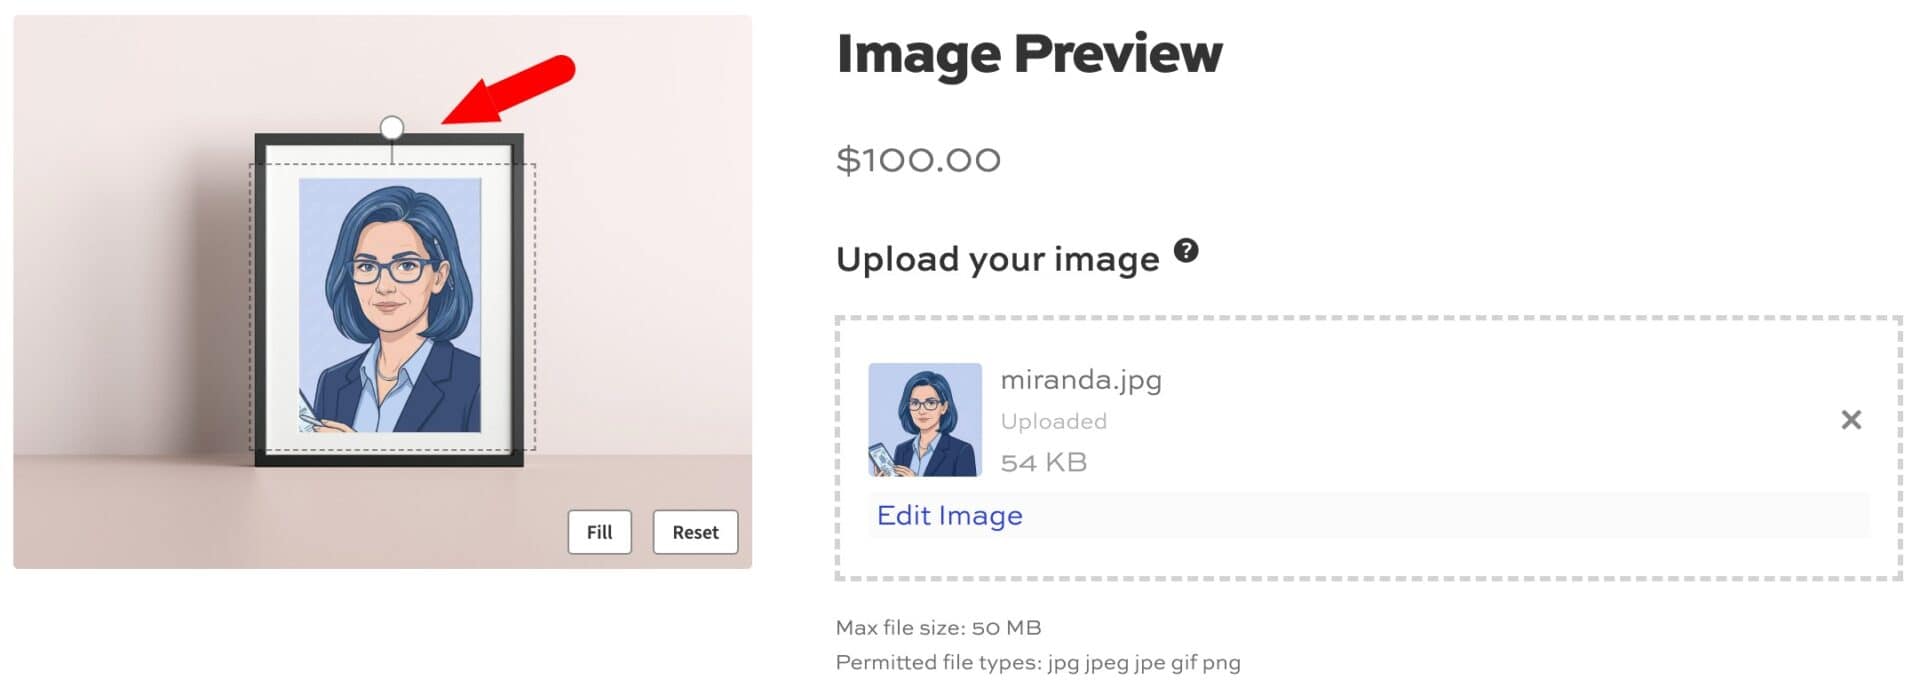
If you’ve drawn a Preview area, dragging, resizing, and rotating is constrained to that area. Only one field’s controls are active at a time on products with more than one interactive upload field.
First step: Add an upload field
To use the Image Preview features, you first need to add an upload field. Add or edit a product and in the ‘Product data’ section, click on the ‘Product Add-Ons’ tab. Click ‘Add Group’ and ‘Add Field’ then choose ‘Upload’ as the ‘Field type’. You now have a field on your product page ready to accept user uploads.
See this article for more detailed information on how to add a new field to your product page. There’s also this document with specific details on upload fields themselves.
Image preview settings
Once activated, Image Preview adds the following parameters to the ‘Uploads’ tab.
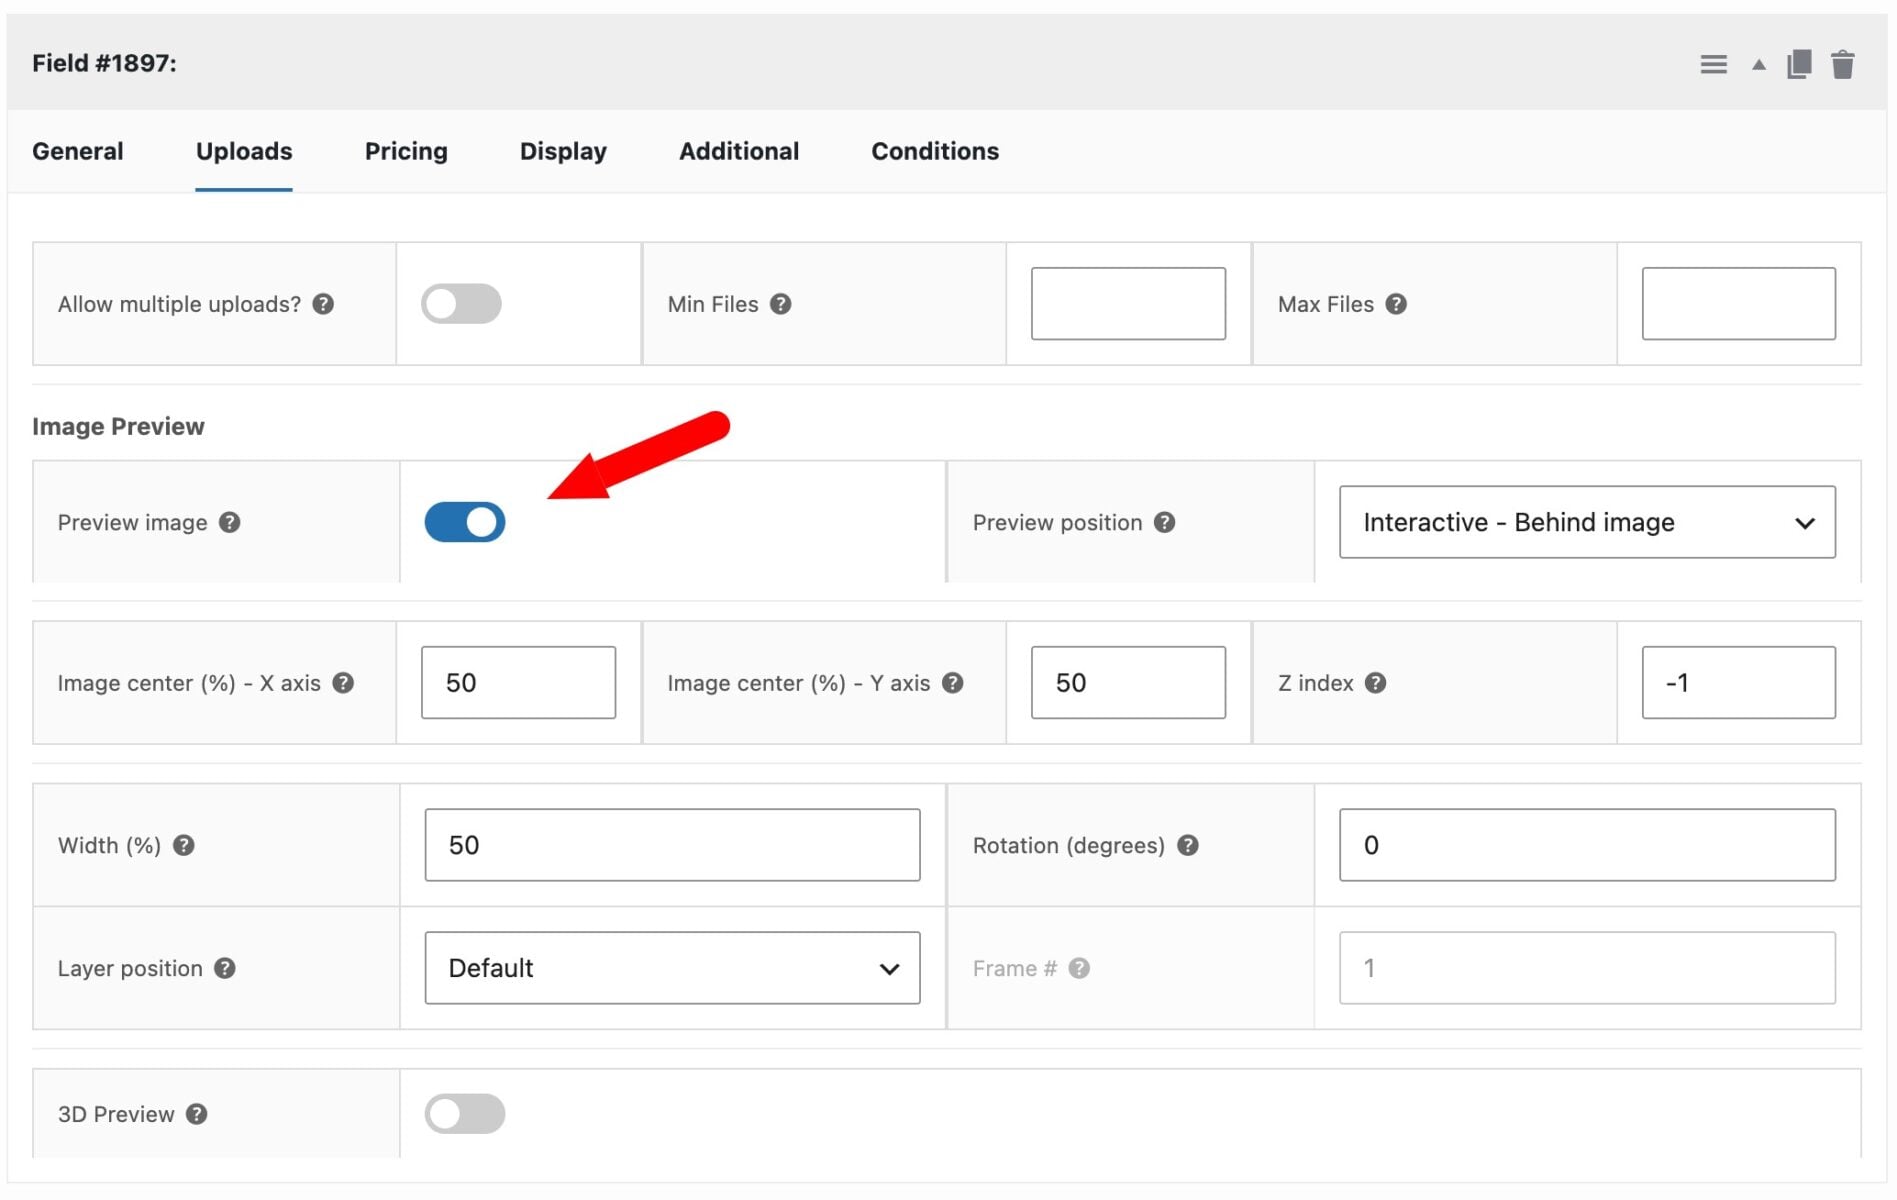
Preview image
Check this option to enable the preview functionality.
Preview position
Choose how the customer interacts with their uploaded image:
- Non-interactive – the uploaded image is placed automatically using the settings below, and the customer can’t move it
- Interactive – Behind image – the customer can drag, resize, and rotate their uploaded image on the product page. It renders behind the main product image, showing through any transparent area.
- Interactive – Over image – as above, but the uploaded image renders above the main product image.
With either interactive option, the customer can position their own image instead of relying on the fixed center, width, and rotation values below. Their adjustments show in the live preview and in the final composite image used at fulfillment. The settings below still set the starting position and size the customer sees before they make any changes.
Which ‘Preview position’ setting do you need?
If you have a PNG with a transparent area as your product image:
- Set Preview position to ‘Interactive – Behind image’ if you want customers to resize and drag the upload.
- Leave the setting as ‘Non-interactive’ if you want to position the image at a specific point without the customer being able to move it
- Set a negative Z index, so the upload shows through the transparent area.
If you have a product image with no transparency (a plain JPG or PNG):
- Use ‘Interactive – Over image’ if you want customers to resize and drag the upload. The uploaded image sits on top of the product image instead. There’s no transparent area for it to show through so it needs to be positioned above the main image.
- If you don’t want users to be able to resize and drag the upload, set ‘Preview position’ to ‘Non-interactive’
- Use a positive z-index setting
Preview area
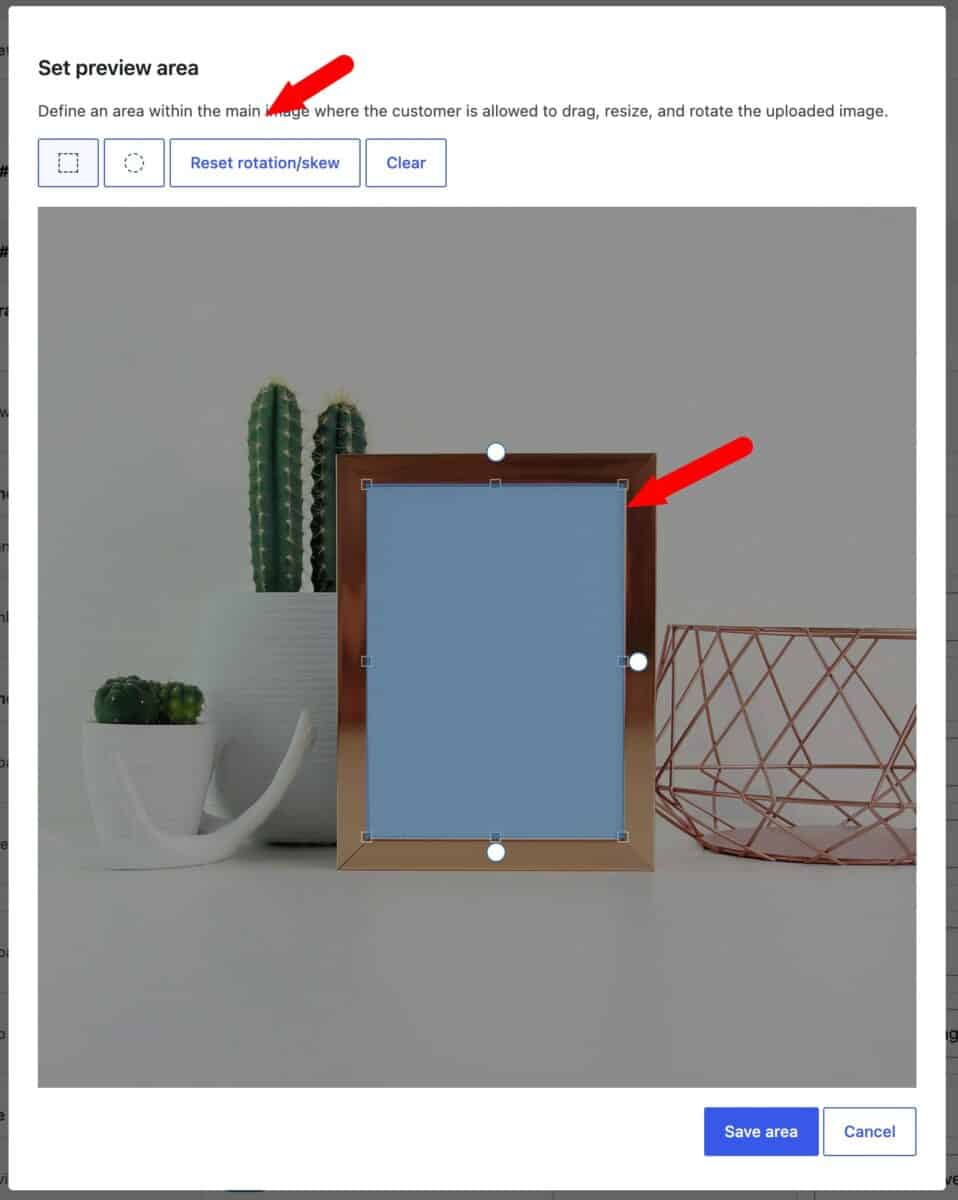
This setting only appears when Preview position is set to “Interactive – Over image.” It lets you restrict the area of the main image the customer can drag, resize, and rotate their upload within.
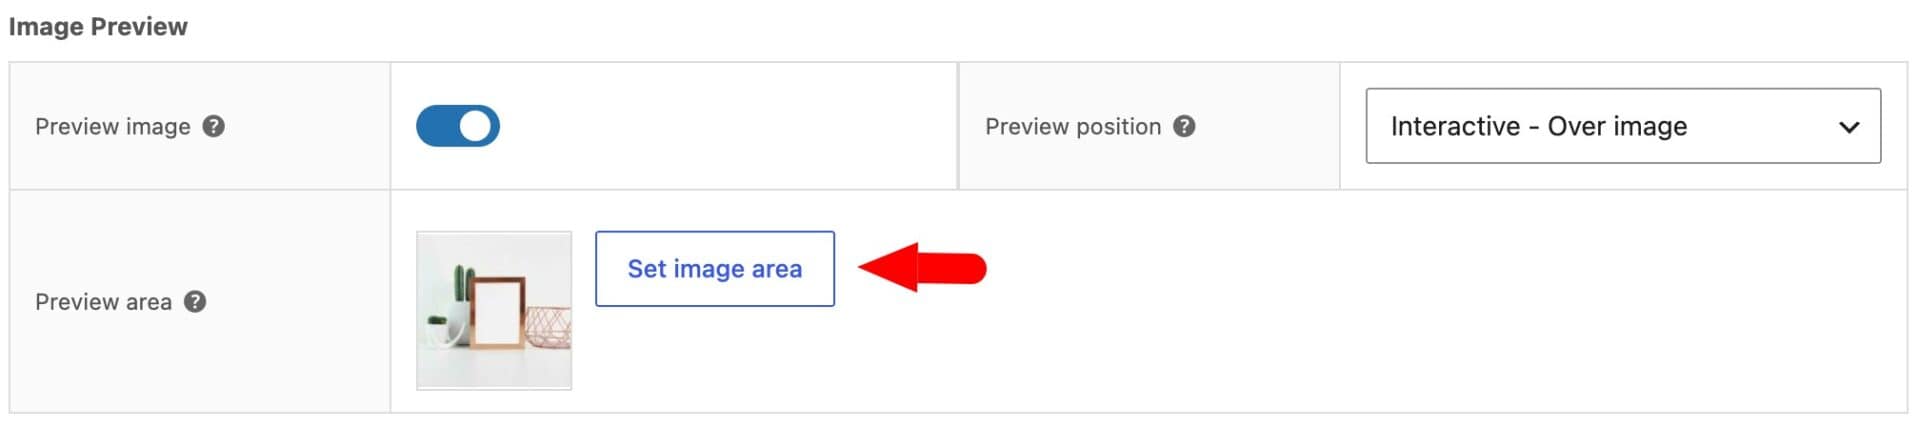
Click ‘Set image area’ to draw a box on the product image. By default, the main product image will be used – but if you have a different image set in ‘Layer position’ (see below), this image will be presented instead.
You can draw rectangular or circular preview areas – just click on the relevant icon – then drag your area on the image. The image background will darken and you’ll see the preview area highlighted in blue.
You can use the handles to rotate and skew the area if you wish. Use the ‘Reset rotation/skew’ button to clear any unwanted transformations. Or click ‘Clear’ to start again.
Once you’ve defined your preview area, click ‘Save area’.
A thumbnail of the current product image appears next to the button, with the drawn area overlaid. Click ‘Redraw image area’ to change it, or ‘Clear’ to remove the restriction and allow the whole image.
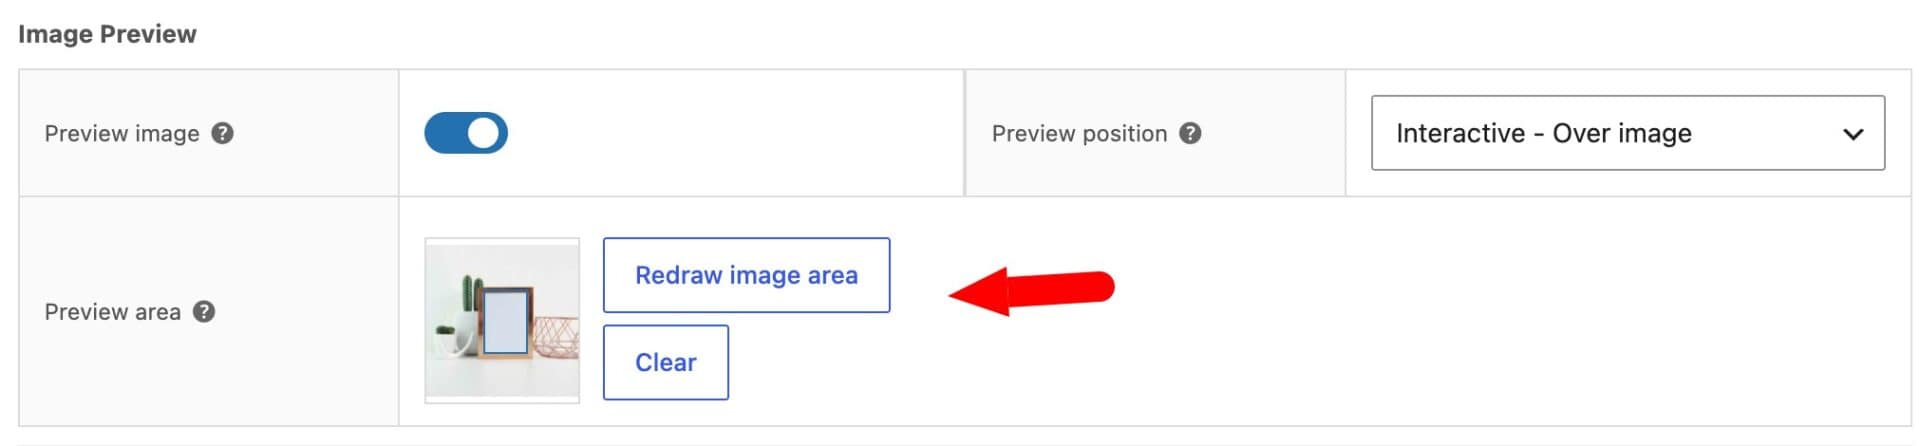
If no area is set, the customer can position their image anywhere within the product image.
The area is drawn against whichever image the Layer position and Frame # settings below currently resolve to. Changing either setting afterward triggers a warning that the area may need to be redrawn, since it was drawn against a different image.
Image center (%) – X axis
This setting determines how far left or right the centre of the uploaded image will sit relative to the main product image. If you enter 0 here, the centre of the uploaded image will appear on the left side of the main image; enter 50 to center the uploaded image horizontally.
Image center (%) – Y axis
This setting determines the vertical position of the uploaded image relative to the main product image. A value of 0 will position the uploaded image at the top of the main image; enter 50 to center the uploaded image vertically.; and 100 will be the bottom of the main image
Z index
This setting determines whether the uploaded image will be displayed above or behind the main product image. A value of -1 will mean the uploaded version is displayed behind the main product image. Any value greater than 0 will place the upload in front of the main image.
This is set automatically if you choose one of the interactive option in ‘Preview position’.
Width (%)
Determines the width of the previewed image relative to the main product image container.
Rotation (degrees)
Sets the starting rotation of the uploaded image. When using an interactive Preview position the customer can rotate further from this starting point.
Layer position
By default, the plugin will display the image preview on all product images in the product image gallery. However, you can limit where it’s displayed using this setting. Choose from:
- Default
- First Frame
- Last Frame
- Specific Frame #
If you choose first, last or a specific frame, the product gallery will automatically switch to show the frame you’ve selected here when a customer uploads an image.
Frame
If you choose Specific Frame # in the Layer position setting, you can specify which image
Multiple upload fields
A product can have more than one interactive upload field sharing the same product image – for example, a front design and a back design on the same image. Each field’s uploaded image can be dragged, resized, and rotated independently of the others.
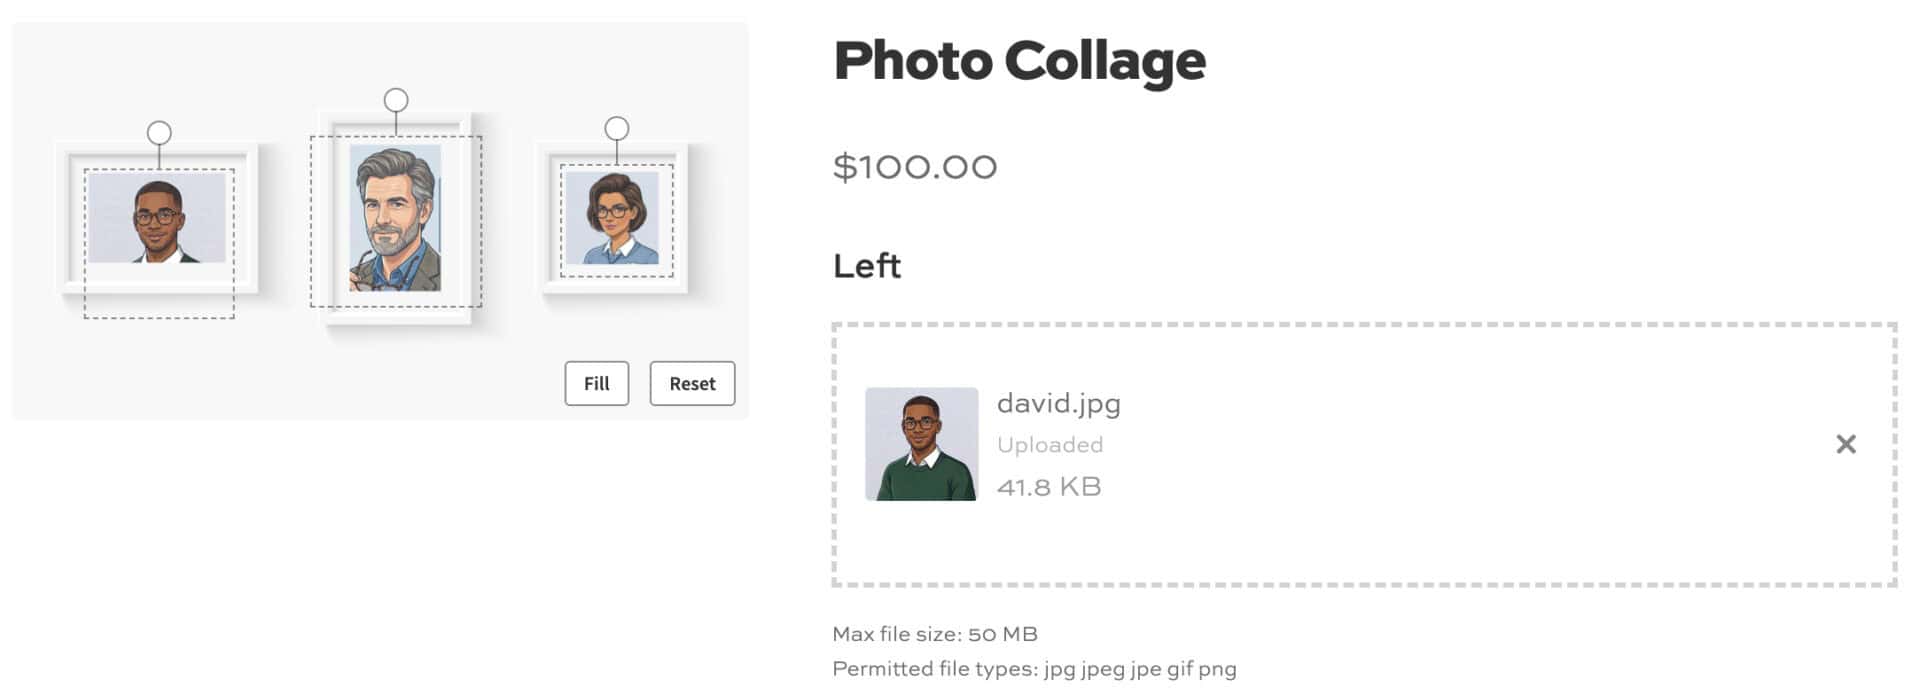
Only one set of on-image controls (the Reset and Fill/Fit buttons) can be shown at a time without them overlapping. Clicking or dragging a particular upload’s image makes that field “active” and brings its buttons to the front.
The other field’s image stays visible and in place. It just doesn’t show its buttons until you click into it.
Enabling composite images
By default, the uploaded image preview is layered on top of the product image only visually, on the product page. The image that ends up in the cart, checkout, and order emails is still just the plain product image, with the customer’s upload as a separate file.
Composite images change this. When enabled, Image Preview generates a single flattened image – the product image with the customer’s upload already merged into it – and uses that as the cart, checkout, and order thumbnail instead.
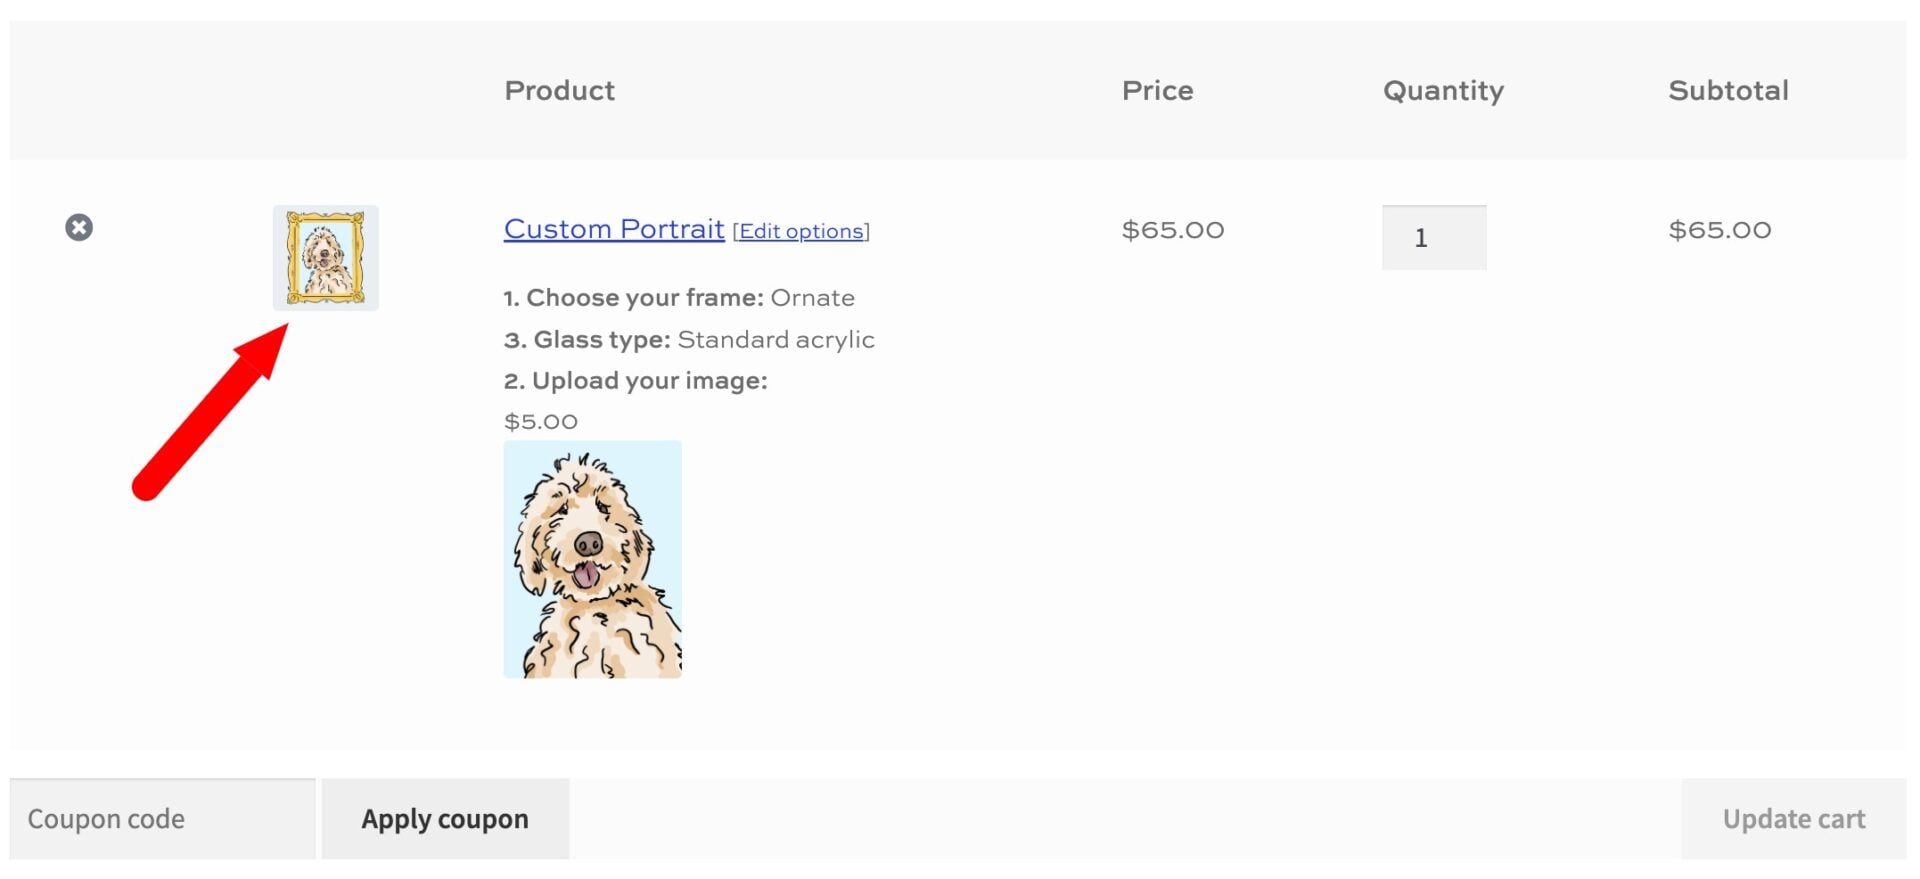
This gives you and your customer one image showing exactly how the upload was positioned, sized, and rotated, rather than the product image and the upload as two separate things.
To enable it, go to WooCommerce > Settings > Product Add-Ons and check ‘Enable layer image (beta)’. Composite images are generated using the Imagick PHP extension, so your hosting needs to support it. If it isn’t available, the plugin falls back to the default behavior and logs a notice.
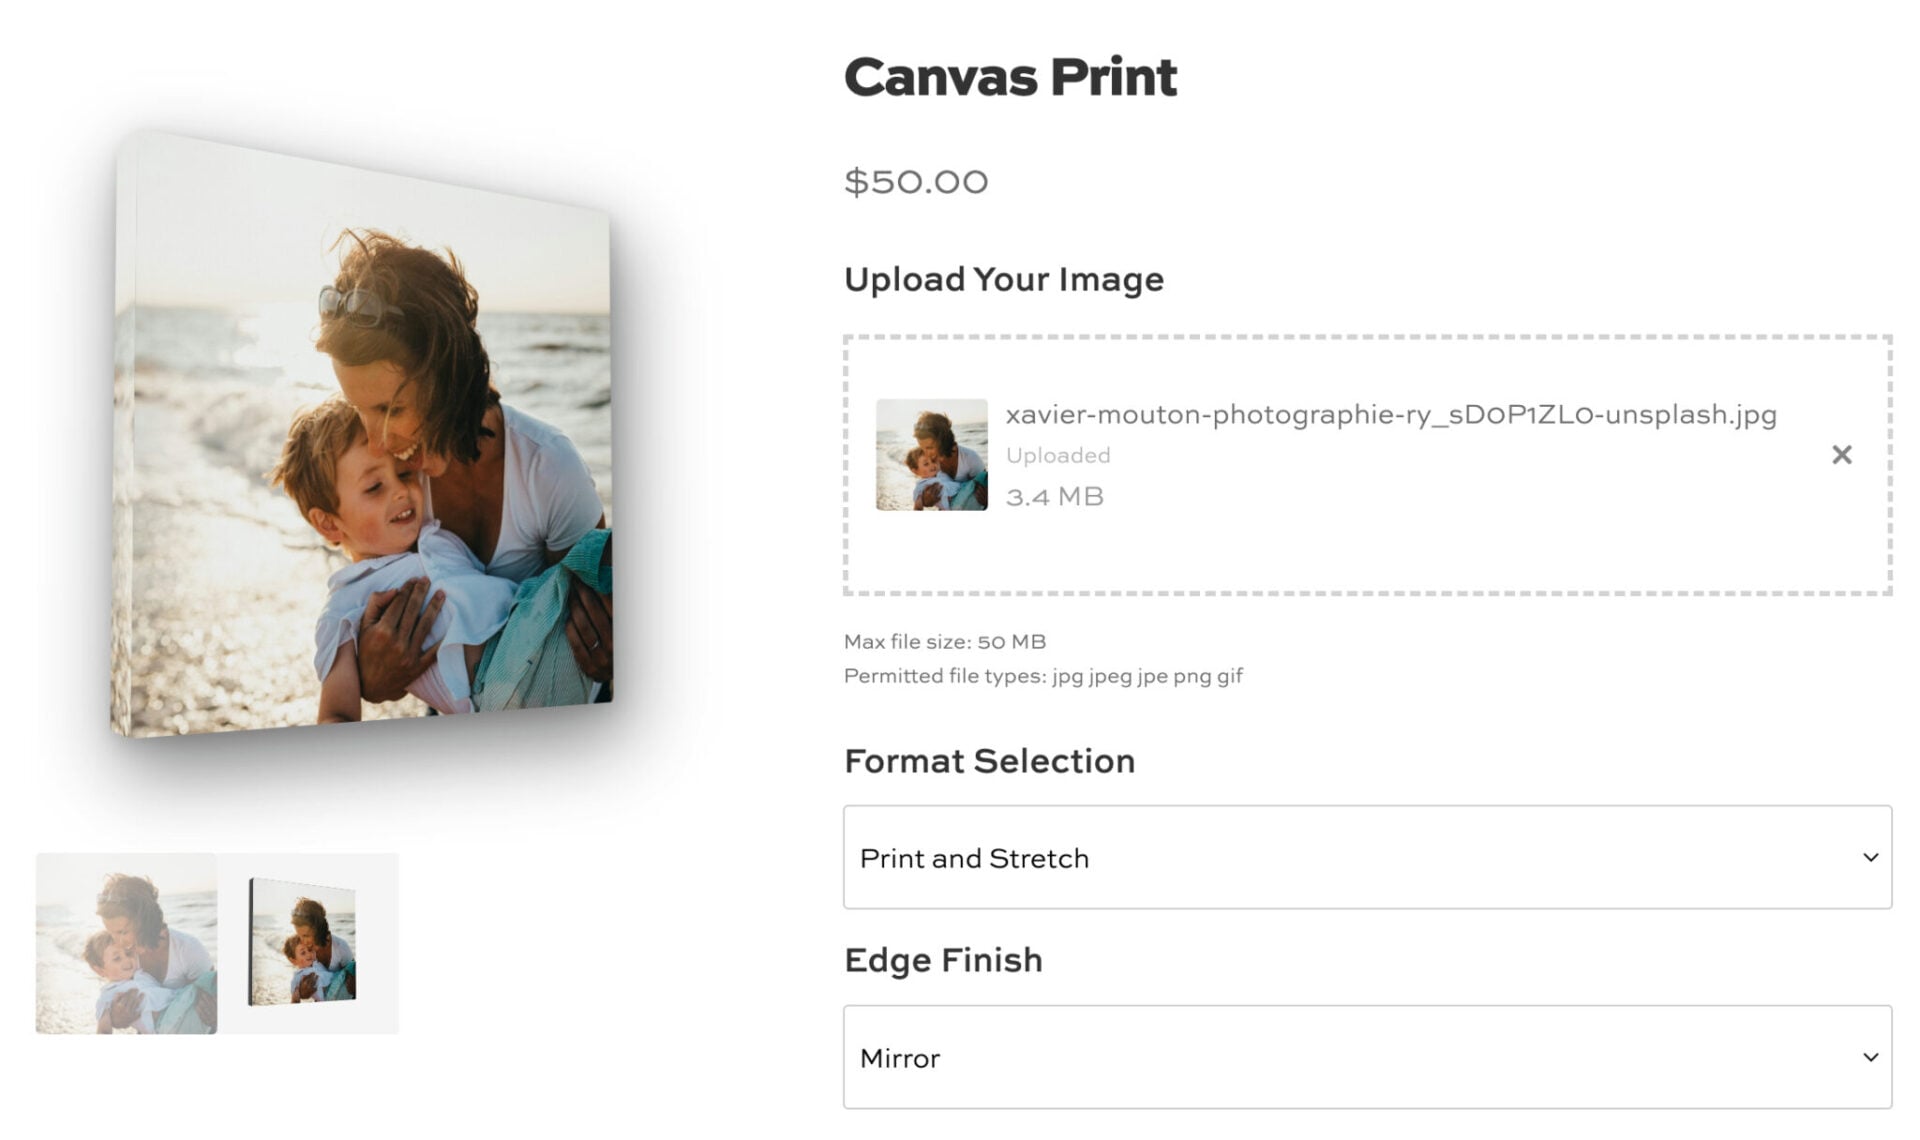
3D Canvas Preview
The 3D preview option displays the customer’s uploaded image as a canvas artwork with a 3D perspective effect showing the front face and visible edges of a stretched canvas. This is ideal for products like art prints or photo canvas wraps.
Enabling 3D Preview
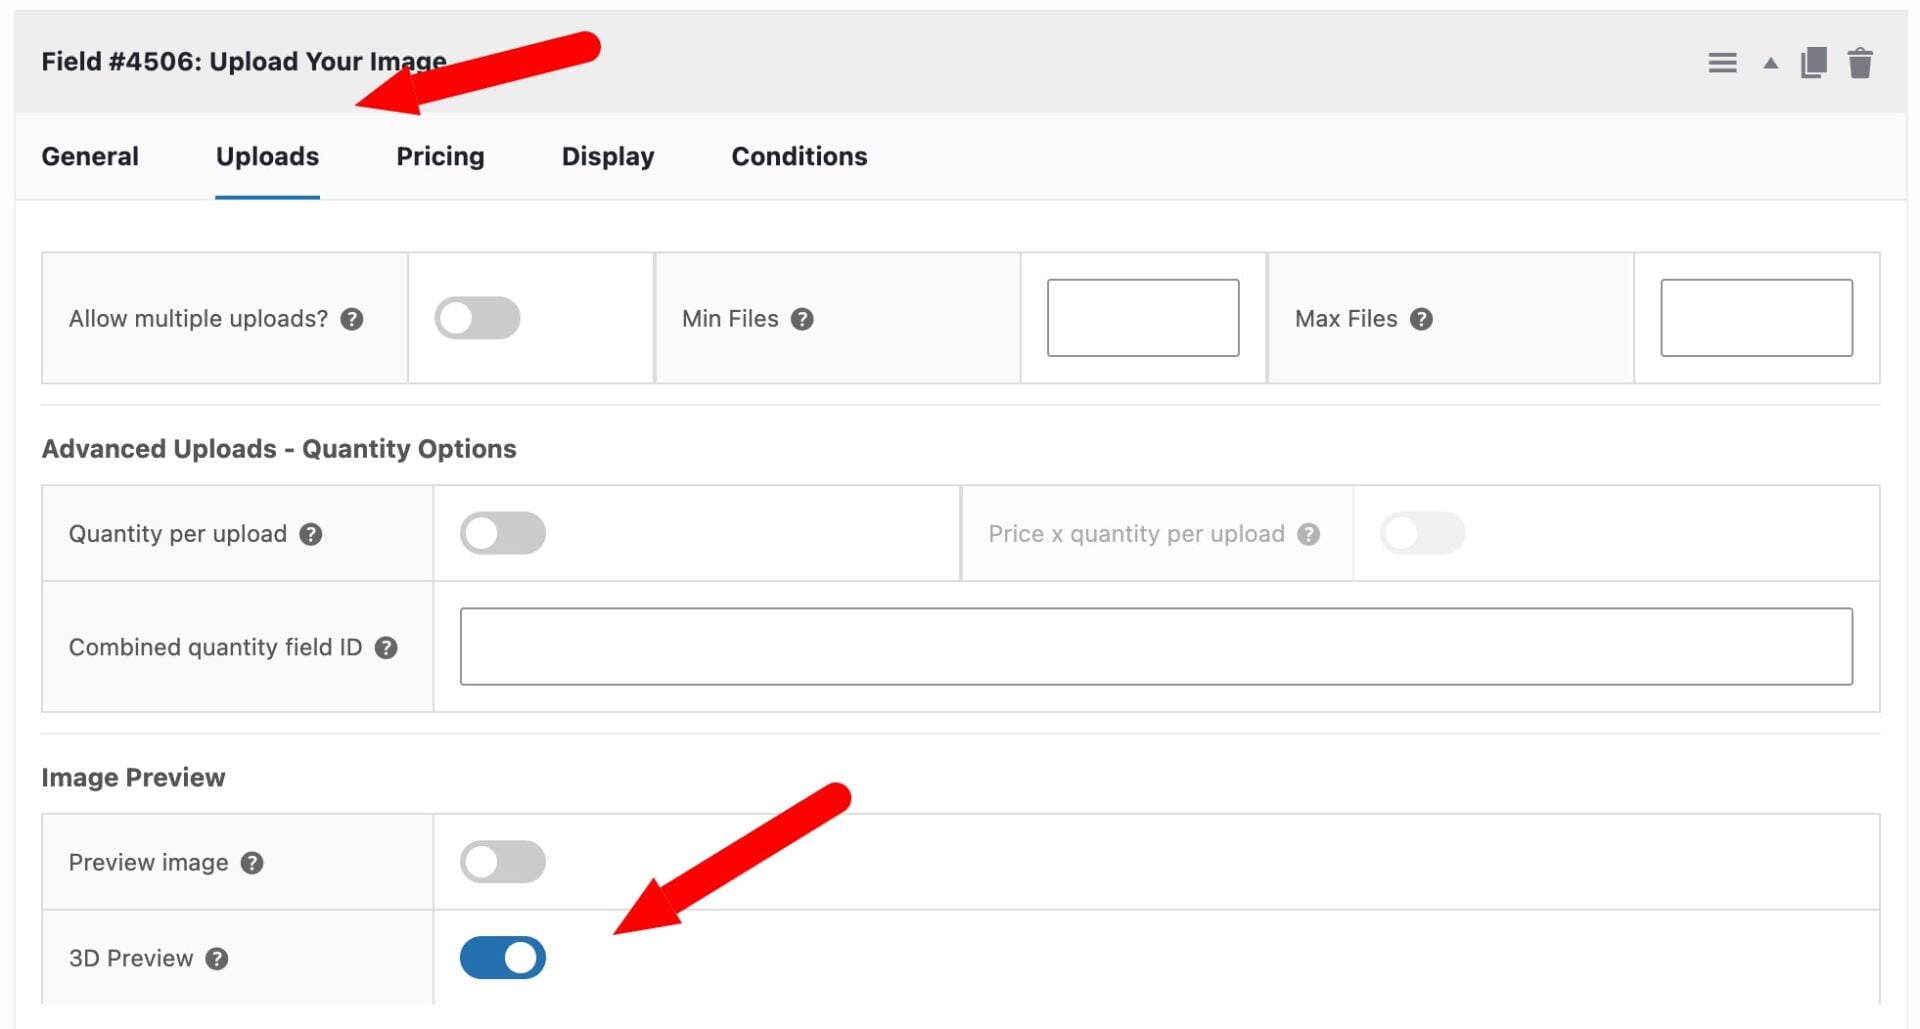
To enable the 3D preview for an upload field, first enable Preview image on the field, then check the 3D Preview option that appears below the image preview settings.
Customer Options
When 3D preview is enabled, two dropdowns appear below the upload field on the product page:
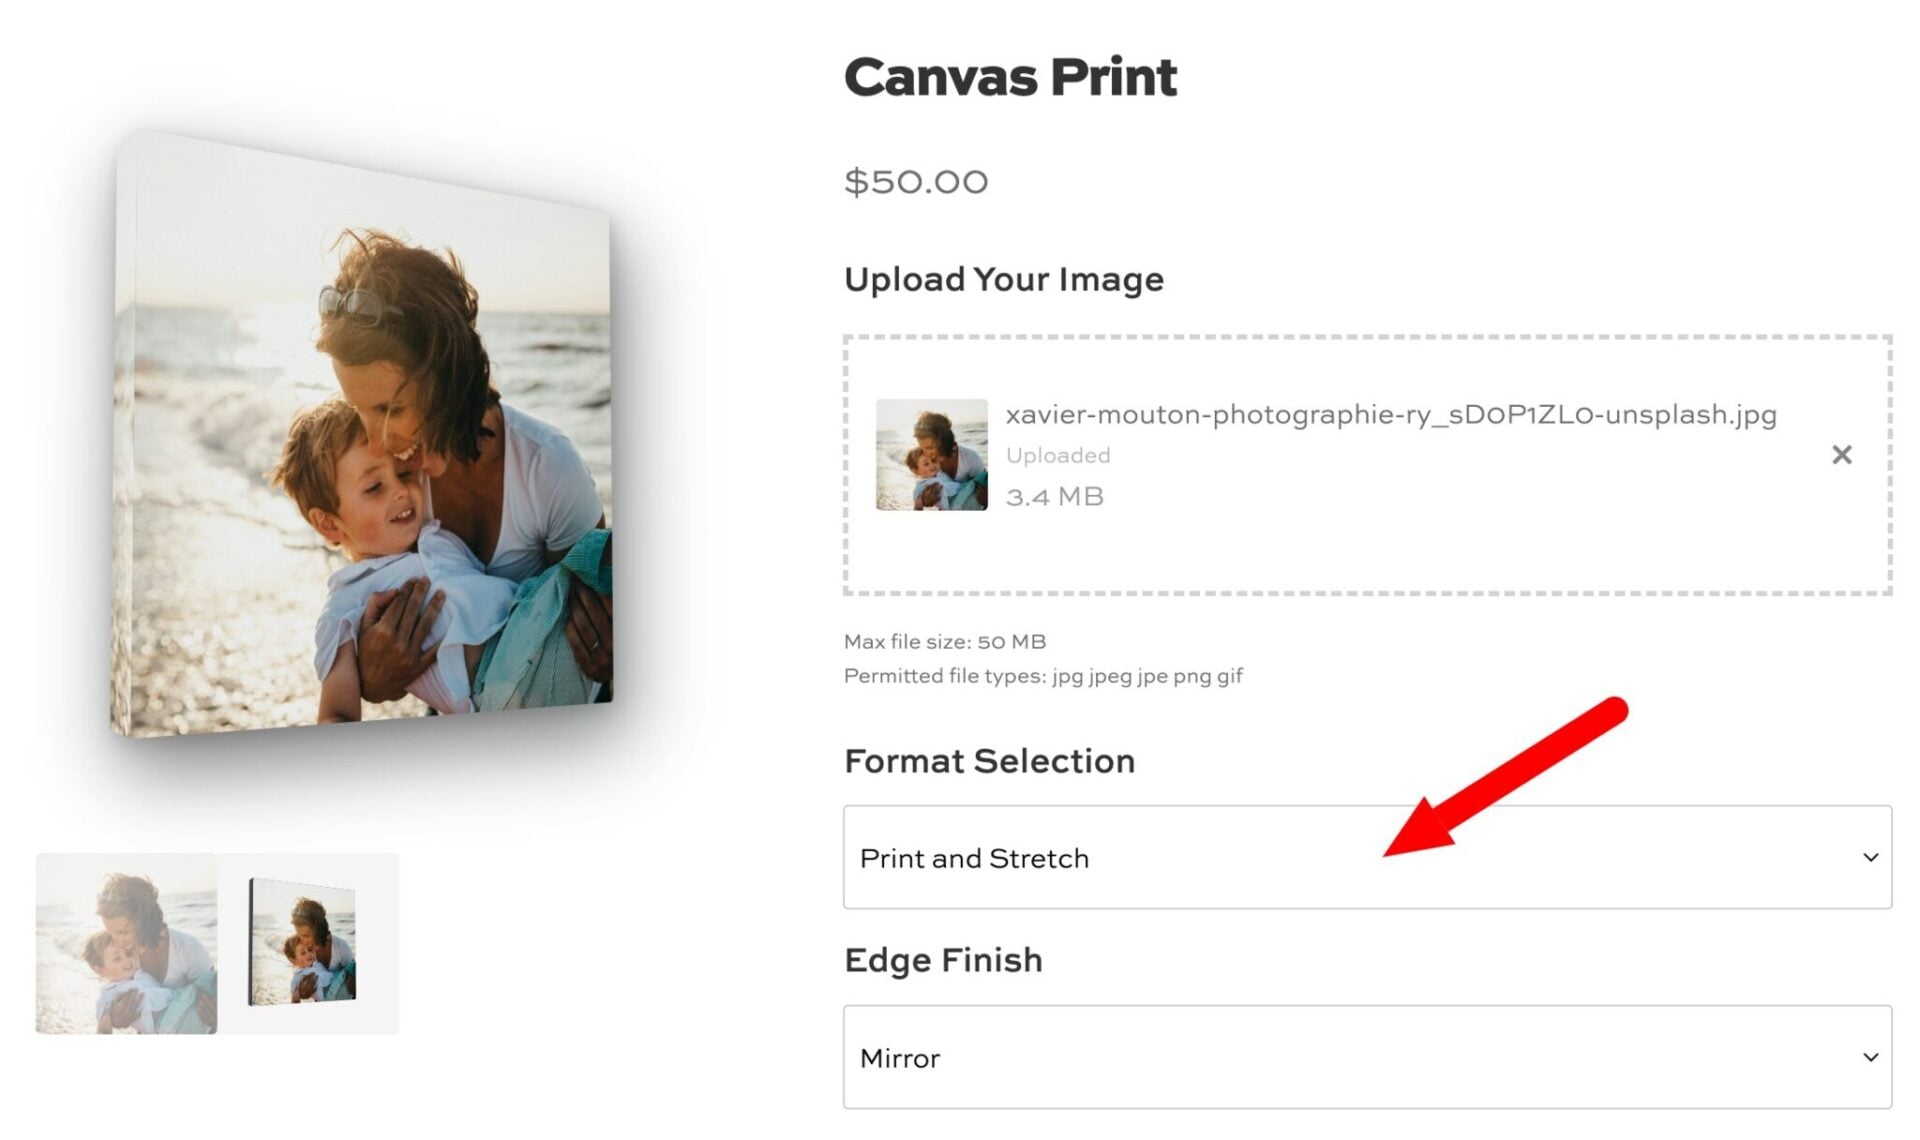
Format Selection
- Print and Stretch — Displays the uploaded image on a 3D canvas with visible left and top edges, giving a stretched canvas effect.
- Print Only — Displays the image flat, without the 3D canvas effect. The edge finish option is hidden in this mode.
Edge Finish (available in Print and Stretch mode only)
- Black — Dark grey edges.
- White — Light grey edges.
- Mirror — The edges mirror the image content, as seen on gallery-wrapped canvases.
Switching Views
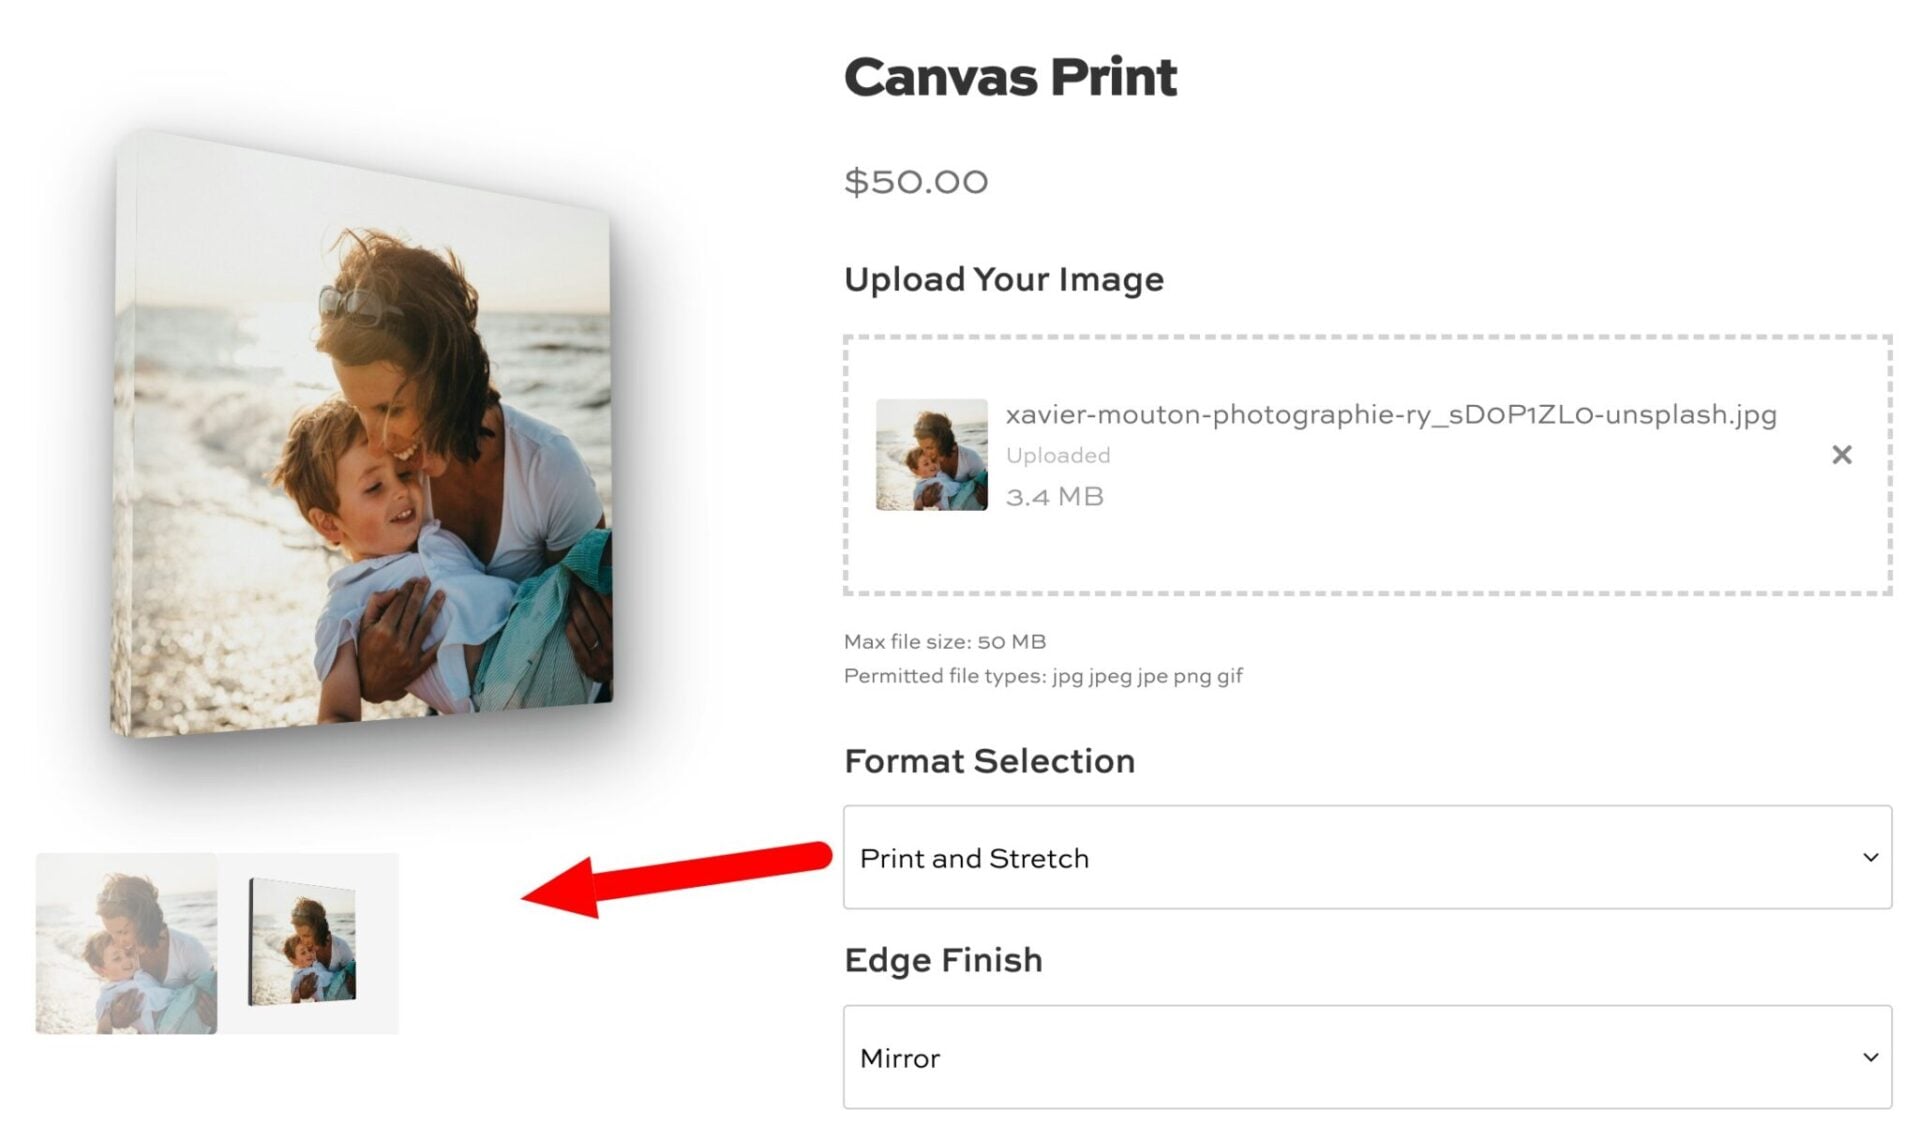
A thumbnail strip appears below the product gallery showing two clickable thumbnails – a flat view and a 3D view. Customers can click these to switch between the two perspectives.
You can see a demo 3d canvas preview product here.