The WooCommerce Product Add-Ons Ultimate plugin allows you to use conditional logic to determine whether or not to display certain groups or fields.
What are conditions?
A simple example of a condition is to have two fields: Field A is a checkbox; Field B is a text field. You can set a condition on Field B so that it only display when Field A is checked.
Group conditions and field conditions
If you apply conditions to a field, it will only affect that field.
If you apply conditions to a group, it will affect all the fields within that group.
Apply conditions to groups allows you to speed up your workflow. If you have multiple fields that will display or hide depending on the same conditions, you can place them in a single group and apply the set of conditions to the group.
Both field and group conditions are always dependent on the value of fields. You can’t set a group condition that depends on the status of another group. You can only set a condition (group and field) that is dependent on the value of a field.
Setting up a field condition
To create a field condition, you’ll need at least two Product Add Ons fields – one field that will display or not depending on the status of the other field. In the example below, we’ve created a checkbox field and a text field. We only want the text field to display if the user has selected the checkbox field.
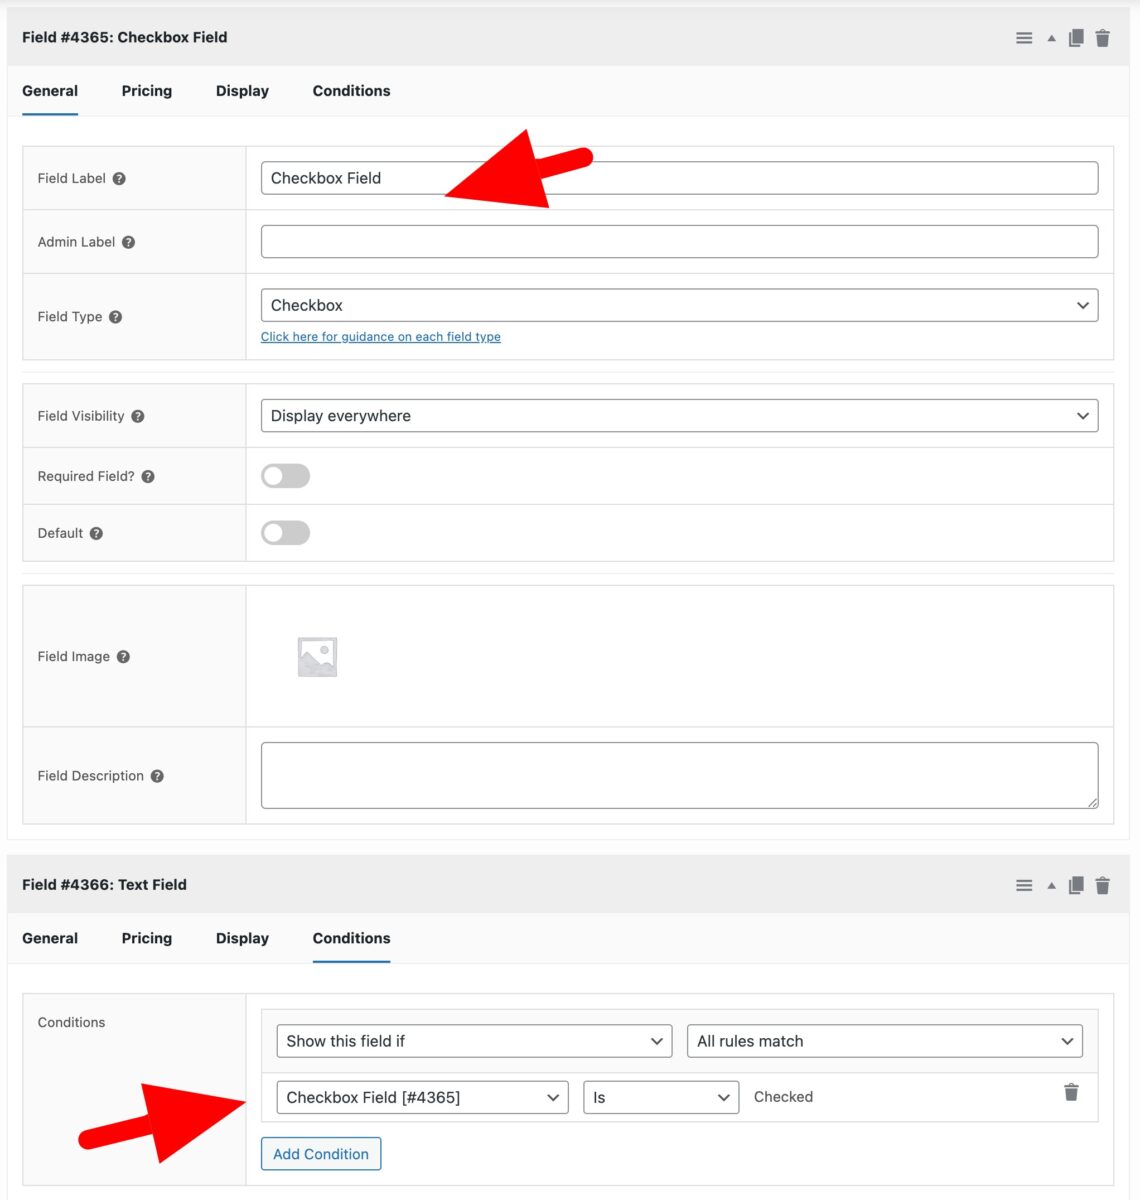
To create a condition, click the ‘Add Condition’ button on the ‘Conditions’ tab of the field that you wish to apply the condition to. We only want to display the text field if the checkbox is selected, so we create a condition on the text field.
This opens up a new set of dropdown fields. In the first field, you can choose either:
- Hide this field if
- Show this field if
Choose whether you’d like to hide or show the field if the condition is true.
Then, choose from:
- All rules match
- Any rules match
This field is only relevant if you have more than one condition.
Finally, you define the condition:
- Choose which field will be checked as part of the condition – in our example, it’s ‘Checkbox Field’
- Choose an operator: in this case, choose between ‘Is’ and ‘Is not’
- Then define the value of the field that you’re testing
Types of operator
The ‘operator’ is how you connect your field with the required value. In the screenshot above, the operator is ‘Is’. In all, you can choose from the following operators:
- Is
- Is not
- Contains
- Does not contain
- Equals
- Greater than
- Less than
- >=
- <=
Please note that only certain operators are available depending on the type of field that you are checking. So a checkbox field can only be checked or not checked. Therefore you can only choose ‘Is’ or ‘Is not’ as the operator.
Fields with numeric values can use ‘Equals’, ‘Greater than’, ‘Less than’, ‘>=’ or ‘<=’ as their operators.
Fields with multiple selections, like checkbox groups, will use ‘Contains’ or ‘Does not contain’ as their operator.
Field conditions based on quantity
You can also set field conditions based on the quantity of product. Instead of selecting a field, choose ‘Quantity’.
Field conditions based on cost
You can also set conditions based on the cost of the product. Instead of selecting a field, choose ‘Cost’.
Field conditions based on attribute
You can set conditions based on whether a certain attribute term has applied to the product. So if you have a ‘Colour’ attribute you can set a condition on a field to only display if the product has the ‘Red’ term applied for ‘Colour’.
Field conditions based on log-in status
You can set a condition based on whether a user is logged in or not. So you can choose to display fields only if a user is logged in / not logged in – or you can hide fields from users who are logged in / not logged in.
Setting up a group condition
Group conditions are very similar to field conditions. Please note that you can’t use group conditions on global groups.
To add a group condition, click the ‘Add Condition’ in the ‘Group Conditions’ section.
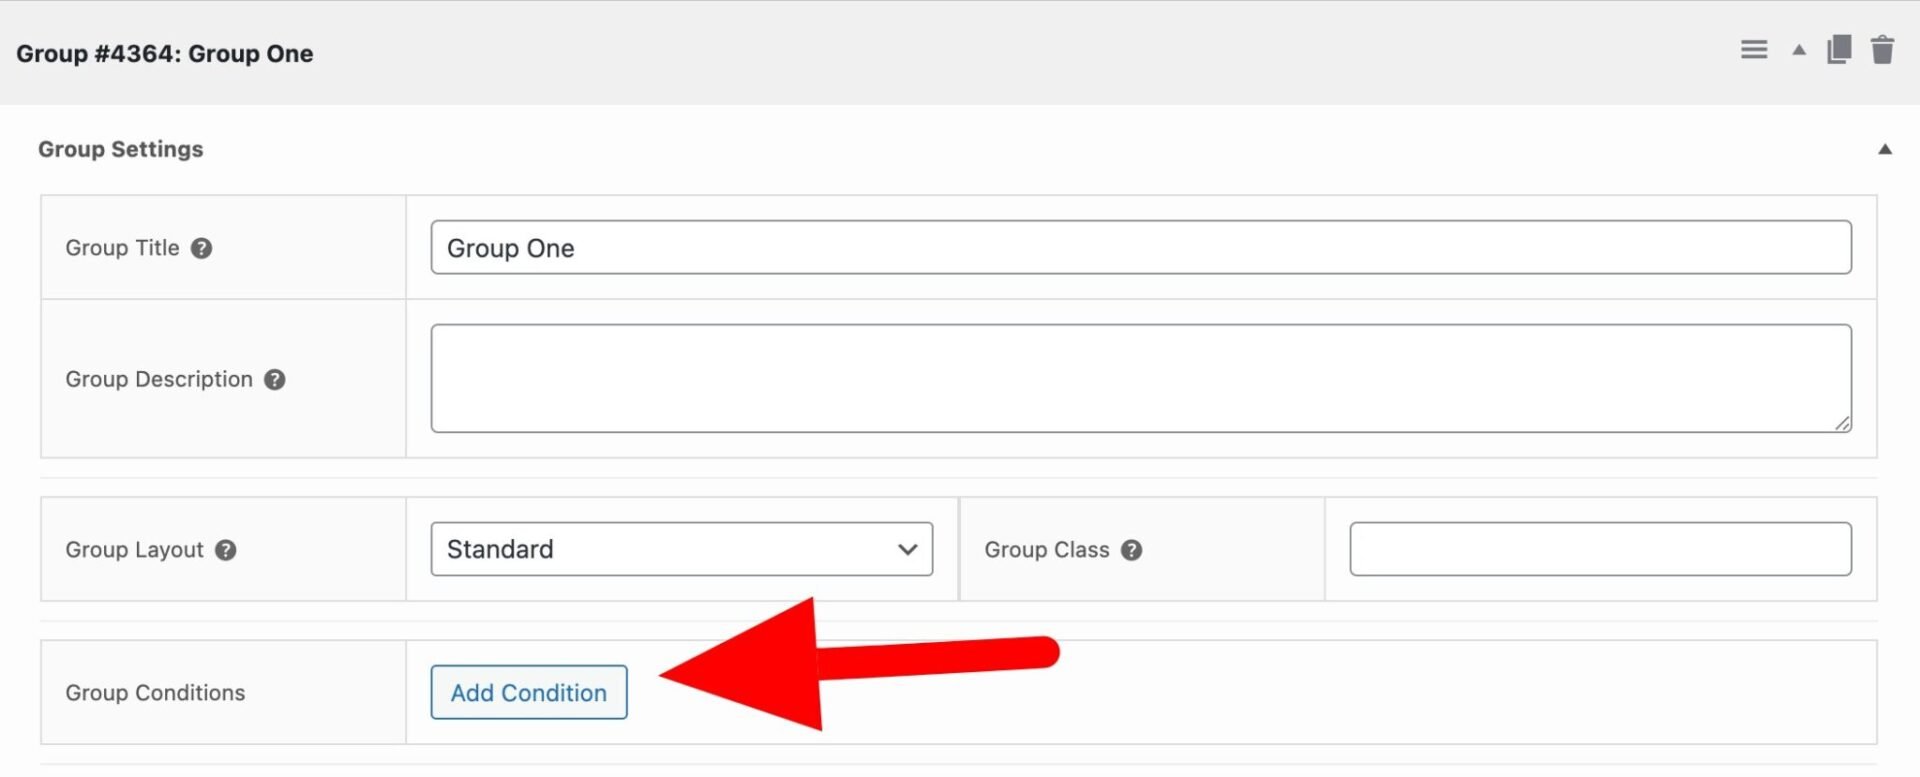
You’ll see the same options as the field conditions above.
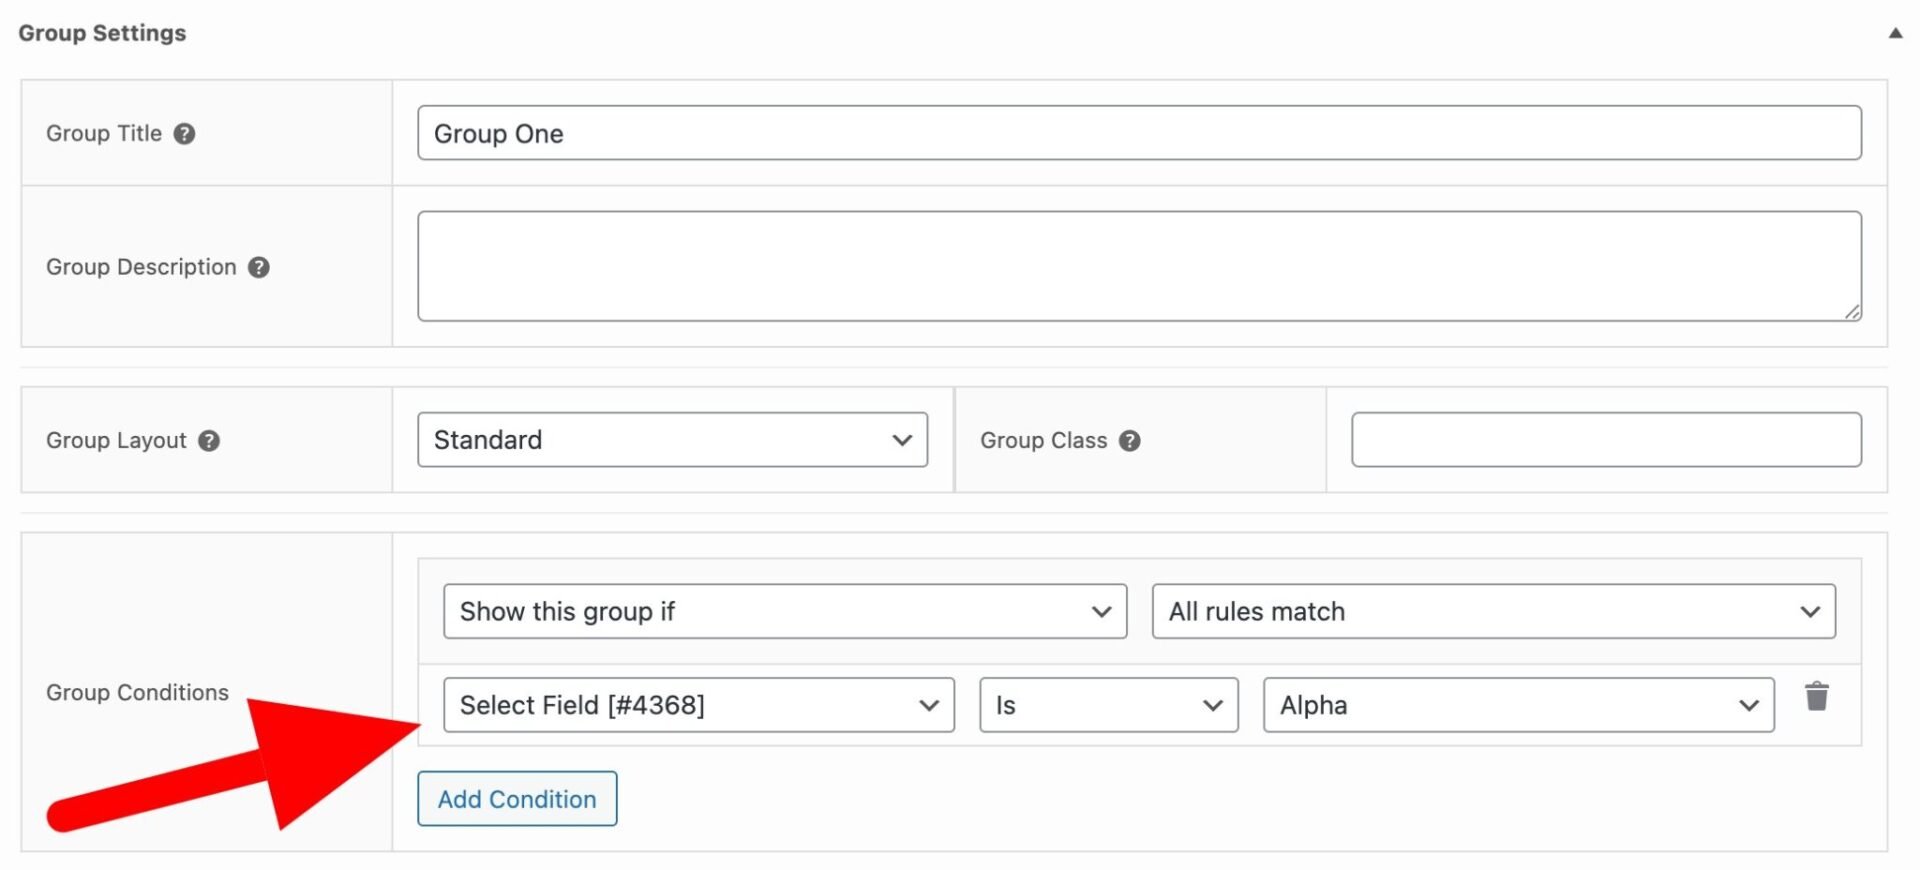
You can add as many conditions to a group as you like. You can only use fields from other groups.
Groups conditions based on user role
If you wish, you can choose to hide or show groups depending on the user’s role. So, for example, you can show certain groups only to certain user roles – or you can hide groups from certain user roles.

Always pass field data in groups
If you are using a condition to hide a group but you still want to pass the values from the fields within that group to the cart and the order, you can check the ‘Always Include in Order’ option.
Note that any conditions on fields ‘within’ the group will continue to work as before – so a field that’s hidden by a condition will not pass any data, even if it’s in a group that is always included.
Reset values for hidden fields
If you want to reset the value of a field when it is hidden by a condition, use the ‘Reset field values’ in WooCommerce > Settings > Product Add-Ons:

Conditions based on the selected variation
To set conditions based on the selected variation, please see this article: Variation-specific fields.
Display hidden fields as disabled
Maybe you want to display fields that would otherwise be hidden (because they’re conditional on another field’s value). This code snippet keeps all fields visible, but disables and greys out fields that are unavailable:
Here’s how to add a snippet.