Members Only allows you to customize and add new fields to the registration form. This can be very useful if you want to collect specific information about your users when they register.
In this article we look at how to add and edit new registration form fields. We also look at how to add a select field for the user to choose their own role when they sign up.
Managing extra registration fields
To add or edit registration fields, go to Members Only > User Fields. In the User Fields setting, you’ll see a list of all the standard WooCommerce user fields, like First Name, Last Name, etc.
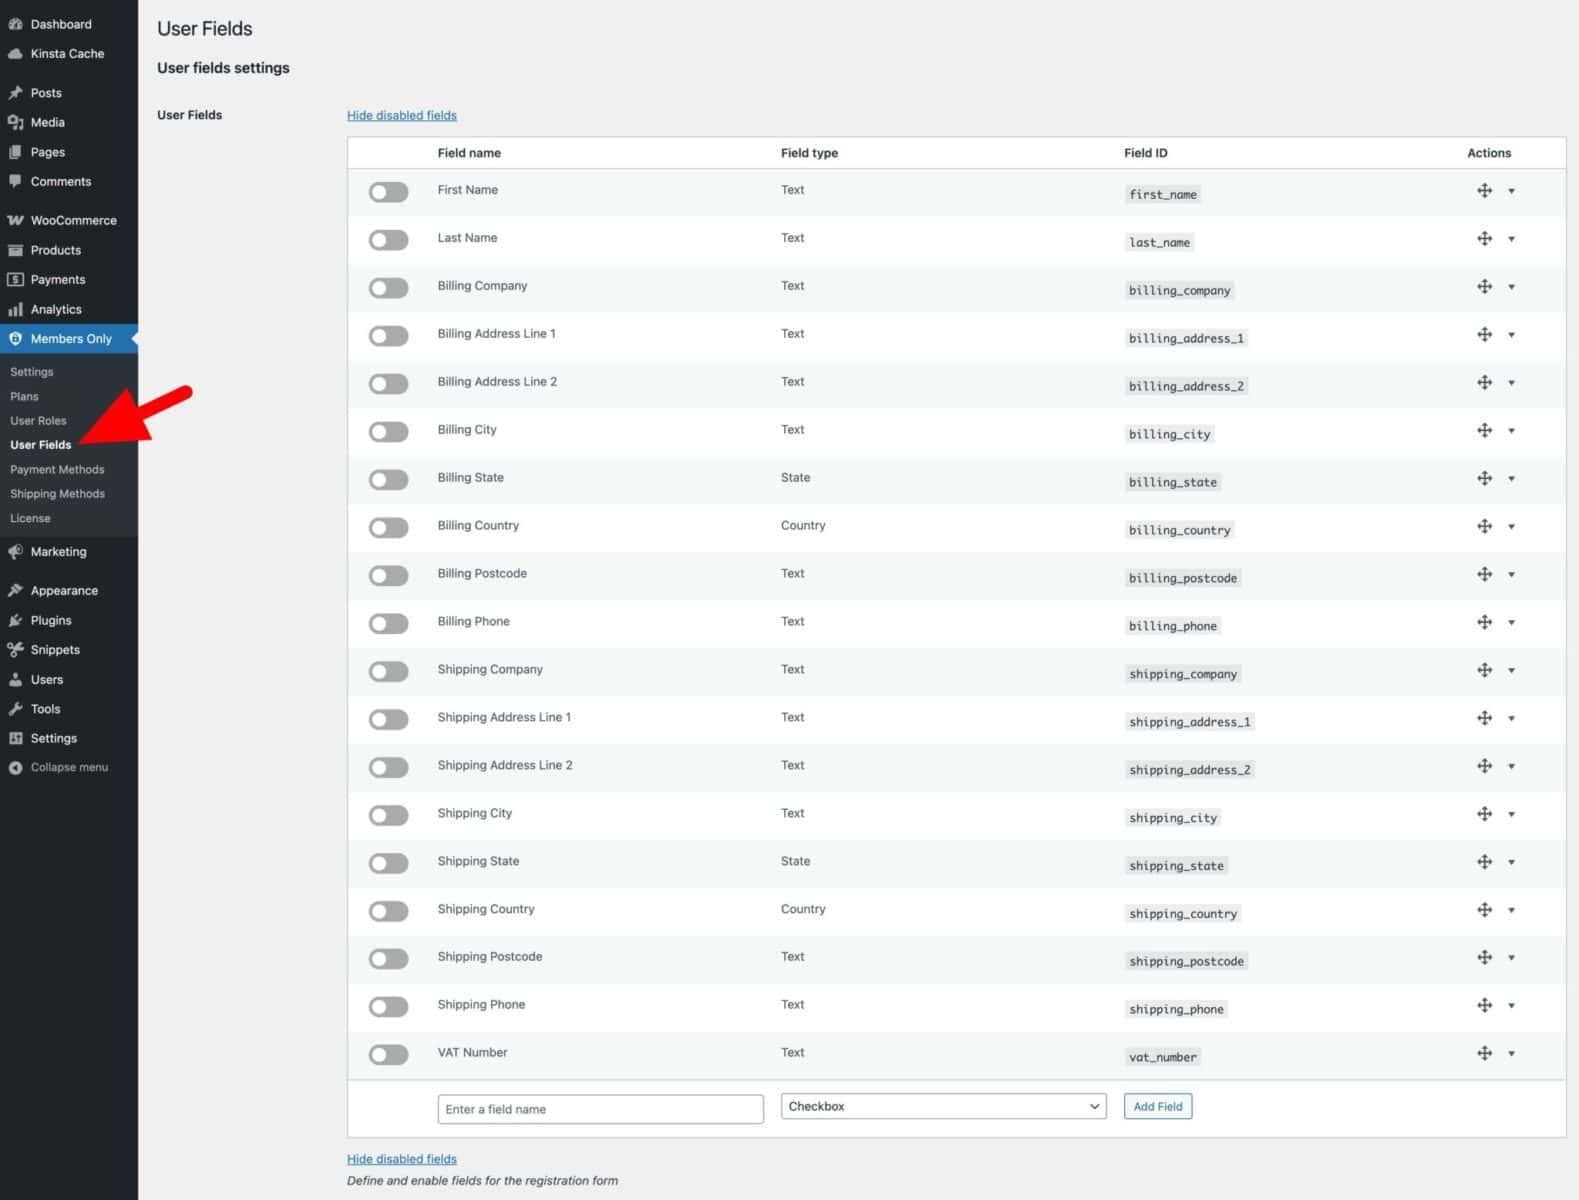
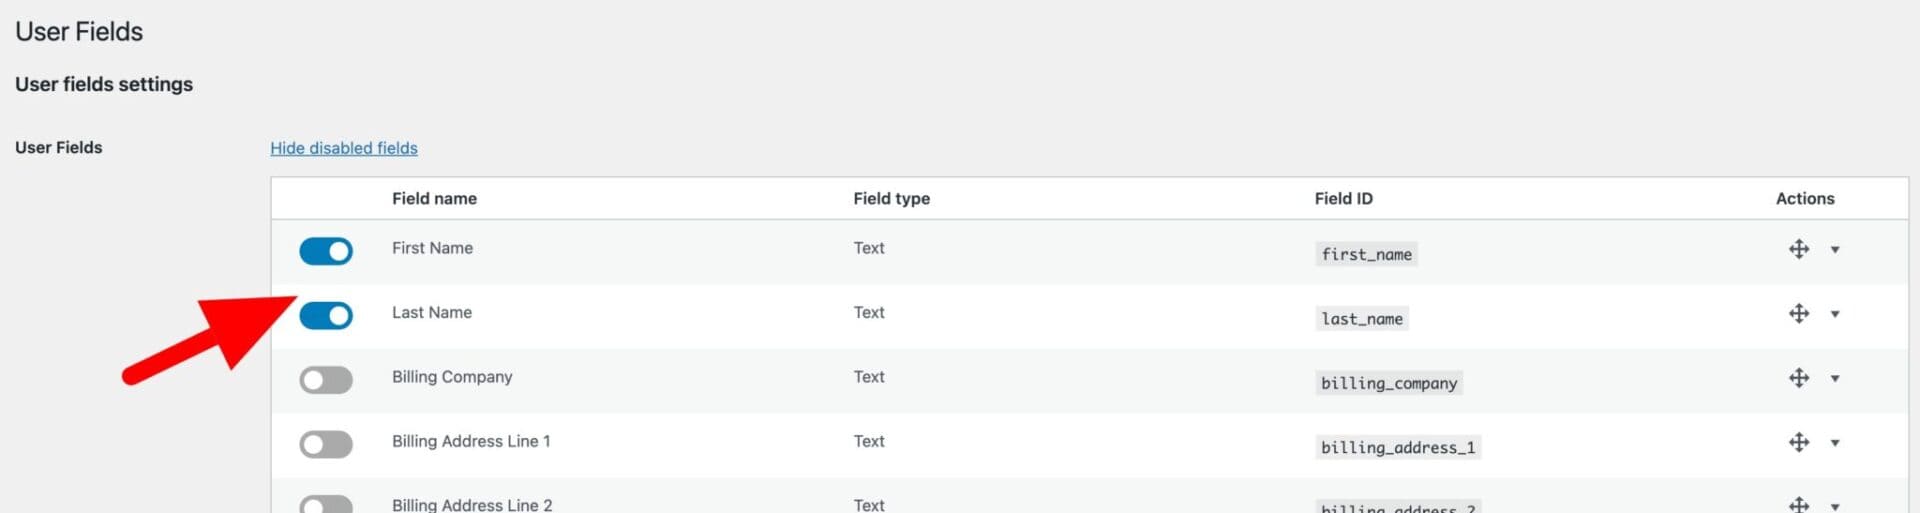
You can enable any of these fields just by updating the toggle on the left of the field name. Any enabled fields will appear on the registration form for new users.
Adding extra fields
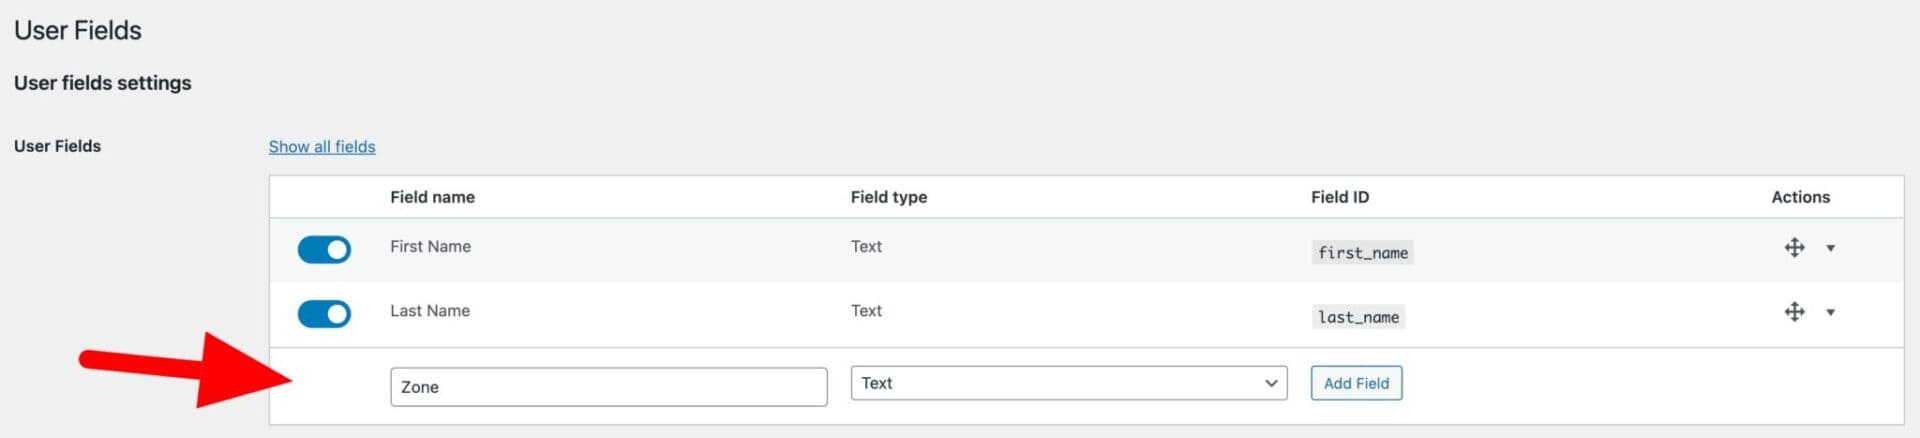
To create your own custom fields, just scroll to the bottom of the list of user fields, enter the name of your field and choose the field type. Then click ‘Add Field’.
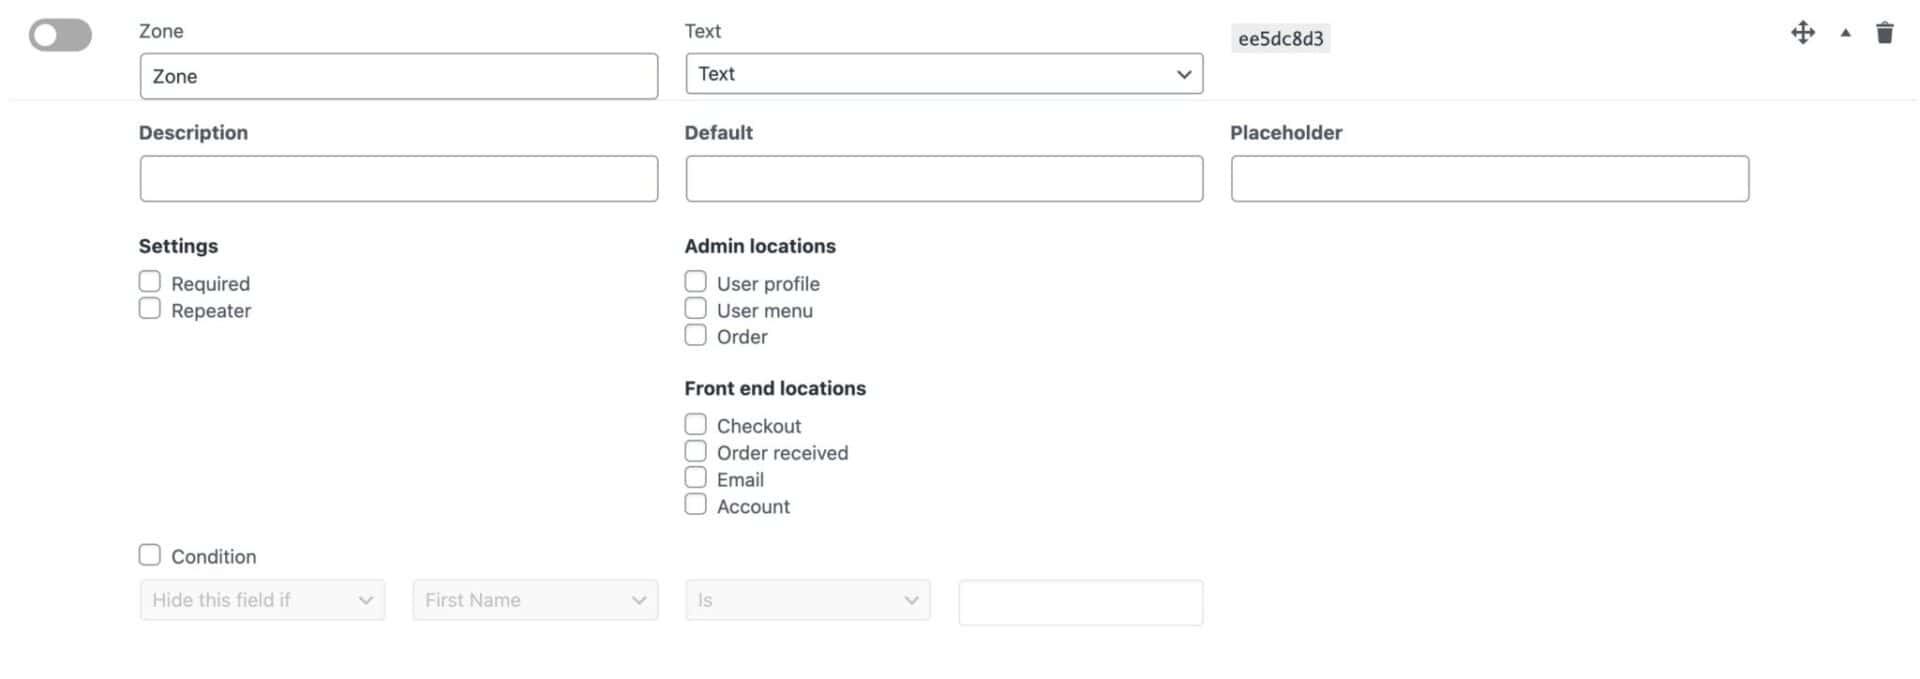
Your new field will be added to your list of user fields. You can then use the expand icon to display more settings for this field.
User field settings
Each user field has the following settings:
- Field label: this is the label for the field that the user will see on the front end
- Field type: this is the field type, e.g. text field, select field, etc
- Field ID: this ID can be used for advanced features
- Description: the description will appear with the field on the front end
- Default: use this to enter a default value for the field
- Placeholder: use this to enter placeholder text that will display in a text field
There are some further options under ‘Settings’:
- Required: enable this if the user is required to enter a value in the registration form
- Repeater: enable this if the field can be duplicated by the user – e.g. if the user needs to enter the names of multiple users
Further, there are options under ‘Admin locations’:
- User profile: enable this to display the value of the field in the user’s profile page
- User menu: enable this to include a column for the field in the list of users
- Order: enable this to pass the value of the field to any orders placed by the user
In ‘Front end locations’:
- Checkout: enable this to include the field on the checkout page. The user will be able to edit the value of the field even after registering
- Order received: enable this to include the field on the ‘Order received’ page
- Email: enable this to include the field in confirmation emails
- Account: enable this to include the field in the user’s account page. Users will be able to edit the value of the field from their account profile
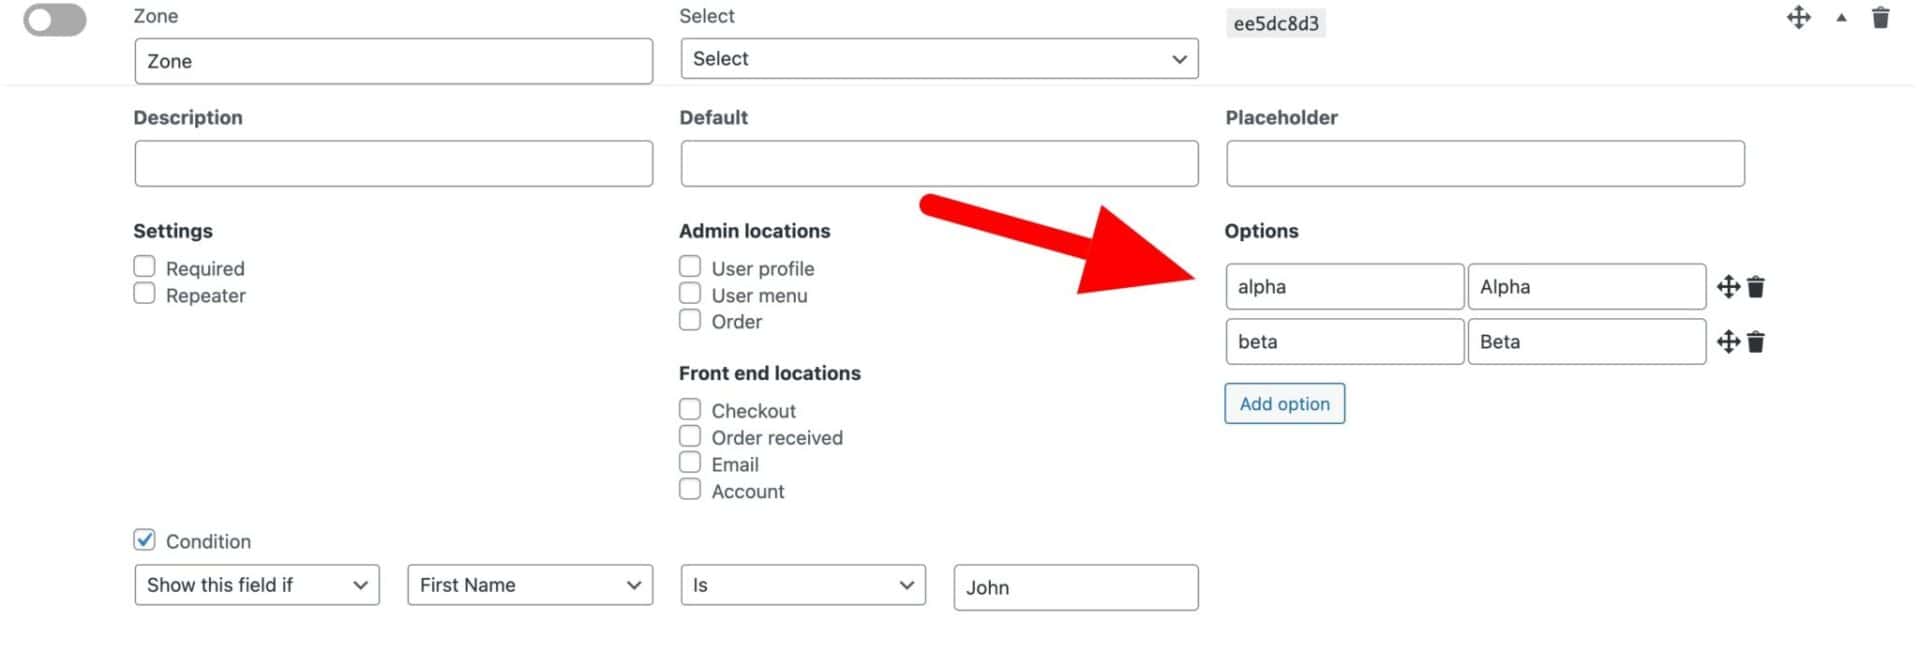
‘Options’:
If your field type allows for the user to select from pre-defined options (e.g. in a select field), you can specify your options here.
Click ‘Add option’ to add a new option. Enter the key for the option in the left hand field and the value (that the user will see) in the right hand field.
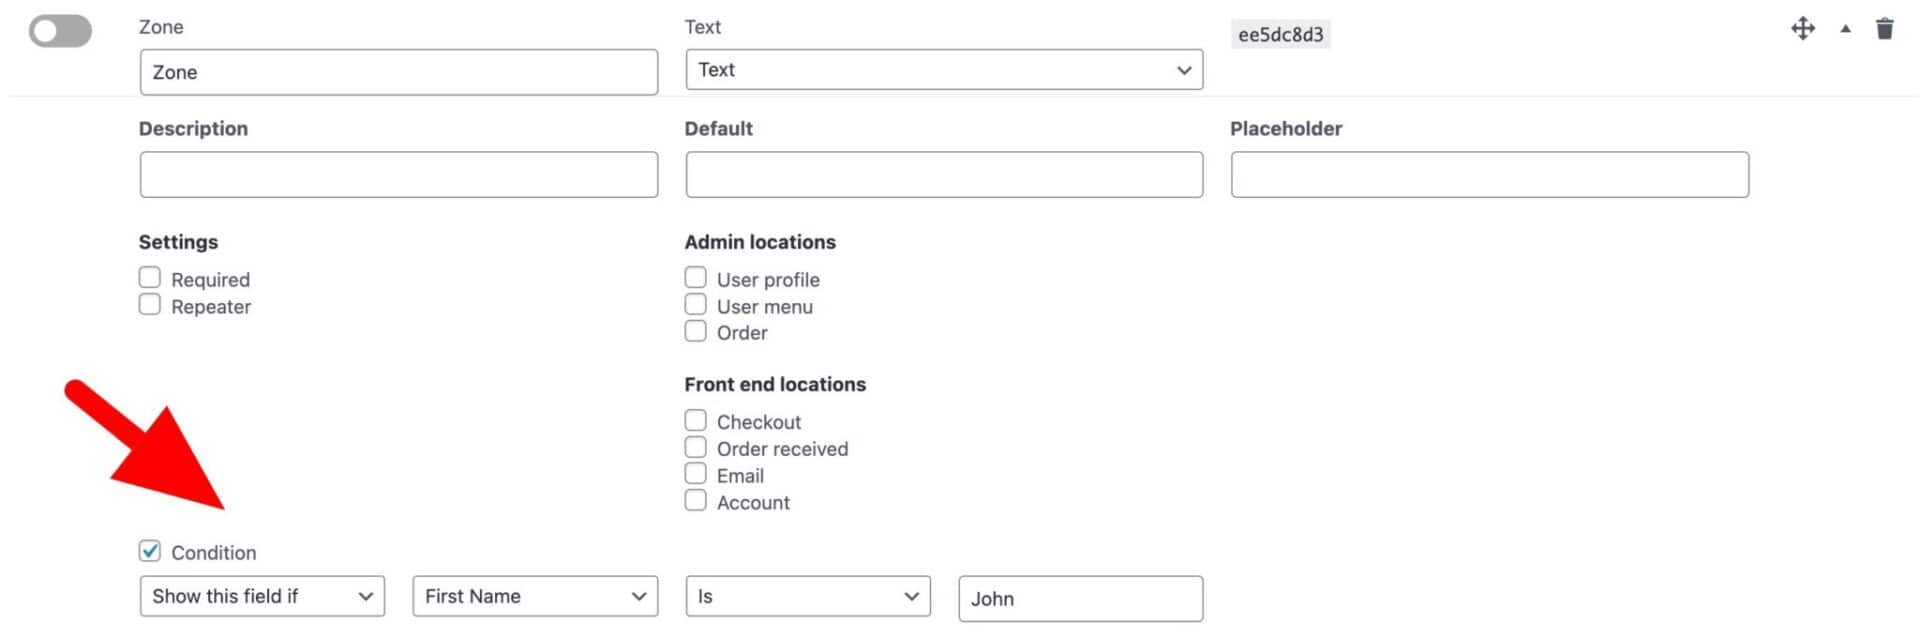
Setting conditions on registration fields
You can choose to display registration fields conditionally based on the value of another field. To add a condition to a registration field:
- Enable the ‘Condition’ checkbox
- Choose whether to show or hide the field if the condition is valid
- Select the field to test for the condition
- Enter the value that the field needs to be set to in order for the condition to be valid
Create a Roles field
You might want to allow the user to select their own role when they register. For example, users may be able to choose between being ‘Wholesale’ and ‘Retail’ customers.
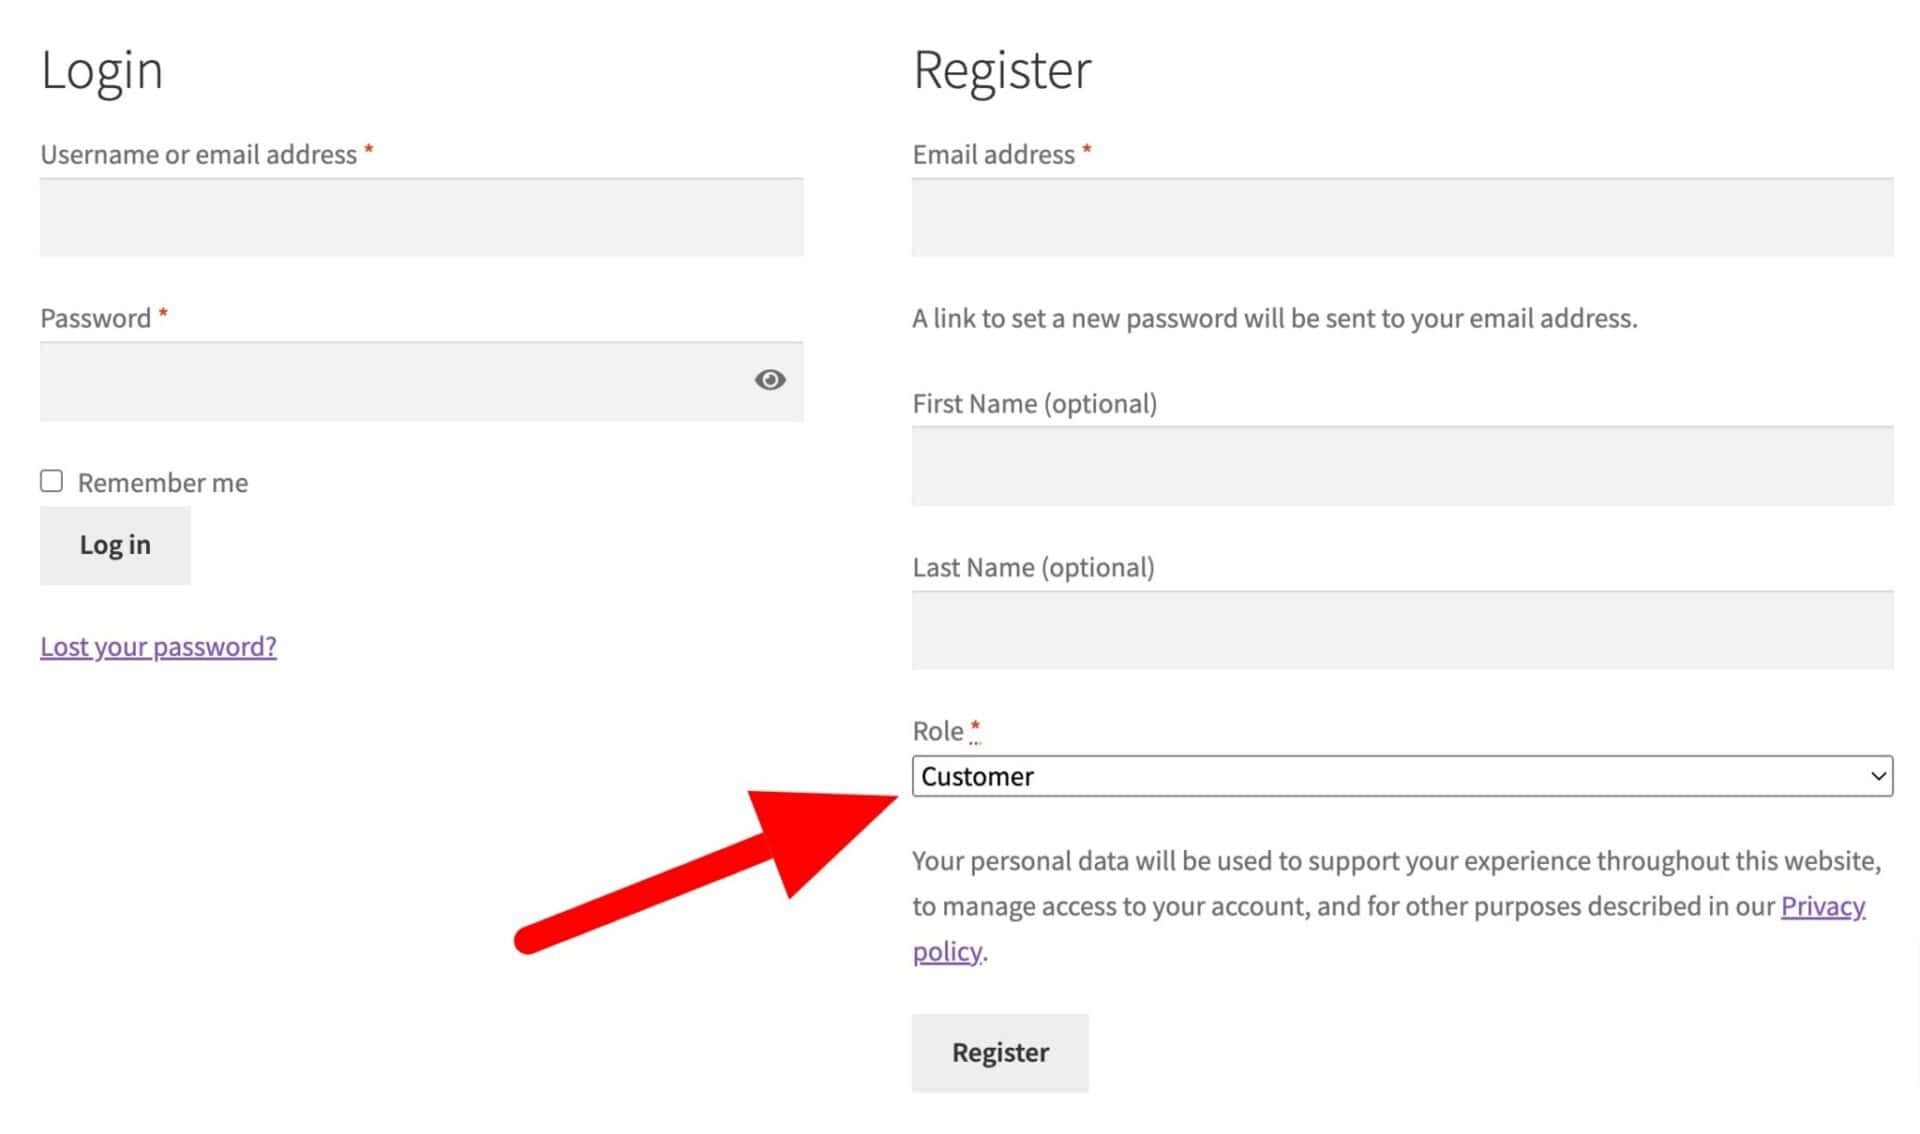
To enable a Roles field:
- Check the ‘Enable Roles Field’ option
- Select which roles should appear in the dropdown field by selecting them in the ‘Include’ column
- Optionally, select which roles require approval by selecting them in the ‘Needs Approval’ column
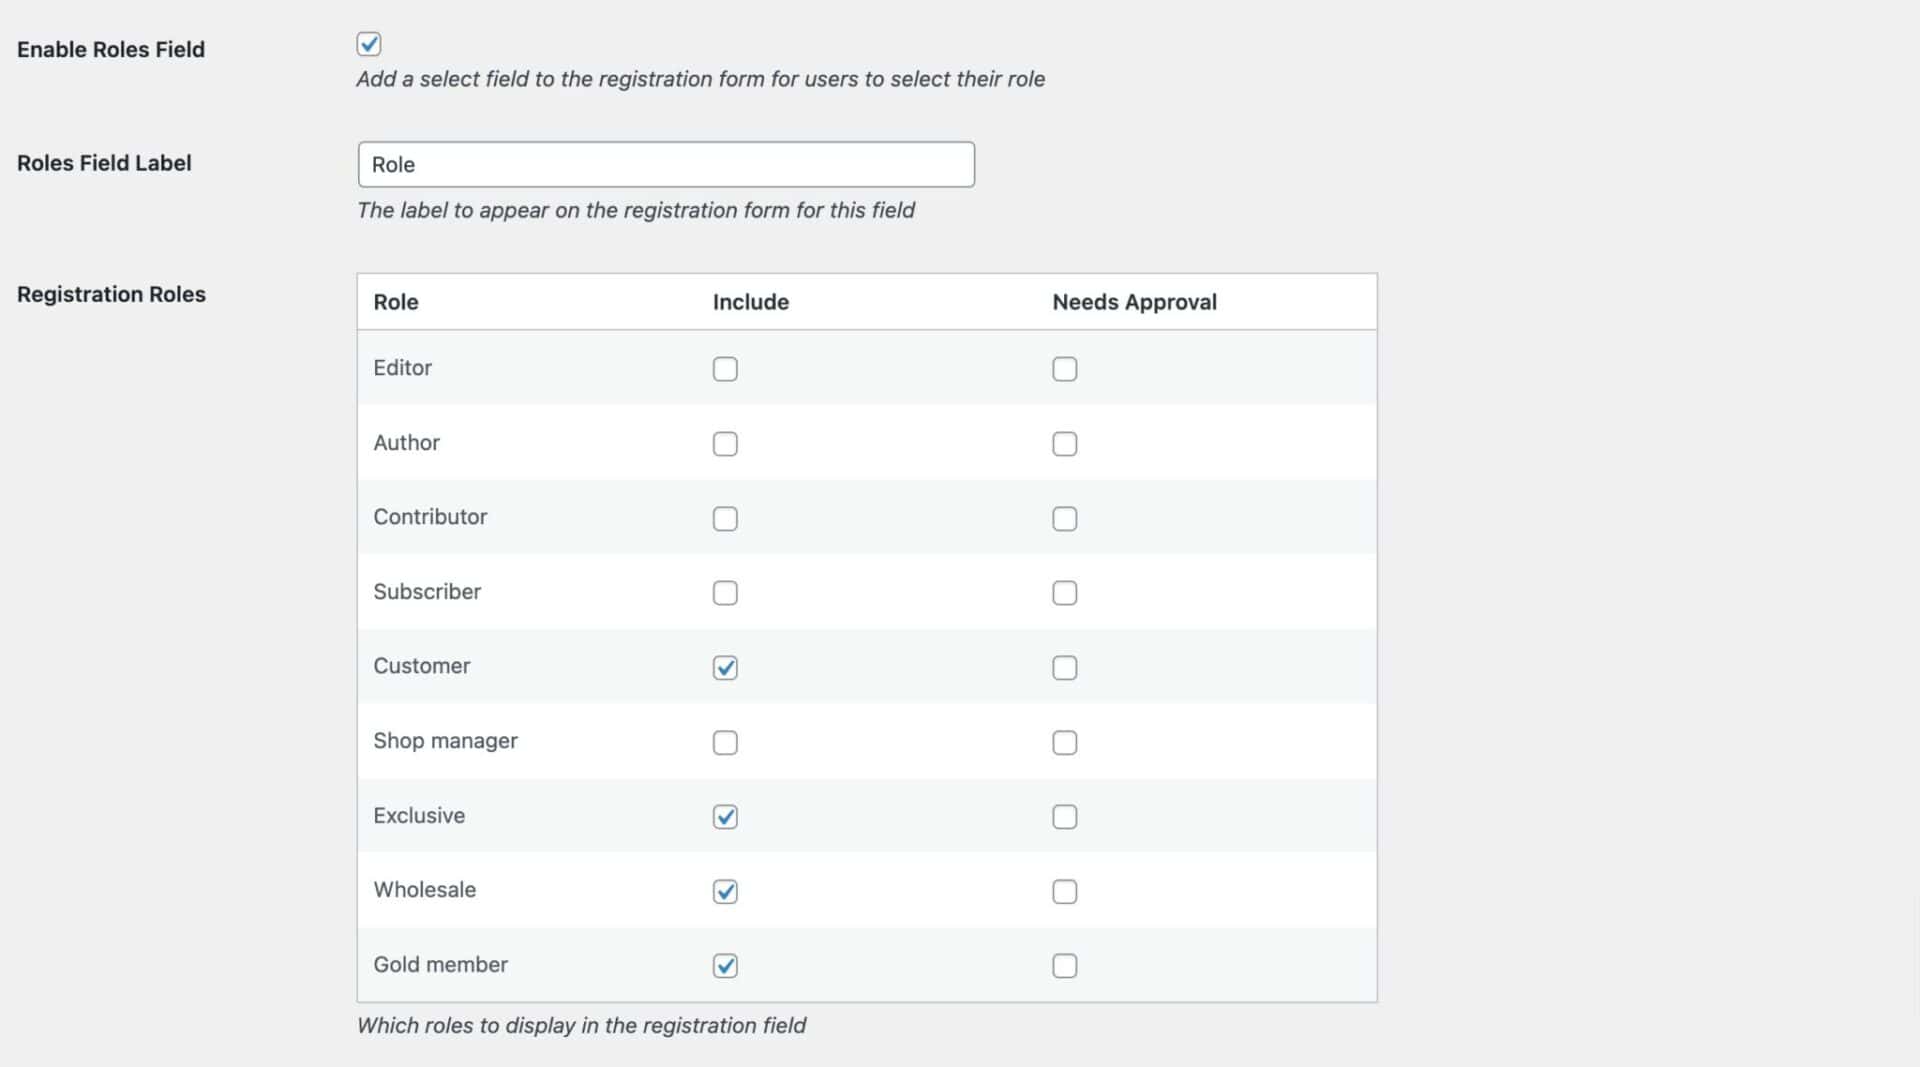
Save the settings and the Roles field will be included in the registration form.
Redirect after registering
By default, the user will return to the My Account page after they register. If you prefer to redirect them to a custom landing page, you can select the page in the ‘Redirect After Registration’ setting in Members Only > User Fields.