The Image Preview extension for Add-Ons Ultimate allows you to display your user’s uploaded images in the main product image.
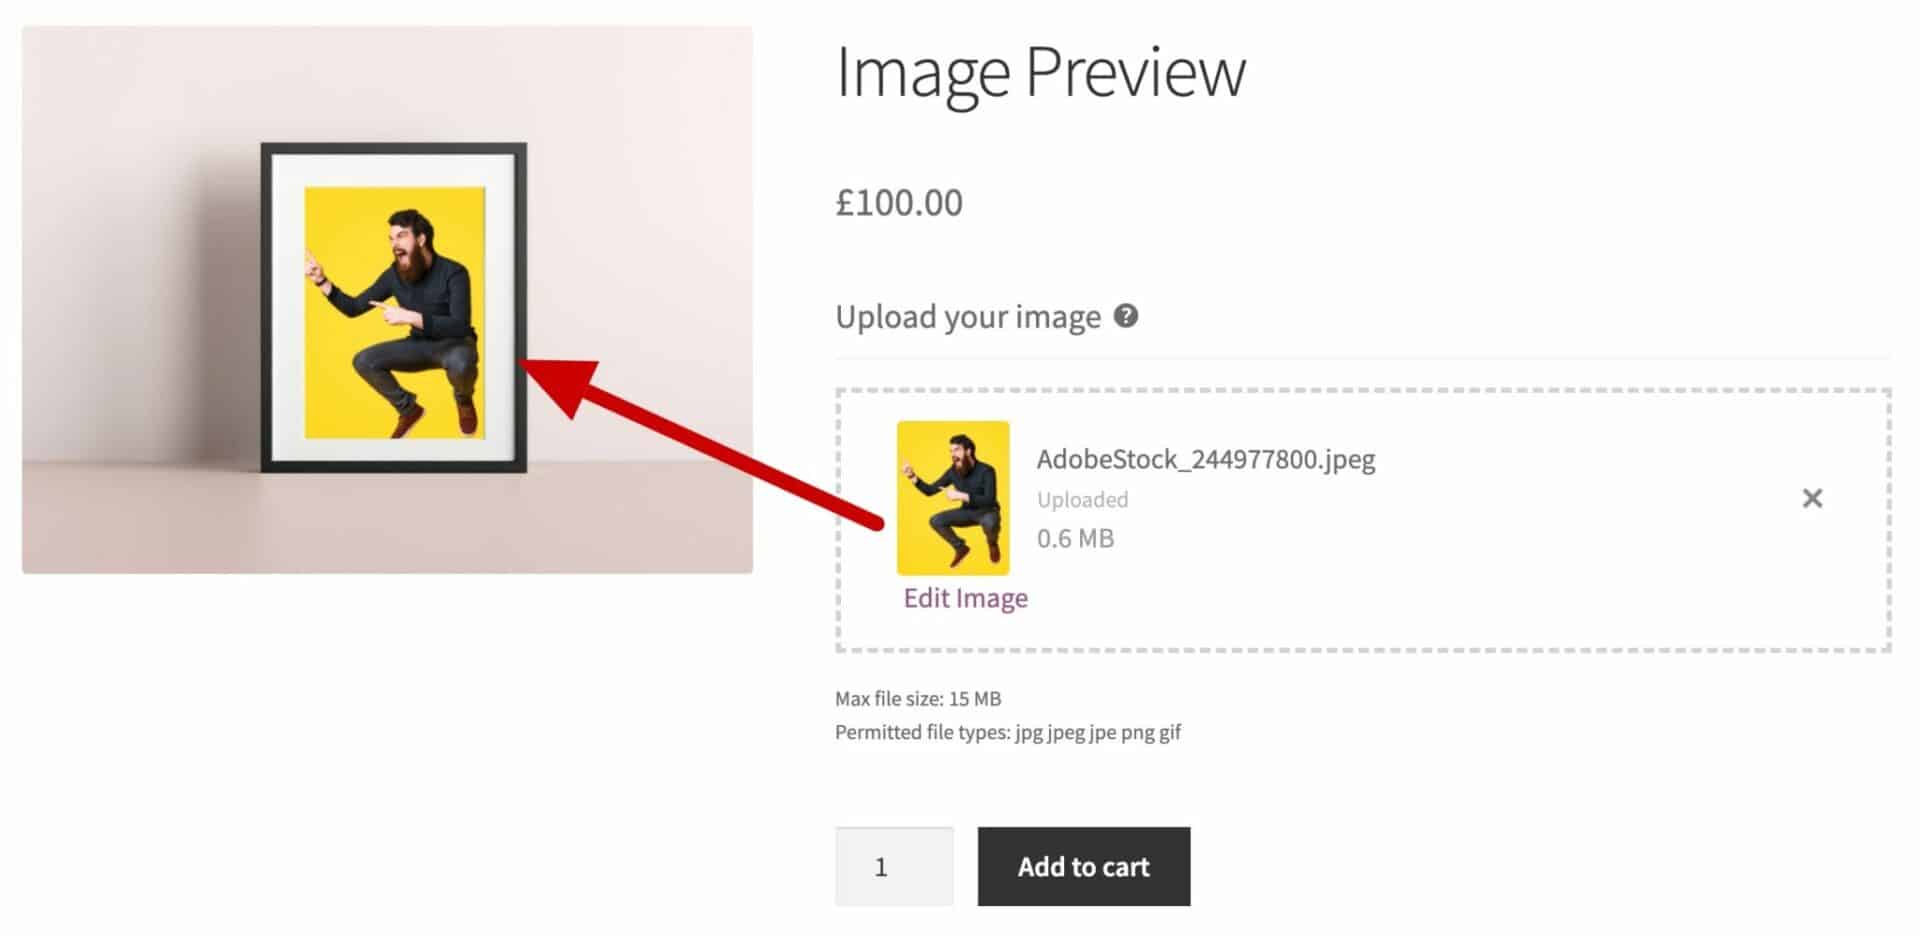
In the example above, the user has uploaded an image using a standard ‘Upload’ field in Add-Ons Ultimate. Then the uploaded image is displayed within the main product image.
This means that you can use a main product image that has a transparent area. You can then position the uploaded image inside the transparent area to create a composite image.
In the image below, the area indicated by the arrow is transparent. (Note: you’ll need to save your product image as a PNG file if you’re using transparent areas).

Then, when the user uploads an image, the Image Preview plugin adds it to the main image in the transparent area.
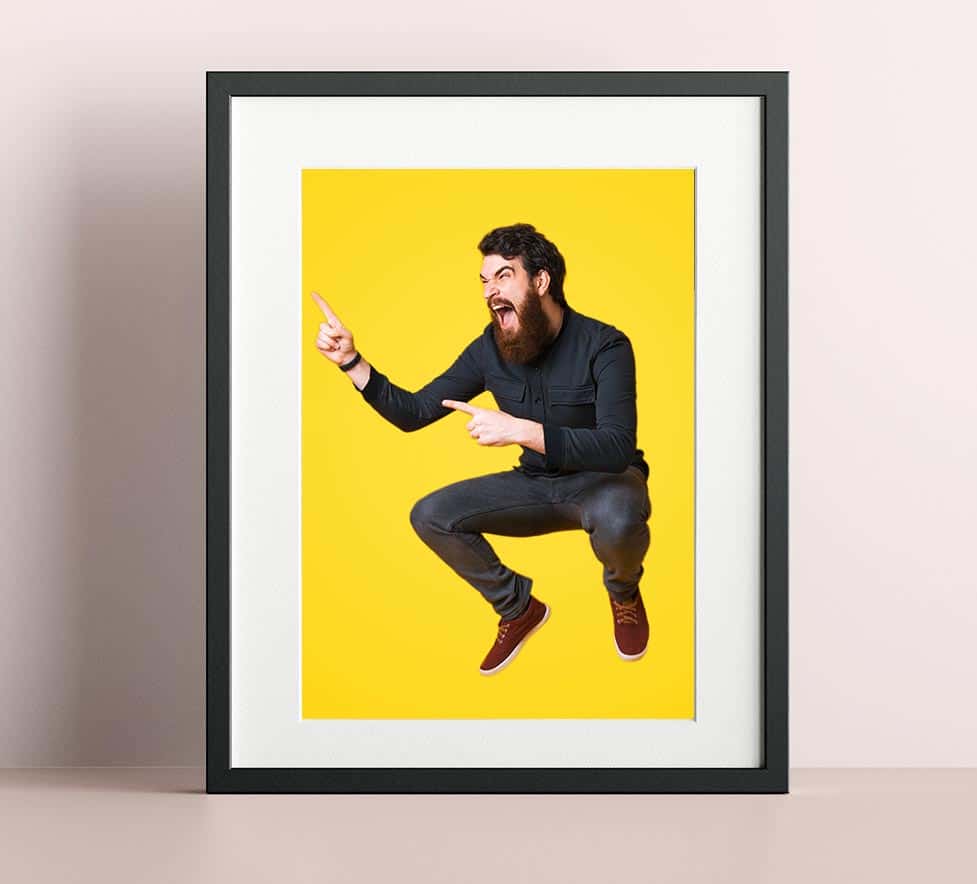
Image Preview settings
When activated, Image Preview adds some parameters to the ‘Uploads’ tab.
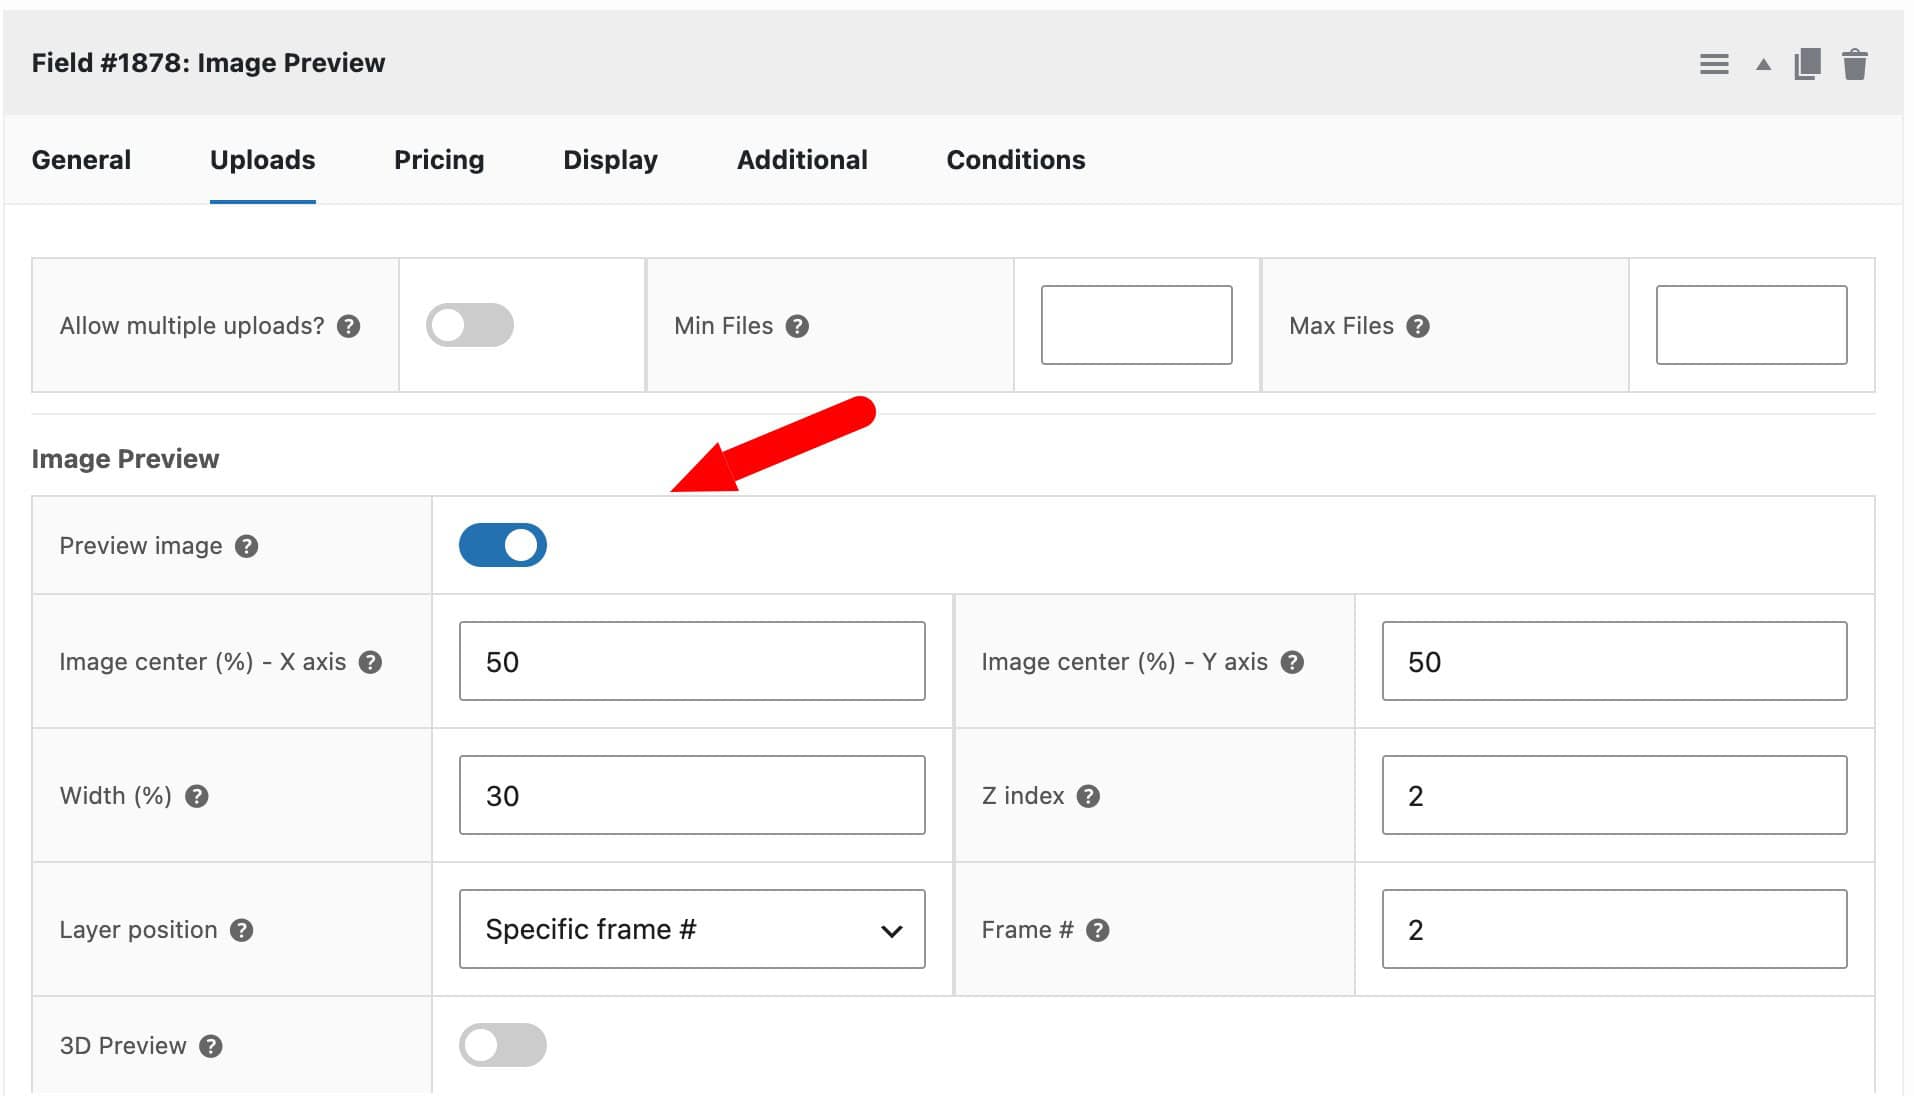
- Preview image
Check this option to enable the preview functionality - Image center (%) – X axis
This setting determines how far left or right the centre of the uploaded image will sit relative to the main product image. If you enter 0 here, the centre of the image will appear on the left side of the image; 50 will position the text exactly in the horizontal centre of the image. - Image center (%) – Y axis
This setting determines the vertical position of the uploaded image relative to the main product image. A value of 0 will position the uploaded image at the top of the main image; 50 will be the vertical middle; and 100 will be the bottom of the main image - Width (%)
This setting determines the width of the previewed image relative to the main product image width - Z index
This setting determines whether the uploaded image will be displayed above or behind the main product image. A value of -1 will mean the uploaded version is displayed behind the main product image. Any value greater than 0 will place the upload in front of the main image - Layer position
By default, the plugin will display the image preview on all product images in the product image gallery. However, you can limit where it’s displayed using this setting. Choose from Default, First Frame, Last Frame, or Specific Frame #. When a customer uploads an image, the product gallery will automatically switch to show the frame you’ve selected here, so they can see their preview in context. - Frame #
If you choose Specific Frame # in the Layer position setting, you can specify which image you want the preview to display on here. Frame # 1 refers to the product’s main image. Frame # 2 is the first image in the product gallery, Frame # 3 is the second gallery image, and so on.
3D Canvas Preview
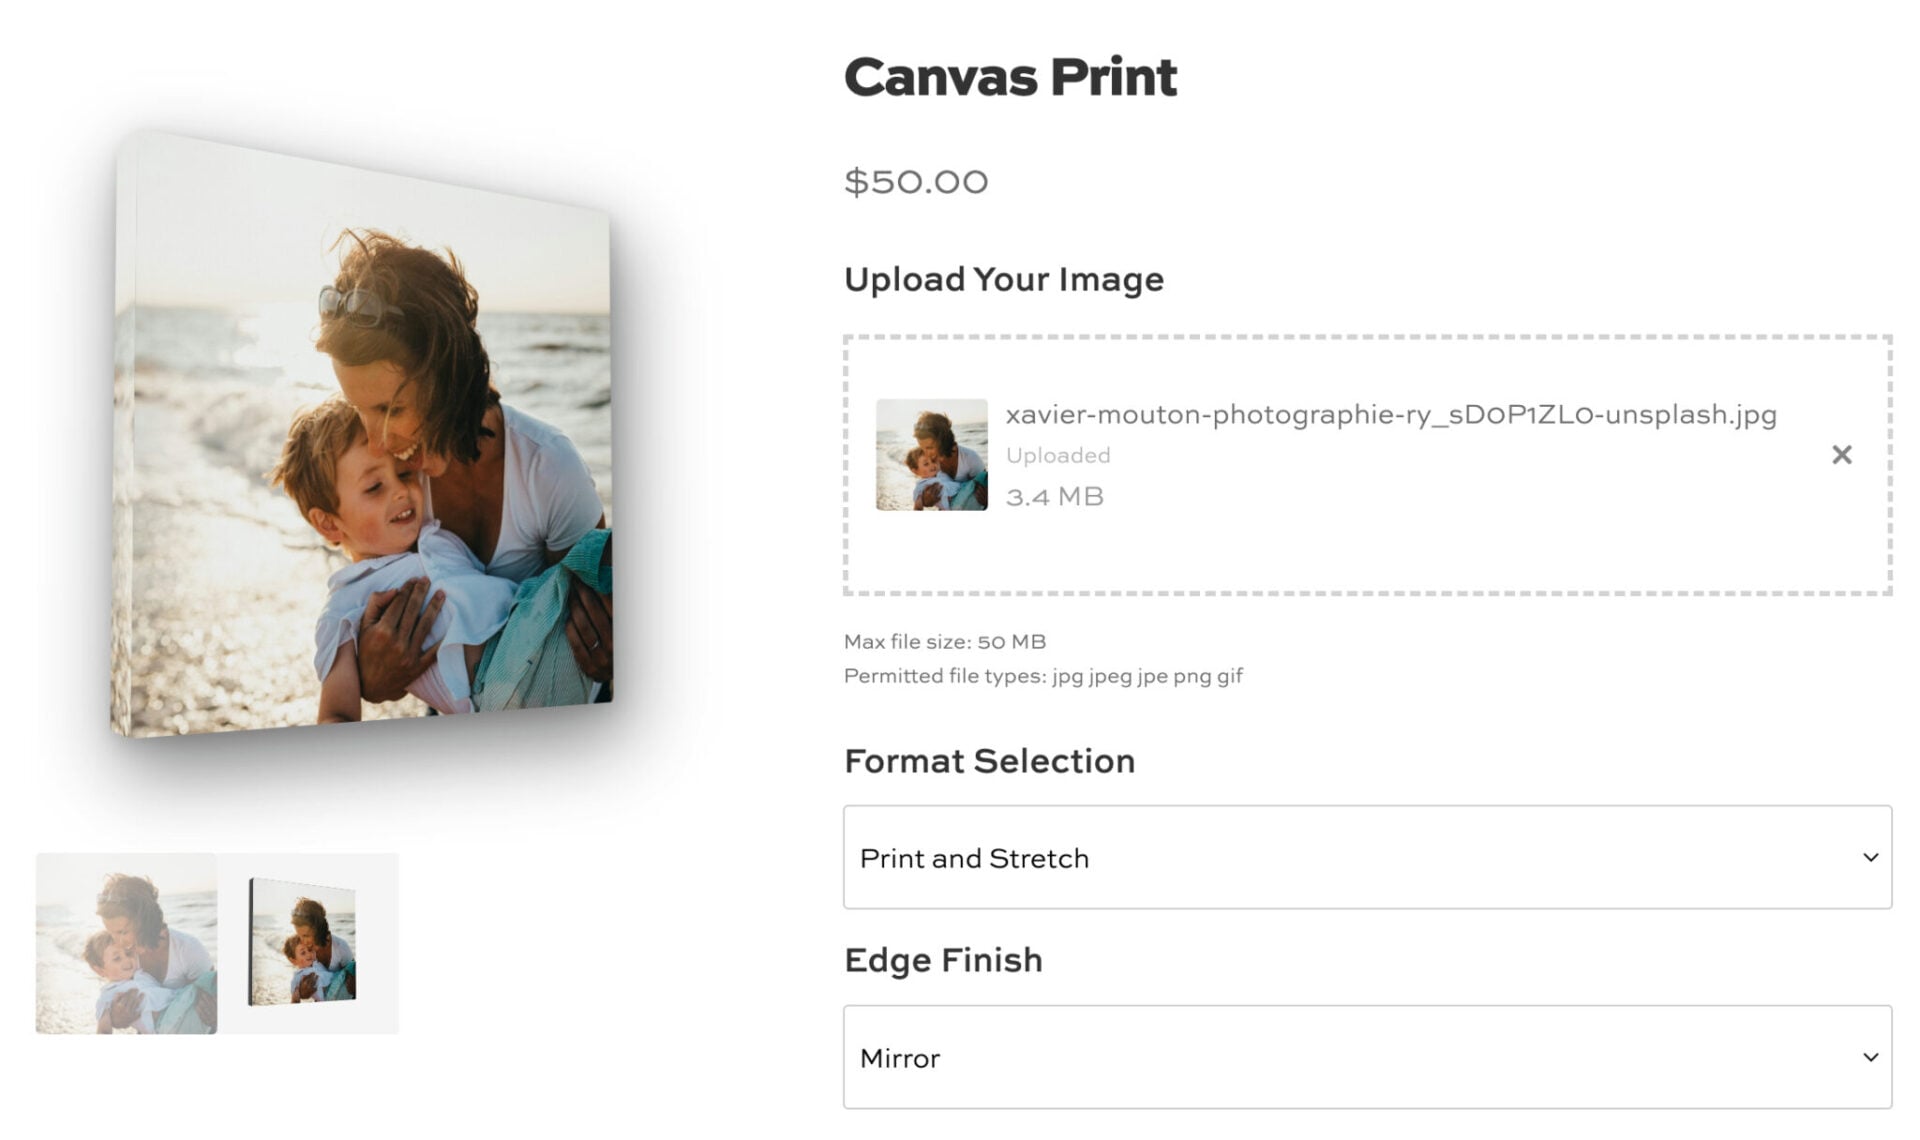
The 3D preview option displays the customer’s uploaded image as a canvas artwork with a 3D perspective effect showing the front face and visible edges of a stretched canvas. This is ideal for products like art prints or photo canvas wraps.
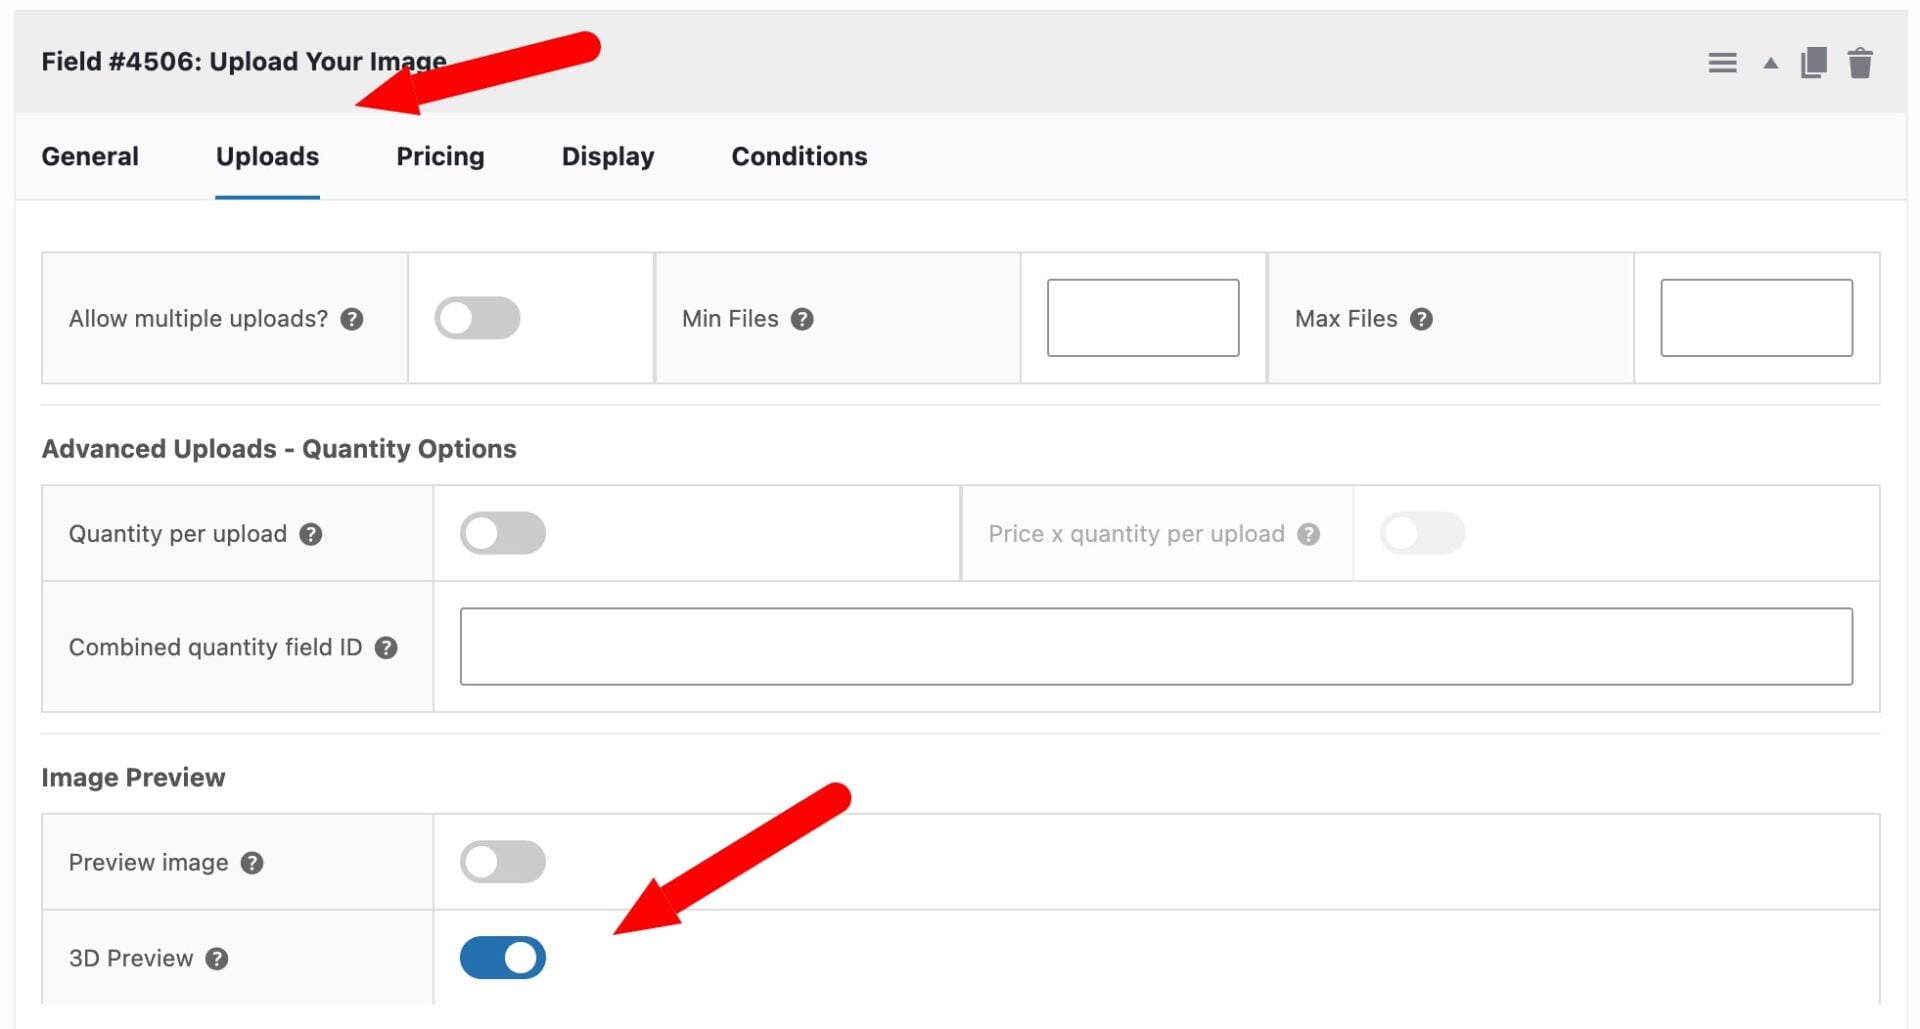
Enabling 3D Preview
To enable the 3D preview for an upload field, first enable Preview image on the field, then check the 3D Preview option that appears below the image preview settings.
Customer Options
When 3D preview is enabled, two dropdowns appear below the upload field on the product page:
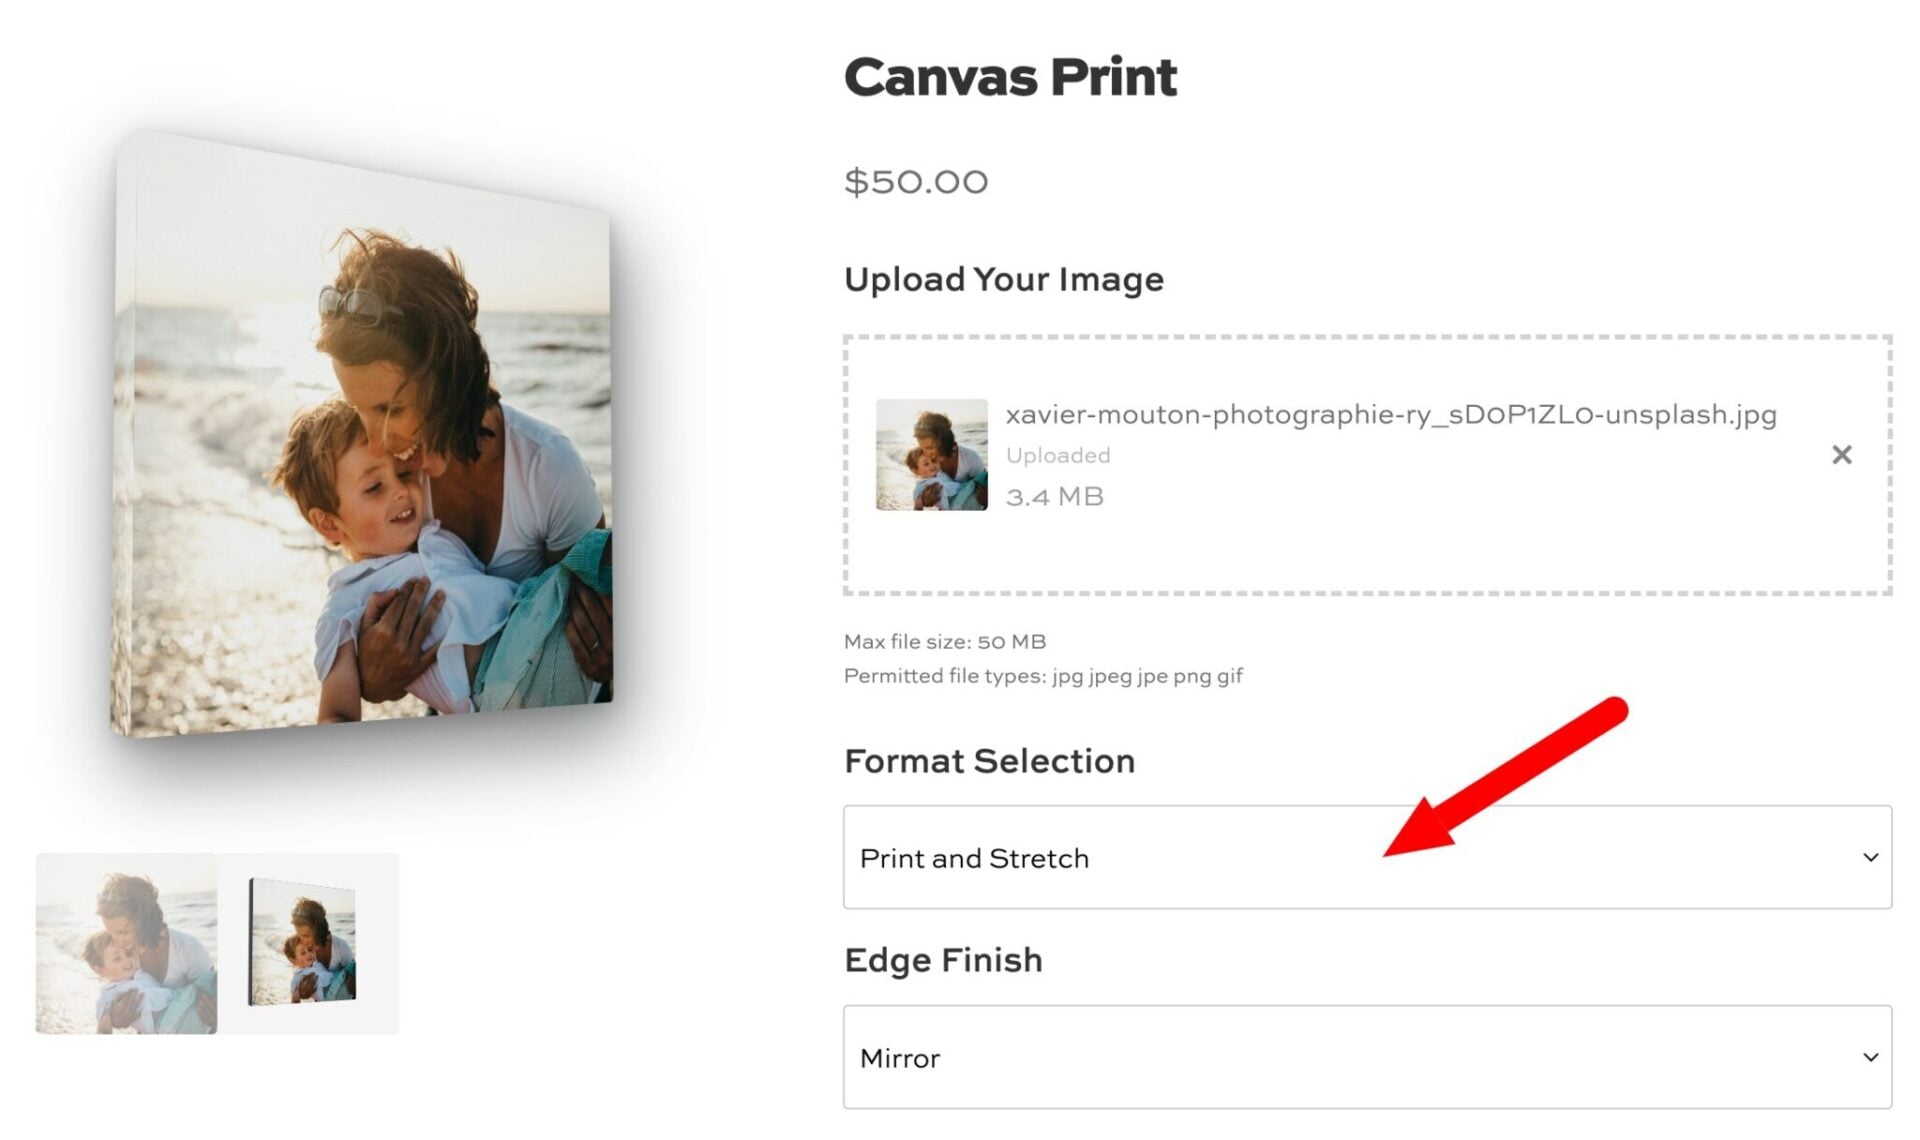
Format Selection
- Print and Stretch — Displays the uploaded image on a 3D canvas with visible left and top edges, giving a stretched canvas effect.
- Print Only — Displays the image flat, without the 3D canvas effect. The edge finish option is hidden in this mode.
Edge Finish (available in Print and Stretch mode only)
- Black — Dark grey edges.
- White — Light grey edges.
- Mirror — The edges mirror the image content, as seen on gallery-wrapped canvases.
Switching Views
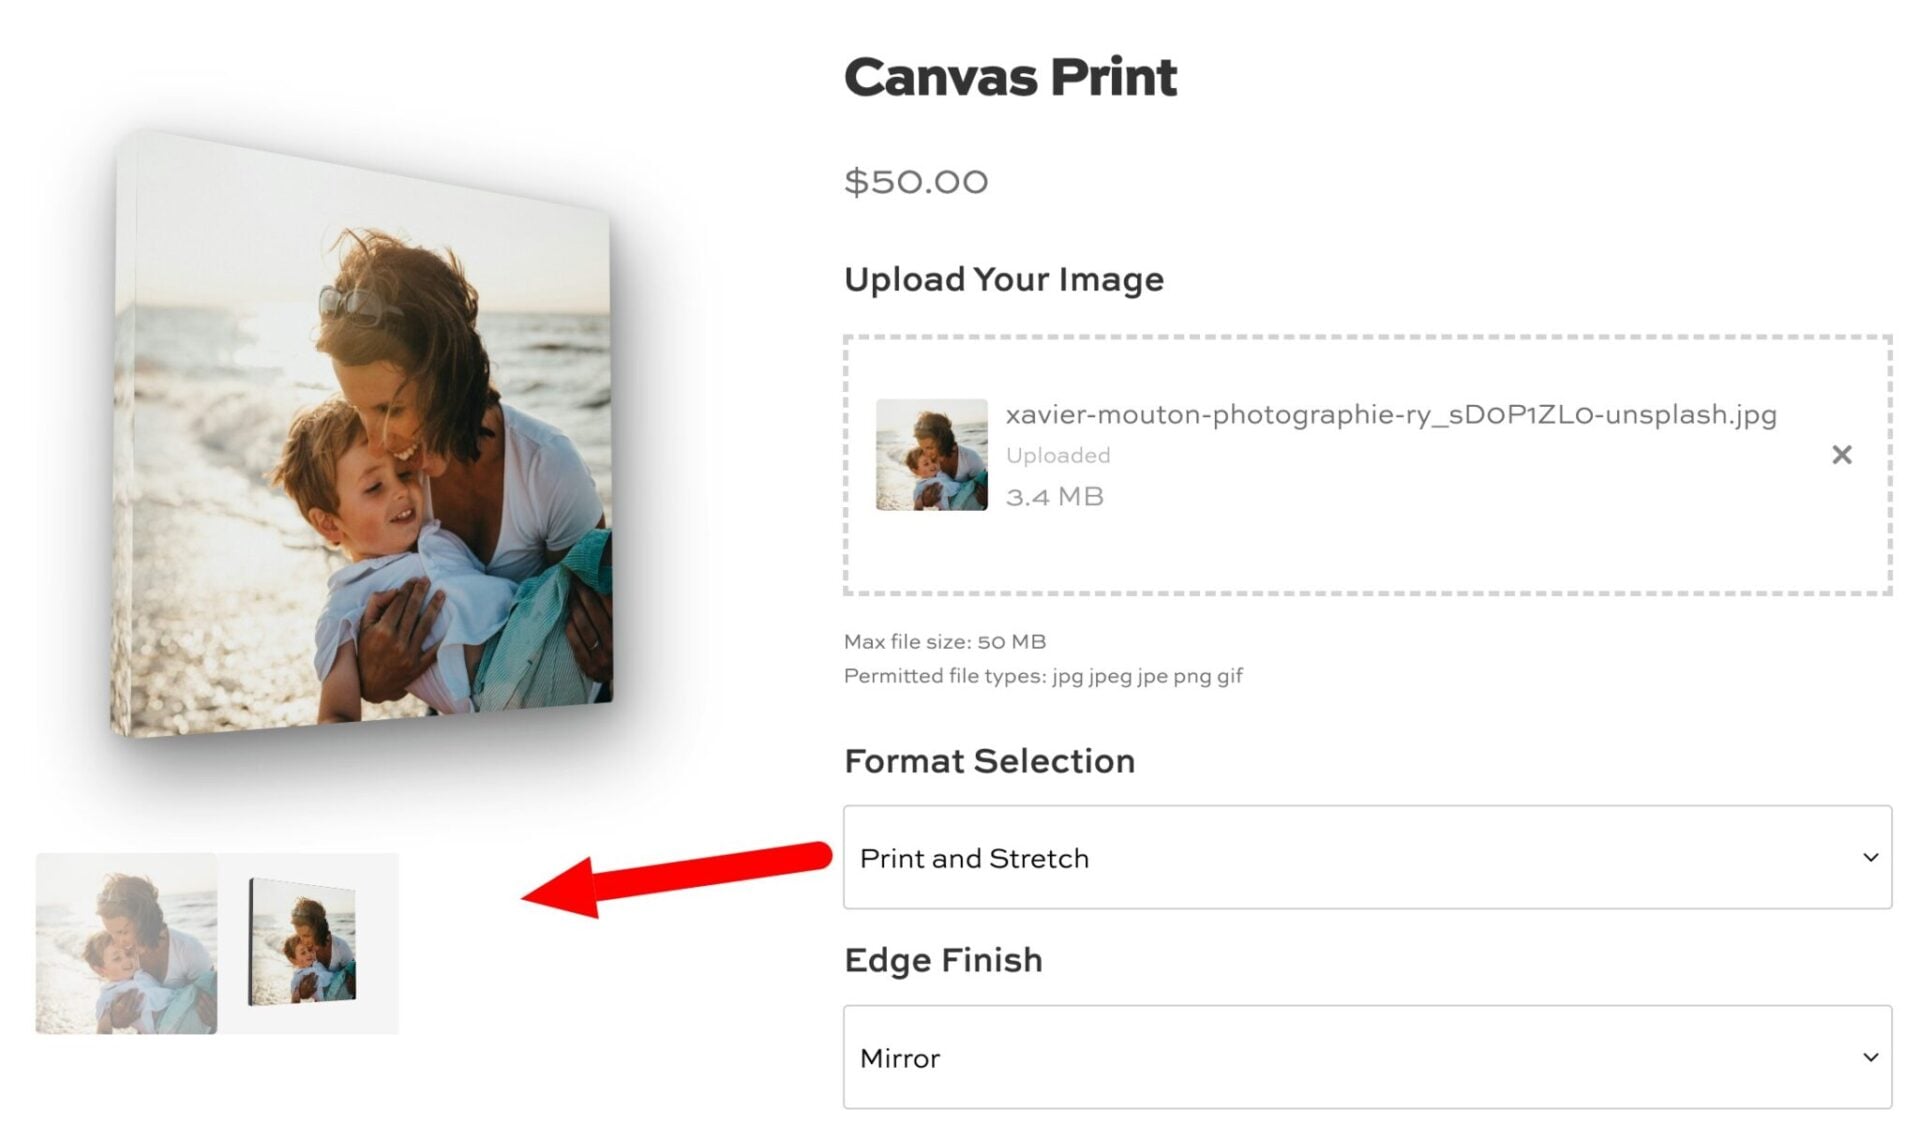
A thumbnail strip appears below the product gallery showing two clickable thumbnails – a flat view and a 3D view. Customers can click these to switch between the two perspectives.
You can see a demo 3d canvas preview product here.